| | LRK Home | | Bio Info | | Krash Khronicles | | LAROKE | |
| | BettyLou | | BillyBob's Garage | | Rat Patrol | | Deerslayer | | Elvira | |
| | Land of the Free and Home of the Brave | |
| | Keppylou's Art | | WWI Soldier's Diary | |
BillyBob Work-in-Progress Log
![]()
WHAT'S NEW is a chronological listing of updates to the BillyBob site.
![]()
TRUCK LINKS including vendor sites for old parts, custom parts, and tools as well as sites for classic car and truck organizations
STORE Operating in association with Amazon.com, books, recordings and tools can be purchased.
PLANNING for the restoration including project schedule and cost estimates.
![]()
TRAVELS WITH BILLYBOB With apologies to Steinbeck, this area of BillyBob's Garage will be used to log the trips BillyBob and I make together.
WORK-IN-PROGRESS is the restoration of parts of BillyBob that I can accomplish without a garage.
PRE-RESTORATION includes log entries of minor repairs and adventures between time of purchase and the time when I started restoration, a piece at a time.
JR'S KORNER JR's Korner is the history of BillyBob before I got him authored by my brother, Wm. C. Kephart.
![]()
BILLYBOB MAINTENANCE Ever changing detailing, oil change, lube, etc. maintenance routines specifically developed for BillyBob, including required tools, materials and procedures.
PARTS SHOP The Parts Shop is a repository of How-To articles. Things that I have done over and over enough times to have developed a procedure. This gives me a checklist and saves brain cells.
STEALTH SHOP Urban residence design with large integrated shop and separate living quarters for a relative or renter.
![]()
You will need the Adobe Acrobat browser plugin to view these wiring diagrams which are in the PDF file format. This format allows zooming and panning. If you don't have this plugin, it can be downloaded and installed (free) from the Adobe site. The button below will take you there.
![]()
BILLYBOB WIRING DIAGRAM Here's the wiring diagram updated with BillyBob's current state 'cepting the third-party strap-on turn-signal director.
STRAP-ON TURN-SIGNAL DIRECTOR/BRAKE LIGHT CIRCUIT This turn signal and brake light circuit diagram shows the current state of the third-party turn-signal director wiring, which will remain in place until I figure out the problems with the OEM turn-signal director. It also shows the OEM headlight switch.
53. Getting back on track
 July
4th 2007 Independence day
Nice day. Not too hot. First day back under the BillyBob shadetree
since returning from the Macungie
run roadtrip. 23 days and 4,783 miles with BillyBob. The
first order of bizness, therefore, is an oil and filter change
followed by monthly
maintenance and quarterly maintenance.
Also removed the jerry can mounts for storage up at the warehouse.
Drank some beer and wrote up some of the roadtrip logs. Wingnut tried
to show me how he took care of the computers while I was away (if green
poop on green circuit boards can be considered taking care of things,
that is). All-in-all, a good day.
July
4th 2007 Independence day
Nice day. Not too hot. First day back under the BillyBob shadetree
since returning from the Macungie
run roadtrip. 23 days and 4,783 miles with BillyBob. The
first order of bizness, therefore, is an oil and filter change
followed by monthly
maintenance and quarterly maintenance.
Also removed the jerry can mounts for storage up at the warehouse.
Drank some beer and wrote up some of the roadtrip logs. Wingnut tried
to show me how he took care of the computers while I was away (if green
poop on green circuit boards can be considered taking care of things,
that is). All-in-all, a good day.
July 14th 2007 It's summer in the south. Already 80 degrees when I got on the road up to the Krash lab at daybreak. Last weekend was stormy and I had to finish up the Macungie run logs so I stayed inside the Krash Lab and got that done along with the help of several beers. Today, I'm cleaning BillyBob up a bit and recategorizing the spare parts and tools I took with me on that trip. A few items will remain with the truck while the other ammo boxes will be divided between the storage shed and the warehouse bay.
Transferred the five gallons of spare gas from the jerry can to BillyBob's tank. Used the five gallons of water in the other jerry can to clean up the resulting mess. I don't have a spout for the jerry can yet and there is spillage as a result. Funnels and intermediate containers and hand siphons are a poor substitute for a good spout.
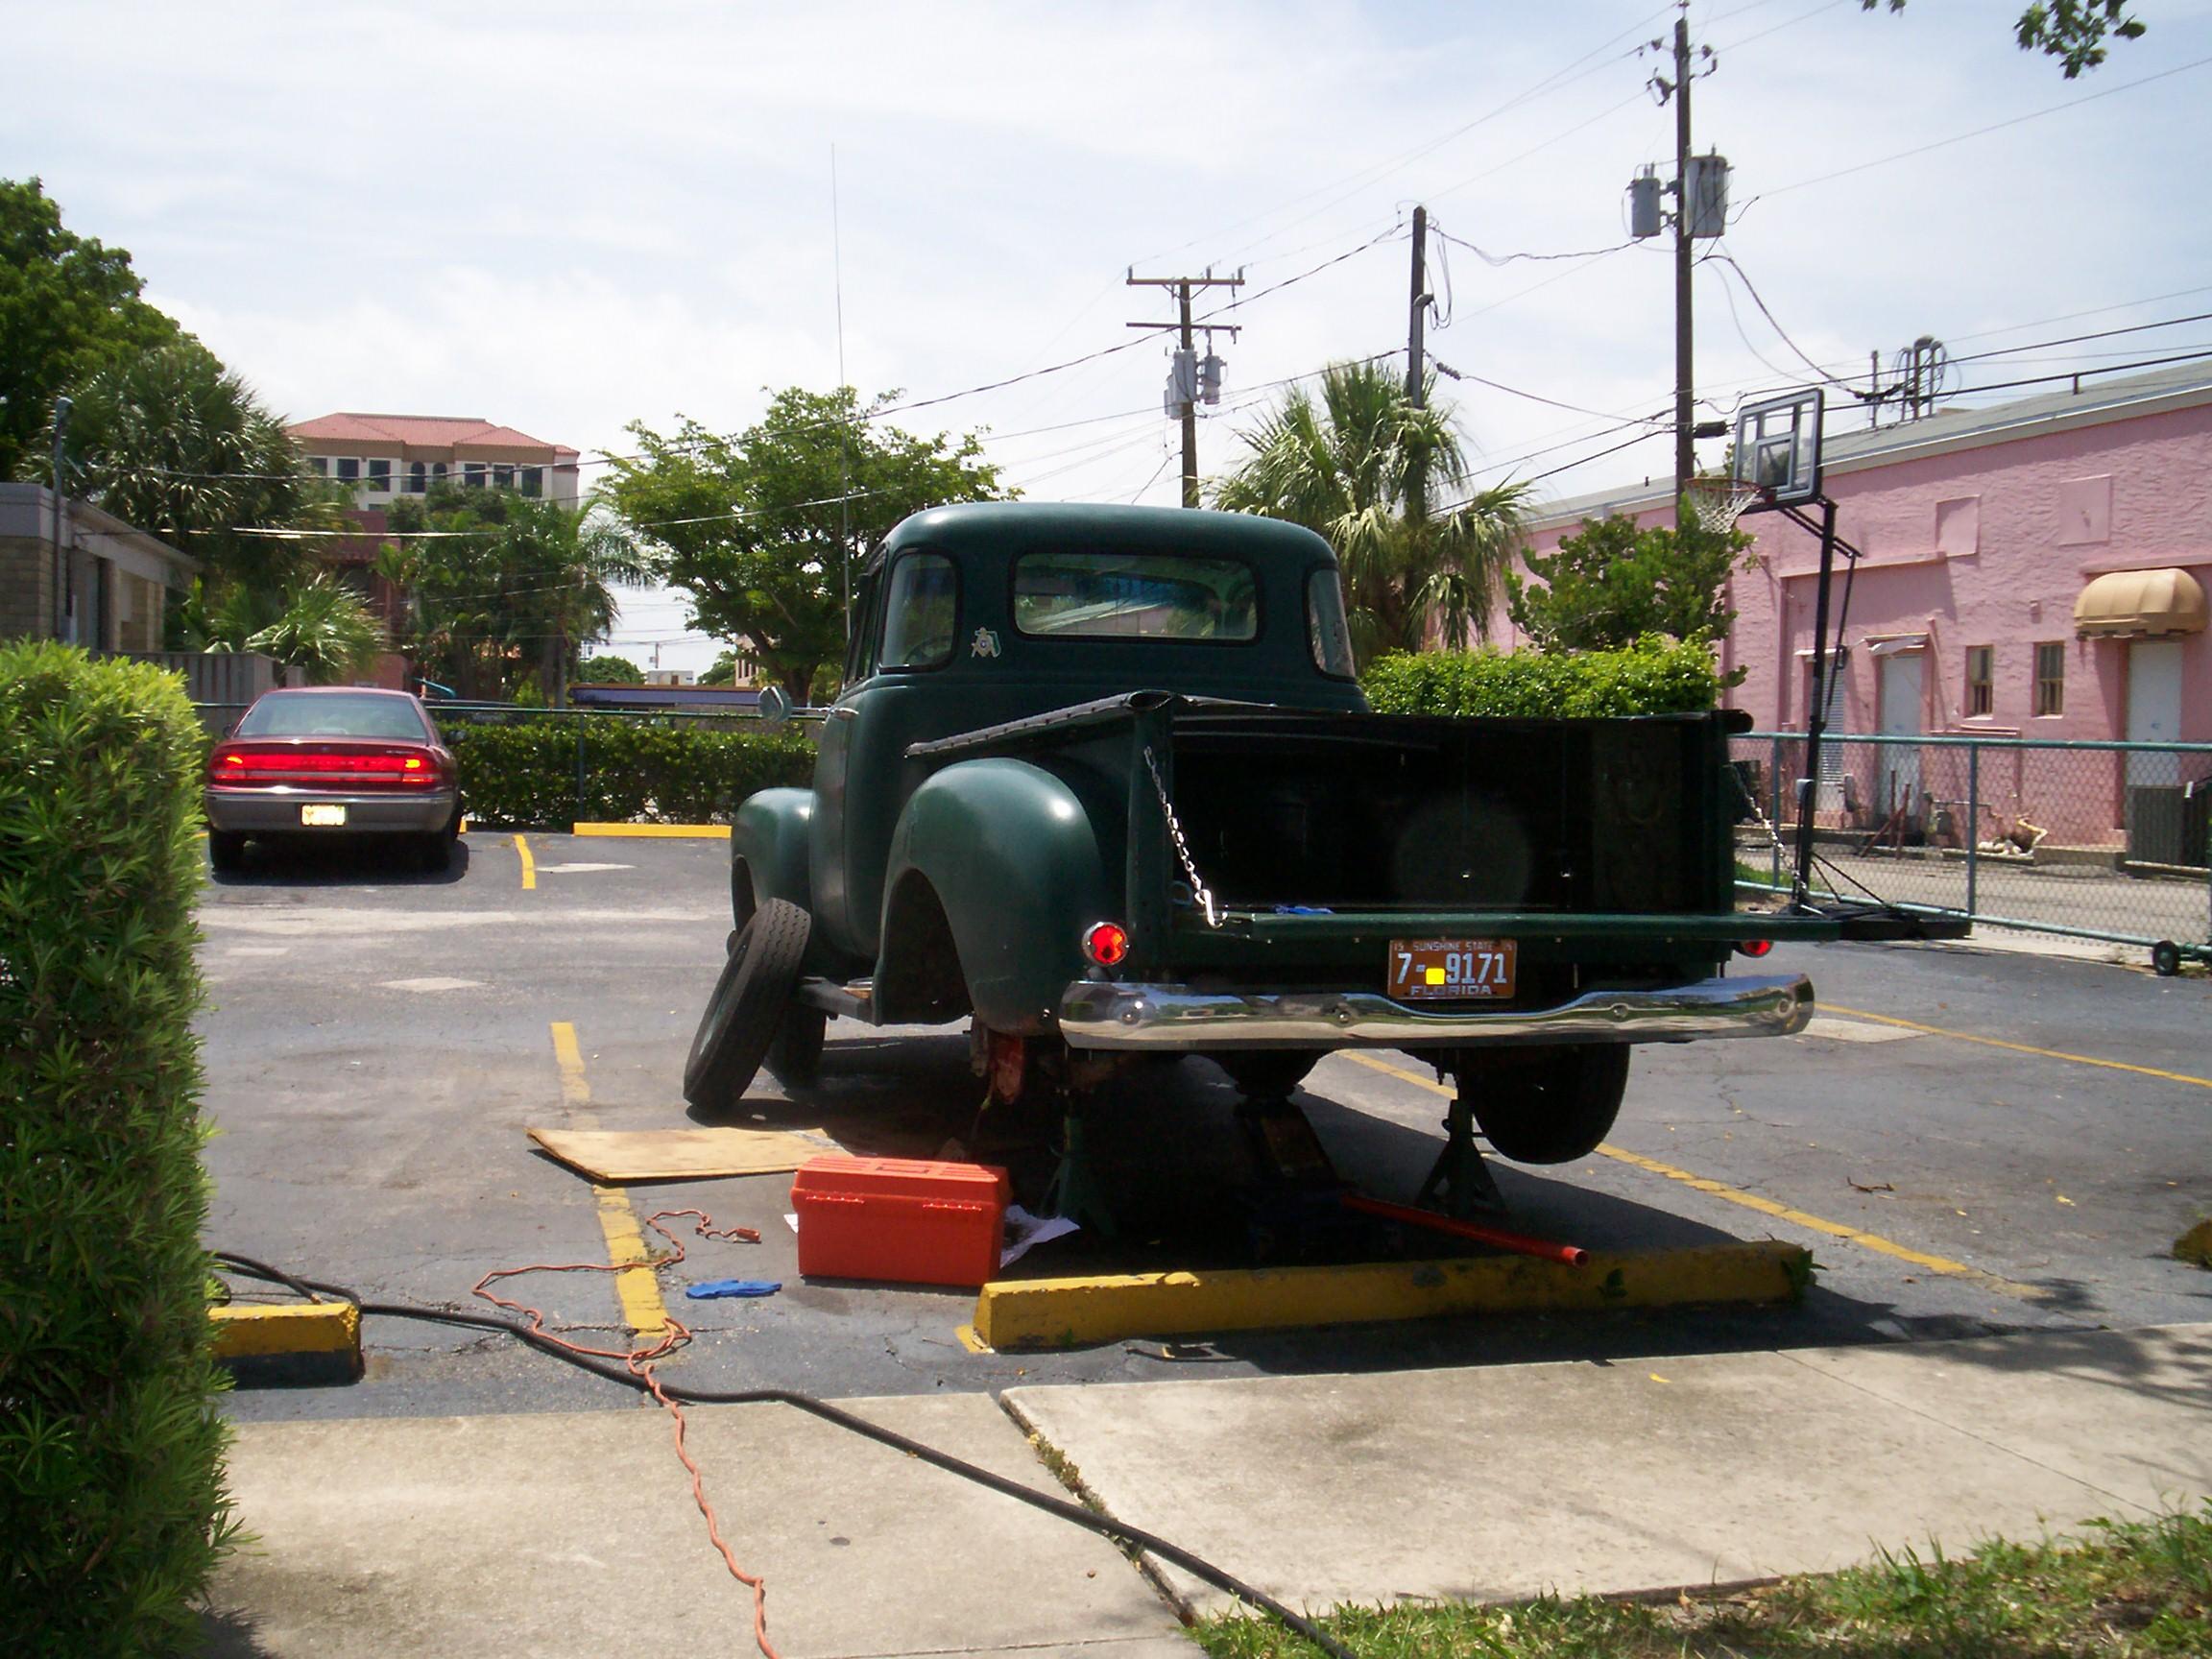
 July
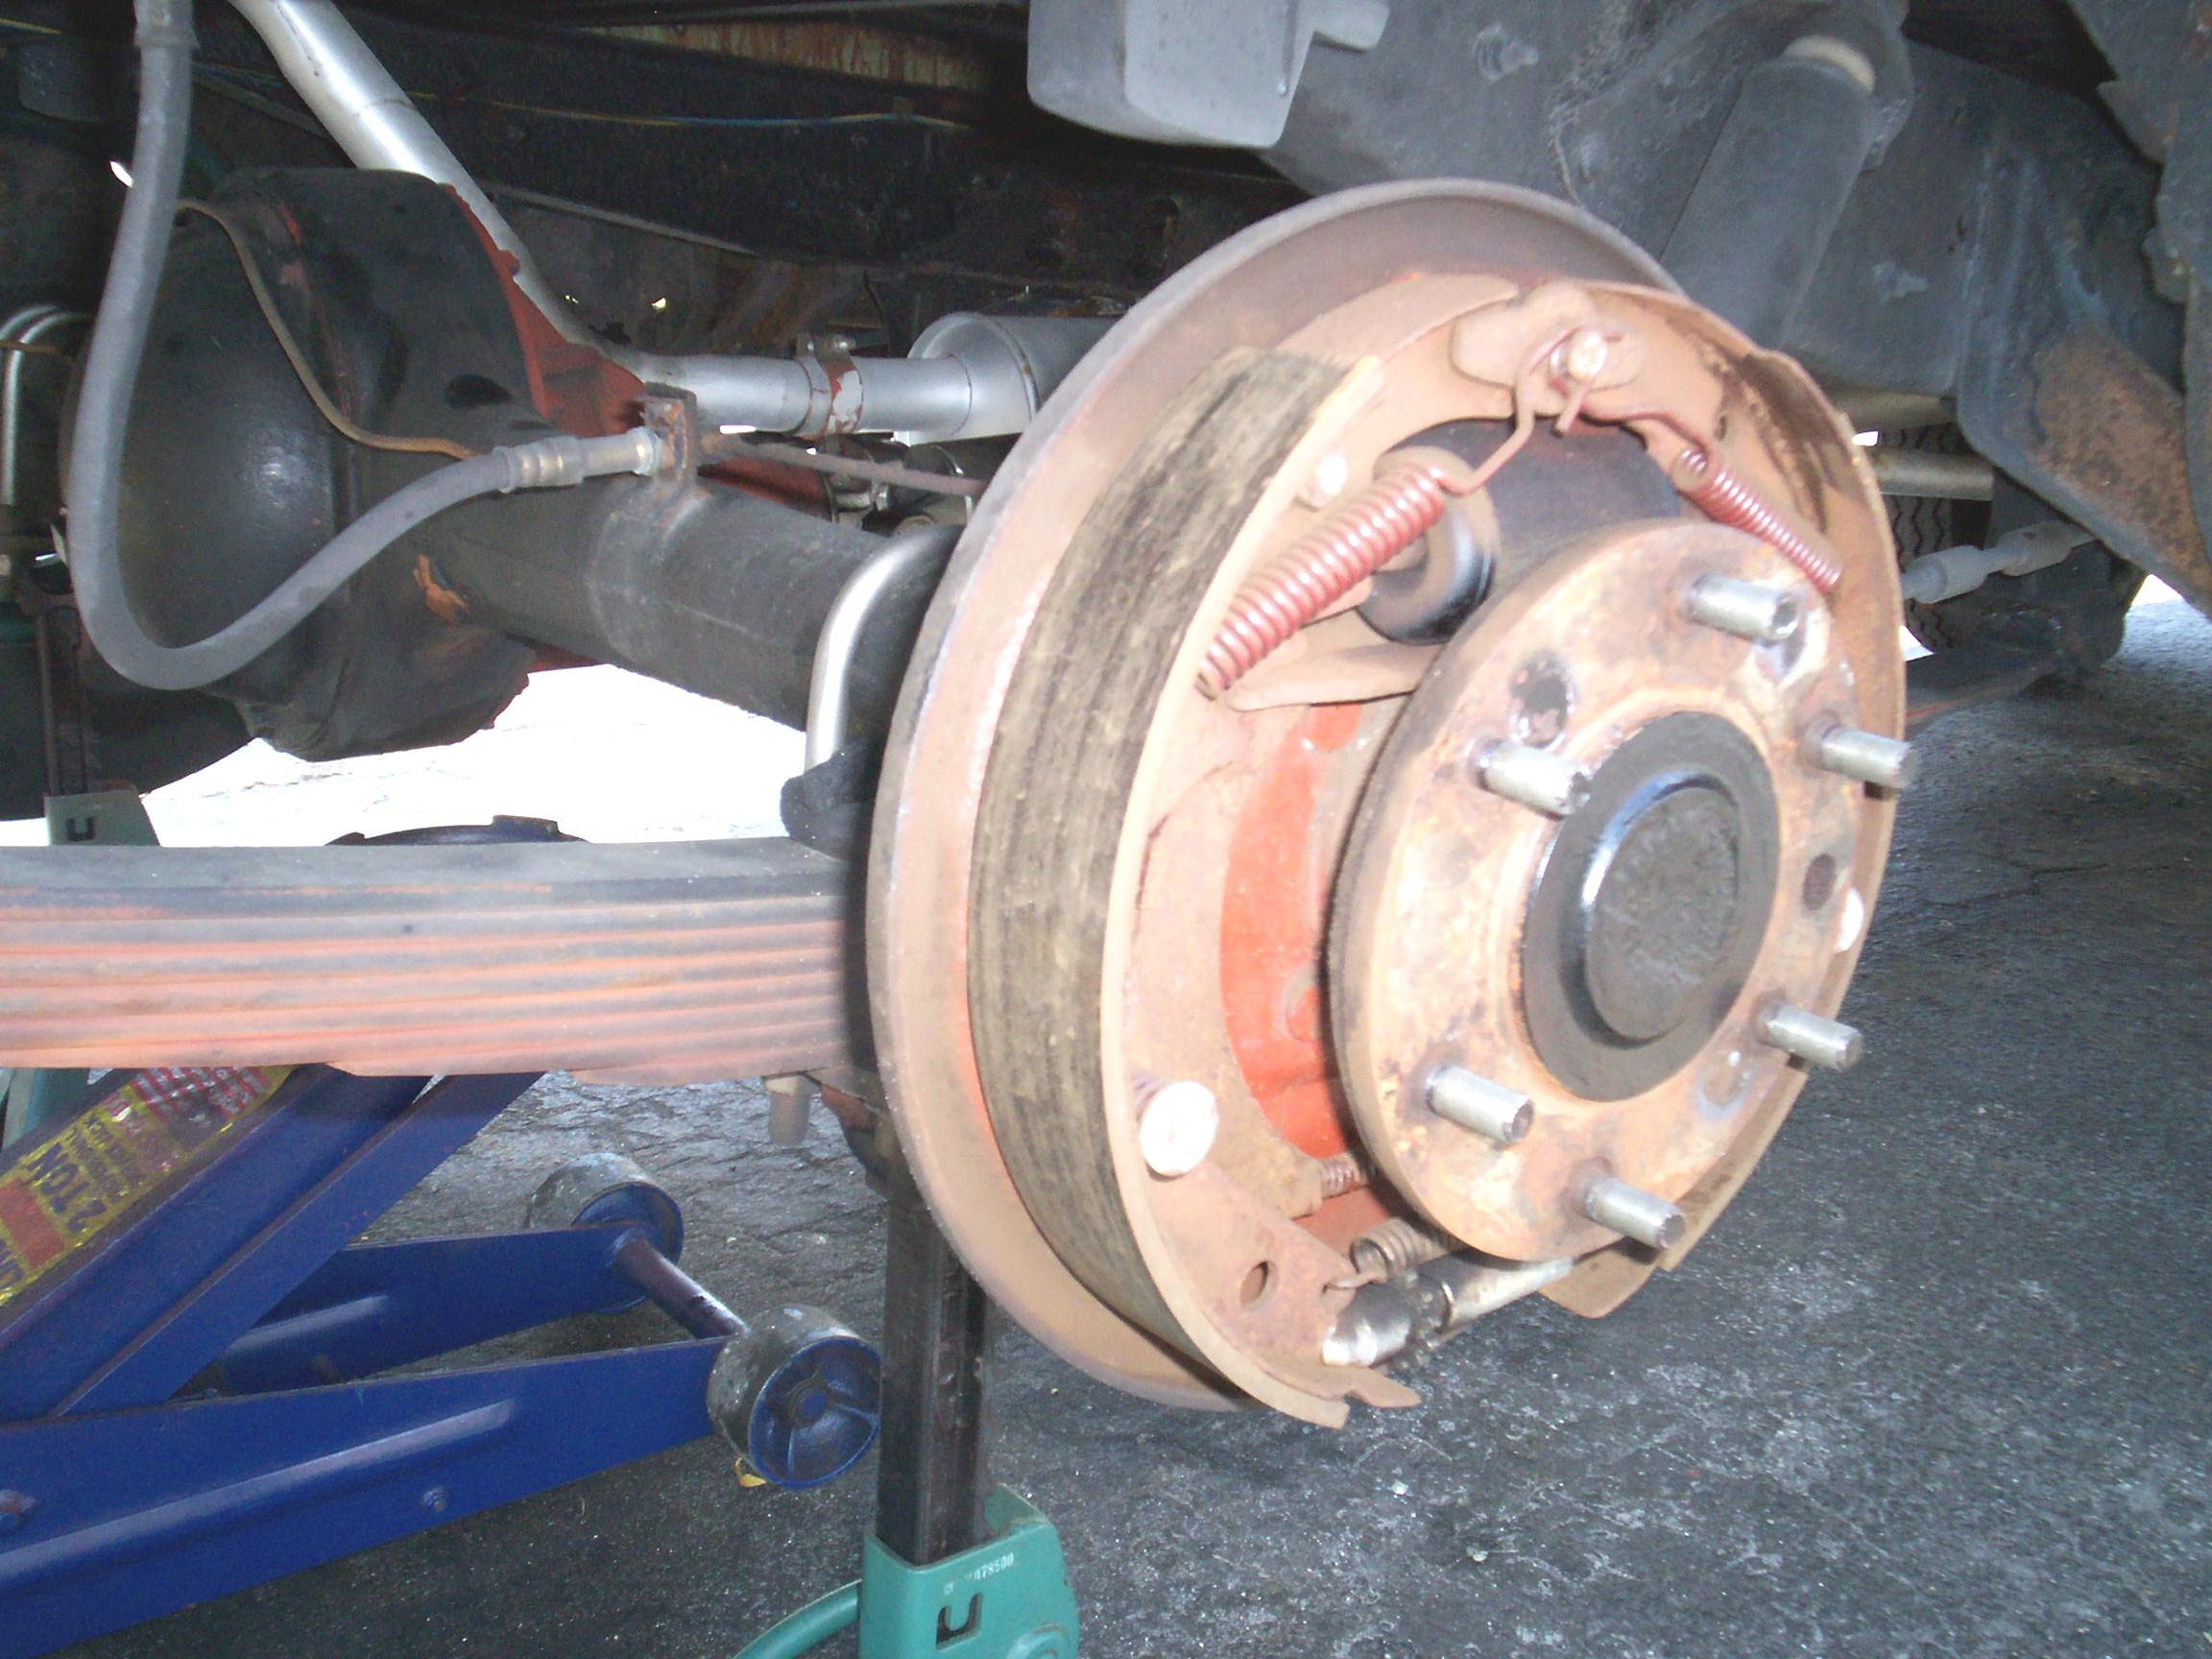
21st 2007 A nice day to
work. It's still hot but not quite the broiler that last saturday was.
Dragged out and organized the tools before jacking up BillyBob's rear
end and pulling the passenger side rear wheel. The brake drum came off
without problems and visual inspection revealed that the linings were
still good.
July
21st 2007 A nice day to
work. It's still hot but not quite the broiler that last saturday was.
Dragged out and organized the tools before jacking up BillyBob's rear
end and pulling the passenger side rear wheel. The brake drum came off
without problems and visual inspection revealed that the linings were
still good.
My "beer of the month club" shipment arrived yesterday and one of the selections, Wild Goose Oatmeal Stout, has enuf of a kick to slow me down a bit. When the afternoon rains came, I sampled 'nother beer of the month selection, and that put BillyBob and me on the road of the damned down to Crabby jack's.
July 28th 2007 Good weather this morning to work in. Back to the broken parking brake cable on the passenger side. I'm slippimg into some bad habits and as a result, mother nature is getting ahead of me in our struggle for BillyBob's soul.
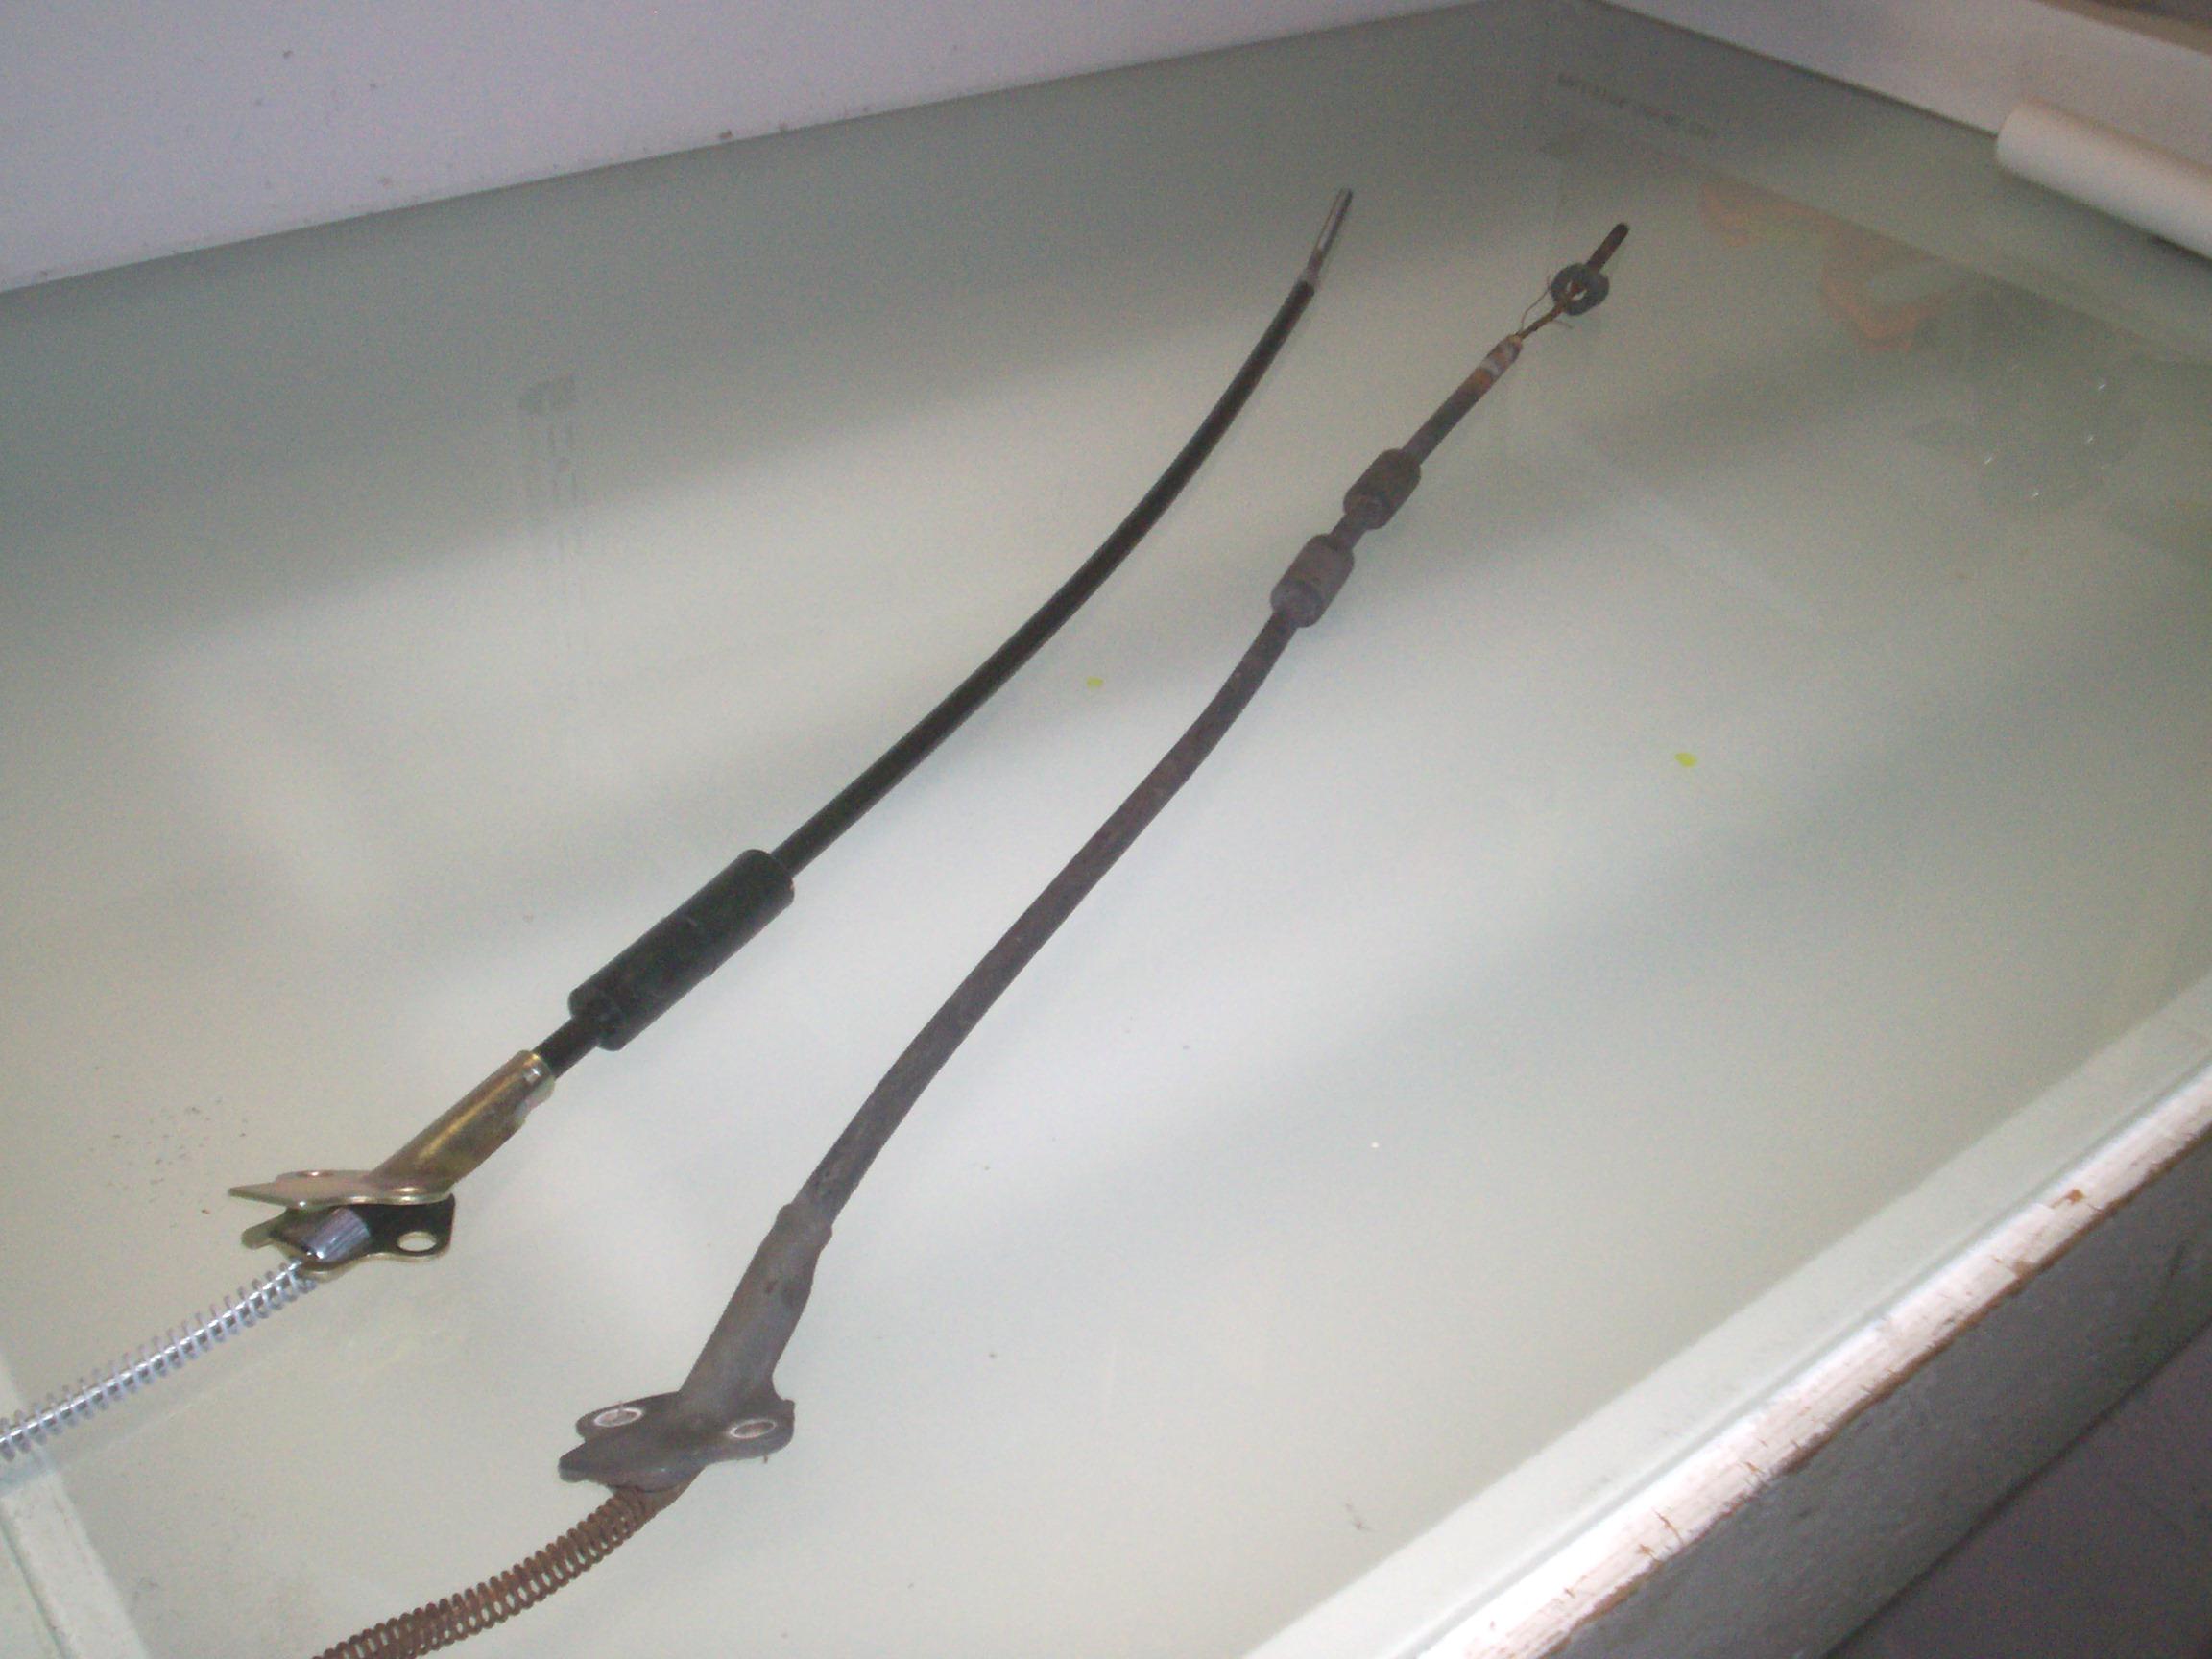 The
new cable and the old have some differences but, at first glance, I
don't forsee any problems. Hunted up some new fasteners in my vast
McMaster-Carr collection and updated my fastener inventory
with 5/16"-18 x 3/4" cap screws, lock washers and hex nuts for the
cable bracket to backing plate connection.
The
new cable and the old have some differences but, at first glance, I
don't forsee any problems. Hunted up some new fasteners in my vast
McMaster-Carr collection and updated my fastener inventory
with 5/16"-18 x 3/4" cap screws, lock washers and hex nuts for the
cable bracket to backing plate connection.
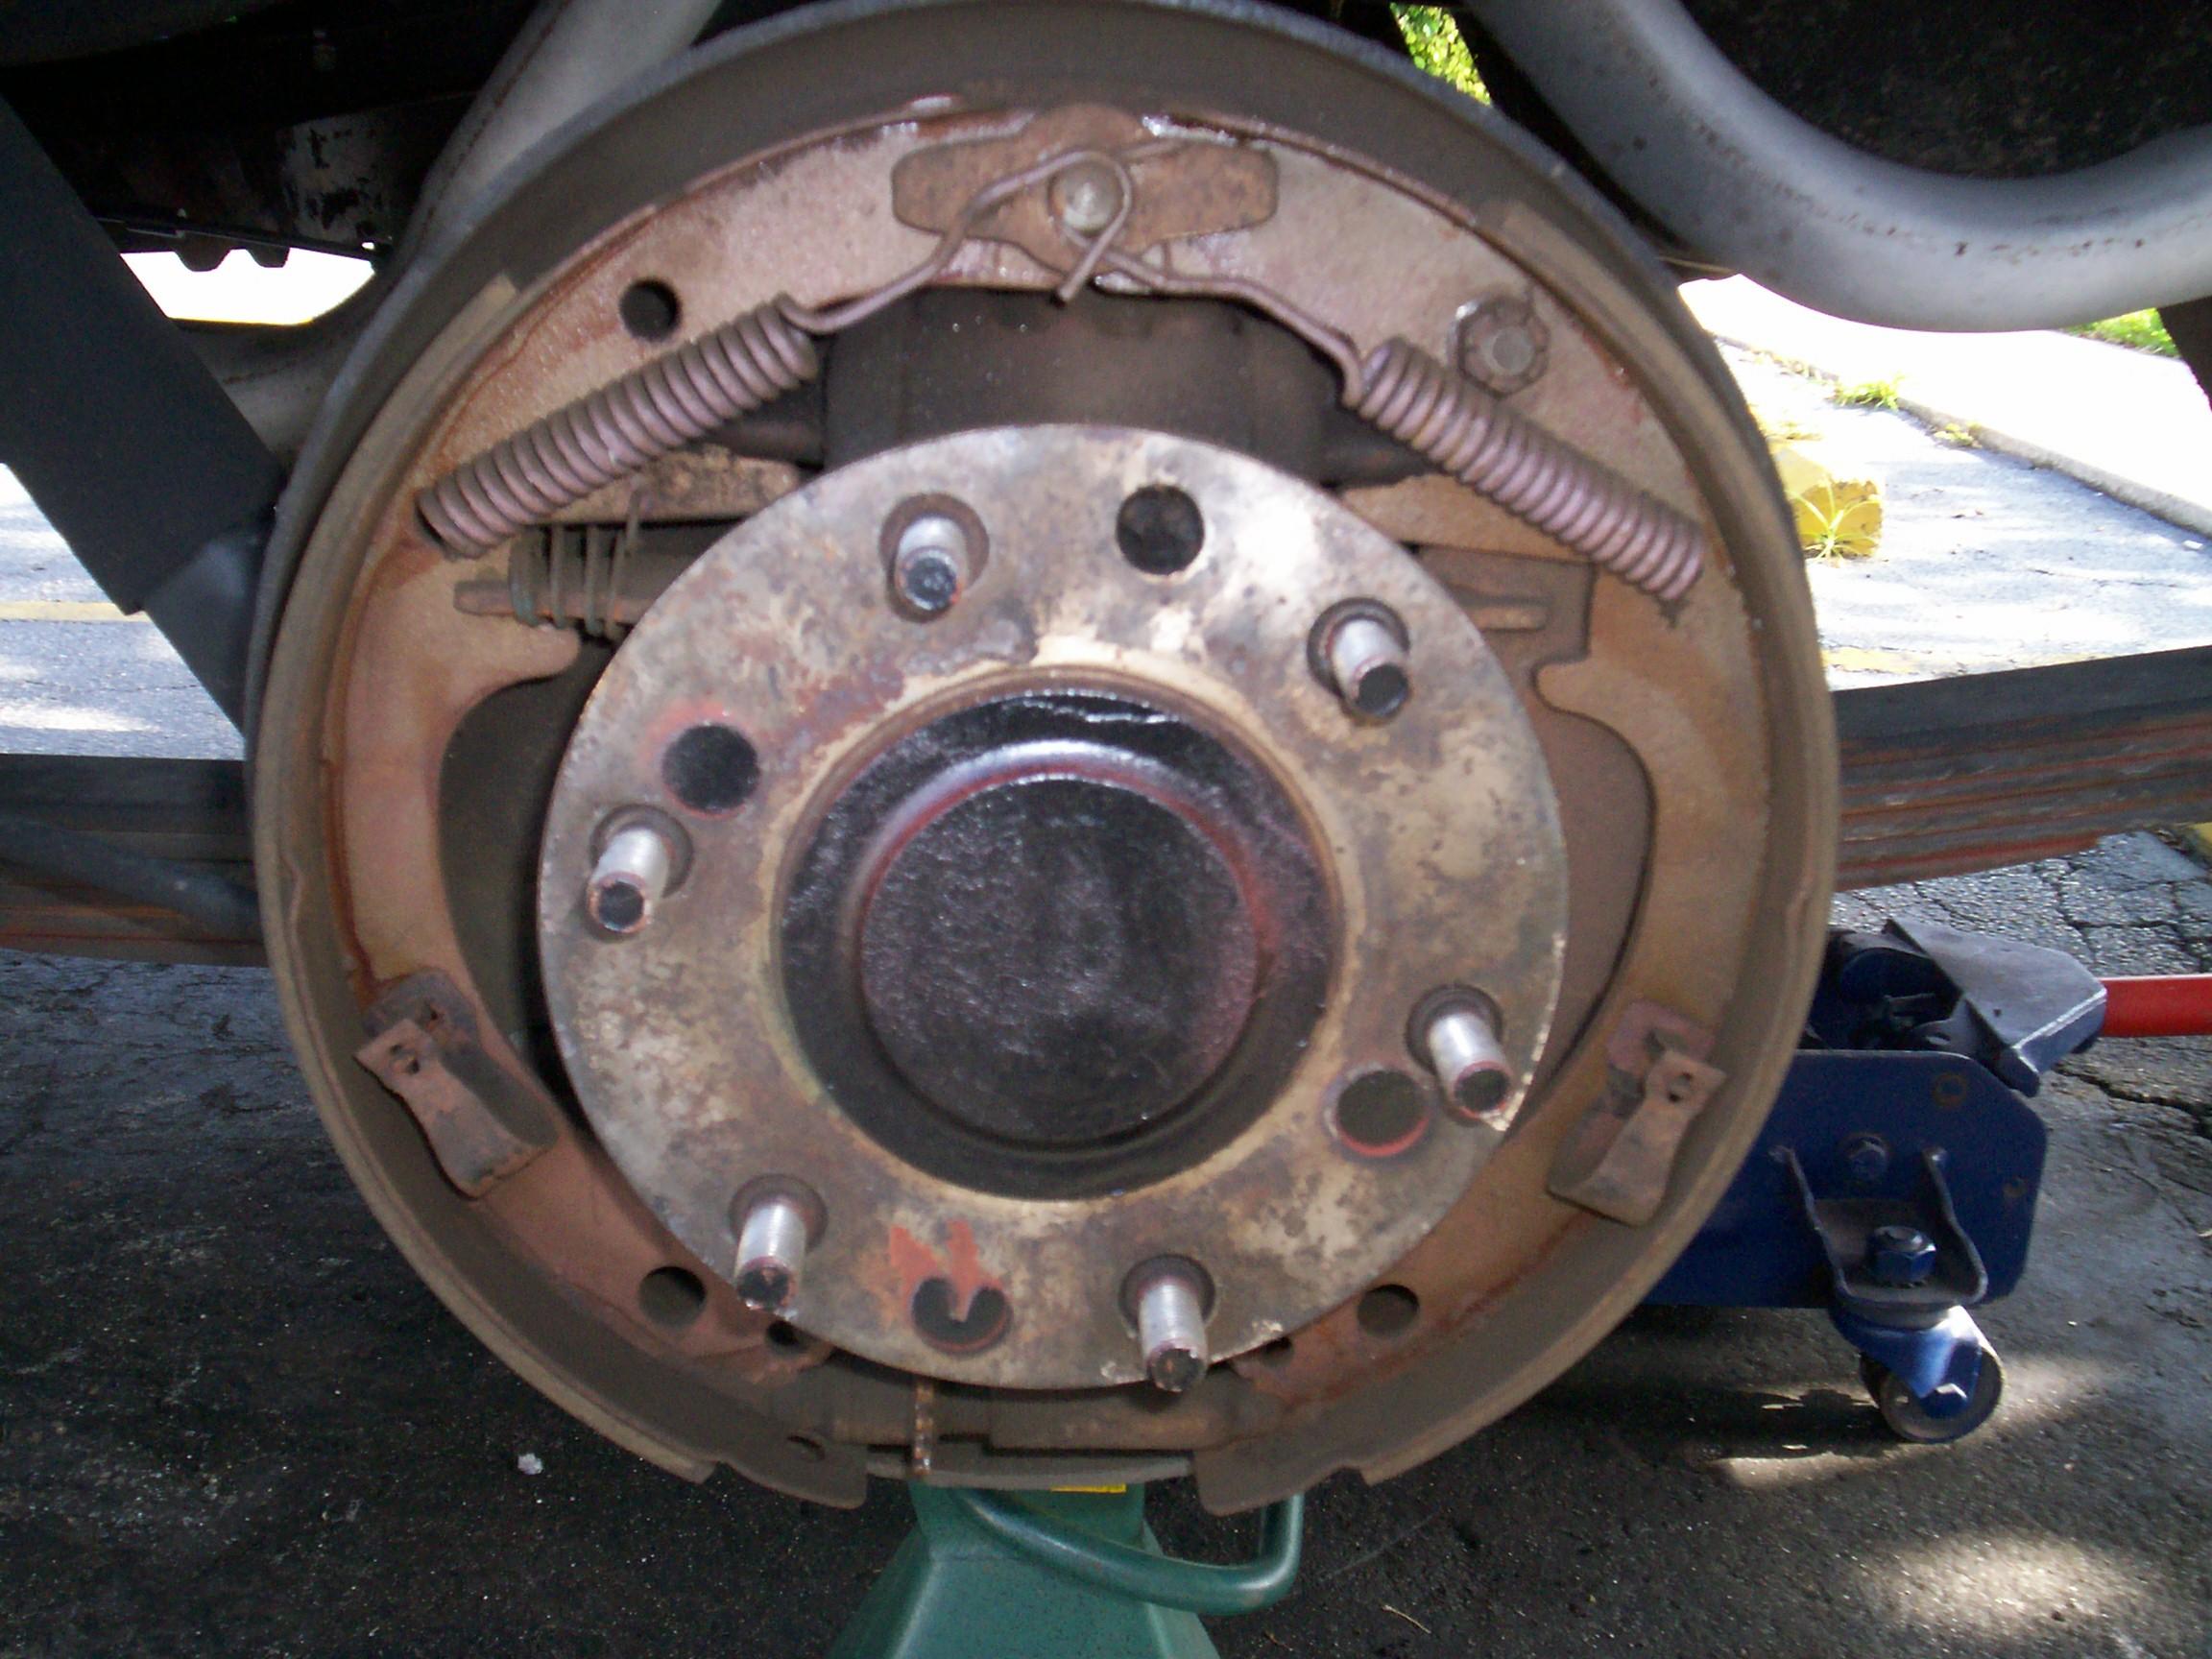
 There
are two facing brackets on the cable where it interfaces with the
backing plate. I've seen a few lively discussions regarding whether
these two plates should be on the outside of the backing plate or if
the backing plate should be sandwiched between them. Having them both
on the backside of the plate has worked for me in the past and I'm
sticking with that method. The return spring (around the cable inside
the drum) is not as stiff on the new cable as the old one was so it was
easier connecting the lever on the shoe to the cable than I was
expecting.
There
are two facing brackets on the cable where it interfaces with the
backing plate. I've seen a few lively discussions regarding whether
these two plates should be on the outside of the backing plate or if
the backing plate should be sandwiched between them. Having them both
on the backside of the plate has worked for me in the past and I'm
sticking with that method. The return spring (around the cable inside
the drum) is not as stiff on the new cable as the old one was so it was
easier connecting the lever on the shoe to the cable than I was
expecting.
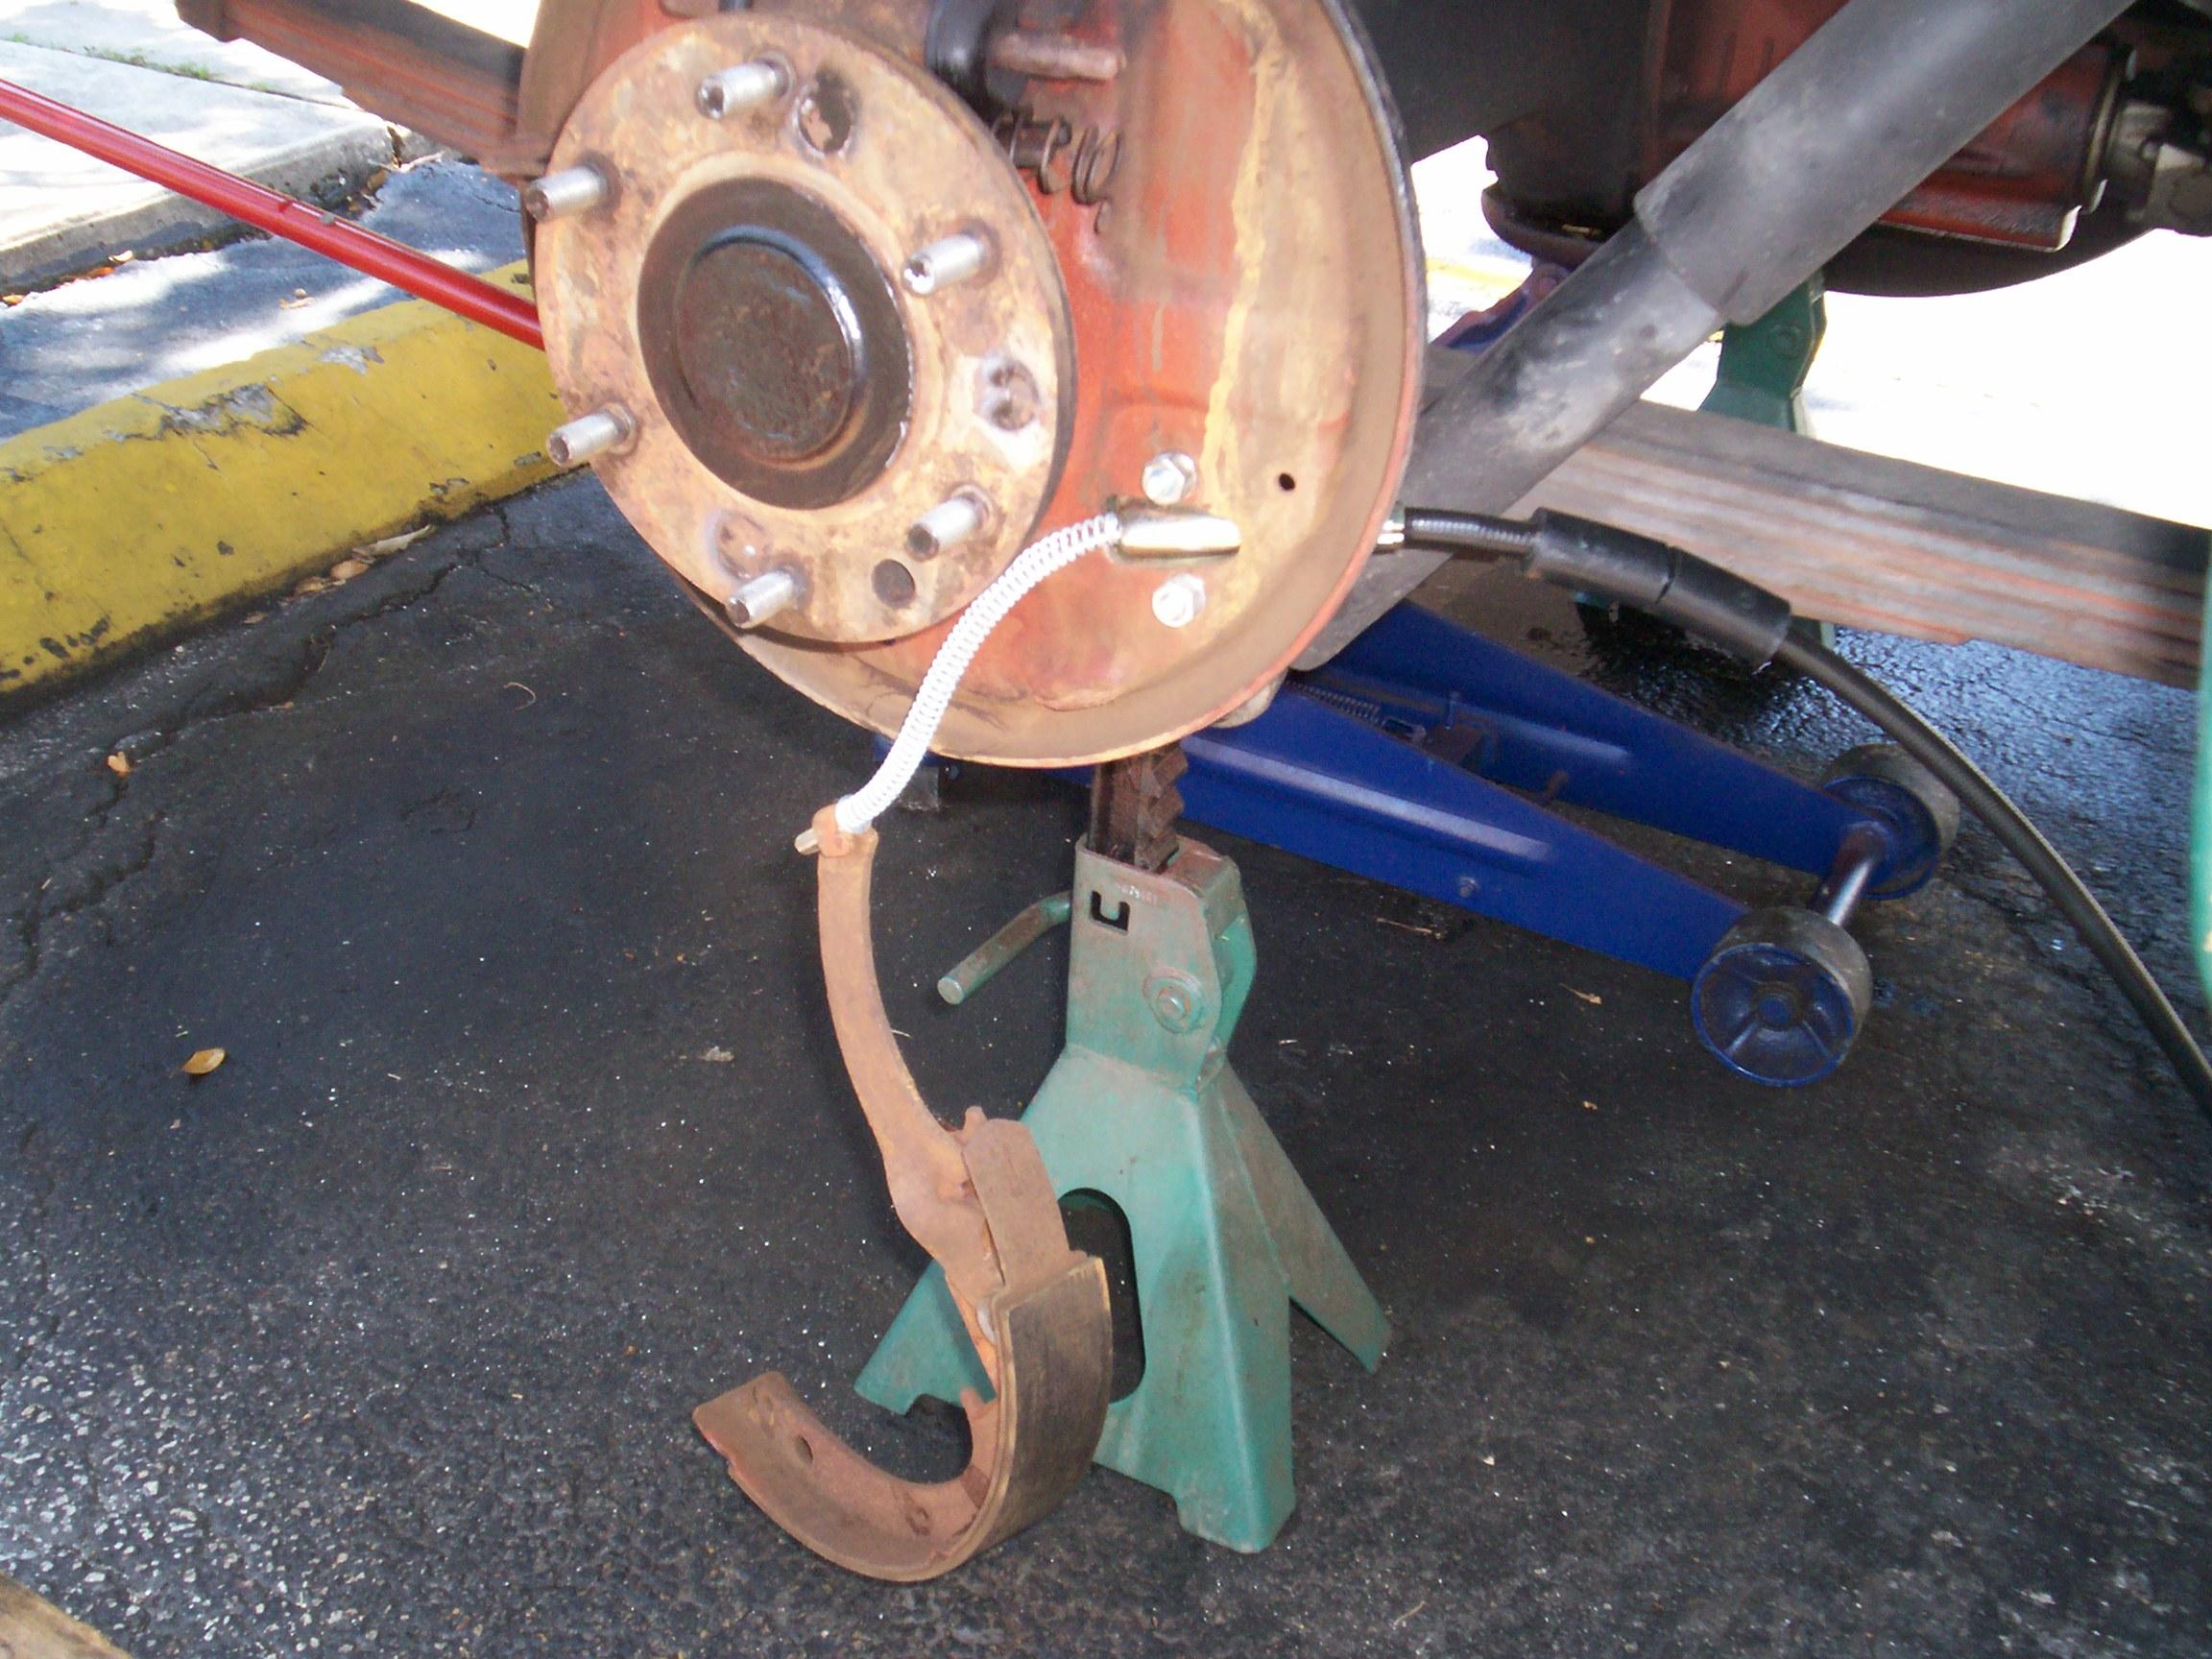
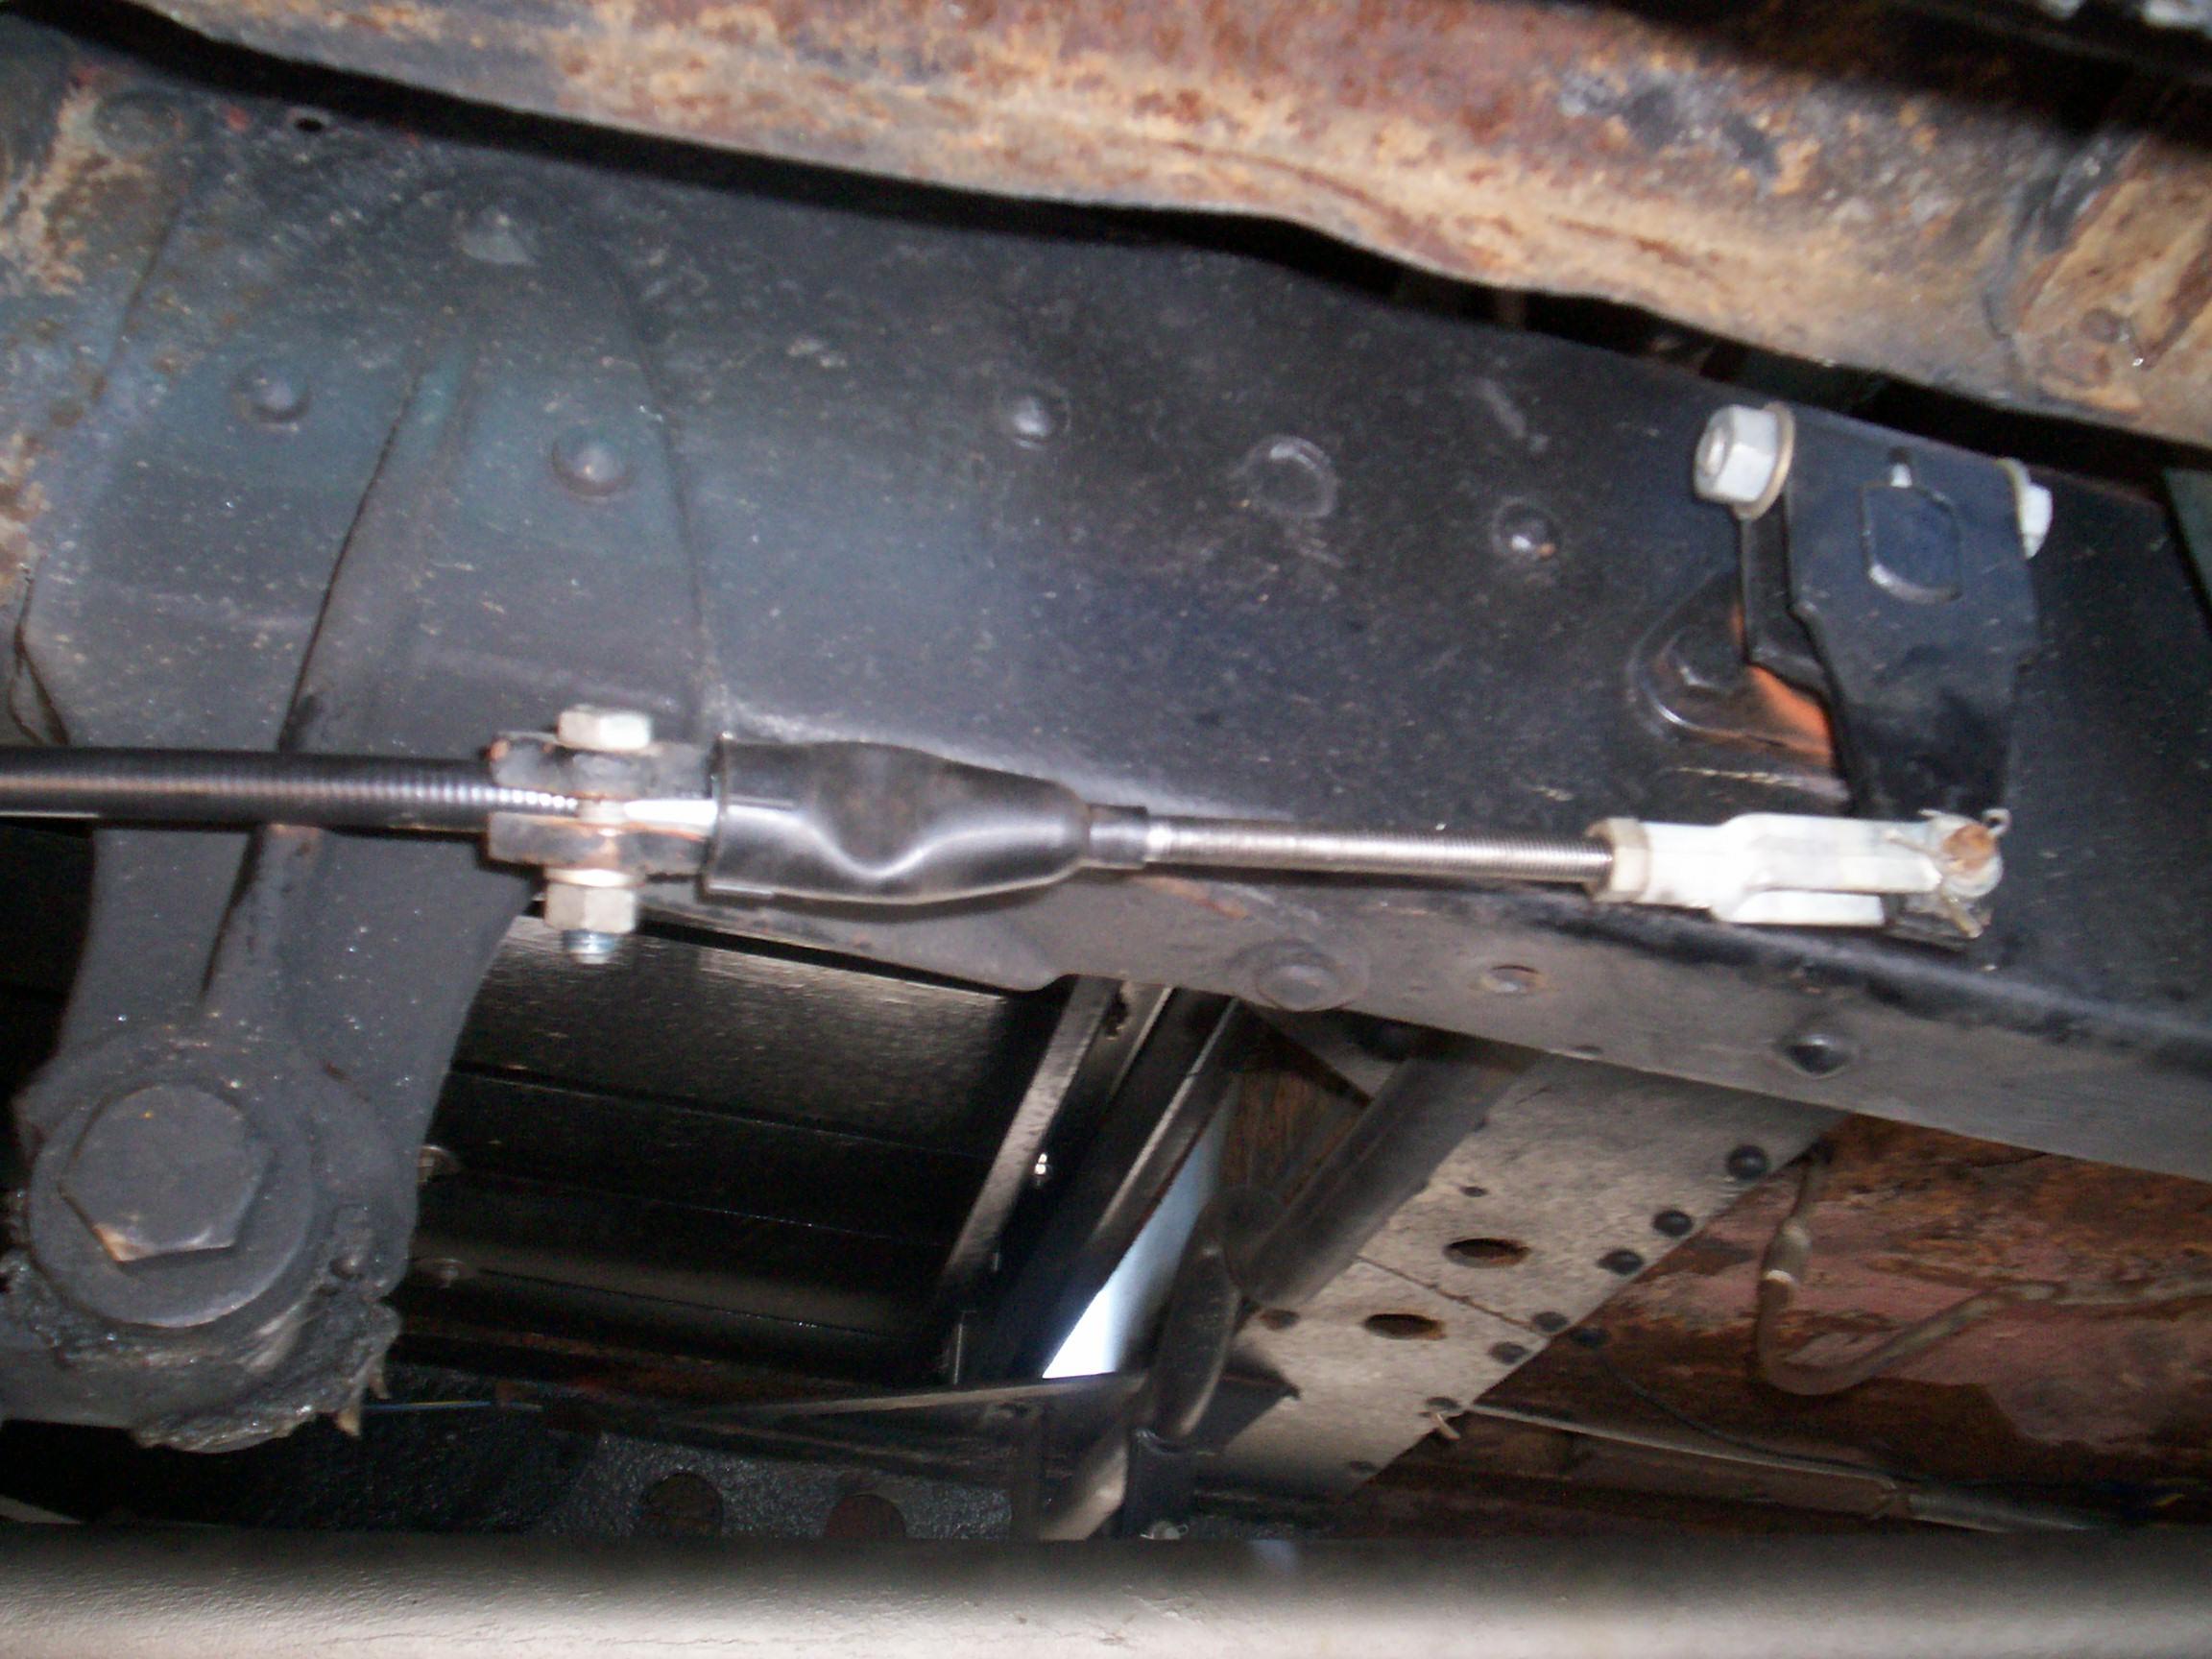 Reinstalled
the shoes and brake drum and wheel. Then hooked up the other end of the
brake cable with the old hardware and a new cable boot. The first time
I encountered this cable boot years ago, it was a real frustration
since I didn't know the installation trick. You've got a rubber nipple
with a 1/16" hole that you have to force over a long, threaded 5/16"
shaft. The trick is a drop of dishwashing soap in the hole of the
rubber boot and a pair of external snap-ring pliers to spread the hole
enuf to get it over the threaded shaft. Needle nose pliers will work
too but the snap ring pliers are easier because the ends are smaller
and open up when you squeeze the handle.
Reinstalled
the shoes and brake drum and wheel. Then hooked up the other end of the
brake cable with the old hardware and a new cable boot. The first time
I encountered this cable boot years ago, it was a real frustration
since I didn't know the installation trick. You've got a rubber nipple
with a 1/16" hole that you have to force over a long, threaded 5/16"
shaft. The trick is a drop of dishwashing soap in the hole of the
rubber boot and a pair of external snap-ring pliers to spread the hole
enuf to get it over the threaded shaft. Needle nose pliers will work
too but the snap ring pliers are easier because the ends are smaller
and open up when you squeeze the handle.
July 29th 2007 Good weather again this morning under the shadetree. The boss is planning on bringing Frankie ('39 Caddy) to the office so we can mess around with the top mechanism so I'm keeping the work on BillyBob light. BillyBob's paint is looking pretty ratty again. The roof is chalky and the hood and fender tops have "freckles" where I applied Meguiar's Quik Detailer without removing raindrops and drying first. Wasn't shure how to go about fixing the situation so I didn't even clean the parrot poop off BillyBob before I took off on the Macungie run.
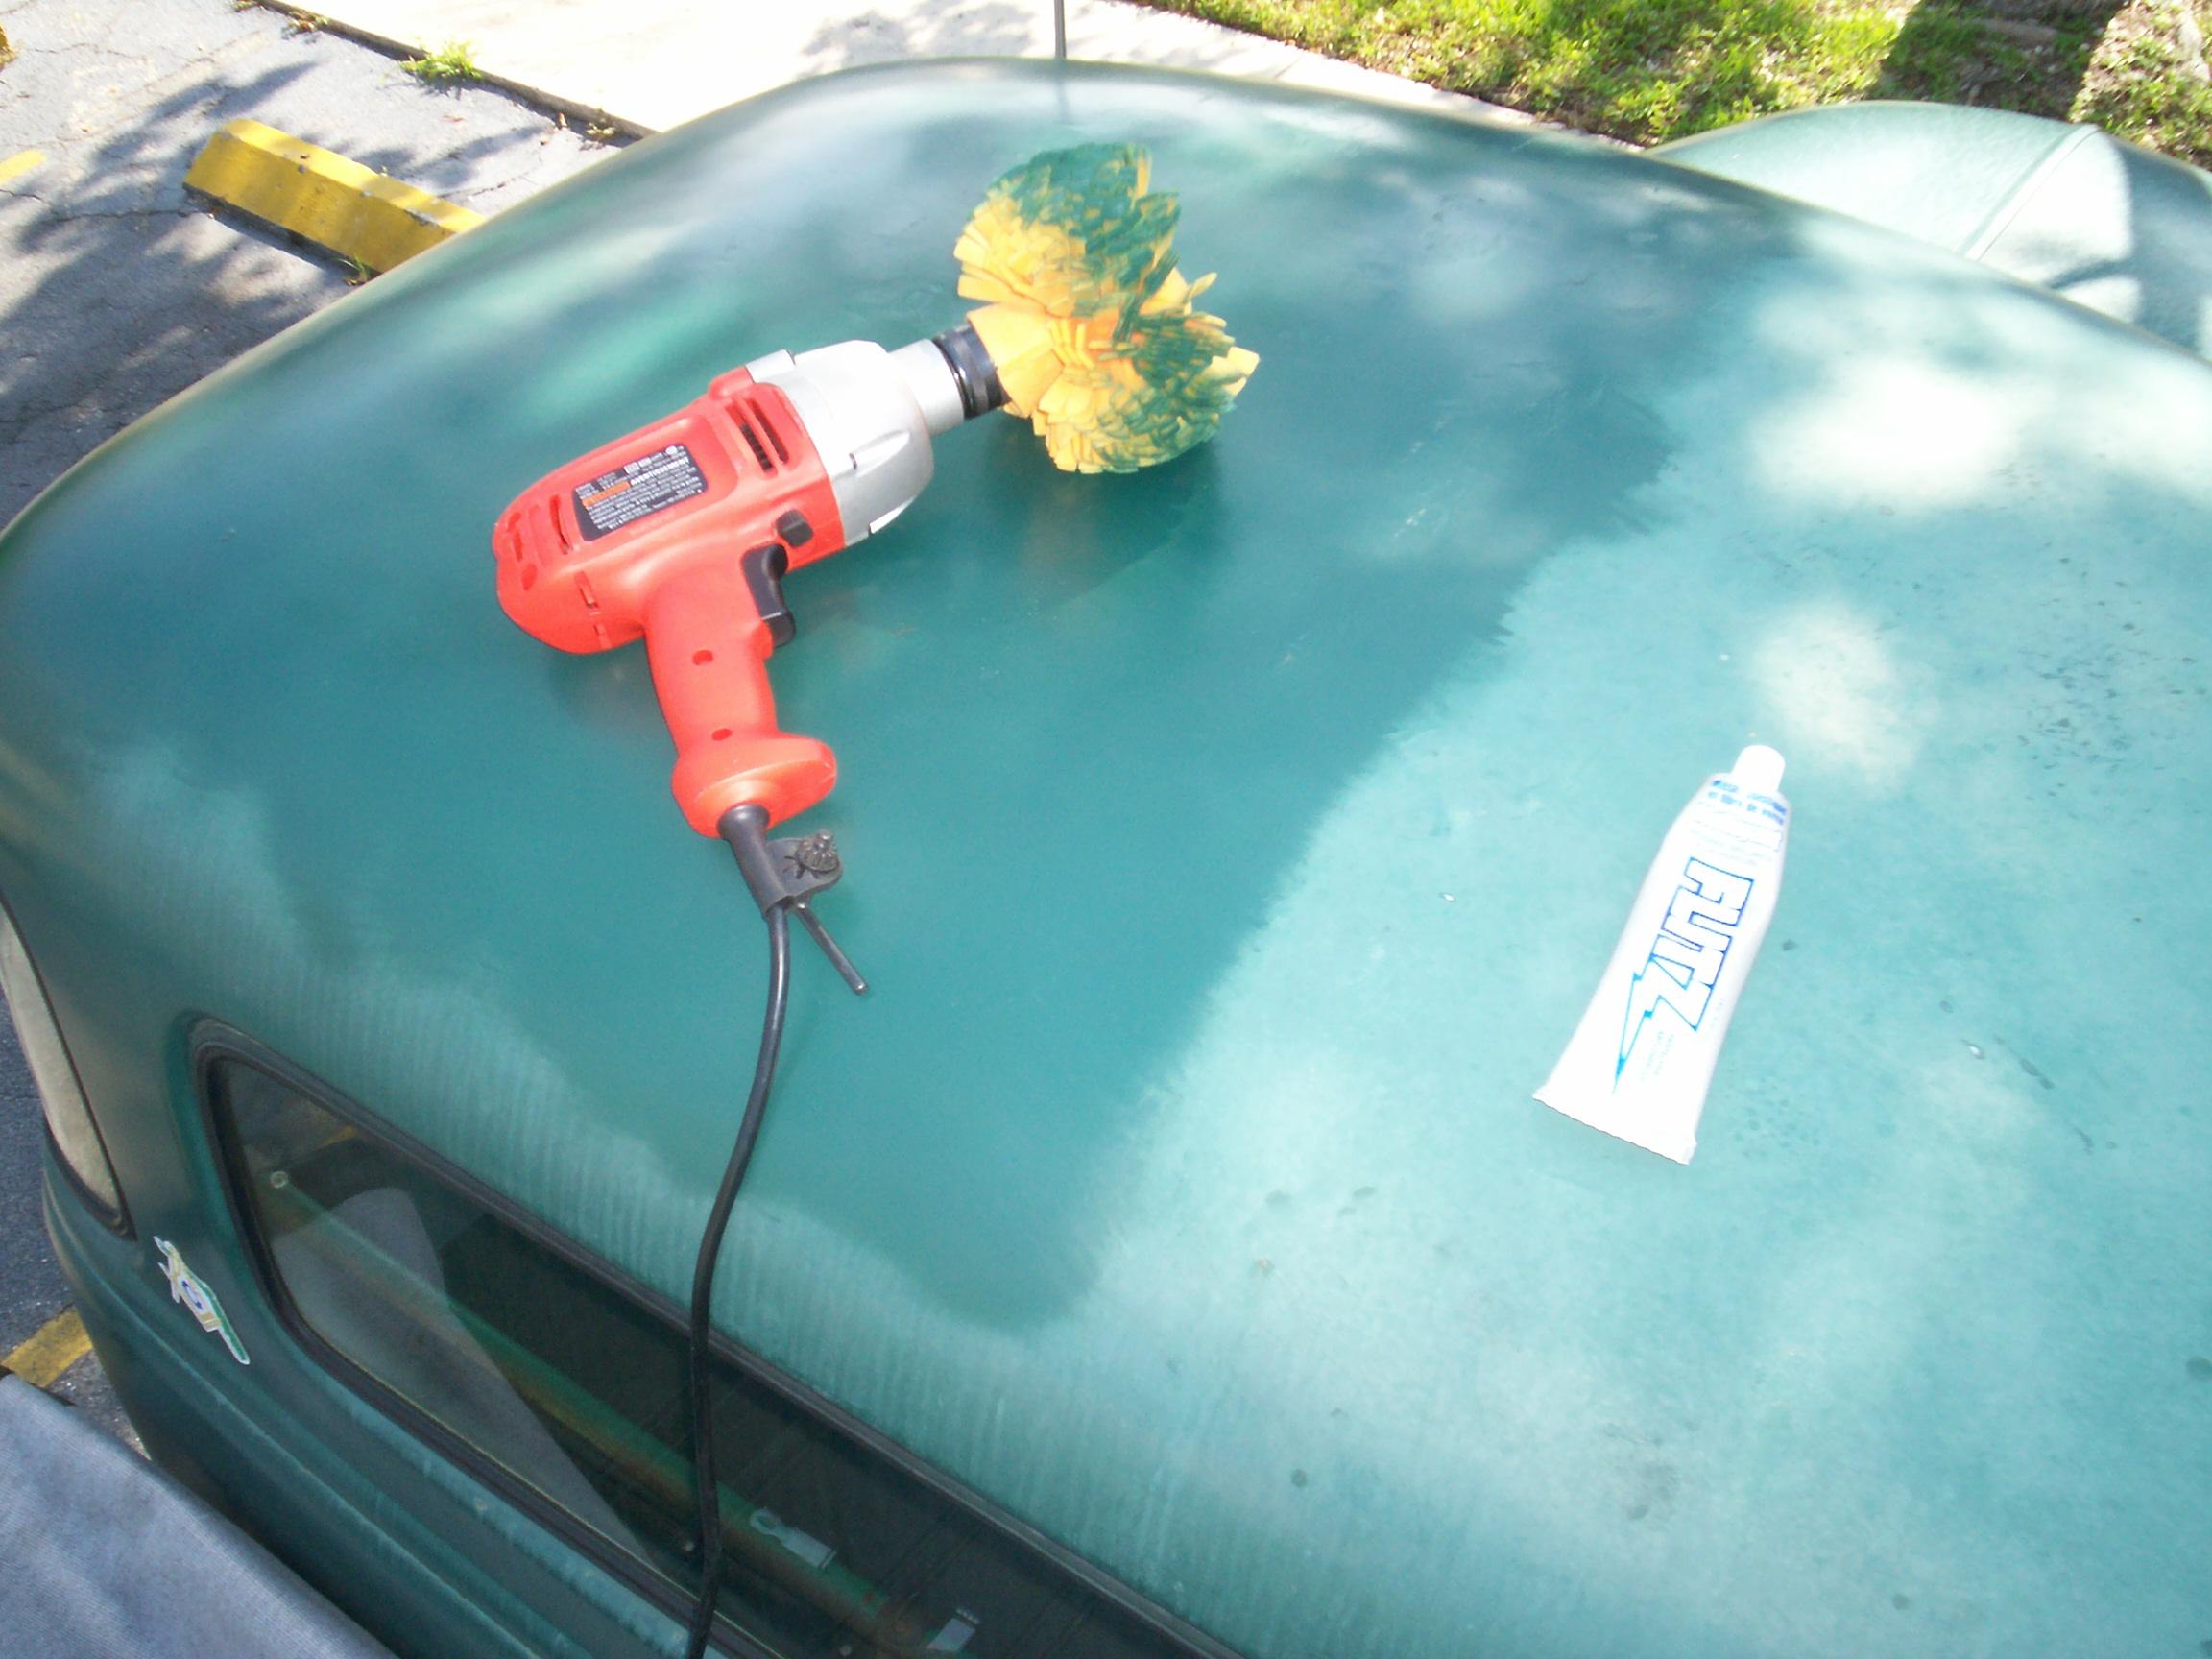 I
got a Flitz ball and polish
some time back and haven't gotten around to trying it out yet. Decided
to experiment and try it on the roof. It worked pretty good in bringing
back the "farm truck patina" so I continued with the hood and cowl.
We'll give it a week and try the Quik Detailer again on the newly
polished areas.
I
got a Flitz ball and polish
some time back and haven't gotten around to trying it out yet. Decided
to experiment and try it on the roof. It worked pretty good in bringing
back the "farm truck patina" so I continued with the hood and cowl.
We'll give it a week and try the Quik Detailer again on the newly
polished areas.
The rains started about one in the afternoon. The boss had not shown up yet and probably won't bring the Caddy out if it keeps raining . . . It kept raining. Clouds pass, sun shines but it keeps sprinkling lightly thru it all. Happens that way in this neck of the woods sometimes. I watched TV fer awhile and sat in BillyBob's cab and smoked a cigar and listened to latino music on the radio. Finally, I closed up shop and headed for the Krash Pad.
 August
4th 2007 Another good
weather day 'cept for the heat. Gonna have to work slow. Got BillyBob
up in the air and removed the driver side rear wheel and brake drum. My
original plan was to replace the '54 wheel cylinder that JR's mechanic
installed years ago. It is in good shape, however, and I've
reconsidered. The new plan is to remove components down to the wheel
cylinder and mask it off for painting ops.
August
4th 2007 Another good
weather day 'cept for the heat. Gonna have to work slow. Got BillyBob
up in the air and removed the driver side rear wheel and brake drum. My
original plan was to replace the '54 wheel cylinder that JR's mechanic
installed years ago. It is in good shape, however, and I've
reconsidered. The new plan is to remove components down to the wheel
cylinder and mask it off for painting ops.
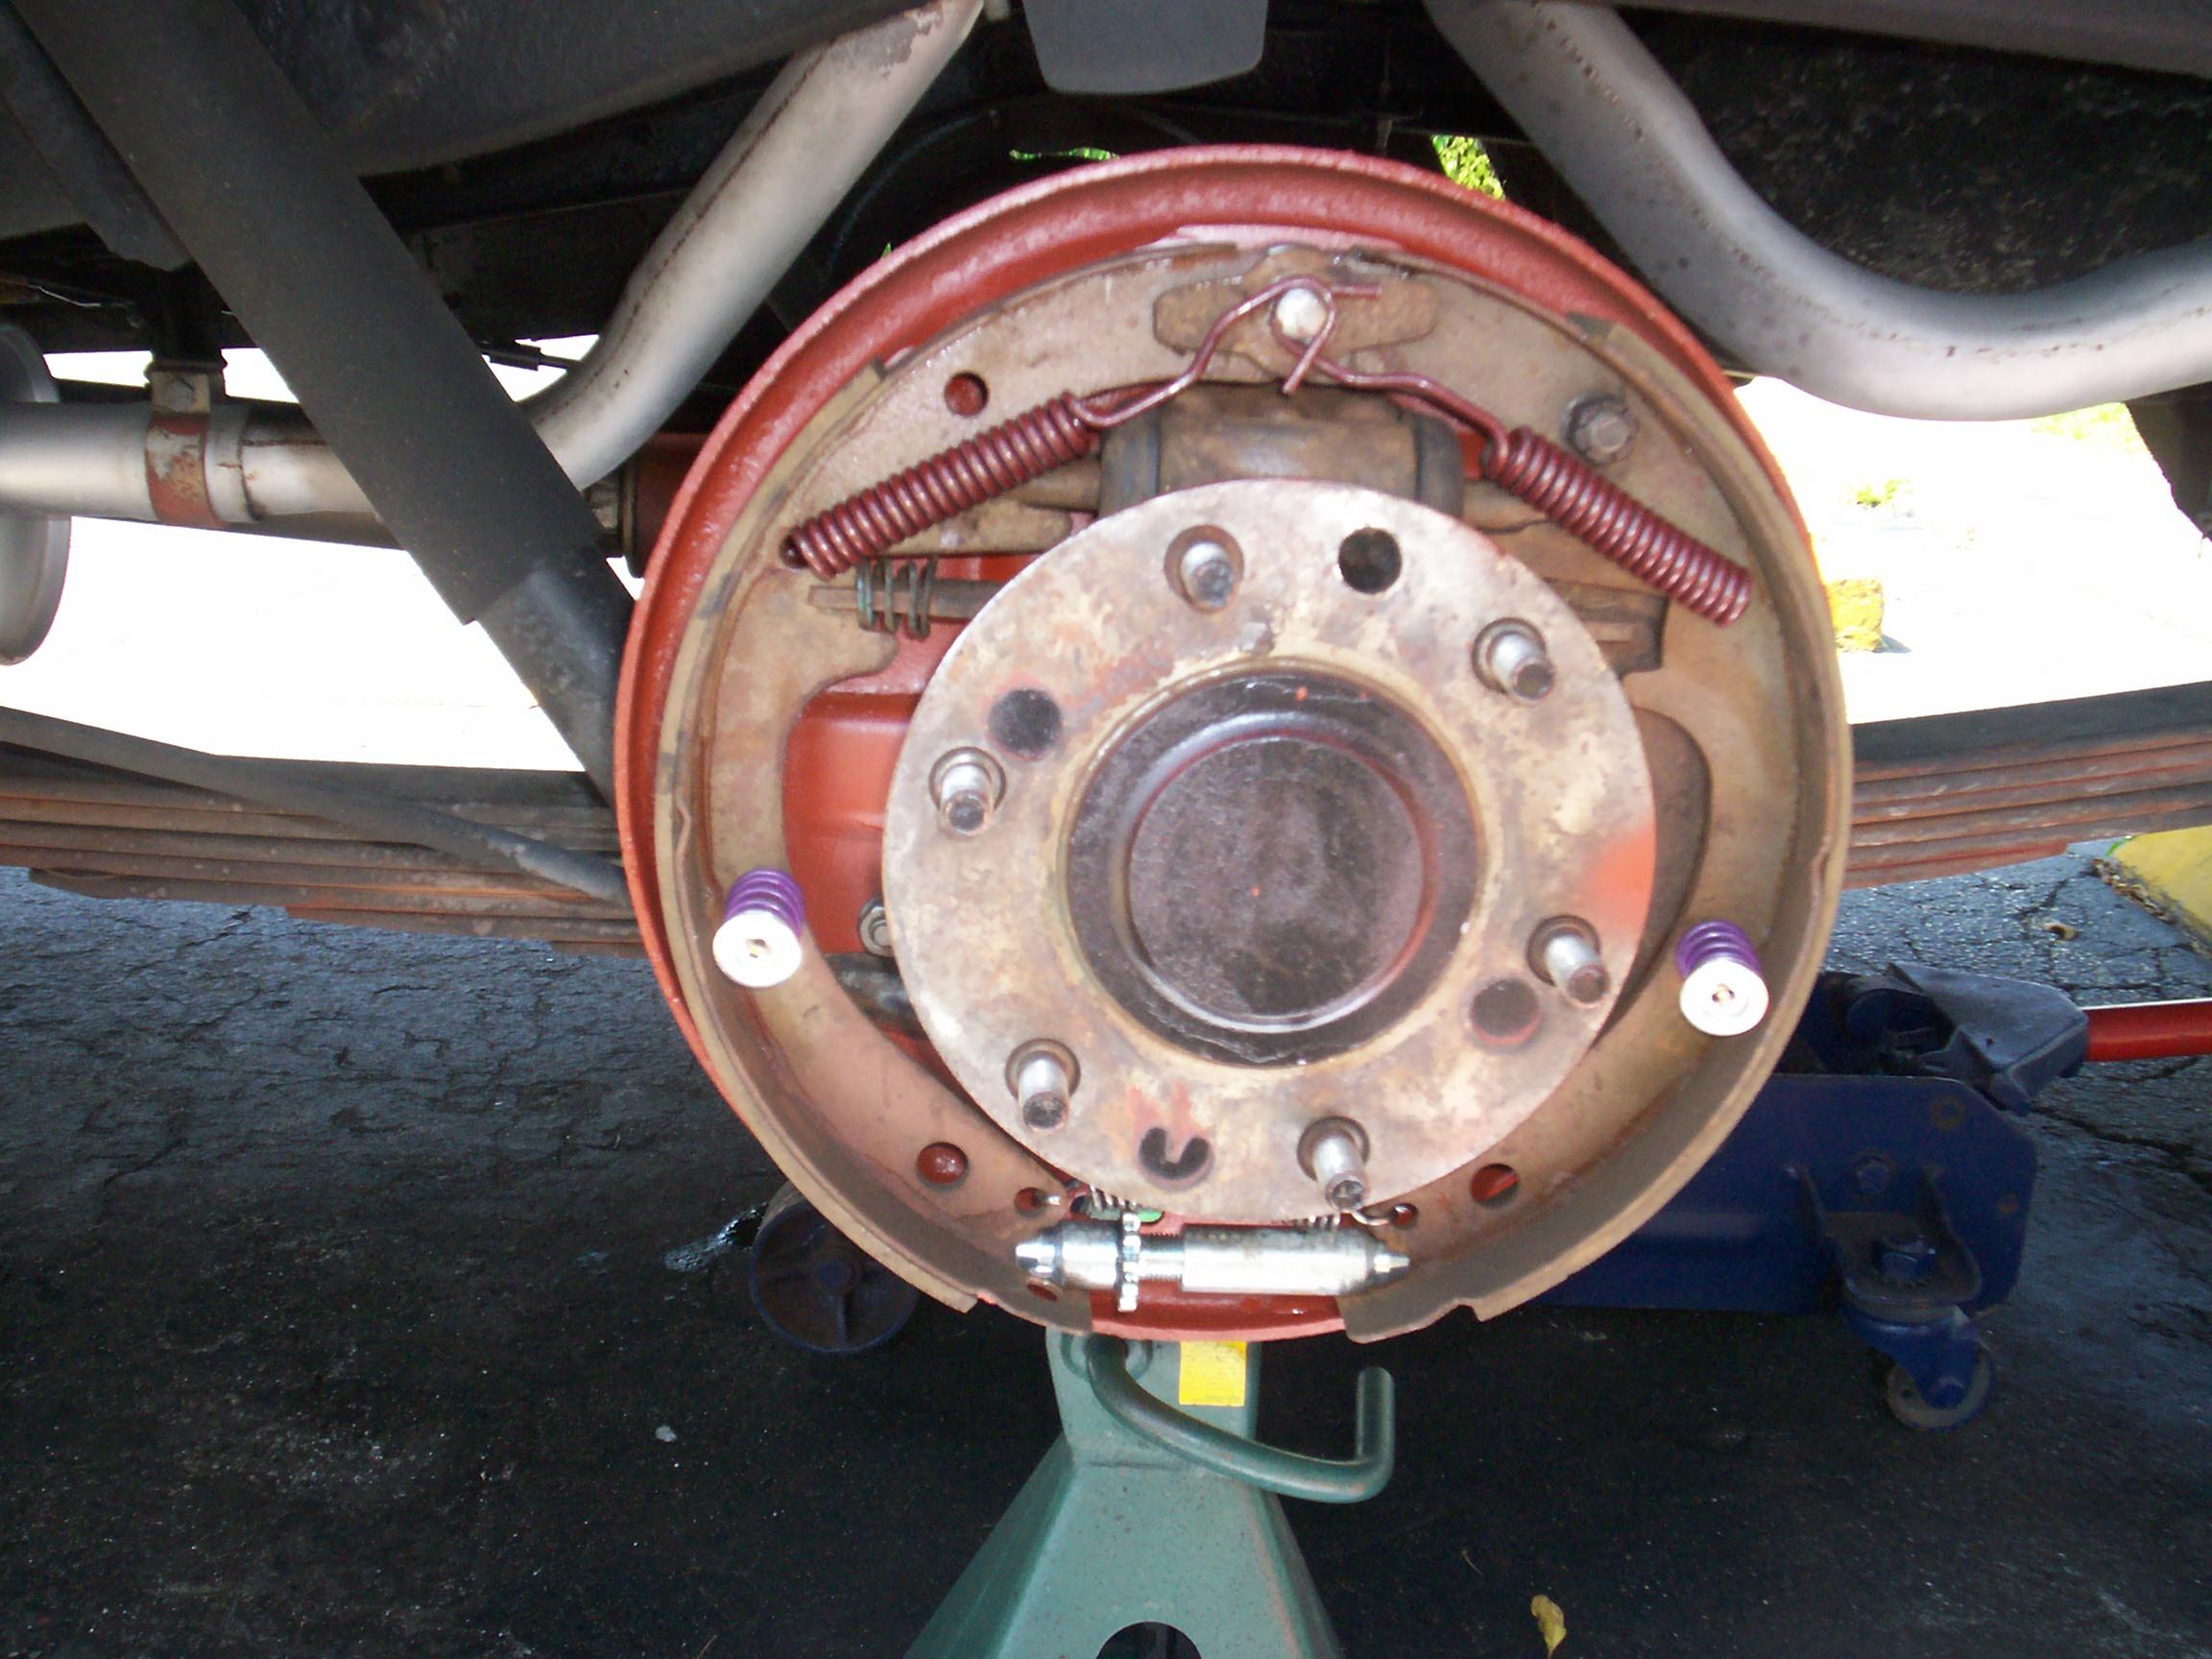
 Springs
and shoes were taken off and backing plate was cleaned with brake
cleaner and paper towels followed by wire cup in the electric angle
grinder. The wheel cylinder, parking brake cable and shoe pivot were
masked off next for painting after checking under the wheel cylinder
rubber seals for leakage. Good news there. No leakage. After masking,
the backing plate got an application of PRE Paint Prep followed by a
heavy coat of Eastwood's Rust Encapsulator. That was given a few hours
to dry while I hunted up new springs, retainers and adjuster for the
brake shoes in my inventory. I just hope they are here at the Krash Lab
and not up at the warehouse.
Springs
and shoes were taken off and backing plate was cleaned with brake
cleaner and paper towels followed by wire cup in the electric angle
grinder. The wheel cylinder, parking brake cable and shoe pivot were
masked off next for painting after checking under the wheel cylinder
rubber seals for leakage. Good news there. No leakage. After masking,
the backing plate got an application of PRE Paint Prep followed by a
heavy coat of Eastwood's Rust Encapsulator. That was given a few hours
to dry while I hunted up new springs, retainers and adjuster for the
brake shoes in my inventory. I just hope they are here at the Krash Lab
and not up at the warehouse.
 I
found everything I needed 'cept for the little wheel cylinder pushrods
that engage the shoes. I had to clean up the old ones and reuse them
this time. A few beers and a cigar and it was time to put things back
together again. It is really hot today. I'm watching the Military
Channel in the Krash Lab and going out during the commercials to work
on BillyBob for a few minutes in the sun. Keeps the possibility of heat
exhaustion or sunstroke down. Drinking lots of water now to keep
dehydration in check (sun and beer).
I
found everything I needed 'cept for the little wheel cylinder pushrods
that engage the shoes. I had to clean up the old ones and reuse them
this time. A few beers and a cigar and it was time to put things back
together again. It is really hot today. I'm watching the Military
Channel in the Krash Lab and going out during the commercials to work
on BillyBob for a few minutes in the sun. Keeps the possibility of heat
exhaustion or sunstroke down. Drinking lots of water now to keep
dehydration in check (sun and beer).
 August
5th 2007 Good weather
and not quite as hot as yesterday. It was time for monthly maintenance.
All fluids are holding. I checked the steering box too and the STP is
not seeping out. It only needed topping off. My guess regarding the
leakage I had during the Macungie run is that the engine heat and
vibrations from hours on the road caused it to leak more than
day-to-day driving. Topped off the shift linkage box with chassis
grease too. Then I continued polishing the paint with the Flitz ball
and polish. Last week I got the roof and most of the hood done before
the rains started. Today, I finished the hood and did the fenders and
passenger side door. I also treated what I polished last week with Quik
Detailer.
August
5th 2007 Good weather
and not quite as hot as yesterday. It was time for monthly maintenance.
All fluids are holding. I checked the steering box too and the STP is
not seeping out. It only needed topping off. My guess regarding the
leakage I had during the Macungie run is that the engine heat and
vibrations from hours on the road caused it to leak more than
day-to-day driving. Topped off the shift linkage box with chassis
grease too. Then I continued polishing the paint with the Flitz ball
and polish. Last week I got the roof and most of the hood done before
the rains started. Today, I finished the hood and did the fenders and
passenger side door. I also treated what I polished last week with Quik
Detailer.
August 11th 2007 Arrived at the Krash Lab before seven. It's already hot and there is a forty percent chance of rain today if you believe the forecast. The Flitz polish I've been working with the past two weeks has put a nice shine to the rattlecan Rustoleum paint but it doesn't bead up in the rain. I thought I'd try wax one more time. Got another Flitz ball for the job. Washed and dried the roof, hood and front fenders. Then applied Mequiar's NXT Generation spray wax with a rag. Buffed off with a rag then went over it with the Flitz ball. Not bad. I've finally got wax on the Rustoleum without the foggy appearance that was plaguing me before.
Put an application of Rain-X on the windshield after cleaning it. When I was in Melbourne during the Macungie run, My uncle Tom gave me a couple of noise supressors to put on the radio antenna wire. These are similar to the bulges you see at either end of a monitor cable on your computer. Will they work for an AM antenna wire? Who knows. Can't hurt to find out.
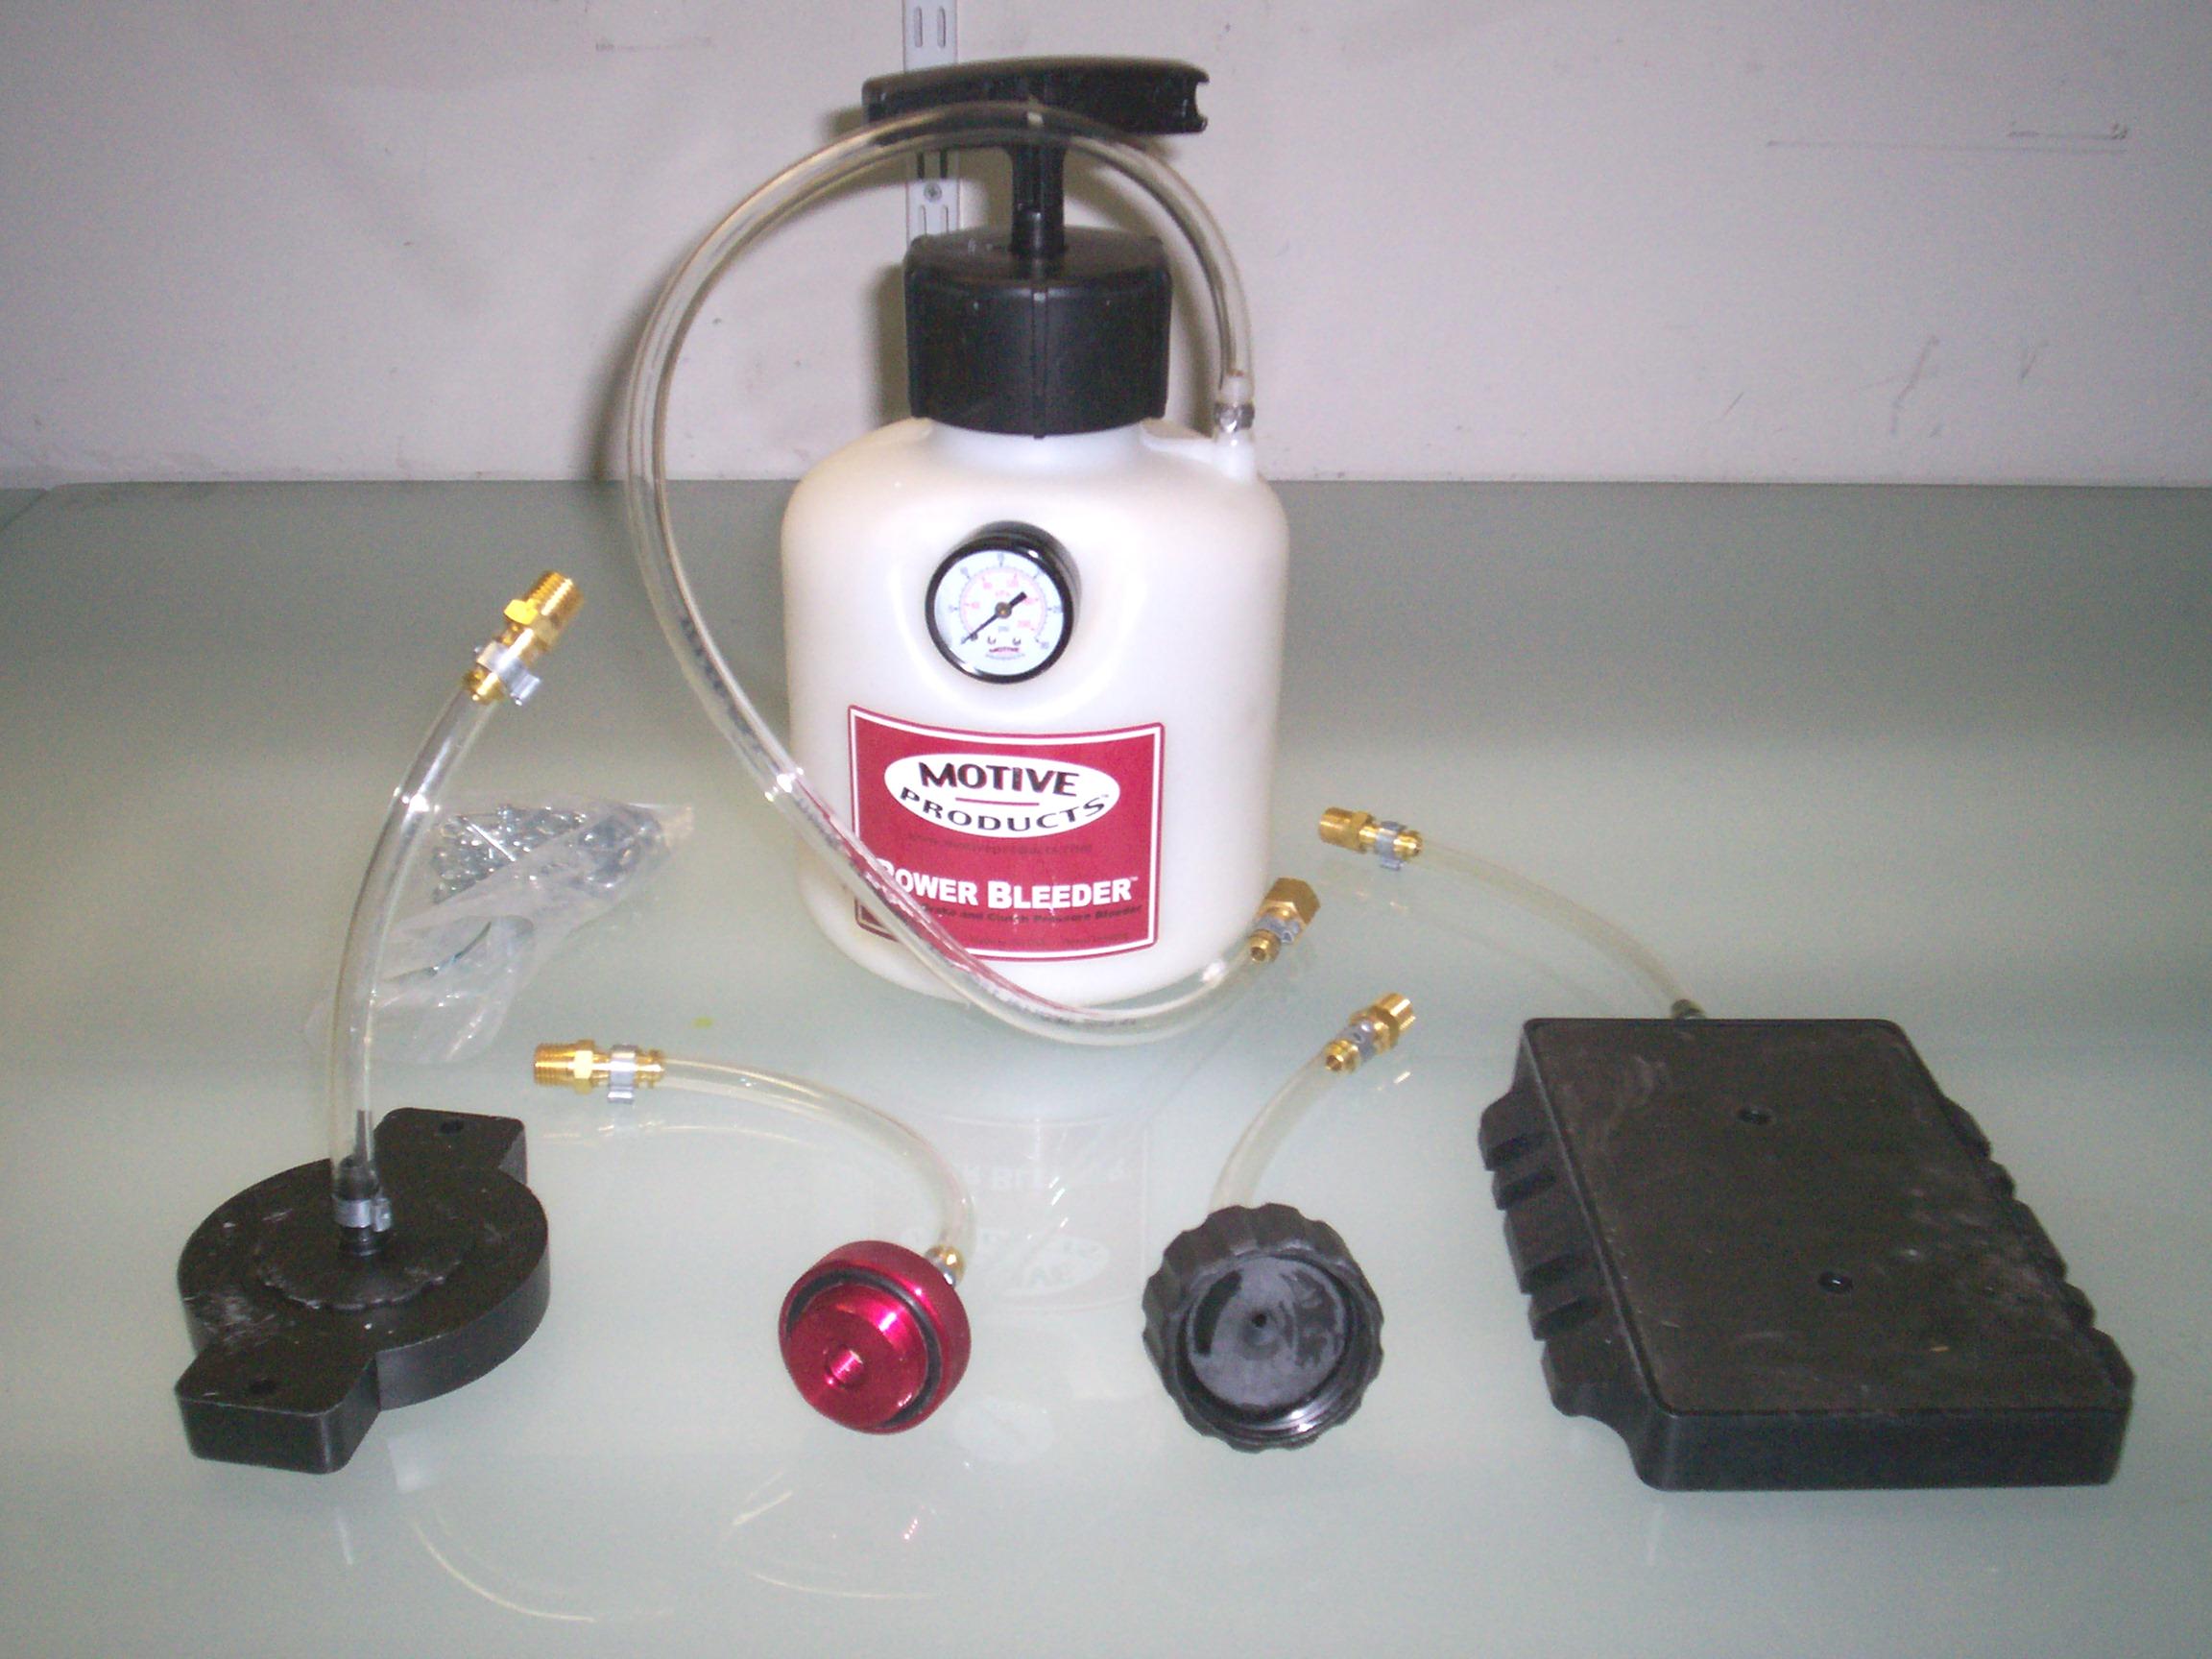 August
18th 2007 Well, the
noise supressors had no effect. Last sunday was a blistering broiler of
a day so no work got done under the shade tree. Today is better. Some
time back, I got a Motive Systems Power Bleeder for the Jeep clutch
since the Mitivac is not suitable for bleeding that system. I also got
all the accessory attachments so I could, hopefully, use it with
BillyBob too. Everytime I get a new tool that I don't know how to use,
I tiptoe around it fer awhile, getting up the gumption to tear into
things and make the mistakes I always do in unfamiliar territory.
August
18th 2007 Well, the
noise supressors had no effect. Last sunday was a blistering broiler of
a day so no work got done under the shade tree. Today is better. Some
time back, I got a Motive Systems Power Bleeder for the Jeep clutch
since the Mitivac is not suitable for bleeding that system. I also got
all the accessory attachments so I could, hopefully, use it with
BillyBob too. Everytime I get a new tool that I don't know how to use,
I tiptoe around it fer awhile, getting up the gumption to tear into
things and make the mistakes I always do in unfamiliar territory.
August 25th 2007 Summertime blues again. Hot, muggy, forty percent chance of rain. Still haven't got the brakes bled. Jacked the front end up and adjusted the brakes. Then jacked the rear end up and adjusted the rear brakes. Got BillyBob back on the ground and then it started sprinkling off and on. The weather got worse after awhile instead of better so I packed it in for the day.
August 26th 2007 The brake adjustment gave me engagement of the brakes with very little depression of the pedal. Brake pedal was already solid. One of the reasons I've been procrastinating, other than sheer laziness, is that the brakes are working better than they ever have and I'm a bit fearful of messin' up a good thing. It's past time to quit pussy-footin' around 'tho.
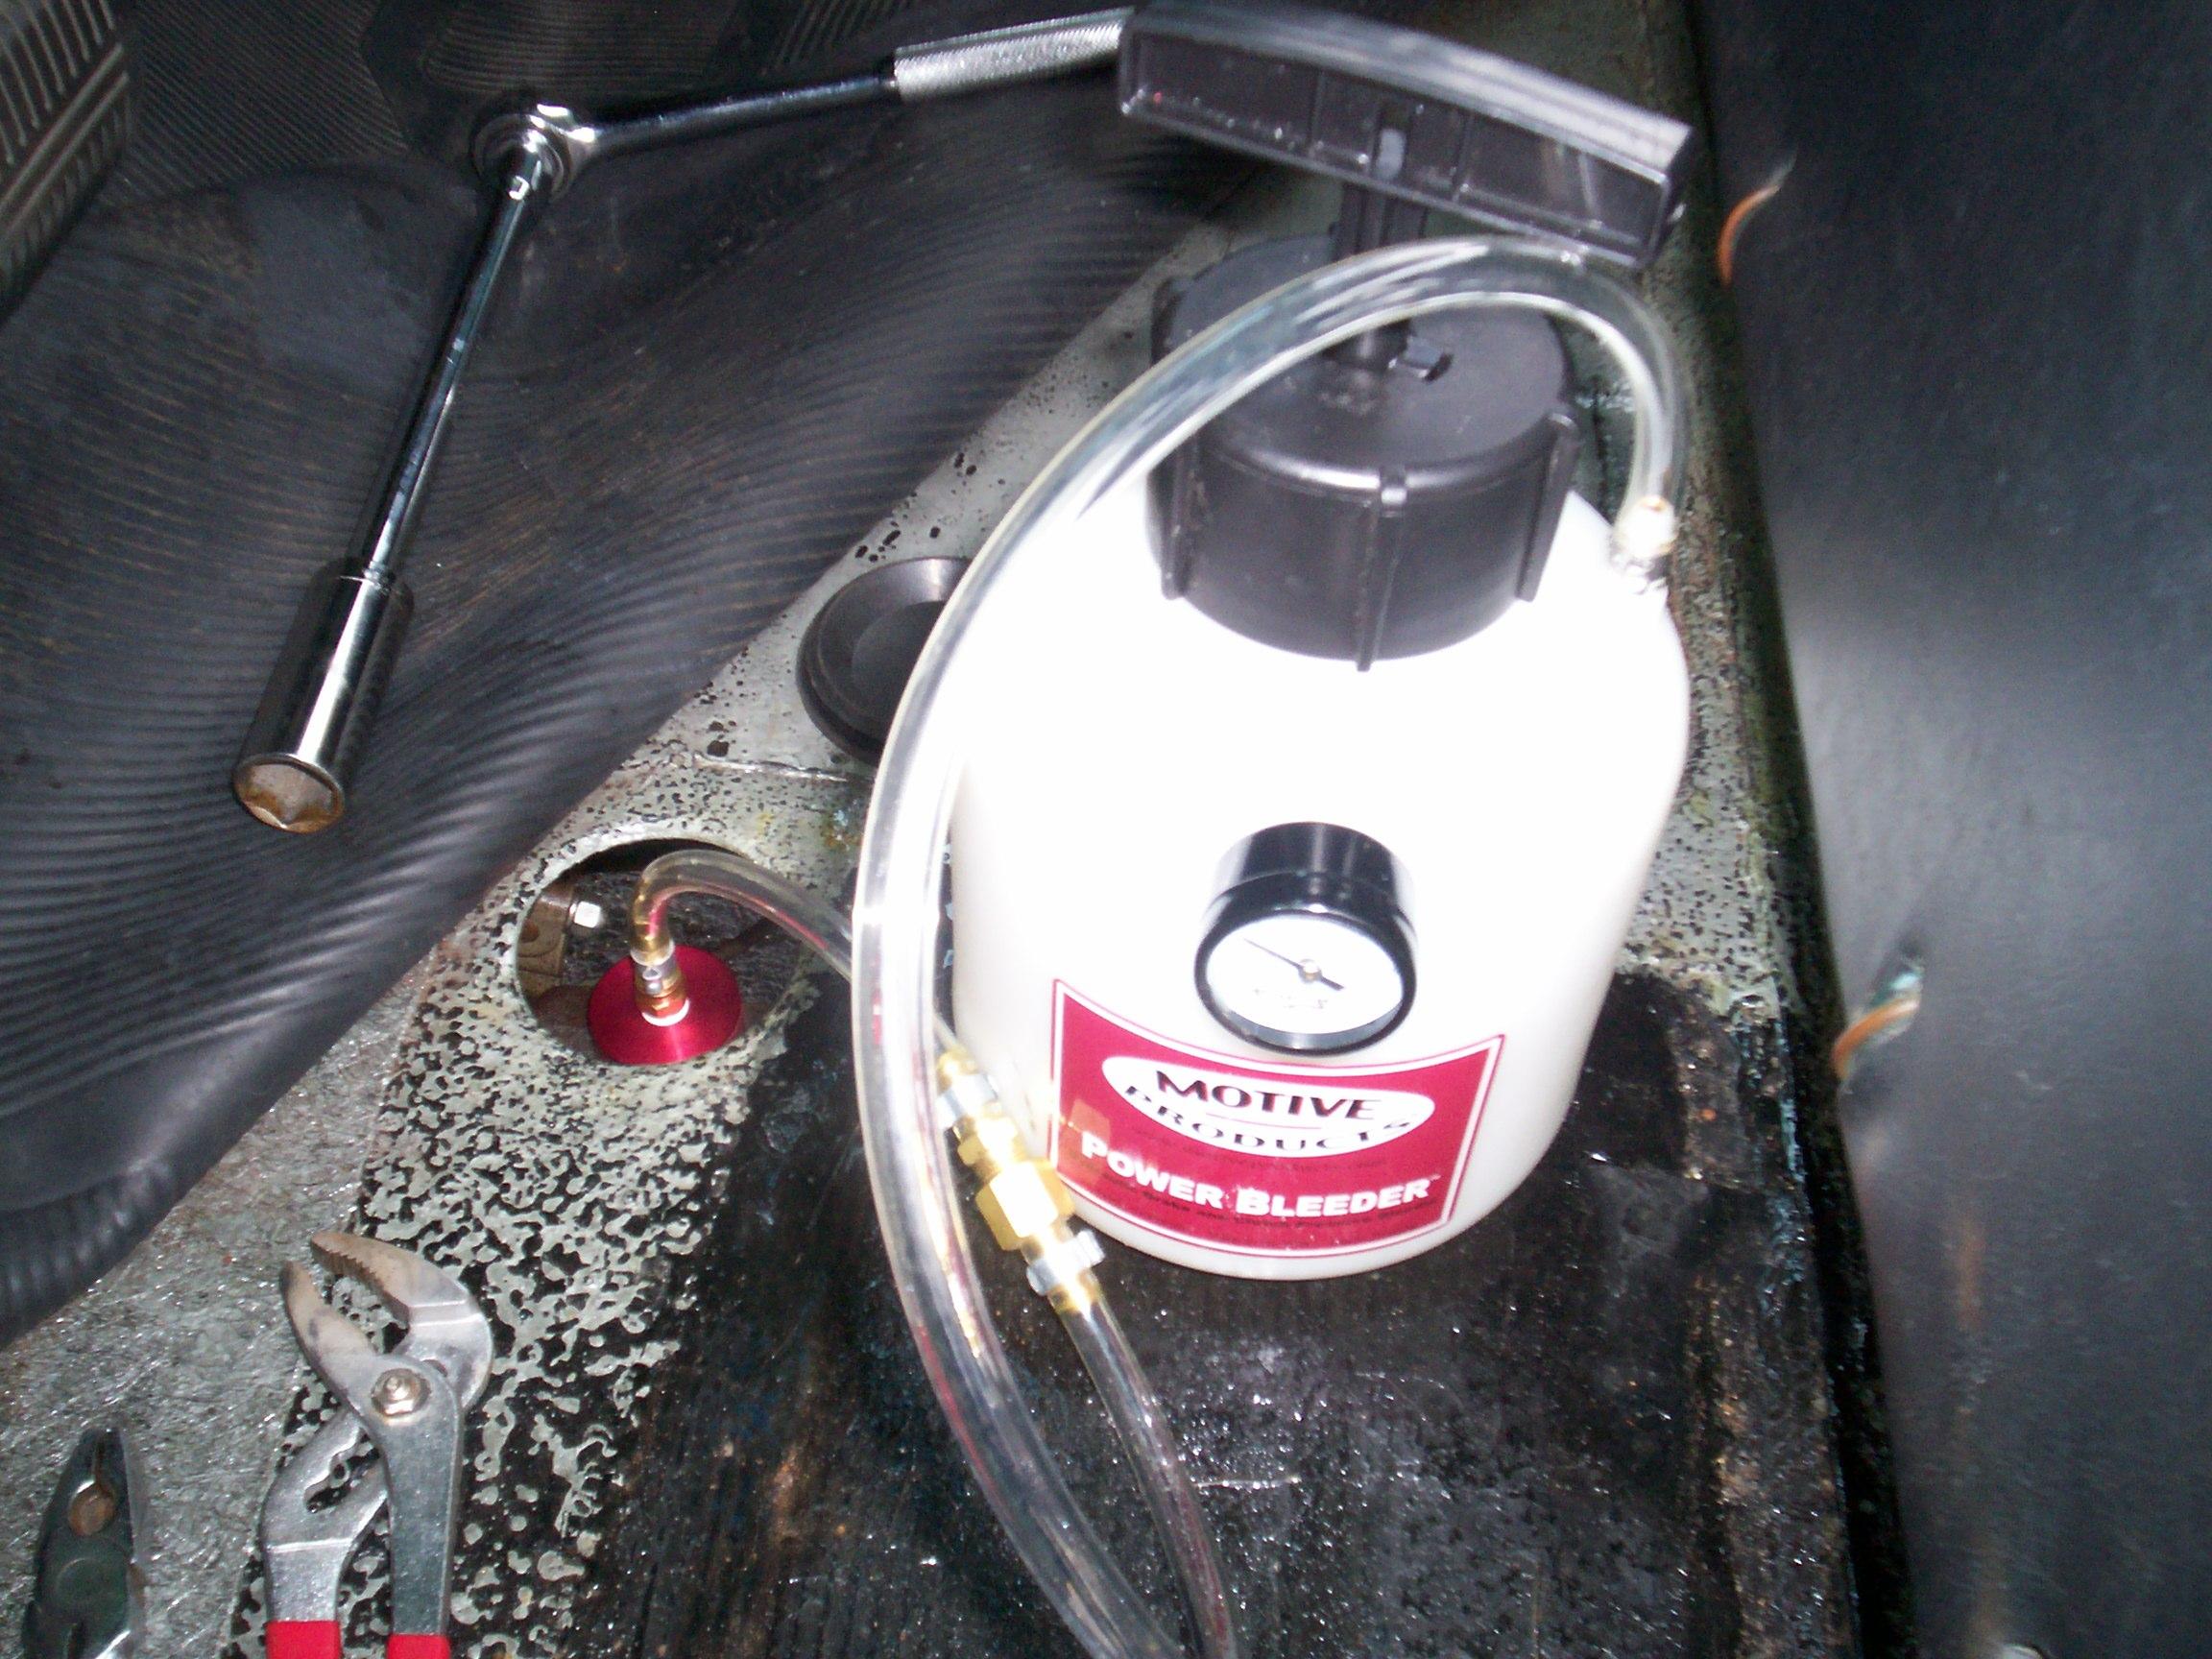 The
ground was still dry when I got to the Krash Lab but the sky was
rumbling in the distance. I got the pressure bleeder connected to
BillyBob's master cylinder and pumped the pressure up to ten psi for a
recommended leak test. The accessory attachment for "antiques" worked
well. The pressure was down to eight psi after about five minutes had
passed. There was no documentation to tell me if that was good or bad
so I told myself it was good and plunged ahead. I released the pressure
and poured about two quarts of DOT 3 brake fluid in the power bleeder.
Pumped the pressure back up to ten psi. There are no recommendations
for how high the pressure should be for older vehicles. I decided to
start on the low side.
The
ground was still dry when I got to the Krash Lab but the sky was
rumbling in the distance. I got the pressure bleeder connected to
BillyBob's master cylinder and pumped the pressure up to ten psi for a
recommended leak test. The accessory attachment for "antiques" worked
well. The pressure was down to eight psi after about five minutes had
passed. There was no documentation to tell me if that was good or bad
so I told myself it was good and plunged ahead. I released the pressure
and poured about two quarts of DOT 3 brake fluid in the power bleeder.
Pumped the pressure back up to ten psi. There are no recommendations
for how high the pressure should be for older vehicles. I decided to
start on the low side.
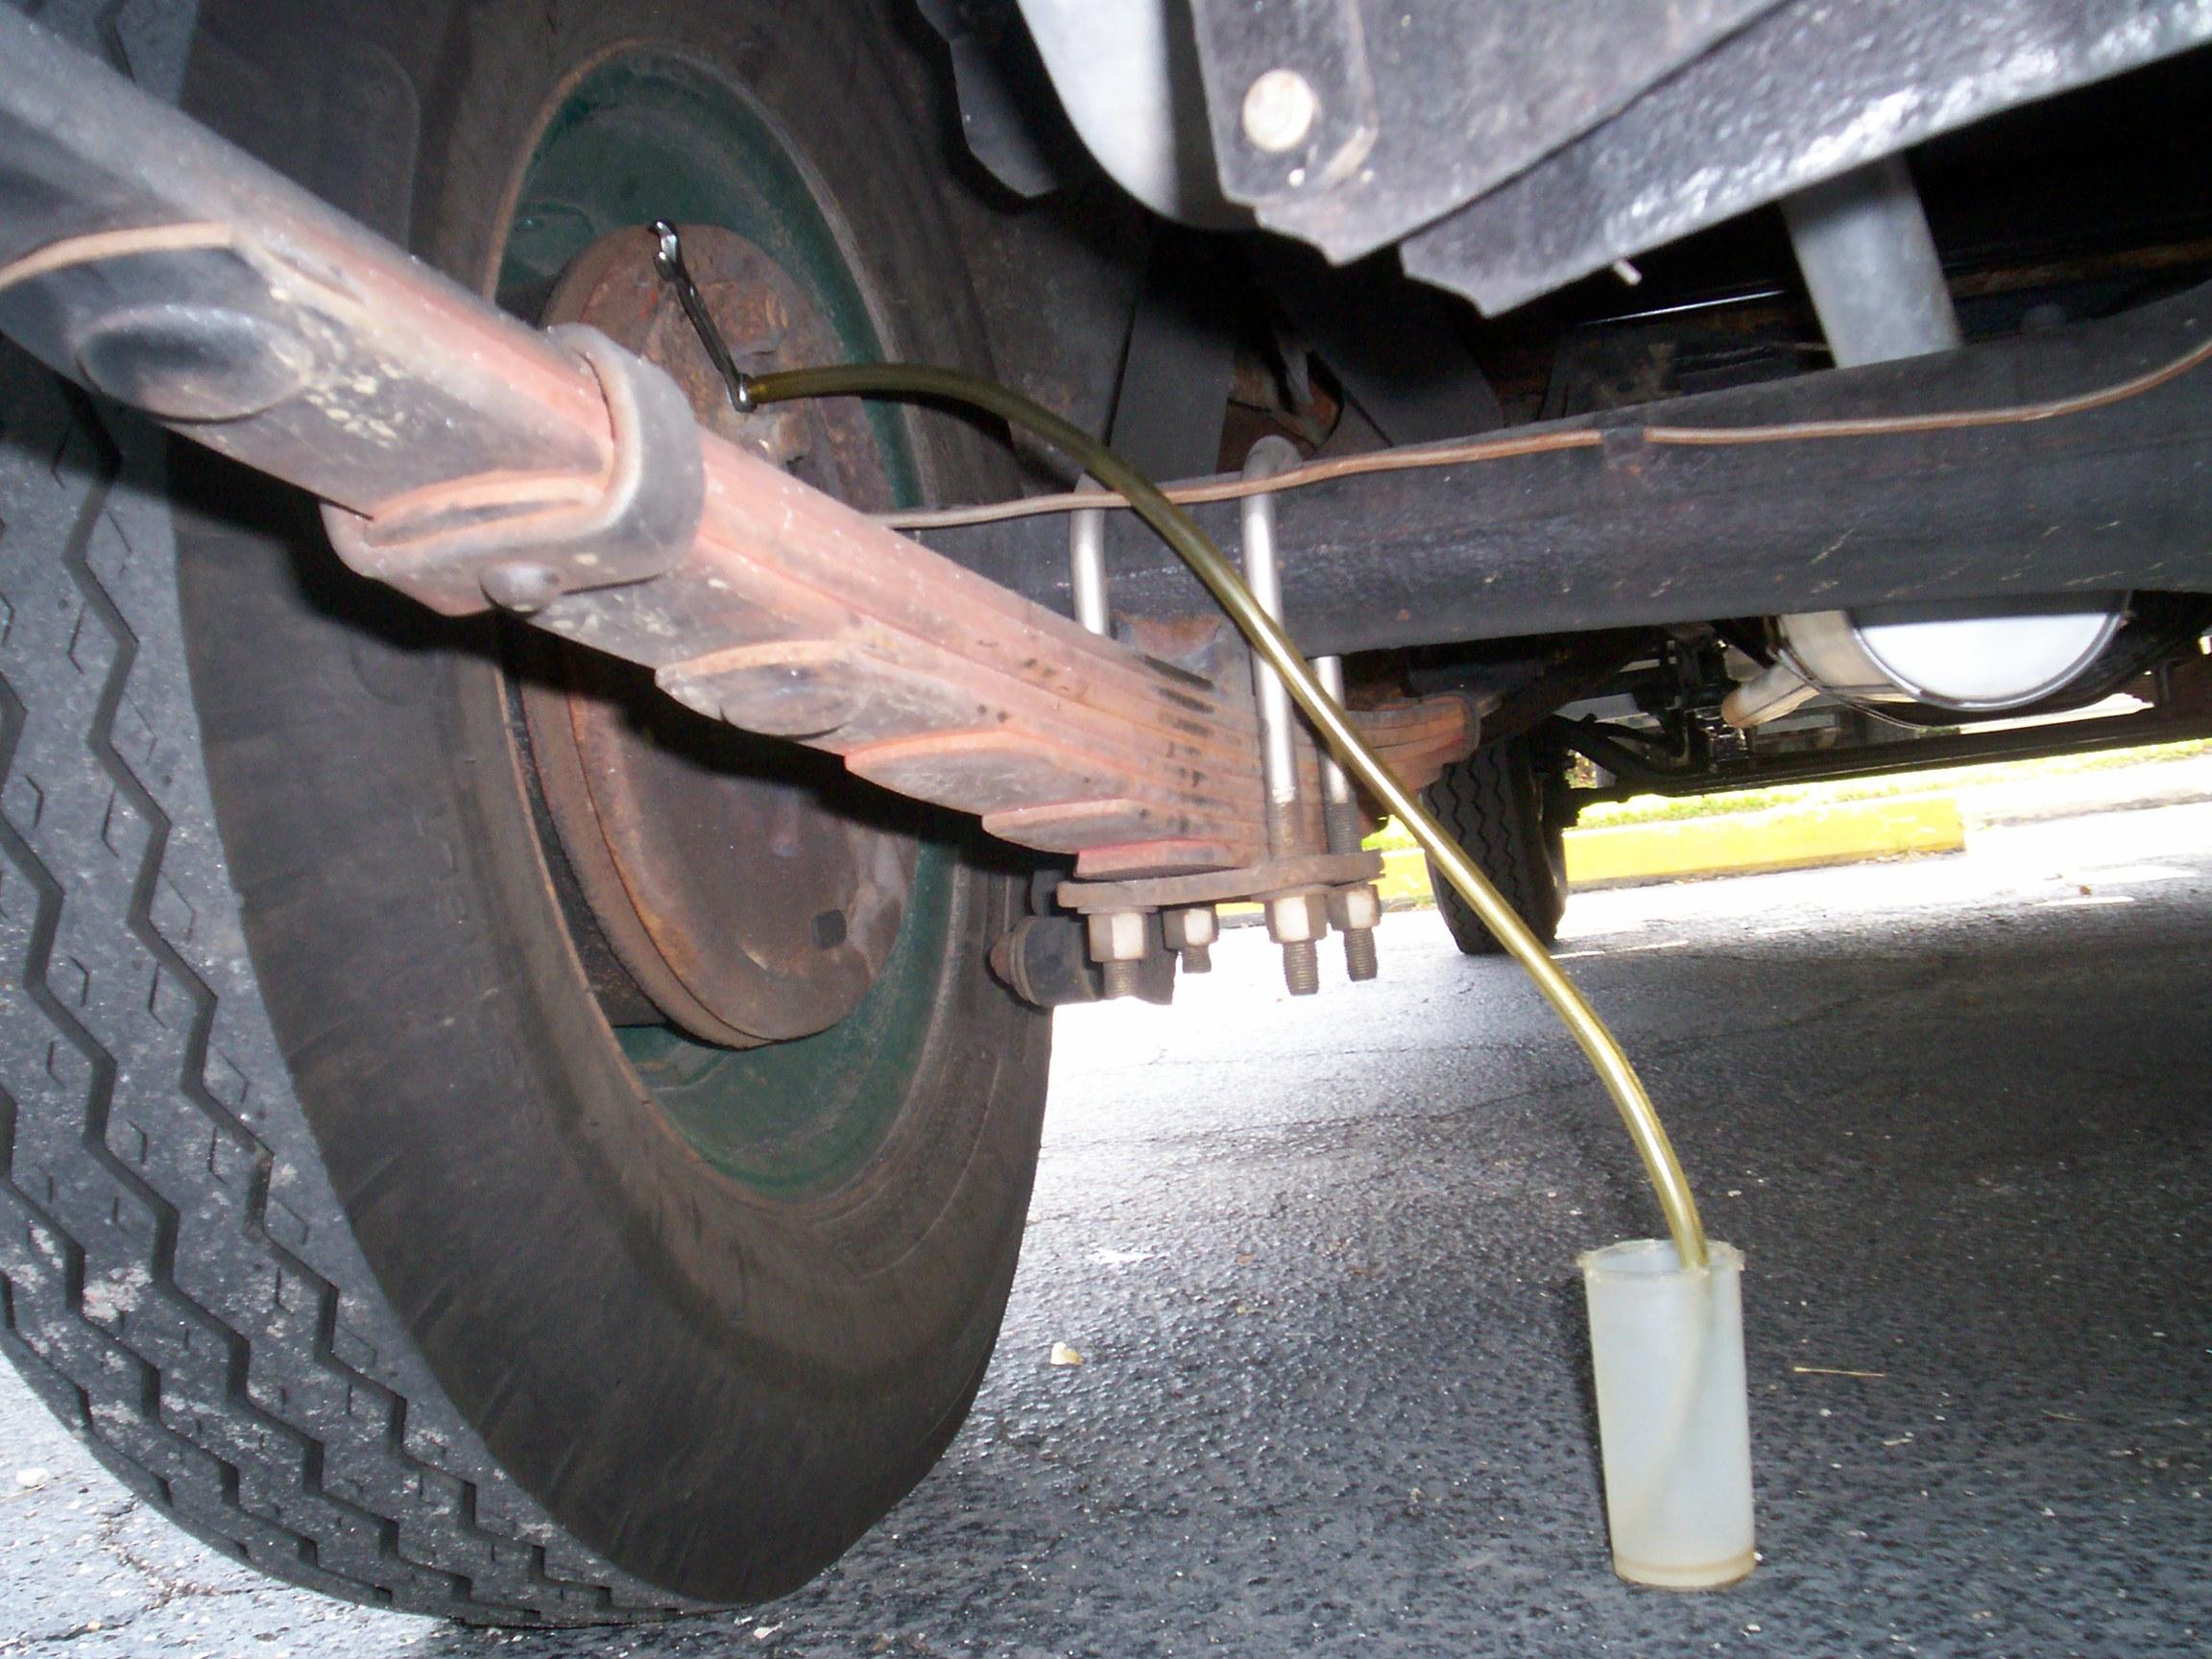 Setup
the driver side rear wheel for bleeding first (farthest away from the
master). Motive Systems was scimpy in what they provided for this end
of the operation so I cannabalized my Mitivac for tubing and collection
reservoir. I use a small 3/8" six point box end wrench for the bleeder
(Yeah, I've rounded a couple of these in the past). It doesn't have
enuf leverage for the initial loosening, however, and I use a 3/8" six
point deep socket for that before the tubing is attached.
Setup
the driver side rear wheel for bleeding first (farthest away from the
master). Motive Systems was scimpy in what they provided for this end
of the operation so I cannabalized my Mitivac for tubing and collection
reservoir. I use a small 3/8" six point box end wrench for the bleeder
(Yeah, I've rounded a couple of these in the past). It doesn't have
enuf leverage for the initial loosening, however, and I use a 3/8" six
point deep socket for that before the tubing is attached.
The pressure bleeder worked great. Once the bleeder screw is loose enough for fluid flow, more is not better. If you turn it too much, air gets in around the threads if you're using a vacuum bleeder. Judging if the bleeder is open enough has been a problem with the Mitivac for me. It is a breeze with the pressure bleeder.
 I
was on my third wheel when it started sprinkling. It was raining harder
by the time I got to the last wheel. I stopped to put my "creeper"
under cover. This is a nice square of carpet that Tom Caperton gave me
when I visited him on the Macungie run. I did the last wheel on the
bare asphalt as the parking lot started getting swampy. I had to wait
for the rain to stop before finishing up in the cab. Got the bubble
chair out and had my cigar and coffee on the back door stoop while I
waited. I won't be doing the Jeep clutch today. Smoke 'em if ya got 'em.
I
was on my third wheel when it started sprinkling. It was raining harder
by the time I got to the last wheel. I stopped to put my "creeper"
under cover. This is a nice square of carpet that Tom Caperton gave me
when I visited him on the Macungie run. I did the last wheel on the
bare asphalt as the parking lot started getting swampy. I had to wait
for the rain to stop before finishing up in the cab. Got the bubble
chair out and had my cigar and coffee on the back door stoop while I
waited. I won't be doing the Jeep clutch today. Smoke 'em if ya got 'em.
September 1st 2007 It's my 58th birthday. I gotta pick up the pace. During the week I finetuned the brake adjustment. I would check each wheel after the seven mile trip up to the Krash Lab each morning. The driver side rear wheel was running hot and the other three were just slightly warm. I'd pull the shoes back a couple of notches with the brake spoon and check the results on the following morning. Two days of this routine and I had everything uniform.
September 15th 2007 Fell flat on my face. Didn't get anything done on the Labor Day weekend and then caught a stomach virus that put me down for the count the following weekend. Here we are in the middle of September. Overdue for monthly maintenance so that was done first this morning on both BillyBob and BettyLou.
September 22nd 2007 Sixty percent chance of rain today, the forecasters say. I still haven't got my groove back from a lazy summer but I'm determined to make a go of it today. Last week I didn't get much done beyond monthly maintenance. I pulled the spare tire and carrier for detailing and did some parts organization and that was it.
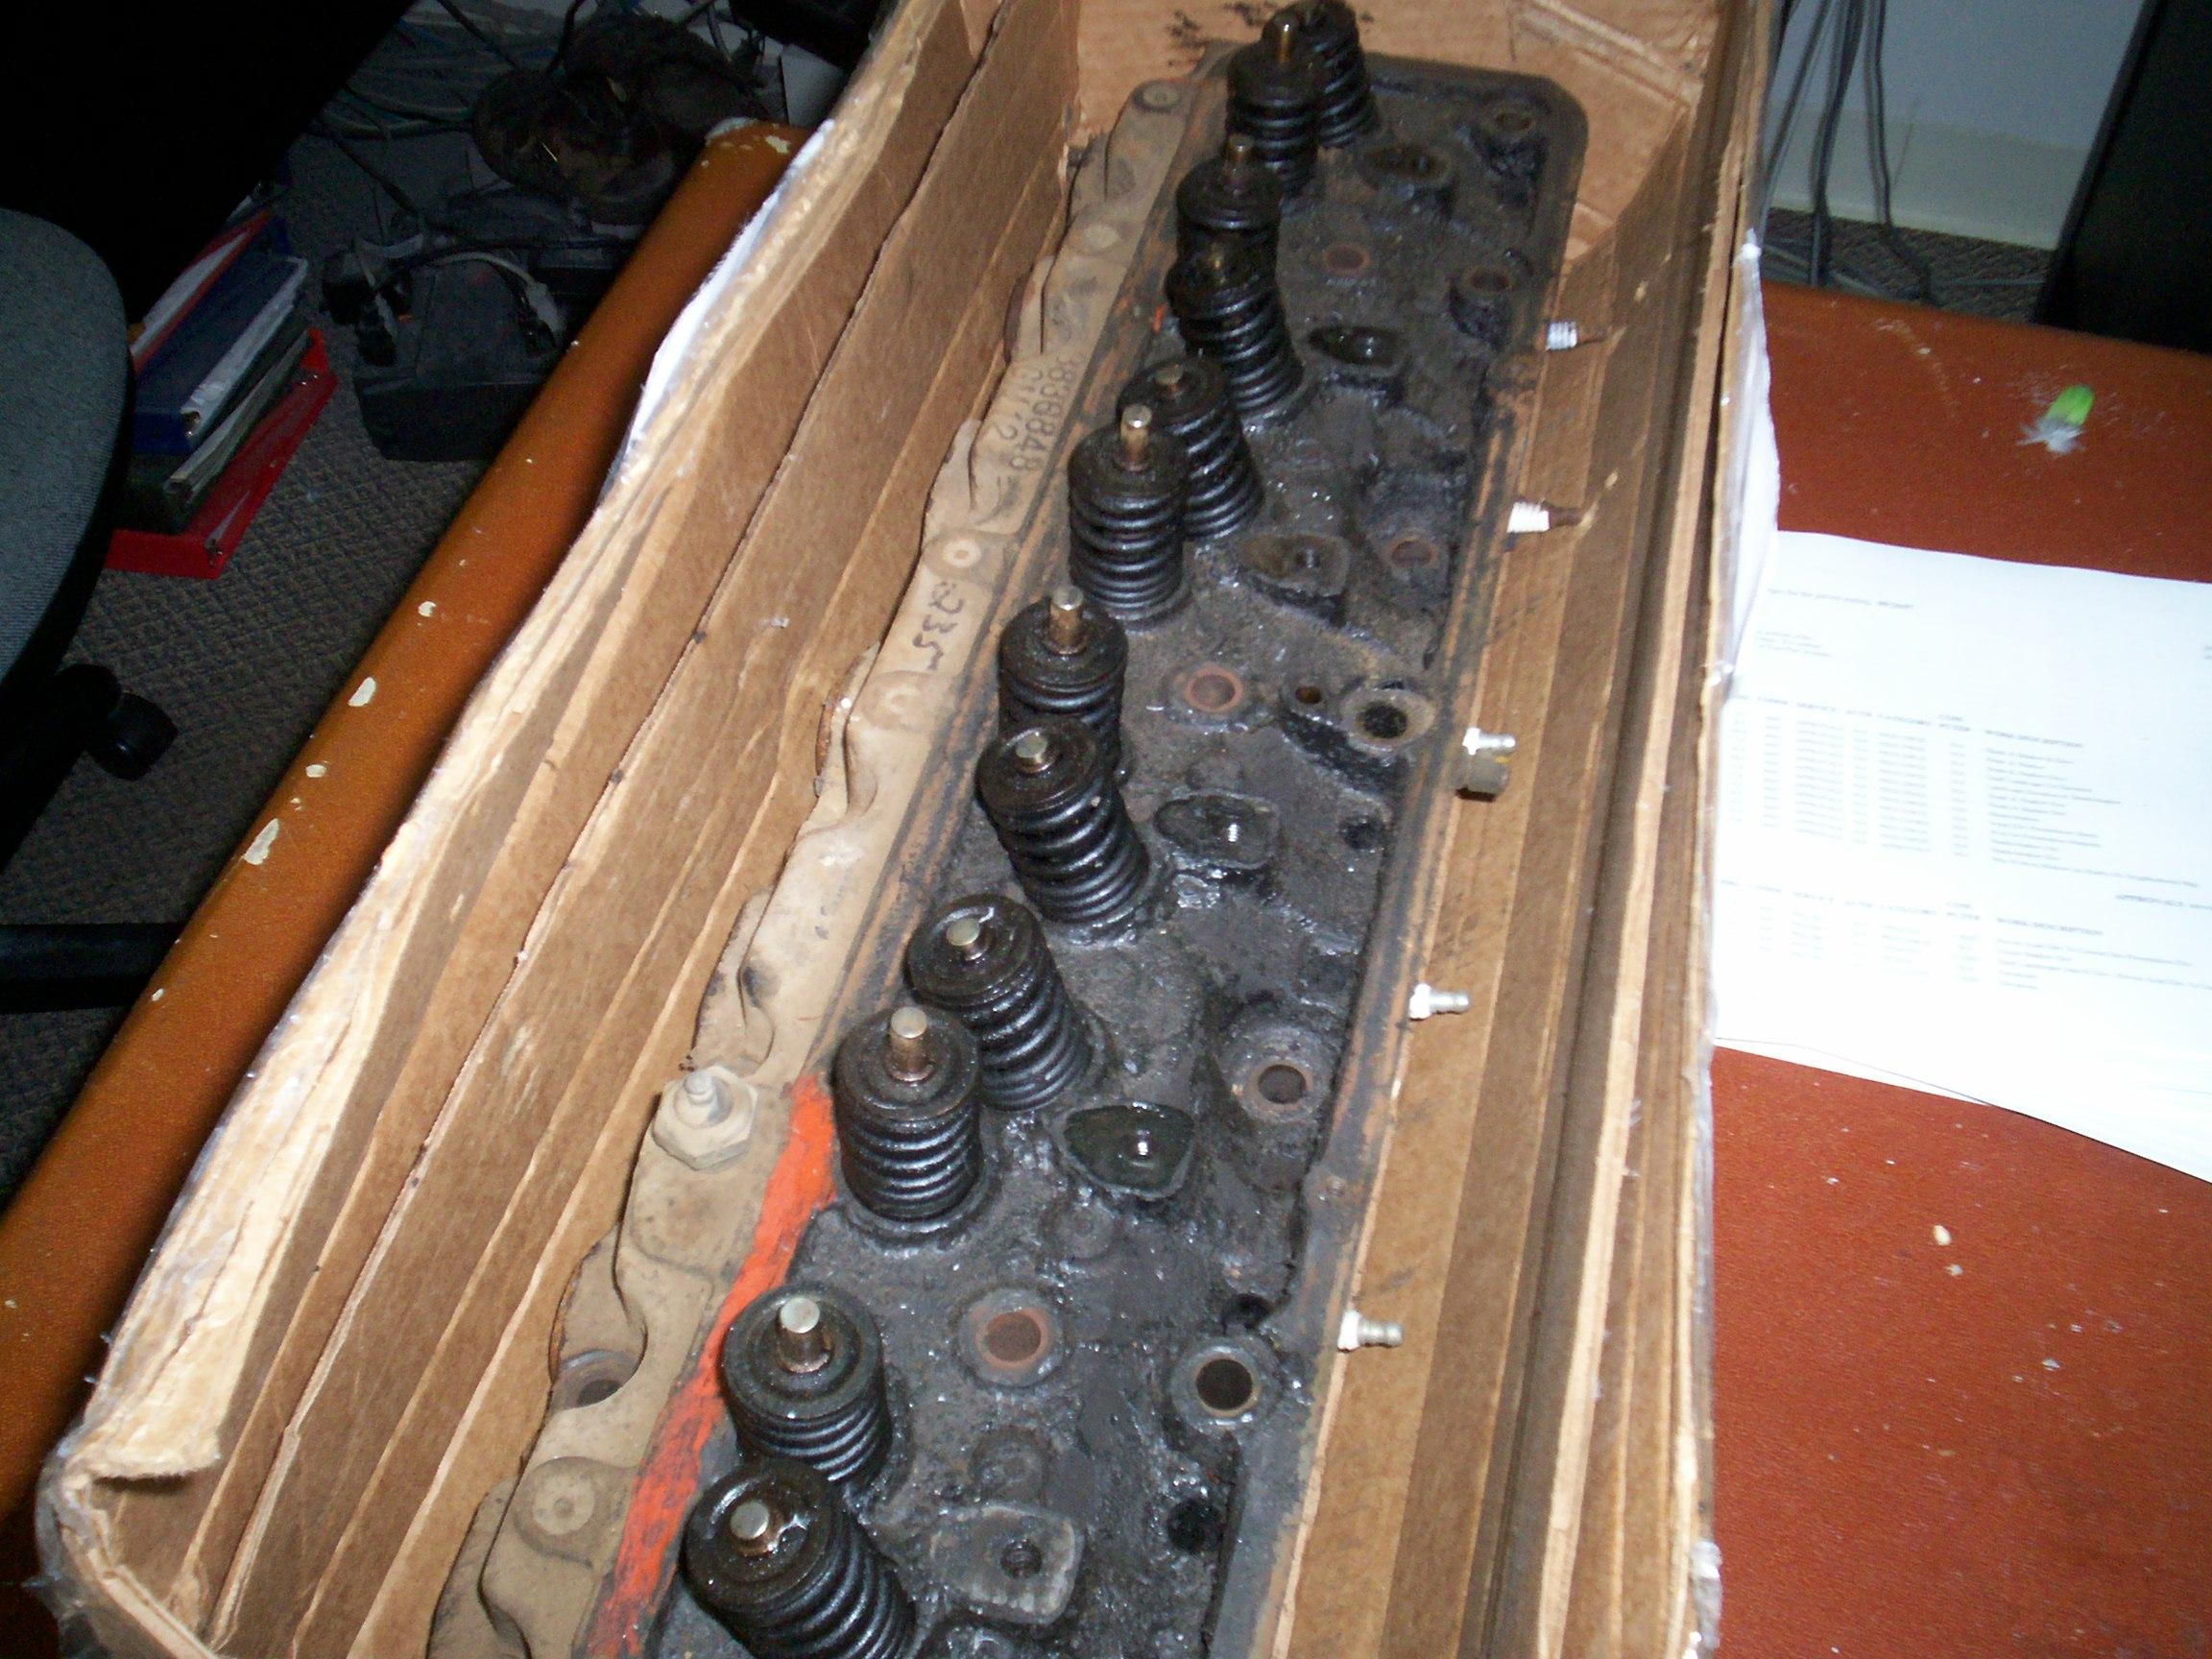 A
couple of weeks ago, I got a "848" replacement head for BillyBob on
ebay. BillyBob's current head has a 7.5 compression ratio. They started
producing the "848" (last three digits of the casting number) in 1956.
It should have a compression ratio of 8.25. It arrived intact and
doesn't look as if the UPS guy dropped it anywhere along the way. I
need to take it up to the warehouse until I can get to cleaning it up
and checking for cracks and other defects. It might be a boat anchor
but at $125 plus $35 shipping, I considered it worth the risk. My
methodist granddad would say this thing is "heavier than a dead baptist
preacher". Our UPS guy is not happy with me.
A
couple of weeks ago, I got a "848" replacement head for BillyBob on
ebay. BillyBob's current head has a 7.5 compression ratio. They started
producing the "848" (last three digits of the casting number) in 1956.
It should have a compression ratio of 8.25. It arrived intact and
doesn't look as if the UPS guy dropped it anywhere along the way. I
need to take it up to the warehouse until I can get to cleaning it up
and checking for cracks and other defects. It might be a boat anchor
but at $125 plus $35 shipping, I considered it worth the risk. My
methodist granddad would say this thing is "heavier than a dead baptist
preacher". Our UPS guy is not happy with me.
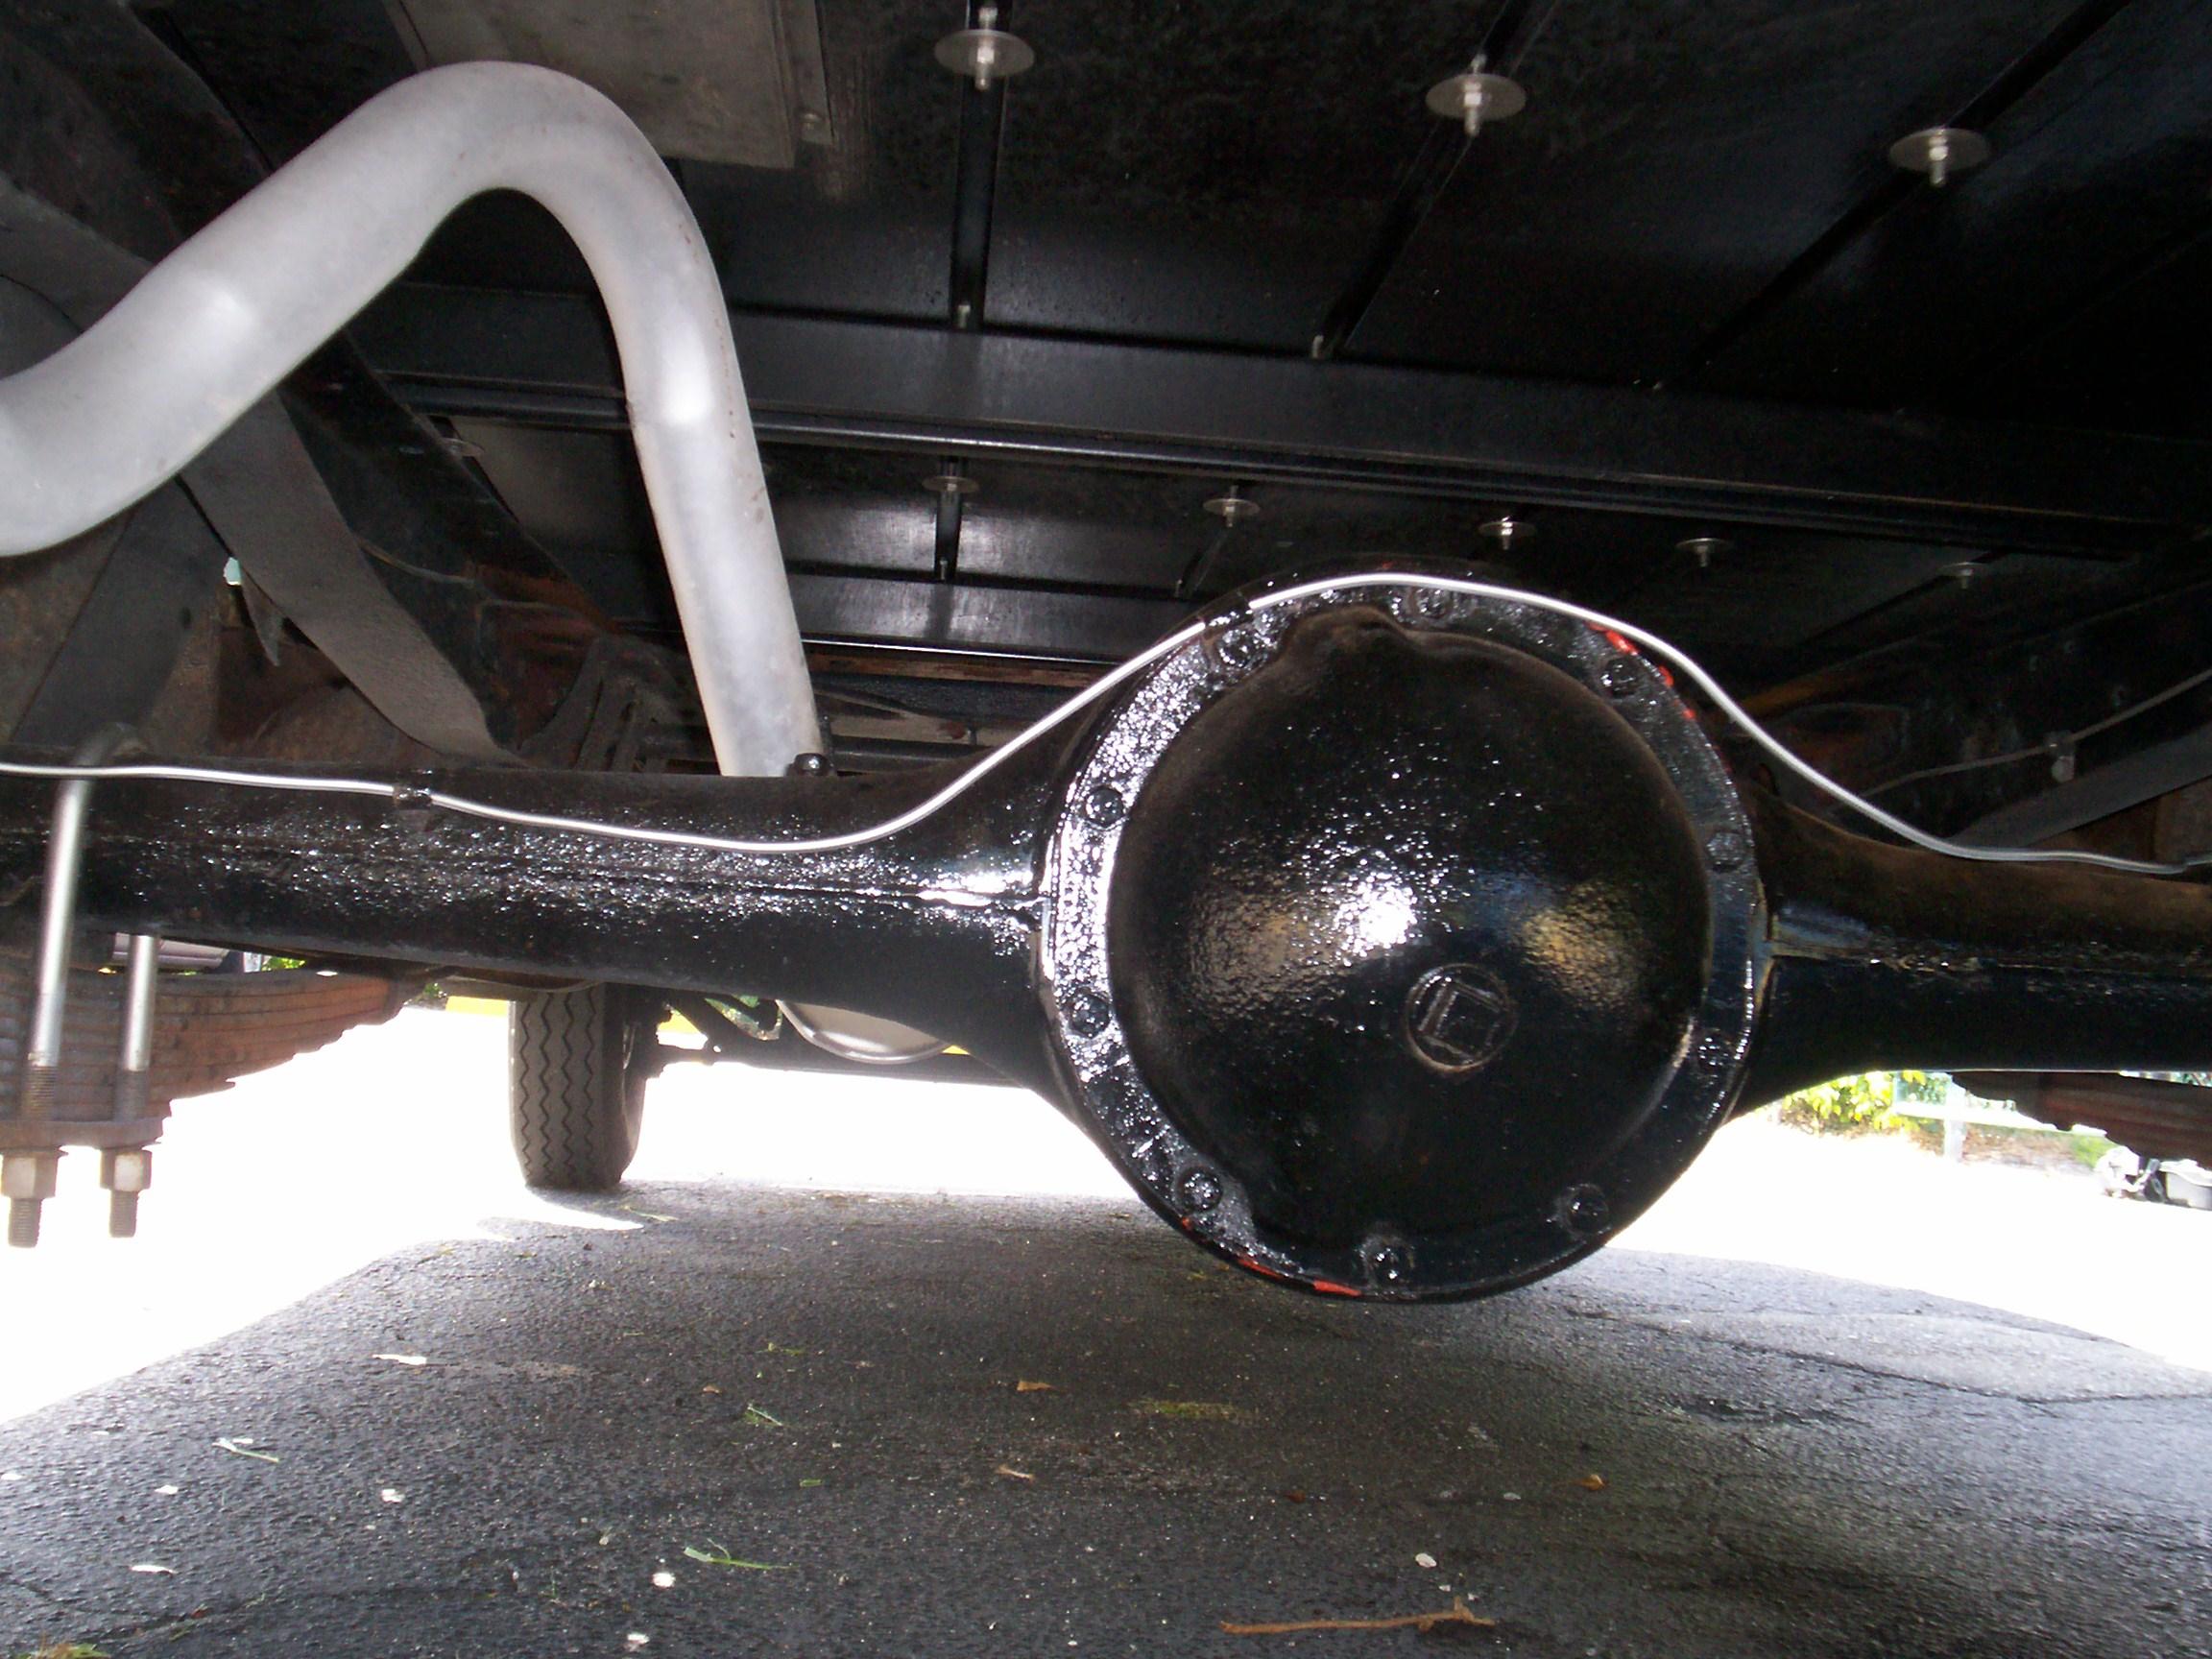
Got to the Krash Lab early and pulled the tools out of the shed. Setup the air compressor and grime blaster, garden hose and one gal 20/80 purple degreaser/water mix. Degreased and rinsed BillyBob's rear axle and backing plates. Moved BillyBob to a dryer spot and jacked up the rear end and removed the rear wheels.
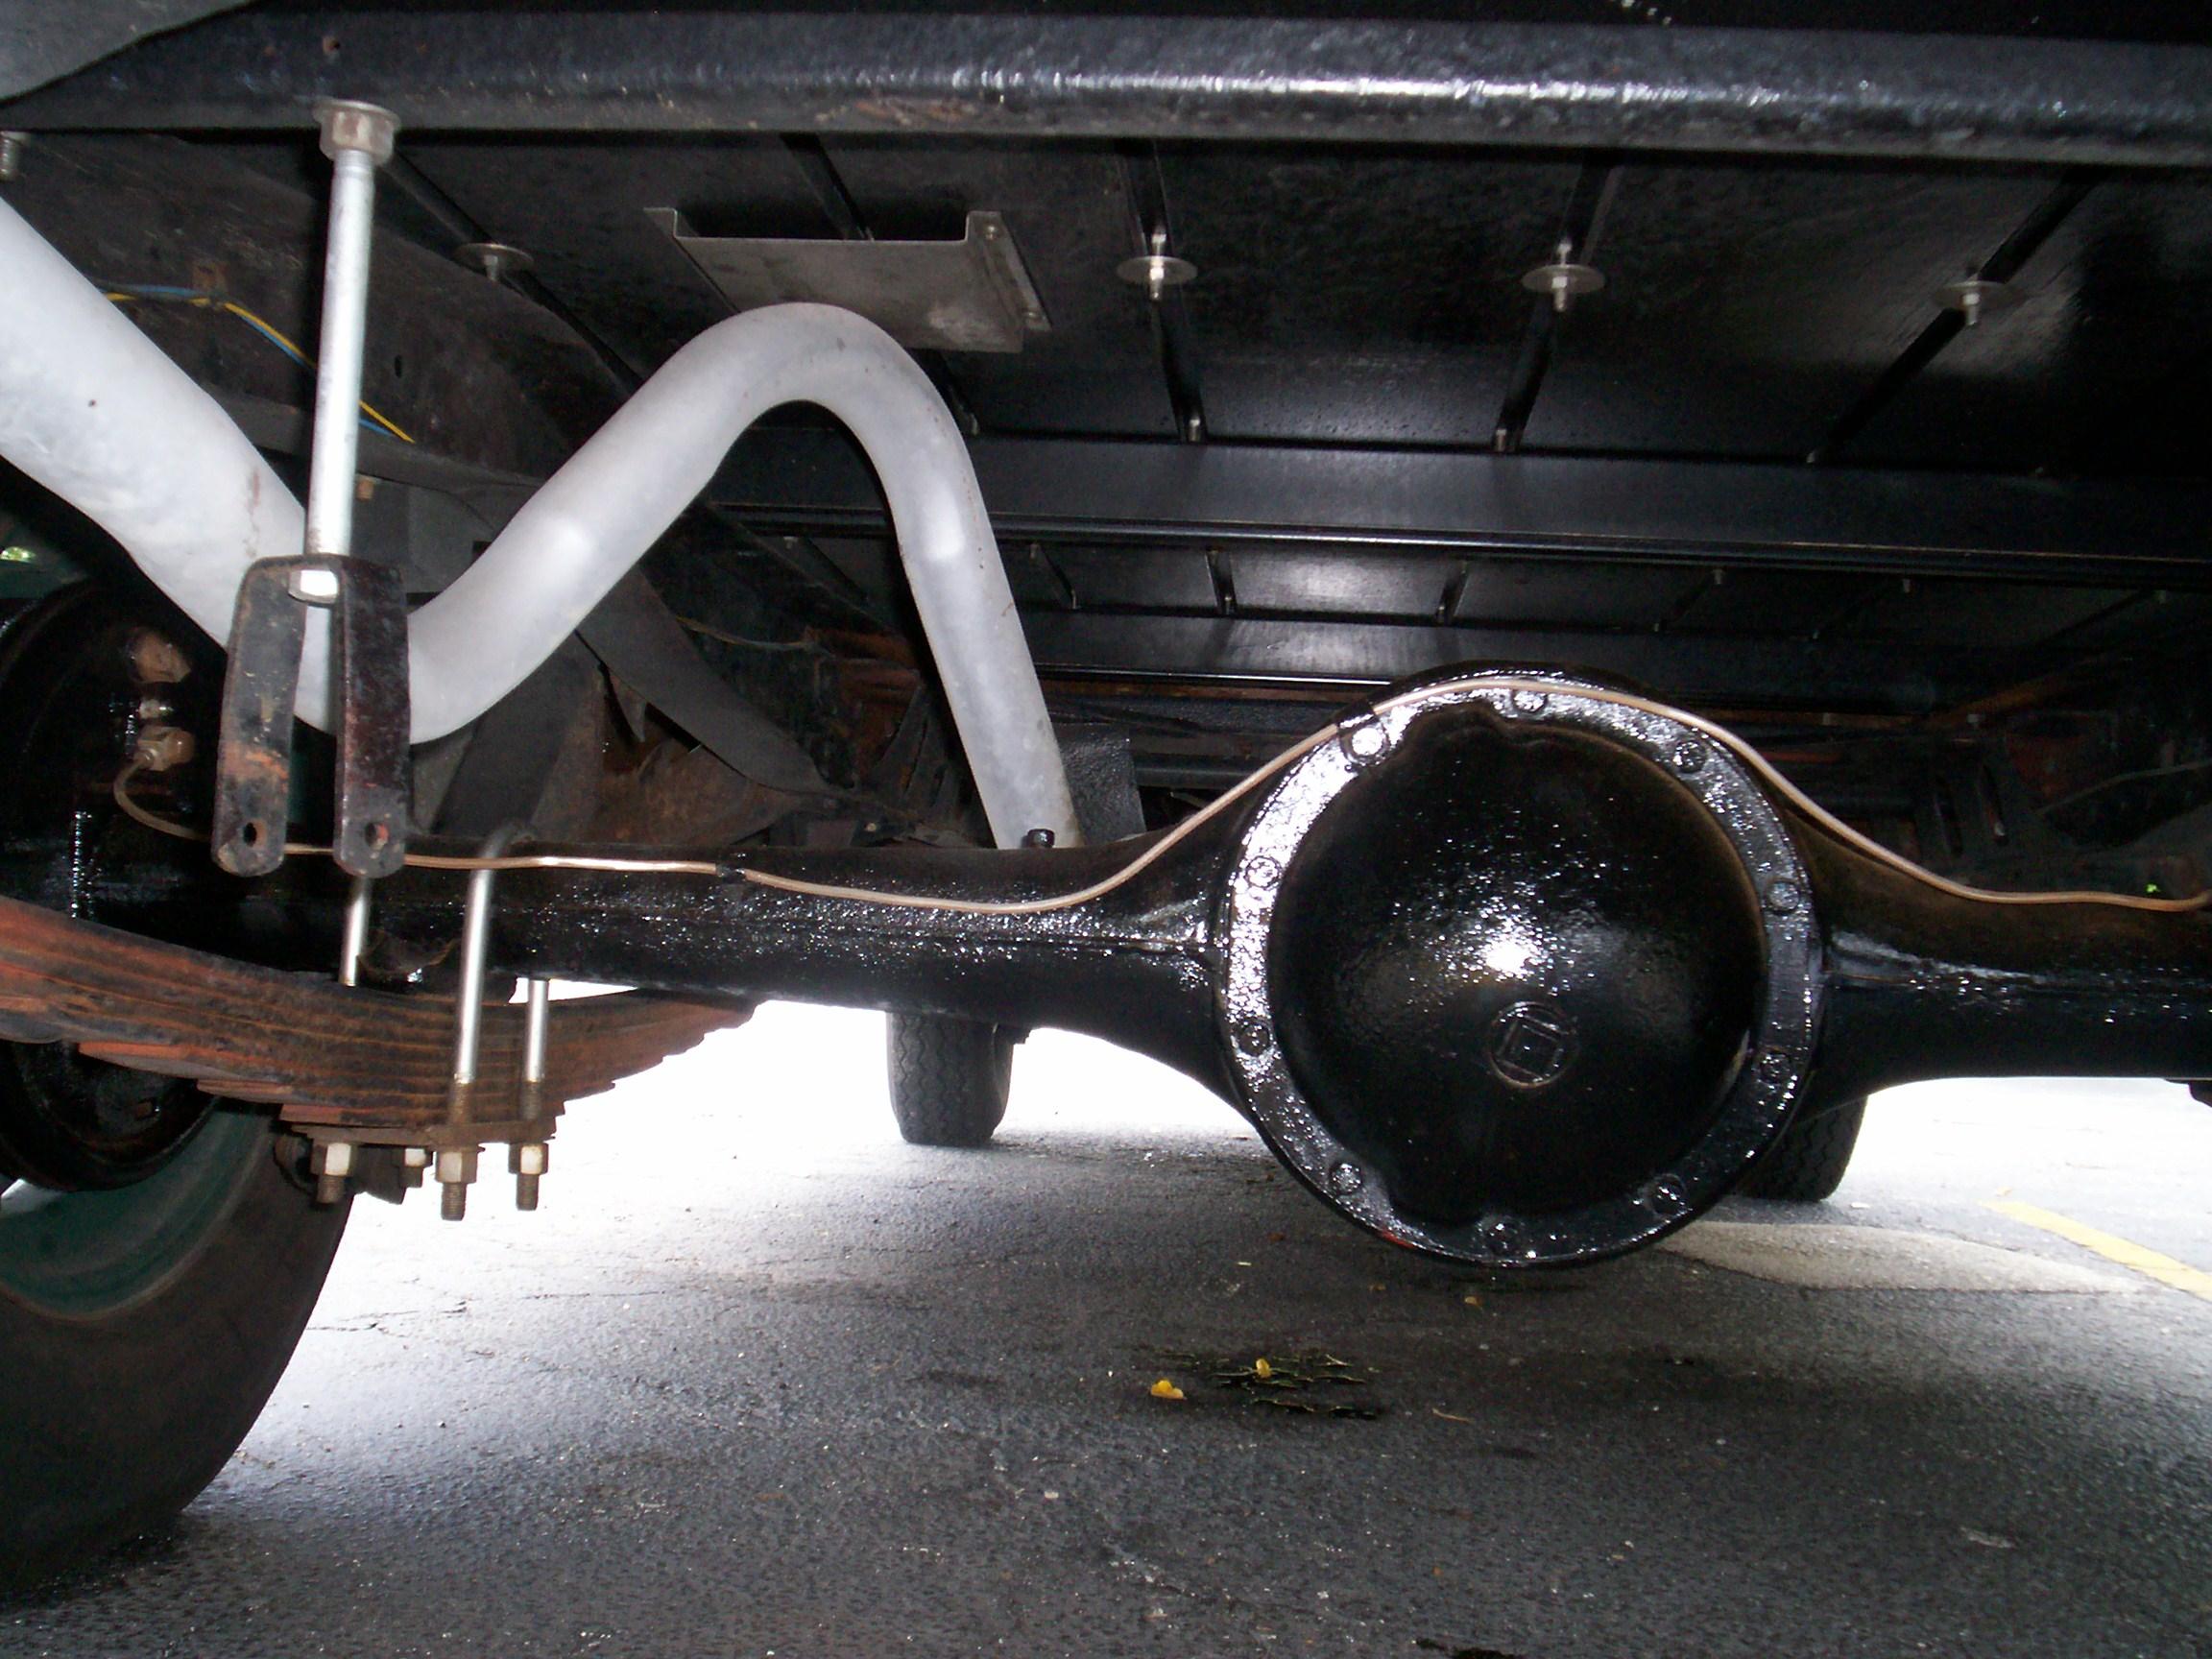 Wire-brushed
the driver side backing plate and a bare spot on the axle (from
dripping brake fluid) with a wire cup in the 'lectric angle grinder.
Masked the brake lines and bleeders. Masked the u-bolts too and applied
PRE Paint Prep. Hit the wire-brushed areas with a coat of Eastwood's
Rust Encapsulator. Had a few bottles of Millstream Brewing Company's
"Oktoberfest" Lager (beer of the month club) and watched Powerblock on
TV while I waited for the paint to dry. Finished up by giving the
driver side backing plate and axle a coat of Eastwood's Chassis Black.
Removed the masking, put the wheels back on and got BillyBob back on
the ground again. The sky was dark and rumbling all afternoon but it
didn't rain on me and turned out to be a plus day.
Wire-brushed
the driver side backing plate and a bare spot on the axle (from
dripping brake fluid) with a wire cup in the 'lectric angle grinder.
Masked the brake lines and bleeders. Masked the u-bolts too and applied
PRE Paint Prep. Hit the wire-brushed areas with a coat of Eastwood's
Rust Encapsulator. Had a few bottles of Millstream Brewing Company's
"Oktoberfest" Lager (beer of the month club) and watched Powerblock on
TV while I waited for the paint to dry. Finished up by giving the
driver side backing plate and axle a coat of Eastwood's Chassis Black.
Removed the masking, put the wheels back on and got BillyBob back on
the ground again. The sky was dark and rumbling all afternoon but it
didn't rain on me and turned out to be a plus day.
September 29th 2007 End of summer. Rained shortly after I got to the Krash Lab. To the west is the weird sight of a rainbow framing the moon. We've got two months left of hurricane season but city workers are stringing Christmas decorations in the park up the street!
It's a slow moving day. It rained three times by noon, then Donny, the "global warming" lawn man, showed up to put a damper in my activities. I don't argue with him anymore. Obviously, you can't employ logic with a guy who uses a gas-powered leaf blower all day long and blames global warming on the president. I broke out the beer of the month club selection early. Blackhawk Stout, brewed and bottled by the Mendocino Brewing Co. of Ukiah, Ca. I nebber heard of Ukiah before and now I see two references in one month. This beer and Rob English's Cannonball Run roadtrip between Boston and San Francisco. It was one of the meet up places for Rob and the OldGMCtrucks members who live in California.
I spent all day, discounting disruptions, on a little task. The brake lines on the rear axle were rusted. The other brake lines are OK. How did this happen? Eventually figured that when I wiped them down with lacquer thinner in the past to remove overspray, I also removed the protective coating on them that I wasn't aware of. Hard lessons are the best learned. I won't do that again.
 First,
I sanded the brake line to get most of the rust off. Then, with the
help of the beer, I thought a lot regarding a solution. The easy way
out was to do nothing further. The next solution up the ladder was to
spray the line with Eastwood's Diamond Clear Metal Finish. I wasn't too
happy with the results of Diamond Clear in my past uses of it, however.
After a few beers, I focused on the harder choice. Masked off the axle
and backing plates and treated the brake lines with PRE Paint Prep.
Gave the lines a coat of Eastwood's Self-etching primer, then a coat of
Eastwood's Detail Gray. Can't get good coverage so, I don't expect much
of this solution but, it will look nice fer a week or so.
First,
I sanded the brake line to get most of the rust off. Then, with the
help of the beer, I thought a lot regarding a solution. The easy way
out was to do nothing further. The next solution up the ladder was to
spray the line with Eastwood's Diamond Clear Metal Finish. I wasn't too
happy with the results of Diamond Clear in my past uses of it, however.
After a few beers, I focused on the harder choice. Masked off the axle
and backing plates and treated the brake lines with PRE Paint Prep.
Gave the lines a coat of Eastwood's Self-etching primer, then a coat of
Eastwood's Detail Gray. Can't get good coverage so, I don't expect much
of this solution but, it will look nice fer a week or so.
October 6th 2007 Breezy and overcast today but not as bad yet as last weekend. Maybe I can get a few things done before the rain drives me inside. Am a bit overdue on quarterly maintenance so that was performed first on BillyBob.
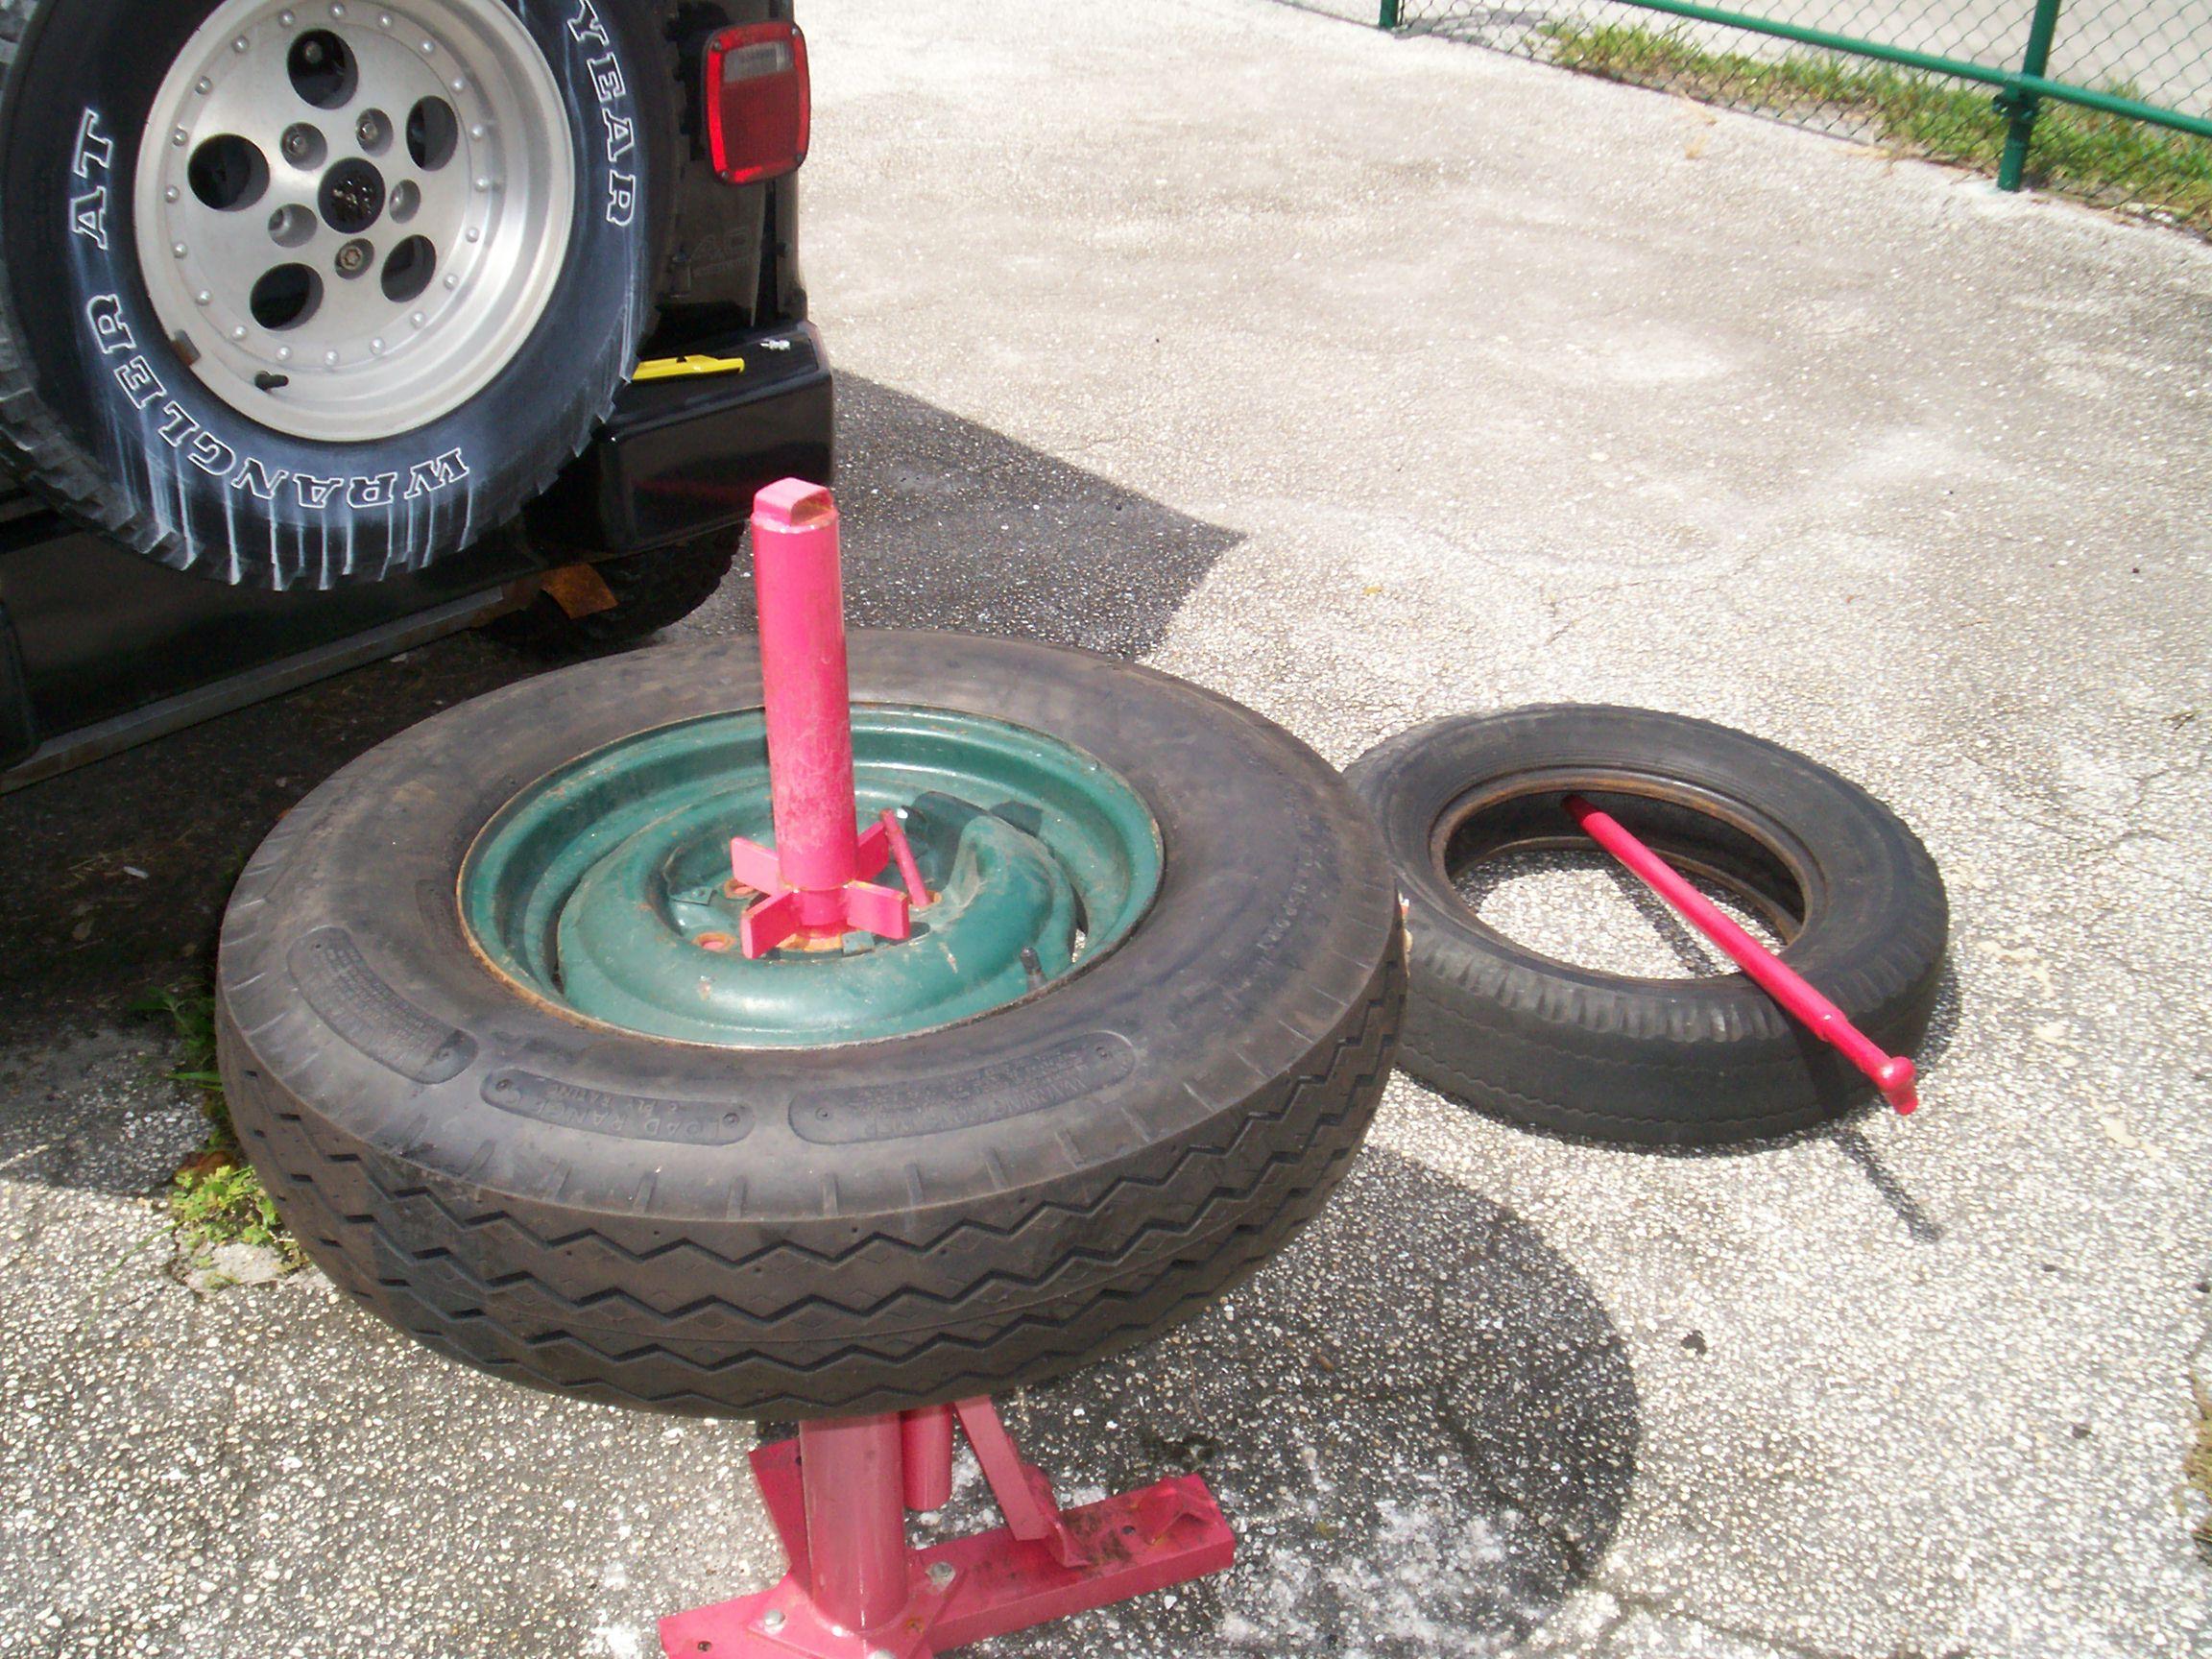 Set
about changing the tire on BillyBob's spare next. This is the last of
the bald and cracked tires that were on BillyBob when I got him Back in
'95. I took it easy and it went without too much difficulty. Muscled
the old tire and inner tube off then cleaned the wheel up with a wire
cup in the electric angle grinder. Put the new 6.50x16 tire on with a
used, but fairly new, inner tube from my last tire changing episode
before the Macungie run. Inflated the new tire to 45 psi and waited a
couple of hours to see if the pressure held. It did.
Set
about changing the tire on BillyBob's spare next. This is the last of
the bald and cracked tires that were on BillyBob when I got him Back in
'95. I took it easy and it went without too much difficulty. Muscled
the old tire and inner tube off then cleaned the wheel up with a wire
cup in the electric angle grinder. Put the new 6.50x16 tire on with a
used, but fairly new, inner tube from my last tire changing episode
before the Macungie run. Inflated the new tire to 45 psi and waited a
couple of hours to see if the pressure held. It did.
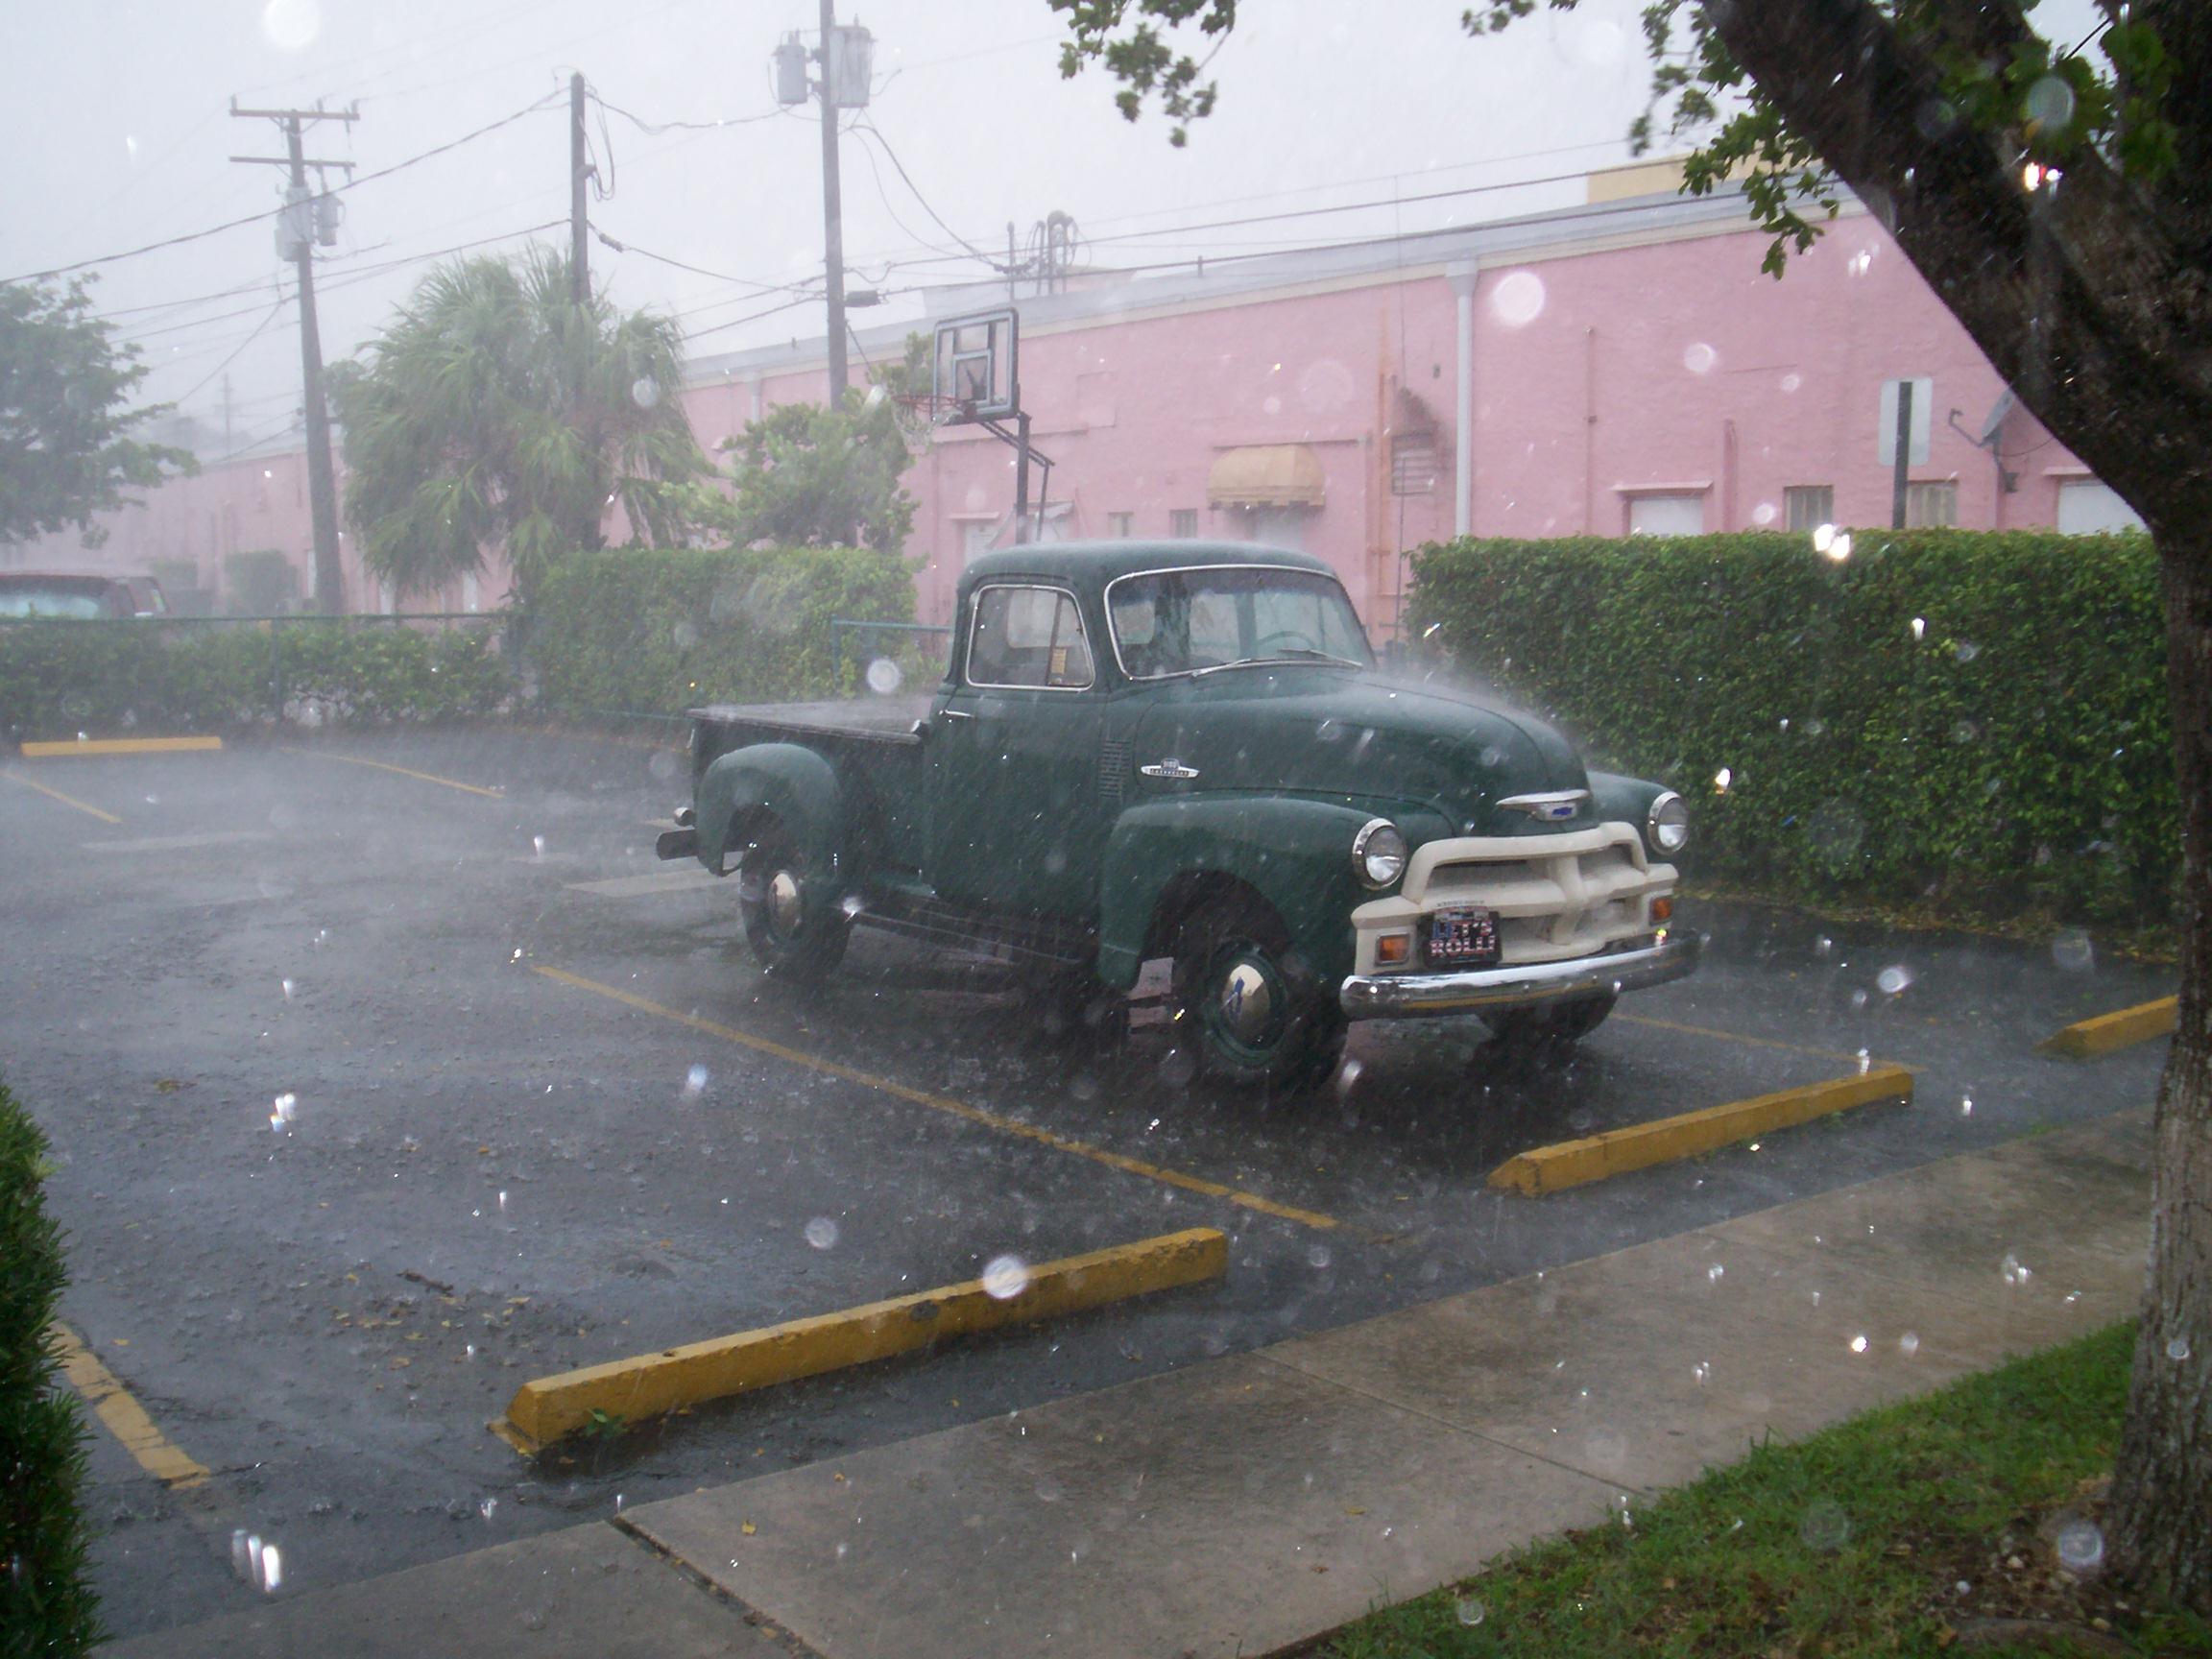 A
hard rain hit the Krash Lab about 3:45 pm. Came up on me too fast to
get the tools in the shed ~!@#$%^ Only
lasted ten minutes but turned the shadetree garage into a swamp. I
packed it in for the day and did computer work inside.
A
hard rain hit the Krash Lab about 3:45 pm. Came up on me too fast to
get the tools in the shed ~!@#$%^ Only
lasted ten minutes but turned the shadetree garage into a swamp. I
packed it in for the day and did computer work inside.
October 7th 2007 Stopped up at the warehouse on the way to the Krash Lab to pick up my wheel paint masking rings and to let off some parts. A few weeks back, I ordered a pinion seal from RockAuto.com. After I cleaned and touched up the paint on the rear axle a couple of weeks ago. I kept an eye on it for leakage. It really doesn't leak unless overfilled or parked on a slope and then not much. I chickened out of trying the seal repair this go round and put the pinion seal in the traveling parts ammo box with the other spare chassis parts.
When I got set up at the Krash Lab, I pulled out the spare tire carrier, washed it, PRE Paint Prepped it and gave it a freshen up coat of rattlecan chassis black. After it cured for a few hours, I had another improvement in mind. Back when I did my first wheel restoration with real automotive paint and pinstripes, I immediately messed it up with deep gouges trying to mount it in the spare wheel carrier. One of BillyBob's fans, Pete from Liberty Modular Homes, suggested using "Plasti Dip". I was aware of Plasti Dip but didn't know the name of the stuff until I got Pete's e-mail. Thanks Pete, if you're still reading the BillyBob logs.
I started putting coats of black Plasti Dip on the "spade" edge of the tire carrier at half-hour intervals with a 1" throw away brush until I got a good buildup of the stuff. Very messy if you can't actually dip and have to use the brush application method.
Got out the spare tire/wheel and the wheel masking rings. PRE Paint Prepped the wheel on both sides and gave the bare spots a coat of rattlecan Rust Encapsulator. After that cured a couple of hours, both sides of the spare wheel got a coat of Rustoleum Dark Hunter Green. The wheel carrier hardware got a cleaning session followed by a polishing session in the tumbler.
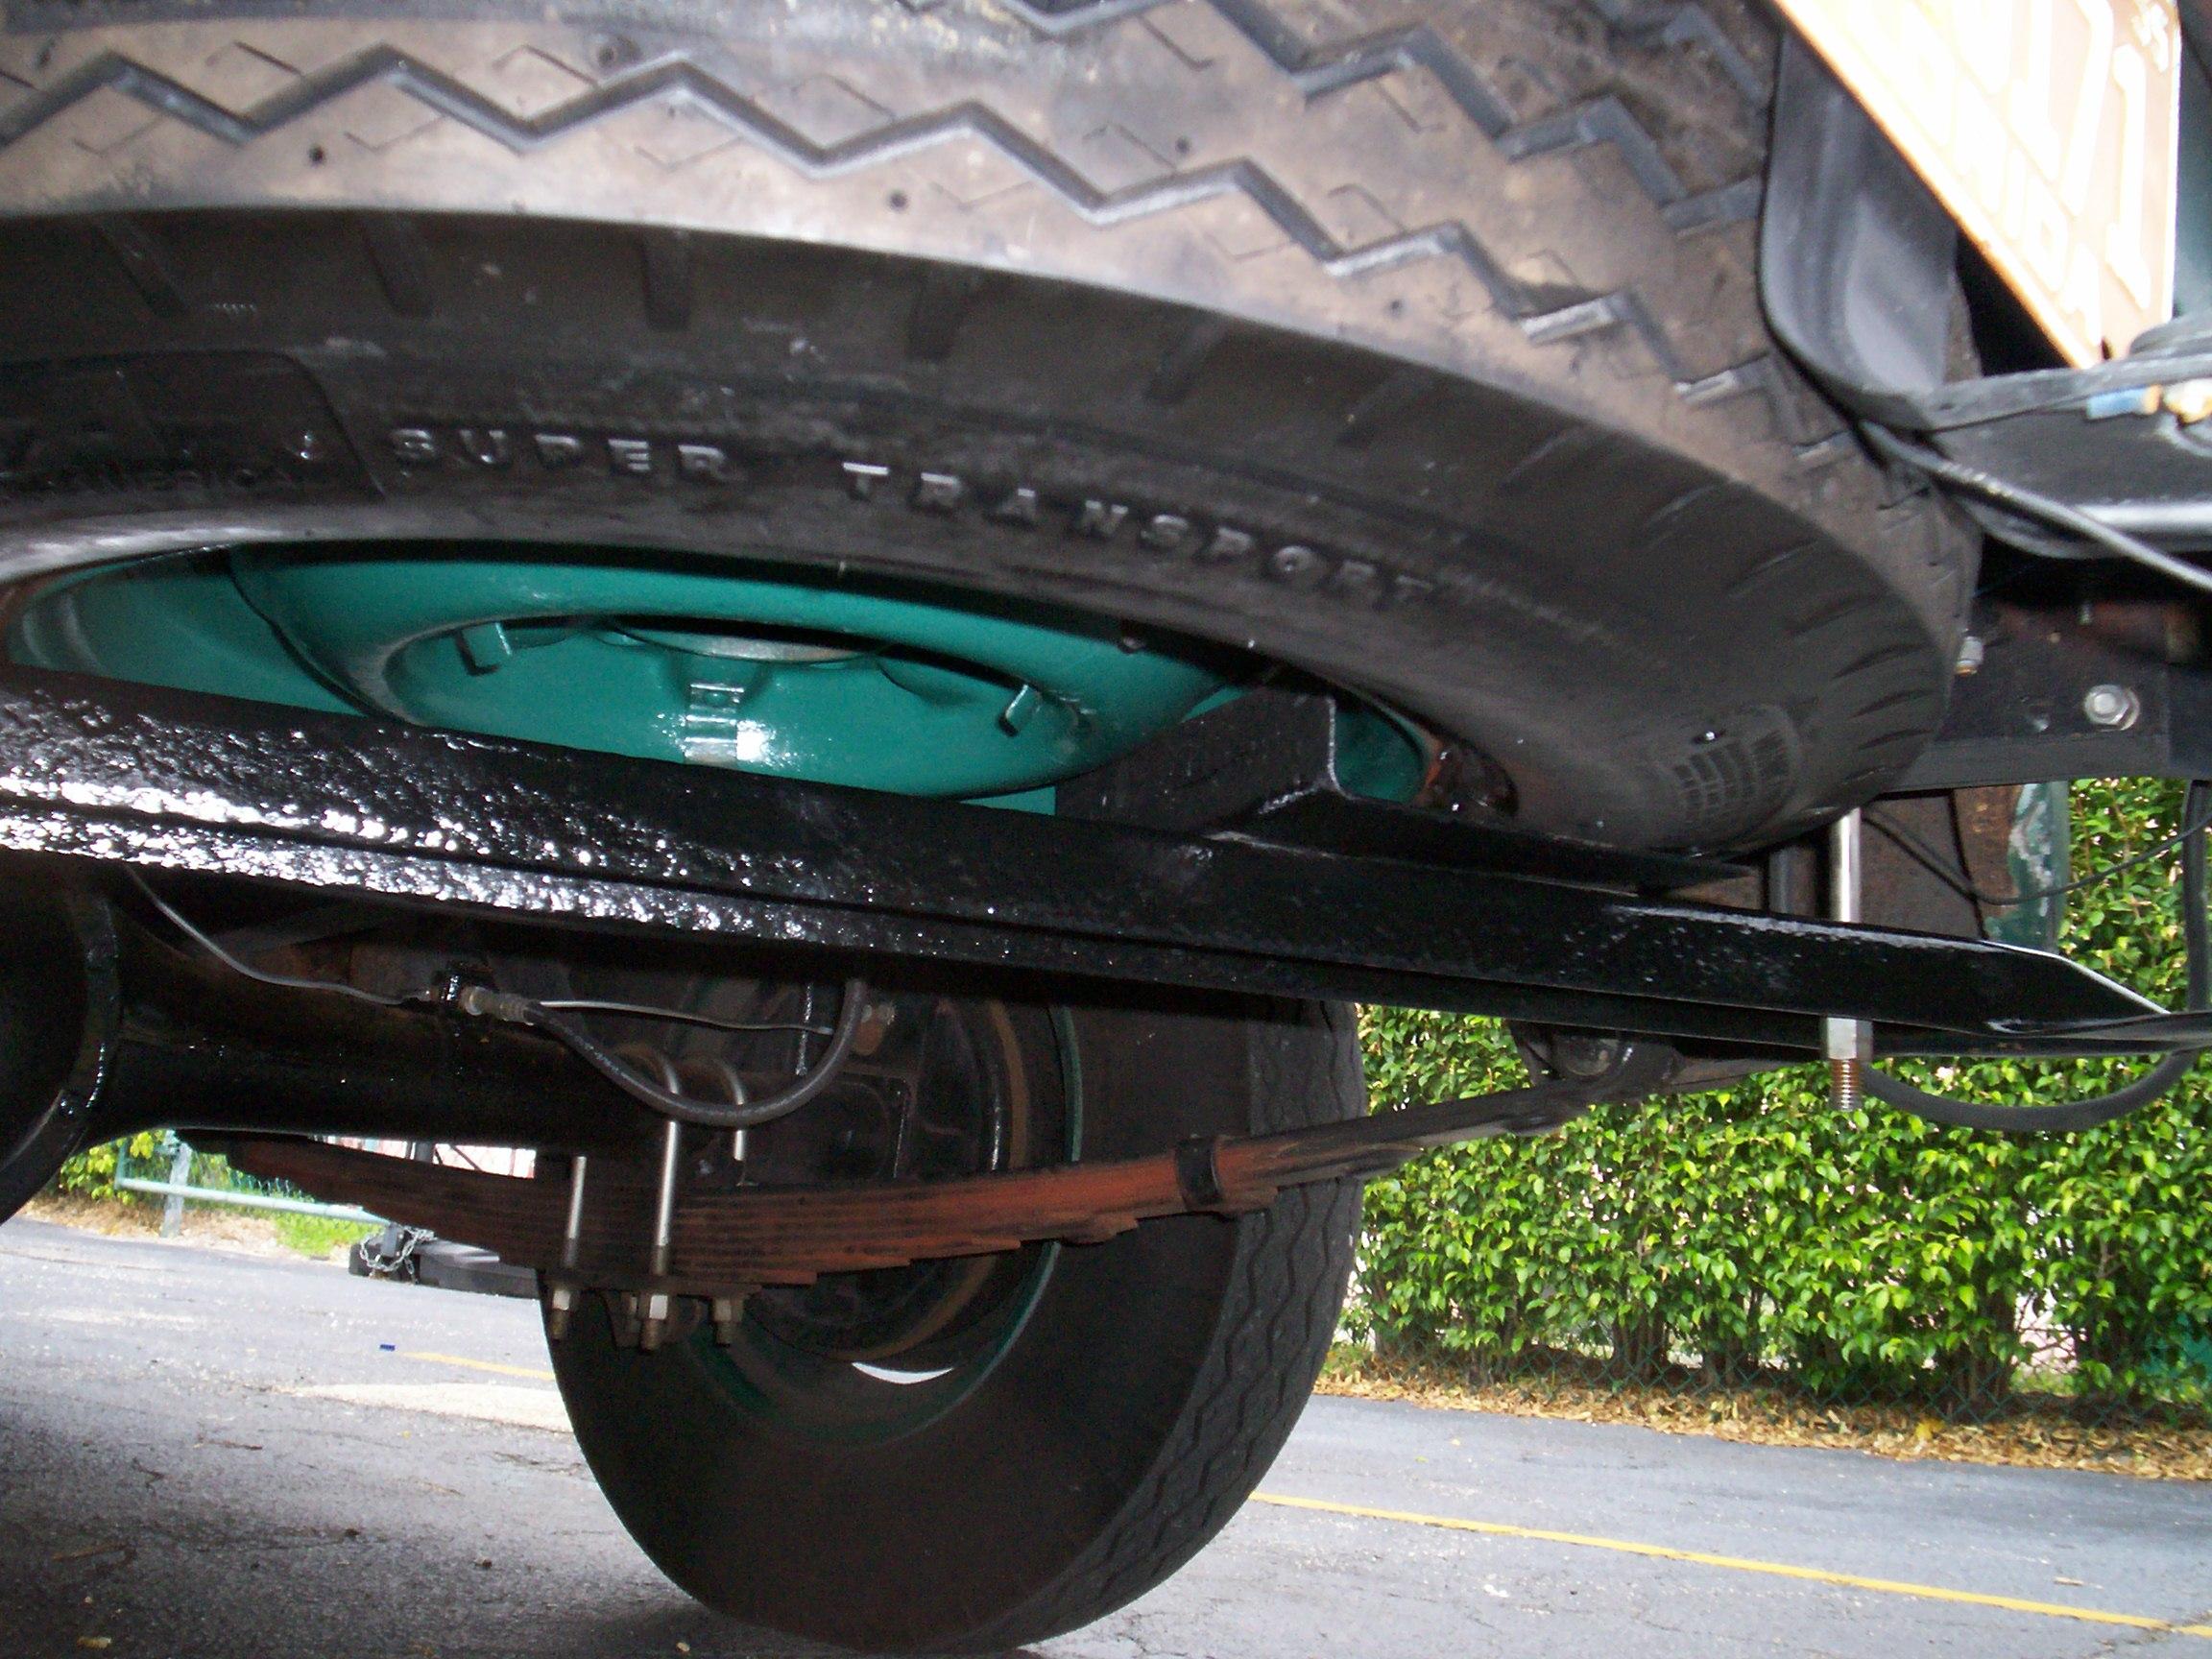 October
13th 2007 During the
past week I added a spare
tire detailing routine to BillyBob's maintenance procedures.
This morning, first thing, I put the tire carrier and spare back on
BillyBob. Hope that thing doesn't have to come out of there until the
next detailing. That's it! Finally done with the chassis phase of this
detailing cycle. On to the cab interior next. I've also got to turn my
attention to Renegade and BettyLou for a bit. I still haven't got the
Jeep back on the road and last week, I blew one of BettyLou's brake
lines so, BillyBob is currently my only running vehicle.
October
13th 2007 During the
past week I added a spare
tire detailing routine to BillyBob's maintenance procedures.
This morning, first thing, I put the tire carrier and spare back on
BillyBob. Hope that thing doesn't have to come out of there until the
next detailing. That's it! Finally done with the chassis phase of this
detailing cycle. On to the cab interior next. I've also got to turn my
attention to Renegade and BettyLou for a bit. I still haven't got the
Jeep back on the road and last week, I blew one of BettyLou's brake
lines so, BillyBob is currently my only running vehicle.
| < Back
to Intro |
You can email me at ![]() webmaster@laroke.com
webmaster@laroke.com
Issued Saturday October 13, 2007
Updated Friday March 30, 2018
copyright © 1996-2018 Larry Robert Kephart all rights reserved
| | LRK Home | | Bio Info | | Krash Khronicles | | LAROKE | |
| | BettyLou | | BillyBob's Garage | | Rat Patrol | | Deerslayer | | Elvira | |
| | Land of the Free and Home of the Brave | |
| | Keppylou's Art | | WWI Soldier's Diary | |