| | LRK Home | | Bio Info | | Krash Khronicles | | LAROKE | |
| | BettyLou | | BillyBob's Garage | | Rat Patrol | | Deerslayer | | Elvira | |
| | Land of the Free and Home of the Brave | |
| | Keppylou's Art | | WWI Soldier's Diary | |
BillyBob Work-in-Progress Log
![]()
WHAT'S NEW is a chronological listing of updates to the BillyBob site.
![]()
TRUCK LINKS including vendor sites for old parts, custom parts, and tools as well as sites for classic car and truck organizations
STORE Operating in association with Amazon.com, books, recordings and tools can be purchased.
PLANNING for the restoration including project schedule and cost estimates.
![]()
TRAVELS WITH BILLYBOB With apologies to Steinbeck, this area of BillyBob's Garage will be used to log the trips BillyBob and I make together.
WORK-IN-PROGRESS is the restoration of parts of BillyBob that I can accomplish without a garage.
PRE-RESTORATION includes log entries of minor repairs and adventures between time of purchase and the time when I started restoration, a piece at a time.
JR'S KORNER JR's Korner is the history of BillyBob before I got him authored by my brother, Wm. C. Kephart.
![]()
BILLYBOB MAINTENANCE Ever changing detailing, oil change, lube, etc. maintenance routines specifically developed for BillyBob, including required tools, materials and procedures.
PARTS SHOP The Parts Shop is a repository of How-To articles. Things that I have done over and over enough times to have developed a procedure. This gives me a checklist and saves brain cells.
STEALTH SHOP Urban residence design with large integrated shop and separate living quarters for a relative or renter.
![]()
You will need the Adobe Acrobat browser plugin to view these wiring diagrams which are in the PDF file format. This format allows zooming and panning. If you don't have this plugin, it can be downloaded and installed (free) from the Adobe site. The button below will take you there.
![]()
BILLYBOB WIRING DIAGRAM Here's the wiring diagram updated with BillyBob's current state 'cepting the third-party strap-on turn-signal director.
STRAP-ON TURN-SIGNAL DIRECTOR/BRAKE LIGHT CIRCUIT This turn signal and brake light circuit diagram shows the current state of the third-party turn-signal director wiring, which will remain in place until I figure out the problems with the OEM turn-signal director. It also shows the OEM headlight switch.
54. Cab Capers and the D-train
October 14th 2007 Overcast and breezy today. Started on the interiors phase of the detailing cycle, general cleaning specifically. The floor mat (painted with tire paint last time) and starter button assembly have held up well since the previous detailing. Neither needs refinishing, just cleaning.
October 20th 2007 It was raining when I got up in the dark and the Krash Lab was already wet when BillyBob and I pulled into the lot. Started with general lubrication tasks of the interior phase of the detailing cycle. The last time I was thru this drill, I lubed the choke and throttle cables to establish the procedure. They did not need lubrication and it was a mistake to lube them. They need a bit of friction to work properly and hold their positions when engaged. They do not need lubrication unless they are gunked up so bad that they won't work at all. I added a warning about this to the procedure.
Then I went off to fiddle with Renegade and BettyLou fer awhile. Having only one working vehicle, even if it's good ole reliable BillyBob, makes me anxious.
October 21st 2007 I got to the Krash Lab in the dark again, Shortly after daybreak, it rained. After the shadetree garage dried out a bit, I pushed BillyBob to high ground and performed monthly maintenance. Then, I worked on BettyLou's brake problem some more.
November 11th 2007 Armistice Day. Remember the Vets who have done more than anyone to preserve our freedoms. It's been a good weather weekend but I've been spending most of my time trying to get Renegade back on the road. Yesterday, after I drained old gas and water out of the Jeep's gas tank, I grabbed a few beers and started finishing BillyBob's glove box door. Last time I worked on it, I pulled the dent (from someone's knee) most of the way out before sanding the paint off and applying a layer of filler. That was almost three years ago. Man, time is flyin' along. Anyway, I spent an hour or so, workin' down that filler. Getting that door back on the dashboard is one of the items I want to get done this interiors phase of the detailing cycle.
This morning, before going back to work on the Jeep, I started a tuneup on BillyBob. I'm overdue on both time and mileage for this scheduled maintenance. Did a compression check and was pleased to find out that BillyBob is getting 155 psi, plus or minus a pound or two, in all six cylinders. Followed that up by gaping (0.035") six new spark plugs (NGK B6S) and installing them with anti-seize compound and a dab of dielectric grease in the spark plug wire boots.
November 18th 2007 It's a good weather day and since I wanted to continue with the tuneup operations on BillyBob, I made a Fort Lauderdale beach run with a stop at Dunkin' Donuts, for the first time since before Macungie, to warm up the engine.
I started with the battery tests (still had 10.19 volts after cranking for 15 seconds), then continued with the distributor. Got to the mechanical advance check and discovered it to be broken. After turning the rotor by hand, it would not return to the retarded position by itself. This upcoming weekend, I'll go up to the warehouse and find BillyBob's spare distributor. That stops the tuneup ops fer today.
November 22nd 2007 Thanksgiving Day And a beautiful day under the shadetree. I started out with coffee and a cigar, soaking in a nice morning. No garbage trucks or mail trucks in the alley today to spoil the peaceful mood. Usually, I have a big project planned for the four day weekend but, with BillyBob as my only working vehicle, I can't risk disabling him too. I can use the Jeep in a pinch but it's not quite ready for prime time.
It's time for monthly maintenance again so that was performed first. BillyBob needed a quart of oil and some air in the tires and that was it. BillyBob's exhaust header nut was tightend up again as it had worked loose. During the week, I had retreived the remanufactured distributor from the warehouse. It came in a raw metal finish so painting it was the first step. The bottom was masked off along with the plastic coil terminal and an old distributor cap was placed on top. Itwas hung up in BillyBob's tree and PRE Paint Prepped. Afterwards, it was given a coat of Eastwood's Self-Etching Primer. After curing for a couple of hours, this was followed up with a couple of coats of Eastwood's Spray Gray detail paint.
November 23rd 2007 Good weather under the shade tree again. 'Sposed to be a cold front rollin' thru tonite but for now, everything's good. First thing I did was to get the Factory Shop Manual out and go over distributor replacement operations. Read the instructions that came with the remanufactured distributor too. Put numbered clothespins on the spark plug wires, then removed them and the distributor cap. Disconnected the coil wire from the side of the distributor. Moved the rotor counterclockwise as far as it would go (remember the mechanical advance is broken) and marked its position on the housing with a scribe mark. Made a second set of alignment marks to fix distributor body location with respect to the engine block. Loosened the distributor clamp and lifted the distributor out of the block.
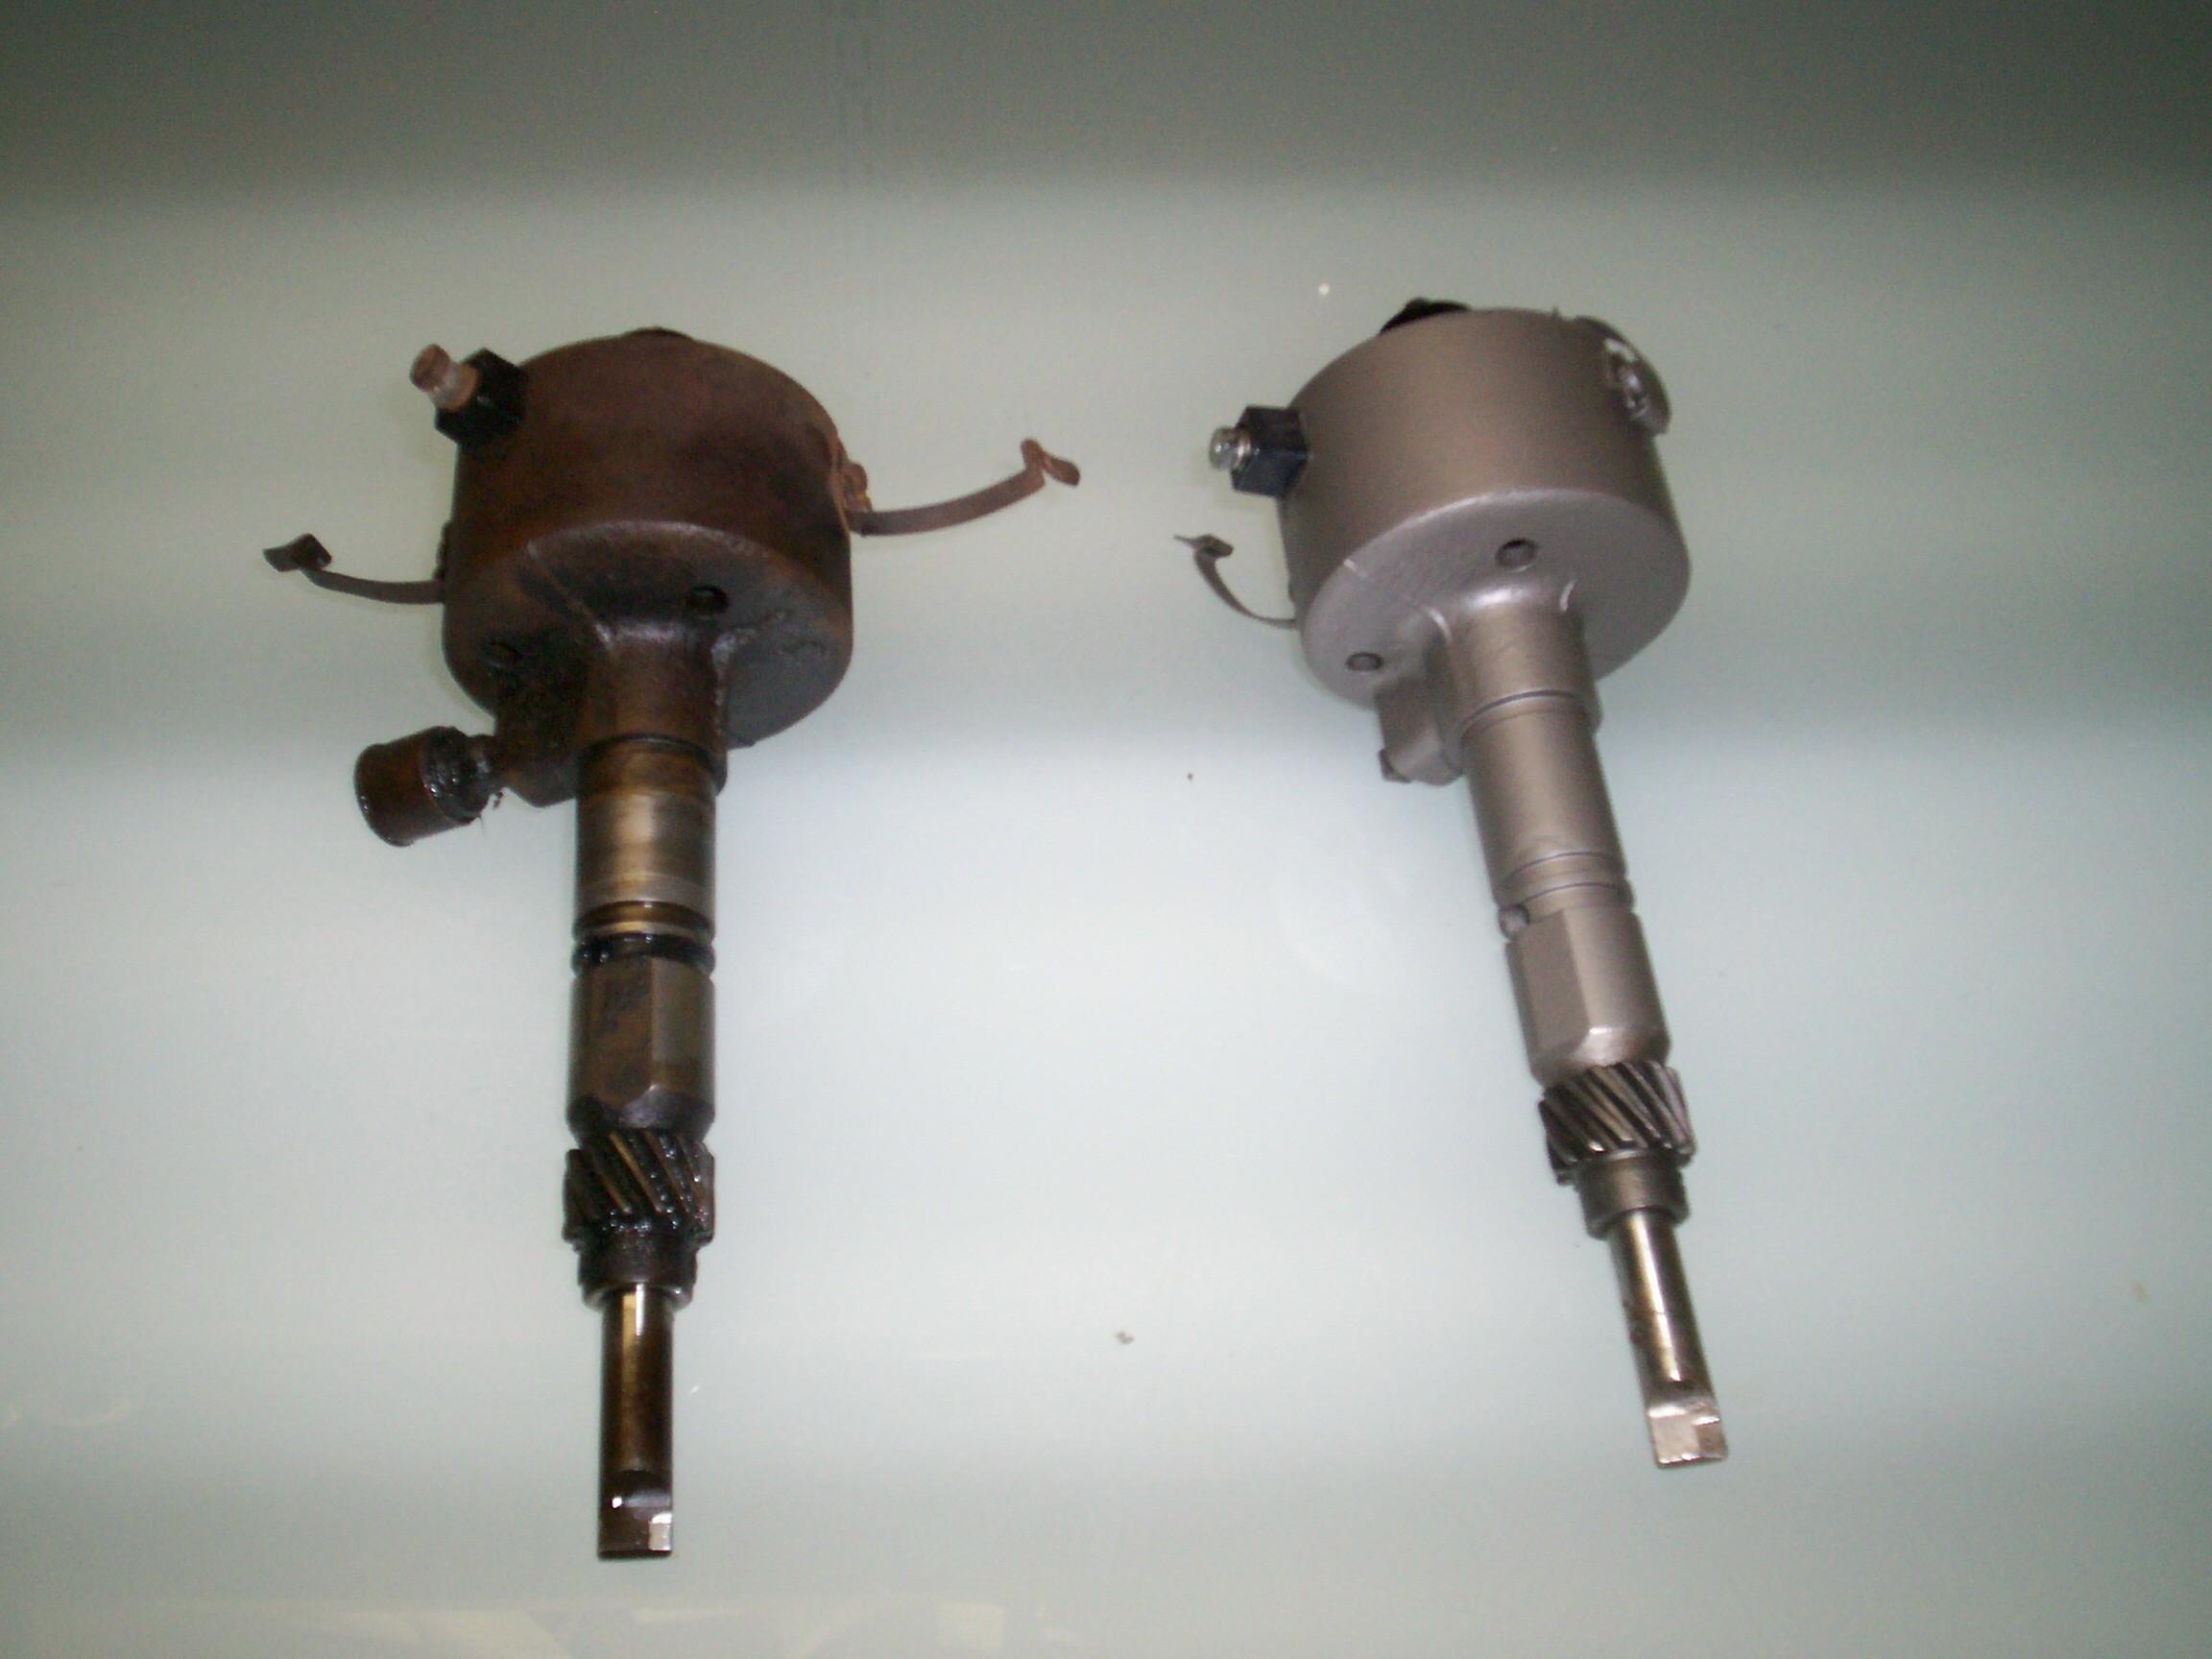 Set
the old and the new dizzys side-by-side for an inspection. First thing
I noticed is that I have too much paint on the new distributor. This
whole thing has to move in its hole when the vacuum advance comes into
play. Not good to have paint on the mating surfaces. I marked where I
thought the paint line should be (clamp position) with masking tape and
went to work on my new paint job below that with lacquer thinner until
I had bare metal again. Put matching position scribe marks on the new
dizzy matching those on the old one next. Removed the "grease pot" off
the old dizzy and removed the grease pot plug off the new dizzy. Put
the grease pot on the new dizzy and ran it down until it was lubed then
removed the pot again and replaced it with the plug. I'm gonna clean
and paint the grease pot assembly before I install it back on the new
distributor. Put motor oil on the new distributor shaft and gear and
prepared to put it in BillyBob.
Set
the old and the new dizzys side-by-side for an inspection. First thing
I noticed is that I have too much paint on the new distributor. This
whole thing has to move in its hole when the vacuum advance comes into
play. Not good to have paint on the mating surfaces. I marked where I
thought the paint line should be (clamp position) with masking tape and
went to work on my new paint job below that with lacquer thinner until
I had bare metal again. Put matching position scribe marks on the new
dizzy matching those on the old one next. Removed the "grease pot" off
the old dizzy and removed the grease pot plug off the new dizzy. Put
the grease pot on the new dizzy and ran it down until it was lubed then
removed the pot again and replaced it with the plug. I'm gonna clean
and paint the grease pot assembly before I install it back on the new
distributor. Put motor oil on the new distributor shaft and gear and
prepared to put it in BillyBob.
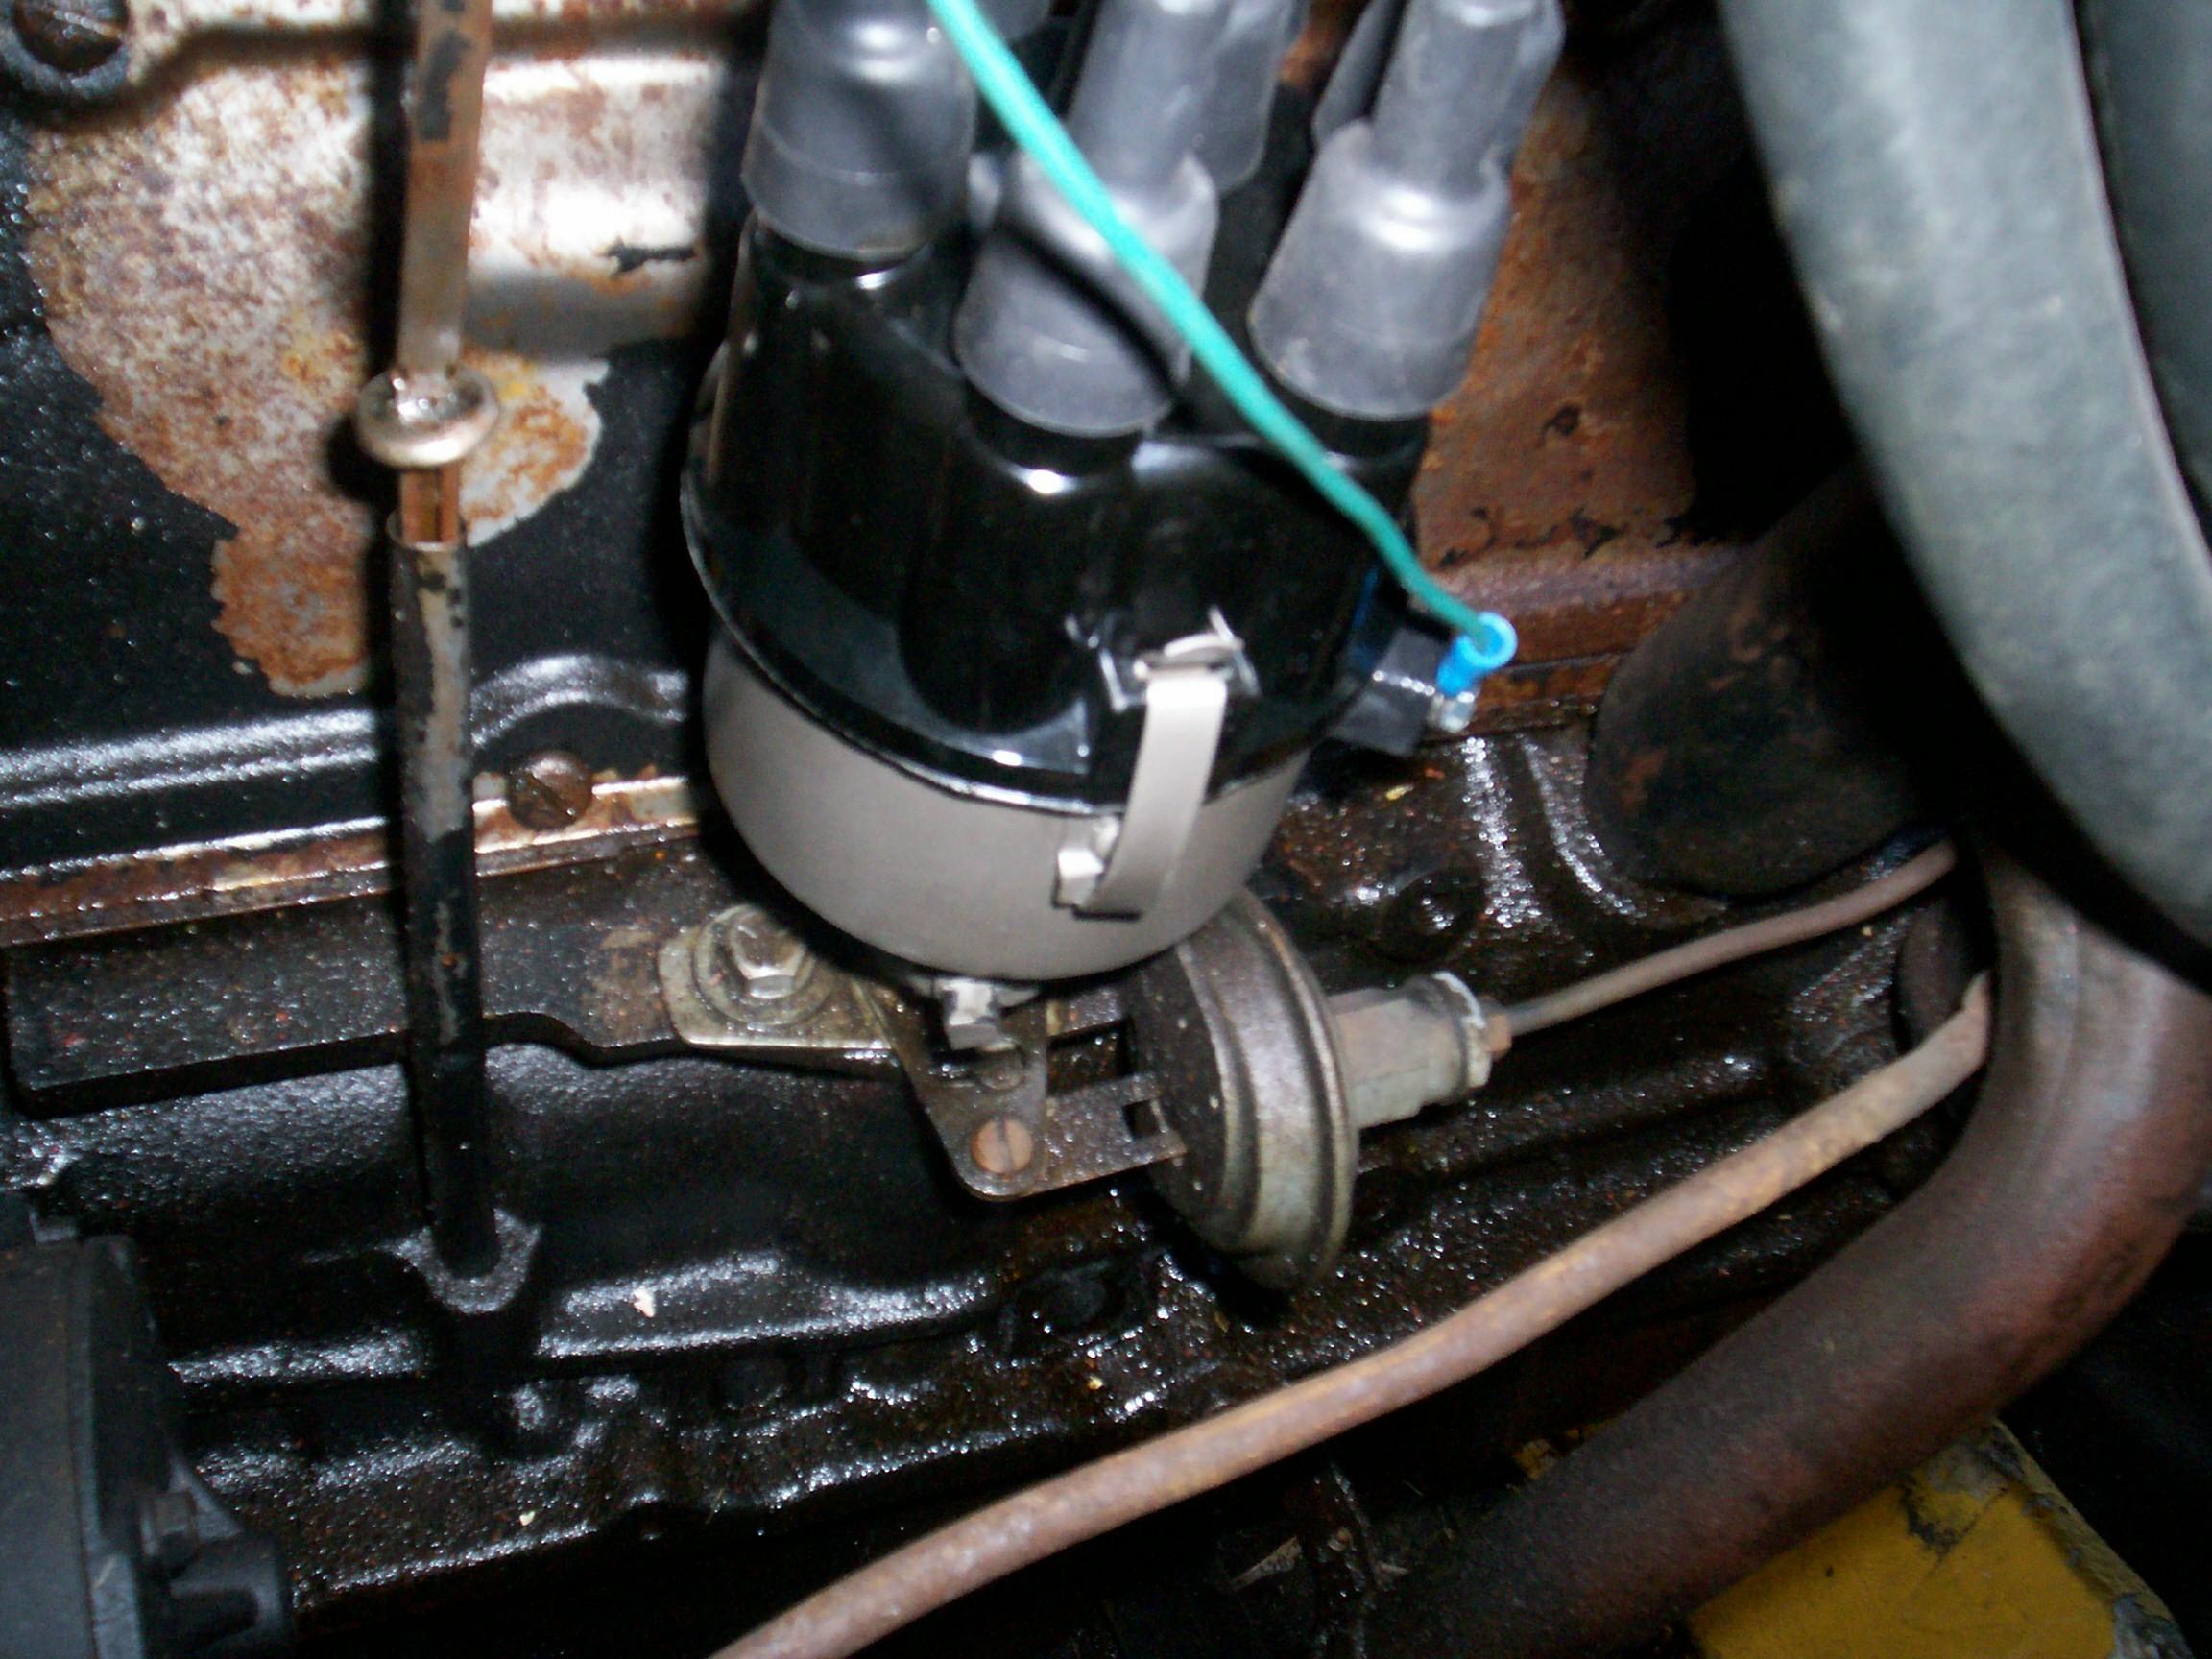
This job either goes right the first time or it doesn't . . . It didn't! I could drive the Jeep in a pinch but the fact that BillyBob is my only real means of transit right now gave Murphy an invitation to get involved. Damnation! I lined up the rotor mark and inserted the dizzy into its hole. It seated and I lined up the body with its mark on the engine and tightened up the clamp. Put the cap back on and connected the wires. Started the engine ok but there was a bump/thump at the dizzy. AARRUUGGH! At this point, I don't know if I got a bad dizzy or the malfunction is me. Replaced the new rotor with old one 'cause this is the first thing that occured to me. No joy. OOPS! No oil pressure! The dizzy isn't seated the whole way. Hope I haven't damaged the engine. Fiddled around with a screwdriver to position the oil pump slot and got the oil pump tang seated . . . Only thing is, the engine won't start now. Mein Gott! I fiddle around for 'nother half hour trying to get the dizzy seated correctly. I'm just about to give up and find top dead center to install it like you do if you don't have alignment marks when I find the sweet spot. Phew!
 All
righty, then. Back to the tuneup where I left off last week. The new
dizzy came with points and condenser so I didn't replace them. In
addition, the points were preset at 0.016" so I left them be. Got out
the induction timing light and adjusted the distributor body until the
flywheel ball was on the pointer. Hooked up the dwell tach. The idle
RPM was 500, just where it is 'sposed to be and the dwell was a hair
over 33 degrees (closer than I've gotten on my own with the old dizzy).
I'm feeling better now.
All
righty, then. Back to the tuneup where I left off last week. The new
dizzy came with points and condenser so I didn't replace them. In
addition, the points were preset at 0.016" so I left them be. Got out
the induction timing light and adjusted the distributor body until the
flywheel ball was on the pointer. Hooked up the dwell tach. The idle
RPM was 500, just where it is 'sposed to be and the dwell was a hair
over 33 degrees (closer than I've gotten on my own with the old dizzy).
I'm feeling better now.
November 24th 2007 The front is rolling thru this morning. It was wet on the ground when BillyBob and I arrived at the Krash Lab. Drank my java and smoked a cigar. Back to interior work. I've got a bunch of small parts to paint. Glove box door, hinge and hold open, defroster vent trim piece, headliner bow and rear trim strip, ash tray face, radio surround, parking brake release parts and maybe the steering wheel and door trim. All small parts that I don't want to drag out the HVLP turbine rig for and I'm shure that the rest of the interior paint is dry in the can since it's been several years since I painted the interior during the windshield saga. With this in mind, I ordered two rattlecans of the interior paint from Paintscratch.com a week or so back.
Still need to prep all the parts for painting. Jumped back on the glove box door today. Sanded it down to the point where it needs a second application of filler. Couldn't find the activator for my can of metal-to-metal filler. Went online and found that I could buy the activator separately. That's good. Checked my can of filler and it's as hard as a rock. That's bad. I don't use this stuff fast enuf 'cause I love bodywork so much. This stuff will not harden without activator. Unless it's in the can, that is! It's still uneasy outside so I spent the rest of the day running an inventory on my bodywork materials to see what else I need to get.
November 25th 2007 The good weather is back. Made another Fort Lauderdale Beach run on the way up to the Krash Lab to warm up BillyBpb's engine for valve adjustment. That went quick without incident and before long I was smoking a cigar and watching the valve train happily click-clacking away while I watched for oil flow. It's all good.
November 26th 2007 Been noticin' hesitation durng acceleration since I put the new dizzy in on friday, especially when the engine is cold. It's not bad and, since I don't drive with a heavy foot in my old age, I didn't know at first if it was just my imagination. If I put my foot into it tho', BillyBob will bog down. Did some intarweb research and found the same recommendations in several forums. Timing the engine "by the book" is not all that compatible with modern gas blends. The solution is more static advance. I'm gonna nudge the dizzy a smidgeon counter-clockwise every day until I get some improvement . . . or, I determine it's something else, like the carby accelerator pump going bad just at the same time I installed a new dizzy. Those kinda cosmic coincidences can drive ya bonkers.
December 1st 2007 Good weather in the shadetree garage this morning. Dragged out the tools and went to work. I've been soaking the distributor grease pot in parts cleaner solvent all week. Not shure if that was a good idea. When I fished it out of the soup, I discovered a rubber-like material below the first few threads where the pot screws onto the base. I didn't know this stuff was here when I first dumped the parts into the parts cleaner. It appears to function to keep the pot from rotating with the engine vibration between adjustments. Nothin' for it. Let's move on. The pot was rusty so it was cleaned up with a wire wheel, PRE Paint Prepped and given a coat of Self-Etching Primer.
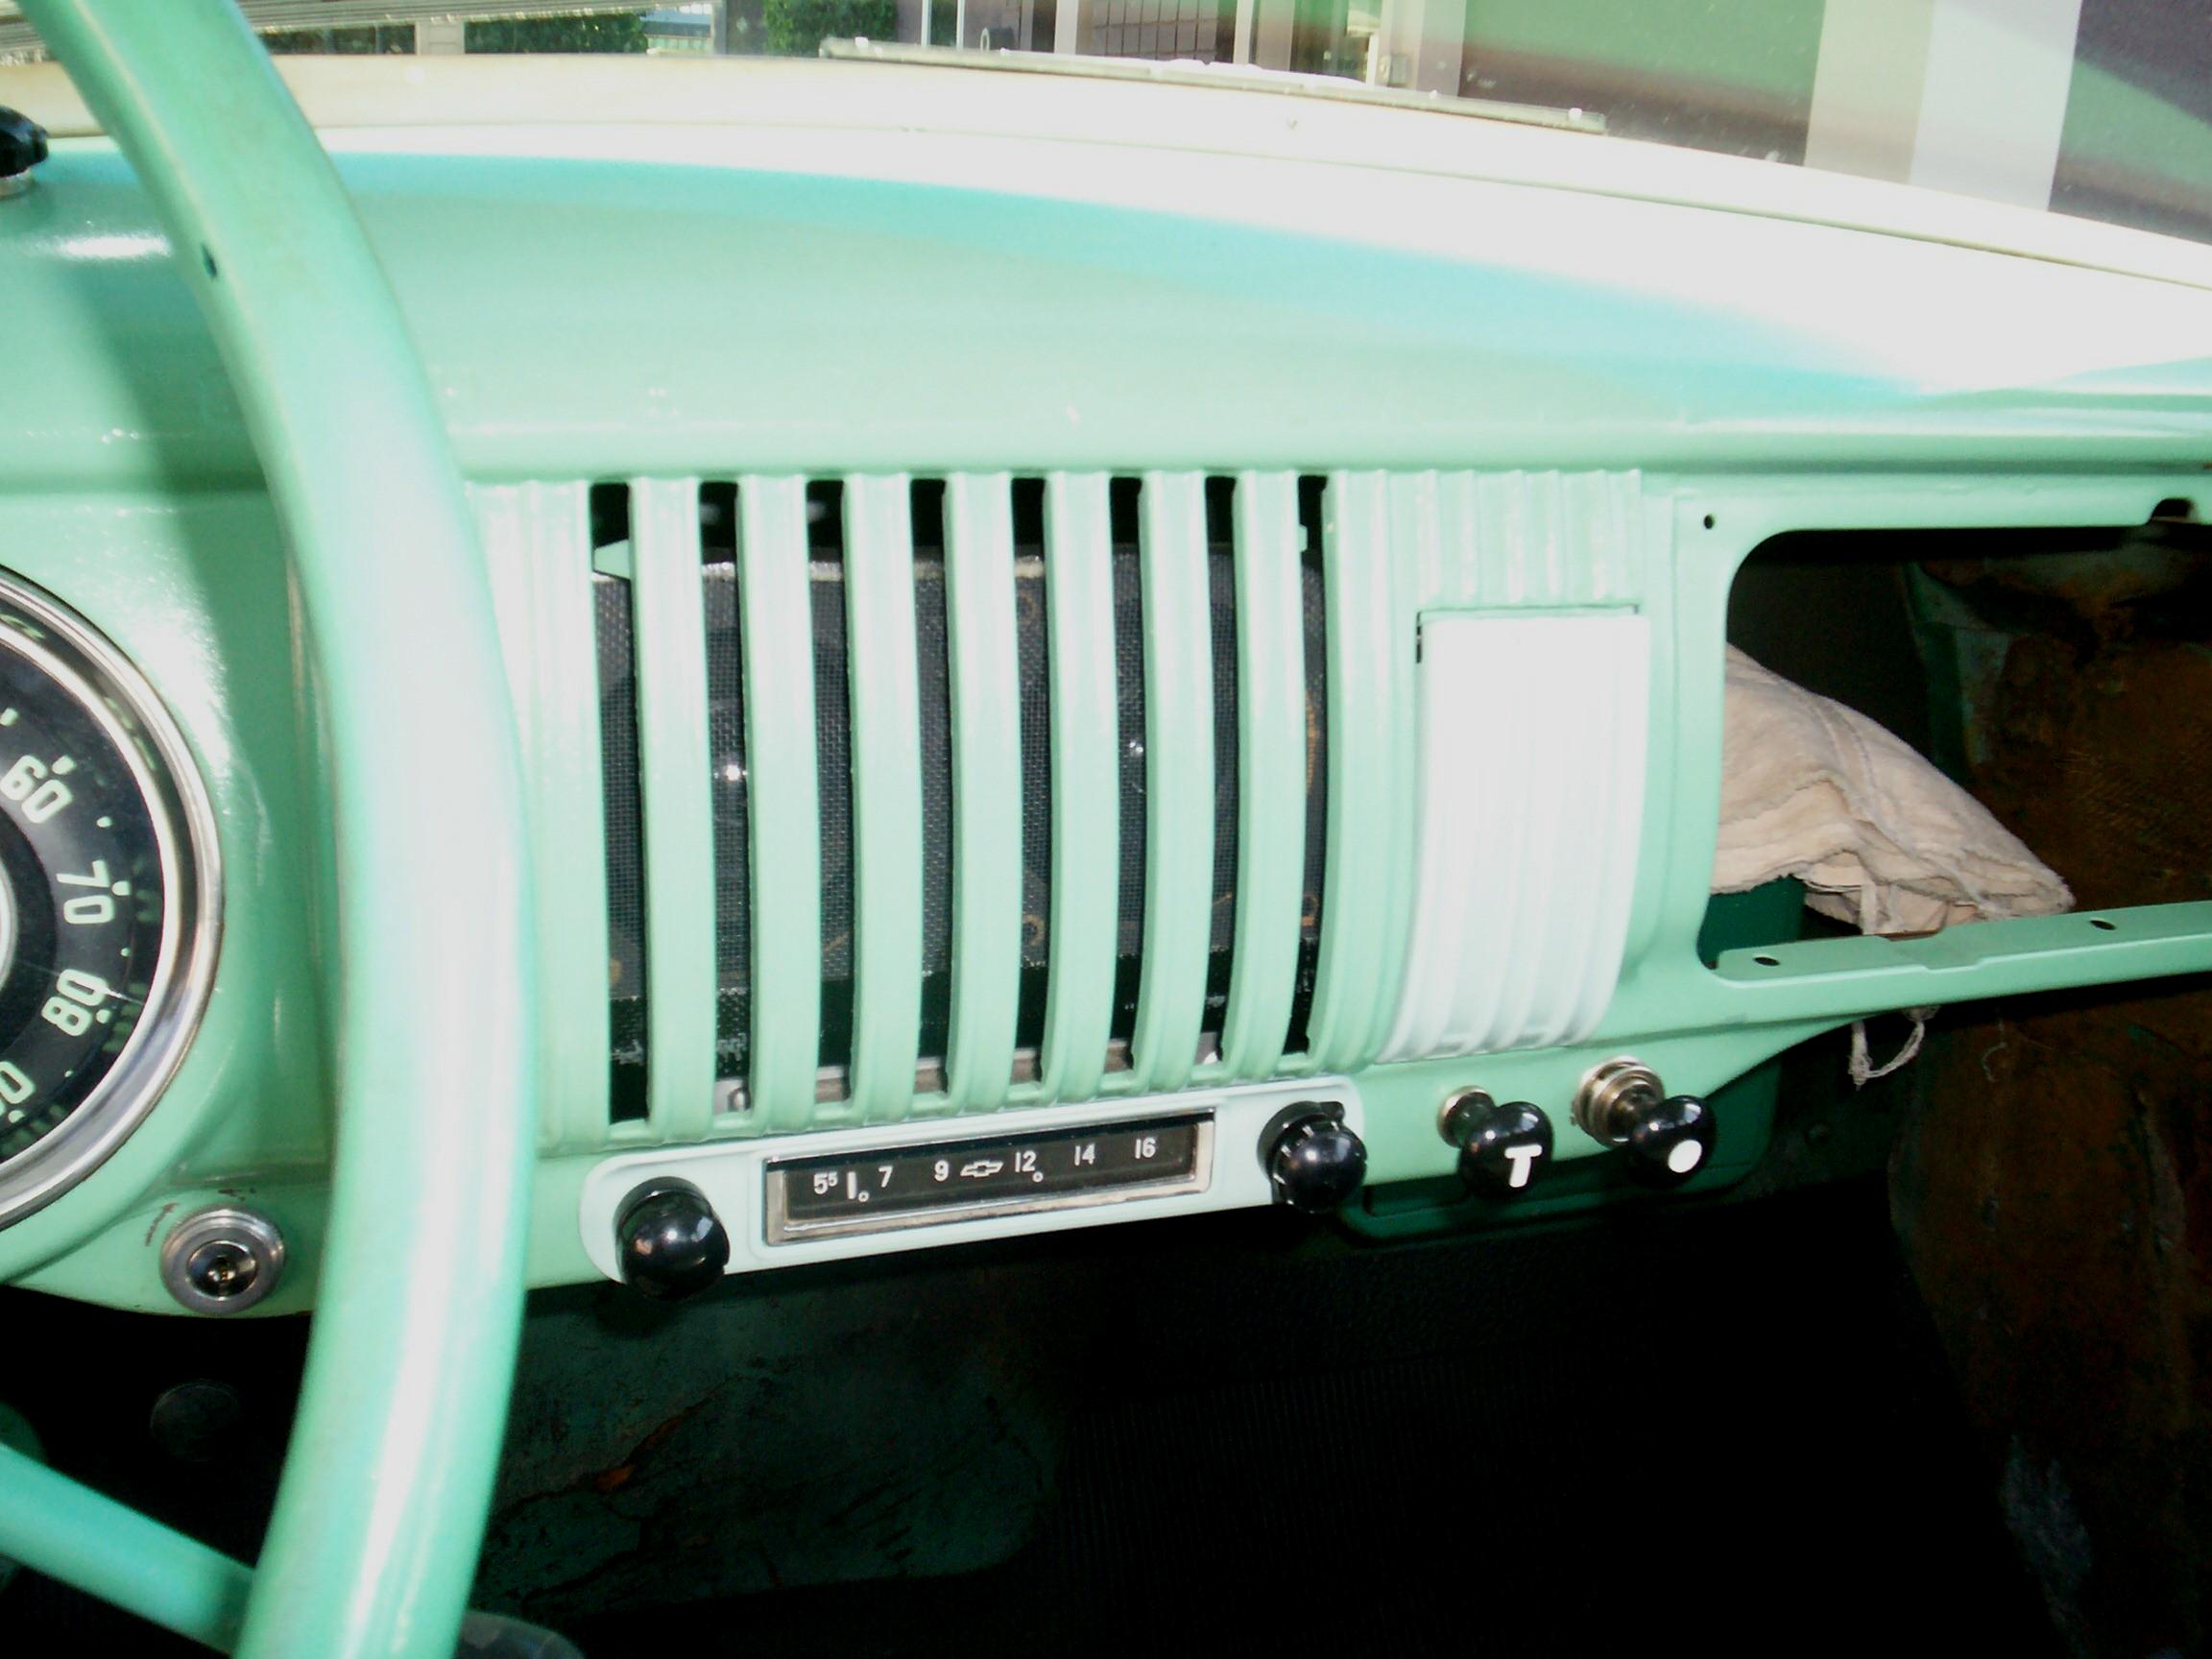 The
interior paint rattlecans arrived from Paintscratch.com this week. I
pulled out the ashtray cover and roughed up the primer on it with a 3M
scuff pad. PRE Paint Prepped it and gave it three coats of the Surf
Green paint. Pulled the radio faceplate next and gave it the same
treatment. Gave the dizzy grease pot a couple of coats of Eastwood's
Spray Gray paint. These are all fast drying paints. It wasn't long
before I could assemble the ashtray and put it and the radio faceplate
back in BillyBob. The paint match isn't very good. The paint that
Pantscratch originally sent me for the interior is different from the
closest match on their website. When I ordered the Surf Green paint, I
noted what they actually sent me last time in the order but whoever
mixed the paint ignored the note. The Surf Green is lighter and has
more blue in it. I'll live with it fer now. If it bugs me enuf, I'll
deal with it next detailing cycle. Hell, after three Pauli Girl Lagers,
it's starting to grow on me.
The
interior paint rattlecans arrived from Paintscratch.com this week. I
pulled out the ashtray cover and roughed up the primer on it with a 3M
scuff pad. PRE Paint Prepped it and gave it three coats of the Surf
Green paint. Pulled the radio faceplate next and gave it the same
treatment. Gave the dizzy grease pot a couple of coats of Eastwood's
Spray Gray paint. These are all fast drying paints. It wasn't long
before I could assemble the ashtray and put it and the radio faceplate
back in BillyBob. The paint match isn't very good. The paint that
Pantscratch originally sent me for the interior is different from the
closest match on their website. When I ordered the Surf Green paint, I
noted what they actually sent me last time in the order but whoever
mixed the paint ignored the note. The Surf Green is lighter and has
more blue in it. I'll live with it fer now. If it bugs me enuf, I'll
deal with it next detailing cycle. Hell, after three Pauli Girl Lagers,
it's starting to grow on me.
December 2nd 2007 The good weather continues. Made a Fort Lauderdale Beach run to warm up the engine 'cause BillyBob's due for an oil change. I was five minutes late hitting the beach. At the south end of Ft. Lauderdale Beach, the police stopped traffic to let a few hundred bicylists get out in front of us. Five minutes earlier, I would have been ahead of them. I turned around and got off the beach. Sometimes you have to make your own luck. I went up Dixie Highway. It's mostly warehouses, light industrial and old neighborhoods in south Florida. The bicylists here are illegals and they try to stay out of your way. They don't ride up the middle of the road concentrating on the spandex-clad butt of the Lance Armstrong wannabe in front of them.
Then, I came to my second police stop, this time in Boca. The Boca Raton police send overwhelming force to the most minor of traffic accidents. There are often ten cops standing around a fenderbender. They tend to consider traffic direction beneath them, however. That was the case today. Lot of guys standing around. Noone directing traffic unless a motorist took the initiative. Then a cop would break out of the group to stop said motorist and have words. BillyBob and I sat at the front of the line and I put on my Davy Crockett bear grin. One cop could have kept traffic going. Instead, they made us all wait until they were finished. About ten minutes.
I finally got to the Krash Lab and started the oil change. After that, I gave BillyBob's headliner bow and rear trim piece the same treatment the ashtray and radio faceplate got yesterday. Then I went on to work on Renegade.
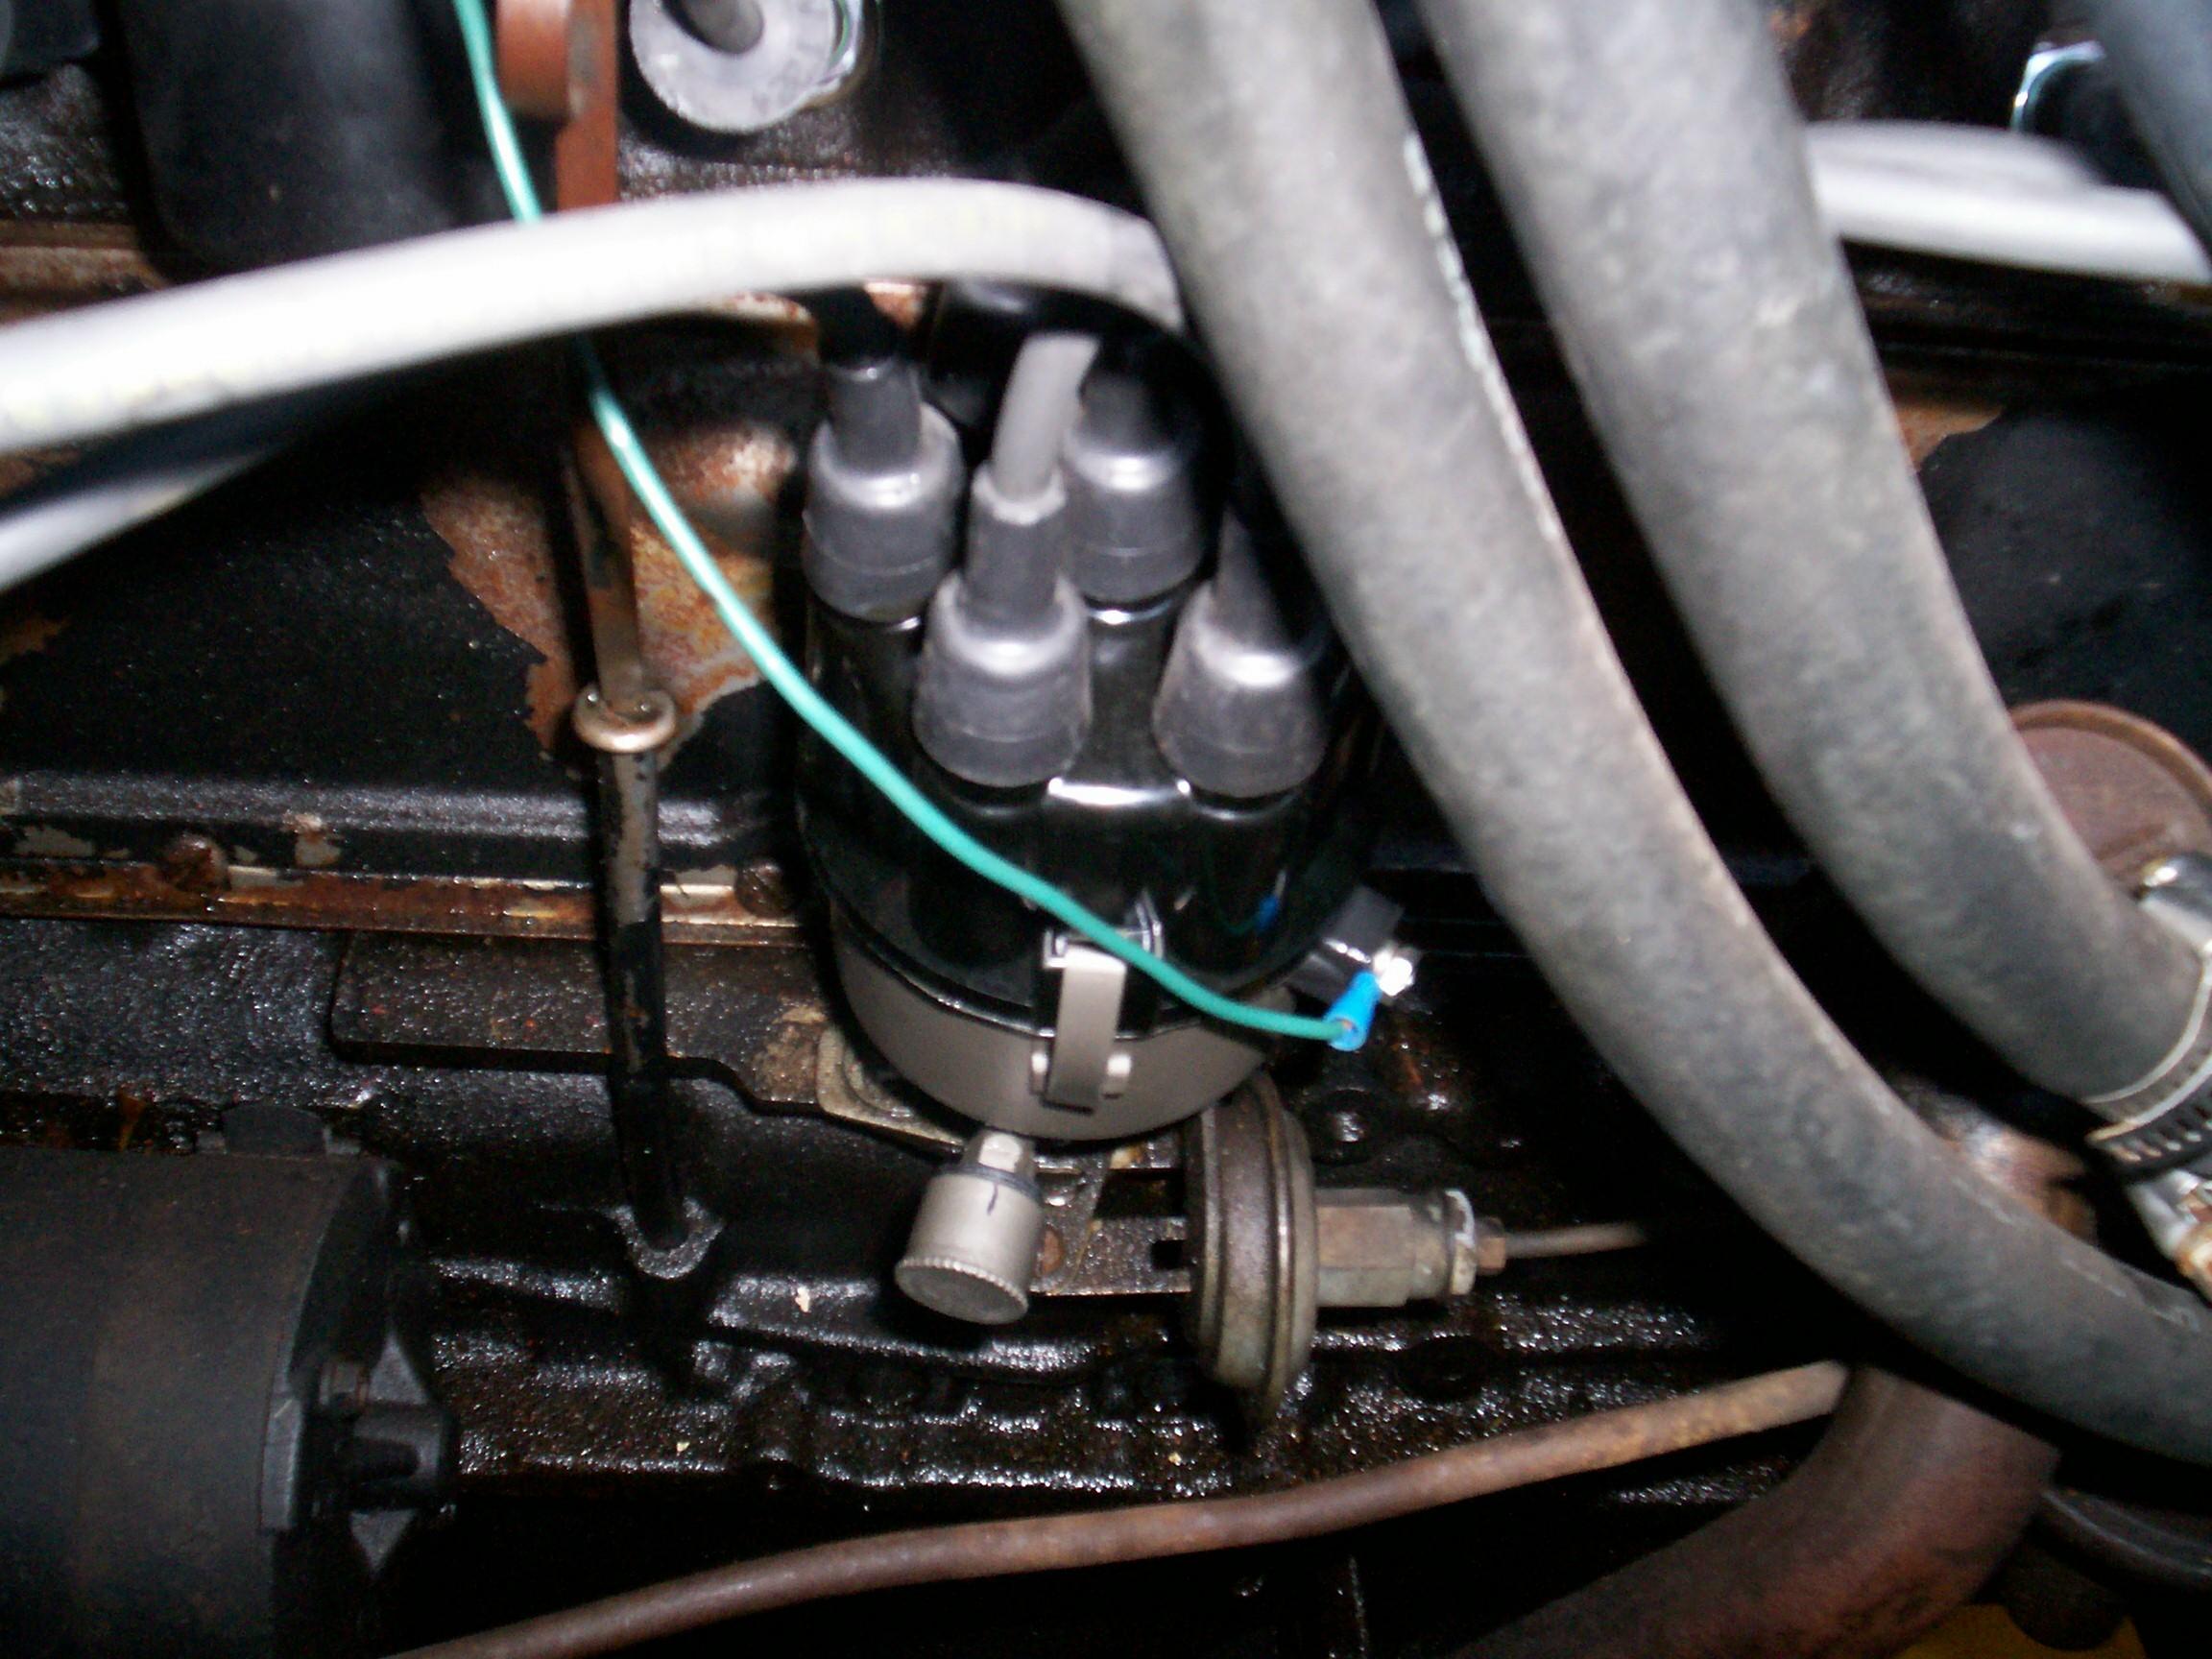 December
8th 2007 Blessed with
good weather again this morning. Got the tools out and did a little
remedial work first. Filled up the freshly painted distributor grease
cup and reinstalled it on BillyBob. I've been playin' with advancing
the timing to get the truck running better. I'm almost there, I think.
I nudged the distributor counter-clockwise just a bit more and
tightened up the clamp again. BillyBob does not start as easy as he
used to and I miss that.
December
8th 2007 Blessed with
good weather again this morning. Got the tools out and did a little
remedial work first. Filled up the freshly painted distributor grease
cup and reinstalled it on BillyBob. I've been playin' with advancing
the timing to get the truck running better. I'm almost there, I think.
I nudged the distributor counter-clockwise just a bit more and
tightened up the clamp again. BillyBob does not start as easy as he
used to and I miss that.
Last week, the headliner bow and trim were painted. On my Fort Lauderdale run I had also stopped at BillyBob's warehouse bay and picked up the replacement headliner I purchased a few years ago. The two pieces of headliner cardboard were unrolled (the way they ship) and weighted down flat to straighten them out. They've been like that for a week. I guess it's time to try to install the headliner.
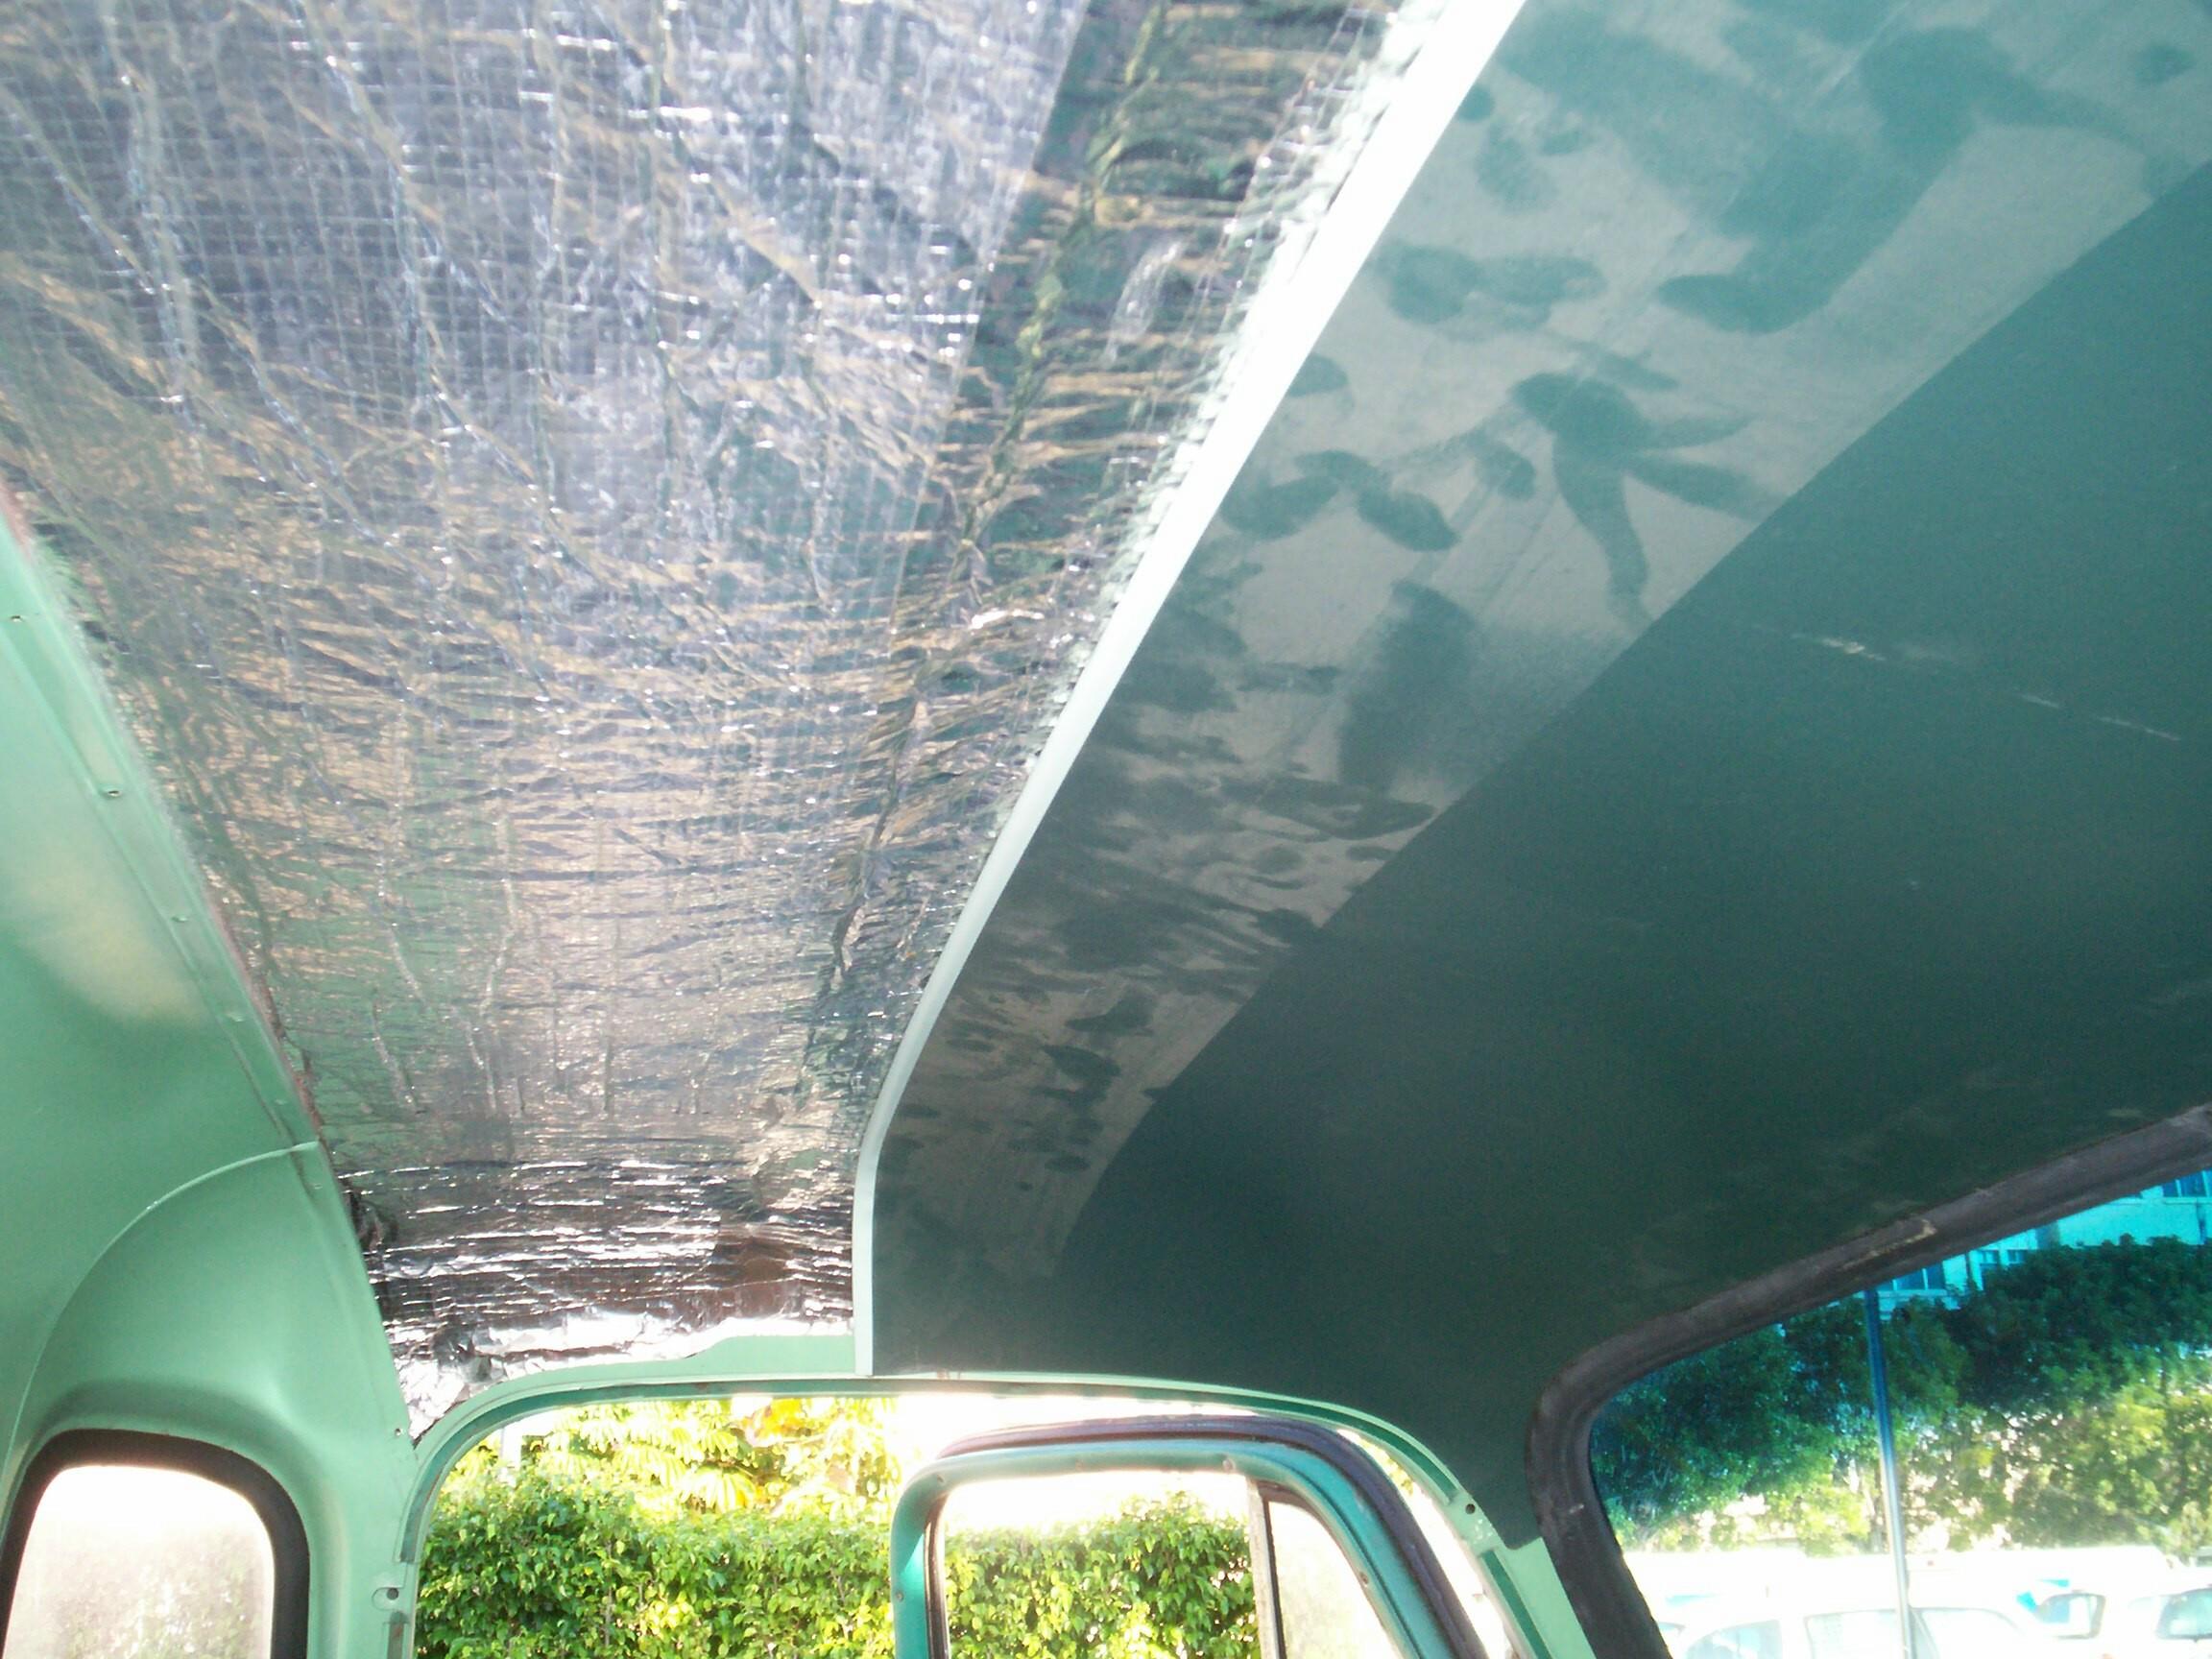 This
is one of those restoration tasks that are like beating your head
against the wall. It feels better when you're done than it does during
the doin'. I've done it two times previously and I think I've already
learned the hard lessons. Prepared by taking the rearview mirror off
the top of the windshield. Got out my plastic glass installation stick
and ran it between the top of the windshield frame and the windshield
gasket because the leading edge of the headliner cardboard goes here.
The headliner bow is S-shaped in section, the lower recess pointing
forward and upper facing rearward. I laid out the flattened front
headliner cardboard on a worktable and worked the rearward edge into
the headliner bow recess. It went well this time and I was done in five
minutes and I didn't have to use duct tape on the back side this time
to keep it in the slot. Misted the back of the cardboard with a 50/50
water/ammonia mixture to make it pliable. I got it wetter than I have
in the past but only in the locations where I knew it had to curve the
most and kept the cardboard dry at the edges. Went out to the truck
and, sitting on BillyBob's seat, began to work the leading edge of the
cardboard under the windshield gasket with the assistance of the glass
installer stick. When I got all the leading edge under the gasket, I
worked it as far forward as I could under the gasket before snapping
the bow up into place. So far, so good.
This
is one of those restoration tasks that are like beating your head
against the wall. It feels better when you're done than it does during
the doin'. I've done it two times previously and I think I've already
learned the hard lessons. Prepared by taking the rearview mirror off
the top of the windshield. Got out my plastic glass installation stick
and ran it between the top of the windshield frame and the windshield
gasket because the leading edge of the headliner cardboard goes here.
The headliner bow is S-shaped in section, the lower recess pointing
forward and upper facing rearward. I laid out the flattened front
headliner cardboard on a worktable and worked the rearward edge into
the headliner bow recess. It went well this time and I was done in five
minutes and I didn't have to use duct tape on the back side this time
to keep it in the slot. Misted the back of the cardboard with a 50/50
water/ammonia mixture to make it pliable. I got it wetter than I have
in the past but only in the locations where I knew it had to curve the
most and kept the cardboard dry at the edges. Went out to the truck
and, sitting on BillyBob's seat, began to work the leading edge of the
cardboard under the windshield gasket with the assistance of the glass
installer stick. When I got all the leading edge under the gasket, I
worked it as far forward as I could under the gasket before snapping
the bow up into place. So far, so good.
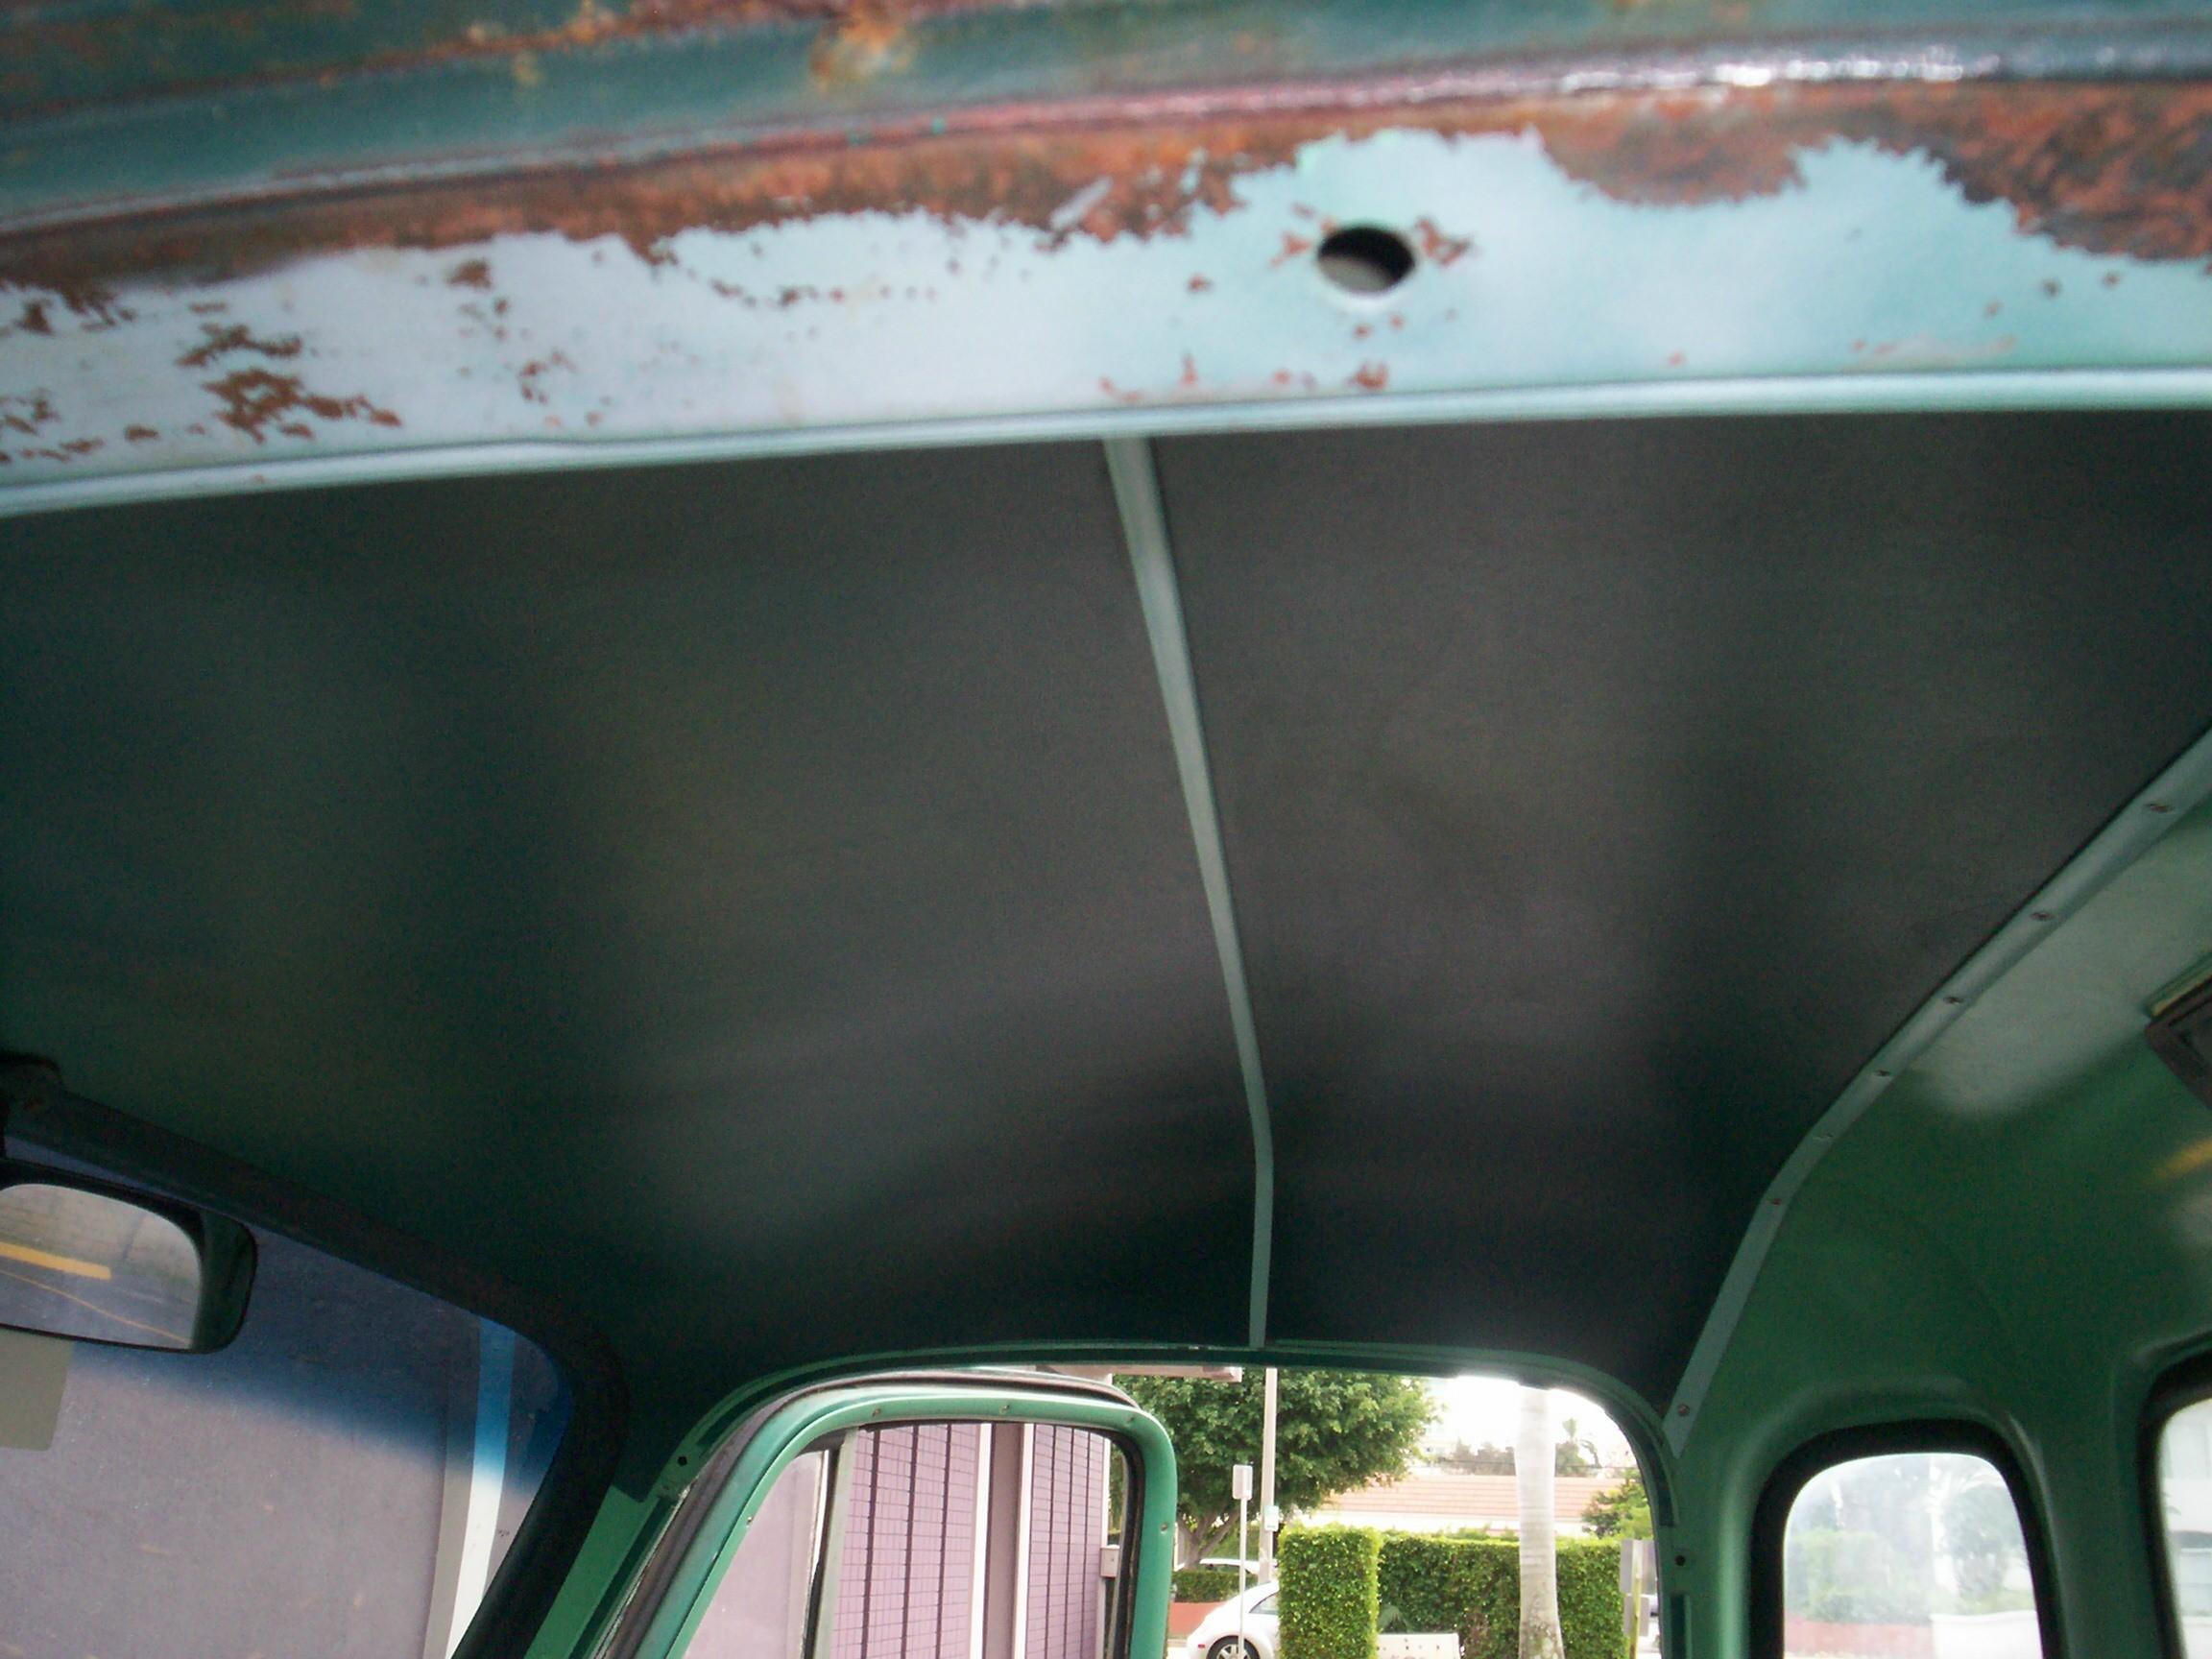 Next,
sitting in BillyBob again, I began to work the leading edge of the
smaller rear cardboard panel into the upper slot of the installed bow.
I didn't wet down this piece as the compound curves are not as radical.
This panel has slots in the rearward edge where the trim strip screws
are located. With the panel inserted in the bow recess as far as it
would go, the rear slots were a good quarter inch or more from exposing
the screw holes. Removed the panel again and took it inside the Krash
Lab to trim a quarter inch off the leading edge. This edge is not
straight. It is curved slightly. I scribed a line and trimmed it with
heavy-duty sissors. Back out to BillyBob. This time, I could see about
half the screw holes when the panel was in place. A box-cutter was used
to trim the other slots enuf to expose the remaining holes. Managed to
get the trim piece back on losing only one screw down behind the seat
in the process. I wuz lucky to have one xtra screw in my fastener
inventory. Finished up by trimming off a small sliver of cardboard
sticking out behind the rear trim piece, wiping the storage dust off
the headliner panels and reinstalling the rearview mirror.
Next,
sitting in BillyBob again, I began to work the leading edge of the
smaller rear cardboard panel into the upper slot of the installed bow.
I didn't wet down this piece as the compound curves are not as radical.
This panel has slots in the rearward edge where the trim strip screws
are located. With the panel inserted in the bow recess as far as it
would go, the rear slots were a good quarter inch or more from exposing
the screw holes. Removed the panel again and took it inside the Krash
Lab to trim a quarter inch off the leading edge. This edge is not
straight. It is curved slightly. I scribed a line and trimmed it with
heavy-duty sissors. Back out to BillyBob. This time, I could see about
half the screw holes when the panel was in place. A box-cutter was used
to trim the other slots enuf to expose the remaining holes. Managed to
get the trim piece back on losing only one screw down behind the seat
in the process. I wuz lucky to have one xtra screw in my fastener
inventory. Finished up by trimming off a small sliver of cardboard
sticking out behind the rear trim piece, wiping the storage dust off
the headliner panels and reinstalling the rearview mirror.
Time fer a beer while I wait out some minor rain and get ready to work on the Jeep some.
 December
9th 2007 Took a
shakedown ride in Renegade after BillyBob and I got to the Krash Lab
and I can officially declare the Jeep back on the road. Celebrated by
enjoying the early morning sitting in BillyBob listening to the radio
with coffee and cigar. It's been a while since I've done that.
BillyBob's new headliner has to be seasoned with cigar smoke anyway so
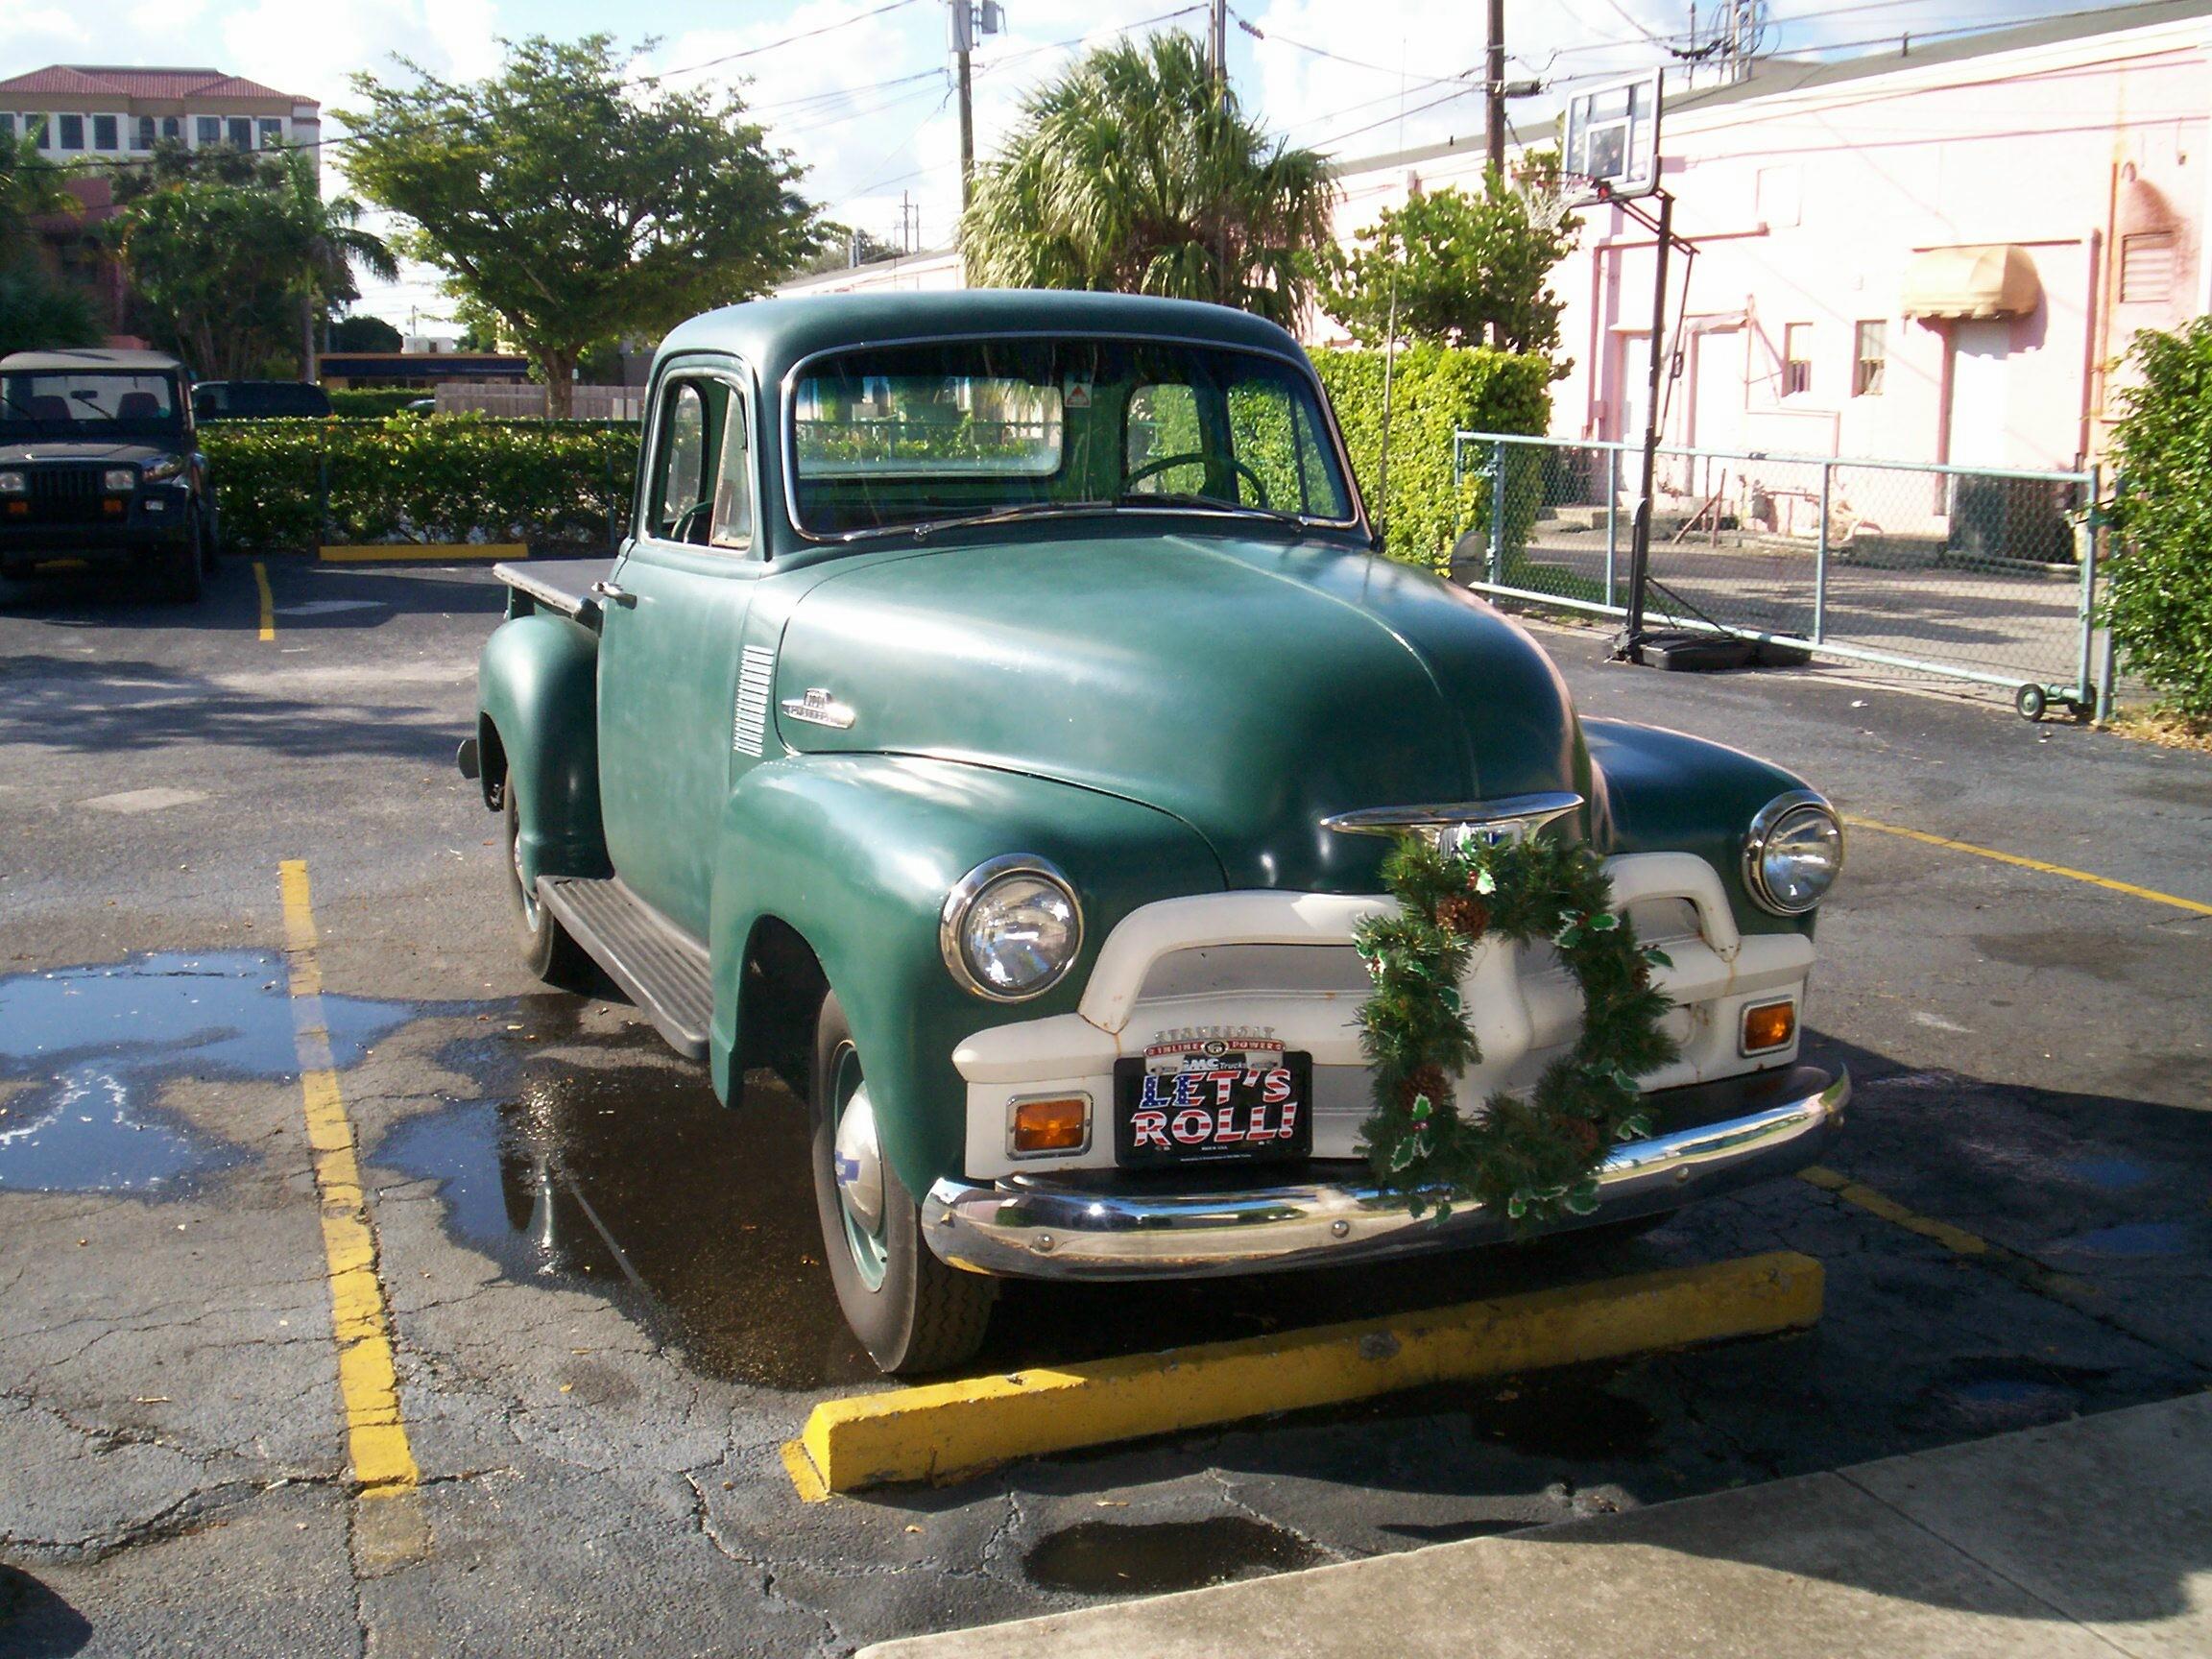
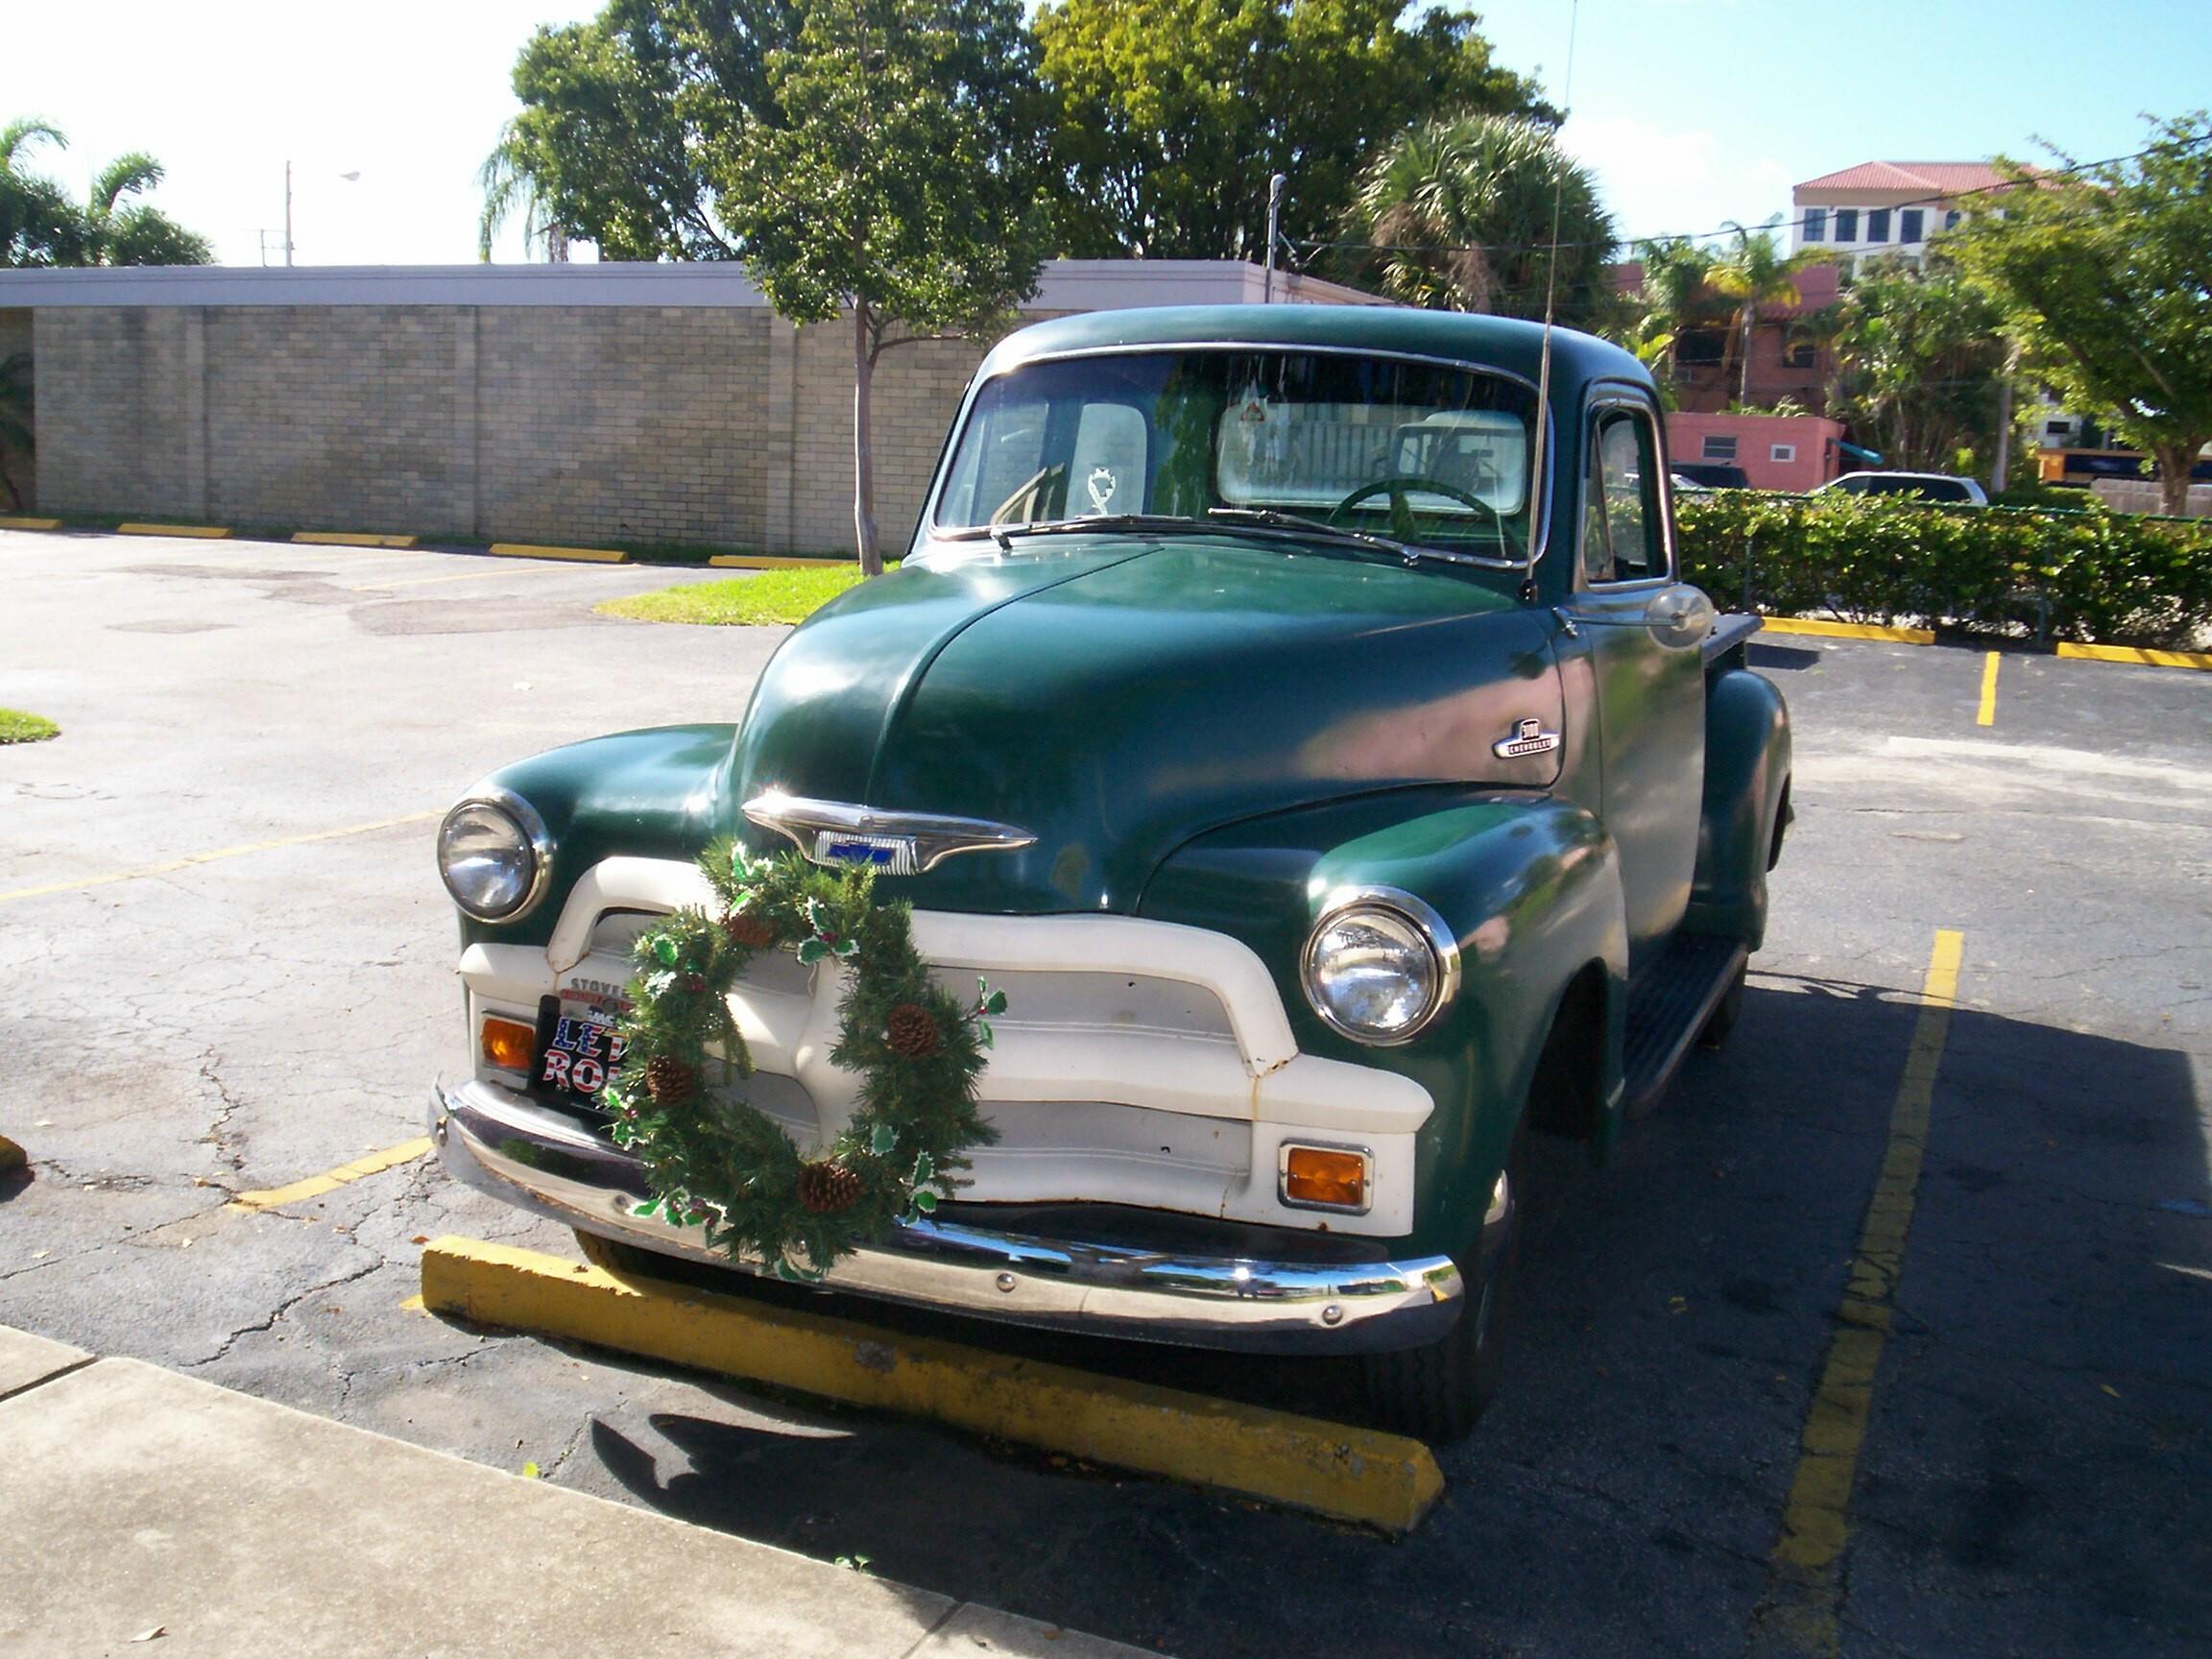
it was real work. After that, BillyBob was festooned with his Christmas
wreath nose art which had been picked up at the warehouse on the way in.
December
9th 2007 Took a
shakedown ride in Renegade after BillyBob and I got to the Krash Lab
and I can officially declare the Jeep back on the road. Celebrated by
enjoying the early morning sitting in BillyBob listening to the radio
with coffee and cigar. It's been a while since I've done that.
BillyBob's new headliner has to be seasoned with cigar smoke anyway so
it was real work. After that, BillyBob was festooned with his Christmas
wreath nose art which had been picked up at the warehouse on the way in.
 Took
the trim strip (between windshield and dashboard) that covers the
defroster vents off fer painting. When the windshield saga began, I
discovered that one of BillyBob's metal defroster vents was missing and
I've since misplaced the other one. Some time last year, I purchased a
couple of replacement vents and vent hose. These are replacements, not
repops, 'cause they are crudely formed out of plastic. With the vent
strip off, I was able to find some suitable stainless steel sheetmetal
screws in one of my Harbor Freight assortments and install these
things. The one thing I can say for them is that they are probably
easier to install than the originls because they have slots in lieu of
screw holes. On the other hand, in BillyBob's case, they don't cover
the slot in the cowl completely and they look as if they might
interfere with wiper mechanism.
Took
the trim strip (between windshield and dashboard) that covers the
defroster vents off fer painting. When the windshield saga began, I
discovered that one of BillyBob's metal defroster vents was missing and
I've since misplaced the other one. Some time last year, I purchased a
couple of replacement vents and vent hose. These are replacements, not
repops, 'cause they are crudely formed out of plastic. With the vent
strip off, I was able to find some suitable stainless steel sheetmetal
screws in one of my Harbor Freight assortments and install these
things. The one thing I can say for them is that they are probably
easier to install than the originls because they have slots in lieu of
screw holes. On the other hand, in BillyBob's case, they don't cover
the slot in the cowl completely and they look as if they might
interfere with wiper mechanism.
December 10th 2007 It's as I feared. At least one of the plastic vents interferes with the wipers. I had to use the wipers on the way to work today and they stopped before reaching full arc. Put my hand out the window to help them out but that was a no go. Something was blocking them. I turned the wiper off and the wipers returned to their off position. When I got to the Krash Lab, I ordered a pair of used vents from American Classic Truck Parts along with a new locking gas cap to replace the one that broke this morning at the gas station. The week is getting off to a great start.
December 15th 2007 It was wet when BillyBob and I made our way up to the Krash Lab this morning. Hope that's the extent of the 30% chance of rain forecast for today. When I got inside, I discovered we were having a power outage. Total darkness and the constant chirping of about fifteen battery packs. These events make Wingnut, the parrot, hyper. Nuthin' for it but to go outside and smoke a cigar while the power company sorts this out. I'll probaby have to spend some time with the servers later in the day.
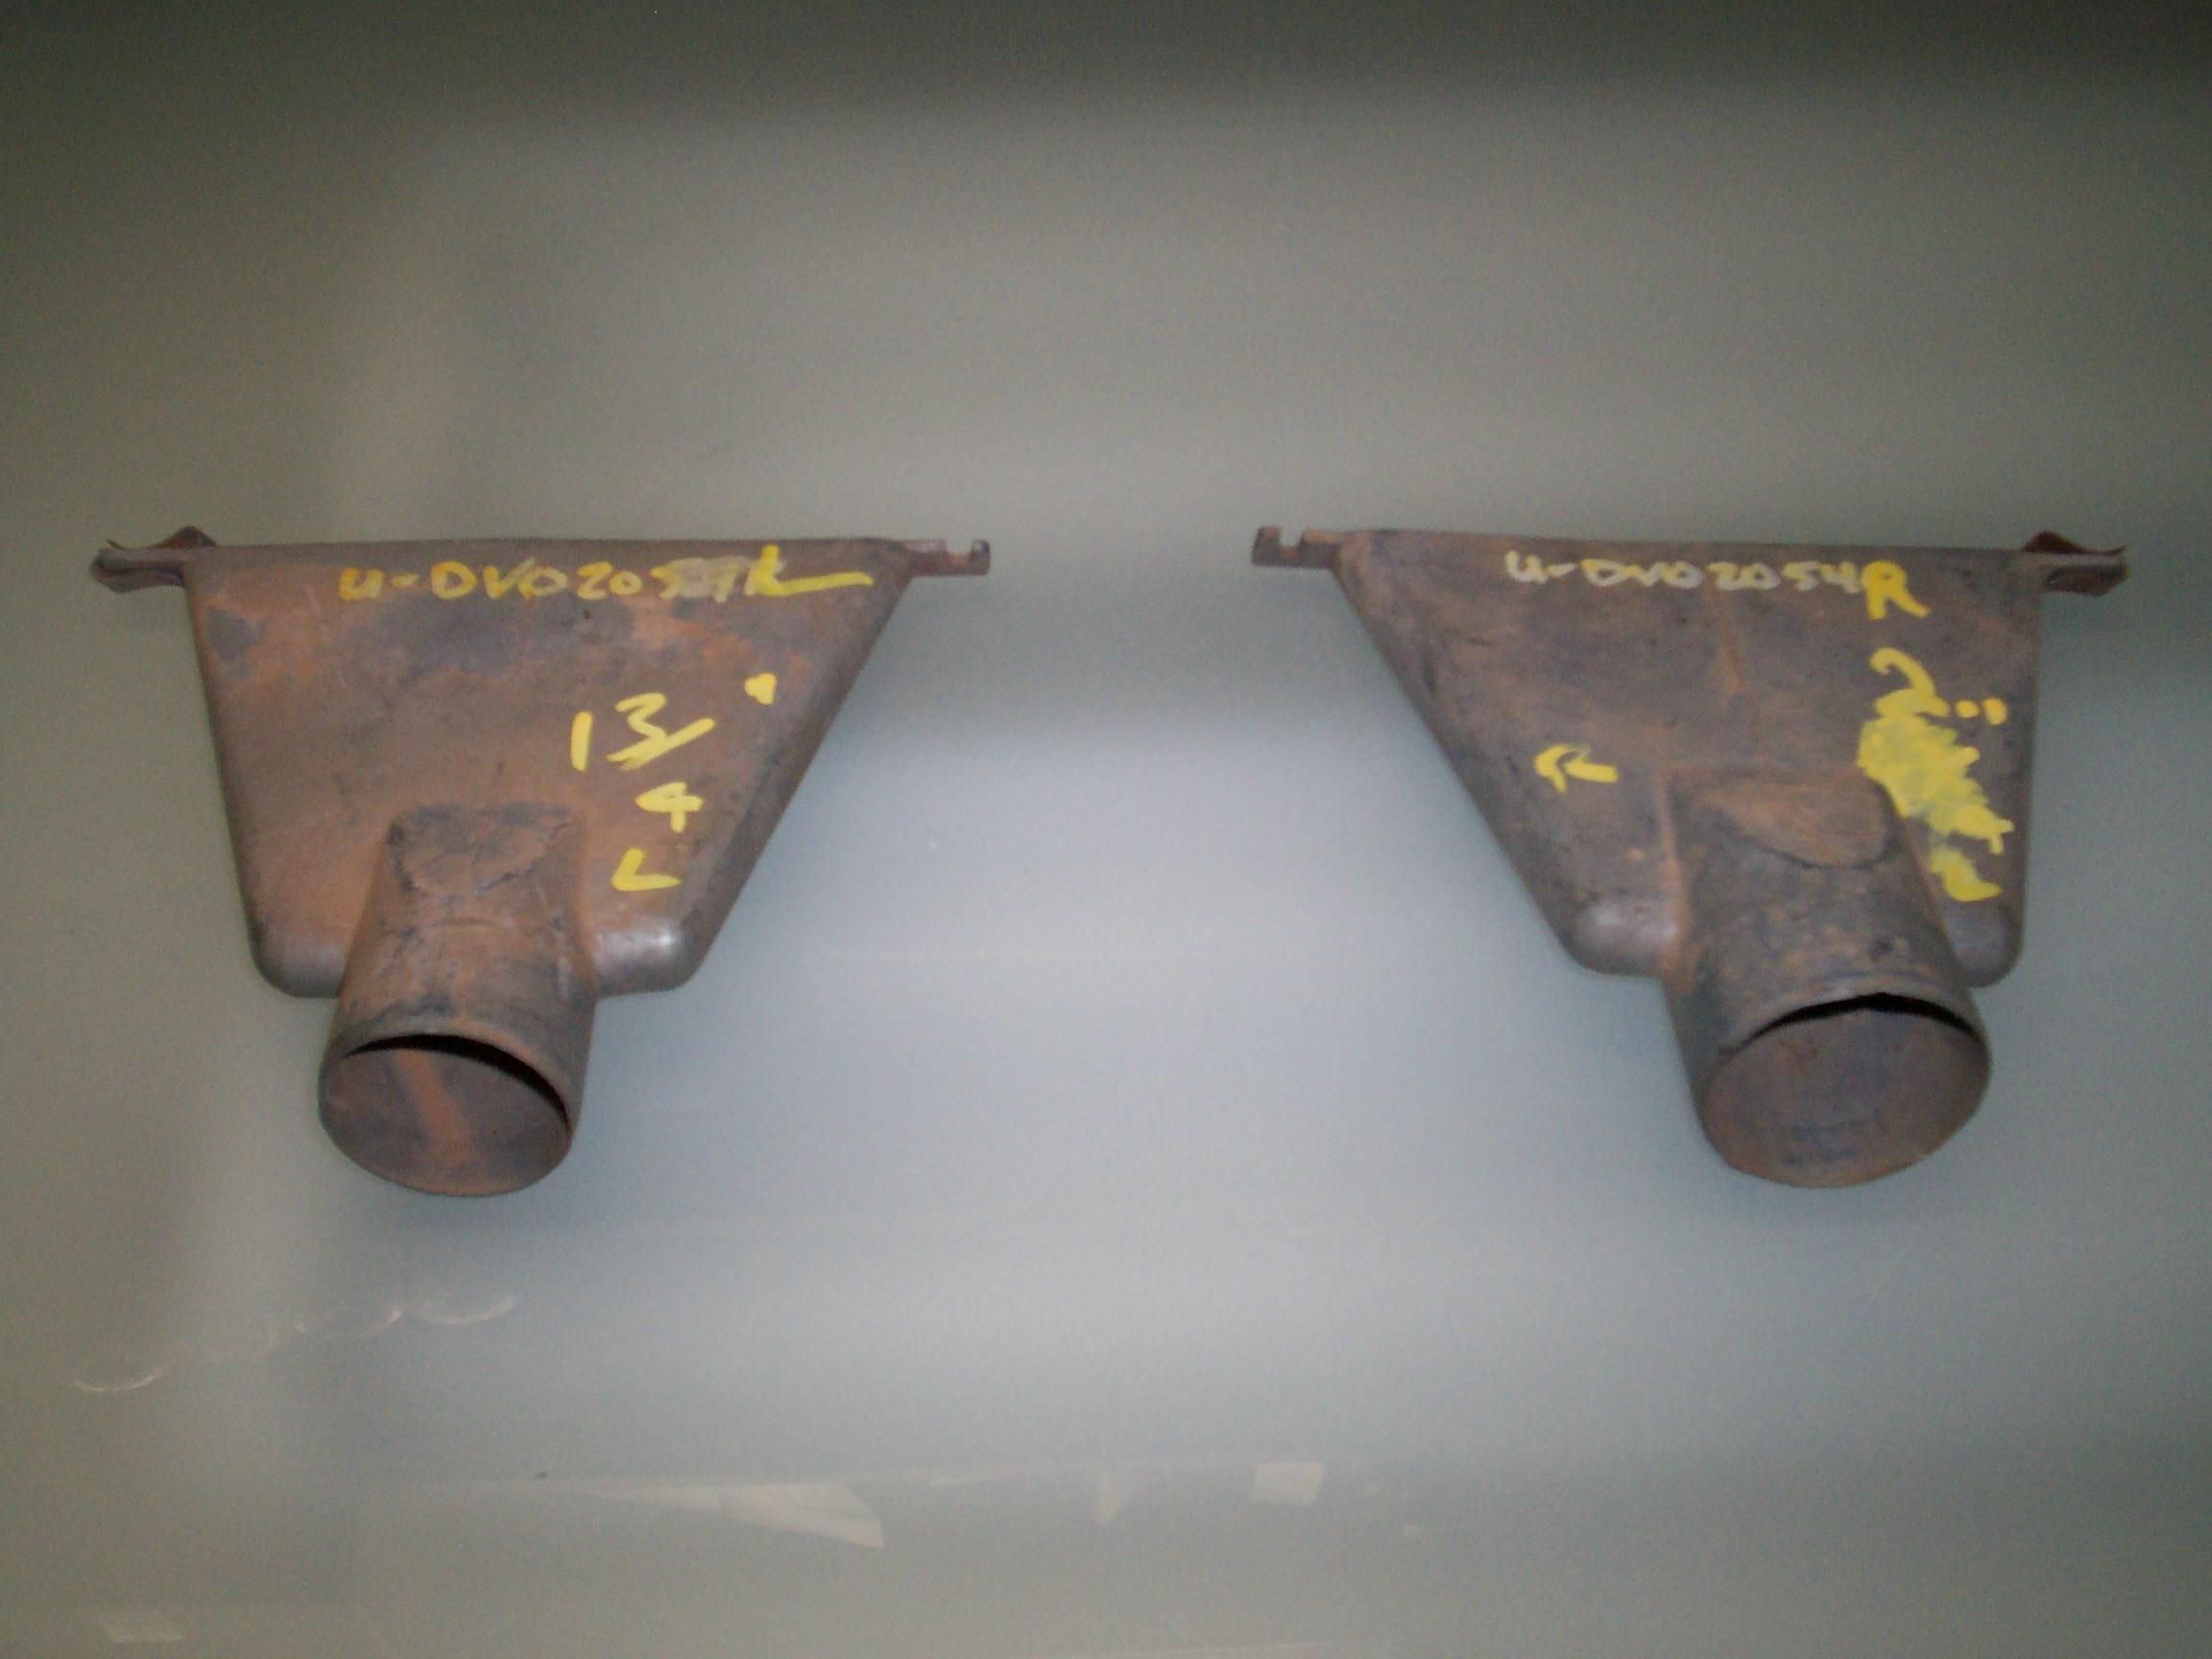 That
senior moment I had in losing track of BillyBob's original defroster
vent turned out to be a good thing. I don't remember where it is but I
remember what it looks like and it isn't like the ones American Classic
sent me. I'm thinking it was a third-party design like the generic box
heater that is now in BillyBob. Interesting that the one defroster vent
has a larger diameter inlet than the other one.
That
senior moment I had in losing track of BillyBob's original defroster
vent turned out to be a good thing. I don't remember where it is but I
remember what it looks like and it isn't like the ones American Classic
sent me. I'm thinking it was a third-party design like the generic box
heater that is now in BillyBob. Interesting that the one defroster vent
has a larger diameter inlet than the other one.
The vents are some kinda pot metal and the only rust is on spring clips that anchor one side of each vent. The other side of each vent is a screw slot. I get the electric angle grinder out and clean them up with a wire cup. Then, I throw them in a bucket of soapy water fer awhile. Scrubbed the junkjard debris out of the vents with a old toothbrush. Rinsed the vents with clean water and dried with compressed air. Hung them up in BillyBob's tree and PRE Paint Prepped them. Gave them a coat of self-etching primer followed by a couple of coats of Eastwood's Detail Gray fast drying lacquer two hours later.
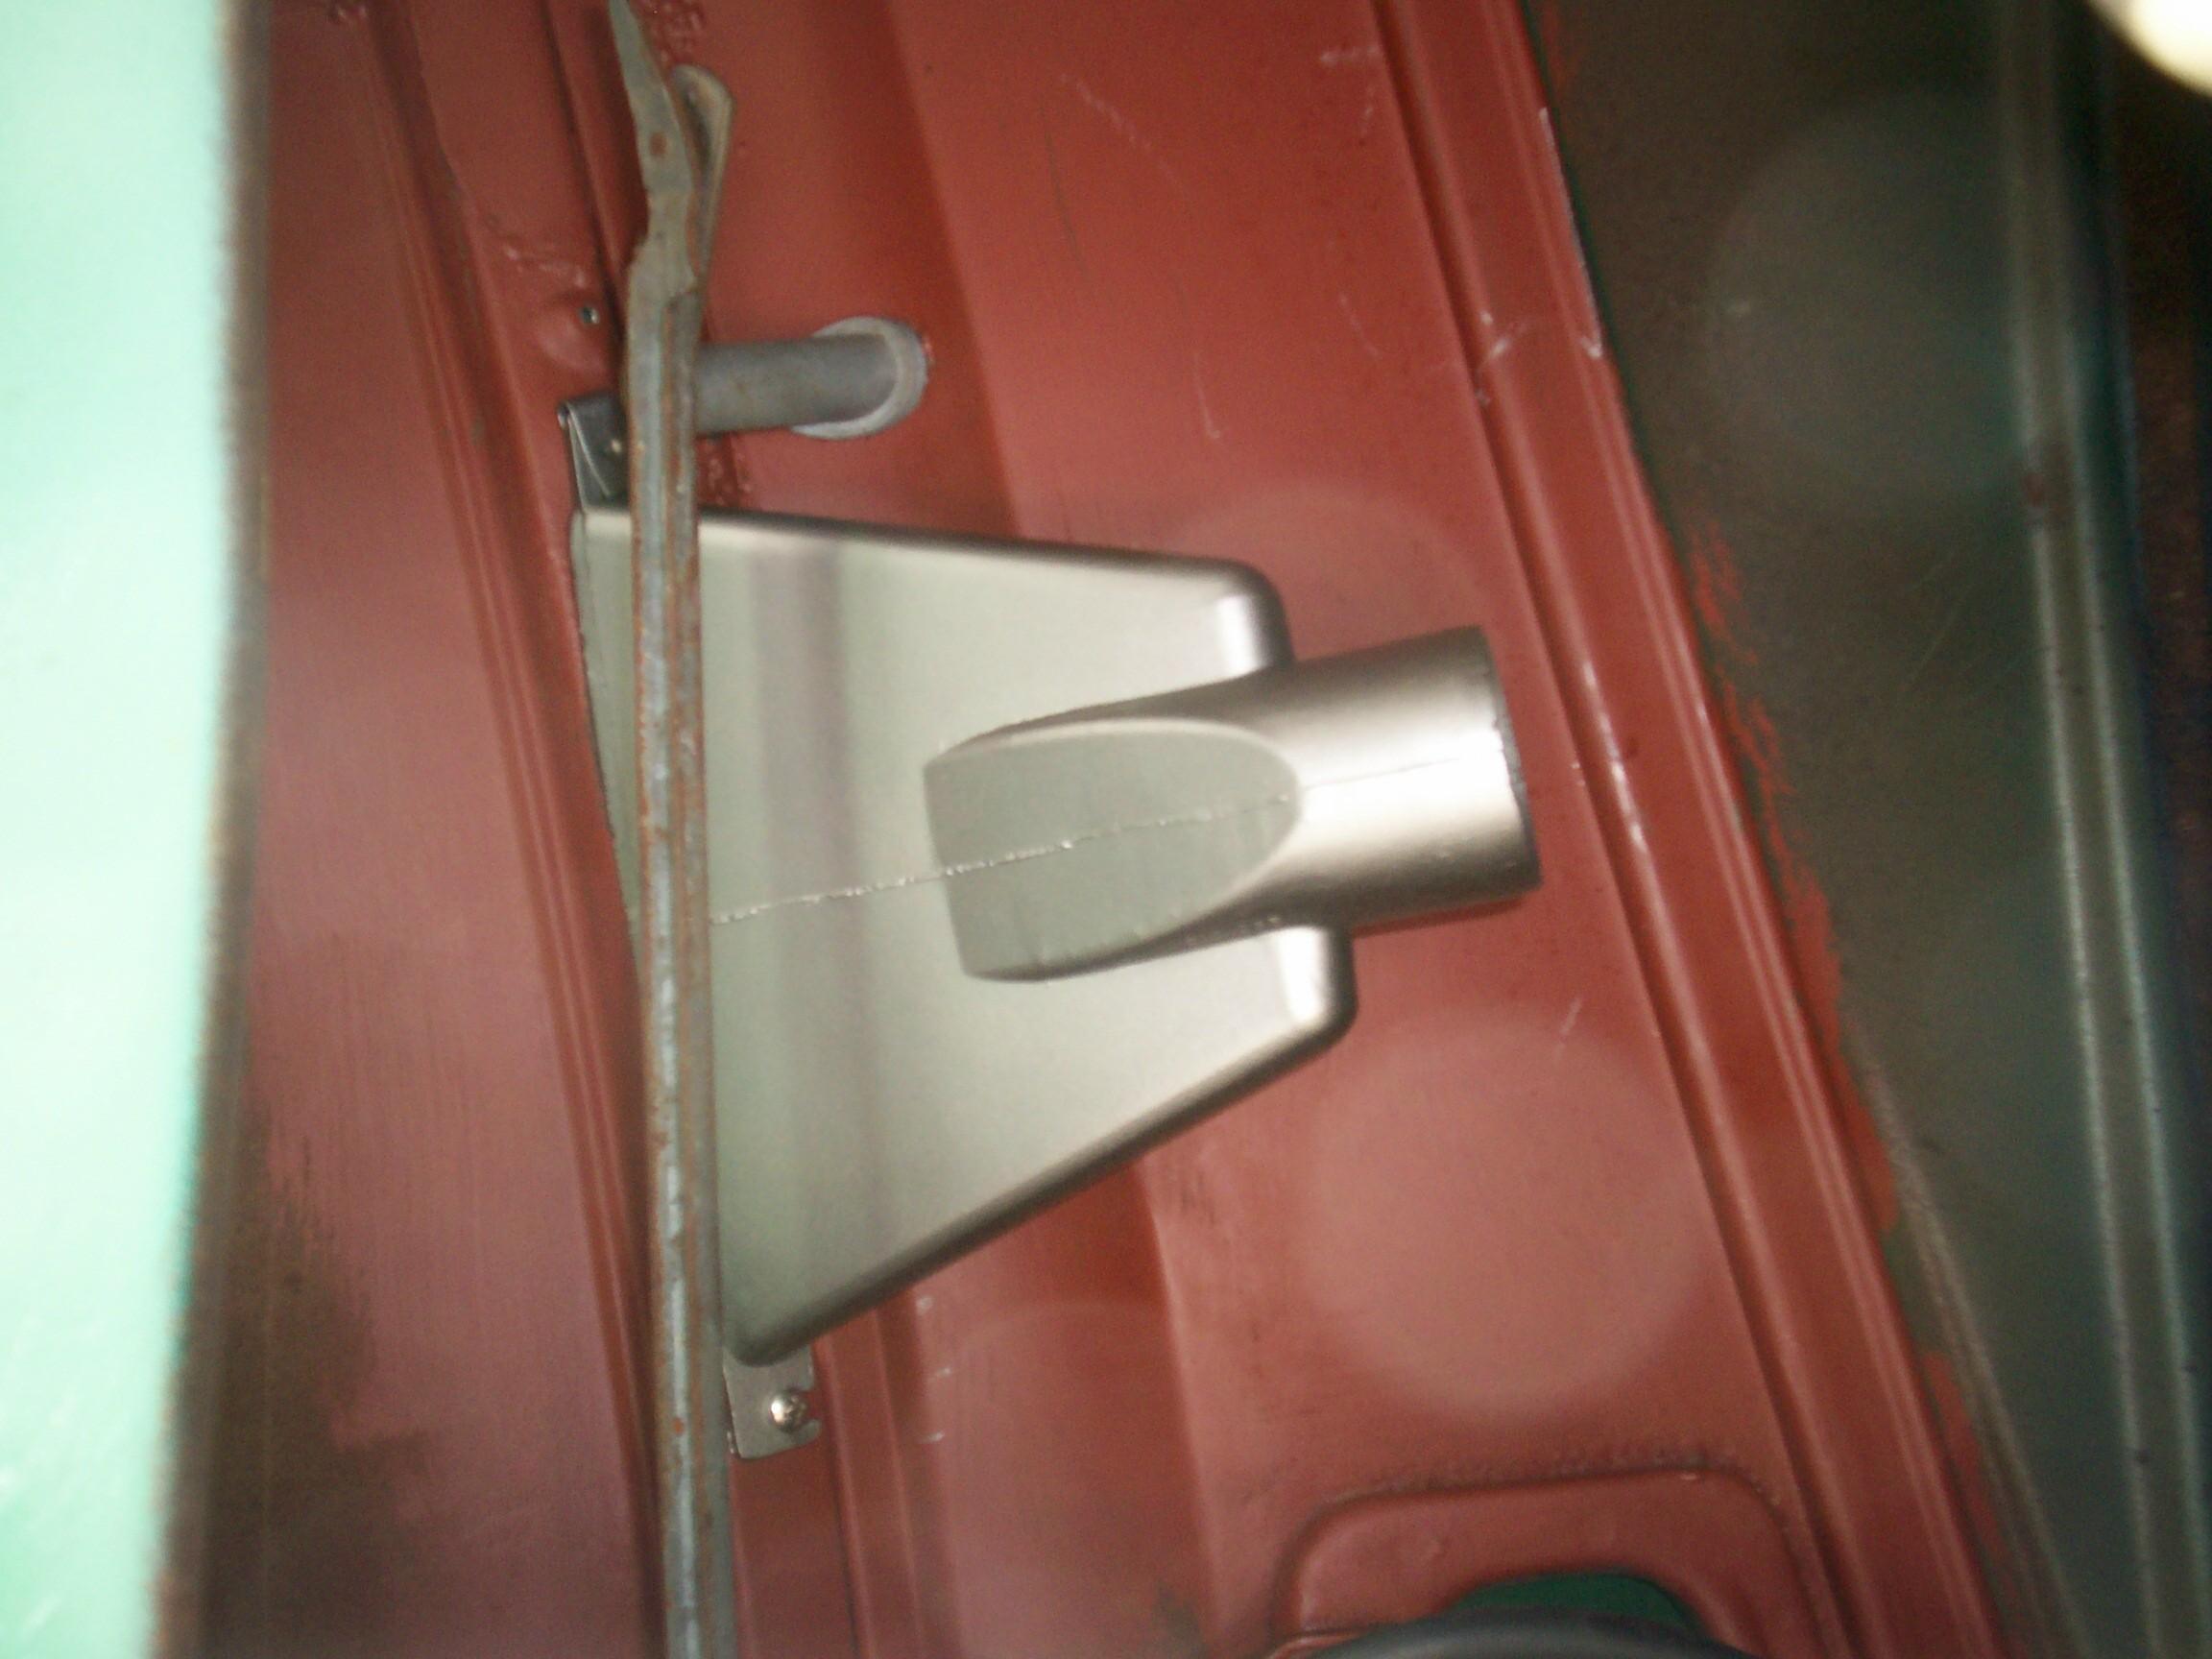 When
the paint was cured, the vents were installed. The passenger side vent
was installed without a hose because there is nowhere to connect the
hose to the plain vanilla heater box. The beauty of this vent design
can be appreciated. The clip connector will hold the vent in place
while the screw is installed on the other side. The clip also solves
the clearance problem with the wiper mechanism.
When
the paint was cured, the vents were installed. The passenger side vent
was installed without a hose because there is nowhere to connect the
hose to the plain vanilla heater box. The beauty of this vent design
can be appreciated. The clip connector will hold the vent in place
while the screw is installed on the other side. The clip also solves
the clearance problem with the wiper mechanism.
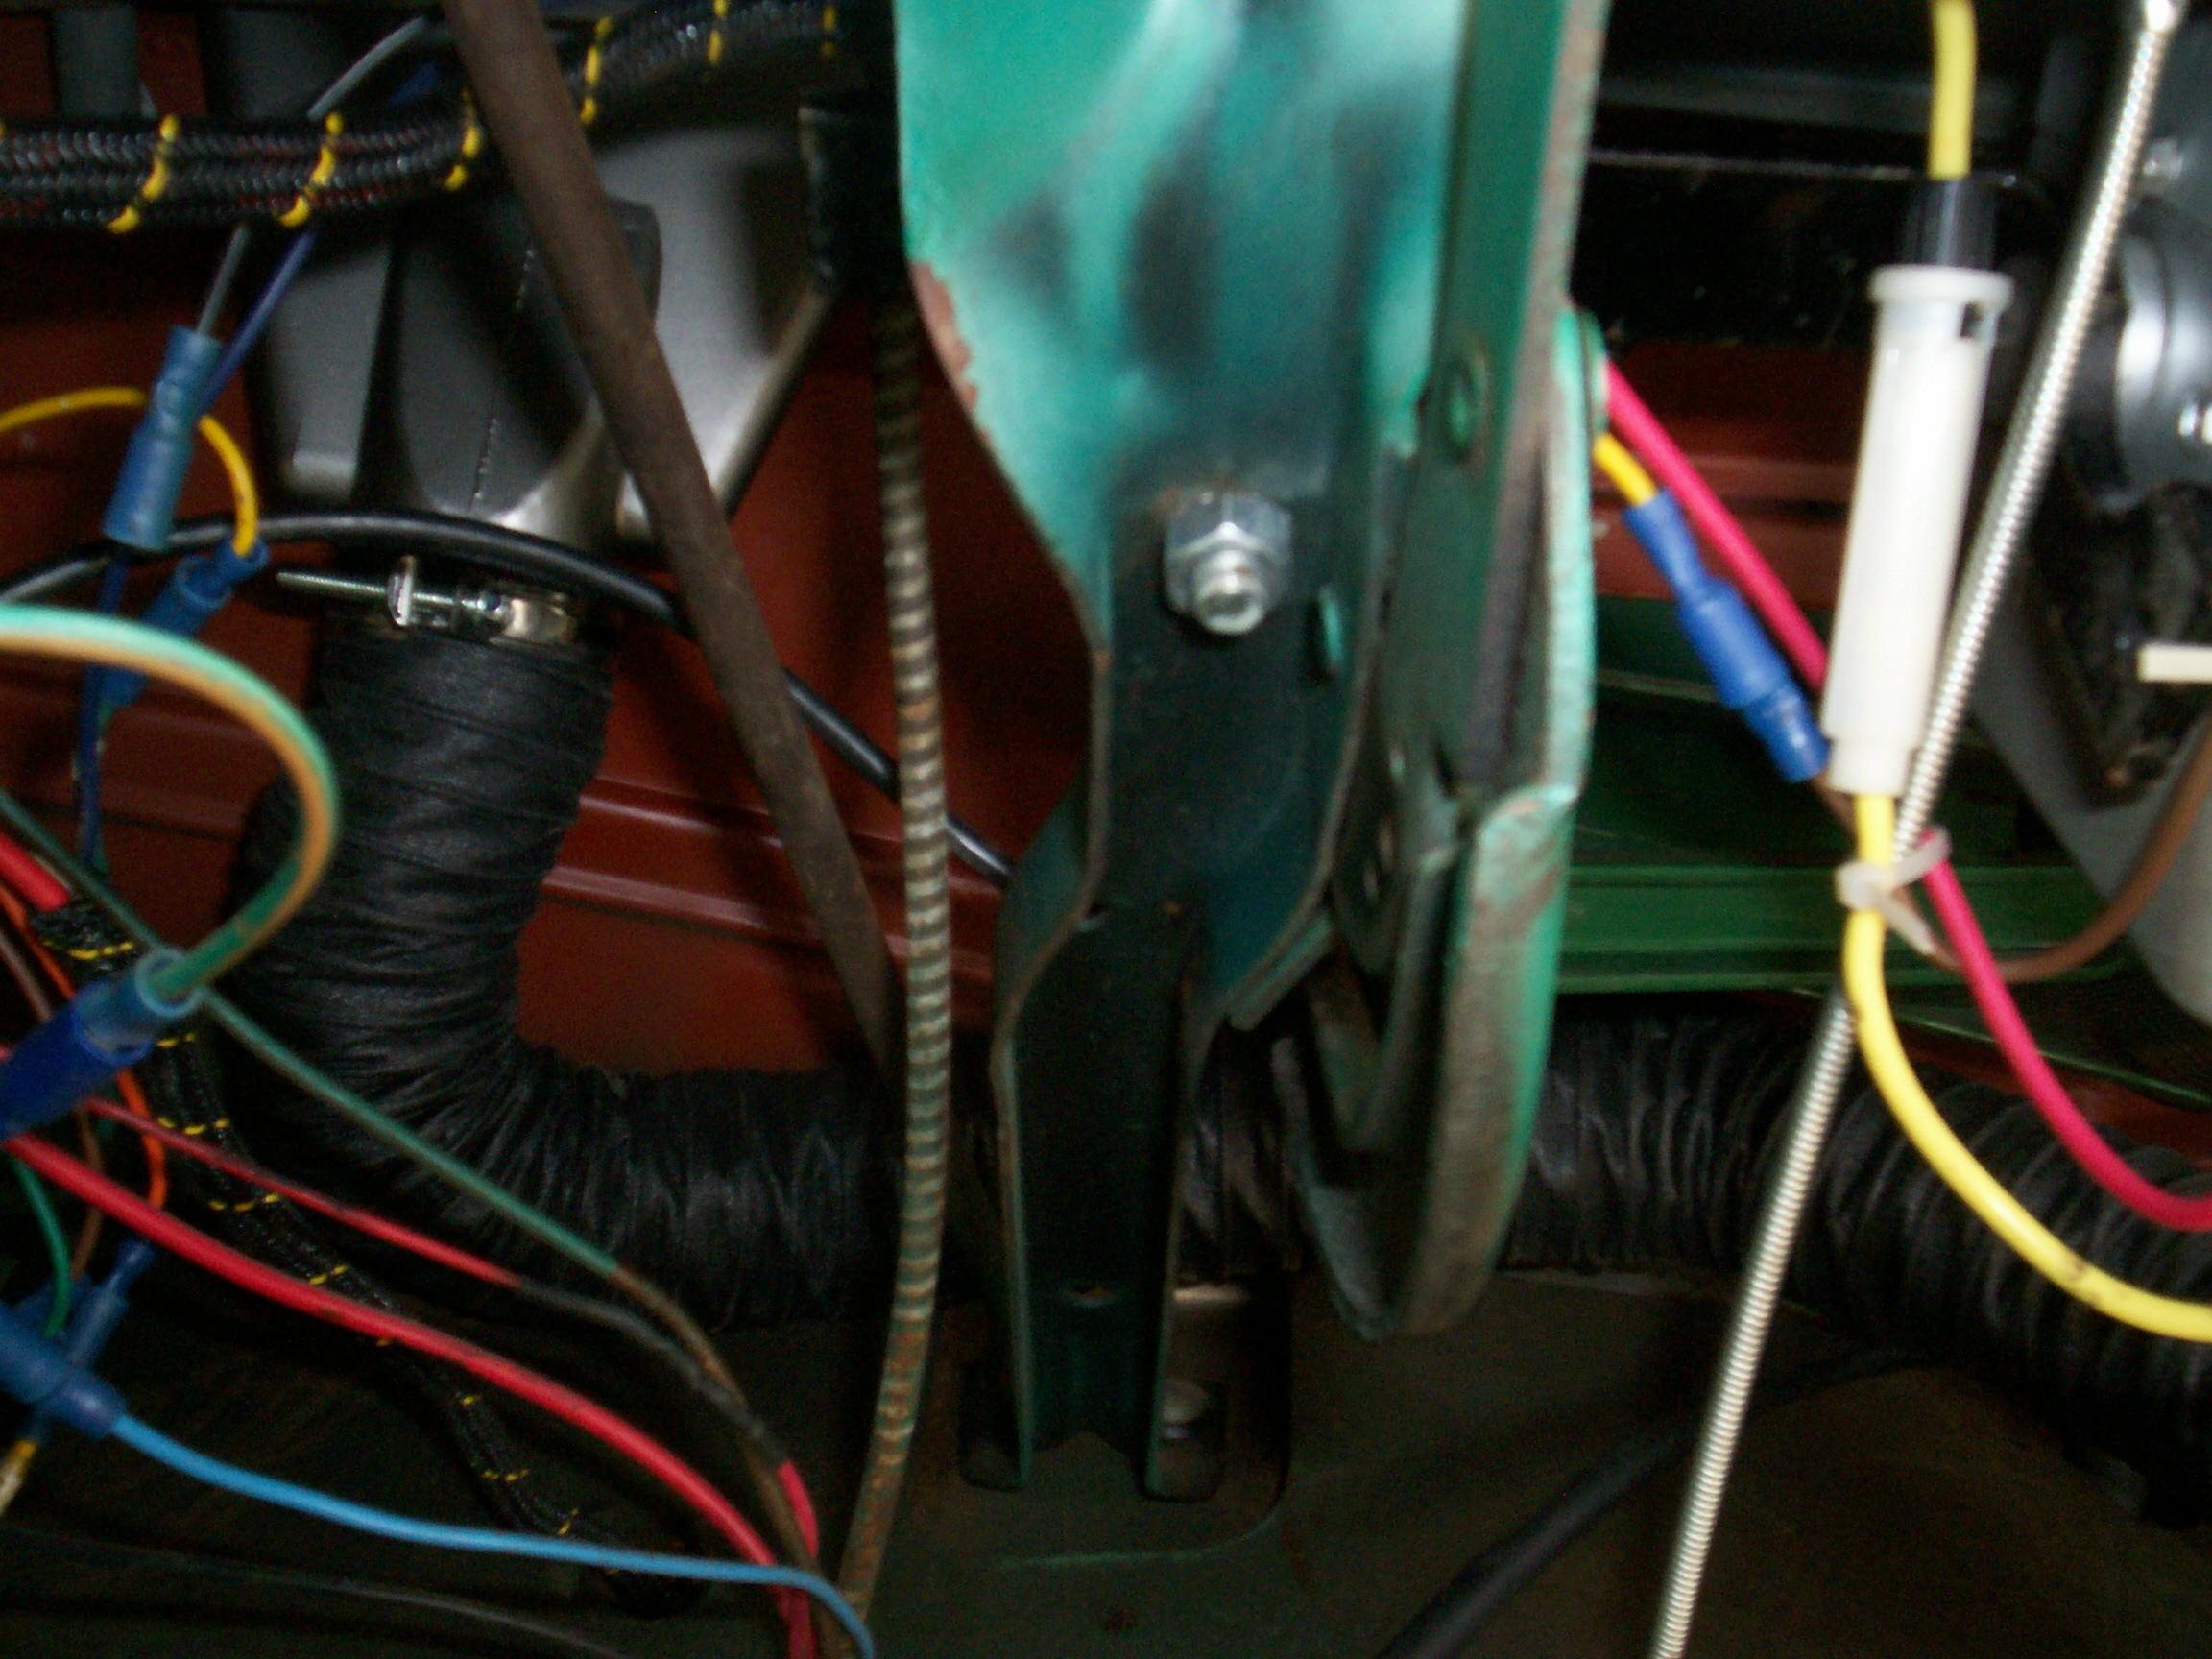 The
heater hose was installed on the driver side vent with a hose clamp I
had in one of my spare parts boxes. I believe these heaters were
installed at the dealership so the dash gauges and wiring would already
be in place. The clip and screw connectors really help in this cramped
working space. The screw can be started first from the bottom. The vent
can be worked into place at the clip end and then the screw slot end
can be rotated onto the started screw. finally the screw can be
tightened. I'ts a five minute operation.
The
heater hose was installed on the driver side vent with a hose clamp I
had in one of my spare parts boxes. I believe these heaters were
installed at the dealership so the dash gauges and wiring would already
be in place. The clip and screw connectors really help in this cramped
working space. The screw can be started first from the bottom. The vent
can be worked into place at the clip end and then the screw slot end
can be rotated onto the started screw. finally the screw can be
tightened. I'ts a five minute operation.
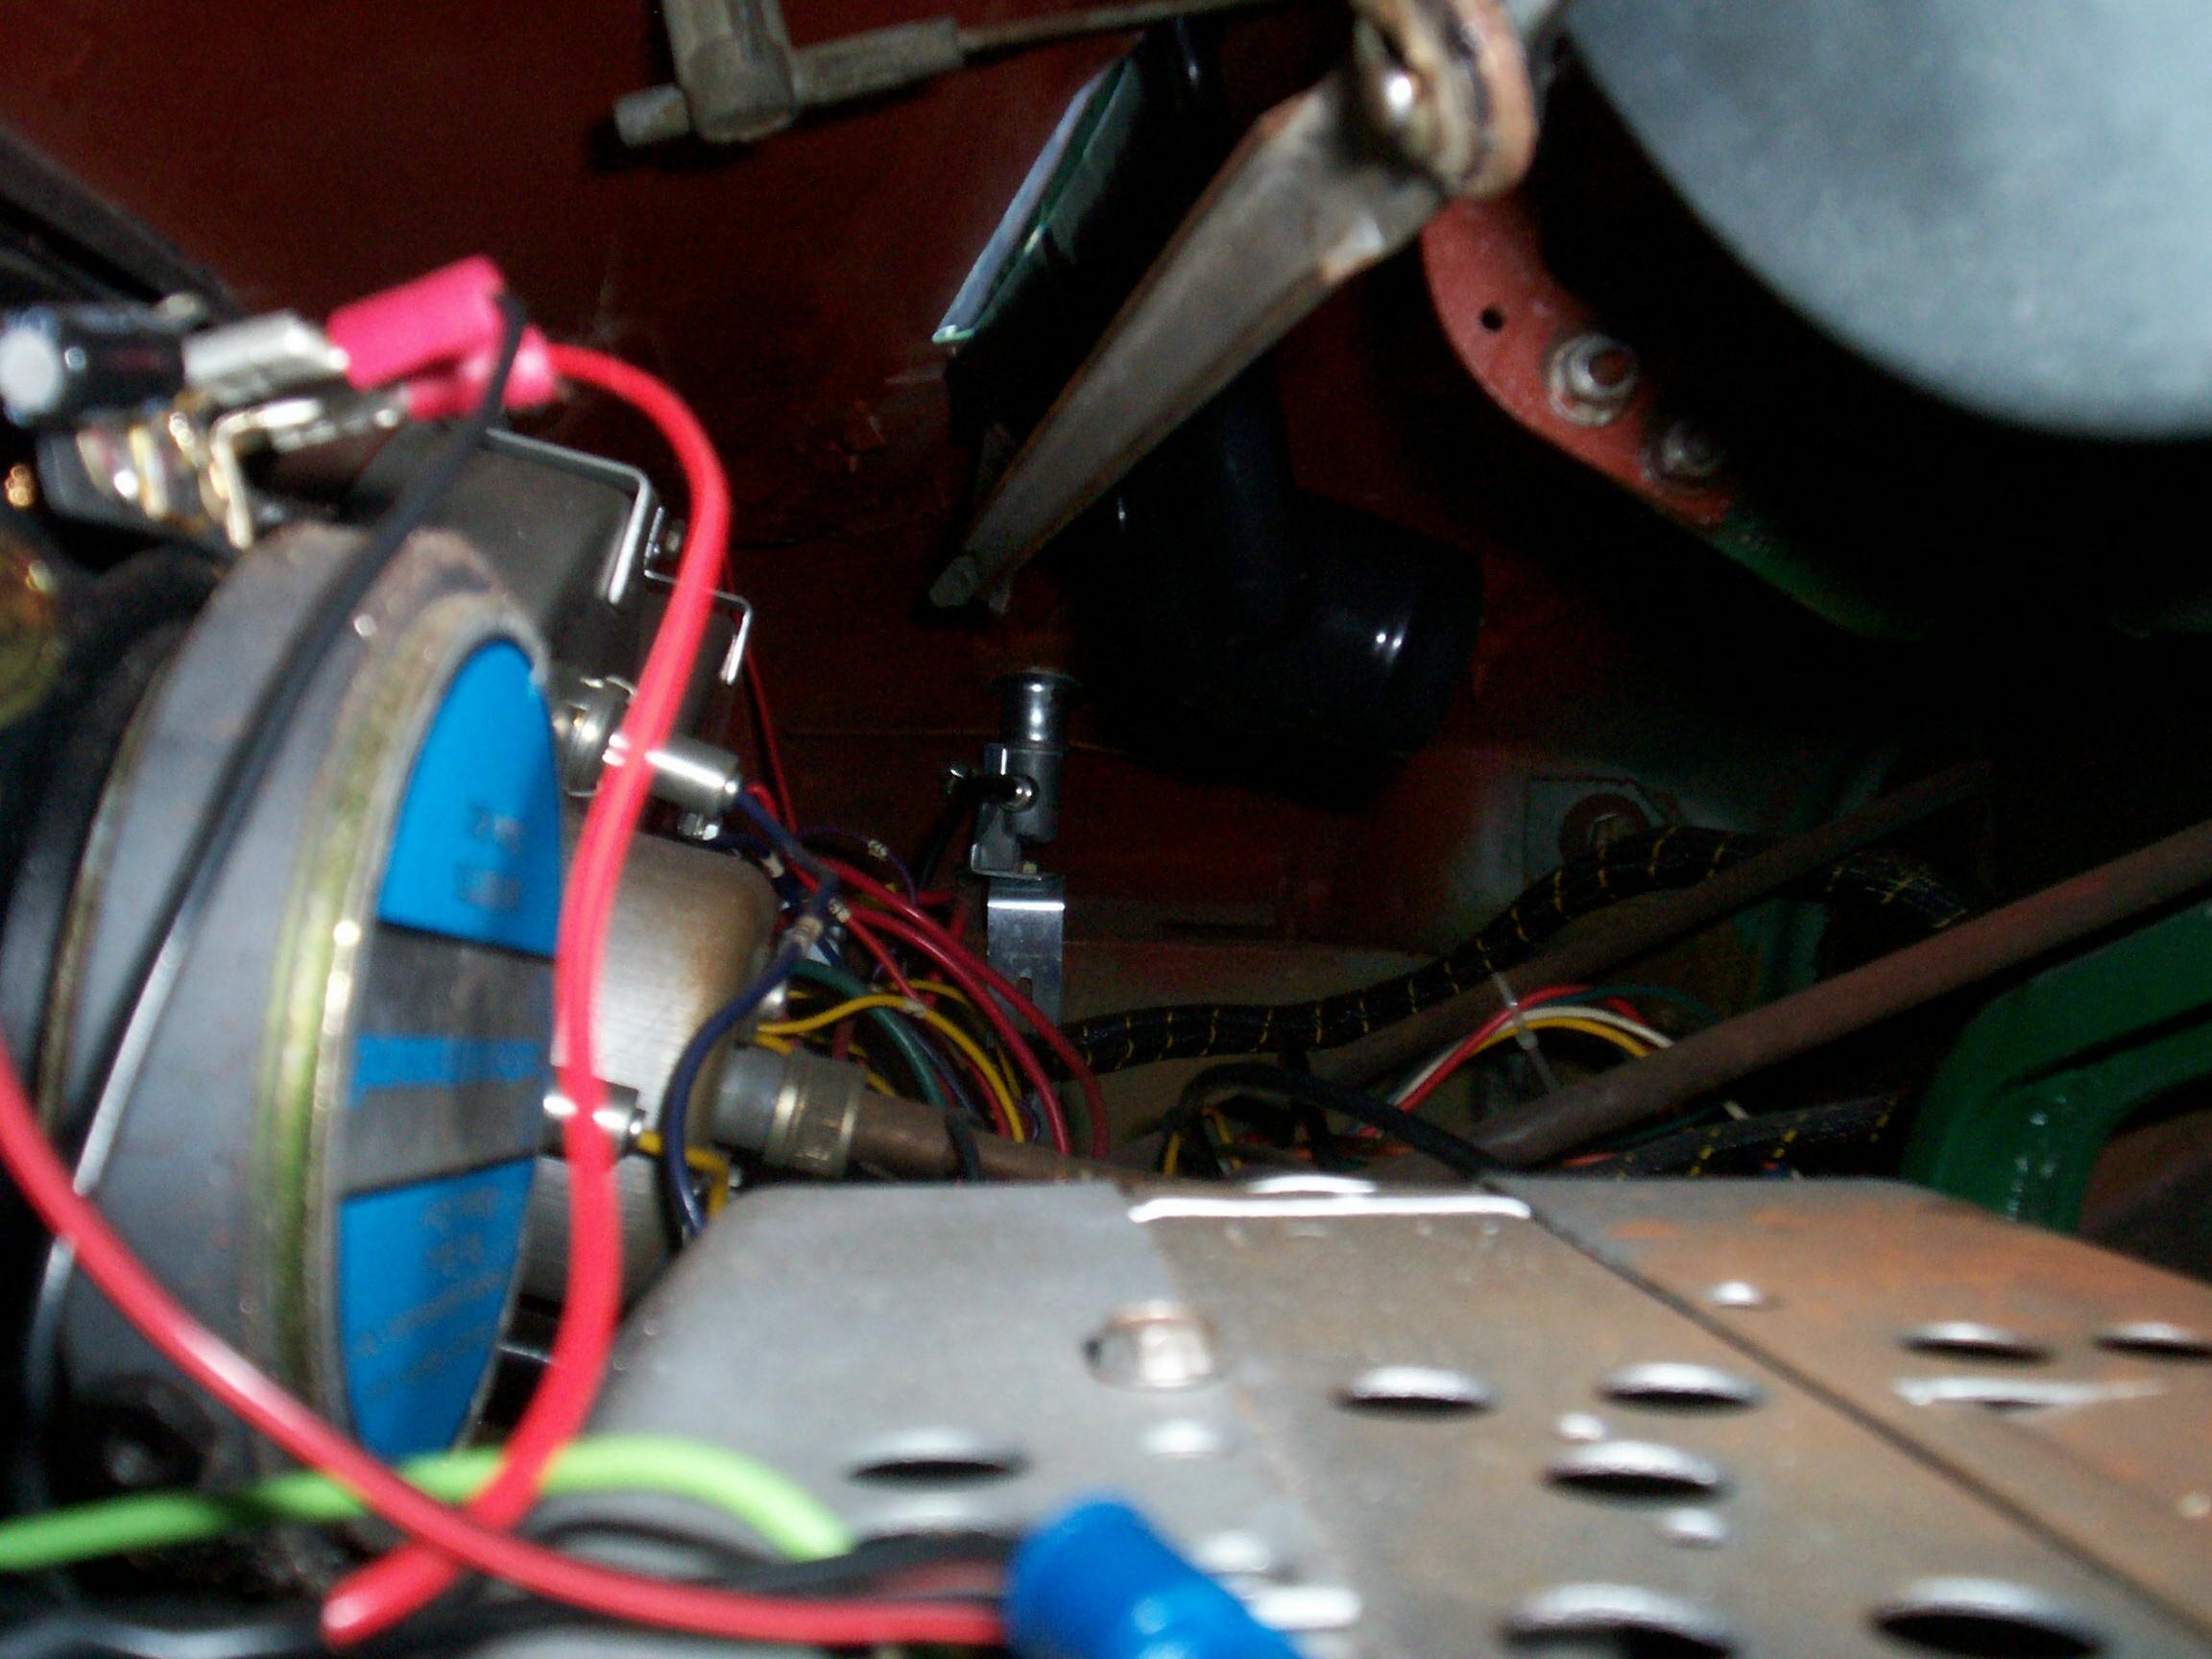
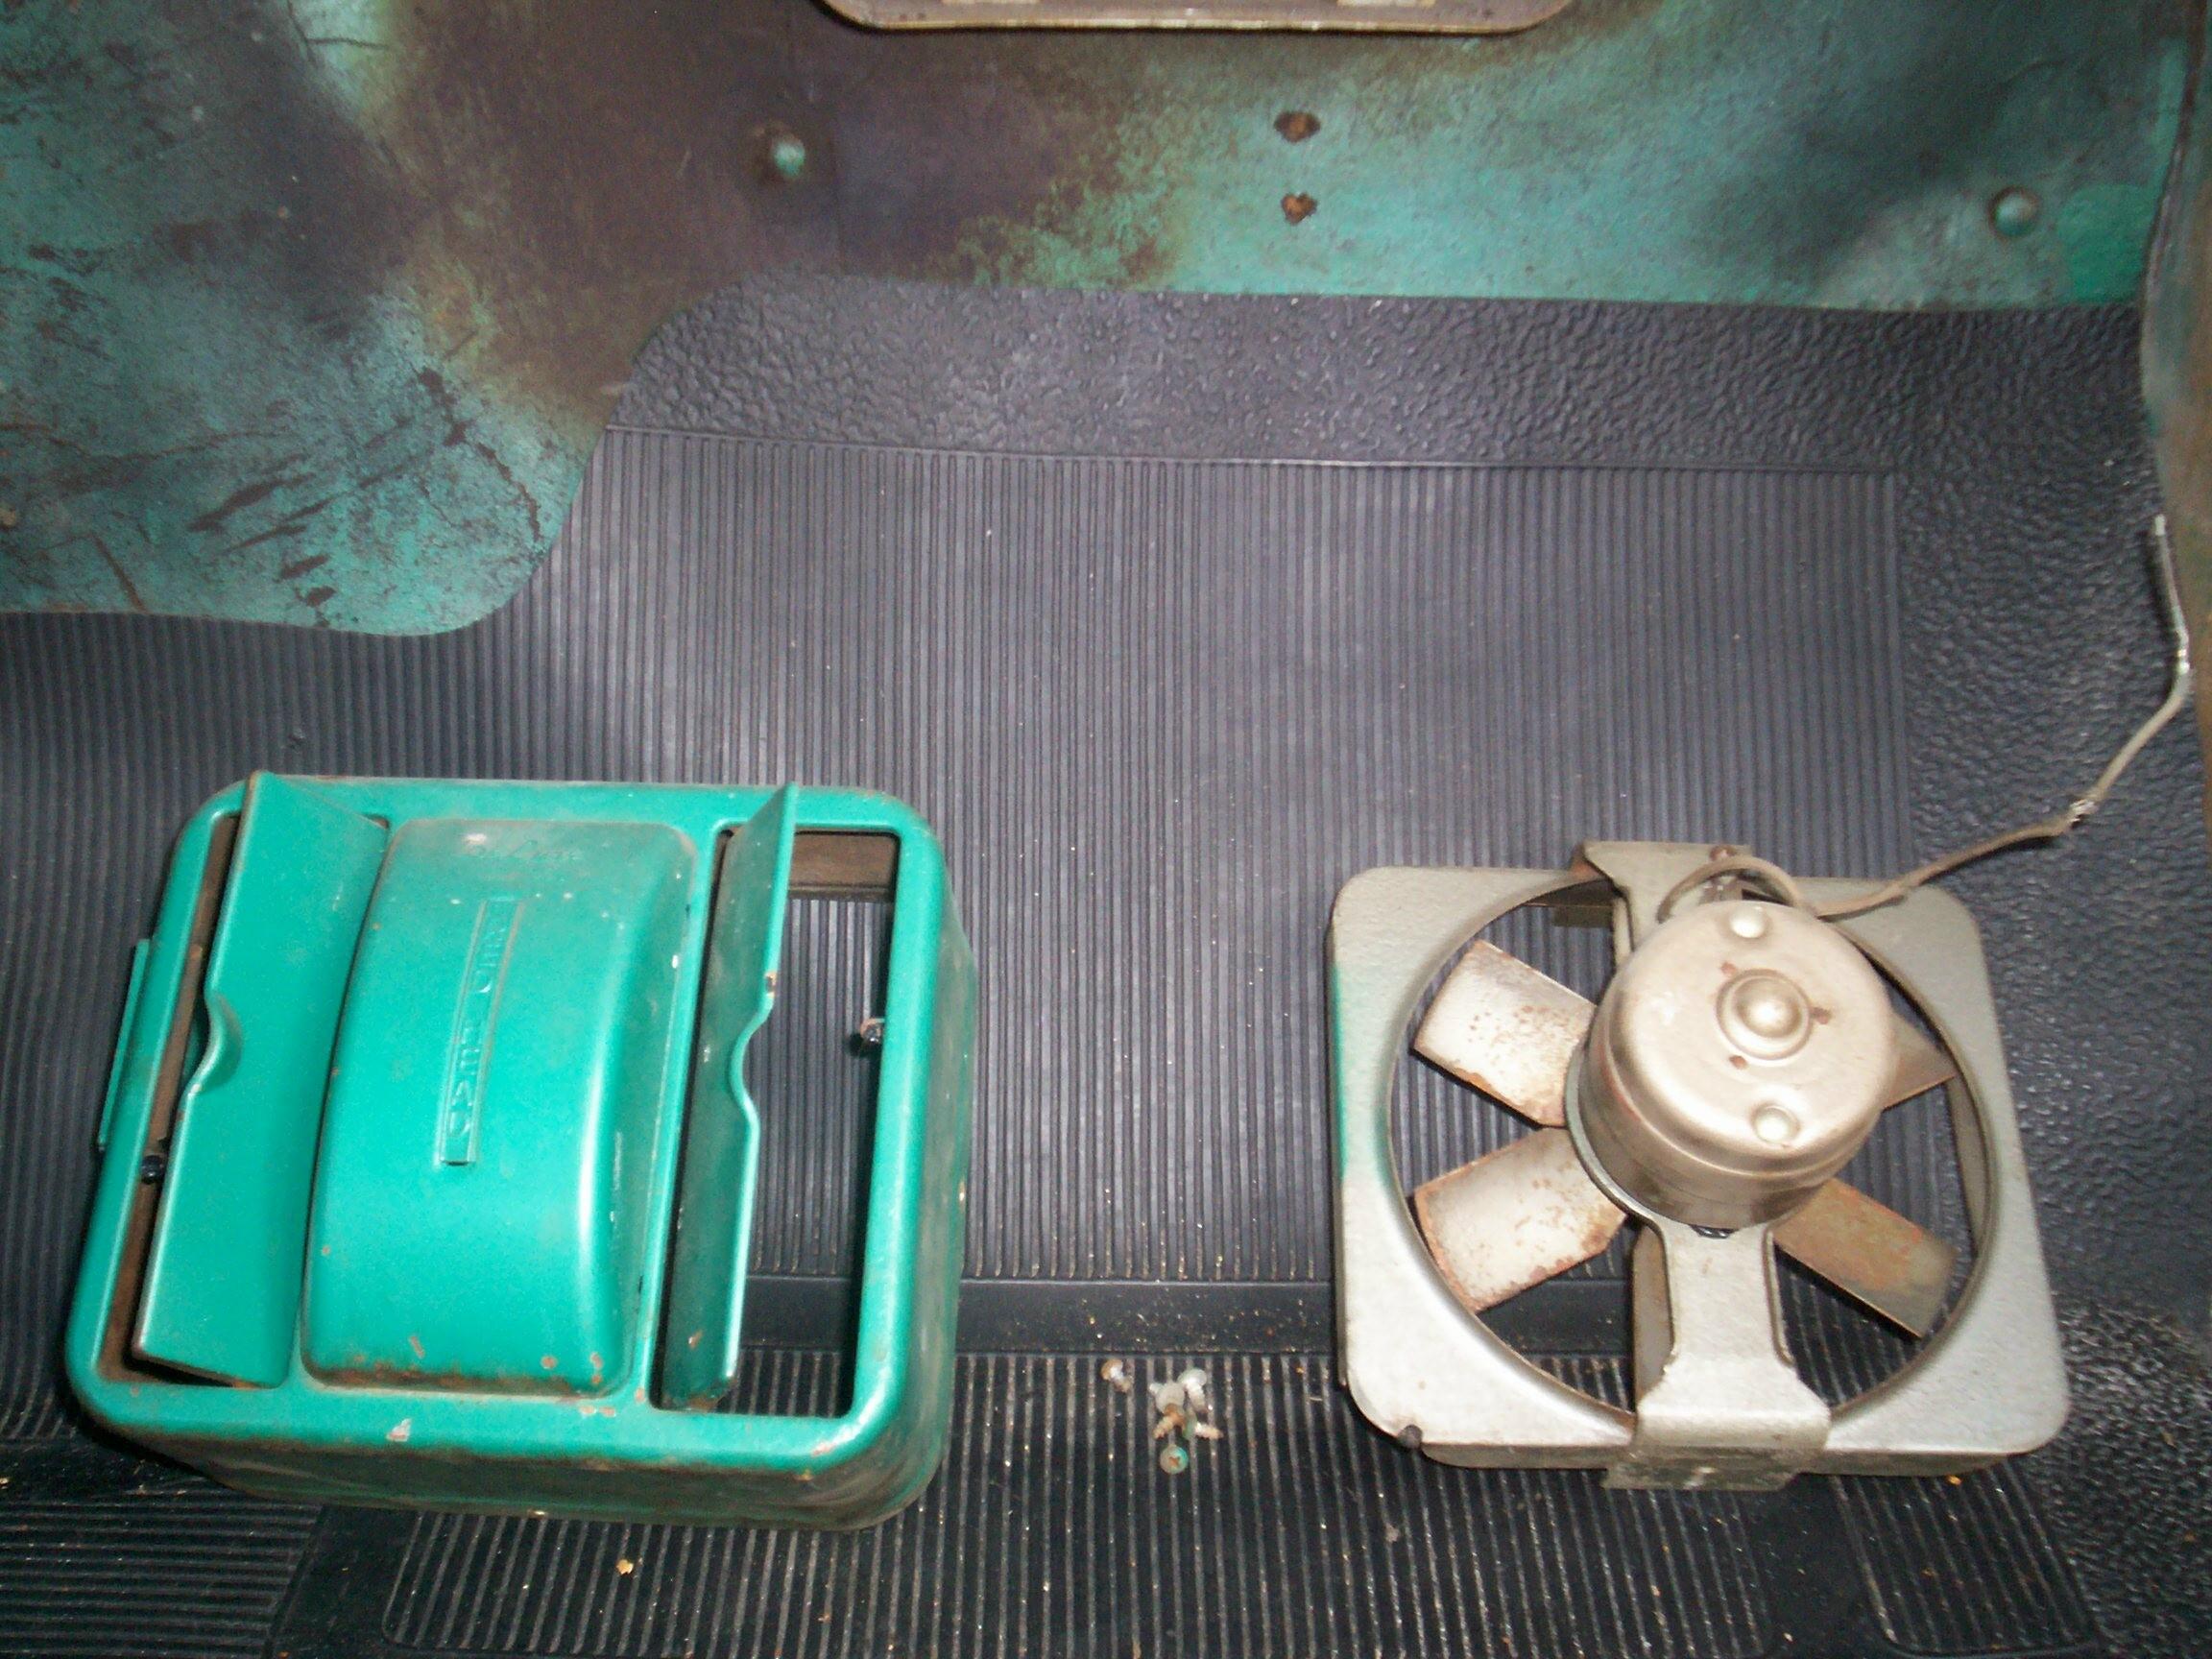 I
looked my generic heater box over and discovered I could get the fan
off without disturbing the heater core or the plumbing. I took it off
to replace its frayed wiring. I want to get a switch and fuse and wire
this thing up to provide heat to the driver side defroster vent until
I'm ready to replace it with a deluxe fresh air heater sometime down
the road.
I
looked my generic heater box over and discovered I could get the fan
off without disturbing the heater core or the plumbing. I took it off
to replace its frayed wiring. I want to get a switch and fuse and wire
this thing up to provide heat to the driver side defroster vent until
I'm ready to replace it with a deluxe fresh air heater sometime down
the road.
 December
26th 2007 I had what I
thought were modest plans for the long Christmas weekend in the
shadetree garage and, as is often the case, I didn't come anywhere
close to realizing them. Good weather was forecast and I wanted to
clean and wax all three vehicles. I worked three days on BillyBob and
only got him half done. Saturday and sunday were spent running the
Flitz ball polisher in my hand drill over the cab, hood and front
fenders. I wuz out of Flitz polish before I got to the rear of the
truck. On Christmas Eve I applied Meguiar's NXT Generation Spray Wax
and buffed it out with another Flitz ball. That only took a couple of
hours, not near as labor intensive as the polishing action. BillyBob
was looking as good as I've ever had him for the Christmas dinner run
up to Stuart on Tuesday. Also performed monthly maintenance on both
BillyBob and Renegade before packing it in for the day.
December
26th 2007 I had what I
thought were modest plans for the long Christmas weekend in the
shadetree garage and, as is often the case, I didn't come anywhere
close to realizing them. Good weather was forecast and I wanted to
clean and wax all three vehicles. I worked three days on BillyBob and
only got him half done. Saturday and sunday were spent running the
Flitz ball polisher in my hand drill over the cab, hood and front
fenders. I wuz out of Flitz polish before I got to the rear of the
truck. On Christmas Eve I applied Meguiar's NXT Generation Spray Wax
and buffed it out with another Flitz ball. That only took a couple of
hours, not near as labor intensive as the polishing action. BillyBob
was looking as good as I've ever had him for the Christmas dinner run
up to Stuart on Tuesday. Also performed monthly maintenance on both
BillyBob and Renegade before packing it in for the day.
Last year I recorded the Christmas dinner run up the coast as a Travels with BillyBob episode. This year was similar. I changed our course to cut down a bit on the driving time. Went up the Florida Turnpike from Boca Raton to Jupiter. Ran east from there on Indiantown Road to U.S. Route 1 then north again into Stuart. Reversed the same course to come home again but someone screwed the pooch in Boynton Beach and the accident caused a forty minute, bumper-to-bumper crawl. Not much fun with BillyBob's marginal clutch and cranky three-on-the-tree shifter. We did make it home safe and sound by nine pm in time for a Christmas call from brother JR.
December 31st 2007 New Year's Eve Lazy day under the shadetree. I've already squandered two good work days an' I'm maintaining that pace fer the rest of the year. Had big plans for this four day holiday but the last of the season's parties got me off on the wrong foot. On friday, we shut down the office at three in the afternoon and proceeded to consume all the gift baskets our clients have sent us for the Christmas season. It's become a tradition for our office. I'm not a wine guy and there was a lot of the stuff to dispose of. Didn't work on BillyBob at all on saturday and yesterday all I did was to hook up the plain vanilla box heater fan with a toggle switch and inline fuse holder so I can get defroster heat to the windshield.
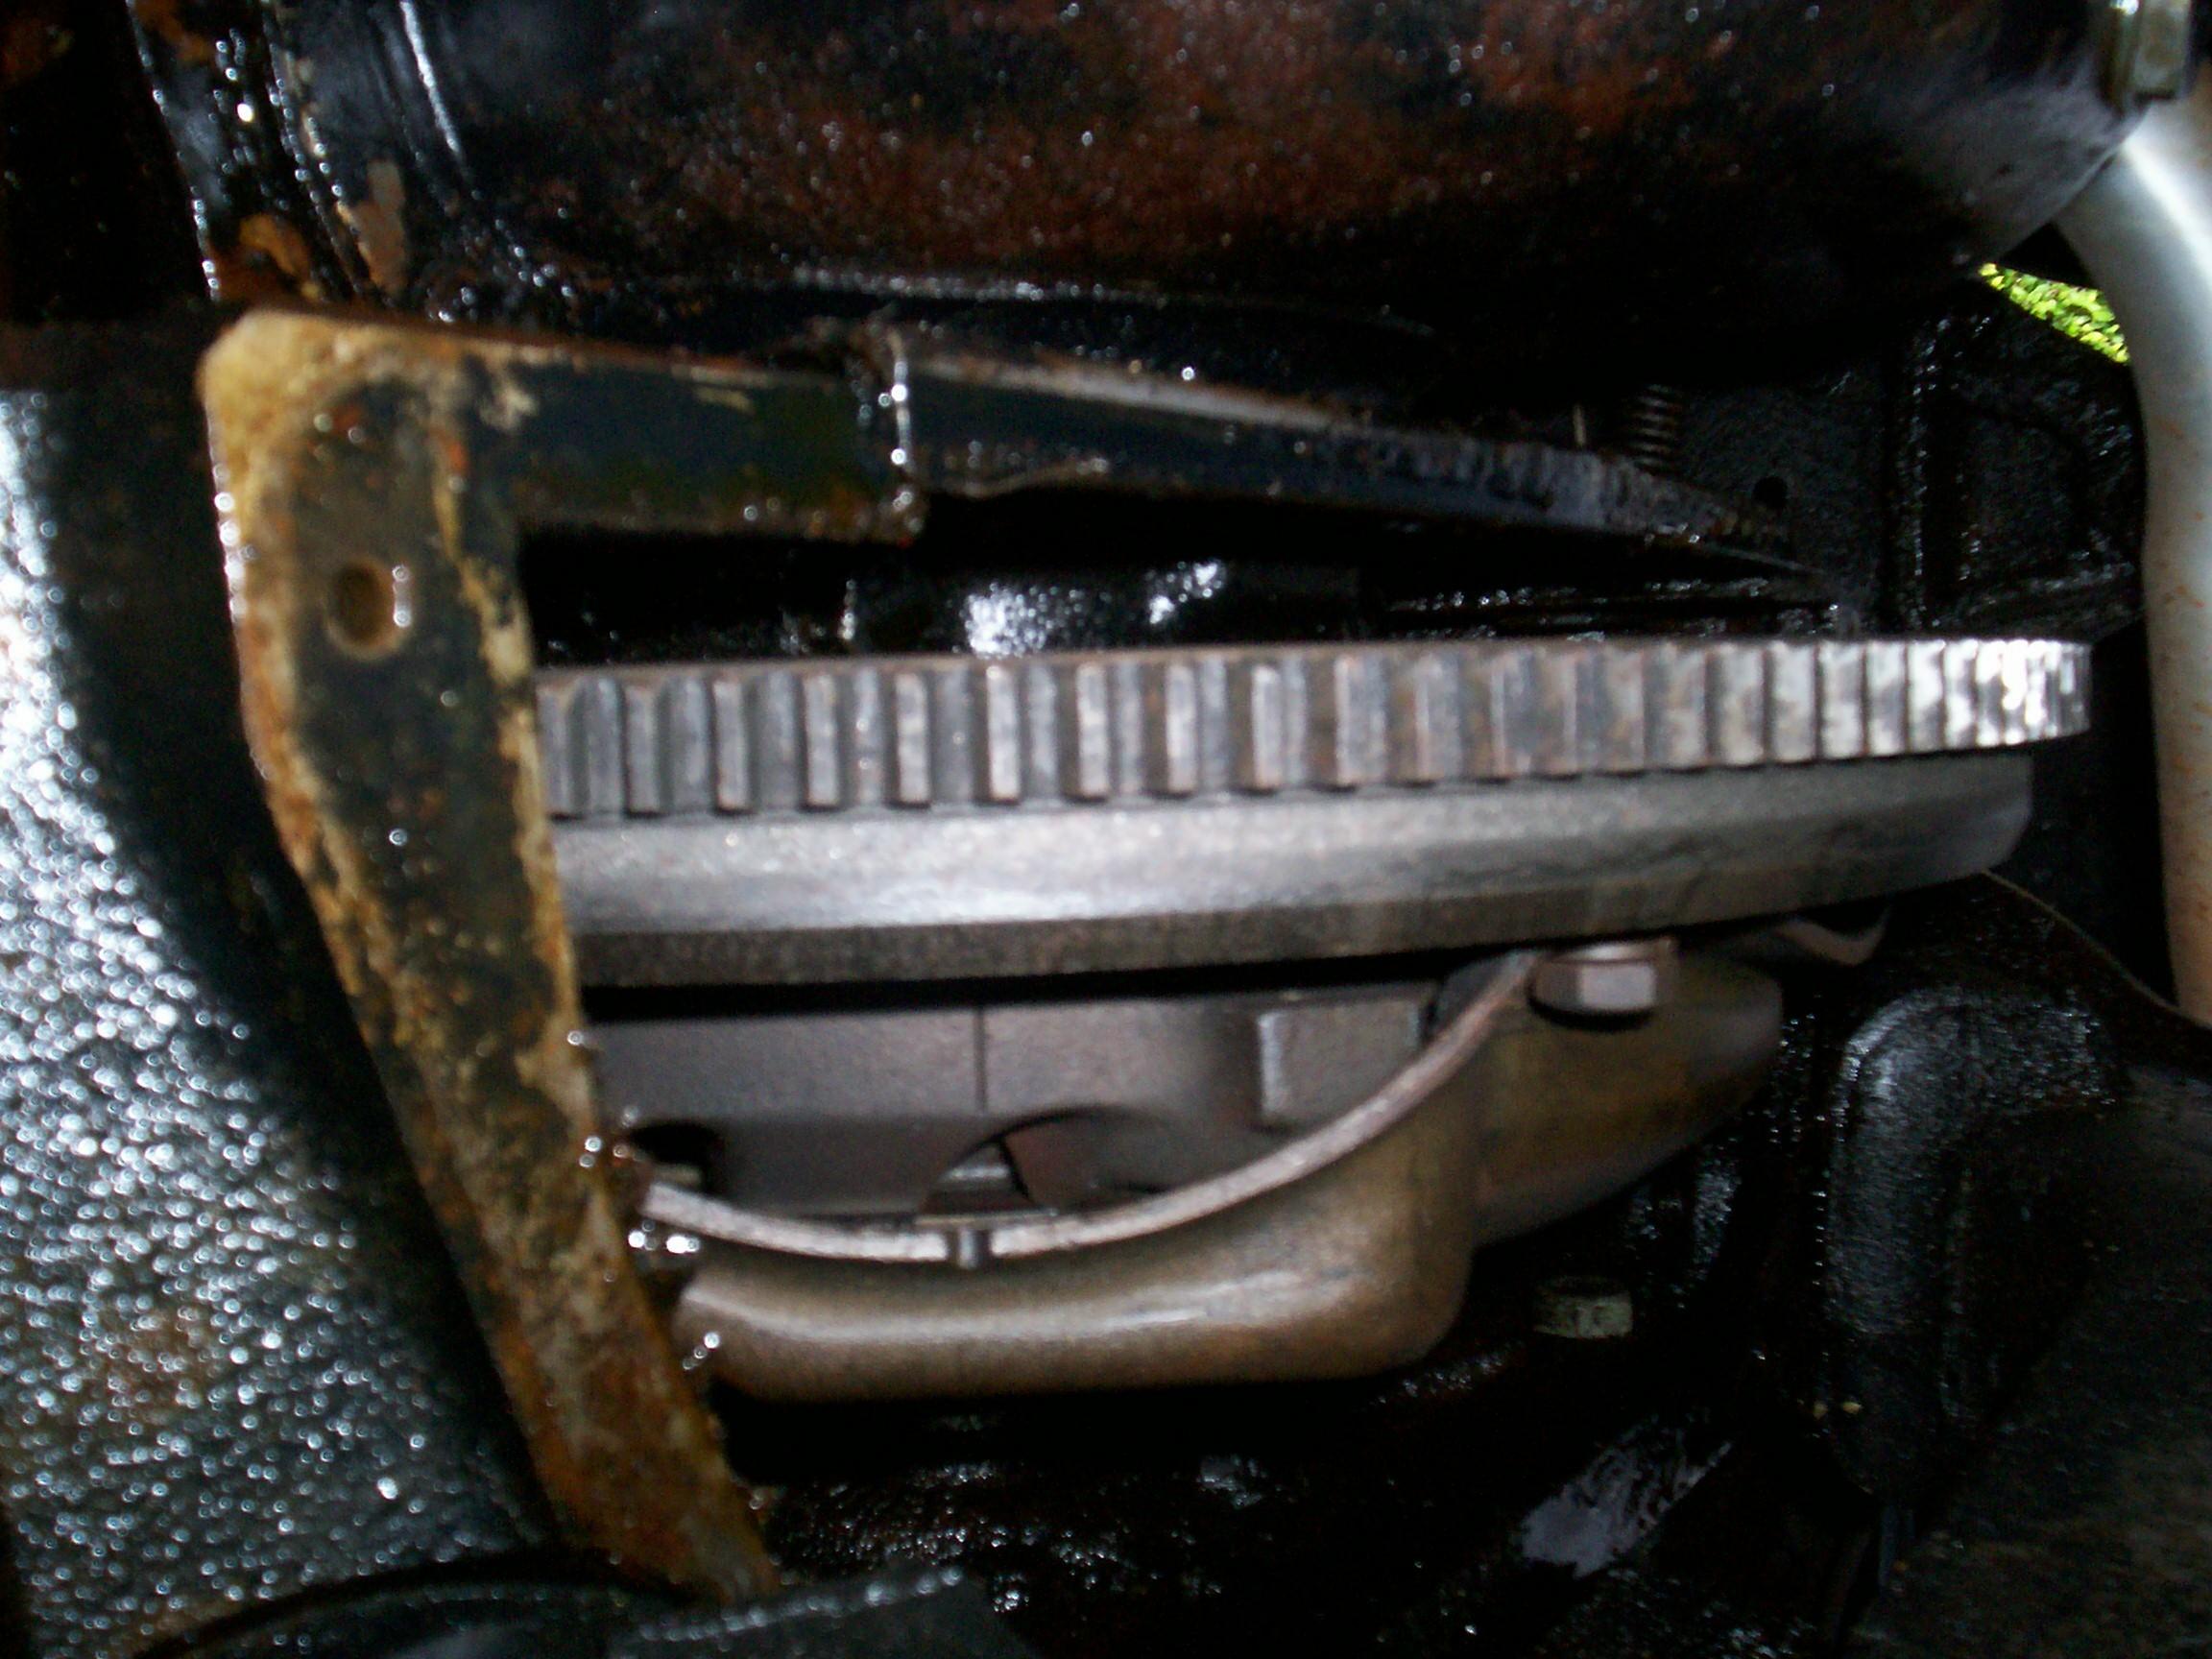 After
I got my coffee and smoked a cigar this morning, I crawled under the
truck to remove the sheetmetal clutch cover on the bottom of the
bellhousing. I knew this thing was held on by four "stovebolt" machine
screws but was concerned about the rear pair as they were about two
inches above the crossmember and I didn't know how I was to get a
screwdriver in there. Only took a closer look at the situation to
discover that there are holes in the crossmember directly below the
screws big enuf to run a screwdriver thru. Had the greasy durn thing
off in a couple of minutes. There's a lot of wet, oily sludge here but
I'm happy to see none of it is dripping off the flywheel.
After
I got my coffee and smoked a cigar this morning, I crawled under the
truck to remove the sheetmetal clutch cover on the bottom of the
bellhousing. I knew this thing was held on by four "stovebolt" machine
screws but was concerned about the rear pair as they were about two
inches above the crossmember and I didn't know how I was to get a
screwdriver in there. Only took a closer look at the situation to
discover that there are holes in the crossmember directly below the
screws big enuf to run a screwdriver thru. Had the greasy durn thing
off in a couple of minutes. There's a lot of wet, oily sludge here but
I'm happy to see none of it is dripping off the flywheel.
January 5th 2008 Overcast and windy today. Gonna work on little things and since it's the beginning of a brand new year, it's time again to start the inventory reorganization drill at the Krash Lab, Krash Pad and BillyBob warehouse too.
Worked on a shifter problem on Renegade during the morning. After the Powerblock TV segment and a few Flying Dog Classic Pale Ales, I turned to BillyBob. Earlier in the week, on the way to the Krash lab, BillyBob's turn signals quit working. When I got to the Krash Lab, I discovered that they were working but the indicator light in the turn signal director was not. They were flashing faster than normal too. I figure either it's a flasher malfunction or the light in the director went south. Since I still have the wiring behind the dashboard for the OEM turn signals, it was a simple matter of disconnecting the wire on the "P" terminal of the flasher from the turn signal director and connecting it to the wire coming from the indicator bulb in the speedo gauge housing. Since I have bullet connectors on all these wires, it took all of ten seconds under the dash. That worked and the flashing speed is back to normal. And that's all I got done before it started raining.
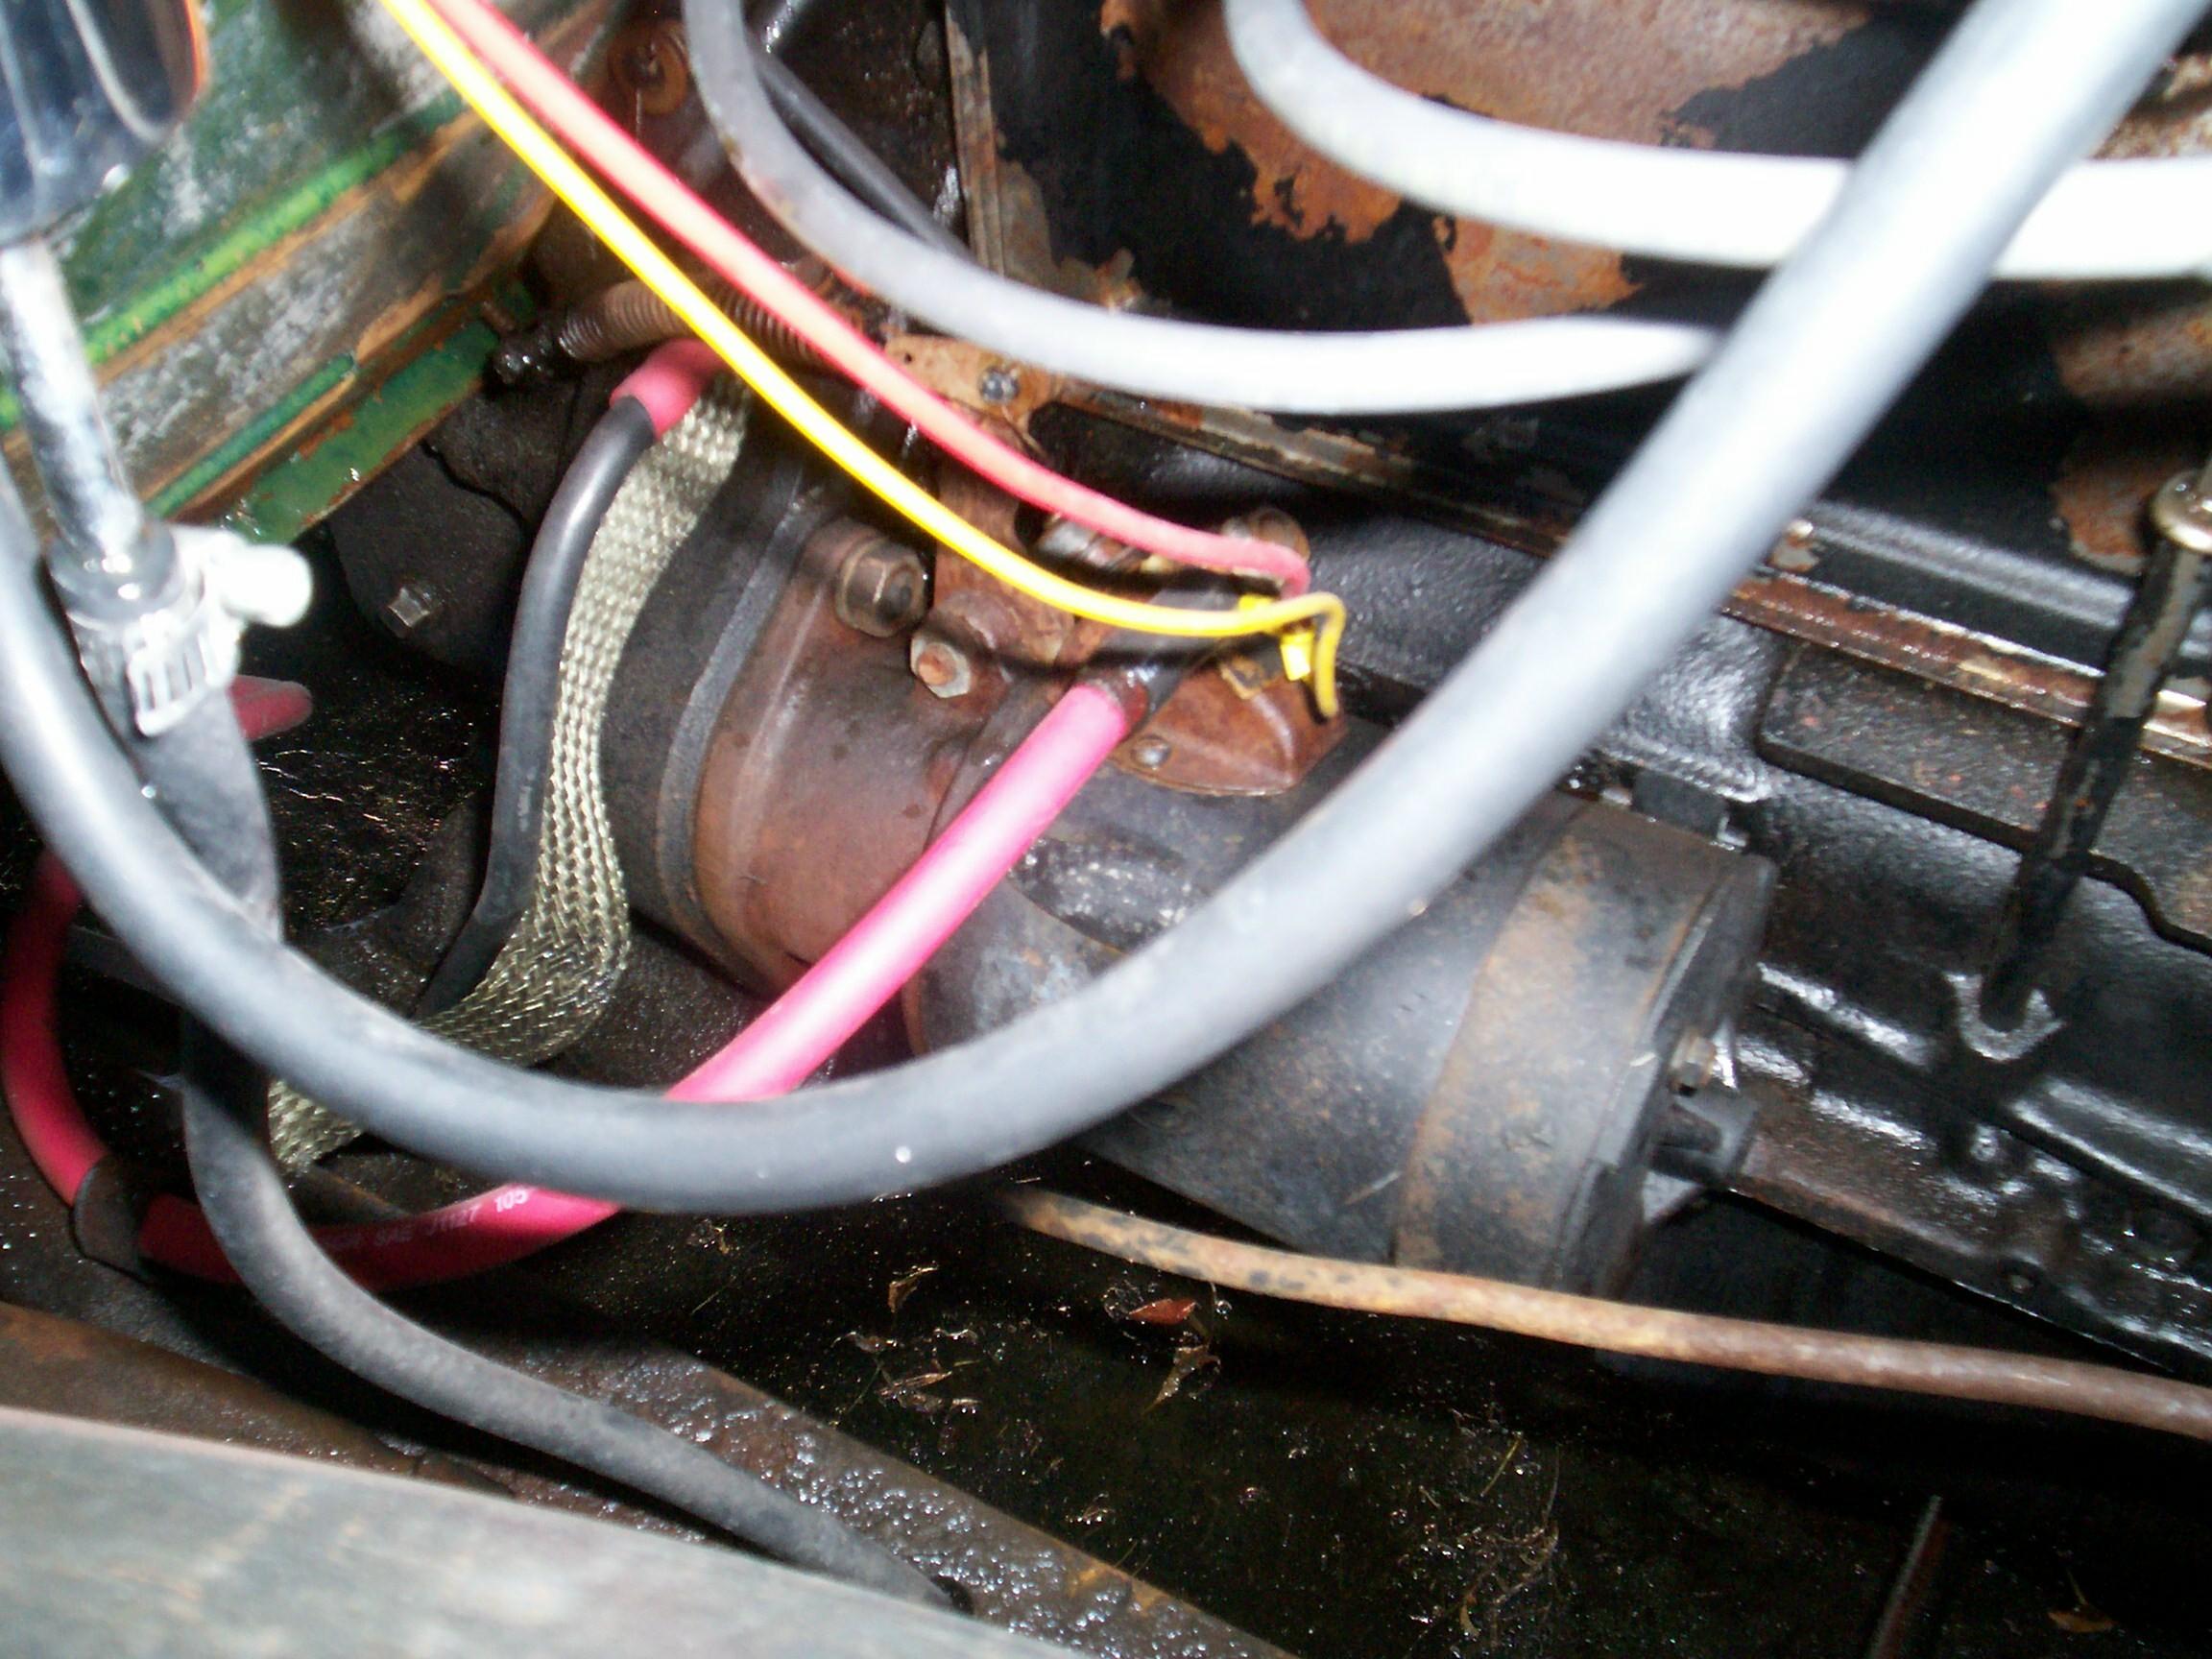
January 9th 2008 Had a dentist appointment this morning. When I came out, I had trouble getting BillyBob started. For some time now, BillyBob's starter has been making a weird run-on clatter after the engine has started and I've released the mash button. Sometimes, there is a hard clunk when it engages too. These two symptoms are different from the clatter it makes when the starter fails to catch a tooth on the worn ringgear. Today wuz different. On the first start attempt, the starter ran strong and the engine ignited but didn't stay running. The second try got the clunk and it didn't stay running again (the timing is too advanced for an easy start sometimes). Third try was a complete dead spot - no activity from the starter at all! That's new! Took a couple of more trys with both strong starter and dead spot starter attempts before I got him running. Went straight to the Krash Lab and locked him up. First order of bizness this weekend will be to switch out starters. Good thing fer me that I got the Jeep running so's I don't have to fly on a wing and a prayer with BillyBob fer the rest of the week.
 January
12th 2008 Good weather
day under the tree today. Last sunday was a good weather day too but I
went the the Kruse
collector car auction in Fort Lauderdale with my boss and his
son and didn't get any work done on BillyBob. First thing this morning,
I dragged out the air compressor, hose and grimeblaster and did a
degreasing session on the worst of the sludge buildup at the back of
BillyBob's engine, particularly in the area of the starter motor.
January
12th 2008 Good weather
day under the tree today. Last sunday was a good weather day too but I
went the the Kruse
collector car auction in Fort Lauderdale with my boss and his
son and didn't get any work done on BillyBob. First thing this morning,
I dragged out the air compressor, hose and grimeblaster and did a
degreasing session on the worst of the sludge buildup at the back of
BillyBob's engine, particularly in the area of the starter motor.
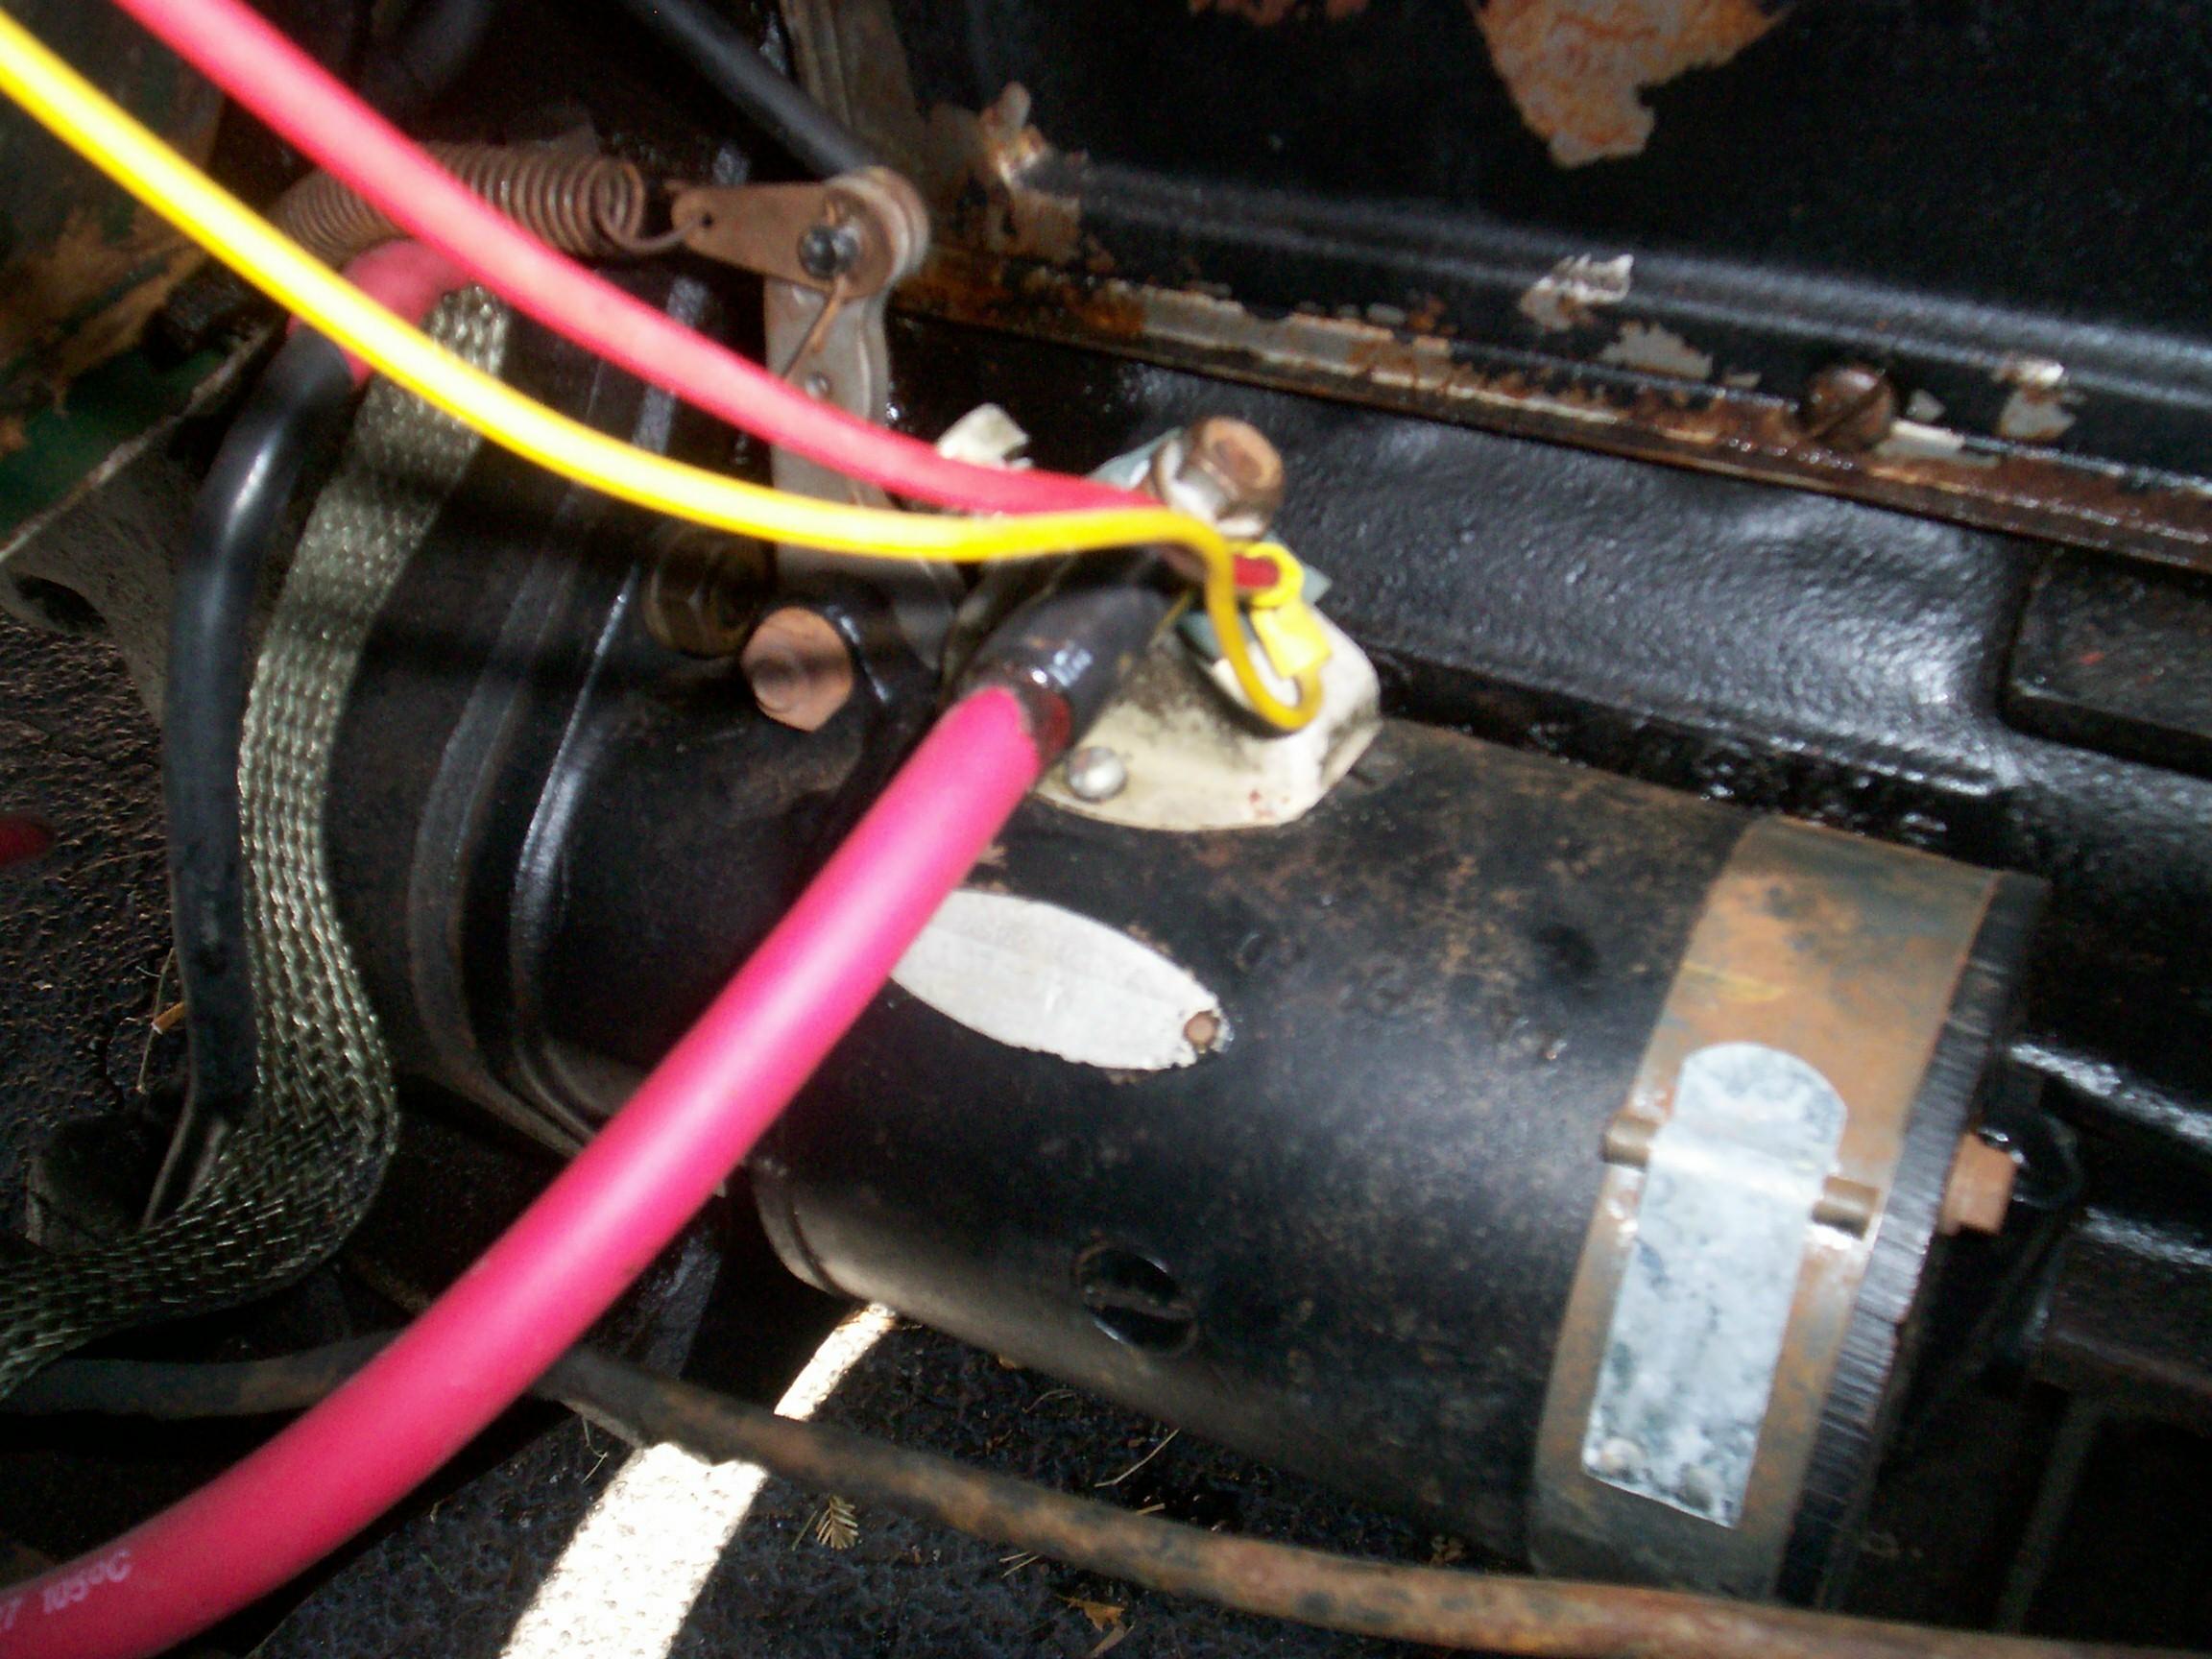 After
the degreasing, I moved BillyBob to a dry spot. I think I've pushed the
old starter 'bout as far as I can. BillyBob's been sitting since I came
back from the Dentist a few days ago and I had a few minutes trouble
getting him going. had those same starter dead spots I had at the
dentist office. When I got him to a dry spot in the parking lot, it
only took a few minutes to swap the starter with my spare that I had
stored away in the travel box up at the warehouse. The spare was a
rebuild from an older starter and it has a oil cup at the front
bearing. I put a drop of oil in and will add it to my quarterly
maintenance routine.
After
the degreasing, I moved BillyBob to a dry spot. I think I've pushed the
old starter 'bout as far as I can. BillyBob's been sitting since I came
back from the Dentist a few days ago and I had a few minutes trouble
getting him going. had those same starter dead spots I had at the
dentist office. When I got him to a dry spot in the parking lot, it
only took a few minutes to swap the starter with my spare that I had
stored away in the travel box up at the warehouse. The spare was a
rebuild from an older starter and it has a oil cup at the front
bearing. I put a drop of oil in and will add it to my quarterly
maintenance routine.
January 13th 2008 Cloudy this morning. The rebuilt starter likes the wornout flywheel ringgear less than the old one. So far, it is more likely to clatter while trying to grab a tooth. It's a real irritant. I've got a lead on a spare flywheel from a salvage yard. I won't be driving BillyBob quite as much until I get this problem cleared up. I used the Flitz ball and polish on BillyBob's rear fenders and bedsides. Washed BillyBob and parked him across the lot from the shadetree to keep bird droppings off him. Next saturday the boss wants to tag team at a car show here in Boca Raton. He'll be taking the '39 Caddy and I'll be taking BillyBob. I'll be back working on the interior and driveline issues on the other side of that.
| < Back
to Intro |
You can email me at ![]() webmaster@laroke.com
webmaster@laroke.com
Issued Tuesday January 15, 2008
Updated Monday April 2, 2018
copyright © 1996-2018 Larry Robert Kephart all rights reserved
| | LRK Home | | Bio Info | | Krash Khronicles | | LAROKE | |
| | BettyLou | | BillyBob's Garage | | Rat Patrol | | Deerslayer | | Elvira | |
| | Land of the Free and Home of the Brave | |
| | Keppylou's Art | | WWI Soldier's Diary | |