| | LRK Home | | Bio Info | | Krash Khronicles | | LAROKE | |
| | BettyLou | | BillyBob's Garage | | Rat Patrol | | Deerslayer | | Elvira | |
| | Land of the Free and Home of the Brave | |
| | Keppylou's Art | | WWI Soldier's Diary | |
BillyBob Work-in-Progress Log
![]()
TRUCK LINKS including vendor sites for old parts, custom parts, and tools as well as sites for classic car and truck organizations
STORE Operating in association with Amazon.com, books, recordings and tools can be purchased.
PLANNING for the restoration including project schedule and cost estimates.
![]()
WORK-IN-PROGRESS is the restoration of parts of BillyBob that I can accomplish without a garage.
PRE-RESTORATION includes log entries of minor repairs and and adventures between time of purchase and the time when I started restoration, a piece at a time.
JR'S KORNER JR's Korner is the history of BillyBob before I got him authored by my brother, Wm. C. Kephart.
![]()
BILLYBOB MAINTENANCE Ever changing detailing, oil change, lube, etc. maintenance routines specifically developed for BillyBob, including required tools, materials and procedures.
STEALTH SHOP Urban residence design with large integrated shop and separate living quarters for a relative or renter.
24. Water Pump Blues
May 11th 2003 On Friday I visited All American Welding Supply in Pompano Beach, Florida. This place was closed the first time I tried on Good Friday. I am completely new to welding so I got some "novice noogies" from the guy behind the counter when I didn't know exactly what I was after. To be honest, I'm much tougher on people who ask me questions about my area of expertise (computers). After we decided on a 20 cu ft bottle of 75% argon/25% CO2 mixture of shielding gas, he headed out the door to get it . . . Then he saw BillyBob, had an attitude adjustment and ramped up into friendly mode. On my way out I gave him a BillyBob business card with directions to this website. Yesterday, I performed brake adjustment and bleeding maintenance on BillyBob and then started setting up the Lincoln SP-135 Plus welder I purchased back in January from TP Tools.
 I'm
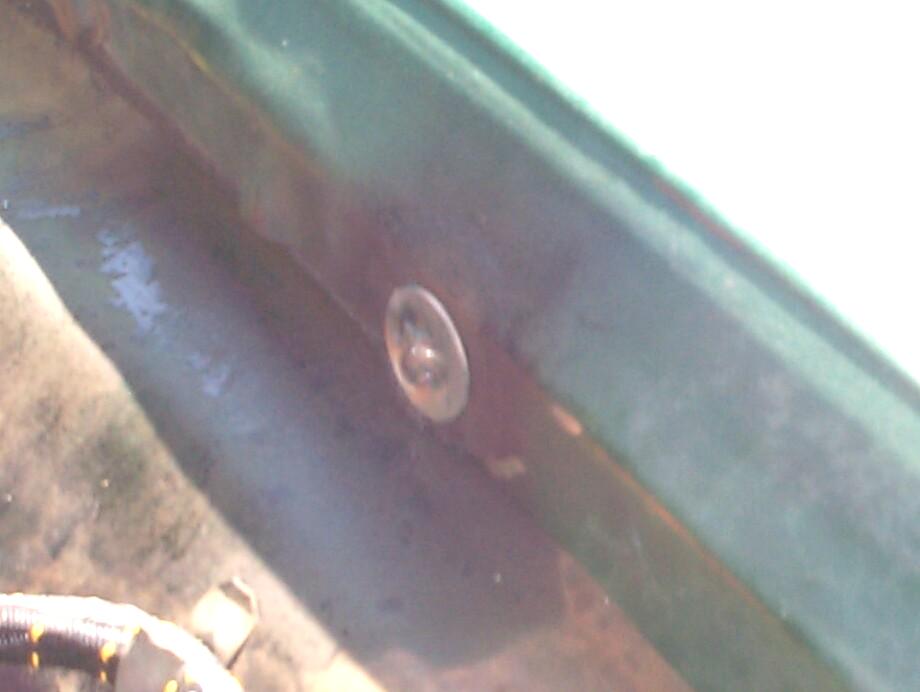
back to the fender bracket cap screw I twisted off back in December. I
heated up the broken segment from both sides with the MAPP torch, then
quenched it with Kroil penetrating oil. Wanted to try the vice-grips
method first but there is not enuf of the broken bolt exposed to get a
grip on it. Spent awhile setting up the MIG welder for the first time
and practiced welding a washer to a bolt end. The leather welding
gloves are exceedingly clumsly and since I wuz wearing sandals,
something hot got me between the toes. Got my workboots on and went
after the fender bracket bolt. I was having trouble feeding too much
wire by bumping the trigger with those acursed gloves before coming in
contact with the welding surface and then it was darn near impossible
to handle wire cutters with the gloves. finally got the washer welded
to the broken cap screw segment.
I'm
back to the fender bracket cap screw I twisted off back in December. I
heated up the broken segment from both sides with the MAPP torch, then
quenched it with Kroil penetrating oil. Wanted to try the vice-grips
method first but there is not enuf of the broken bolt exposed to get a
grip on it. Spent awhile setting up the MIG welder for the first time
and practiced welding a washer to a bolt end. The leather welding
gloves are exceedingly clumsly and since I wuz wearing sandals,
something hot got me between the toes. Got my workboots on and went
after the fender bracket bolt. I was having trouble feeding too much
wire by bumping the trigger with those acursed gloves before coming in
contact with the welding surface and then it was darn near impossible
to handle wire cutters with the gloves. finally got the washer welded
to the broken cap screw segment.
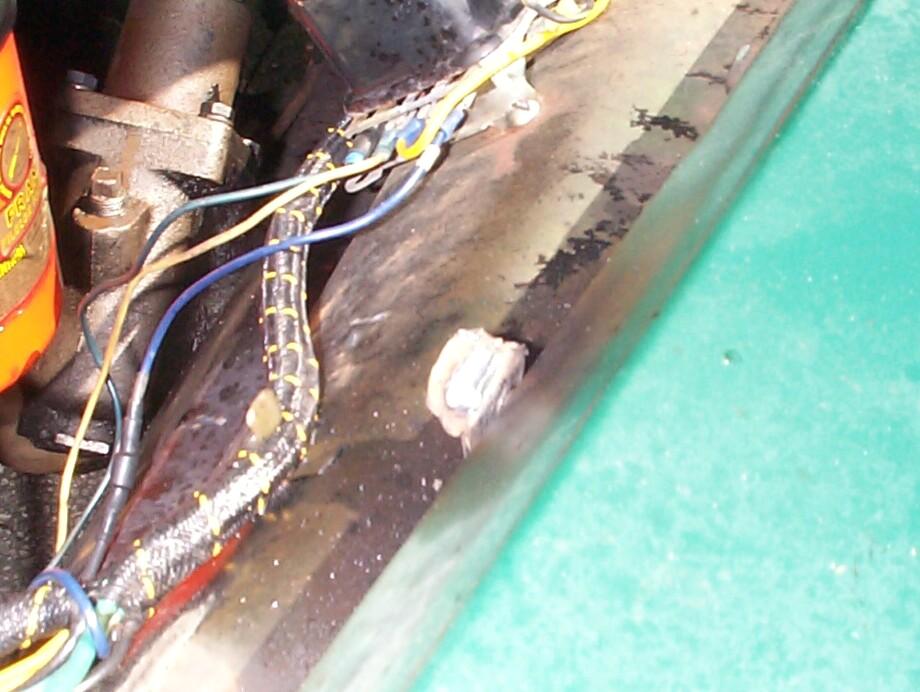 Found
myself a good size hex nut a bit smaller than the washer and proceeded
to weld it to the washer. Held it in place for the first spot weld by
screwing it half on the end of a long bolt that I could hold with my
other hand. Removed the bolt and tacked two more accessible sides.
Managed to turn it a half turn at this point. Nut and washer started to
bend at the welds so I stopped long enuf to tack the other hex sides
now that they were exposed. I also tossed the welding gloves aside in
favor of mechanix gloves . . . MUCH Better! The hex nut was an
unrecognizable glob at this point but the vice-grips didn't mind and
the broken segment started coming out easily after a few turns.
Found
myself a good size hex nut a bit smaller than the washer and proceeded
to weld it to the washer. Held it in place for the first spot weld by
screwing it half on the end of a long bolt that I could hold with my
other hand. Removed the bolt and tacked two more accessible sides.
Managed to turn it a half turn at this point. Nut and washer started to
bend at the welds so I stopped long enuf to tack the other hex sides
now that they were exposed. I also tossed the welding gloves aside in
favor of mechanix gloves . . . MUCH Better! The hex nut was an
unrecognizable glob at this point but the vice-grips didn't mind and
the broken segment started coming out easily after a few turns.
 My
first MIG welding experience is a qualified success. Not pretty, but it
worked. The auto-darkening helmet worked well but it wouldn't stay up
on top of my head when I wasn't welding. A matter af adjustment, I
suppose. Wingnut, my parrot, did not like the multi-colored welding cap
at all. I can see from this experience that I've got to practice a lot
before tackling sheet metal with the welder. Now I've got to go back
outside and cleanup the aftermath.
My
first MIG welding experience is a qualified success. Not pretty, but it
worked. The auto-darkening helmet worked well but it wouldn't stay up
on top of my head when I wasn't welding. A matter af adjustment, I
suppose. Wingnut, my parrot, did not like the multi-colored welding cap
at all. I can see from this experience that I've got to practice a lot
before tackling sheet metal with the welder. Now I've got to go back
outside and cleanup the aftermath.
May 18th 2003 Hot and muggey today in the shadetree garage but I'm not complaining. Quiet too. About two weeks back a nasty grackle took up residence in BillyBob's tree. She has been scolding, buzzin' and divebombing me ever since. I've had a bellyfull of it but it appears she has moved on to hassle somebody else now. Today, I replaced three more capscrews each (right behind the diagonal bracket) along the upper front fender edges. I took care not to twist another capscrew head off. Kroil was applied last week and this week. Each capscrew was heated cherry with the MAPP torch then quenched with water. They came out easily after that. They were replaced with new Grade 8 5/16"-18 x 1/2" zinc-plated cap screws and new lock washers. One more small step towards getting the front fenders off easily when the time comes.
 May
24th 2003 My
maintenance schedule sez it's time for a radiator flushing. Thinkin' on
it some last week, I decided to treat the cooling system flushing as an
opportunity to pull the radiator and clean up the front of the engine a
bit. The radiator could use some paint too. It's only a year old but
the purple degreaser I've been using on the engine compartment has been
pretty hard on some of the paints there. I've been using a 50/50
degreaser/water mix but I'm gonna dilute that to 25/75 for future
degreasing ops. While I was pondering the flushing, I discovered a
slight wobble in the water pump pulley . . . Bad news! No leaks yet but
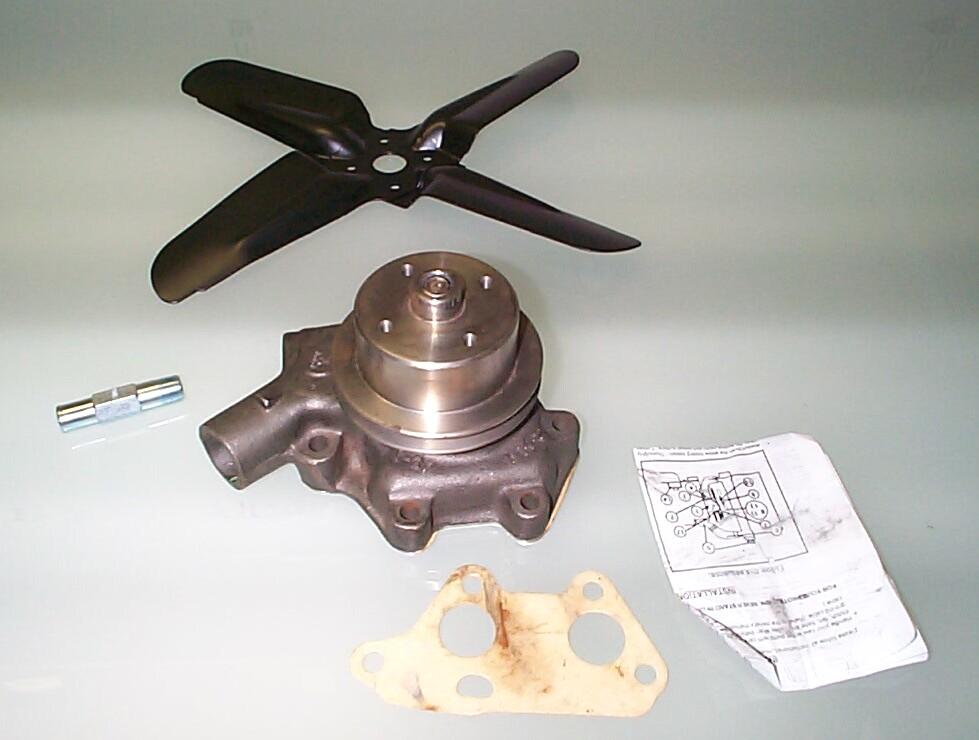
I figure it's only a matter of time. Purchased a spare 53-54 water pump
some time back from Chevy
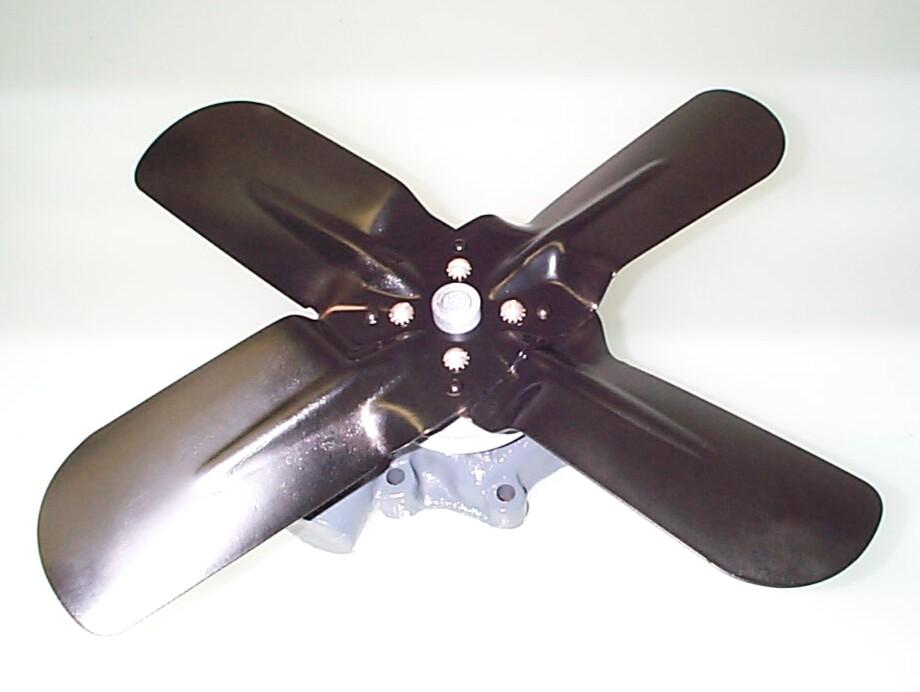
Duty. Went online and ordered 'nother spare pump and a
replacement fan blade. They arrived yesterday. Picked up a heater hose
fitting for the pump at Bennett auto Parts (5/8" hose, 3/8" NPT, 2-3/4"
long).
May
24th 2003 My
maintenance schedule sez it's time for a radiator flushing. Thinkin' on
it some last week, I decided to treat the cooling system flushing as an
opportunity to pull the radiator and clean up the front of the engine a
bit. The radiator could use some paint too. It's only a year old but
the purple degreaser I've been using on the engine compartment has been
pretty hard on some of the paints there. I've been using a 50/50
degreaser/water mix but I'm gonna dilute that to 25/75 for future
degreasing ops. While I was pondering the flushing, I discovered a
slight wobble in the water pump pulley . . . Bad news! No leaks yet but
I figure it's only a matter of time. Purchased a spare 53-54 water pump
some time back from Chevy
Duty. Went online and ordered 'nother spare pump and a
replacement fan blade. They arrived yesterday. Picked up a heater hose
fitting for the pump at Bennett auto Parts (5/8" hose, 3/8" NPT, 2-3/4"
long).
It may be my imagination, but by the middle of last week, I thought I was detecting new noise from the water pump bearing so I put BillyBob in his warehouse bay to wait until I'm ready to put the new water pump on.
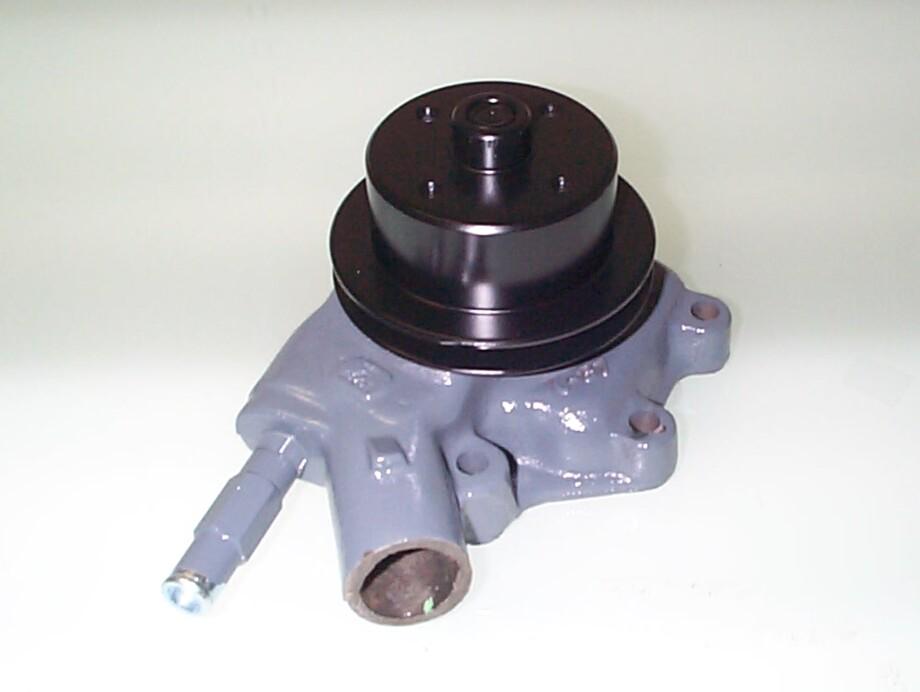
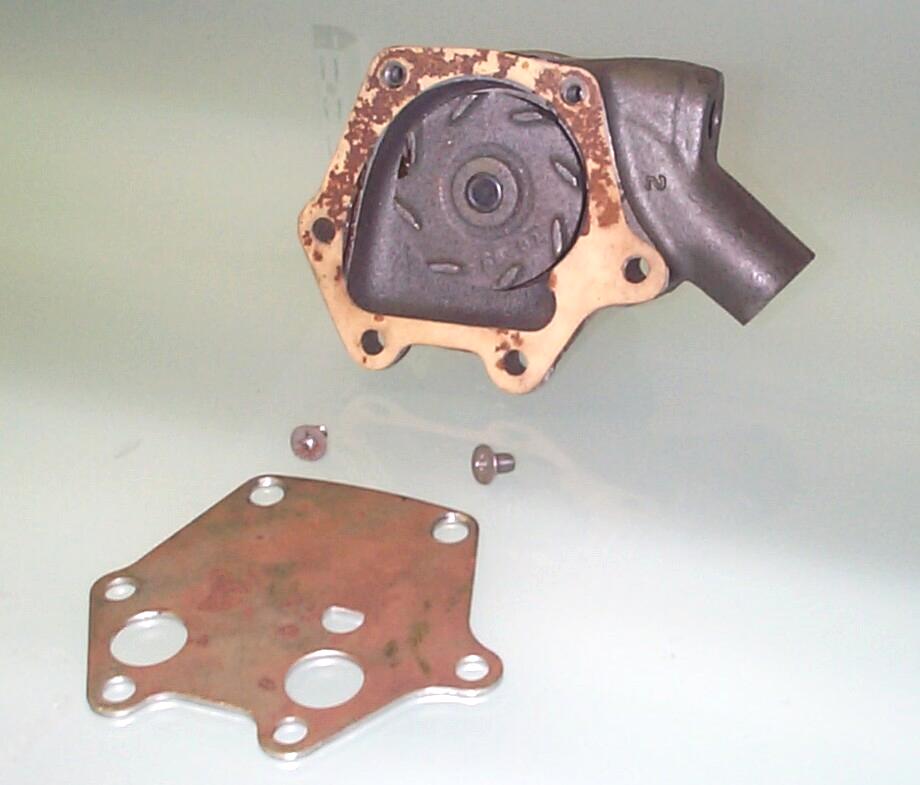 There's
a flat steel plate on the back of the water pump held in place by two
large phillips head machine screws. I removed the plate to clean off
the surface rust on it and to determine if the manufacturer had used
any gasket sealer during assembly. The existing gasket had sealer on
only one side so this was a good move. Used a wire wheel in an
air-powered angle grinder to clean the plate, then re-assembled and
masked off the gasket surfaces. Installed the heater hose fitting with
permatex high-temp thread sealant, masked the remaining openings, and
covered the pulley with a "Saran Quickcover" (available from the
supermarket or SWMBO's domain if you dare). Hung the water pump in
BillyBob's shade tree and applied Eastwood's
PRE Paint Prep. Then gave the pump a couple of rattlecan coats of
"1929-50 Chevy Gray Hi Gloss Hi Temp Engine Enamel" which also arrived
this week from Bill Hirsch Automotive Products.
There's
a flat steel plate on the back of the water pump held in place by two
large phillips head machine screws. I removed the plate to clean off
the surface rust on it and to determine if the manufacturer had used
any gasket sealer during assembly. The existing gasket had sealer on
only one side so this was a good move. Used a wire wheel in an
air-powered angle grinder to clean the plate, then re-assembled and
masked off the gasket surfaces. Installed the heater hose fitting with
permatex high-temp thread sealant, masked the remaining openings, and
covered the pulley with a "Saran Quickcover" (available from the
supermarket or SWMBO's domain if you dare). Hung the water pump in
BillyBob's shade tree and applied Eastwood's
PRE Paint Prep. Then gave the pump a couple of rattlecan coats of
"1929-50 Chevy Gray Hi Gloss Hi Temp Engine Enamel" which also arrived
this week from Bill Hirsch Automotive Products.
 May
25th 2003 Removed the
Saran Quickcover from the pulley and masked off the water pump body
that was painted yesterday. PRE Paint Prepped the Pulley and gave it a
light coat of Eastwood's Self-Etching Primer (lacquer based). Followed
up with three coats of Eastwood's Underhood Black, a fast drying,
semi-gloss paint. Removed the masking after drying and now we're ready
for installation tomorrow.
May
25th 2003 Removed the
Saran Quickcover from the pulley and masked off the water pump body
that was painted yesterday. PRE Paint Prepped the Pulley and gave it a
light coat of Eastwood's Self-Etching Primer (lacquer based). Followed
up with three coats of Eastwood's Underhood Black, a fast drying,
semi-gloss paint. Removed the masking after drying and now we're ready
for installation tomorrow.
May 26th 2003 Decoration Day was first observed in 1868. The graves of the fallen from the War between the States were decorated in rememberance. Today, it is called Memorial Day to remember all those who gave their lives in war for our country. Once again, my thoughts drift to my uncle Dutch throughout the day. My Dad was the first of thirteen sons and daughters. Dutch was second and they were close. When Dutch died in Leyte Gulf, my Dad was in Burma as a Staff Sgt. in an Army Air Corps Combat Cargo outfit.
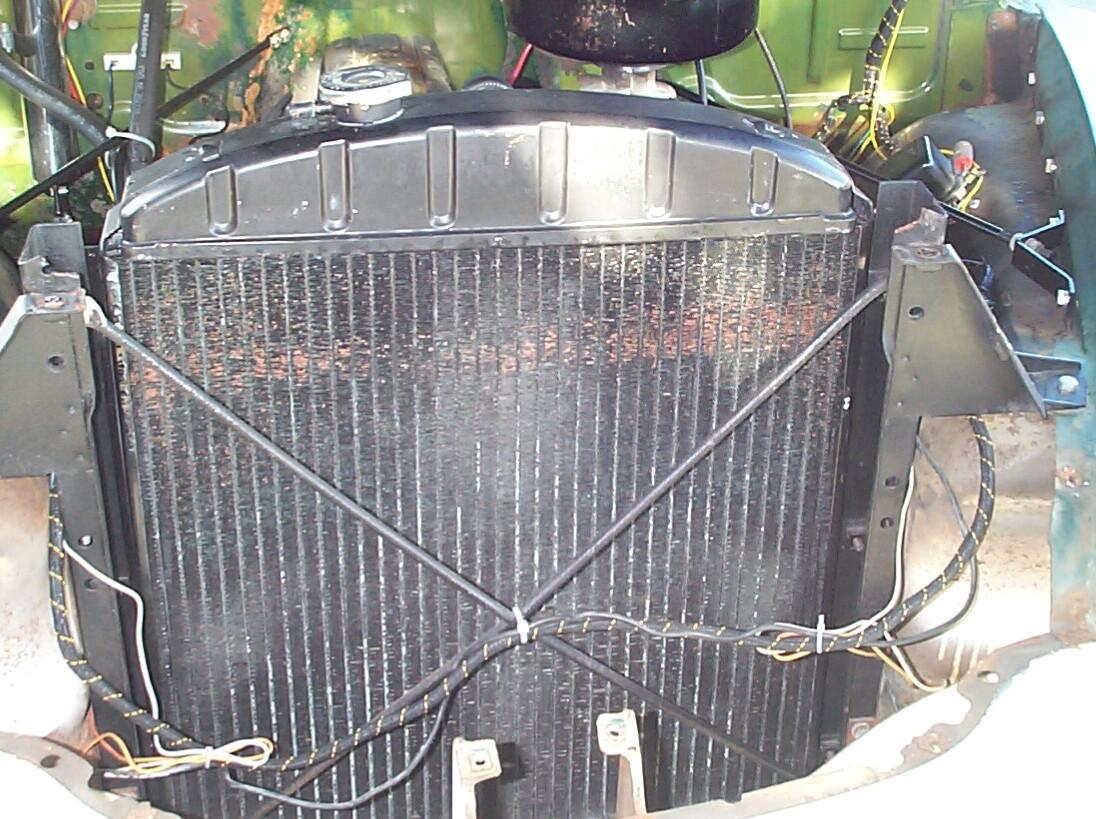 Brought
BillyBob down from the warehouse this morning to replace the water
pump. Removed the radiator grille upper baffle and started to drain the
radiator. This is when I noticed that the cooling fins on the front
side of the radiator are starting to rust away already! This radiator
is only a year old! Must be manufactured by the same ~!@#holes
who make the Jeep radiators. They are carrying the biodegradable
concept a bit too far. Nothing for it but to clean it up and paint it.
Put some Kroil penetrating oil on the fan blade machine screws and gave
the radiator a light wire wheel brushing with the air-powered angle
grinder. I realized I was red-faced wrong about the rusting - the fins
are real copper and the tank is real brass. What I thought was rust was
copper corrosion where the paint had worn thru. Cleaned the radiator
with lacquer thinner (I'm out of PRE Paint Prep), masked the openings
and drainage petcock, and gave it a couple of coats of Eastwood's
Radiator Black paint.
Brought
BillyBob down from the warehouse this morning to replace the water
pump. Removed the radiator grille upper baffle and started to drain the
radiator. This is when I noticed that the cooling fins on the front
side of the radiator are starting to rust away already! This radiator
is only a year old! Must be manufactured by the same ~!@#holes
who make the Jeep radiators. They are carrying the biodegradable
concept a bit too far. Nothing for it but to clean it up and paint it.
Put some Kroil penetrating oil on the fan blade machine screws and gave
the radiator a light wire wheel brushing with the air-powered angle
grinder. I realized I was red-faced wrong about the rusting - the fins
are real copper and the tank is real brass. What I thought was rust was
copper corrosion where the paint had worn thru. Cleaned the radiator
with lacquer thinner (I'm out of PRE Paint Prep), masked the openings
and drainage petcock, and gave it a couple of coats of Eastwood's
Radiator Black paint.
 The
fan and old water pump fasteners came loose easily as did the hose
connections. The new fan blade isn't manly enuf fer me so I'm gonna
sandblast and refinish the original fan and reinstall it the next time
I have the radiator out. I will also clean and reinstall the old
fasteners but I will check their sizes while I have them out and get
replacements for the next time.
The
fan and old water pump fasteners came loose easily as did the hose
connections. The new fan blade isn't manly enuf fer me so I'm gonna
sandblast and refinish the original fan and reinstall it the next time
I have the radiator out. I will also clean and reinstall the old
fasteners but I will check their sizes while I have them out and get
replacements for the next time.
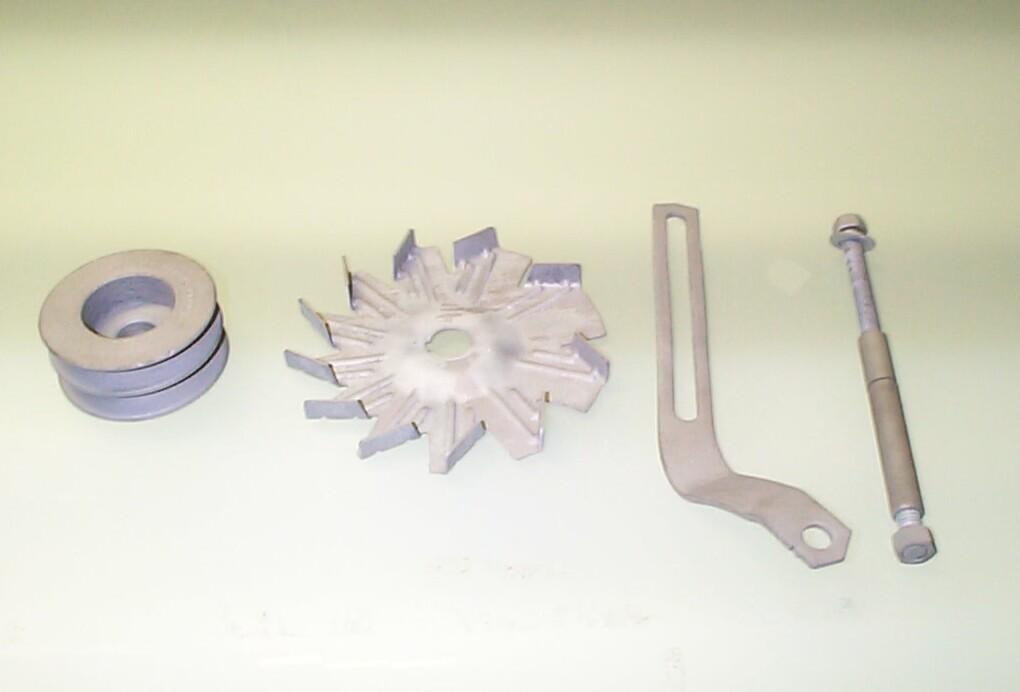 It
was time to fish or cut bait. Before I knew about the water pump going
bad, I had plans to clean and paint the alternator brackets, pulley and
impeller. It will make for a long day if I still do that too . . . Wot
the heck! Let's roll! Disconnected the alternator which is a lot easier
without the radiator in the way. Dragged out the siphon blaster and
sandblasted the bracket, mounting bolt assembly, pulley and impeller.
The other bracket (generator pivot) will have to wait til next time.
It's noon now . . . gotta keep movin' There's some nasty storm clouds
formin' above. I may have to deal with Murphy after all. Put the loose
nuts and bolts in carb cleaner for a soaking. Don't have time to deal
with the tumbler and zinc-plating today.
It
was time to fish or cut bait. Before I knew about the water pump going
bad, I had plans to clean and paint the alternator brackets, pulley and
impeller. It will make for a long day if I still do that too . . . Wot
the heck! Let's roll! Disconnected the alternator which is a lot easier
without the radiator in the way. Dragged out the siphon blaster and
sandblasted the bracket, mounting bolt assembly, pulley and impeller.
The other bracket (generator pivot) will have to wait til next time.
It's noon now . . . gotta keep movin' There's some nasty storm clouds
formin' above. I may have to deal with Murphy after all. Put the loose
nuts and bolts in carb cleaner for a soaking. Don't have time to deal
with the tumbler and zinc-plating today.
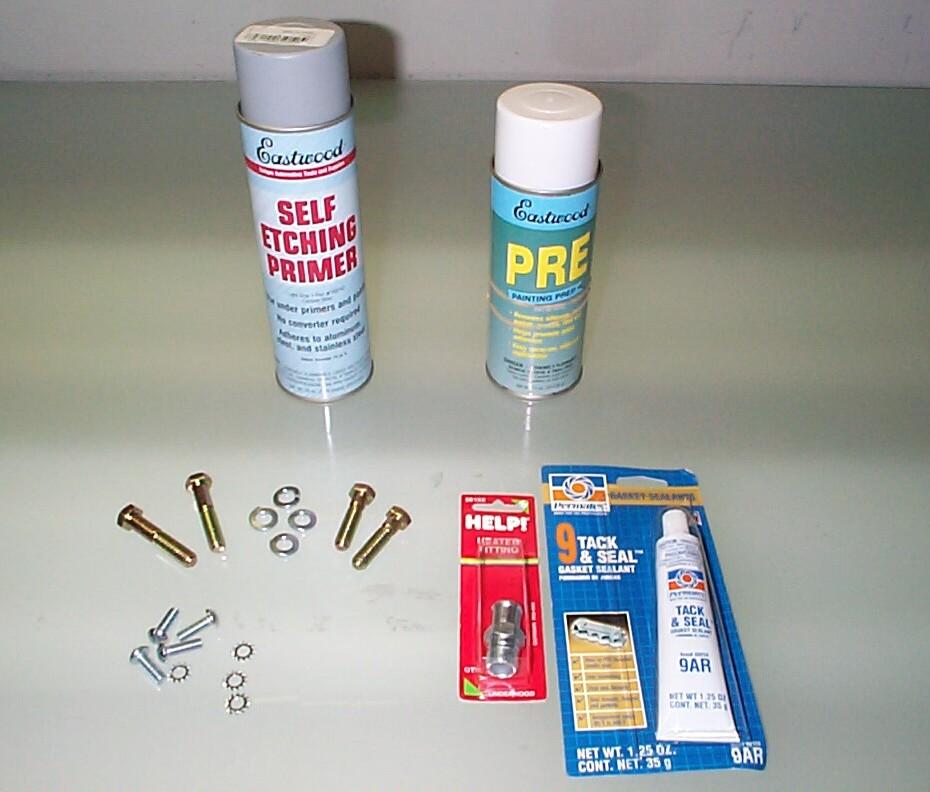
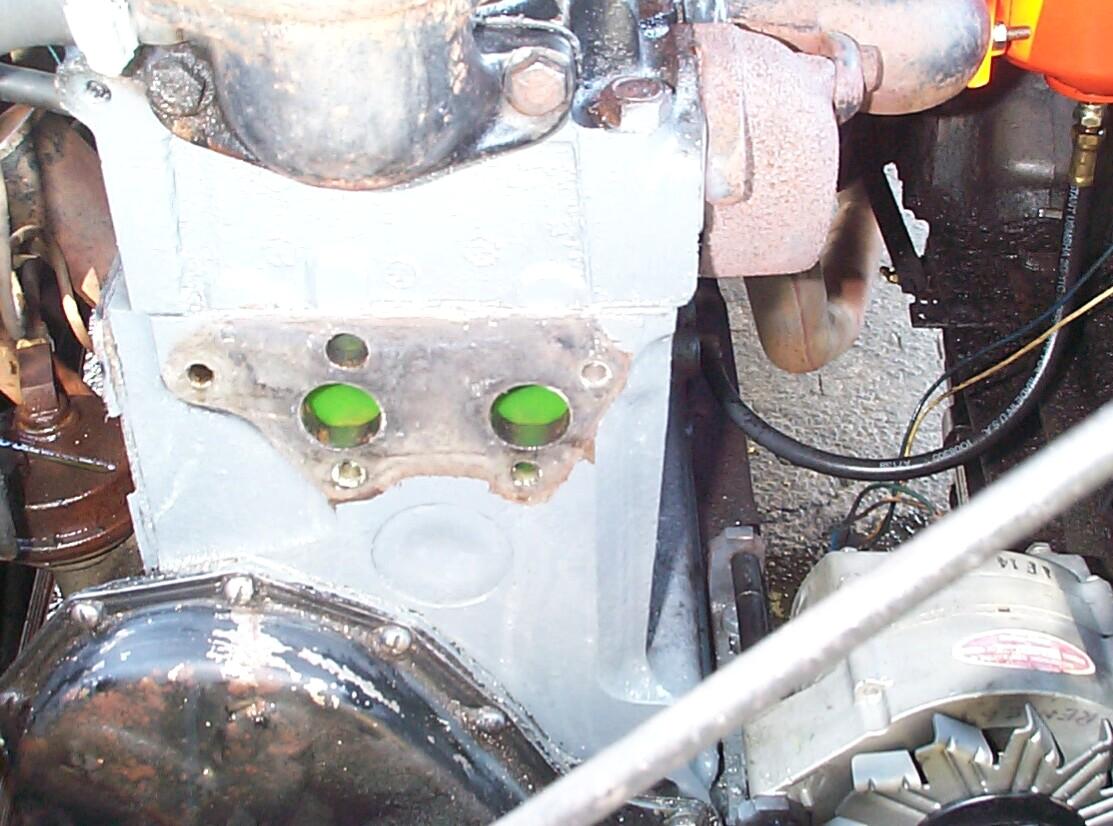
Cleaned the front of the engine with Eastwood's Undergone Undercoating and Heavy Residue Remover, wire brush and shop rags. Masked off the timing gear cover, thermostat housing and water pump gasket surface. Prepped front of block with lacquer thinner and painted with a couple of coats of the Hirsch Chevy Gray Engine Enamel. Wuz starting to get some big spatter rain drops so I stopped long enuf to move critical elements inside. Cleaned the sandblasted parts with lacquer thinner and painted the brackets and pulley with Eastwood's Underhood Black and the alternator impeller with Eastwood's Detail Gray.
 Time
to start putting things back together, water pump first. Applied
Permatex #9 Tack and Seal on all the gaskets and gasket mating surfaces
as well as the hose connections. Pulled the fasteners out of the parts
cleaner soup and chased the threads with a die. The water pump bolts
were of two sizes - two each 3/8"-16 x 2-1/8" and 3/8"-16 x 1-5/8" with
1-1/8" of the shaft threaded in both cases. The fan blade fasteners are
1/4"-20 x 3/4" machine screws (stovebolts). Assumption is the mother of
all foulups and this is where I found out that my assumption that the
brand new water pump was good turned out the be a big gottcha! When the
water pump bolts were torqued down, the pulley would not move. It was
locked up tight! No clearance between the pump impeller and back plate.
This is where I started cussin' and mentally kickin' my own butt around
the shadetree for not checking the water pump BEFORE
I painted it. Backing off the bolts a few turns allowed the pulley to
move again. At this point it was mid-afternoon and I had to get
BillyBob mobile for his trip back to the warehouse. Put everything back
together in a hurry and filled the radiator with one gallon coolant and
the rest with tap water. The flushing will have to wait. One spot of
luck was that I finished before the late afternoon storms broke loose.
I have a dribble leak around the water pump when the engine is running
but it stops when BillyBob is turned off so things could be worse.
Time
to start putting things back together, water pump first. Applied
Permatex #9 Tack and Seal on all the gaskets and gasket mating surfaces
as well as the hose connections. Pulled the fasteners out of the parts
cleaner soup and chased the threads with a die. The water pump bolts
were of two sizes - two each 3/8"-16 x 2-1/8" and 3/8"-16 x 1-5/8" with
1-1/8" of the shaft threaded in both cases. The fan blade fasteners are
1/4"-20 x 3/4" machine screws (stovebolts). Assumption is the mother of
all foulups and this is where I found out that my assumption that the
brand new water pump was good turned out the be a big gottcha! When the
water pump bolts were torqued down, the pulley would not move. It was
locked up tight! No clearance between the pump impeller and back plate.
This is where I started cussin' and mentally kickin' my own butt around
the shadetree for not checking the water pump BEFORE
I painted it. Backing off the bolts a few turns allowed the pulley to
move again. At this point it was mid-afternoon and I had to get
BillyBob mobile for his trip back to the warehouse. Put everything back
together in a hurry and filled the radiator with one gallon coolant and
the rest with tap water. The flushing will have to wait. One spot of
luck was that I finished before the late afternoon storms broke loose.
I have a dribble leak around the water pump when the engine is running
but it stops when BillyBob is turned off so things could be worse.
 May
31th 2003 BillyBob
spent the rest of the week in his warehouse bay. Picked him up first
thing this morning and brought him down to the Krash Lab. Now I'm
sittin' here at a decision point. Should I gamble on the other new
water pump from Chevy Duty being good or should I check it on the
engine before painting it? Decided to paint it. The prospect of
draining/removing the radiator two more times in the next two weeks is
just too much fun to comtemplate. On Tuesday I placed orders with
Eastwood for the painting materials I'd run out of and McMaster-Carr
for new water pump capscrews and fan blade machine screws. The good
news is that everything arrived by Friday. The bad news is that the
rattlecan "Underhood Black" I'd ordered was missing from the Eastwood
Order. I still have a little bit left. Enough, I hope, for the new
water pump pulley. After performing some quarterly maintenance on
BillyBob, I Masked off the main body of the new water pump and hung it
up in BillyBob's tree. Applied PRE Paint Prep to the pulley and gave it
a coat of Eastwood's Self-Etching Primer. Darn! Not enuf Underhood
Black left for the pulley. Tempted to use Eastwood's Trim Black but
don't know how well it will hold up to underhood temperatures.
May
31th 2003 BillyBob
spent the rest of the week in his warehouse bay. Picked him up first
thing this morning and brought him down to the Krash Lab. Now I'm
sittin' here at a decision point. Should I gamble on the other new
water pump from Chevy Duty being good or should I check it on the
engine before painting it? Decided to paint it. The prospect of
draining/removing the radiator two more times in the next two weeks is
just too much fun to comtemplate. On Tuesday I placed orders with
Eastwood for the painting materials I'd run out of and McMaster-Carr
for new water pump capscrews and fan blade machine screws. The good
news is that everything arrived by Friday. The bad news is that the
rattlecan "Underhood Black" I'd ordered was missing from the Eastwood
Order. I still have a little bit left. Enough, I hope, for the new
water pump pulley. After performing some quarterly maintenance on
BillyBob, I Masked off the main body of the new water pump and hung it
up in BillyBob's tree. Applied PRE Paint Prep to the pulley and gave it
a coat of Eastwood's Self-Etching Primer. Darn! Not enuf Underhood
Black left for the pulley. Tempted to use Eastwood's Trim Black but
don't know how well it will hold up to underhood temperatures.
Removed the masking tape and installed another heater hose fitting with high temp thread sealant that I picked up for the new pump at Discount Auto Parts yesterday (5/8" hose, 3/8" NPT, 1-1/2" long). Masked the openings and gasket surface on the back. Put another Saran Quickcover on the (unfinished) pulley and applied PRE Paint Prep. Applied a couple of coats of the Chevy Gray engine paint to the water pump body. Hung the pump up in the shed, put the tools away and took BillyBob back to his barn.
June 1st 2003 Spent the first couple of hours this morning sandblasting BillyBob's old fan. This thing is in good shape with no cracks. There's two ways to finish the fan at my disposal: Self-Etching primer and rattlecan Underhood Black or Powdercoating. The weather was still good so I decided to try the Low-Gloss Black powder from Columbia Coatings again. Last time (with the front bumper brackets) didn't work too well but I've been using better prep methods that I think will improve my luck. Wired the fan up to my homemade powdercoating frame and applied Eastwood's Metal Wash per instructions (using a generic spray bottle). Rinsed with clean water the same way and dried with a hair dryer. Next, Eastwood's Picklex was applied per directions (via spray bottle again) and rinsed with water. Immediately afterwards, the piece was dried and chemicals cooked off for thirty minutes using the infared curing lamp. Applied the black powder after the fan cooled. It was a bit windy and I didn't get complete coverage. Cured each blade for twenty minutes.
Murphy arrived in the form of the lawn service crew. Besides blowin' organic stuff all over the place, the mower guy pulled the plug on the lamp while I was inside. He didn't replace it after he made his pass and I have no idea how long that blade cured. The lamp was cold when I came out to check. When I tried to explain the situation to him, he couldn't understand the relationship between client (my company) and vendor (his company) . . . A little while later, I spied the lawn service company's owner, a grizzled rocker by the name of Donnie, making an inspection run. I cornered him and explained the problem. His response was that the guy was a lawn service employee and that if he had enuf intelligence to replace the electrical plug, he'd be workin' for someone else! Donnie added that the guy was one of his smarter employees in that he didn't run over the cord with the mower in the first place. He expected me to be happy the guy was so thoughtful. I gave up at this point. We weren't on the same page.
 Went
inside and, while I waited for the lawn service guy to get out of the
shadetree garage, tin-zinc plated the new fan machine screws, washers
and water pump lock washers for assembly next week. Threw the plated
screws and washers in the tumbler for a polishing session. For all the
hassle, the fan blade doesn't look too bad but I will probably give it
a coat or two of Underhood Black when the paint arrives from Eastwood
and I finish painting the water pump pulley.
Went
inside and, while I waited for the lawn service guy to get out of the
shadetree garage, tin-zinc plated the new fan machine screws, washers
and water pump lock washers for assembly next week. Threw the plated
screws and washers in the tumbler for a polishing session. For all the
hassle, the fan blade doesn't look too bad but I will probably give it
a coat or two of Underhood Black when the paint arrives from Eastwood
and I finish painting the water pump pulley.
June 3rd 2003 Talking with my co-worker friend, Rick, about the water pump yesterday. He thought I might be able to get the defective pump to work with a thicker gasket. Thought 'bout it overnite and decided I might mess around with a sheet metal shim and two gaskets to get the necessary clearance from the backplate to make it a workable spare. Also figured out that I might be able to check the water pumps for this condition before painting them by snugging up flat washers and hex nuts on the backside on the mounting bolts instead of actually installing them on the block. I should have thought of these solutions sooner . . . I must have a weak MacGyver instinct.
 June
7th 2003 Forty percent
chance scattered showers forecast and it's been raining off and on
since I got to the Krash Lab with BillyBob. Hope it clears up. Got some
of the tools out of the shed between showers and proceeded to mask off
the water pump again to paint the pulley with Underhood Black, which
arrived a couple of days ago. Then used a 3M scuff pad on last week's
powder coated fan while I waited on the weather to clear . . . and
waited . . . and waited. Drat! It's been clear blue skys 'bout three
miles to the west for some time now but not over BillyBob's shadetree.
Nuthin' for it but to top off BillyBob's radiator and take him back to
the barn. Maybe the forty percent of rain will fall on someone else
tomorrow.
June
7th 2003 Forty percent
chance scattered showers forecast and it's been raining off and on
since I got to the Krash Lab with BillyBob. Hope it clears up. Got some
of the tools out of the shed between showers and proceeded to mask off
the water pump again to paint the pulley with Underhood Black, which
arrived a couple of days ago. Then used a 3M scuff pad on last week's
powder coated fan while I waited on the weather to clear . . . and
waited . . . and waited. Drat! It's been clear blue skys 'bout three
miles to the west for some time now but not over BillyBob's shadetree.
Nuthin' for it but to top off BillyBob's radiator and take him back to
the barn. Maybe the forty percent of rain will fall on someone else
tomorrow.
 June
8th 2003 Lookin' good
so far but still forty percent chance of rain today, the weatherman
sez. Got the fan and water pump hung up in the tree for the coats of
Underhood Black after an application of PRE Paint Prep. Drained the
radiator again, removed the radiator grille upper baffle, radiator and
water pump. Cleaned the gasket surface with putty knife and lacquer
thinner. I'm happy with how well the Chevy Gray engine enamel is
holding up since I can't allow it to sit the two weeks Hirsch calls for
in the painting instructions. The constant drip of coolant has not
harmed it either. Had trouble at this point . . . couldn't get the
backing plate off the new water pump to check the gasket. Some sadist
at the factory really put the two big countersunk phillips head machine
screws in tight. Don't have the big ass phillips head driver I need and
the Boss's Panzerwagon is not here to act as a parts chaser today.
Crossed my fingers and soldiered on. Dressed the remaining gasket
surfaces and gasket with Permatex #9 Tack and Seal and bolted the new
water pump on with the new fasteners and high temp thread sealant.
Pulley still moves freely with all bolts tightened. Good.
June
8th 2003 Lookin' good
so far but still forty percent chance of rain today, the weatherman
sez. Got the fan and water pump hung up in the tree for the coats of
Underhood Black after an application of PRE Paint Prep. Drained the
radiator again, removed the radiator grille upper baffle, radiator and
water pump. Cleaned the gasket surface with putty knife and lacquer
thinner. I'm happy with how well the Chevy Gray engine enamel is
holding up since I can't allow it to sit the two weeks Hirsch calls for
in the painting instructions. The constant drip of coolant has not
harmed it either. Had trouble at this point . . . couldn't get the
backing plate off the new water pump to check the gasket. Some sadist
at the factory really put the two big countersunk phillips head machine
screws in tight. Don't have the big ass phillips head driver I need and
the Boss's Panzerwagon is not here to act as a parts chaser today.
Crossed my fingers and soldiered on. Dressed the remaining gasket
surfaces and gasket with Permatex #9 Tack and Seal and bolted the new
water pump on with the new fasteners and high temp thread sealant.
Pulley still moves freely with all bolts tightened. Good.
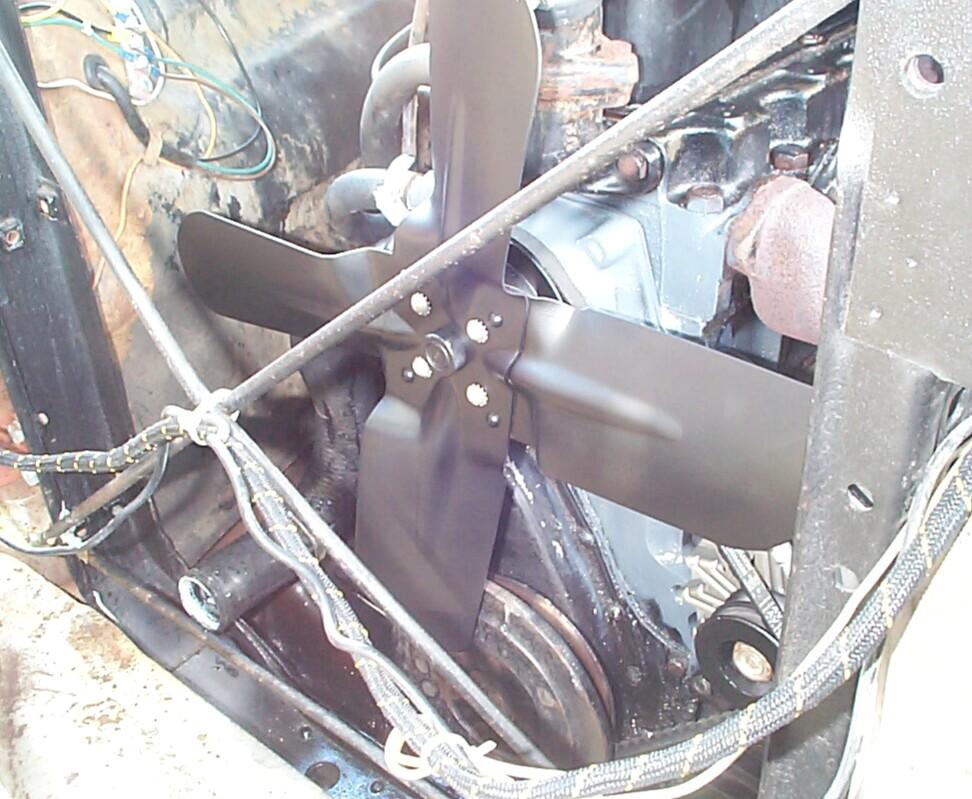 Put
the heater and radiator hose on the new water pump with Permatex #9 and
bolted on the refinished fan with the new machine screws using
threadlocker. Put some gouges in the radiator last time with the wrench
handle in my haste and I turned my attention to that mishap next. Got
two tools from Eastwood for the job during the week: Radiator Pliers,
and Fin Rake Set. The pliers were handy but the Fin Rake Set caused
more harm than good. There were no directions so maybe I just couldn't
figure out how to use it. I spent my time with the pliers straightening
out the fins. Hung the radiator up in the tree, applied PRE Paint Prep,
then another coat of Eastwood's Radiator Black paint after masking off
the petcock and openings.
Put
the heater and radiator hose on the new water pump with Permatex #9 and
bolted on the refinished fan with the new machine screws using
threadlocker. Put some gouges in the radiator last time with the wrench
handle in my haste and I turned my attention to that mishap next. Got
two tools from Eastwood for the job during the week: Radiator Pliers,
and Fin Rake Set. The pliers were handy but the Fin Rake Set caused
more harm than good. There were no directions so maybe I just couldn't
figure out how to use it. I spent my time with the pliers straightening
out the fins. Hung the radiator up in the tree, applied PRE Paint Prep,
then another coat of Eastwood's Radiator Black paint after masking off
the petcock and openings.
Then the pace picked up out of necessity. The ~!@#$% stormclouds started rolling in again. The radiator was placed back in BillyBob during a very light rain. Hopefully that's the worst of it for today. Filled the cooling system up with one gallon of Prestone coolant and tap water again. The instructions for the new water pump states, in bold caps, to never use water pump lubricant so I won't follow that practice anymore. Turned on BillyBob for five minutes . . . No noticable leaks but he got hot so there is still a lot of air trapped in the system. Re-installed the upper radiator baffle, topped off with tap water (over a gallon) and moved BillyBob to a dry spot in the parking lot to run him for a half hour and look for leaks . . . No leaks and engine temp only reached 1/3 up the gauge. I was worried about leaking around the water pump backplate that I couldn't get off with the tools at hand. The low pressure cooling system (4 psi) is a blessing. Time to clean up and enjoy drivin' BillyBob for the first time in 2-1/2 weeks.
When JR finished reading the above, he responded with the following e-mail:
Krash: I changed the water pump as well and it may have been changed when the engine was overhauled. My problem was that Chevy made pumps for two different belt sizes, a narrow and a wide. I got the wrong one the first time. I got the second pump from Napa, the best national jobber for the truck at the time. I had no problems with the backing plate or gaskets. It seems as if the water pump fails way to often. I thinking that the alternator mounting, in as much as its not original, may be putting undue stress on the water pump shaft. I can't think of another reason unless currently available water pumps are garbage. Regards, Bill Kephart Advisory Engineer
| < Back
to Intro |
You can email me at ![]() webmaster@laroke.com
webmaster@laroke.com
Issued Monday June 9, 2003
Updated Wednesday February 14, 2018
copyright © 1996-2018 Larry Robert Kephart all rights reserved
| | LRK Home | | Bio Info | | Krash Khronicles | | LAROKE | |
| | BettyLou | | BillyBob's Garage | | Rat Patrol | | Deerslayer | | Elvira | |
| | Land of the Free and Home of the Brave | |
| | Keppylou's Art | | WWI Soldier's Diary | |