| | LRK Home | | Bio Info | | Krash Khronicles | | LAROKE | |
| | BettyLou | | BillyBob's Garage | | Rat Patrol | | Deerslayer | | Elvira | |
| | Land of the Free and Home of the Brave | |
| | Keppylou's Art | | WWI Soldier's Diary | |
BillyBob Work-in-Progress Log
![]()
WHAT'S NEW is a chronological listing of updates to the BillyBob site.
![]()
TRUCK LINKS including vendor sites for old parts, custom parts, and tools as well as sites for classic car and truck organizations
STORE Operating in association with Amazon.com, books, recordings and tools can be purchased.
PLANNING for the restoration including project schedule and cost estimates.
![]()
TRAVELS WITH BILLYBOB With apologies to Steinbeck, this area of BillyBob's Garage will be used to log the trips BillyBob and I make together.
WORK-IN-PROGRESS is the restoration of parts of BillyBob that I can accomplish without a garage.
PRE-RESTORATION includes log entries of minor repairs and adventures between time of purchase and the time when I started restoration, a piece at a time.
JR'S KORNER JR's Korner is the history of BillyBob before I got him authored by my brother, Wm. C. Kephart.
![]()
BILLYBOB MAINTENANCE Ever changing detailing, oil change, lube, etc. maintenance routines specifically developed for BillyBob, including required tools, materials and procedures.
PARTS SHOP The Parts Shop is a repository of How-To articles. Things that I have done over and over enough times to have developed a procedure. This gives me a checklist and saves brain cells.
STEALTH SHOP Urban residence design with large integrated shop and separate living quarters for a relative or renter.
![]()
You will need the Adobe Acrobat browser plugin to view these wiring diagrams which are in the PDF file format. This format allows zooming and panning. If you don't have this plugin, it can be downloaded and installed (free) from the Adobe site. The button below will take you there.
![]()
BILLYBOB WIRING DIAGRAM Here's the wiring diagram updated with BillyBob's current state 'cepting the third-party strap-on turn-signal director.
STRAP-ON TURN-SIGNAL DIRECTOR/BRAKE LIGHT CIRCUIT This turn signal and brake light circuit diagram shows the current state of the third-party turn-signal director wiring, which will remain in place until I figure out the problems with the OEM turn-signal director. It also shows the OEM headlight switch.
50. Bedded down
December 9th 2006 Forecast is for showers all weekend. It is windy. There will be no bed board painting today. After an uneventful (read pleasant) Fort Lauderdale Beach run, I set about monthly maintenance chores.
December 10th 2006 Windy today but I don't think we'll get the rain they were forcasting yesterday. After a run up to the warehouse in BettyLou, I pulled the bed boards out of the shed to paint the front sides. Started the first coat at 9 AM. Gave the boards their second coat at 12 noon. It was too windy to spray paint the bed strips. That will have to wait a bit longer. That same wind put a lot of dirt in the fresh POR-15 but I'll sand it lightly before applying the top coats.
December 16th 2006 It wuz rainin' when I woke up. It's been raining for three days. Palm Beach County got over eight inches on thursday. I had a cigar and when I was finished, it was still raining. No beach run today and it's doubtful I'll get much done under the shadetree either.
December 17th 2006 Still rainin' this morning. Smoked my cigar and moped around the Krash Lab awhile before giving up getting any painting done this weekend and heading home to the Krash Pad. Dry season this year ain't dry so far.
December 23rd 2006 Thunderstorms forecast for today. Got my coffee and went straight to the Krash Lab. We had a office party last night where we proceeded to drink all the Christmas wine baskets our clients have been dropping off for the last two weeks. I thought I would be under the weather as well this morning but, surprisingly, I'm feeling OK.
 Got
the tools out and started monitoring the doppler weather radar on my
computer in the Krash Lab. Put a wire cup in the electric angle grinder
and cleaned up the rusted out bedside angles and front bed panel bottom
as well as the tailgate crossmsmber. Cleaned the loose stuff with
compressed air and gave these items a coat of POR-15. I was near the
bottom of my first quart of the stuff and it had skinned over in the
past two weeks. After today, I'll let what's left over dry up into a
solid for disposal. By the time I was done, the doppler was showing the
rain front halfway across Palm Beach County. I'll watch the clouds fer
awhile before I decide whether to put the tools under cover or not.
Got
the tools out and started monitoring the doppler weather radar on my
computer in the Krash Lab. Put a wire cup in the electric angle grinder
and cleaned up the rusted out bedside angles and front bed panel bottom
as well as the tailgate crossmsmber. Cleaned the loose stuff with
compressed air and gave these items a coat of POR-15. I was near the
bottom of my first quart of the stuff and it had skinned over in the
past two weeks. After today, I'll let what's left over dry up into a
solid for disposal. By the time I was done, the doppler was showing the
rain front halfway across Palm Beach County. I'll watch the clouds fer
awhile before I decide whether to put the tools under cover or not.
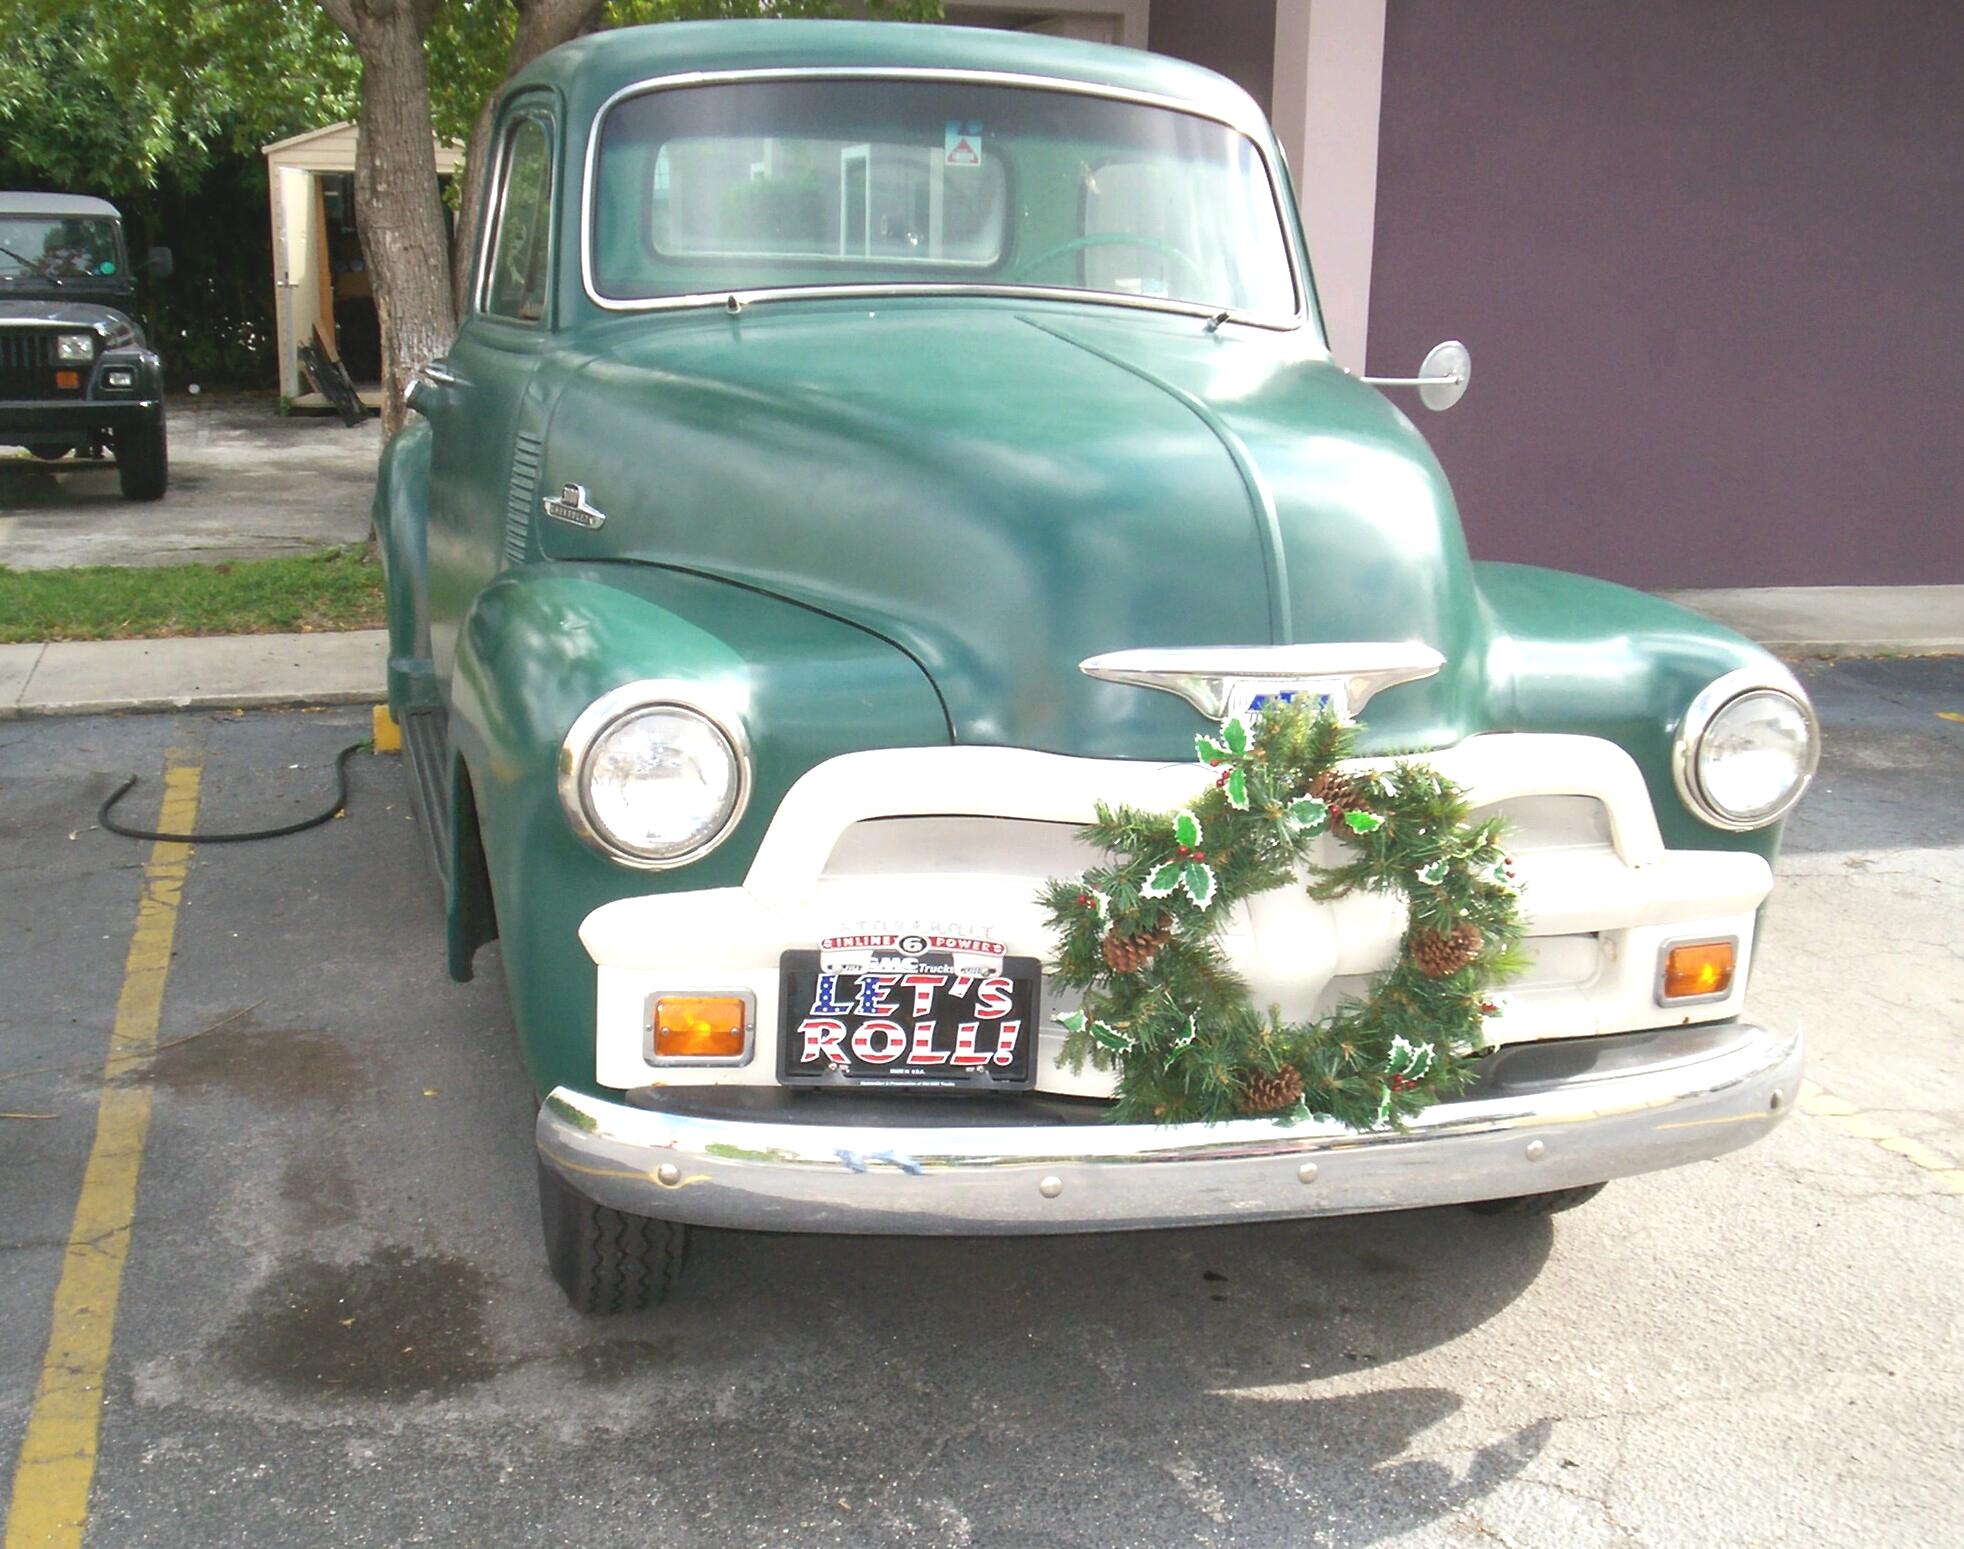 The
acursed blackbirds are back in BillyBob's tree and yesterday they
peppered the truck with their droppings. I tackled close to twenty-five
different offenses to BillyBob with Quik Detailer before festooning his
grille with a Christmas wreath that a client had given my Boss and he,
in turn, had passed on to me. After that, I got the tools back in the
shed as the first drops started to fall.
The
acursed blackbirds are back in BillyBob's tree and yesterday they
peppered the truck with their droppings. I tackled close to twenty-five
different offenses to BillyBob with Quik Detailer before festooning his
grille with a Christmas wreath that a client had given my Boss and he,
in turn, had passed on to me. After that, I got the tools back in the
shed as the first drops started to fall.
Then the storm rolled in. We had a power spike that blew out one of the Krash Lab UPS battery packs and I lost the mail server and a web server. Took me awhile to re-route power wiring thru another UPS and get the servers back on line. Next, the TV lost its satellite signal in the middle of Powerblock.
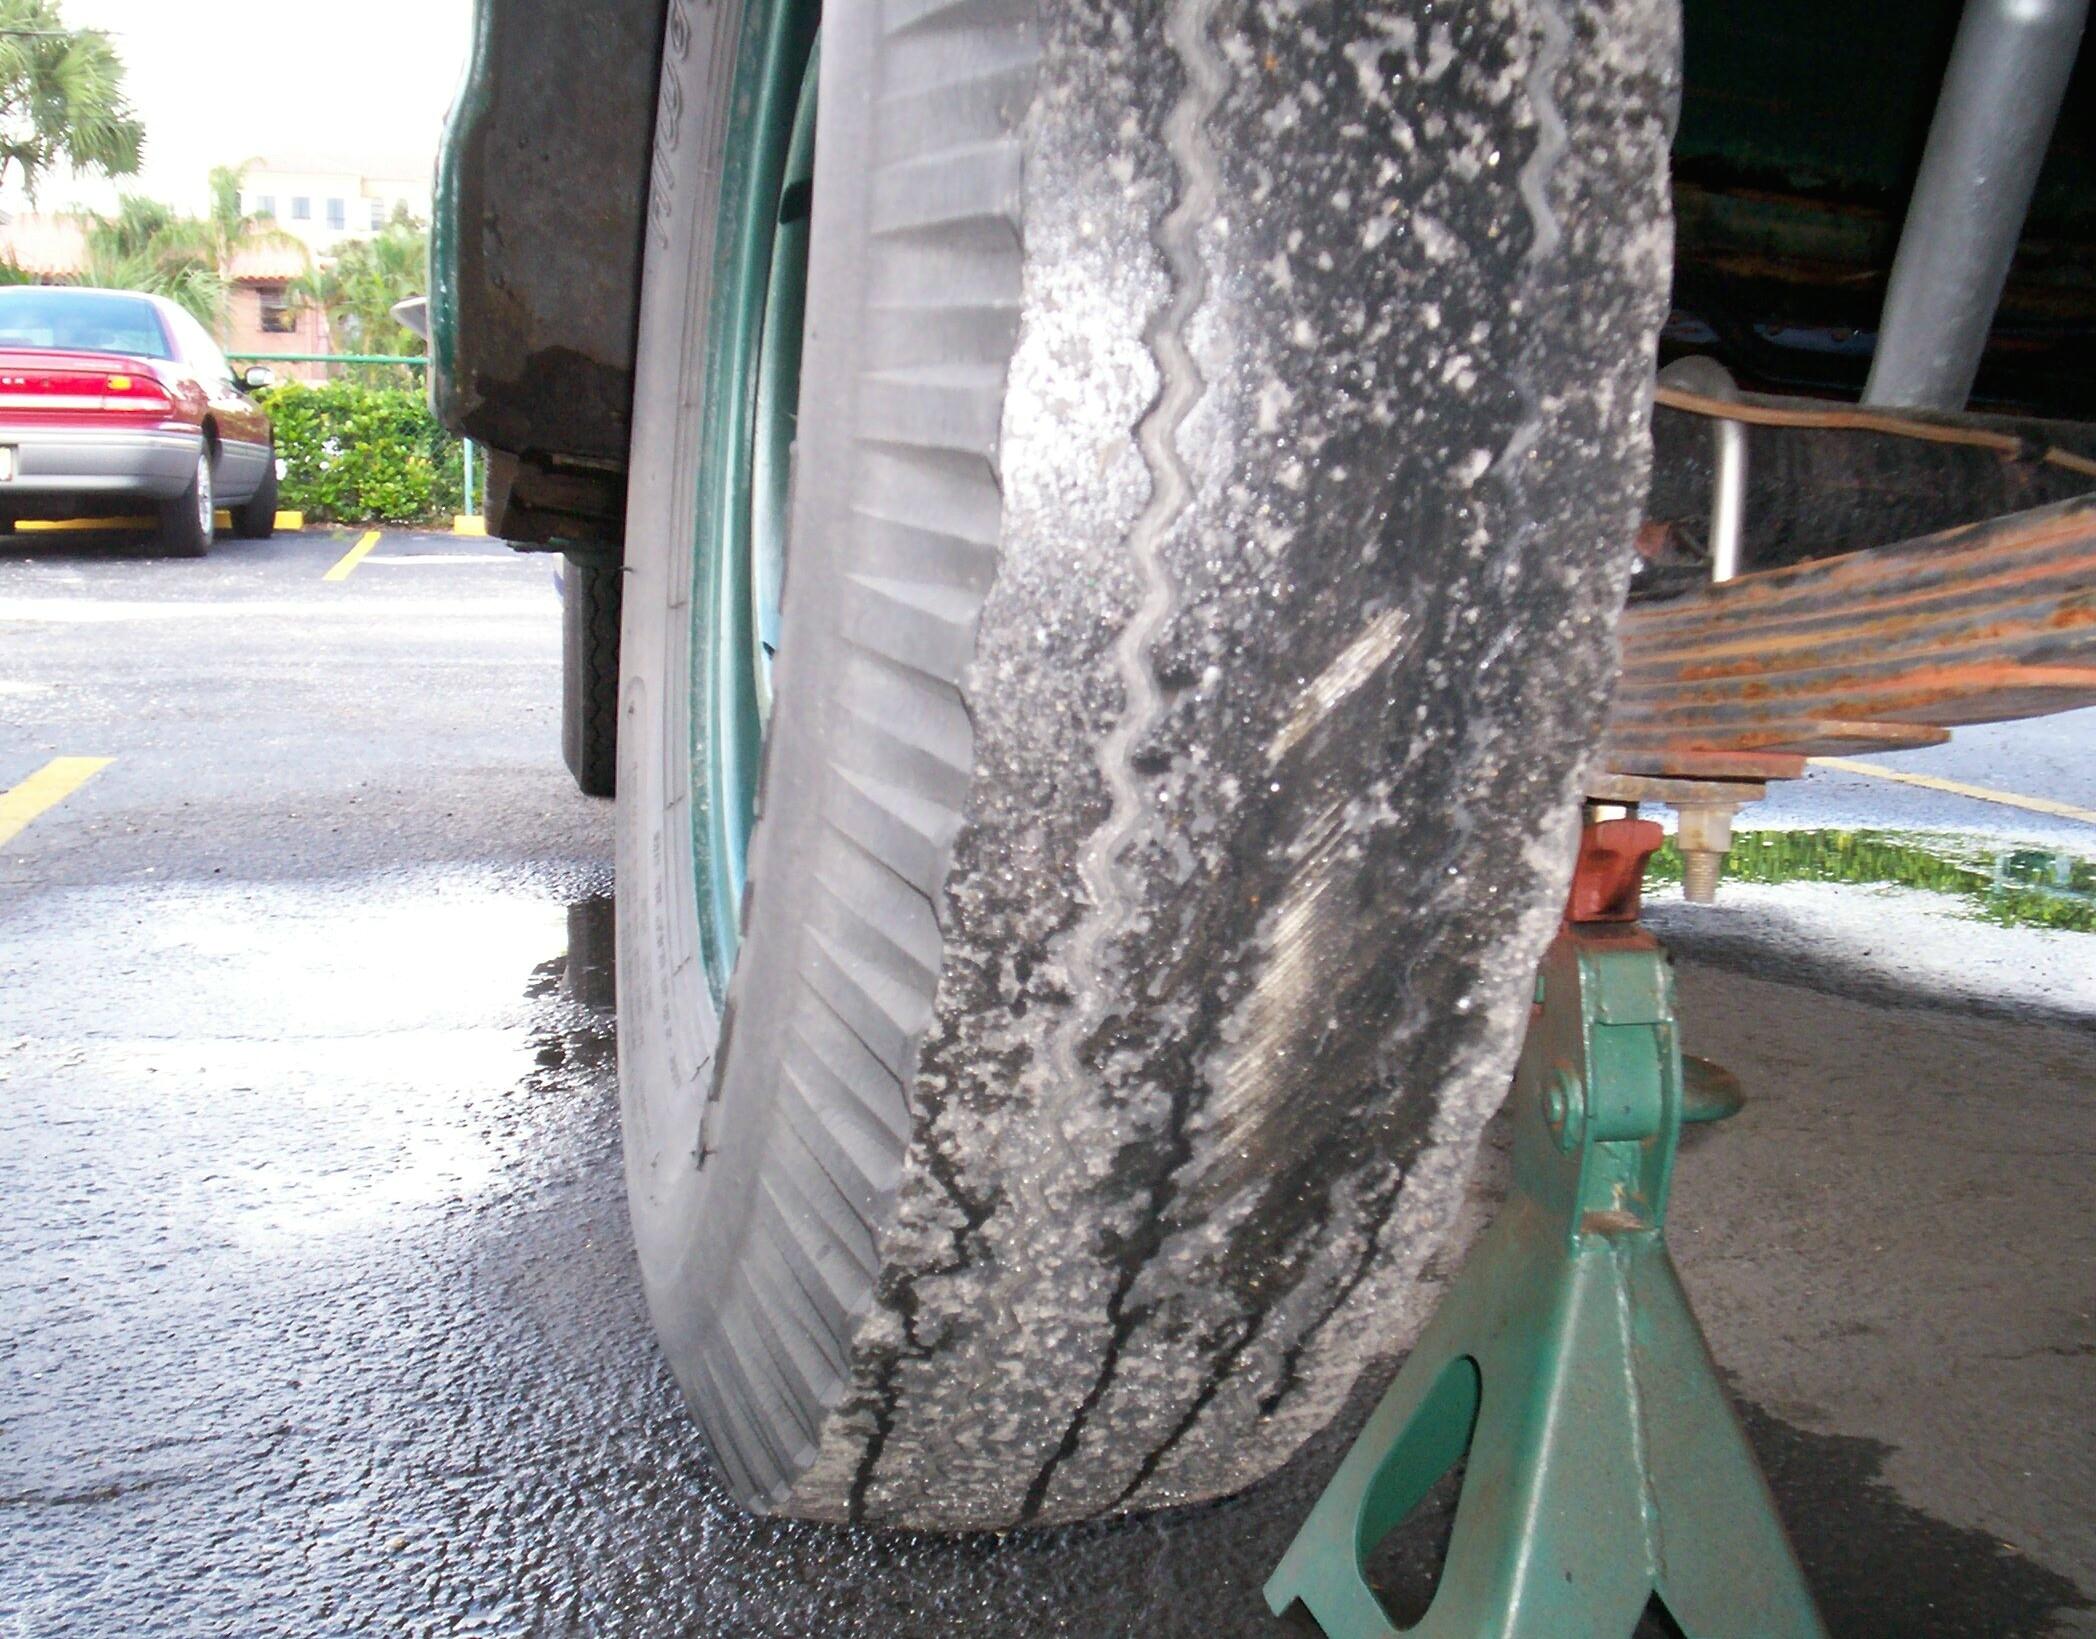 December
24th 2006 Christmas Eve
Weather forecast is better today. Two weeks ago when monthly
maintenance was being performed, I noticed the cords starting to show
thru on the last old tire on BillyBob. Picked up a new tire and inner
tube at the warehouse on the way home in BettyLou last night and that
is the first order of business today.
December
24th 2006 Christmas Eve
Weather forecast is better today. Two weeks ago when monthly
maintenance was being performed, I noticed the cords starting to show
thru on the last old tire on BillyBob. Picked up a new tire and inner
tube at the warehouse on the way home in BettyLou last night and that
is the first order of business today.
. . . So much for the favorable weather report. It started rainin' again shortly after I got to the Krash Lab. Had a cigar with my coffee and the swamp dried up after awhile. After I got the new tire and inner tube mounted and balanced and put back on the truck, I installed a new lighter to provide charging power for the Garmin navigator I plan to use on my trip up the coast tomorrow for Christmas Dinner in Stuart, Florida.
December 30th 2006 The Christmas cruise with BillyBob went well. Today we're back to the Fort Lauderdale Beach cruises on the way to the Krash Lab. It's too windy to spray paint today but, otherwise, the weather is OK. Pulled out the bed boards and started to sand the tops lightly with a foam sanding block for the finish coats. I don't have any wood-working tools and by the time I was finished, I wuz wishin' for a palm sander.
December 31st 2006 New Year's Eve Comtemplative today. Twelfth anniversary of Dad's passing. JR mentioned to me in an e-mail that "I notice that as those who were there or alive when ww2 was in progress are nearing the end of their run. Interest in the lives, hardships, and experiences of those involved are only kept alive by us-one generation removed. When we're done the last thread to the human side of that war will be lost." I think this may be why our maternal Grandfather, Bill Livergood, preferred to tell me stories learned at the knees of Civil War veterans rather than his own WWI experiences. He was the last link with them.
Still a bit windy today but sunny. Got the bed boards out again and wiped them down for their last paint coats. I am only coating the topsides to protect the POR-15 from UV radiation. Behr indoor/exterior Premium Plus hi-gloss "pure black" enamel is being used. I didn't realize until I got this home that it is water-based but I think the POR-15 has cured enough (over a month) that it won't be a problem. We will see. This stuff goes on pretty thick. By the time I finished the first coat, I'd decided it was enuf.
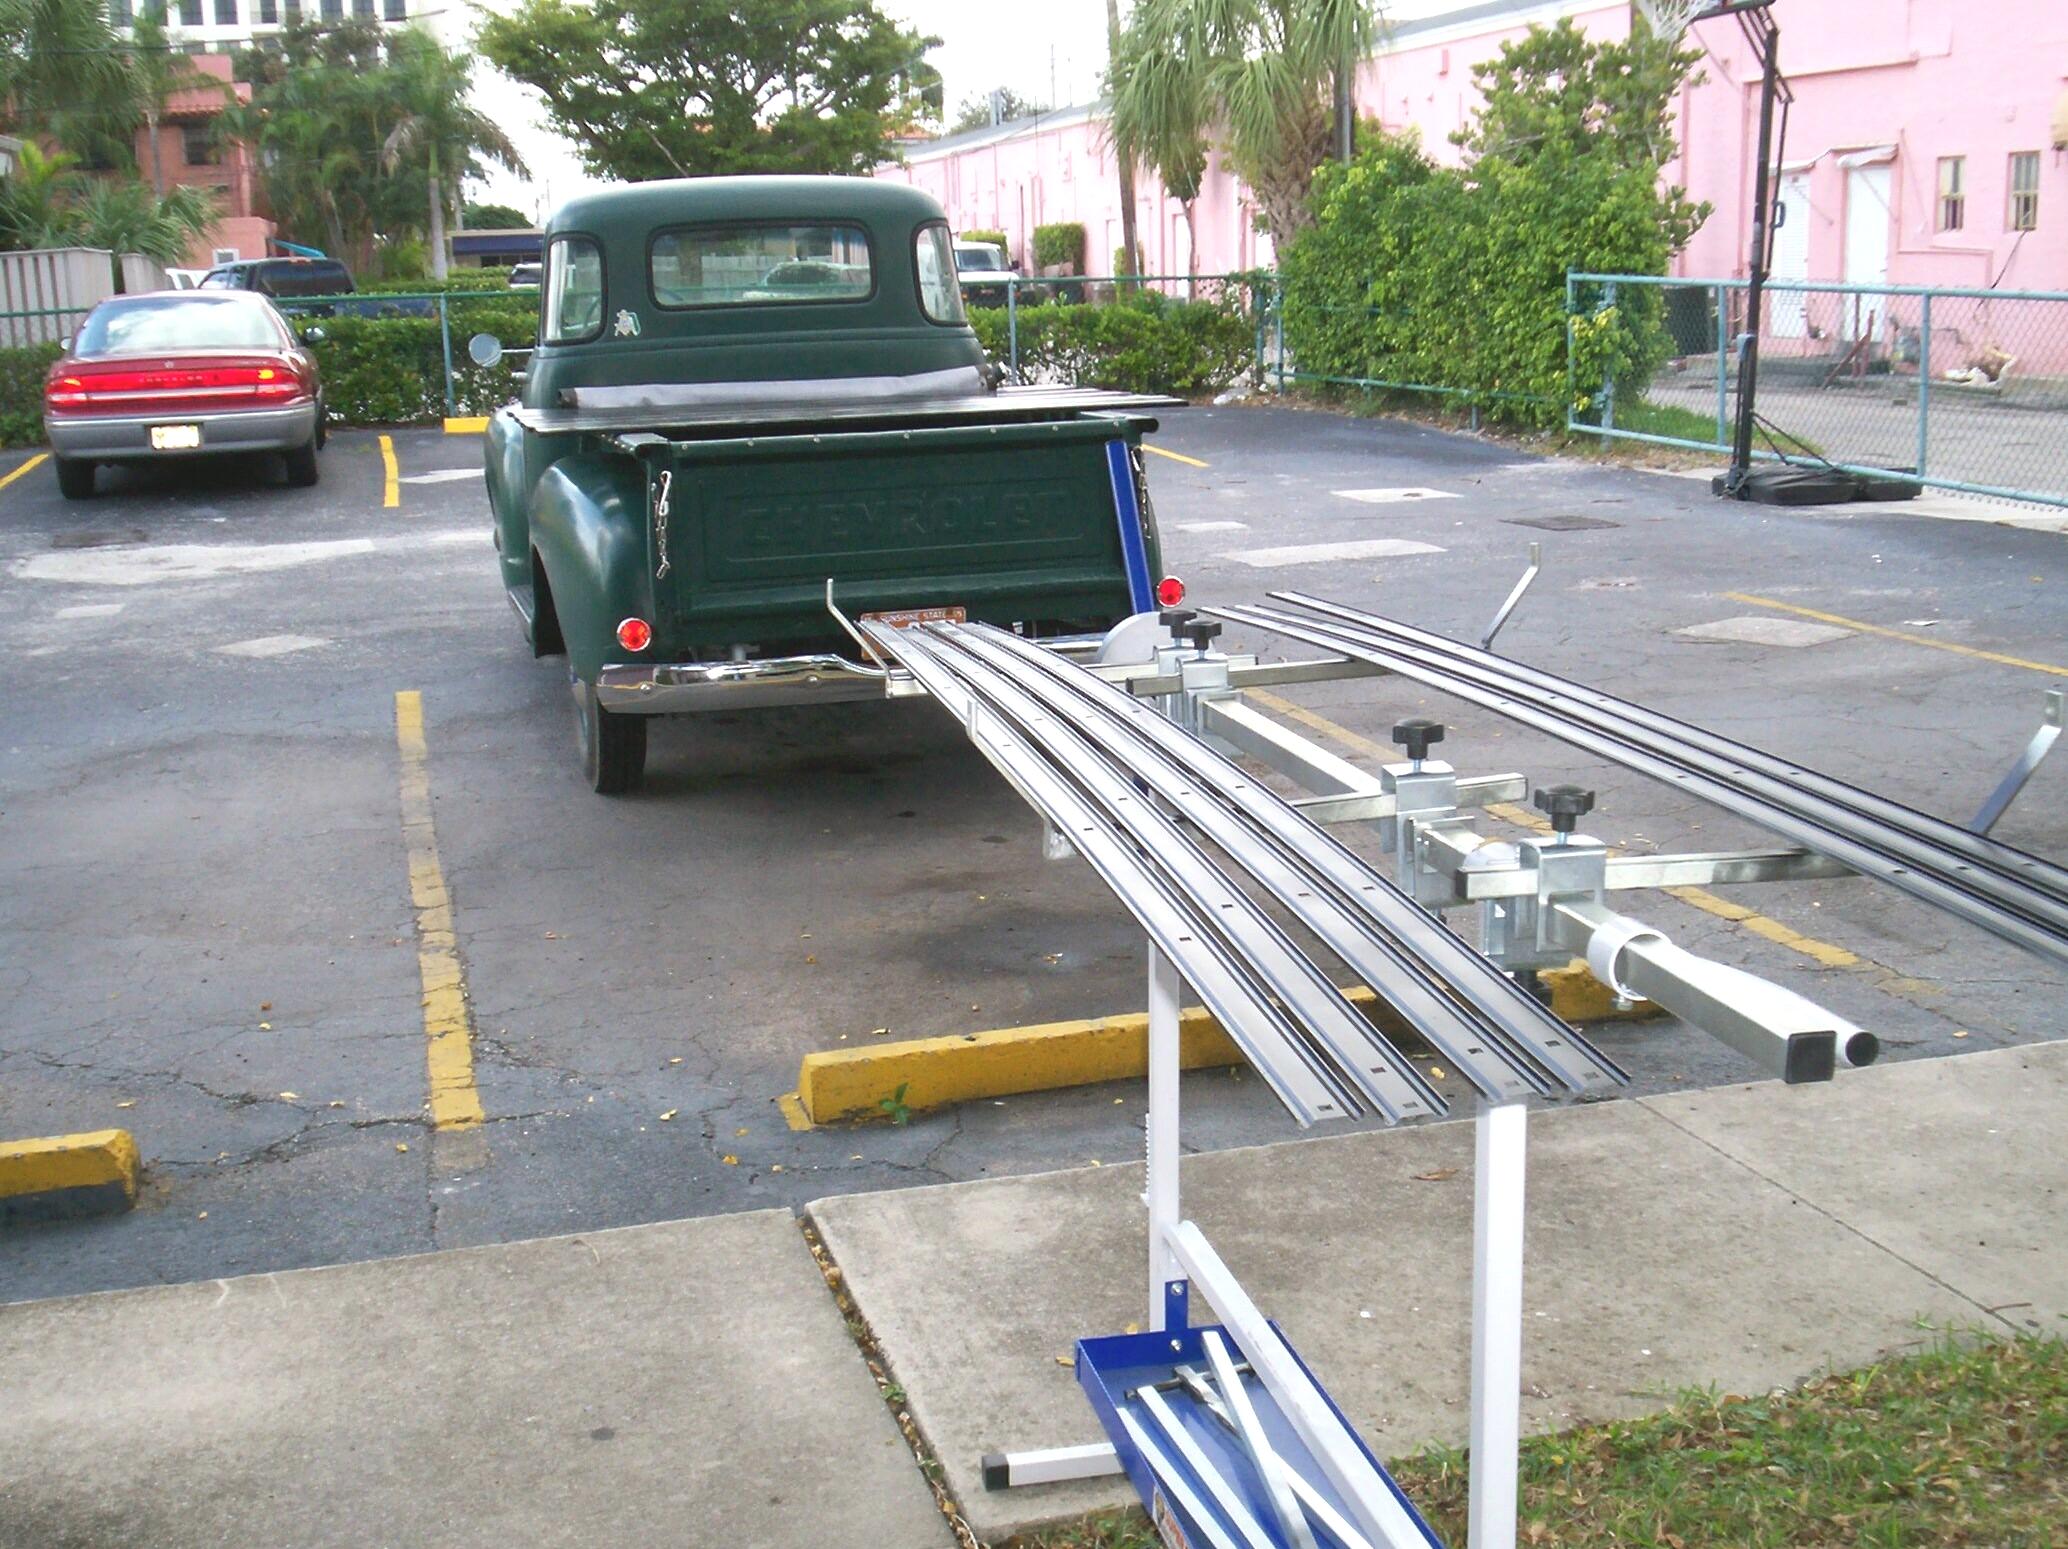 Did
the bed strips next. These things are too long to hang in BillyBob's
tree and there's seven of them. I dug out my superstand I got from
Eastwood a few years ago. I don't use this thing that often so It's
always got other junk piled up on it and around it. Takes awhile to get
at it. Gave the backside of the strips a coat of rattlecan Chassis
Black after PRE Paint Prep. Turned the strips over and gave them a
couple of coats of the same. Not a pretty sight. Am down to my last can
of Chassis Black and it's a sputter can. But what the heck? These are
bed strips in a daily driver, after all.
Did
the bed strips next. These things are too long to hang in BillyBob's
tree and there's seven of them. I dug out my superstand I got from
Eastwood a few years ago. I don't use this thing that often so It's
always got other junk piled up on it and around it. Takes awhile to get
at it. Gave the backside of the strips a coat of rattlecan Chassis
Black after PRE Paint Prep. Turned the strips over and gave them a
couple of coats of the same. Not a pretty sight. Am down to my last can
of Chassis Black and it's a sputter can. But what the heck? These are
bed strips in a daily driver, after all.
When I ran out of paint, I buttoned everyhing up at the Krash Lab and headed off to Crabby Jack's fer a couple of cold ones on the way home to the Krash Pad. Plan to be home b'for darkness falls.
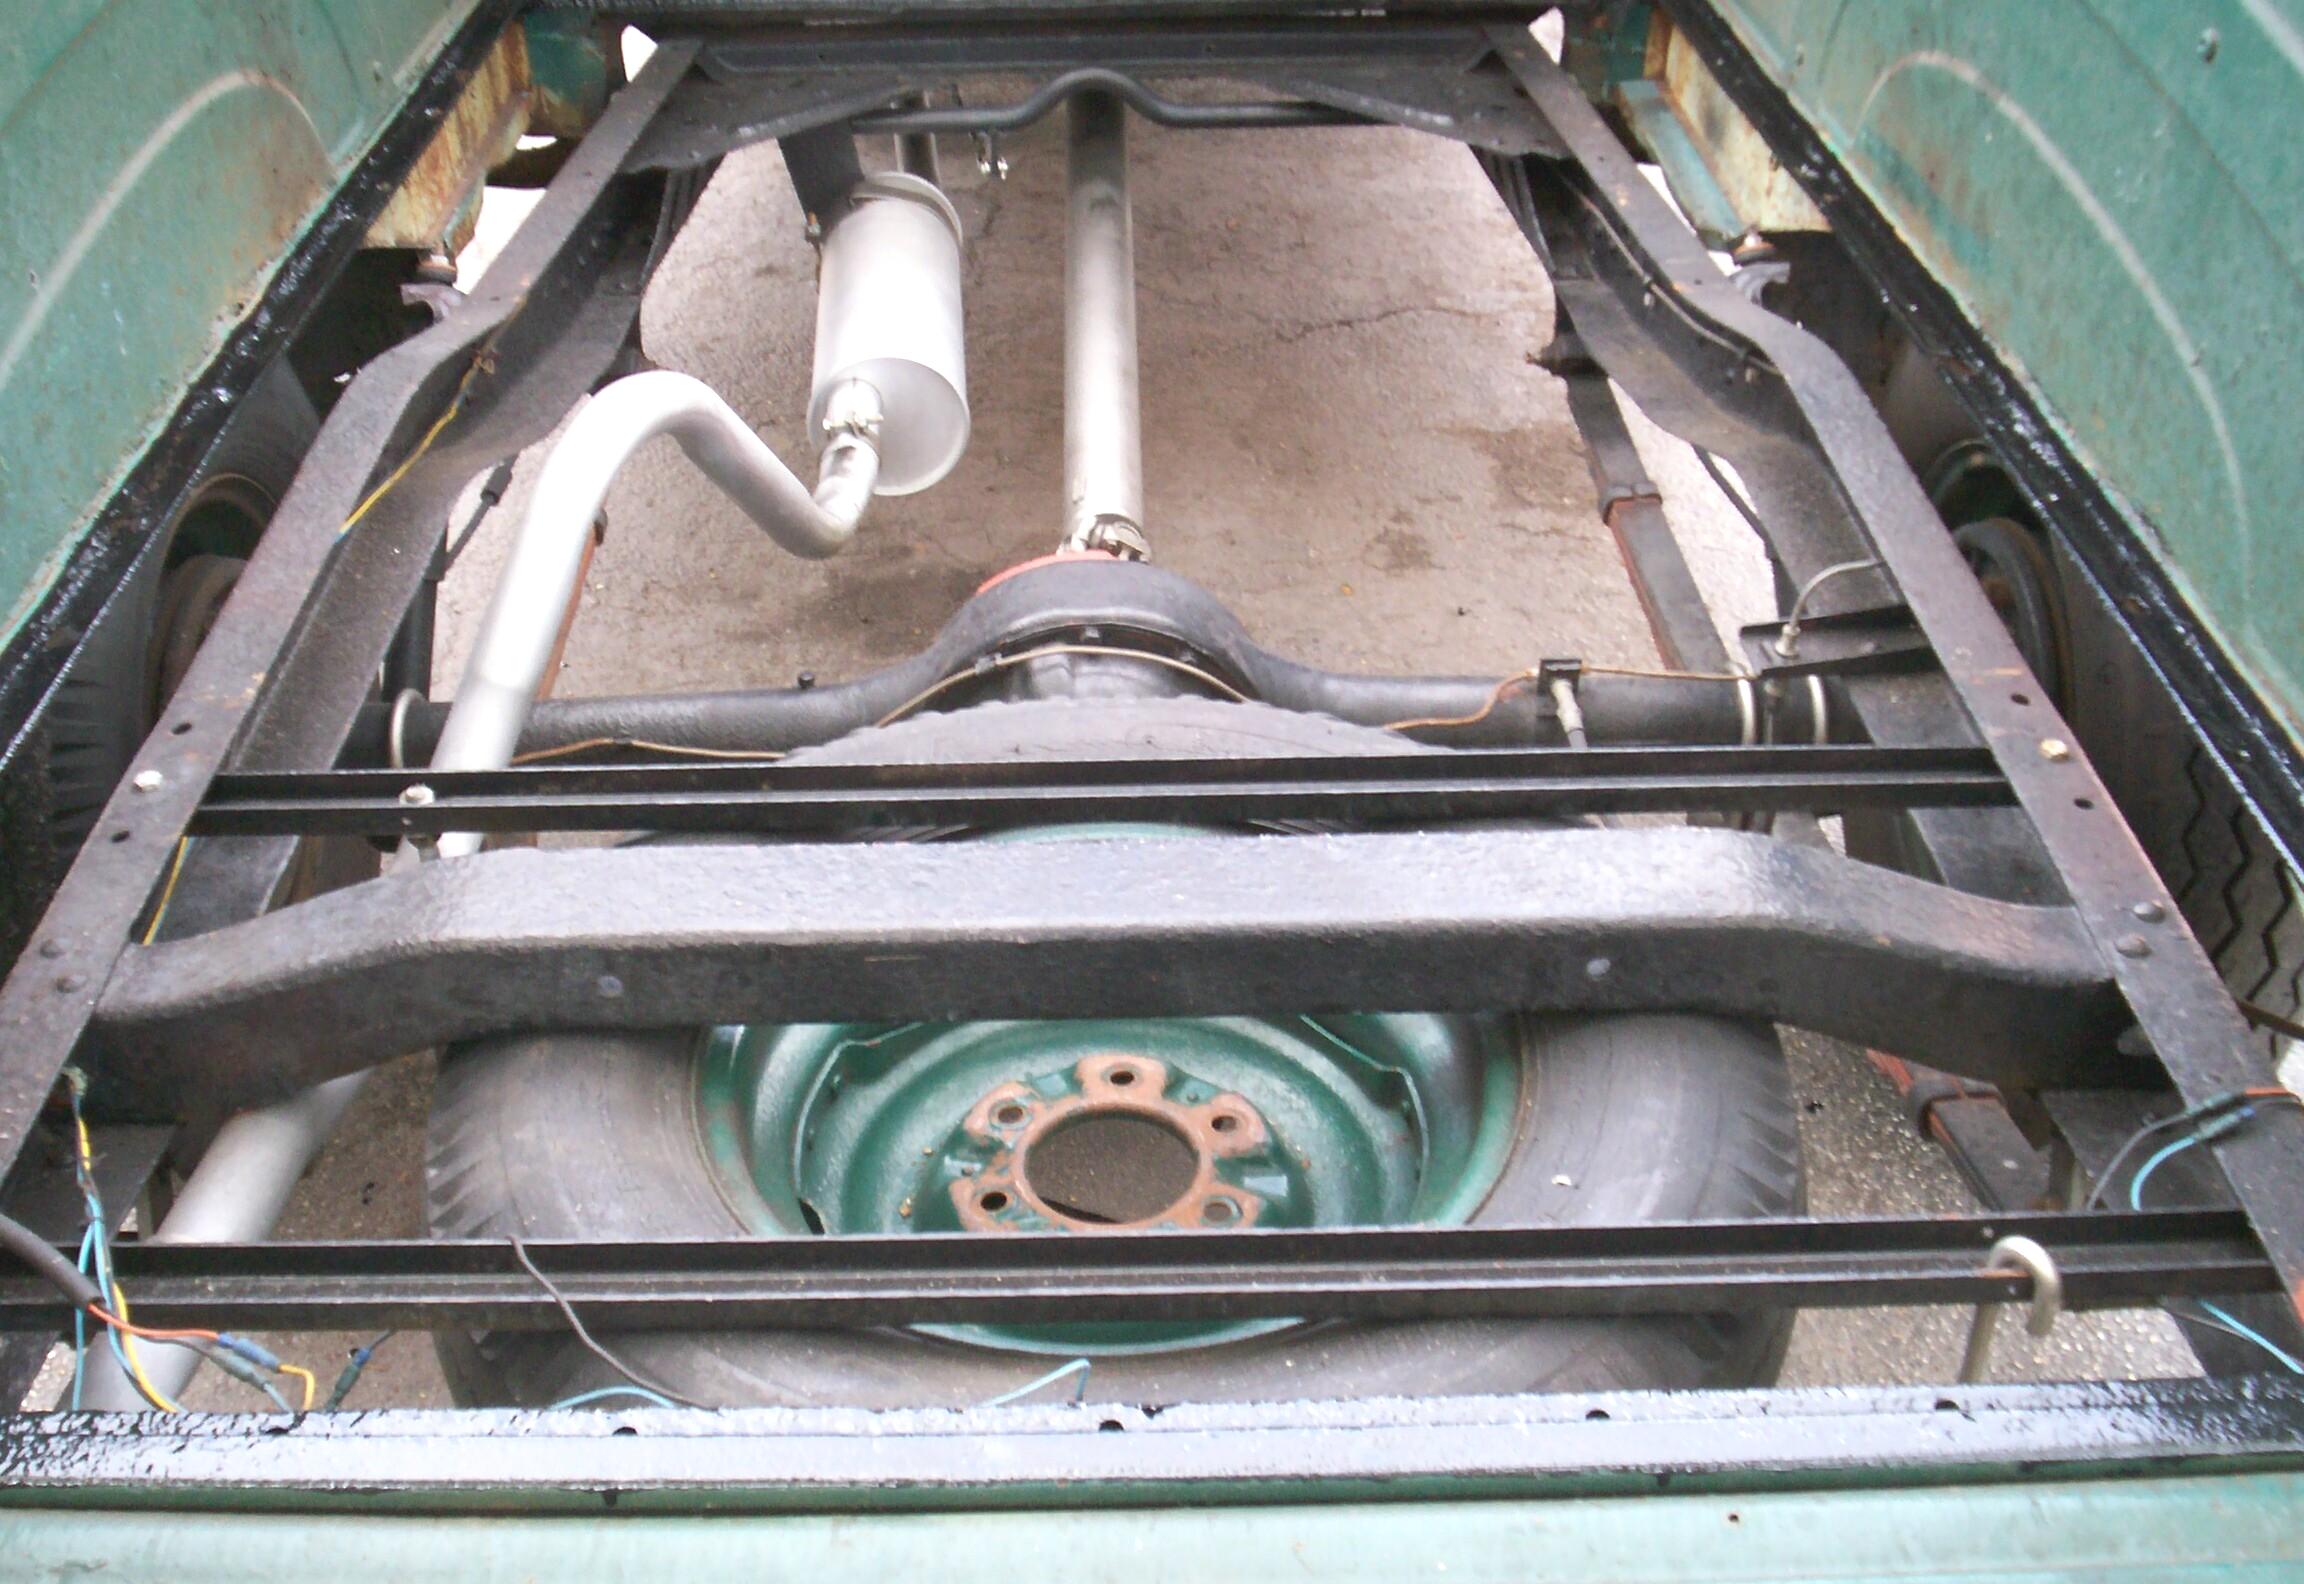
January 1st 2007 New Year's Day I managed to get home from Crabby jack's, safe 'n sound and, well before dark. As a result, I feel fine on this first day of 2007. The weather is good for shadetree garage work too. Started by removing the temporary bolts holding the bed sides to the frame. Same for the upper rear shock mounts and the spare tire.
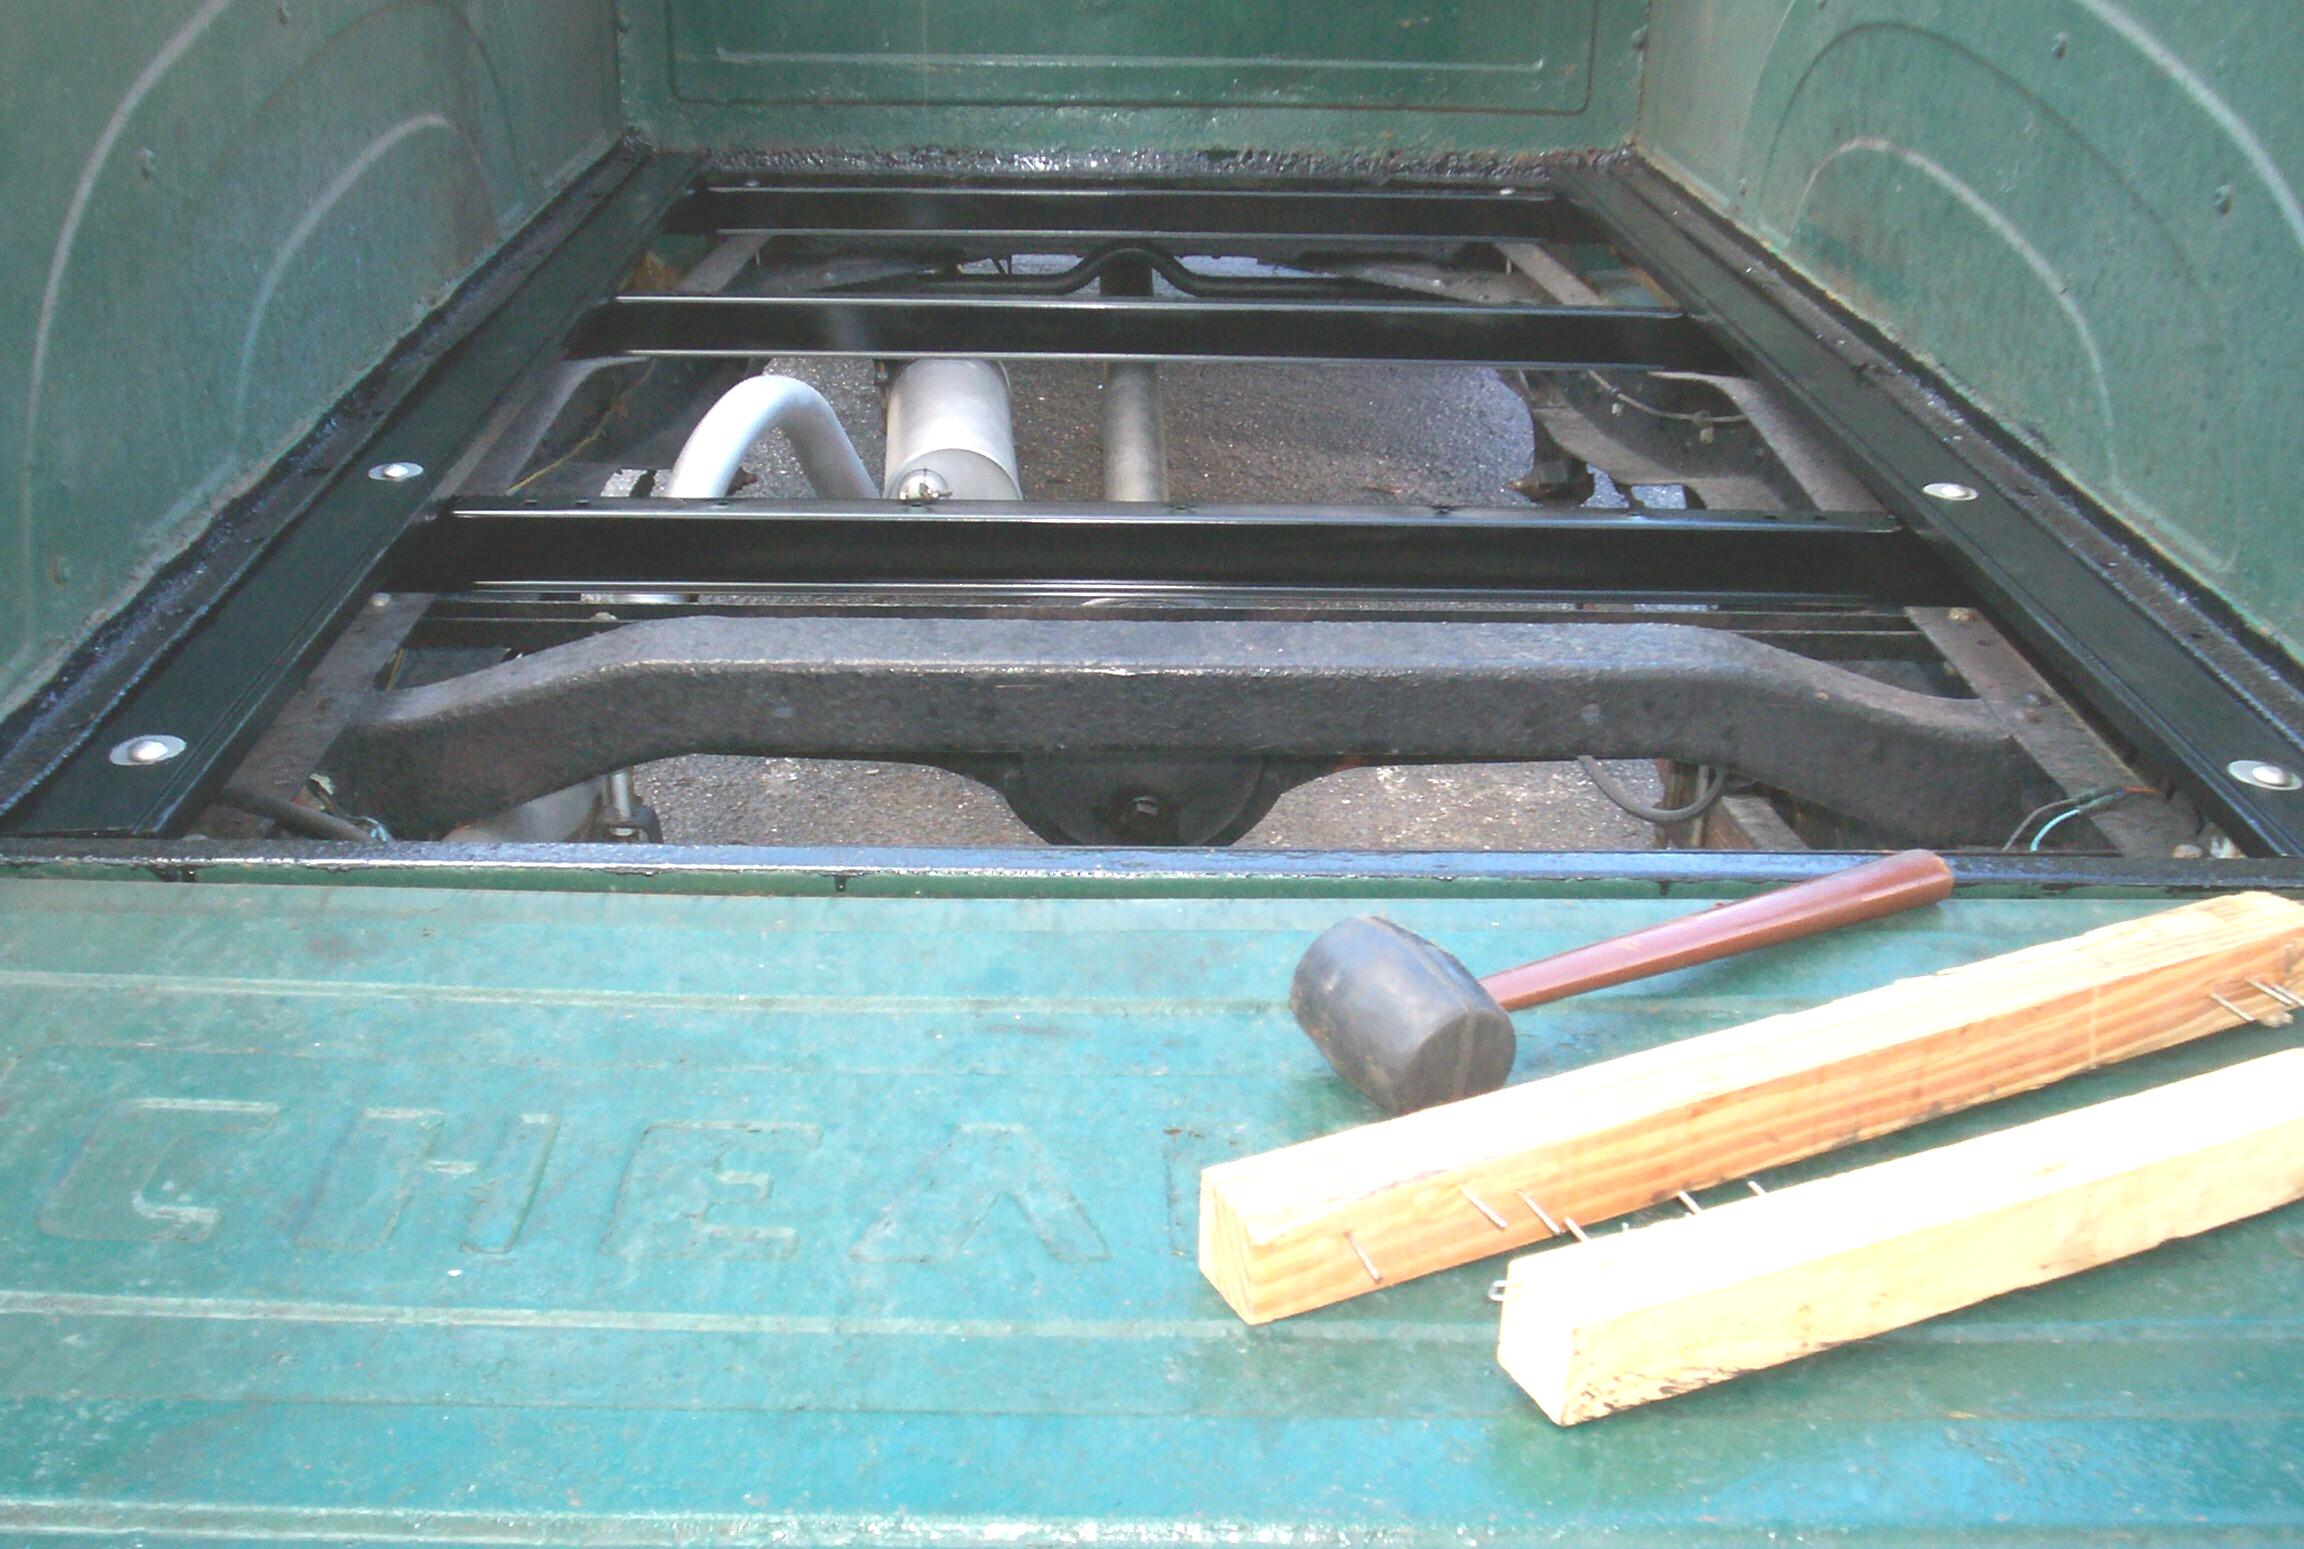 Put
the bed edge boards in place, then the three cross members. They went
in considerably easier this time now that I know the pitfalls from the
trial fit back in November. I'm about to go off the reservation as far
as the assembly instructions are concerned, so I stopped to smoke a
cigar and plan my next moves.
Put
the bed edge boards in place, then the three cross members. They went
in considerably easier this time now that I know the pitfalls from the
trial fit back in November. I'm about to go off the reservation as far
as the assembly instructions are concerned, so I stopped to smoke a
cigar and plan my next moves.
When I trial fit the bed boards, there were several bolts I didn't bother to install because I couldn't reach them. The instructions call for placing all the boards and bed strips before installing any bolts. The troublesome bolts are at the first bed strips on either side. After the cigar there were still four bolts (two on each side) that I did not have a solution for. These hex nuts go on the carriage bolts that go thru the bed strips and then the cross member, which is a channel 2" inches deep by 1-1/4" wide. In most locations, they can be reached by 7/16" socket on an extension. The problem is that in two locations on each side, the holes are directly above where the cross member sets on the frame and you can't get a wrench on them. You can't even get your hands in there to get them "finger tight". If I ever find a physician with hands small enuf for this location, she will become my prostate exam doctor. I'm bypassing these hex nuts for the time being.
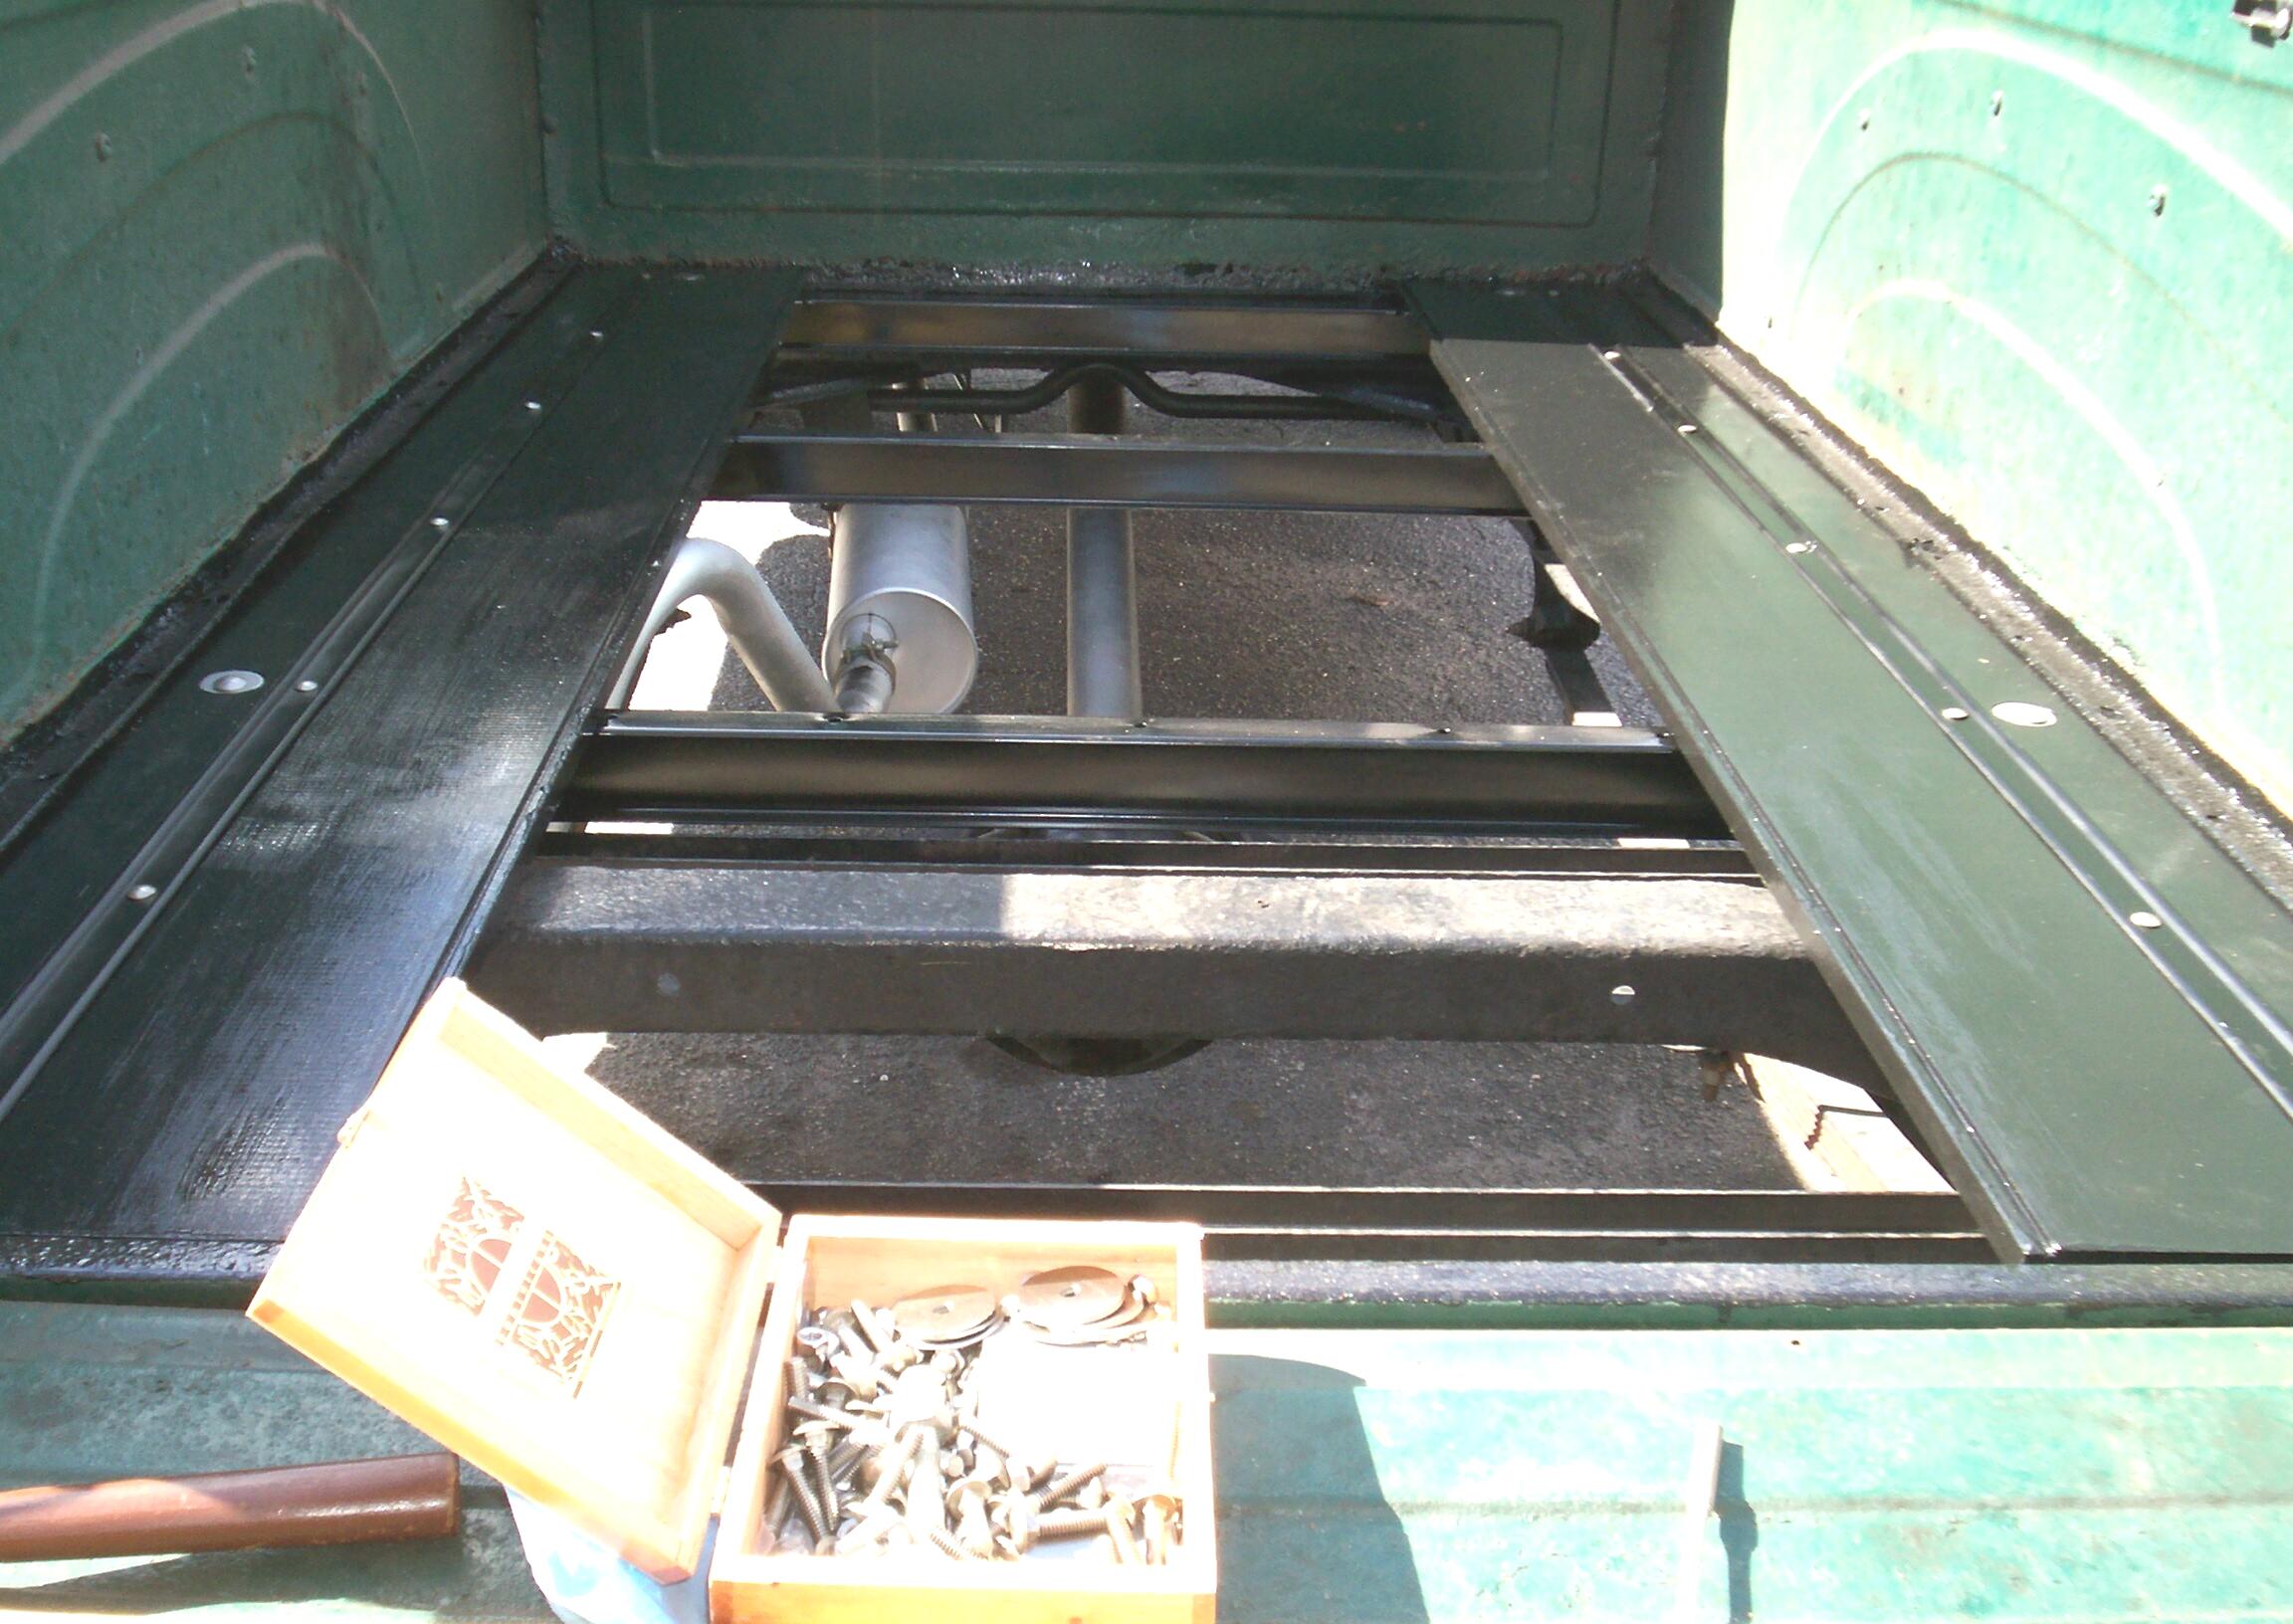 I
didn't have the first four boards and two bed strips in until one in
the afternoon, but they were the most difficult to install so maybe now
things will go faster. The bed strips are still sticky and they are
easily marred. Damnation! I went back to the instructional sheet at
this point. The rest of the bed boards were placed, followed by the
strips. Putting the hex nuts on the carriage bolts was tedjus. Put
threadlocker on a carriage bolt and insert it thru the bed strip, put a
weight (paver in a cardboard box) on the carriage bolt head to fix it
from backing out, then crawl underneath BillyBob and thread a hex nut
and washer on finger tight. Repeat. When a row is in, tighten all hex
nuts in that row before the threadlocker sets.
I
didn't have the first four boards and two bed strips in until one in
the afternoon, but they were the most difficult to install so maybe now
things will go faster. The bed strips are still sticky and they are
easily marred. Damnation! I went back to the instructional sheet at
this point. The rest of the bed boards were placed, followed by the
strips. Putting the hex nuts on the carriage bolts was tedjus. Put
threadlocker on a carriage bolt and insert it thru the bed strip, put a
weight (paver in a cardboard box) on the carriage bolt head to fix it
from backing out, then crawl underneath BillyBob and thread a hex nut
and washer on finger tight. Repeat. When a row is in, tighten all hex
nuts in that row before the threadlocker sets.
 Got
all the bolts by half past three. All I got left now is to bolt the
shocks back up and re-install the spare tire in its carrier. Banged my
knee twice (same knee, same place!) and I'm limping around like an old
man. When I post this log entry, JR
will e-mail to remind me that I am getting to be an old man.
Got
all the bolts by half past three. All I got left now is to bolt the
shocks back up and re-install the spare tire in its carrier. Banged my
knee twice (same knee, same place!) and I'm limping around like an old
man. When I post this log entry, JR
will e-mail to remind me that I am getting to be an old man.
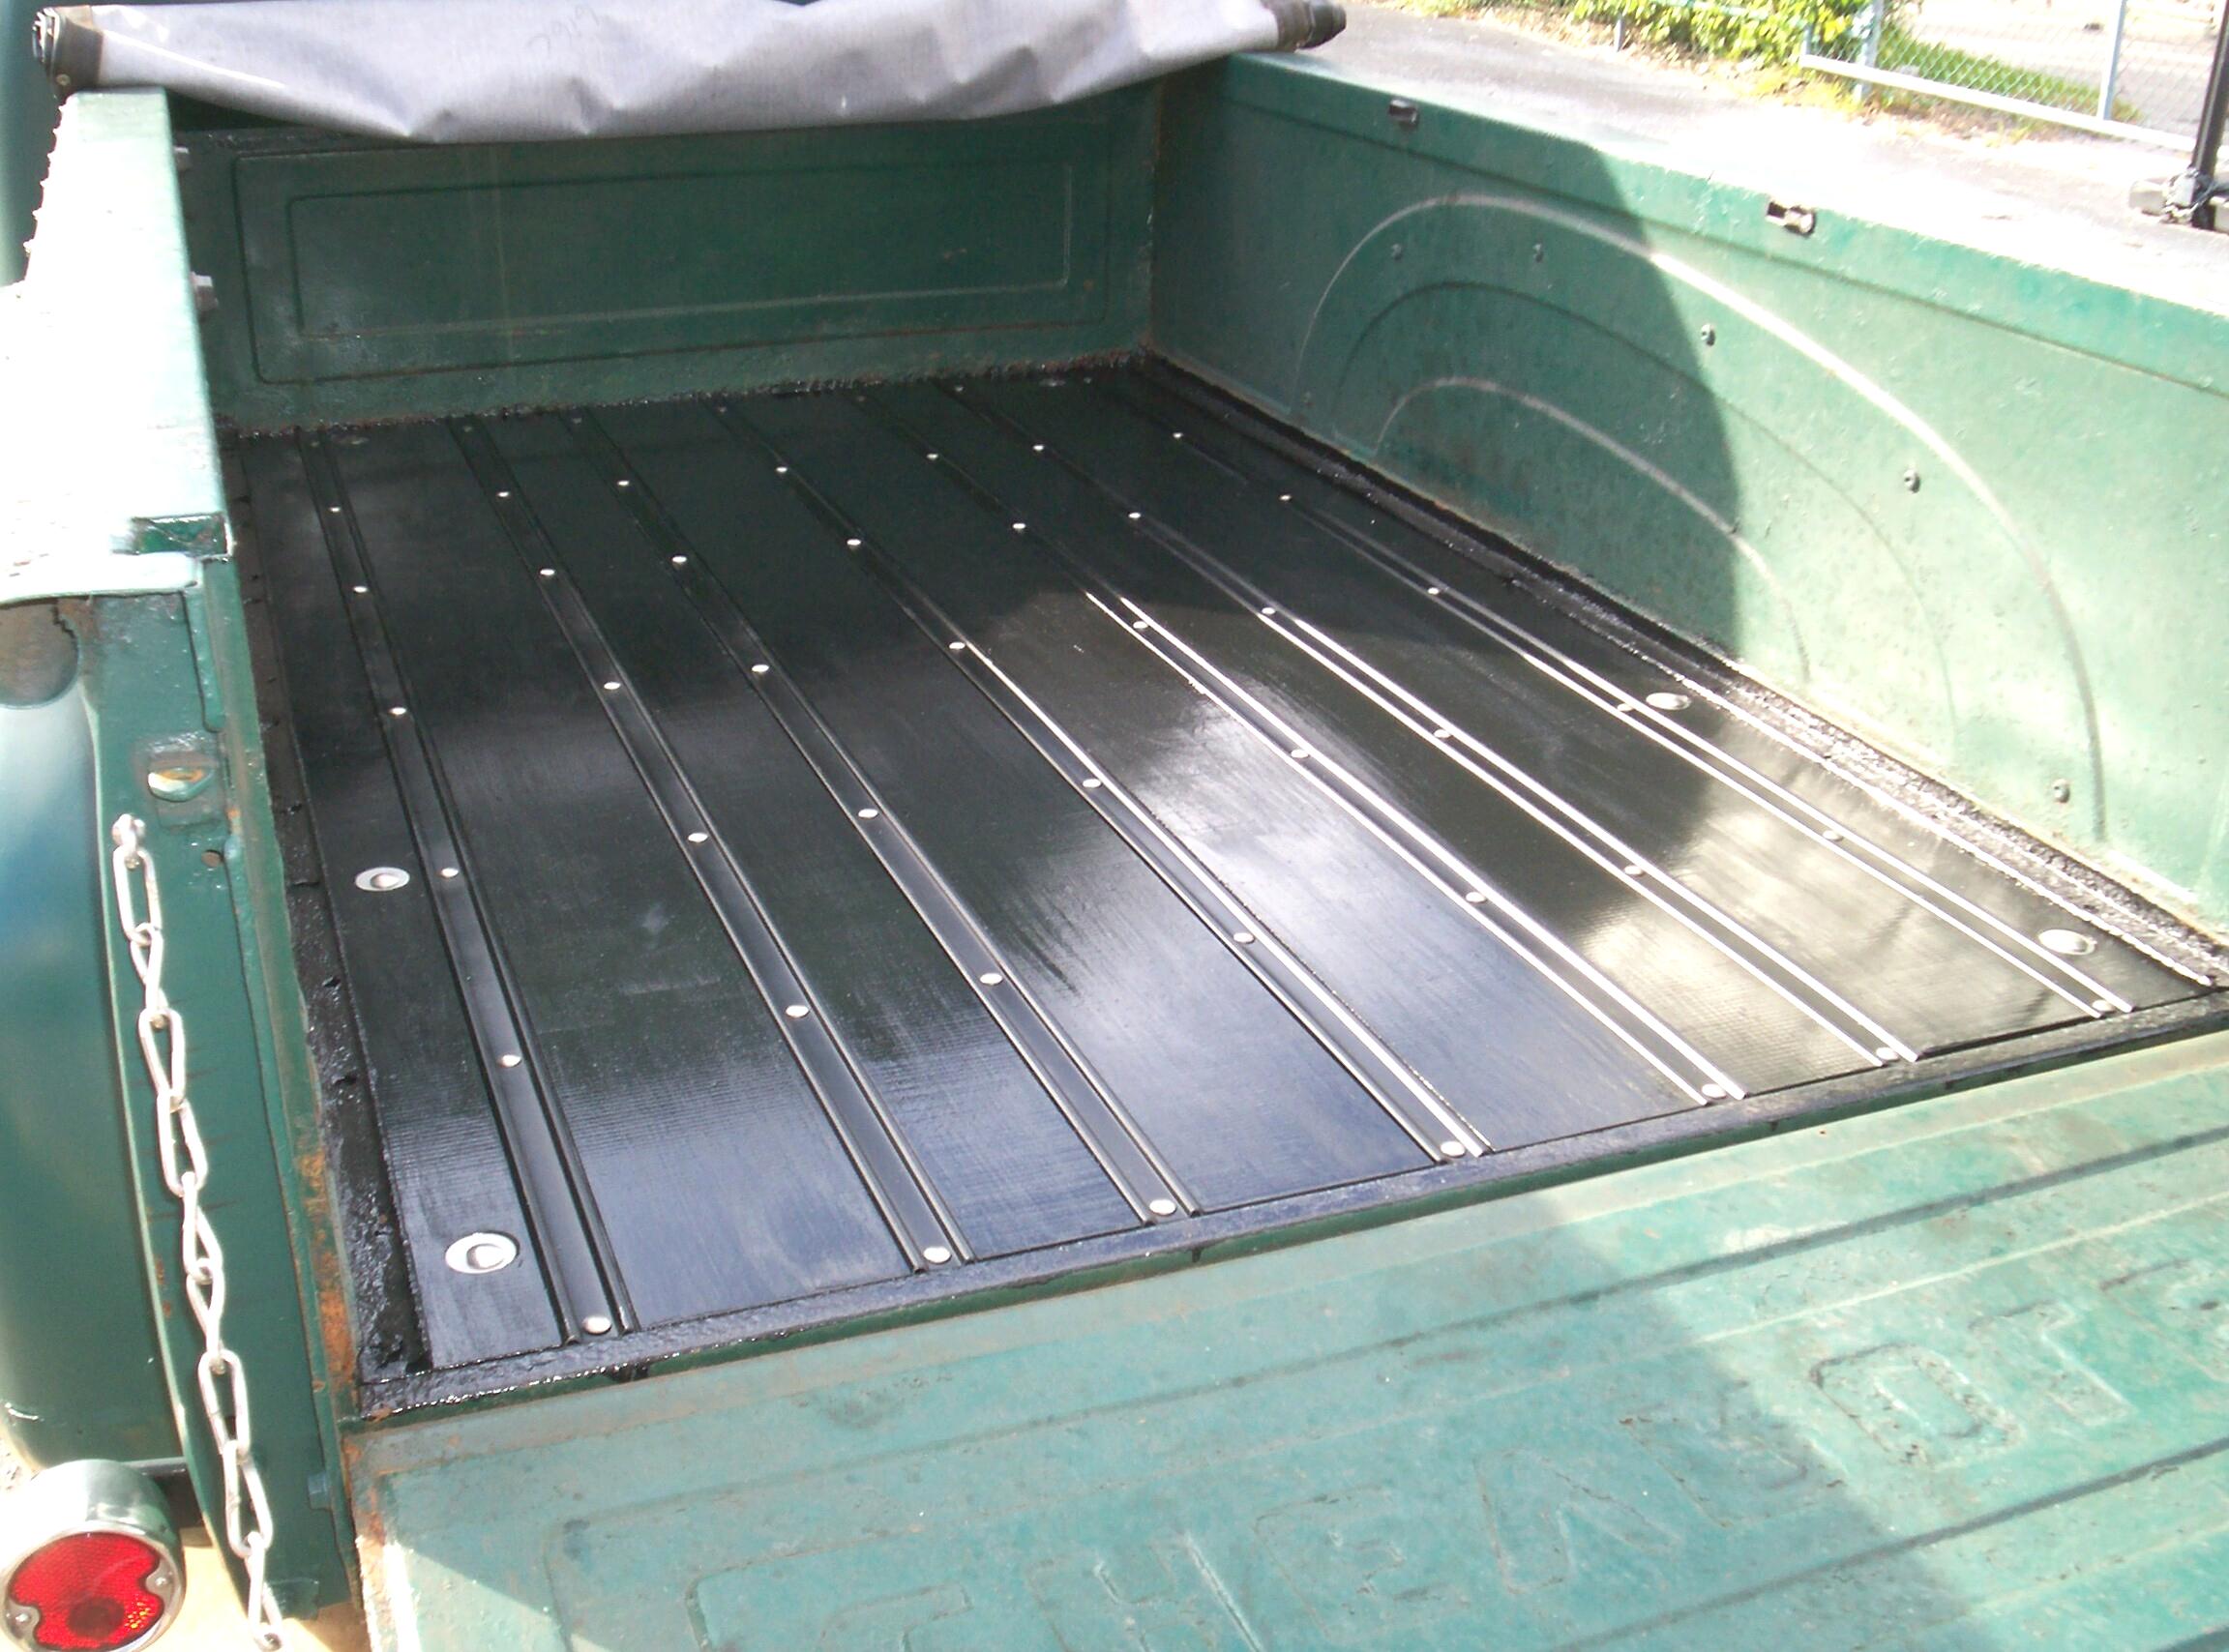
 Well,
It's done fer now and has all the characteristics of a BillyBob
production - Fingerprint smudges on the bed strips that did not
completely dry overnite, dabs here and there from stray gobs of
threadlocker, a few scratches in the paint, etc. JR sez it won't be a
real truck until I haul a load of manure or other offensive material.
With that in mind, there's nutin' to be upset about.
Well,
It's done fer now and has all the characteristics of a BillyBob
production - Fingerprint smudges on the bed strips that did not
completely dry overnite, dabs here and there from stray gobs of
threadlocker, a few scratches in the paint, etc. JR sez it won't be a
real truck until I haul a load of manure or other offensive material.
With that in mind, there's nutin' to be upset about.
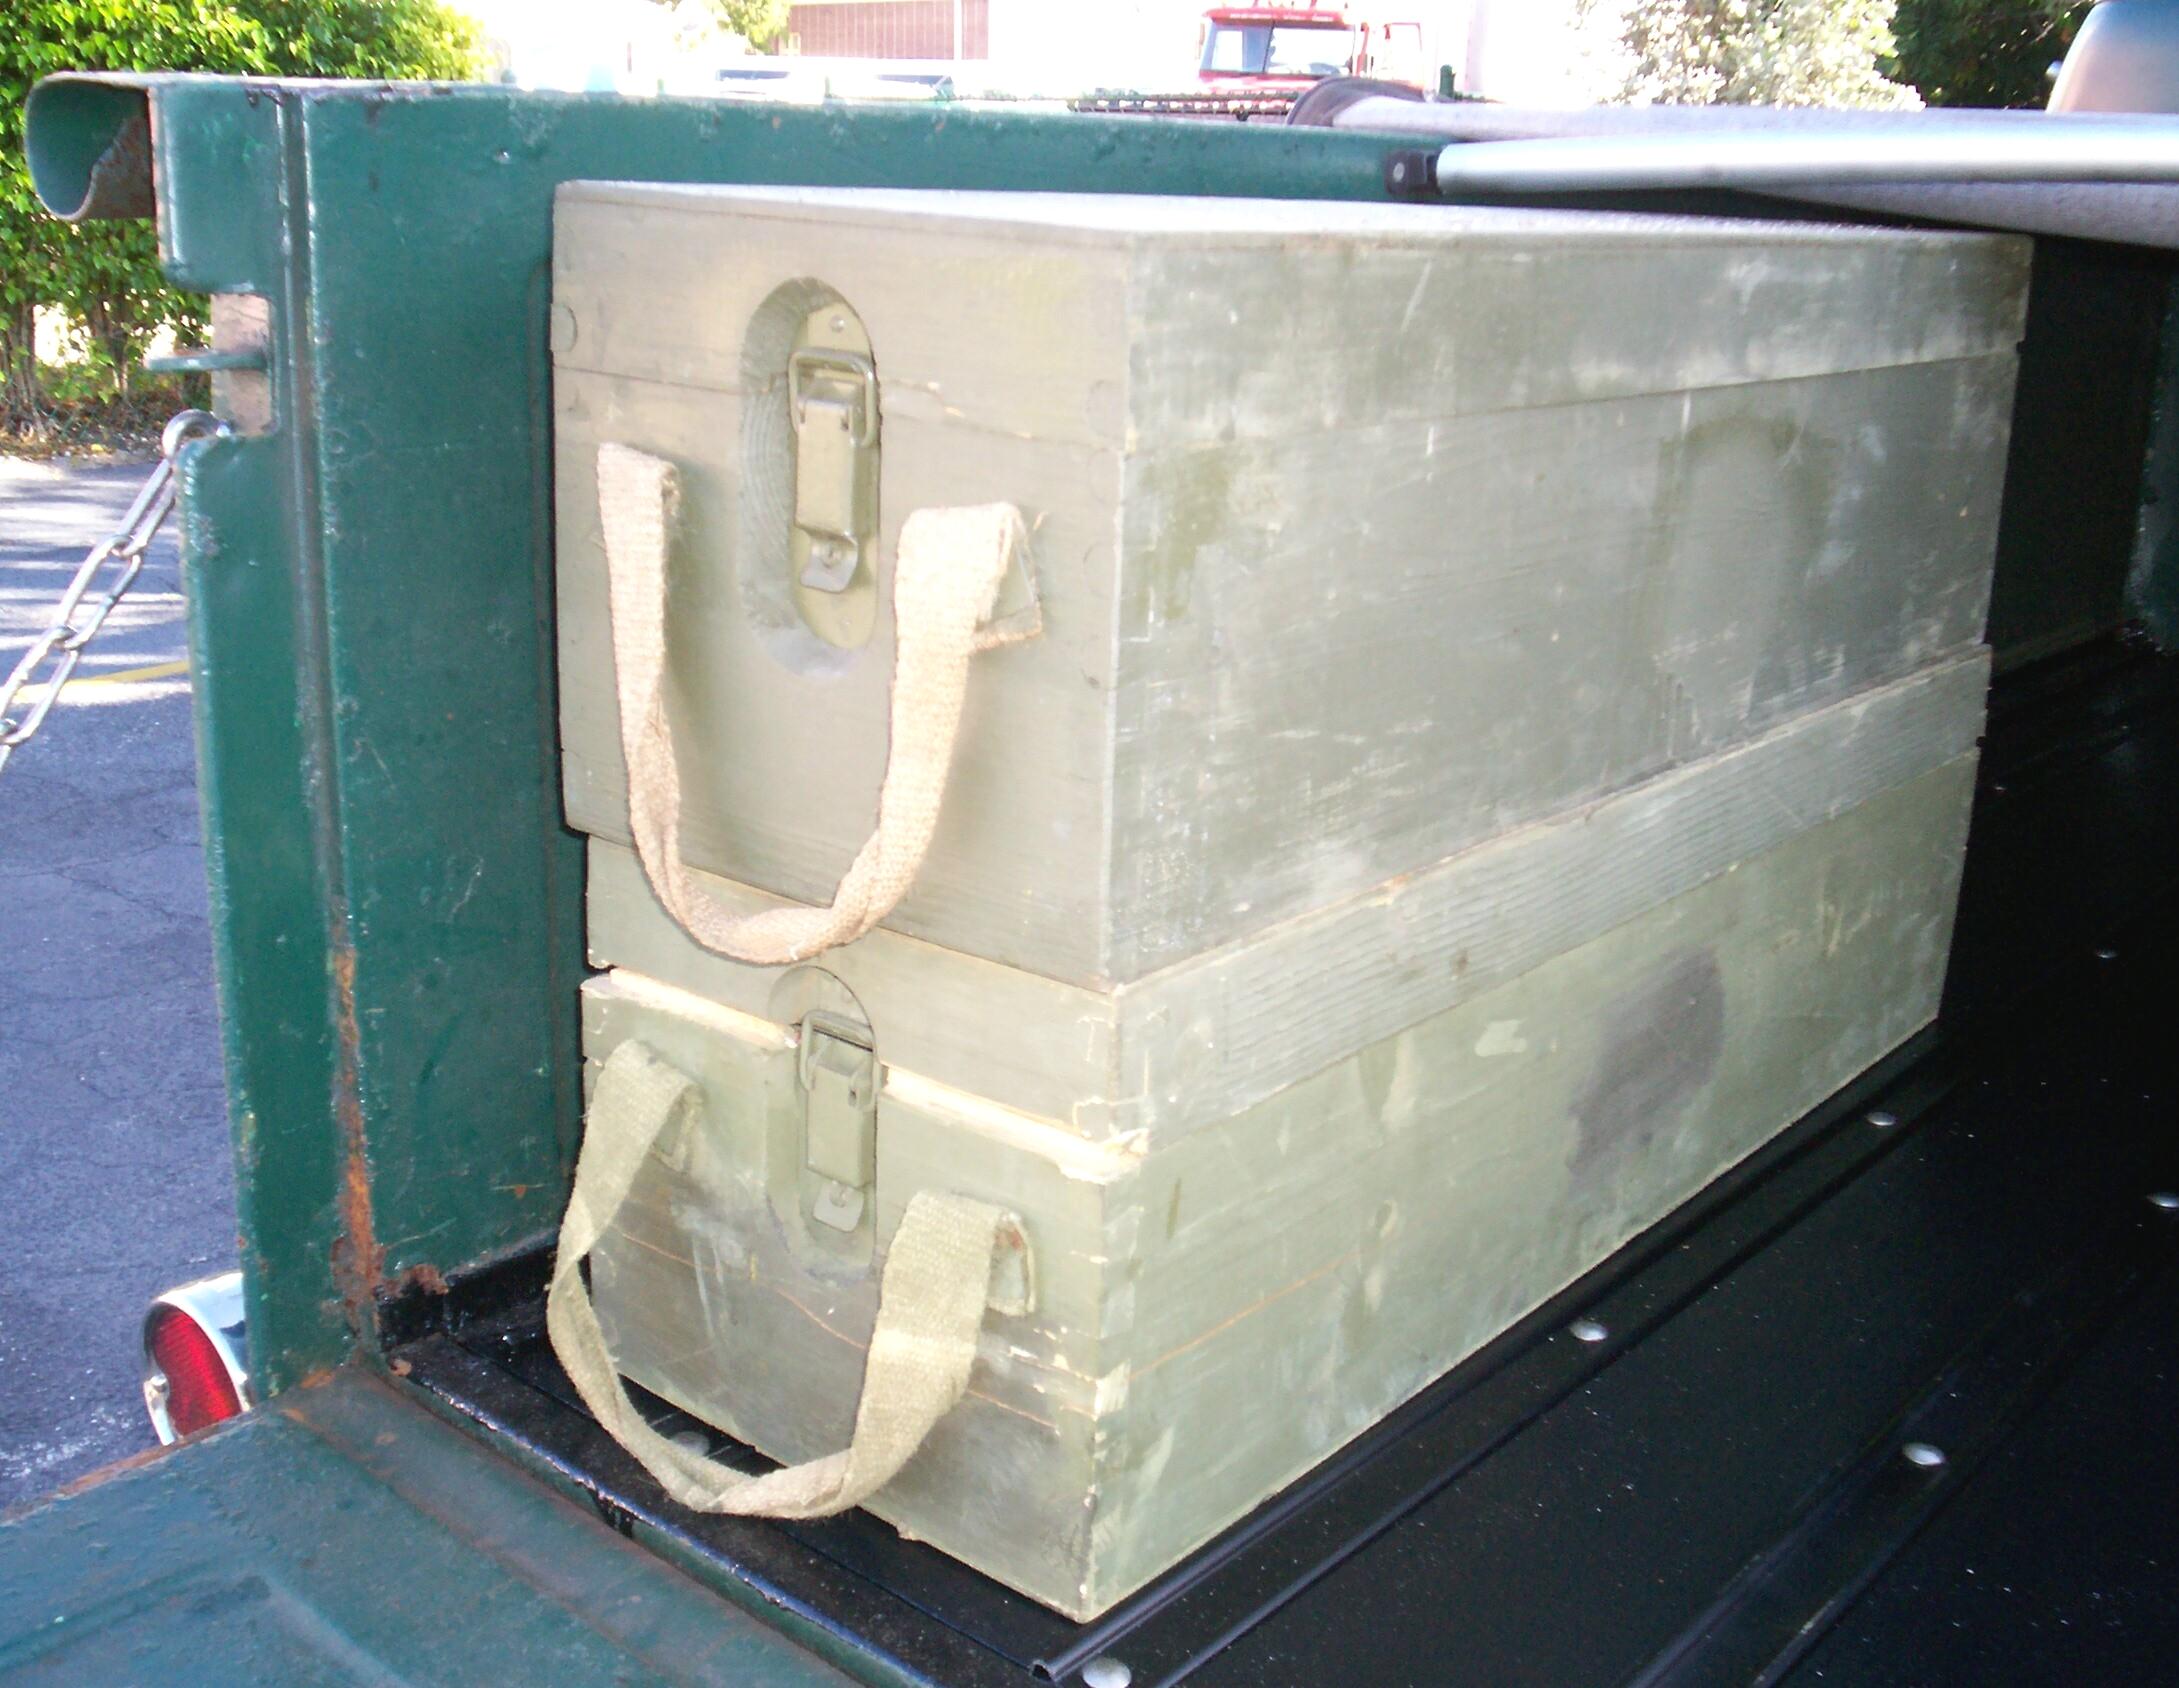
January 6th 2007 Stopped by the warehouse after this morning's beach run to pick up a couple of the munitions boxes that I'm going to use for spare parts and tools on roadtrip events. These things are cheap wood and masonite construction, faded olive drab with rotted canvas handles. They do have nice inset metal latches on the ends. First order of bizness is to clean them up a bit and slap some black paint on them. Nuttin' fancy.
 .
. . The more I looked at 'em, the more I liked the "rat rod" personna
of the old ammo boxes just the way they are. I can always paint 'em
later if I change my mind. Earlier in the week, I web-ordered ten
stainless steel hasps from McMaster-Carr.
They arrived on Friday. My intent was one hasp to anchor each ammo box
to the truck bed or side. Came to the conclusion just before I got
started that two hasps per box was a better idea so I'll have to order
ten more.
.
. . The more I looked at 'em, the more I liked the "rat rod" personna
of the old ammo boxes just the way they are. I can always paint 'em
later if I change my mind. Earlier in the week, I web-ordered ten
stainless steel hasps from McMaster-Carr.
They arrived on Friday. My intent was one hasp to anchor each ammo box
to the truck bed or side. Came to the conclusion just before I got
started that two hasps per box was a better idea so I'll have to order
ten more.
The idea is that the boxes will stack, two high, along the bedsides and bed front. The bottom boxes will be anchored by two hasps each with the hasp fastened to the bed floor and the padlock loop fastened to the box front. The top boxes will be anchored by two hasps each with the hasp fastened to the bedside and the padlock loop fastened to the box top.
Started by locating the first bottom box along the left bedside three inches from the tailgate face. This way I will be able to get my hands on the boxes to lift them out without dropping the gate. The two hasps were located four inches from each end of the box and taped down. The box was then removed to install the hasps to the bed floor. 3/32" guide holes were drilled for #8 x 3/4" stainless steel flathead screws. The padlock loops were installed on the front of the box in the same manner.
The bottom box was placed back into position and checked for fit. Then the top box was placed above it and the two hasps for it were located along the bedsides, again four inches from each end, and taped in place. The top box was then removed again to install the hasps to the bedside. 3/32" guide holes were drilled in the bedsides and then drilled again with a 11/64" bit. #8-32 x 1/2" stainless steel slotted machine screws and hex nuts were used to install the hasps to the bedside. The padlock loops were installed on the top of the box in the same manner since the box tops are 1/8" masonite in lieu of the 3/4" wood used for the box fronts.
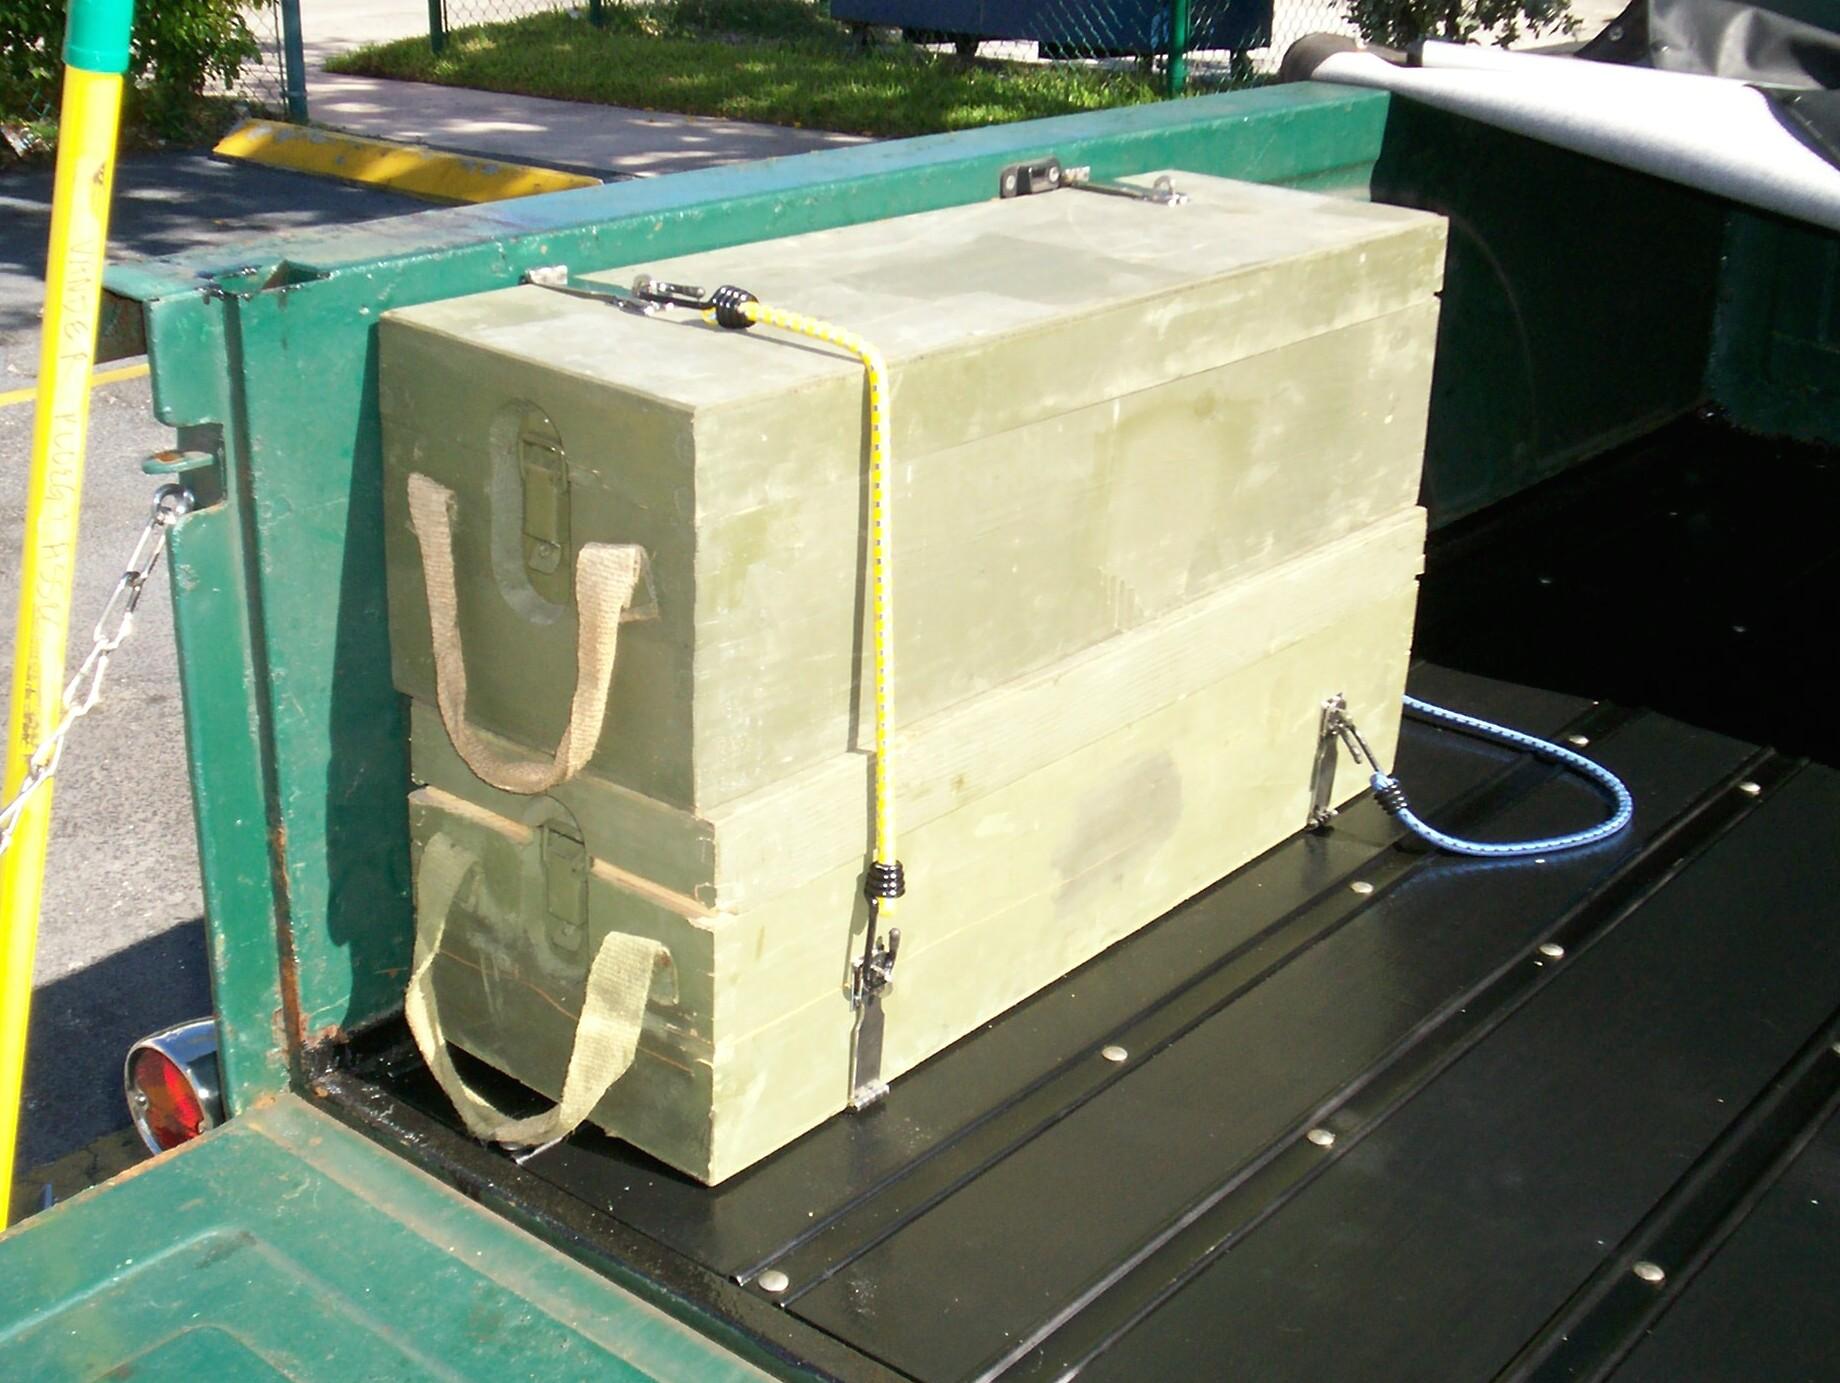 The
final touch is securing the boxes with 12" bungie cords hooked to the
padlock loops of the top and bottom boxes. I scrounged my spare parts
boxes for this prototype installation of the first two boxes. I will
order stainless steel fasteners and bungie cords from McMaster-Carr
with the additional hasp order in the coming week for the other four
pairs of boxes.
The
final touch is securing the boxes with 12" bungie cords hooked to the
padlock loops of the top and bottom boxes. I scrounged my spare parts
boxes for this prototype installation of the first two boxes. I will
order stainless steel fasteners and bungie cords from McMaster-Carr
with the additional hasp order in the coming week for the other four
pairs of boxes.
After the boxes are in, I'll have to start filling them up with roadtrip supplies, parts and tools. In between roadtrips, the ammo boxes can be stored in the warehouse and BillyBob's truck bed can be used like a normal truck with the hasps flat against the floor and bedsides.
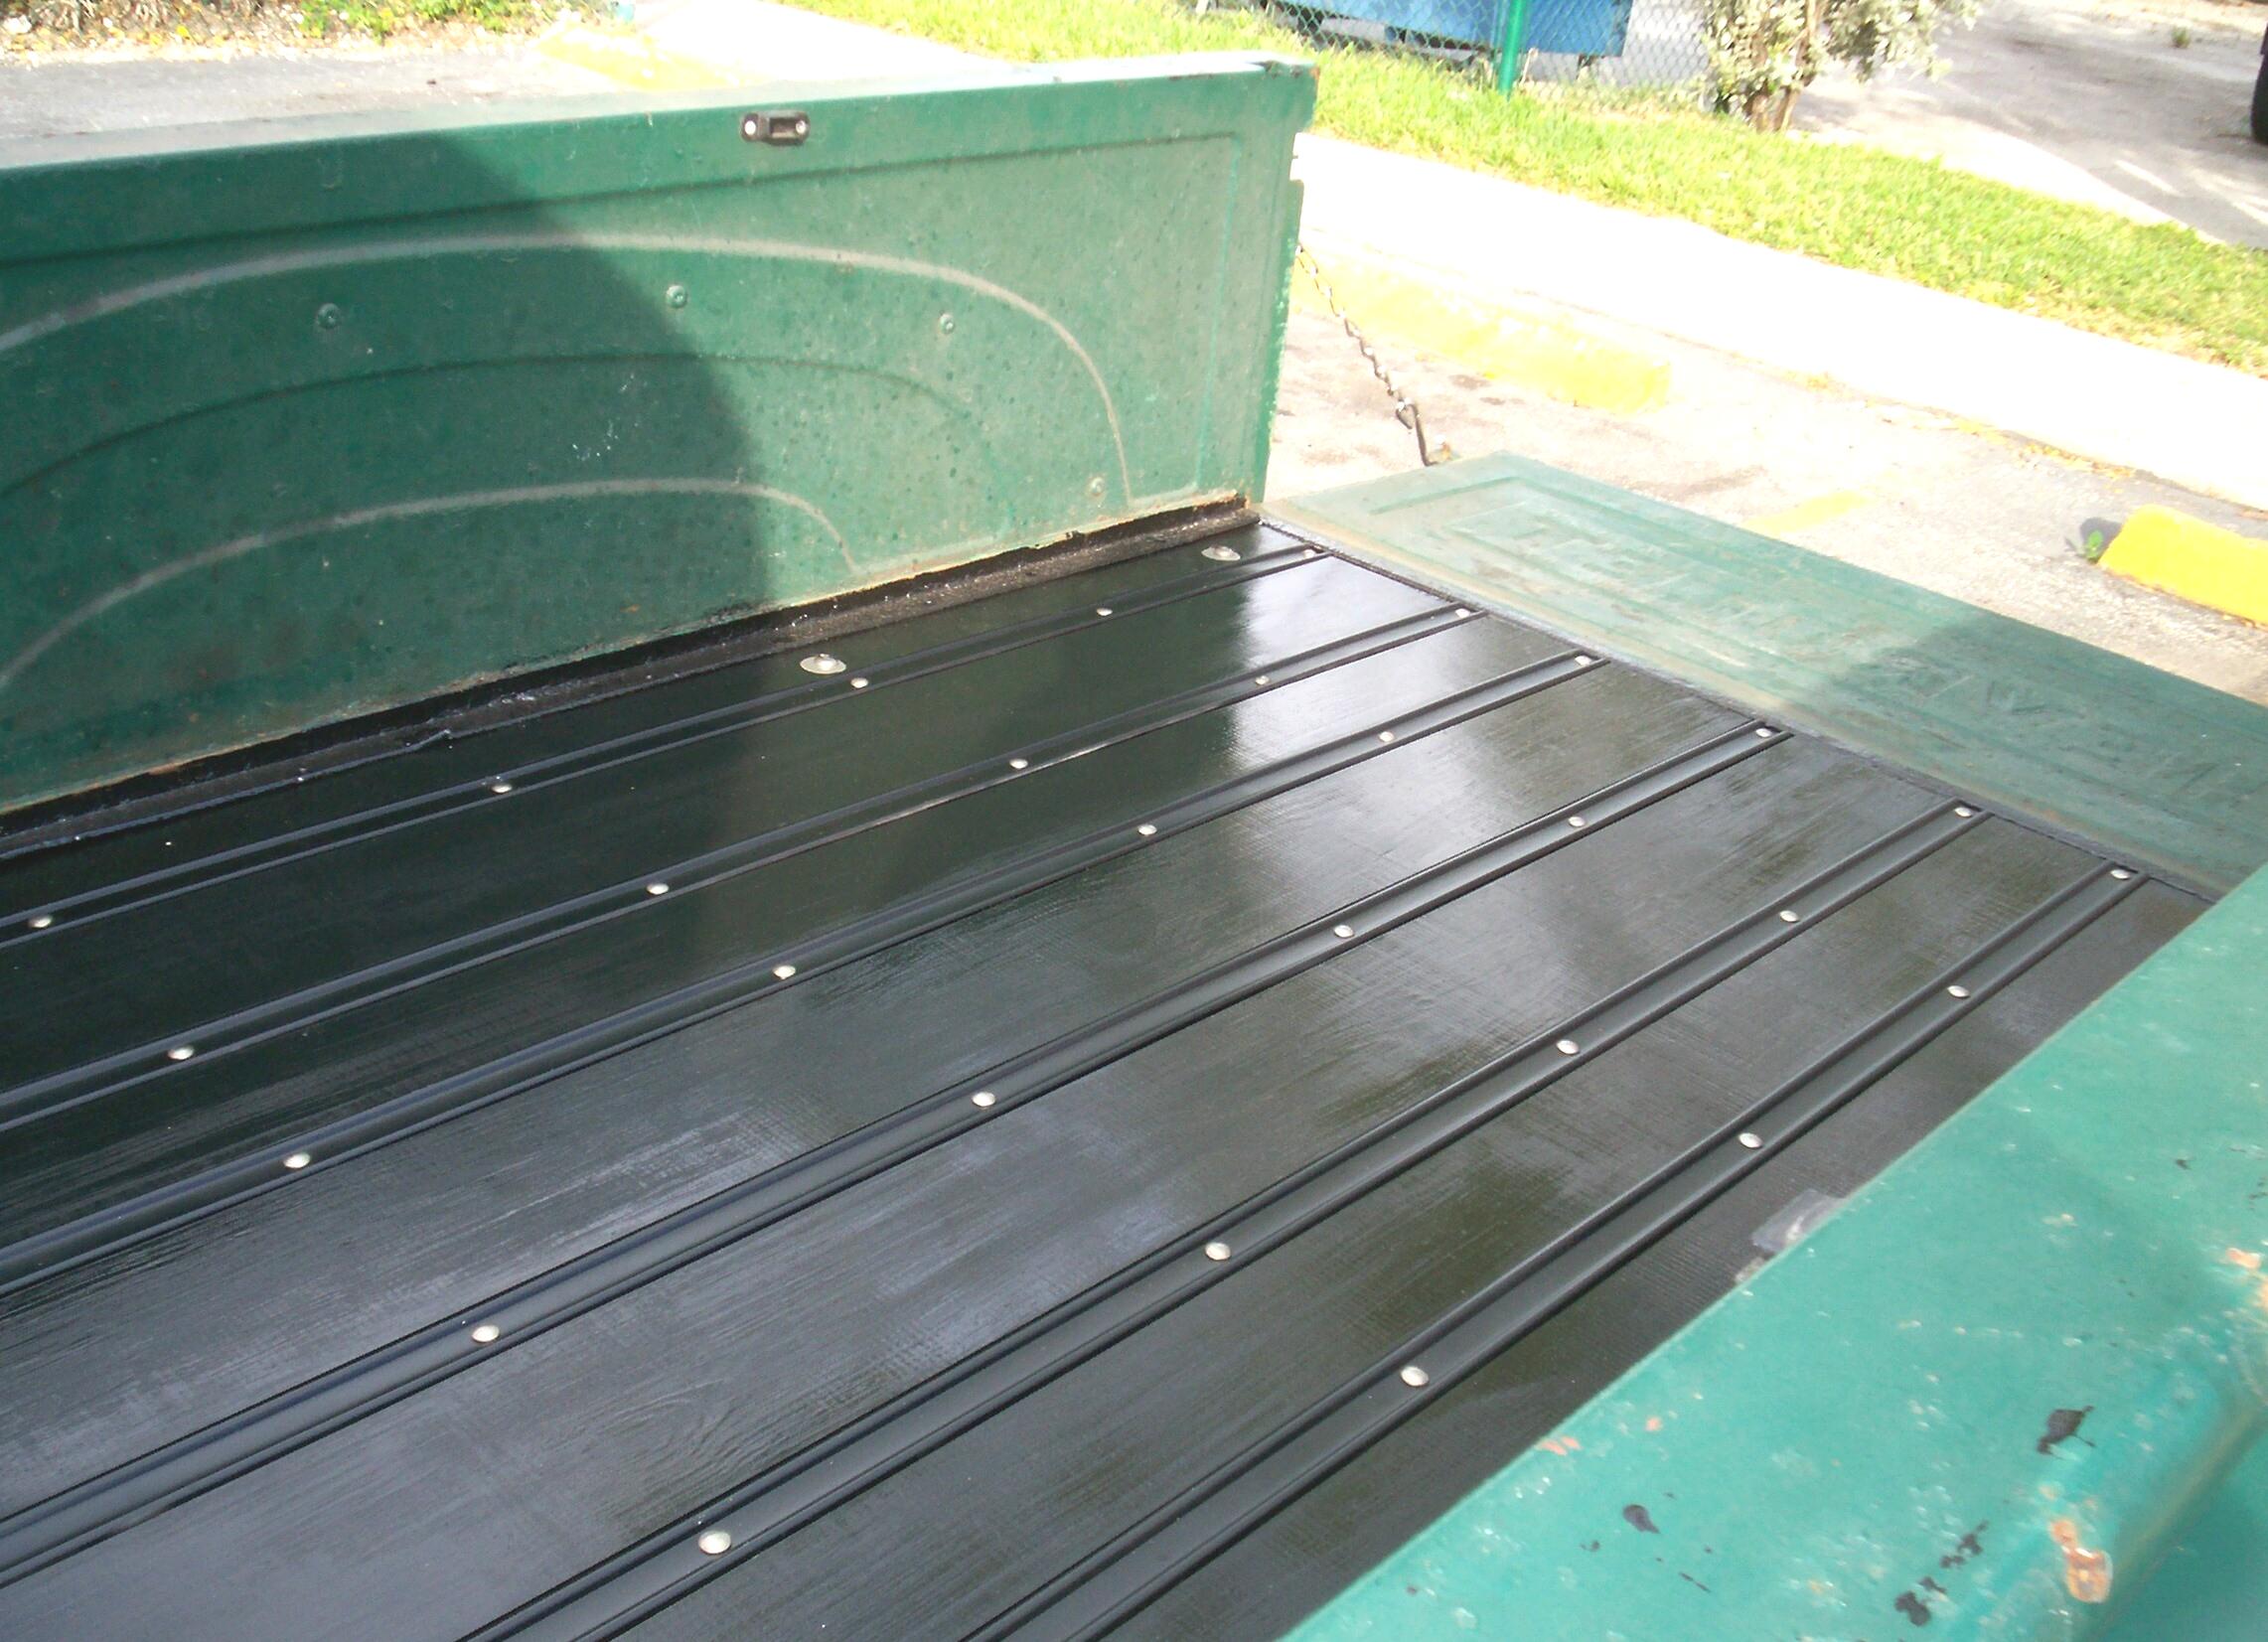
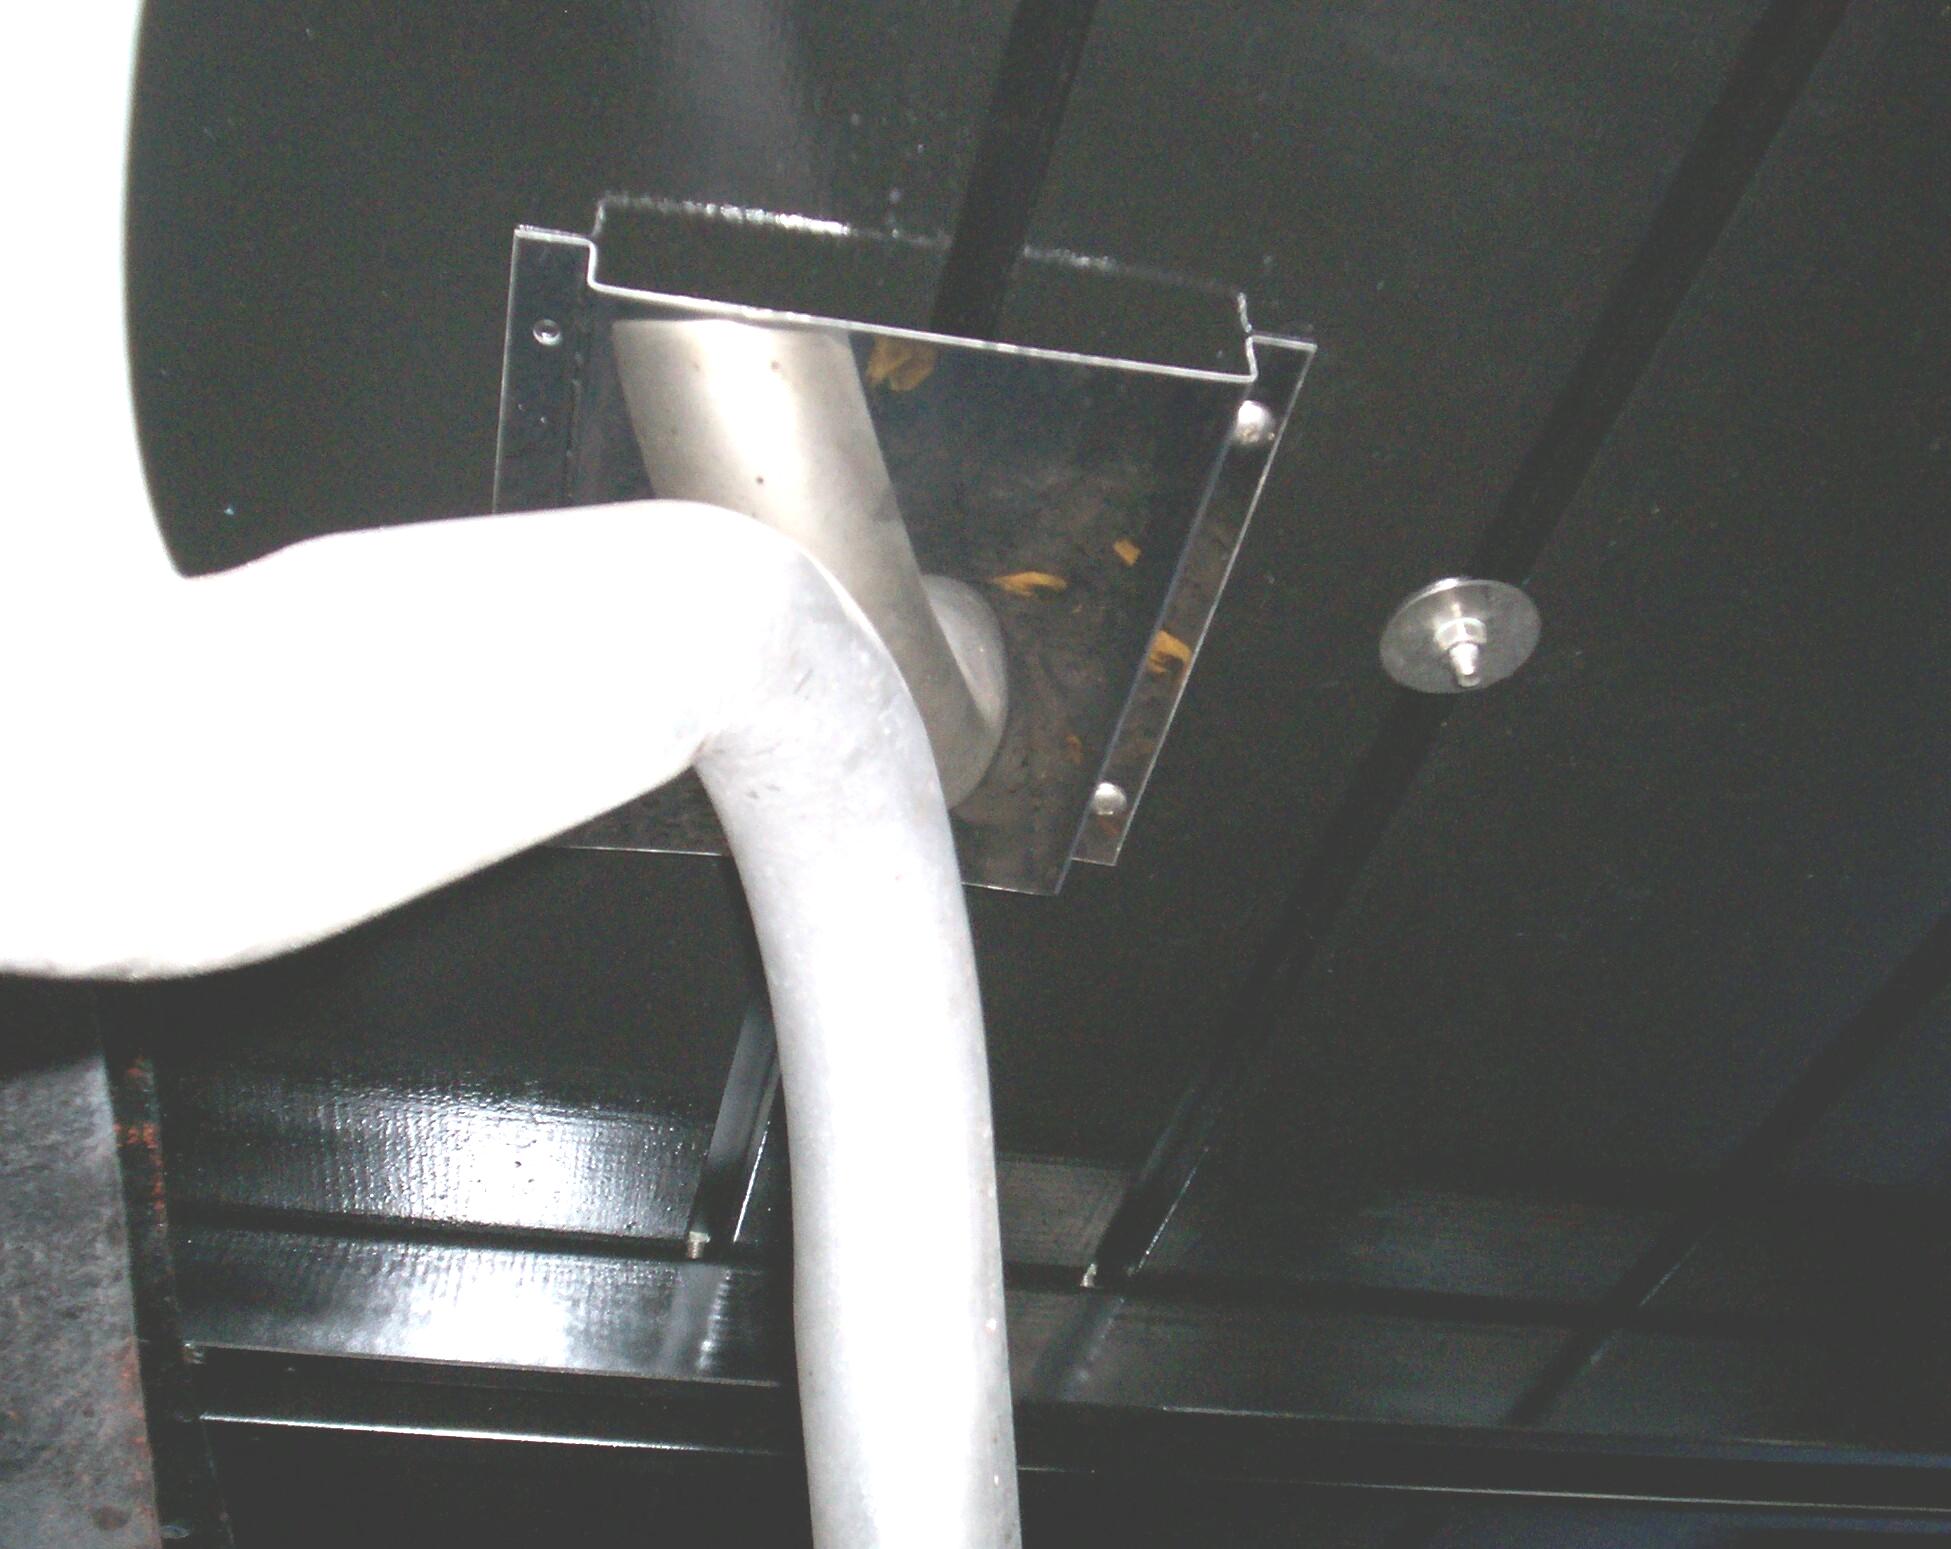 January
7th 2007 The good
weather streak continues here in South Florida. Performed monthly
maintenance on BillyBob and BettyLou first this morning. Installed the
Mar-K stainless steel exhaust shield on the bottom of the new bed next.
This thing goes on with four screws but the exhaust pipe blocks one of
them so, I installed it with three. I'll save the other one until the
next time the tailpipe is out.
January
7th 2007 The good
weather streak continues here in South Florida. Performed monthly
maintenance on BillyBob and BettyLou first this morning. Installed the
Mar-K stainless steel exhaust shield on the bottom of the new bed next.
This thing goes on with four screws but the exhaust pipe blocks one of
them so, I installed it with three. I'll save the other one until the
next time the tailpipe is out.
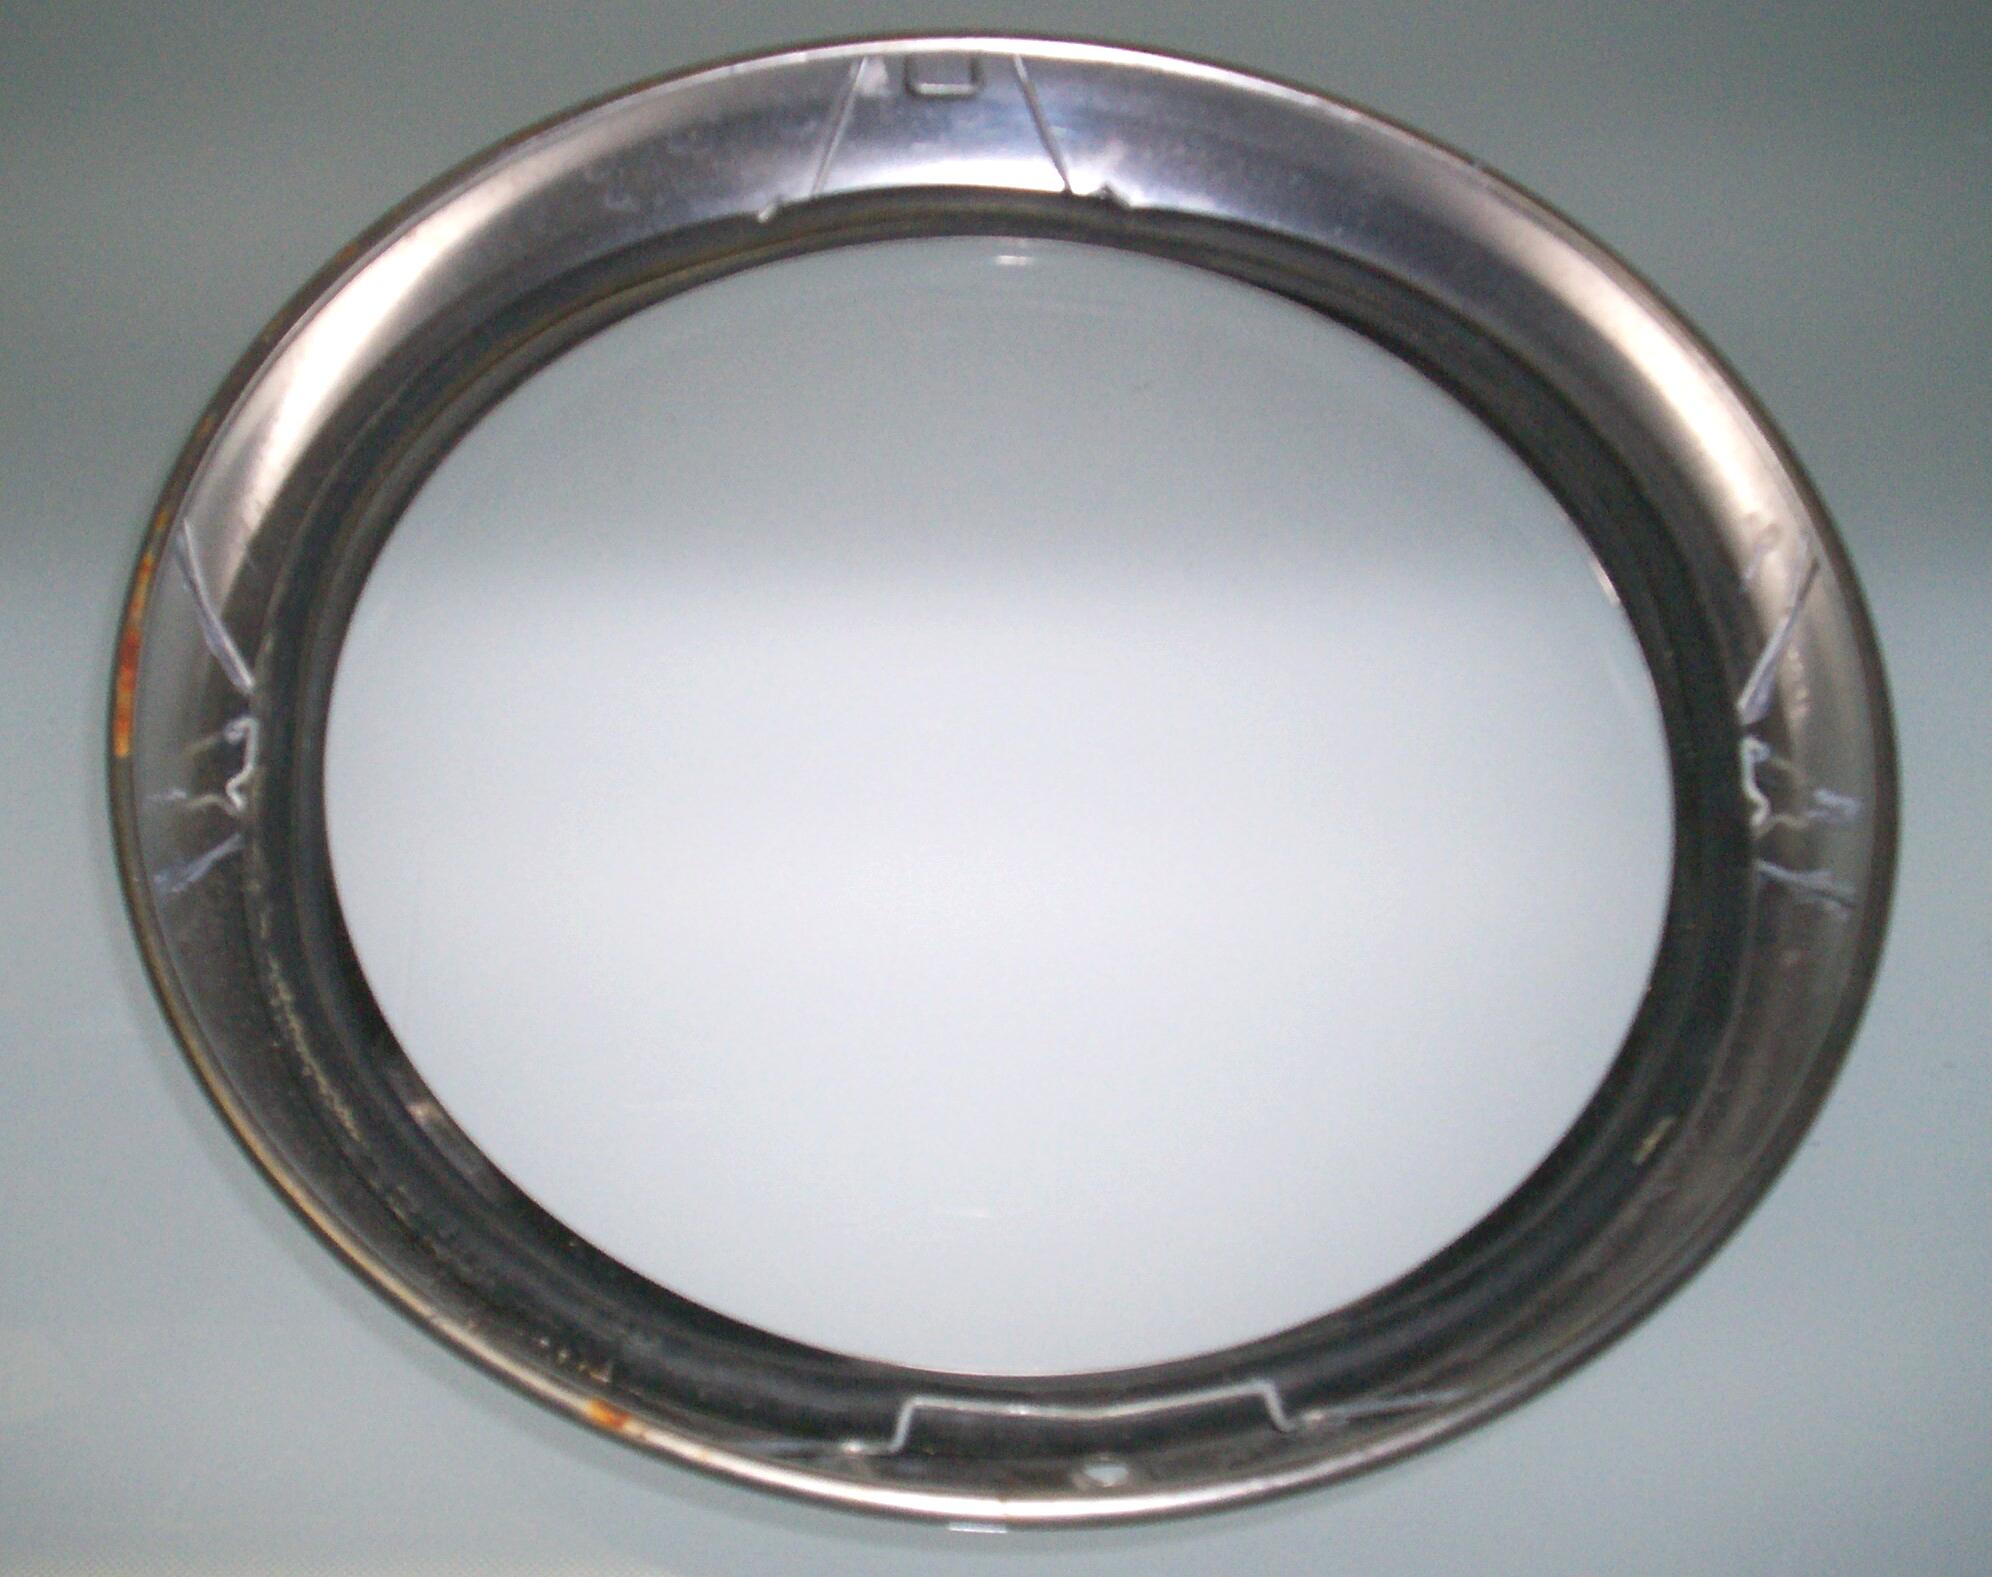 Pulled
one of my headlight rims for a fella, Tim, who e-mailed me asking how
the clips install on the back. This is a little hard to figure out if
you haven't seen one assembled before. The three bottom clips go in
with the middle tab against the rim seal and the leg ends tucked under
the outer rim edge. The top clip is just the reverse with the legs
against the seal so that the center portion of the clip can form a tab
to insert in the slot at the top of the headlight bucket.
Pulled
one of my headlight rims for a fella, Tim, who e-mailed me asking how
the clips install on the back. This is a little hard to figure out if
you haven't seen one assembled before. The three bottom clips go in
with the middle tab against the rim seal and the leg ends tucked under
the outer rim edge. The top clip is just the reverse with the legs
against the seal so that the center portion of the clip can form a tab
to insert in the slot at the top of the headlight bucket.
January 13th 2007 You're sitting at a stoplight in the early morning dark. You haven't had your first cuppa joe yet and a dude from the islands pulls up beside you in a beatup ferd exploder. "I had a '56 Apache nine volt jus' like that one. It be cool runnins' mon!" Where to begin? How to respond other than "The hell you say!"
Got my coffee and headed down the beach. I always order a large coffee with cream and that's what I get most of the time. Sometimes, they give me a large coffee with cream and sugar. Today, I got surprised by a large black coffee. Just another one of life's minor irritants. It's windy and cloudy today but no rain is forecast. Stopped at the warehouse after the beach run and picked up the rest of the ammo boxes.
 The
next pair of boxes were located five inches from the first pair which
put them thirteen inches from the bed front. Murphy made his appearance
a couple of times. The nuts for one set of hasps is directly above the
high point of the fenders where I can't get my hand in between the
fender and bed top to guide them. Using needlenose pliers to hold the
nuts and a lot of cusin' under my breath, I finally got the first hasp
installed . . . only to find I had the darn thing upside down!
Damnation! Also the #8-32 x 3/8" flathead machine screws I got from
McMaster-Carr during the week worked great for the bedside hasps but
were too short for the masonite box tops. I made do with odds and ends
from my parts box but I'll have to get 1/2" long screws and revisit
this later. By three in the afternoon, I had all the bed side boxes
installed. I worked pretty steady fer a change but I can't come close
to those guys on overhaulin'. Why is that?
The
next pair of boxes were located five inches from the first pair which
put them thirteen inches from the bed front. Murphy made his appearance
a couple of times. The nuts for one set of hasps is directly above the
high point of the fenders where I can't get my hand in between the
fender and bed top to guide them. Using needlenose pliers to hold the
nuts and a lot of cusin' under my breath, I finally got the first hasp
installed . . . only to find I had the darn thing upside down!
Damnation! Also the #8-32 x 3/8" flathead machine screws I got from
McMaster-Carr during the week worked great for the bedside hasps but
were too short for the masonite box tops. I made do with odds and ends
from my parts box but I'll have to get 1/2" long screws and revisit
this later. By three in the afternoon, I had all the bed side boxes
installed. I worked pretty steady fer a change but I can't come close
to those guys on overhaulin'. Why is that?
I had planned to stack the last two boxes against the bed front. This solution doesn't work very well because the face of the bed front slants back at an angle in this area to accomodate the rolled top. I'm gonna think 'bout this some more. Time to light up a cigar an' sit in the shade fer awhile.
January 14th 2007 Overcast and breezy today. Had a cigar with my coffee while I watched the sky for a clue as to whether it was going to rain or not. A hour later and the jury was still out. I pulled out a minimum of tools and tackled the last two boxes at the front of the bed. After yesterday's "think tank" I decided to mount the boxes one in front of the other instead of stacked. Had to drill out the holes in the bed front to 1/8" and use the stainless steel wood screws instead of the machine screws because I can't get access between the bed front and cab without removing one or the other.
I got done just as it started to sprinkle. Had another cigar a waited on the weather. I need to add cigars to my emergency supplies list. If you have time to think about it a bit, broke down at the side of the road, you can usually come up with a better solution than the immediate one that comes to mind in your panic state. Takes a hour to smoke a cigar. That's enuf time for a reasonable solution for a roadside problem to surface. Excellent solutions take days or longer to incubate.
The twelve inch bungie cords are too short for the side by side box configuration,. Heck, they're too short for the stacked config too. 16 inchers should be just right. I'll order them this week along with my machine screws. I only seem to be guessing correctly on my hardware orders about fifty percent of the time and I'm building quite an inventory of missed guesses.
January 20th 2007 Nice sunny weather today with the temperature starting out in the high sixties. I've got no complaints. First order of business is a BillyBob oil change so, after a Ft. Lauderdale Beach run and a stop at the warehouse, I let BillyBob idle at the Krash Lab until I got the drain pan situated and found my 7/8" box end wrench for the pan plug. Turned off the engine and got the rest of the tools out while the oil drained.
 After
the oil was changed, the ammo boxes were taken out of the bed and all
the drilling debris from last week was swept out. The ammo box padlock
loop screws were exchanged for #8-32 x 1/2" stainless steel flathead
machine screws that arrived from McMaster-Carr this week along with the
longer 16" bungie cords. Then I started organizing the boxes. One box
will be an "engine" box. First items to go in here were 2 spare fan
belts, 1 exhaust pipe gasket and a gallon of oil.
After
the oil was changed, the ammo boxes were taken out of the bed and all
the drilling debris from last week was swept out. The ammo box padlock
loop screws were exchanged for #8-32 x 1/2" stainless steel flathead
machine screws that arrived from McMaster-Carr this week along with the
longer 16" bungie cords. Then I started organizing the boxes. One box
will be an "engine" box. First items to go in here were 2 spare fan
belts, 1 exhaust pipe gasket and a gallon of oil.
 Two
fan belts? Well, I put a new one on BillyBob today. The old one is
almost ten years old. The one I put on I got from NAPA this week. I had
an old style GM parts belt that was too stiff and short for me to
muscle on and I lost interest in it. The old one I took off still
doesn't look bad so I put it in the box with the pain-in-the-butt GM
belt and the GM belt is relegated to a last chance emergency belt
status.
Two
fan belts? Well, I put a new one on BillyBob today. The old one is
almost ten years old. The one I put on I got from NAPA this week. I had
an old style GM parts belt that was too stiff and short for me to
muscle on and I lost interest in it. The old one I took off still
doesn't look bad so I put it in the box with the pain-in-the-butt GM
belt and the GM belt is relegated to a last chance emergency belt
status.
Went inside during the heat of the day to sort thru some inventory. I brought a box down from the warehouse of parts that JR sent along with the truck over ten years ago. I've never gone thru this stuff. I found two water pumps, one fuel pump, one leakchester B carb and an air cleaner assembly that may or may not be rebuildable. There was also a third party turn signal director that I can cannabalize for parts and a detailed leakchester B rebuild diagram sheet that is probably better than anything that comes with today's carby kits. The rest of the stuff in this box wasn't worth savin' or mentioning.
January 21st 2007 Good weather day again. Not too hot and not too sunny. When I got to the Krash Lab in BettyLou, I noticed a small pool of fresh oil under BillyBob's clutch cover. BillyBob leaks everytime I top off oil levels and it always fills me with a twinge of dismay. The fluids always seem to seek their own level which is a bit lower than spec. I suppose when it bothers me enuf, I'll look into replacing seals and gaskets. I busied myself in inventory organization and planning activities.
Well, the bed is in and so are the ammo boxes. I've got some regular maintenance in the upcoming weeks and I just gotta get Renegade back on the road. He's been laid up for over a year now. And I've got to pay some attention to BettyLou too. This is as good a place as any to post this log entry as things are gonna be slow regarding BillyBob fer a few weeks.
| < Back
to Intro |
You can email me at ![]() webmaster@laroke.com
webmaster@laroke.com
Issued Tuesday January 23, 2007
Updated Monday March 26, 2018
copyright © 1996-2018 Larry Robert Kephart all rights reserved
| | LRK Home | | Bio Info | | Krash Khronicles | | LAROKE | |
| | BettyLou | | BillyBob's Garage | | Rat Patrol | | Deerslayer | | Elvira | |
| | Land of the Free and Home of the Brave | |
| | Keppylou's Art | | WWI Soldier's Diary | |