| | LRK Home | | Bio Info | | Krash Khronicles | | LAROKE | |
| | BettyLou | | BillyBob's Garage | | Rat Patrol | | Deerslayer | | Elvira | |
| | Land of the Free and Home of the Brave | |
| | Keppylou's Art | | WWI Soldier's Diary | |
Tinkering with Deerslayer
![]()
DEERSLAYER LINKS including vendor sites for parts and tools as well as sites for old truck and hot rod organizations
![]()
TINKERING WITH DEERSLAYER chronicles the day-by-day maintenance and improvements episodes for Deerslayer, a '37 Chevy farm truck hot rod.
CRUISIN' WITH DEERSLAYER Roadtrips, cruise-in's and truck show stories and tall tales.
TONY'S DUNGEON Tony Pascarella's forum entries at OldGMCtrucks.com regarding Deerslayer, particularly the 302 GMC engine build in his farmhouse basement.
![]()
DEERSLAYER MAINTENANCE Ever changing detailing, oil change, lube, etc. maintenance routines specifically developed for Deerslayer, including required tools, materials and procedures.
PROJECT NAILHEAD Chronicles the rebuild of a 1954 Buick Roadmaster 322 nailhead engine as a future replacement for Deerslayer's Jimmy 302.
44. Braking Developments
 February
11th 2020
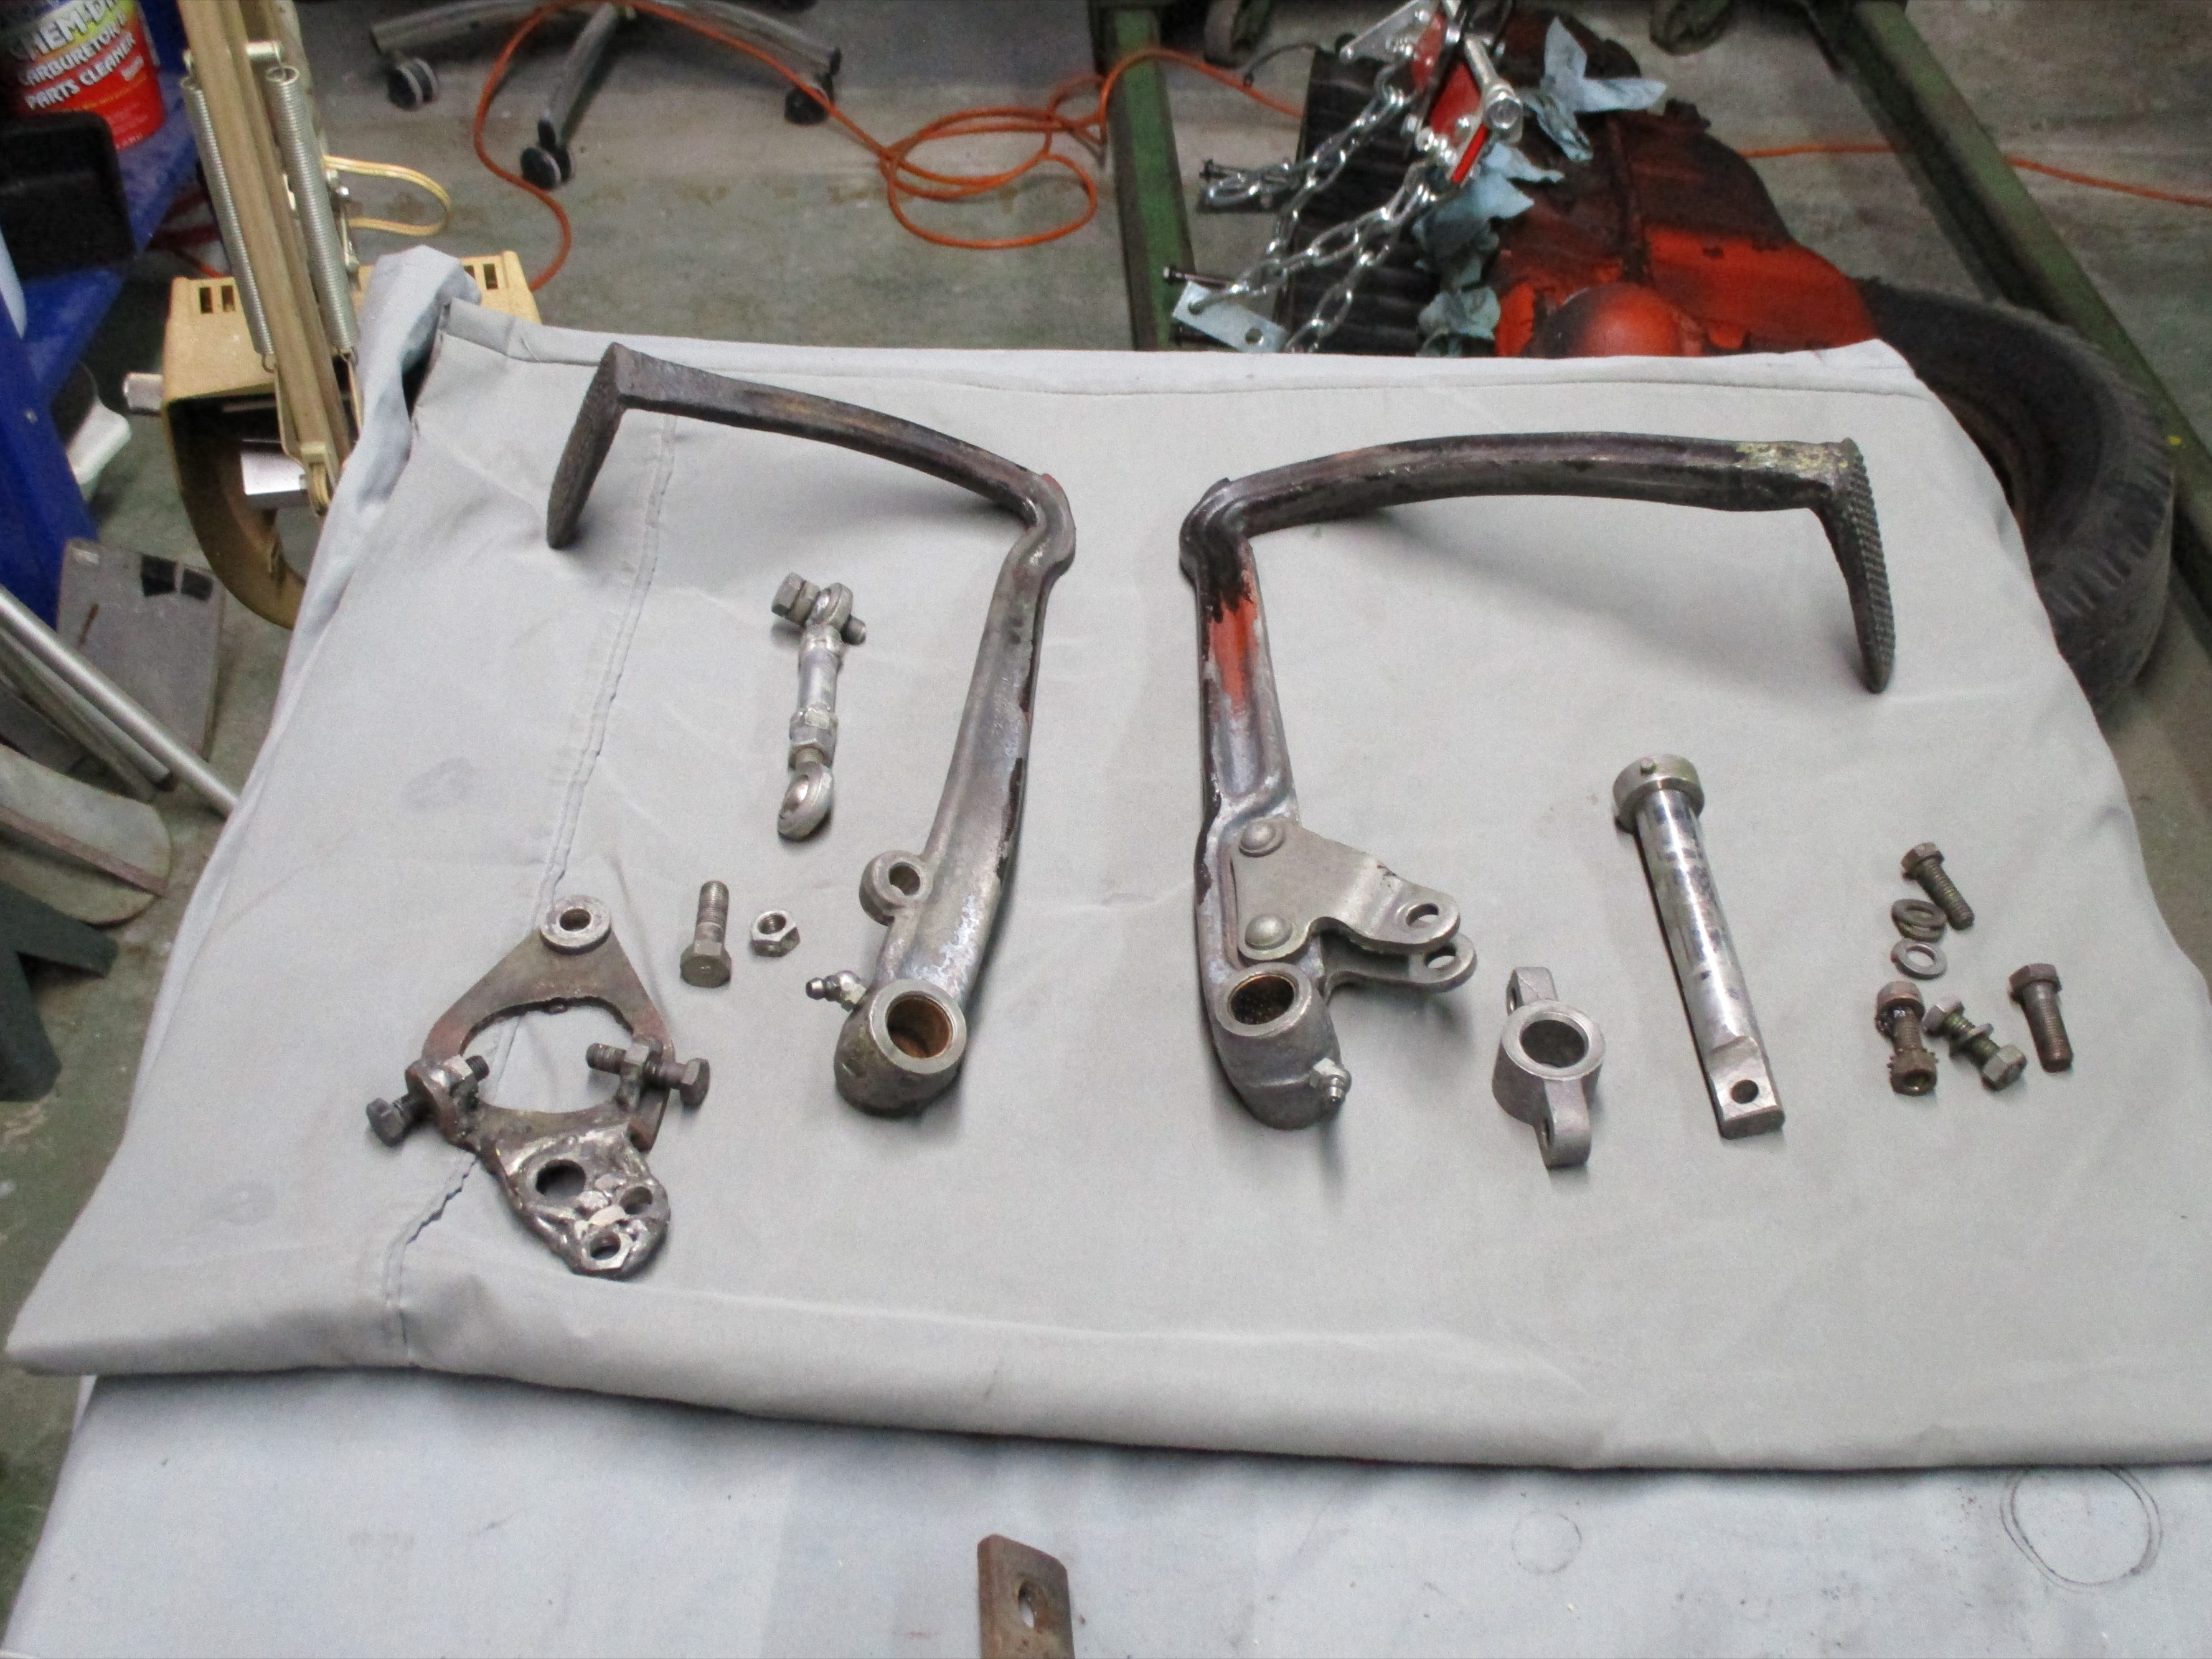
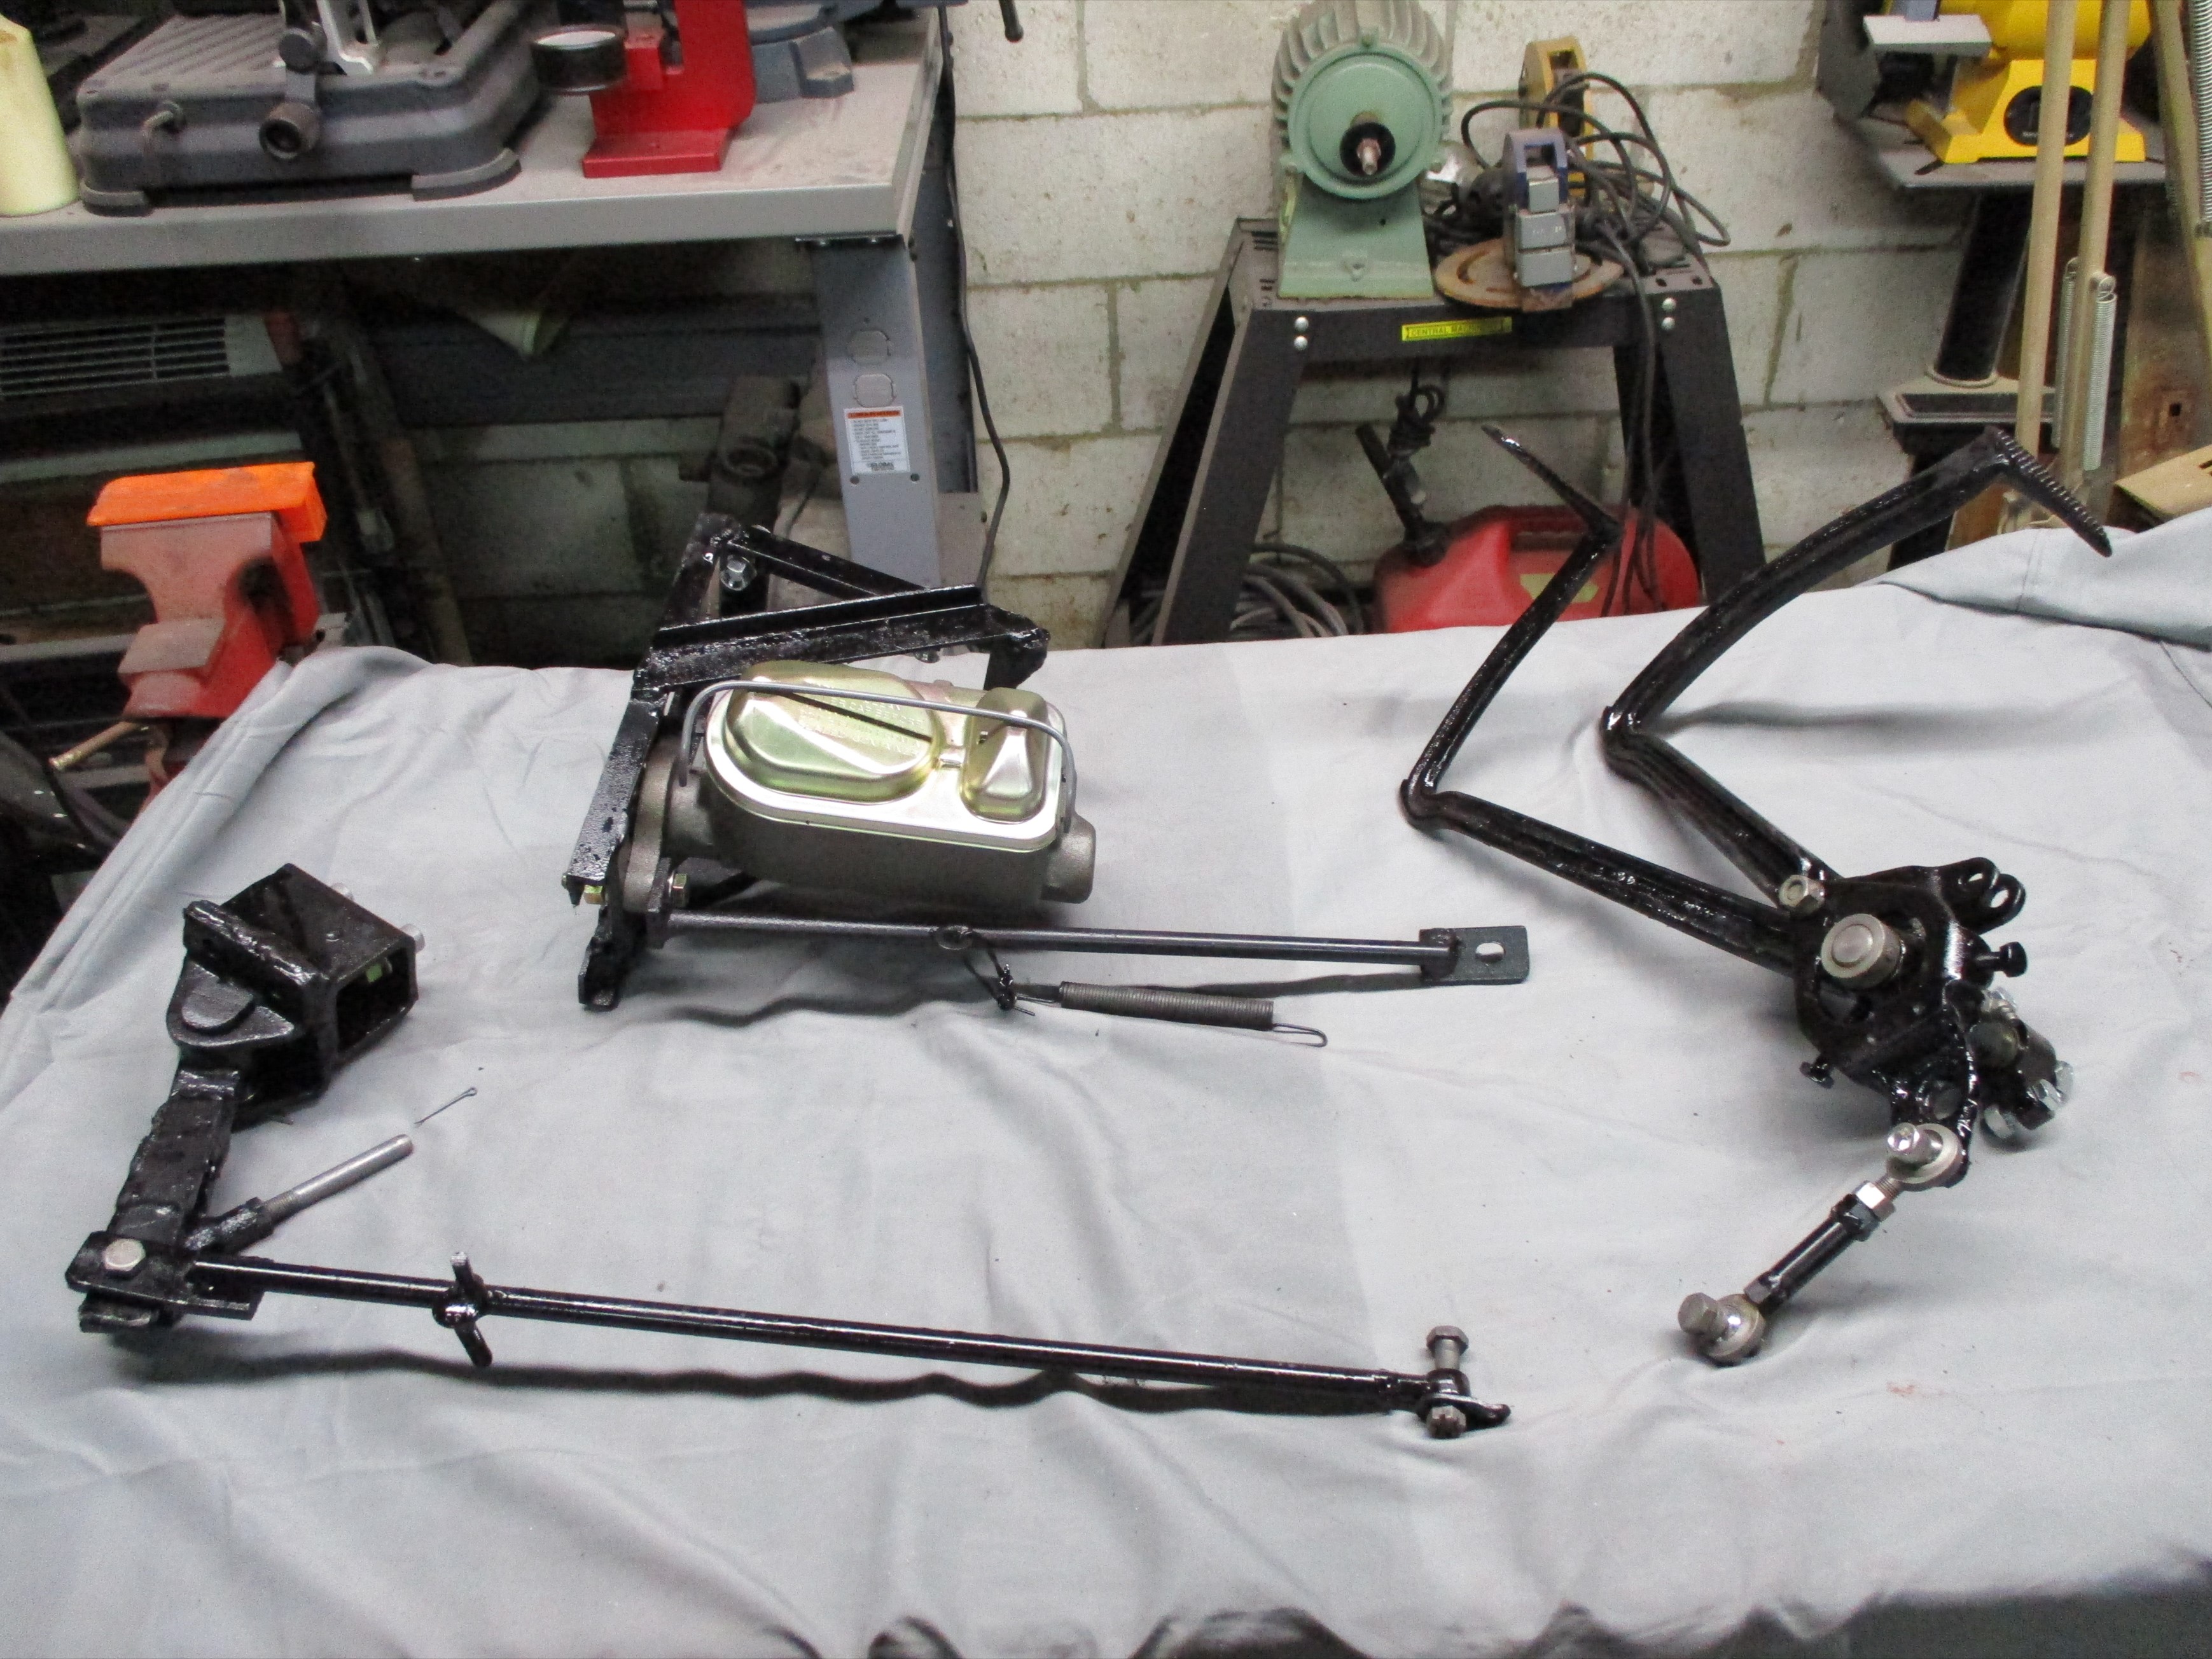
The Jimmy engine and Chevy truck bellhousing will be lifted out as a
unit. The clutch and brake pedal linkages are bolted to the bellhousing
and will have to be removed first. That makes this interesting assembly
of rods, springs and pedals the best candidate for the next cleaning
and painting sub-task.
February
11th 2020
The Jimmy engine and Chevy truck bellhousing will be lifted out as a
unit. The clutch and brake pedal linkages are bolted to the bellhousing
and will have to be removed first. That makes this interesting assembly
of rods, springs and pedals the best candidate for the next cleaning
and painting sub-task.
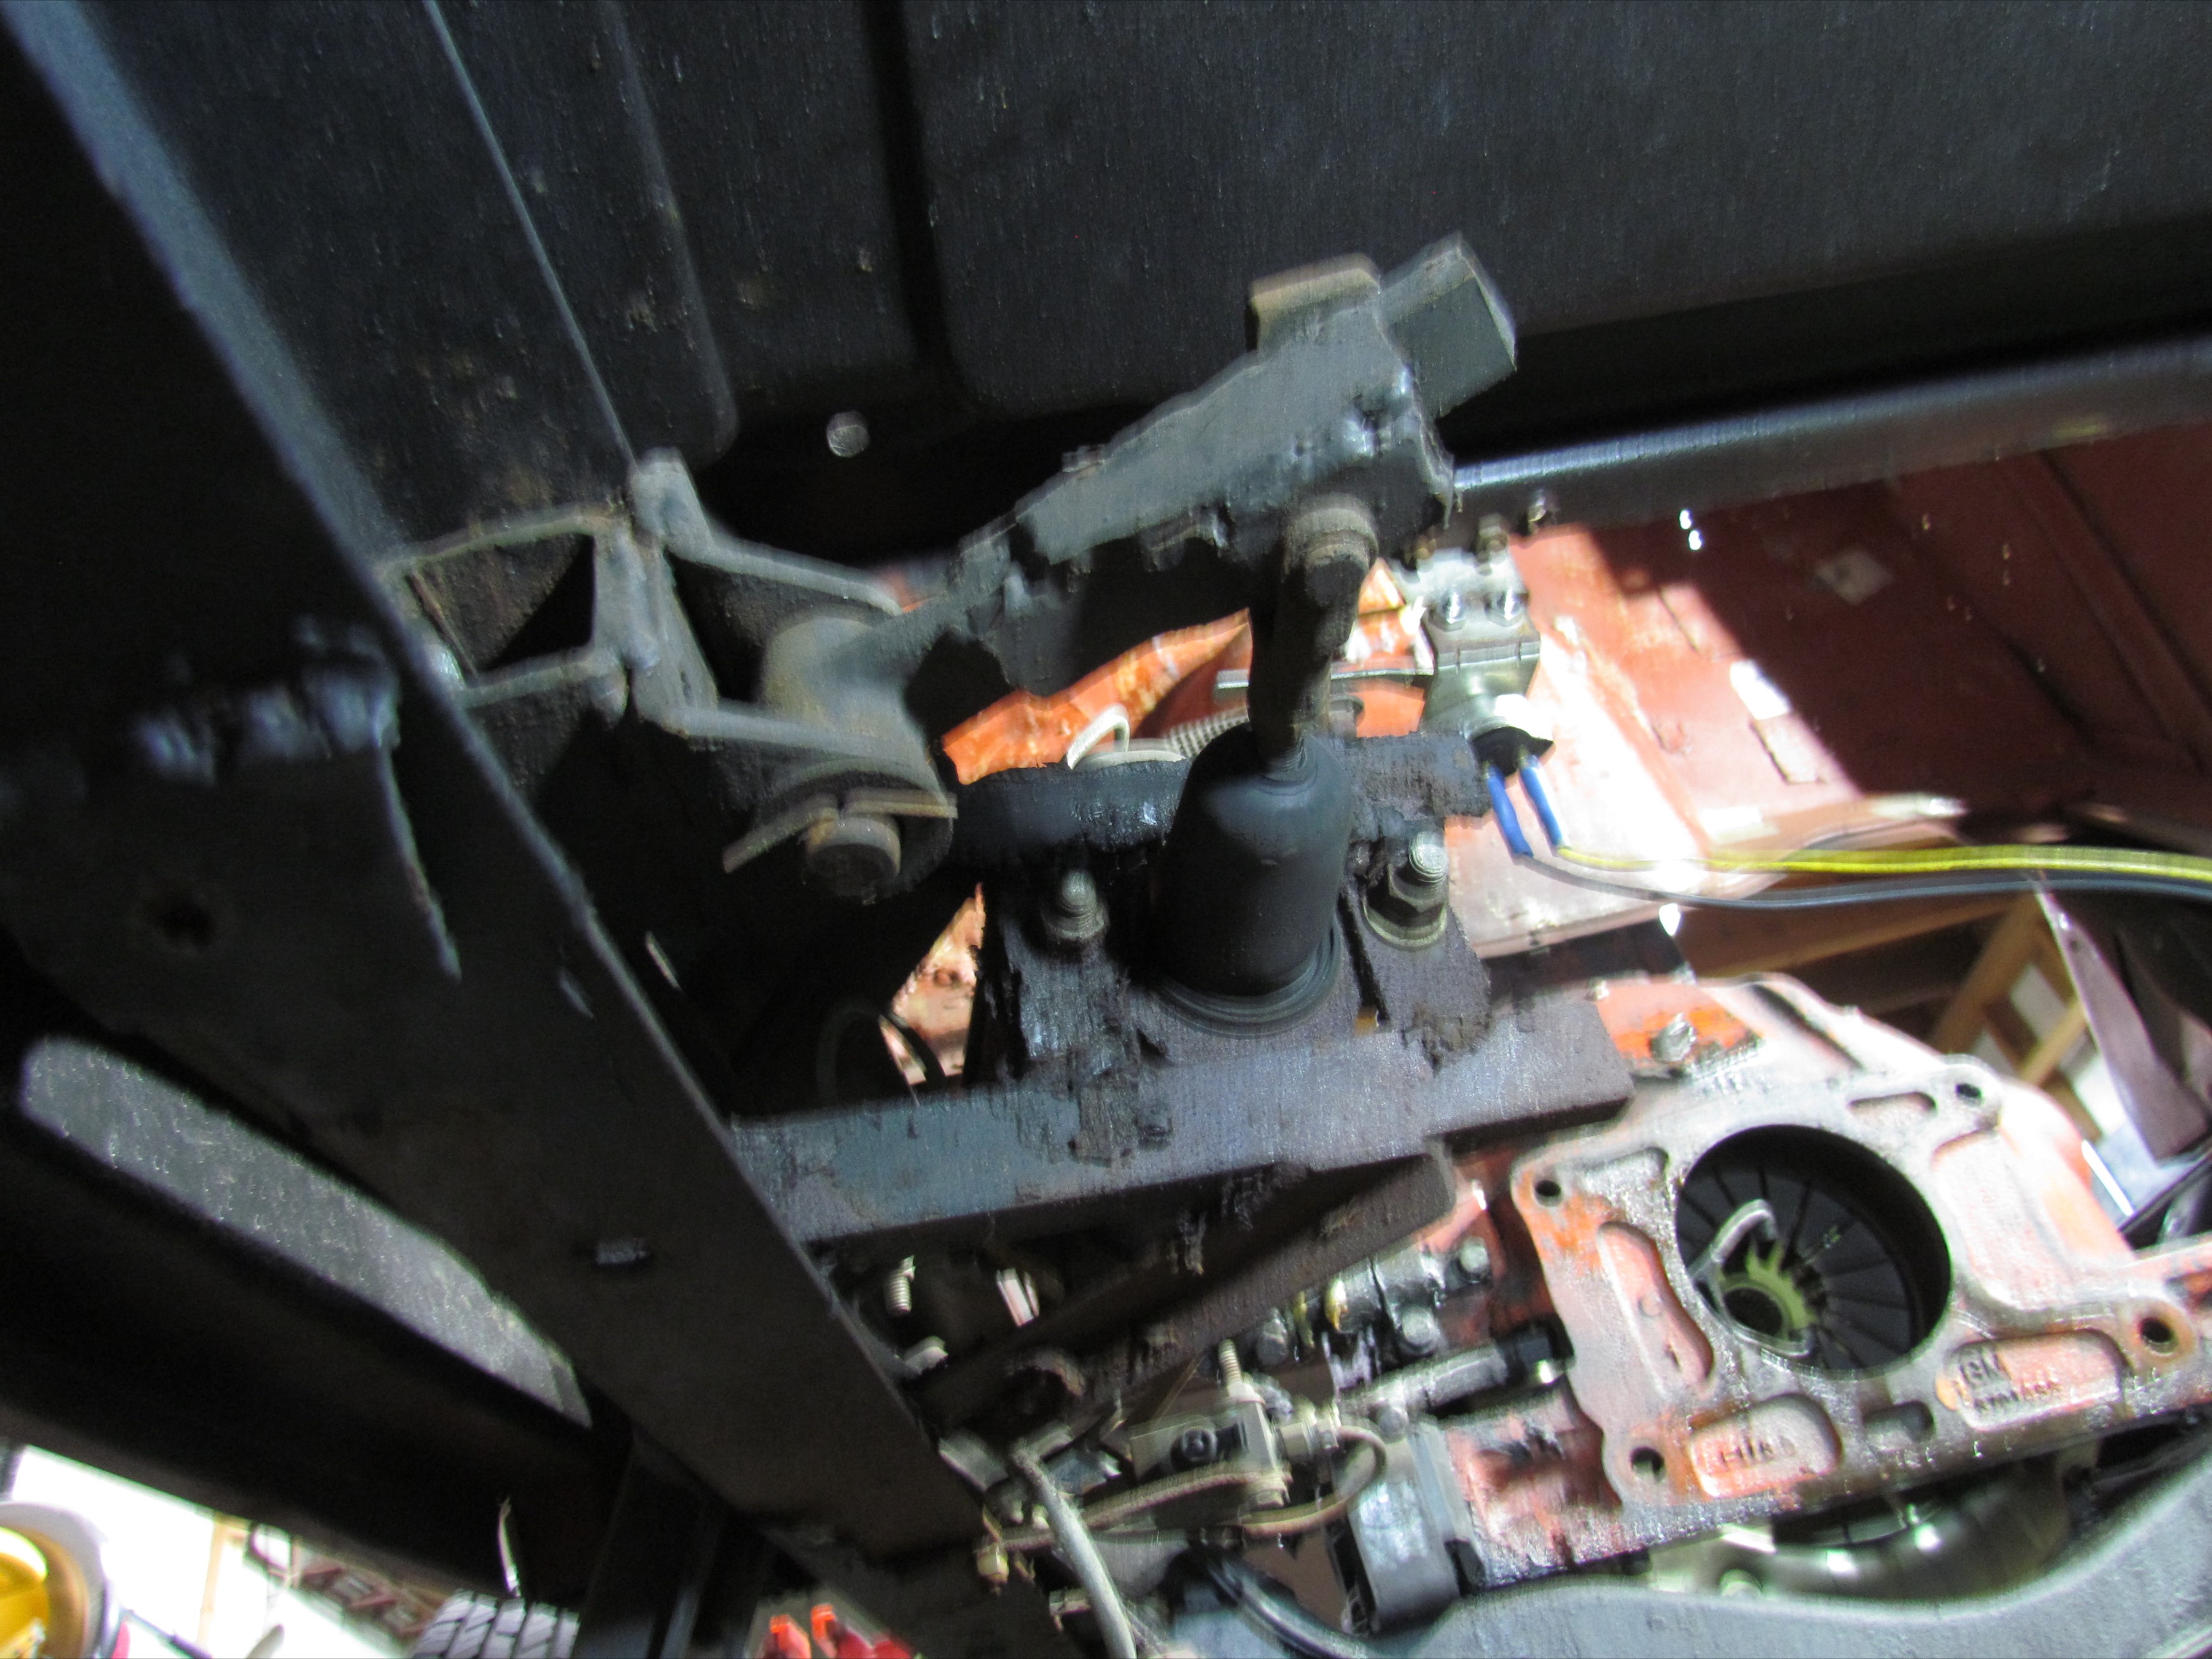 Appears to be three components - the pedal assembly bolted to the
bellhousing, the master cylinder cage bolted to the frame and the brake
rods pivot, also bolted to the frame. Spent the rest of the shop
session in deep ponder mode, planning my approach.
Appears to be three components - the pedal assembly bolted to the
bellhousing, the master cylinder cage bolted to the frame and the brake
rods pivot, also bolted to the frame. Spent the rest of the shop
session in deep ponder mode, planning my approach.
 February
12th 2020
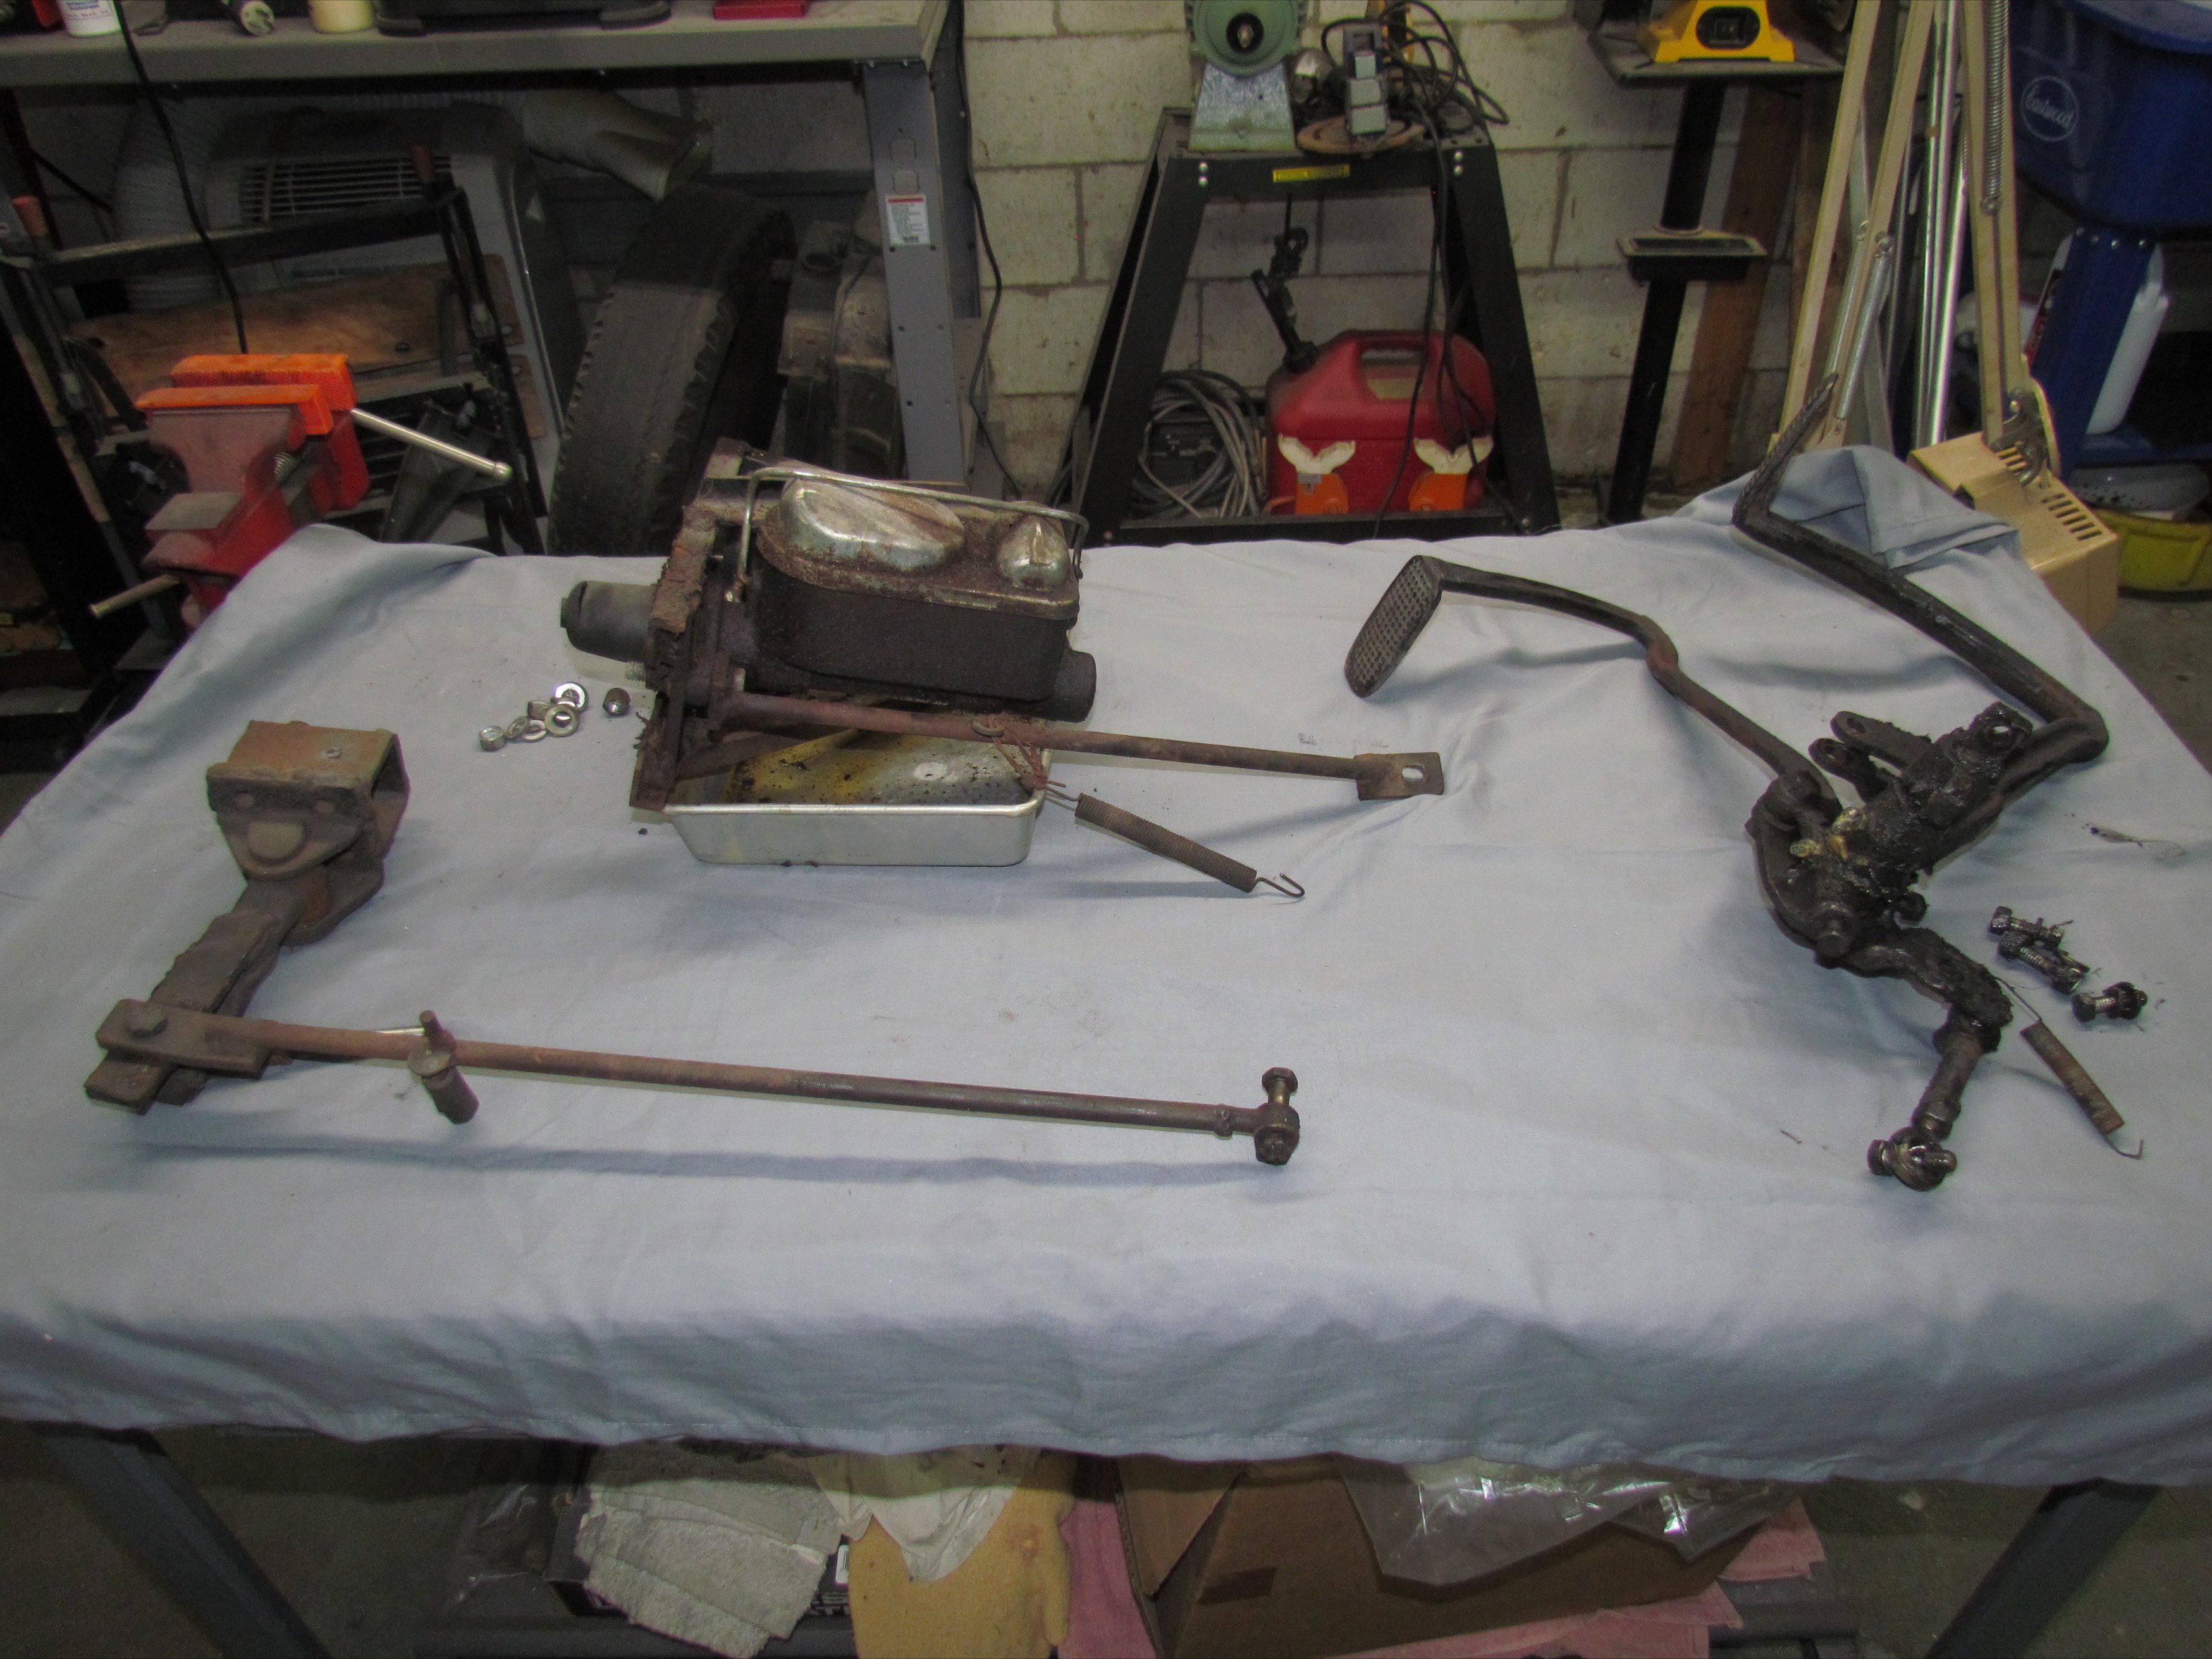
Just damn! Got caught having to roll around under the truck on a
weekday. So be it. On a good note, there were no frozen bolts and I had
the brake and clutch linkages out in about two hours time. Beer of the
day was Adirondack Brewery's Bear Naked All Natural Amber Ale.
February
12th 2020
Just damn! Got caught having to roll around under the truck on a
weekday. So be it. On a good note, there were no frozen bolts and I had
the brake and clutch linkages out in about two hours time. Beer of the
day was Adirondack Brewery's Bear Naked All Natural Amber Ale.
 February
13th 2020
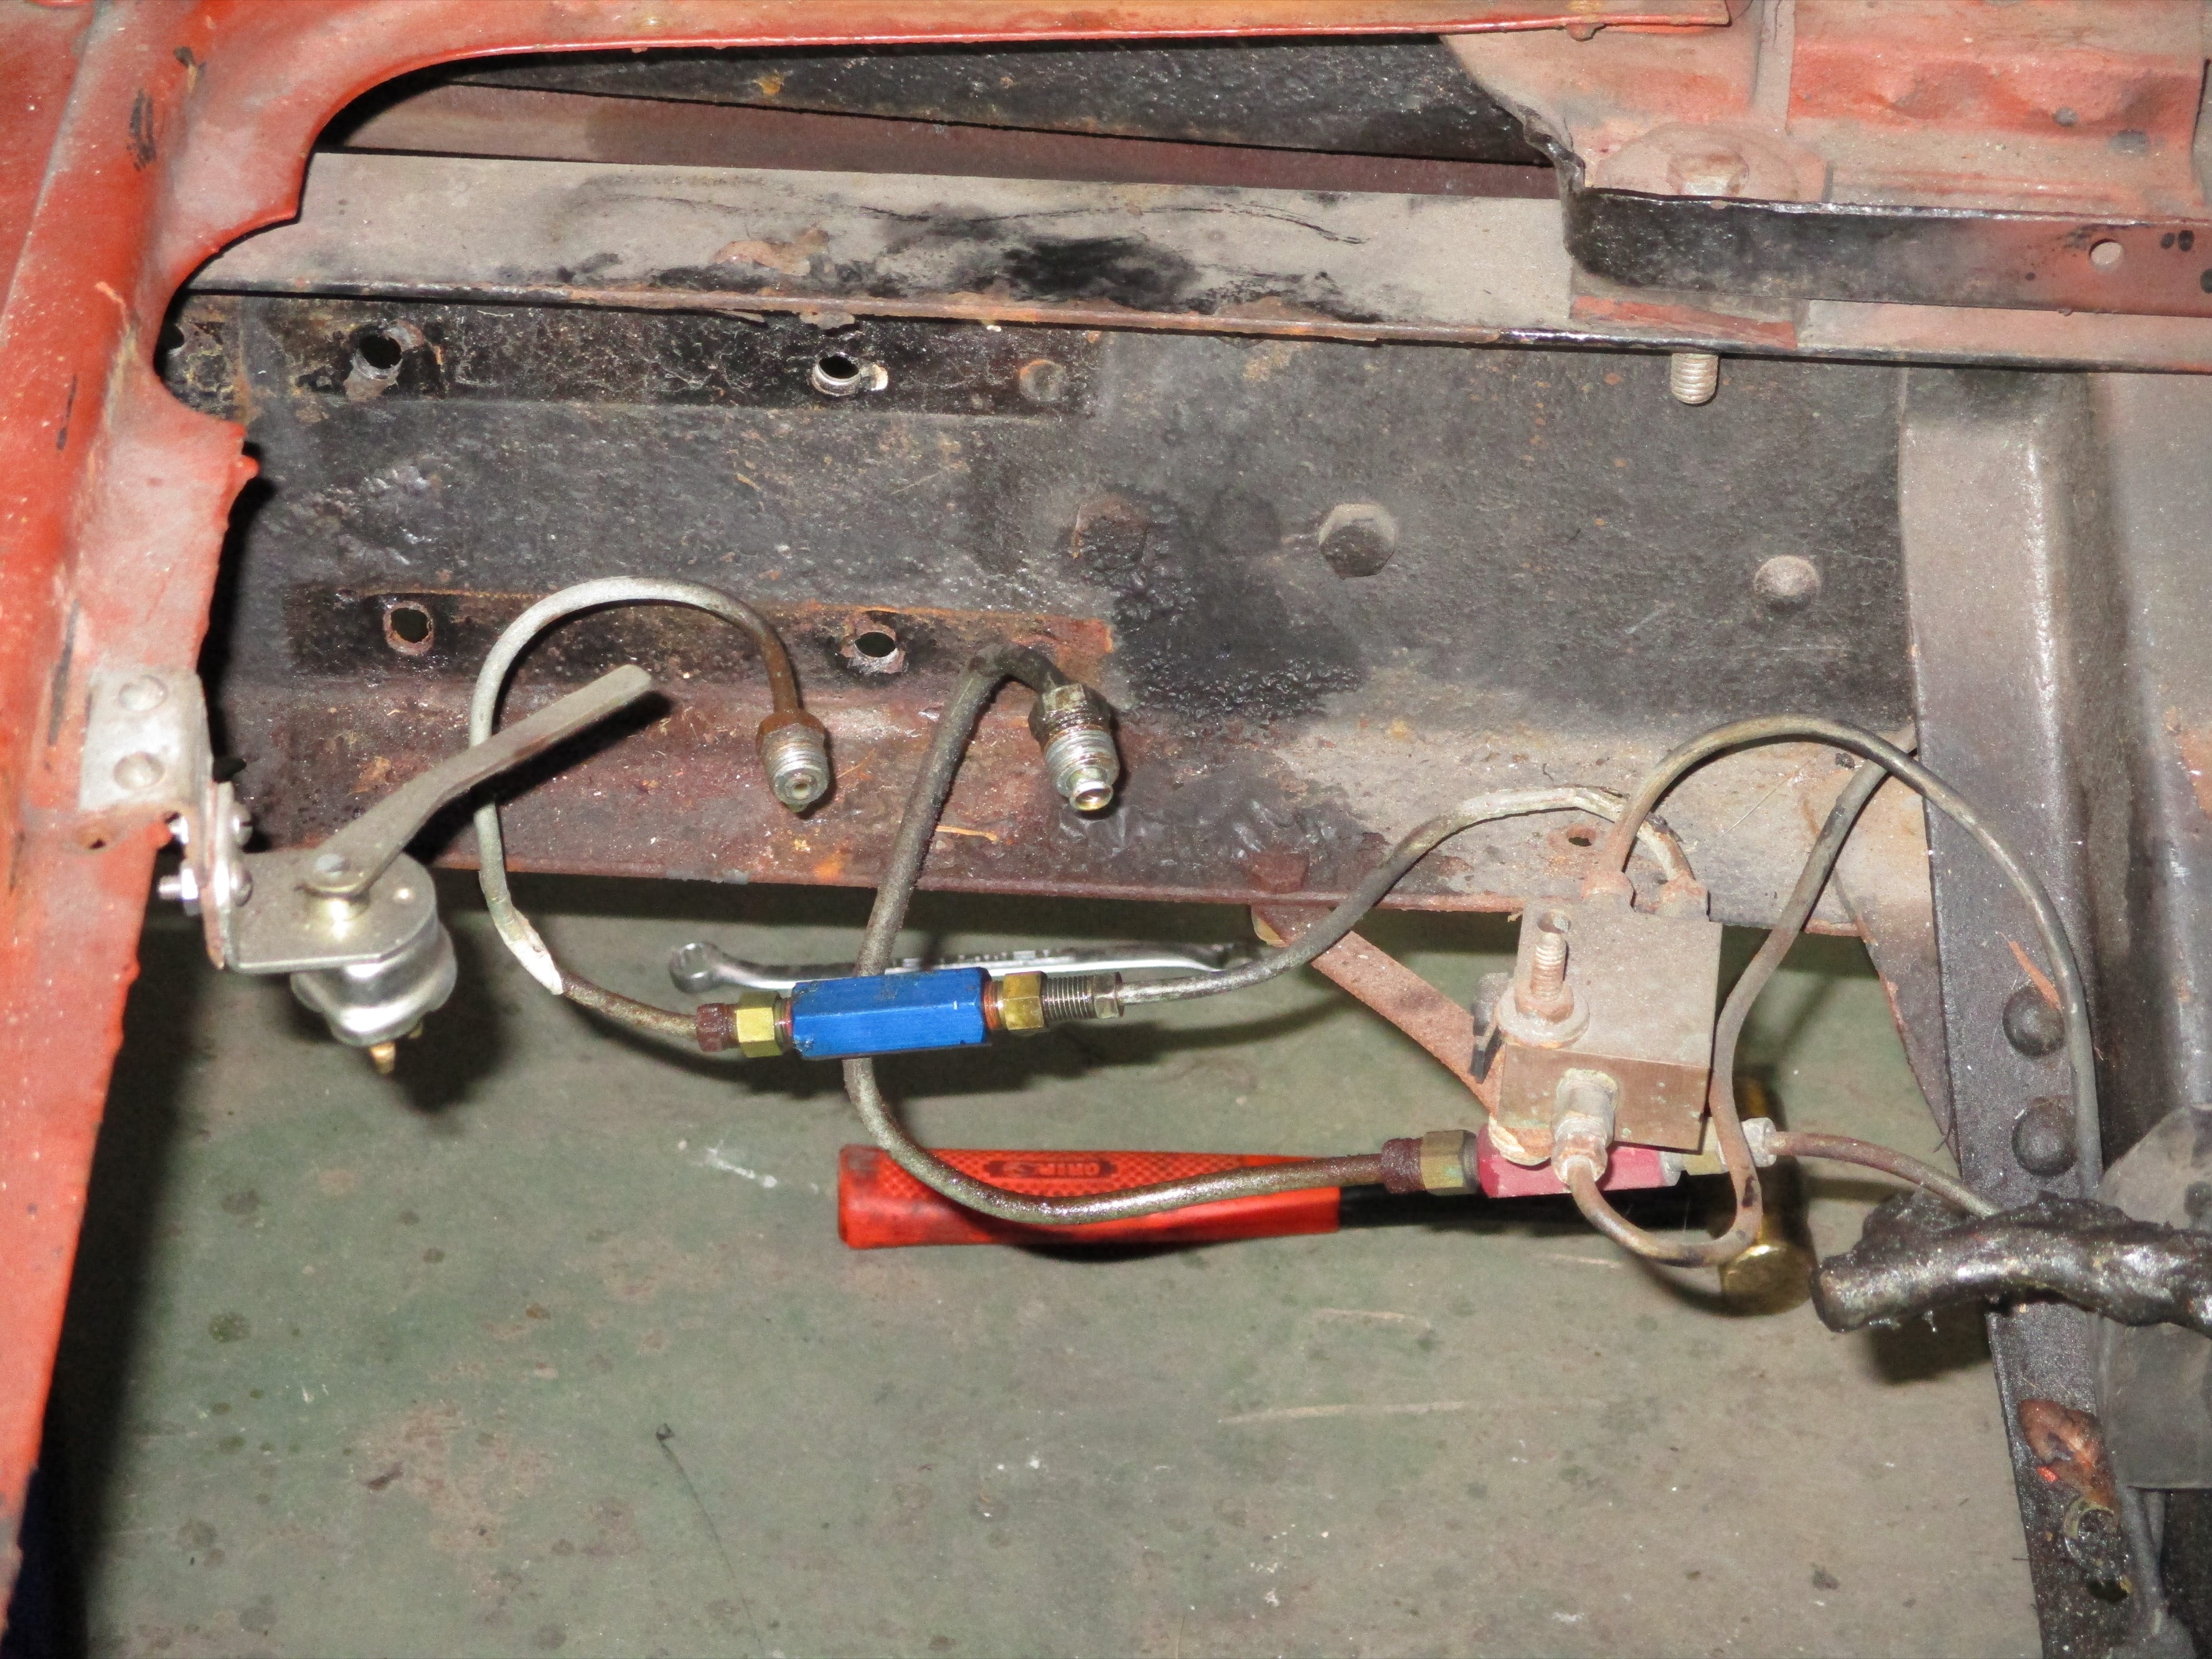
Studied the brake plumbing and did some deep ponder mode thinking as I
wiped scattered tools and put them away. Put the pedal assembly in
the parts washer for its initial soak. Took time out to wash the
clothes I got greasy yesterday.
February
13th 2020
Studied the brake plumbing and did some deep ponder mode thinking as I
wiped scattered tools and put them away. Put the pedal assembly in
the parts washer for its initial soak. Took time out to wash the
clothes I got greasy yesterday.
 February
14th 2020
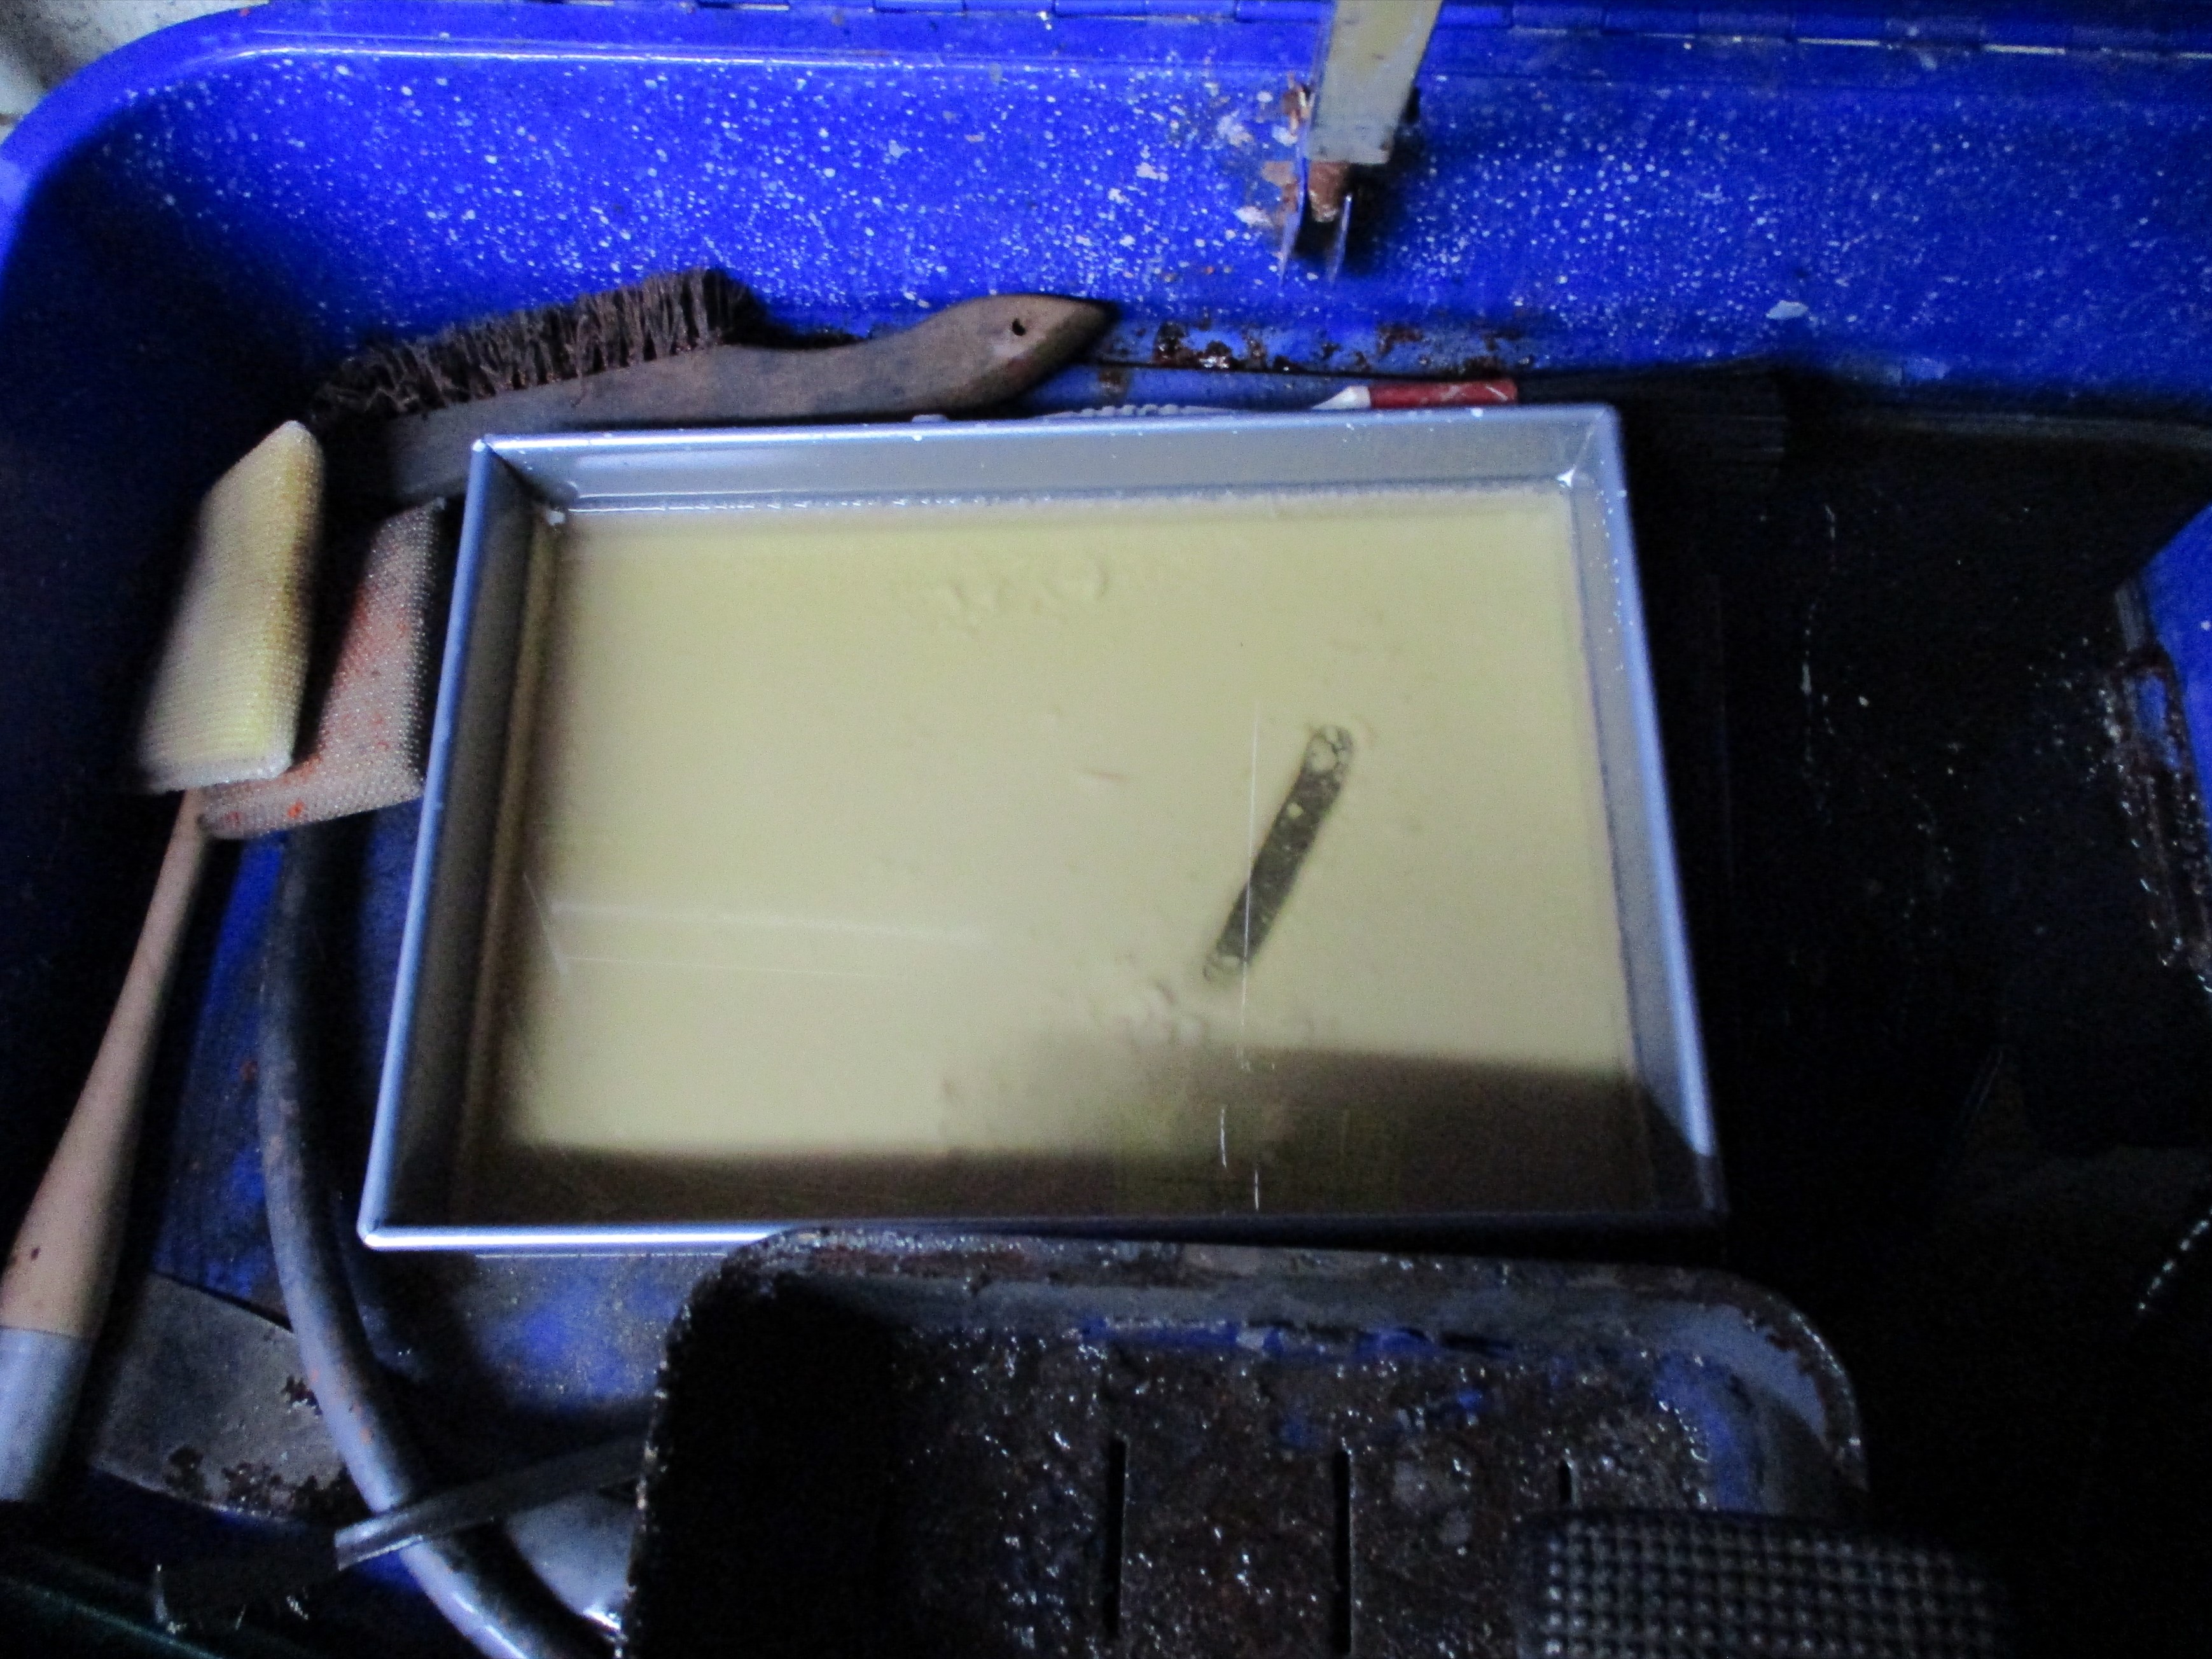
When I lifted the lid on the parts washer yesterday, I discovered this.
I had the idea of placing a pan of fresh Oileater on the parts
washer shelf to take care of small items rather than just dumping them
into the main tank of saturated soup. It worked well but it now appears
that another thing that Oileater eats is Teflon coated baking pans as
there is now a 3/8" layer of beige sludge in this one. Oh well, clean
up and try something else, maybe Tupperware.
February
14th 2020
When I lifted the lid on the parts washer yesterday, I discovered this.
I had the idea of placing a pan of fresh Oileater on the parts
washer shelf to take care of small items rather than just dumping them
into the main tank of saturated soup. It worked well but it now appears
that another thing that Oileater eats is Teflon coated baking pans as
there is now a 3/8" layer of beige sludge in this one. Oh well, clean
up and try something else, maybe Tupperware.
 February
17th 2020
Planned to lift the engine block out over the weekend. Drained the oil
pan first. My machinist friend, Jon Carey, gave me a red ass dressing
down when I told him that the water anti-freeze contaminated
oil had been stewing in the pan four years. I got a mulligan this time.
The oil was consistently black and poured smoothly. Looks like most of
the water from the blown head gasket went out the exhaust ports.
February
17th 2020
Planned to lift the engine block out over the weekend. Drained the oil
pan first. My machinist friend, Jon Carey, gave me a red ass dressing
down when I told him that the water anti-freeze contaminated
oil had been stewing in the pan four years. I got a mulligan this time.
The oil was consistently black and poured smoothly. Looks like most of
the water from the blown head gasket went out the exhaust ports.
Took the water pump off the front of the block and then tackled the damper as I thought it was blocking the front engine mount bolts, I have a "universal" harmonic balancer puller/installer tool that I've used on two engines so far. Both times, none of the eleven different puller bolts fit the damper I was trying to remove. Damnation! The puller holes on this damper were smaller than 3/8" and larger than 5/16" . None of the metric bolts I could find fit either. Why would anybody use a bastard thread like 11/32" fine for this purpose?
After a two hour shop search, I went shadetree mechanic on it
and drove a 3/8-24 tap thru the puller holes. It was a risk since there
were only two but it worked. The damper was off in a matter of minutes
after I got the puller set up.
 February
18th 2020
After the damper was off, I realized what I thought were engine mount
bolts were not mount-to-frame bolts and could not be removed with the
mount in place. They were carriage bolts (my nemesis) sandwiching the
three parts of the mount together. The
mount-to-frame bolts turned out to be behind and were three in number.
The two
on the outside came off easily, The one in the middle, directly under
the crankshaft, did not want to move. I messed around with it the rest
of the day without success. The next day, I went at it with the impact
wrench and that finally did the trick. The rear mount bolts on the
bellhousing came out quickly too.
February
18th 2020
After the damper was off, I realized what I thought were engine mount
bolts were not mount-to-frame bolts and could not be removed with the
mount in place. They were carriage bolts (my nemesis) sandwiching the
three parts of the mount together. The
mount-to-frame bolts turned out to be behind and were three in number.
The two
on the outside came off easily, The one in the middle, directly under
the crankshaft, did not want to move. I messed around with it the rest
of the day without success. The next day, I went at it with the impact
wrench and that finally did the trick. The rear mount bolts on the
bellhousing came out quickly too.
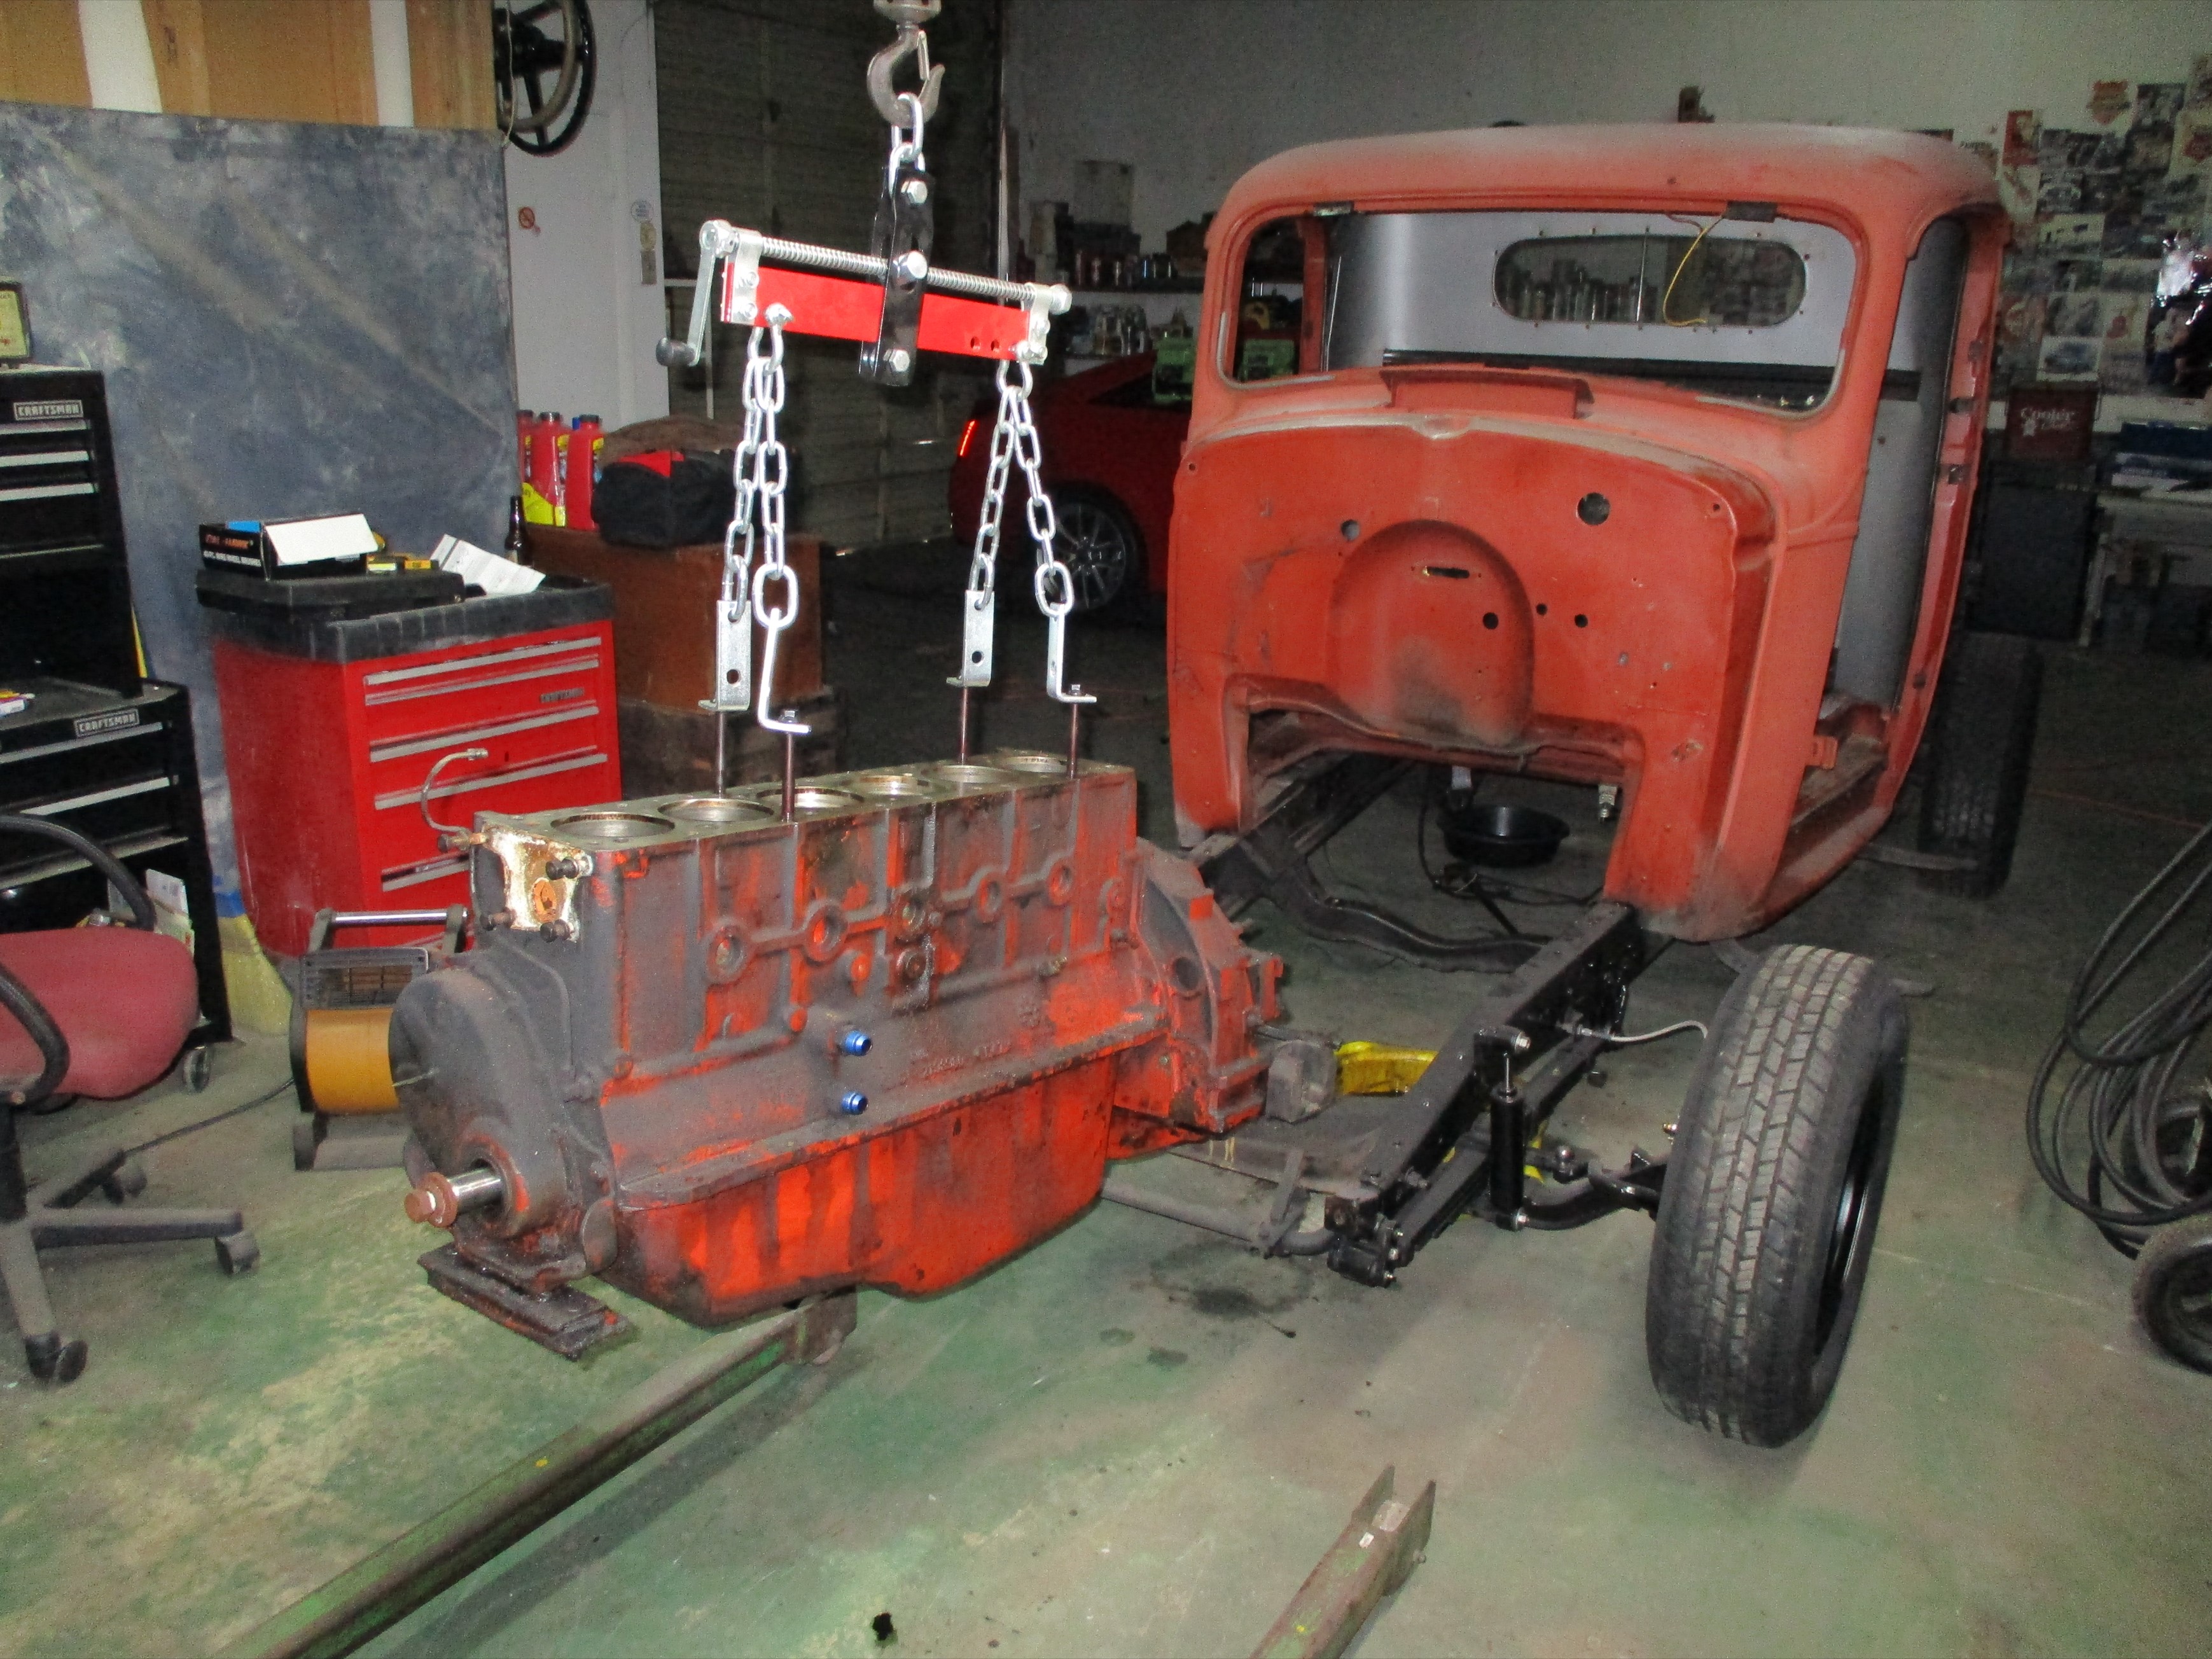
Took Deerslayer off the jack stands, Put the work bench on
furniture dollies and moved it out of the way and jockeyed the
Carroll-Taylor engine hoist into position. The Jimmy block is now out
and was the last big item to come off the chassis in this build. Beer
of
the day was Tommyknocker Brewery & Pub's TK IPA.
 February
19th 2020
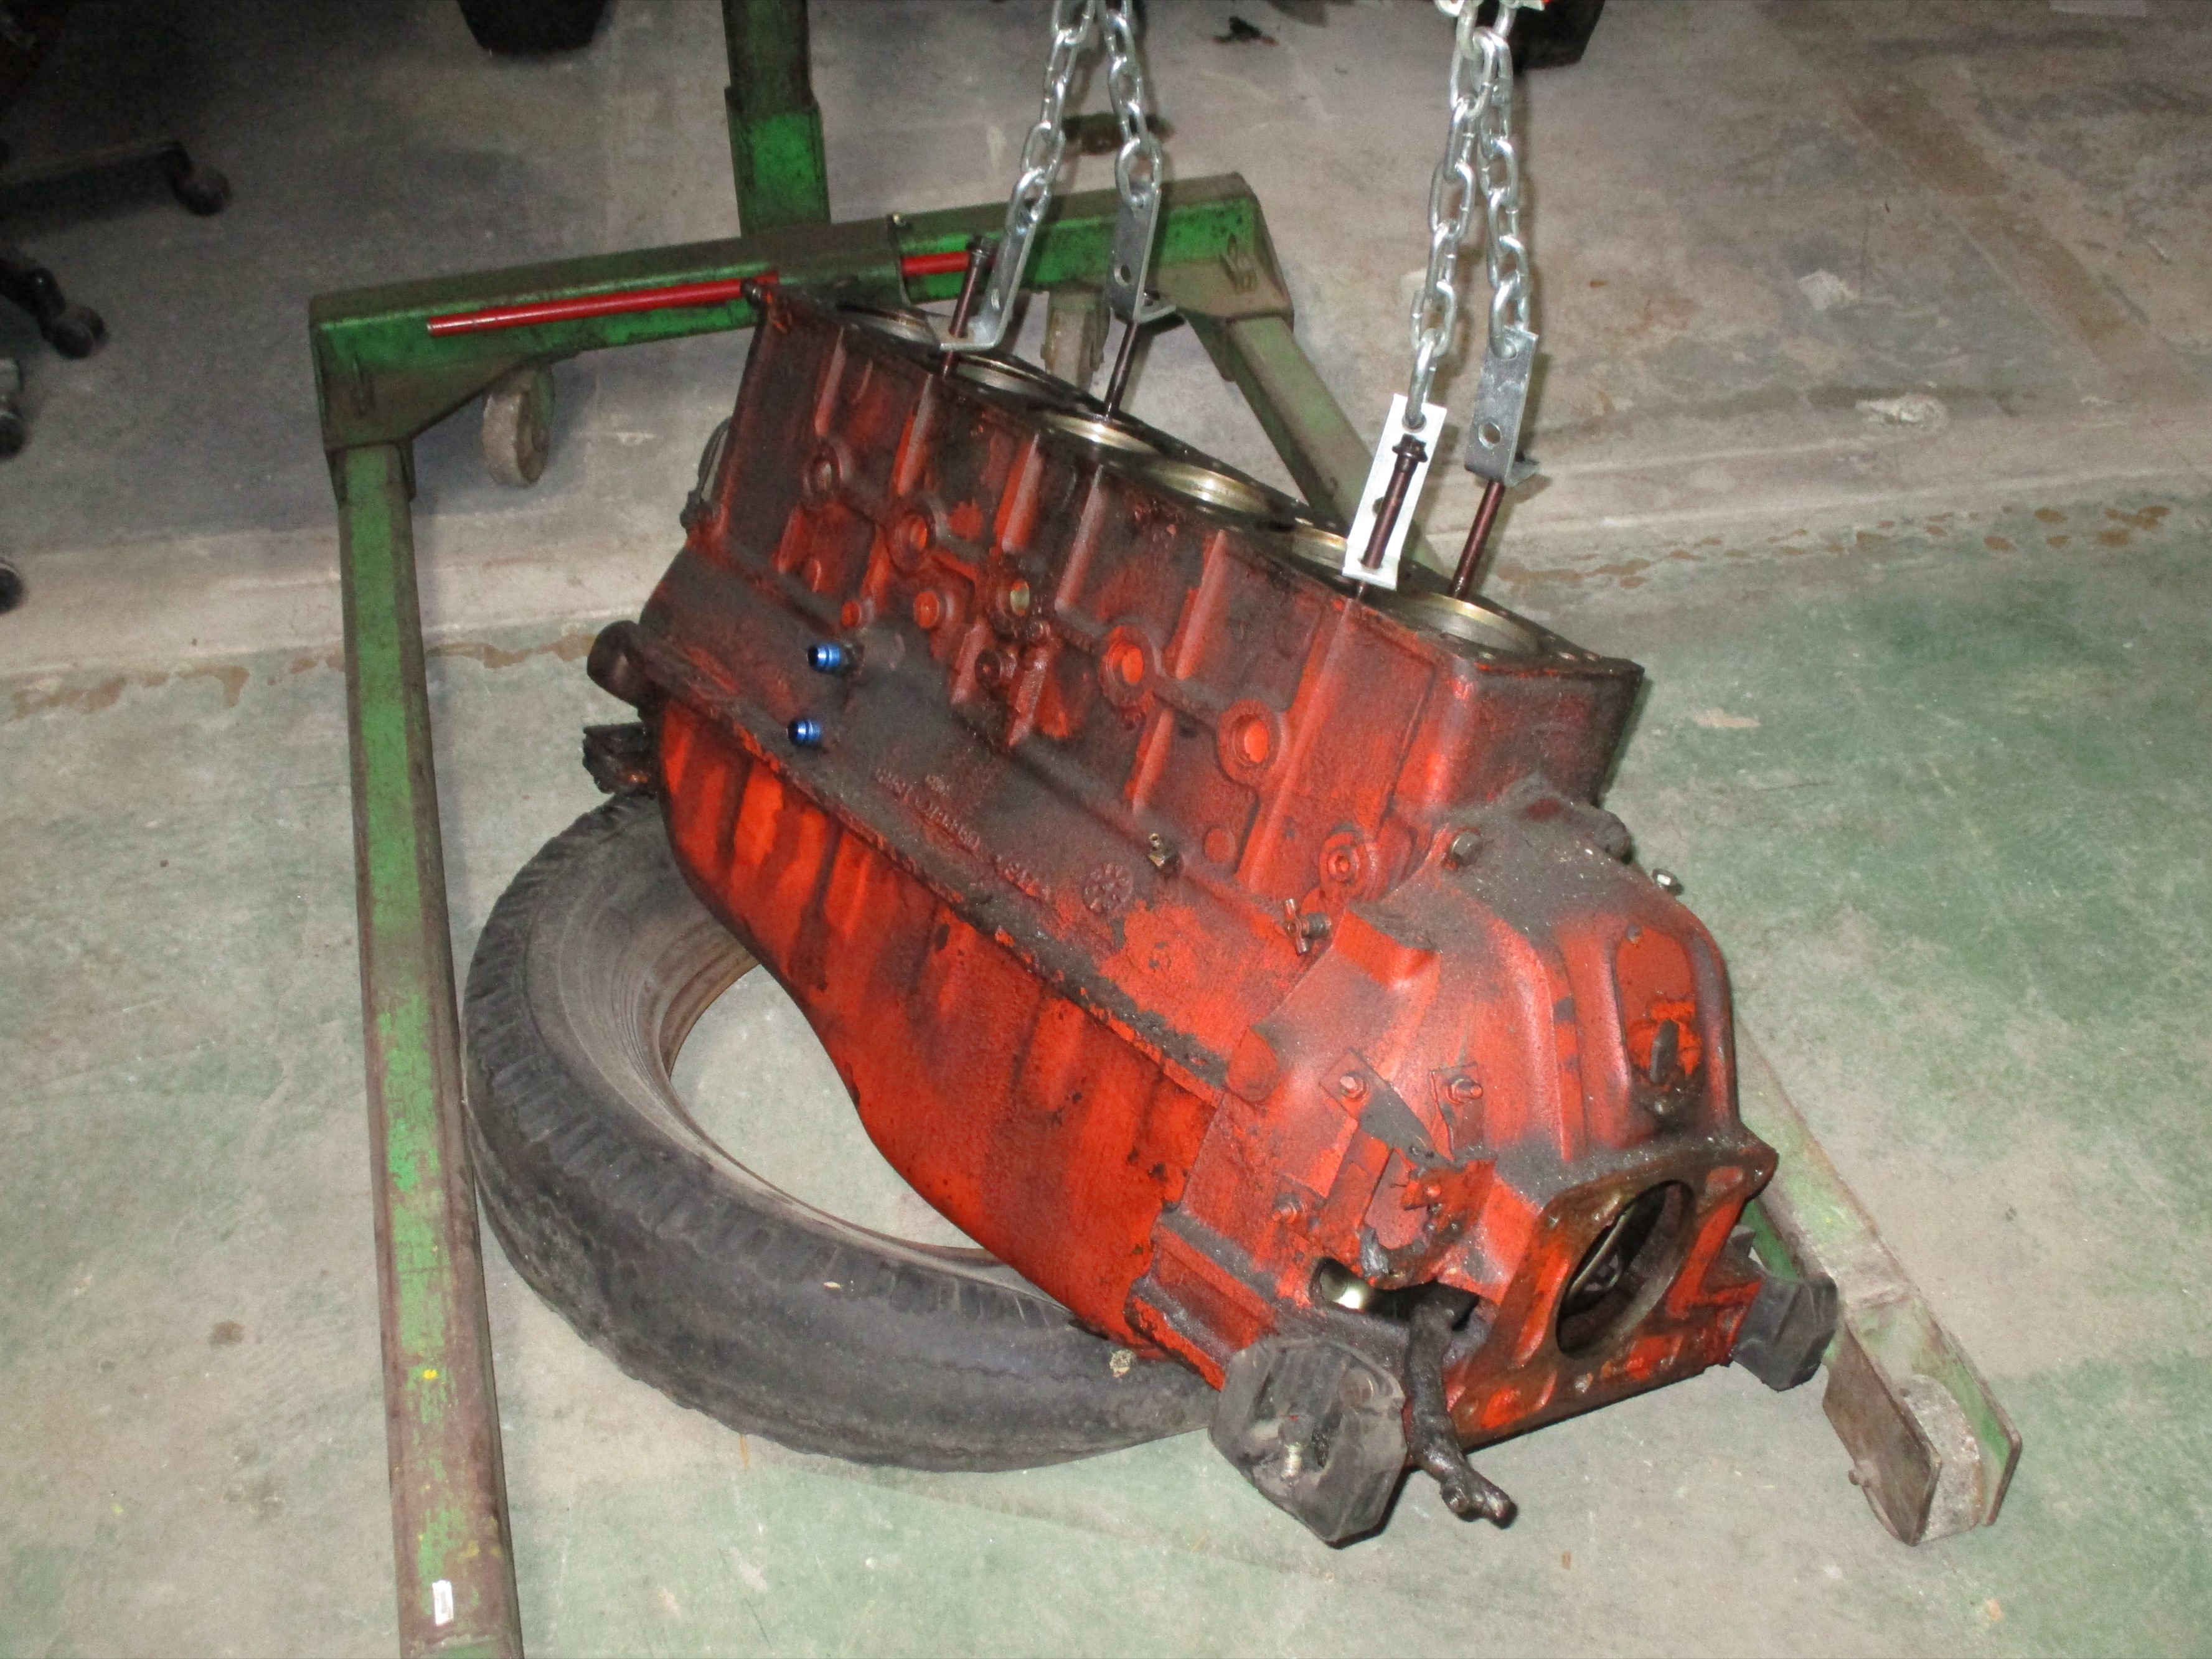
Found I miscalculated when I lowered the Jimmy block unto the old tire
I was going to rest it on until I got the bellhousing off. I need the
engine to lay on its side for that operation but I reached the
limits of the hoist before
it was fully down. This will require some Deep Ponder Mode thinking. I
did manage to push it upright and get a 2x6 under the passenger side
bellhousing mount, keeping it upright, to take the tension off the head
bolts used to lift it.
February
19th 2020
Found I miscalculated when I lowered the Jimmy block unto the old tire
I was going to rest it on until I got the bellhousing off. I need the
engine to lay on its side for that operation but I reached the
limits of the hoist before
it was fully down. This will require some Deep Ponder Mode thinking. I
did manage to push it upright and get a 2x6 under the passenger side
bellhousing mount, keeping it upright, to take the tension off the head
bolts used to lift it.
 February
20th 2020
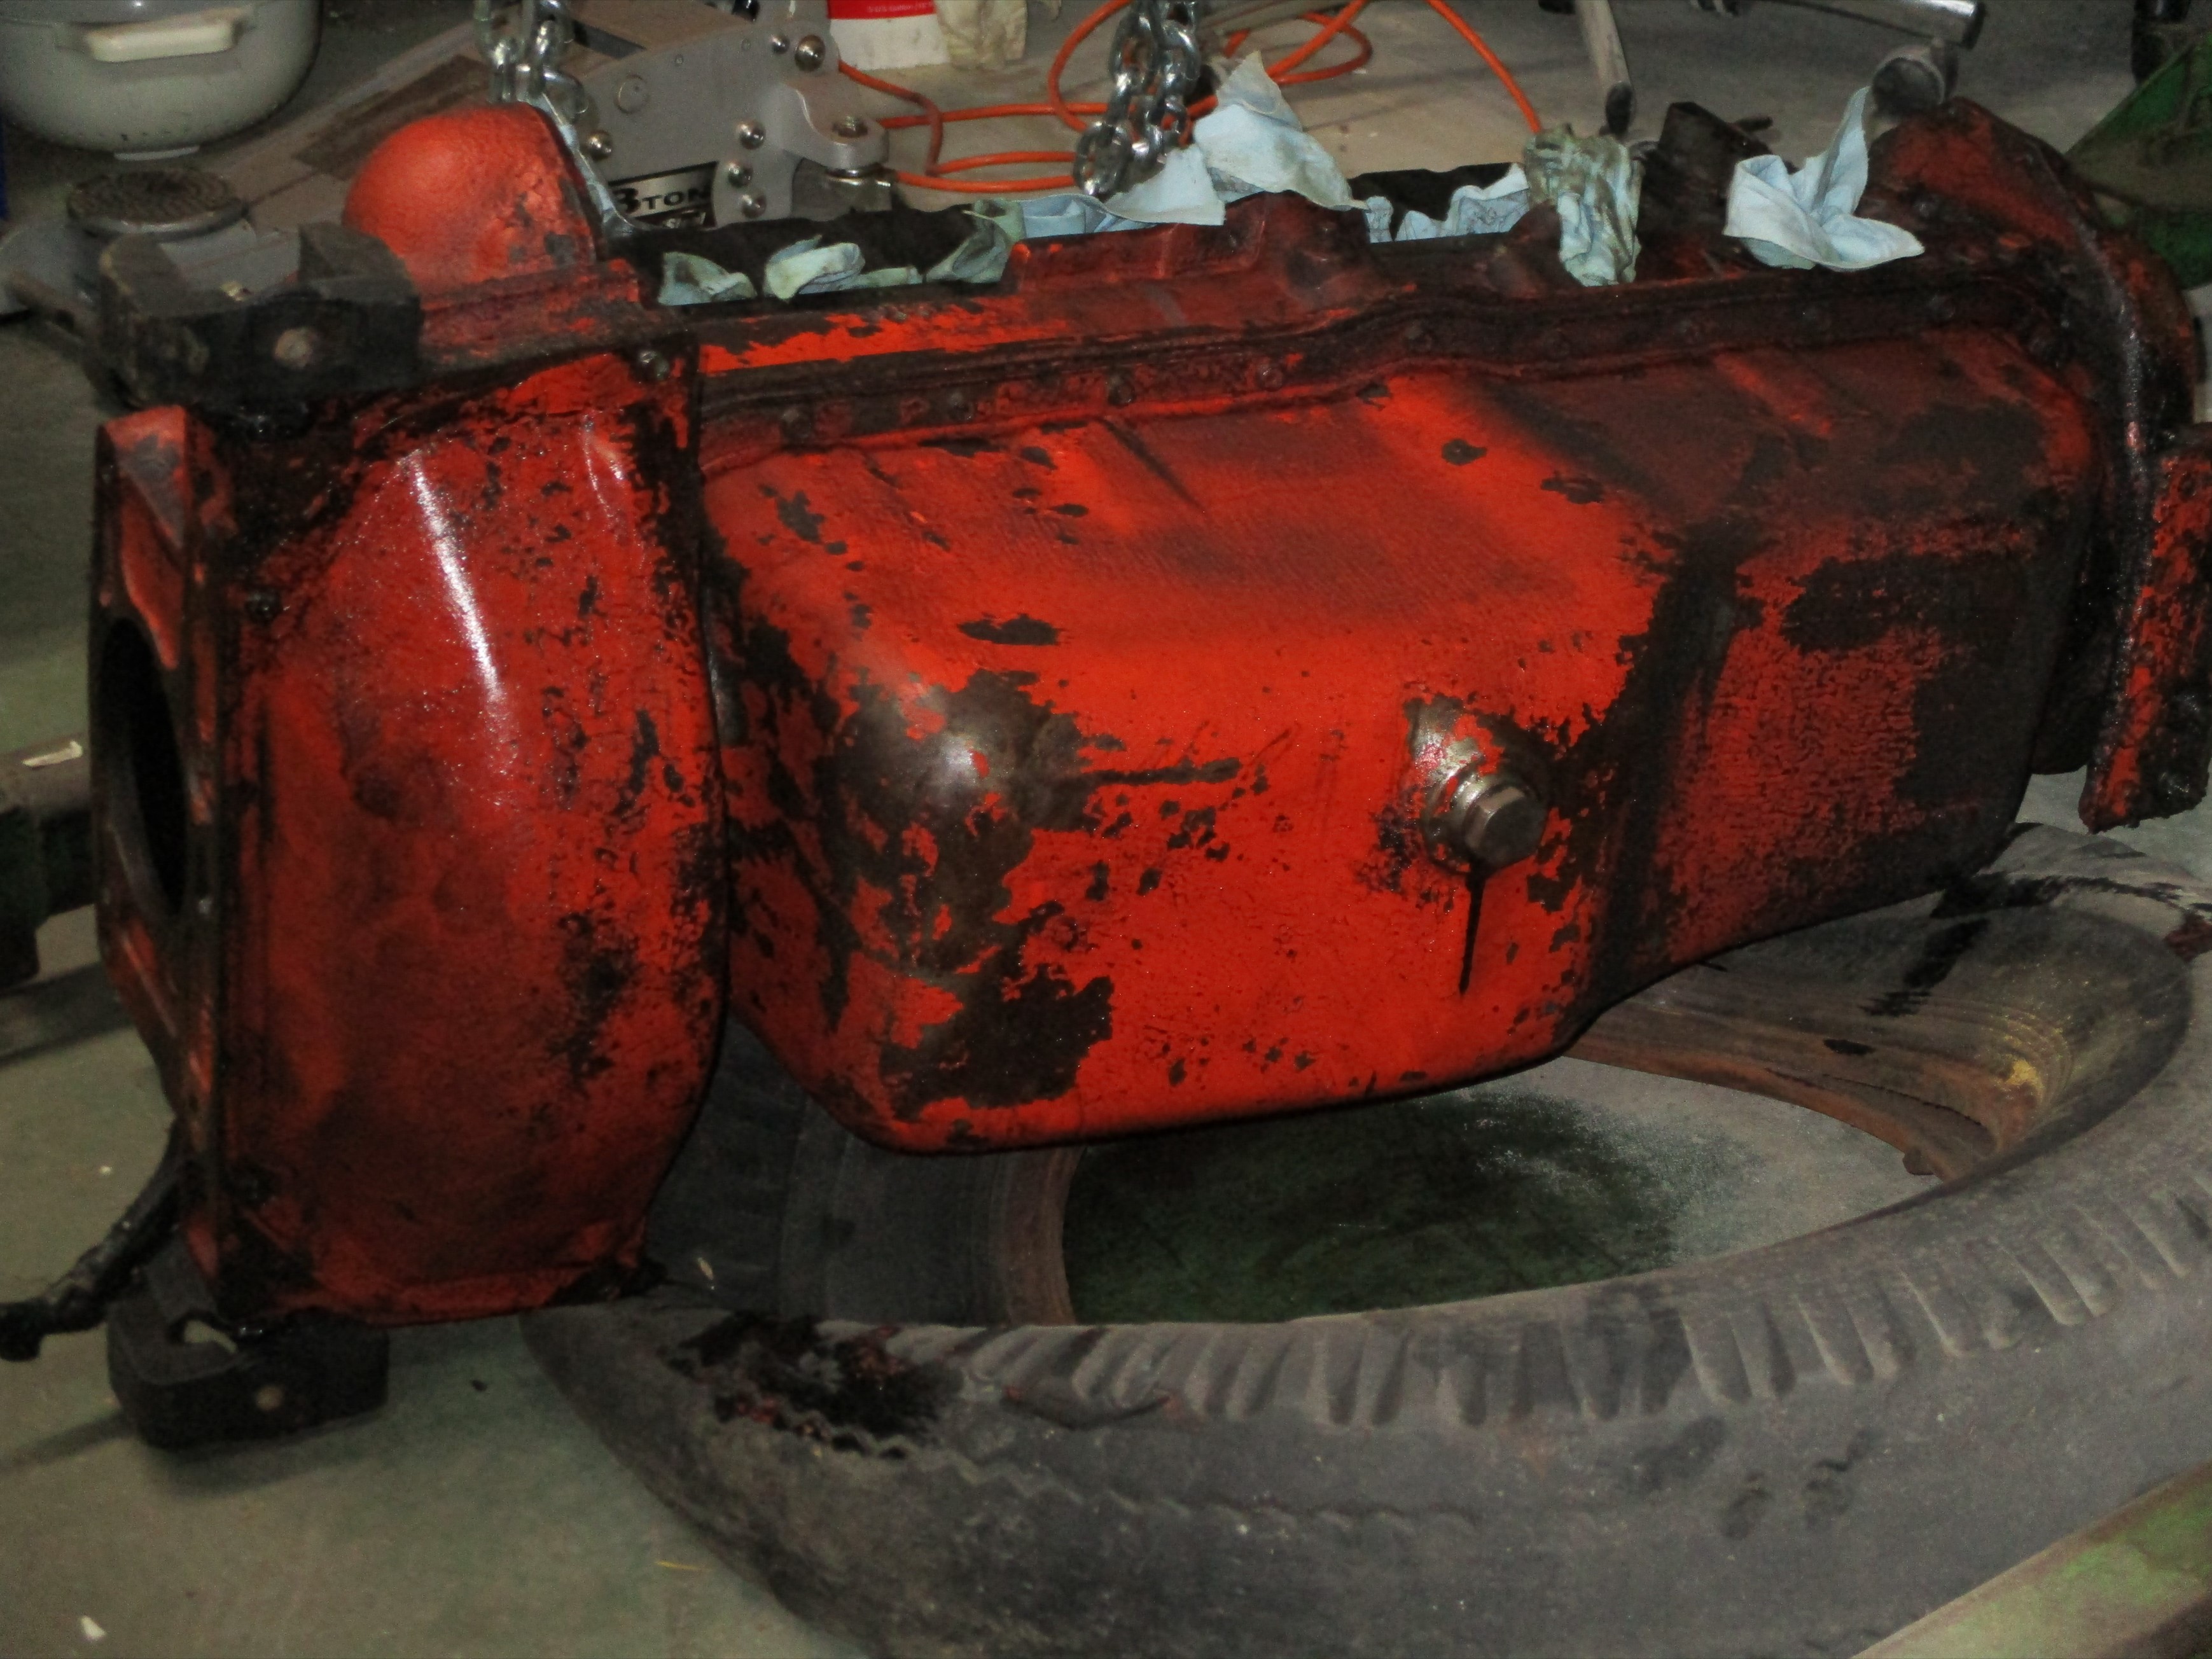
When the engine was propped upright, I gained a little slack in the
hoist chain. This allowed me to let out the remaining length of hoist
chain, about twenty inches, which can't be done under tension. That
twenty inches made the difference. I was able to re-lift the engine and
put it down on its side as originally planned.
February
20th 2020
When the engine was propped upright, I gained a little slack in the
hoist chain. This allowed me to let out the remaining length of hoist
chain, about twenty inches, which can't be done under tension. That
twenty inches made the difference. I was able to re-lift the engine and
put it down on its side as originally planned.
The clutch and flywheel have to come out thru the bottom access opening before the bellhousing can come off. These Jimmy and stovebolt engines have some of the bellhousing bolts behind the flywheel, a dubious engineering achievement in my humble opinion. We'll set that work aside for now to finish some of the other small tasks I have started. Beer of the day was Fulton Brewery's Proper Porter American Porter.
 February
21st 2020
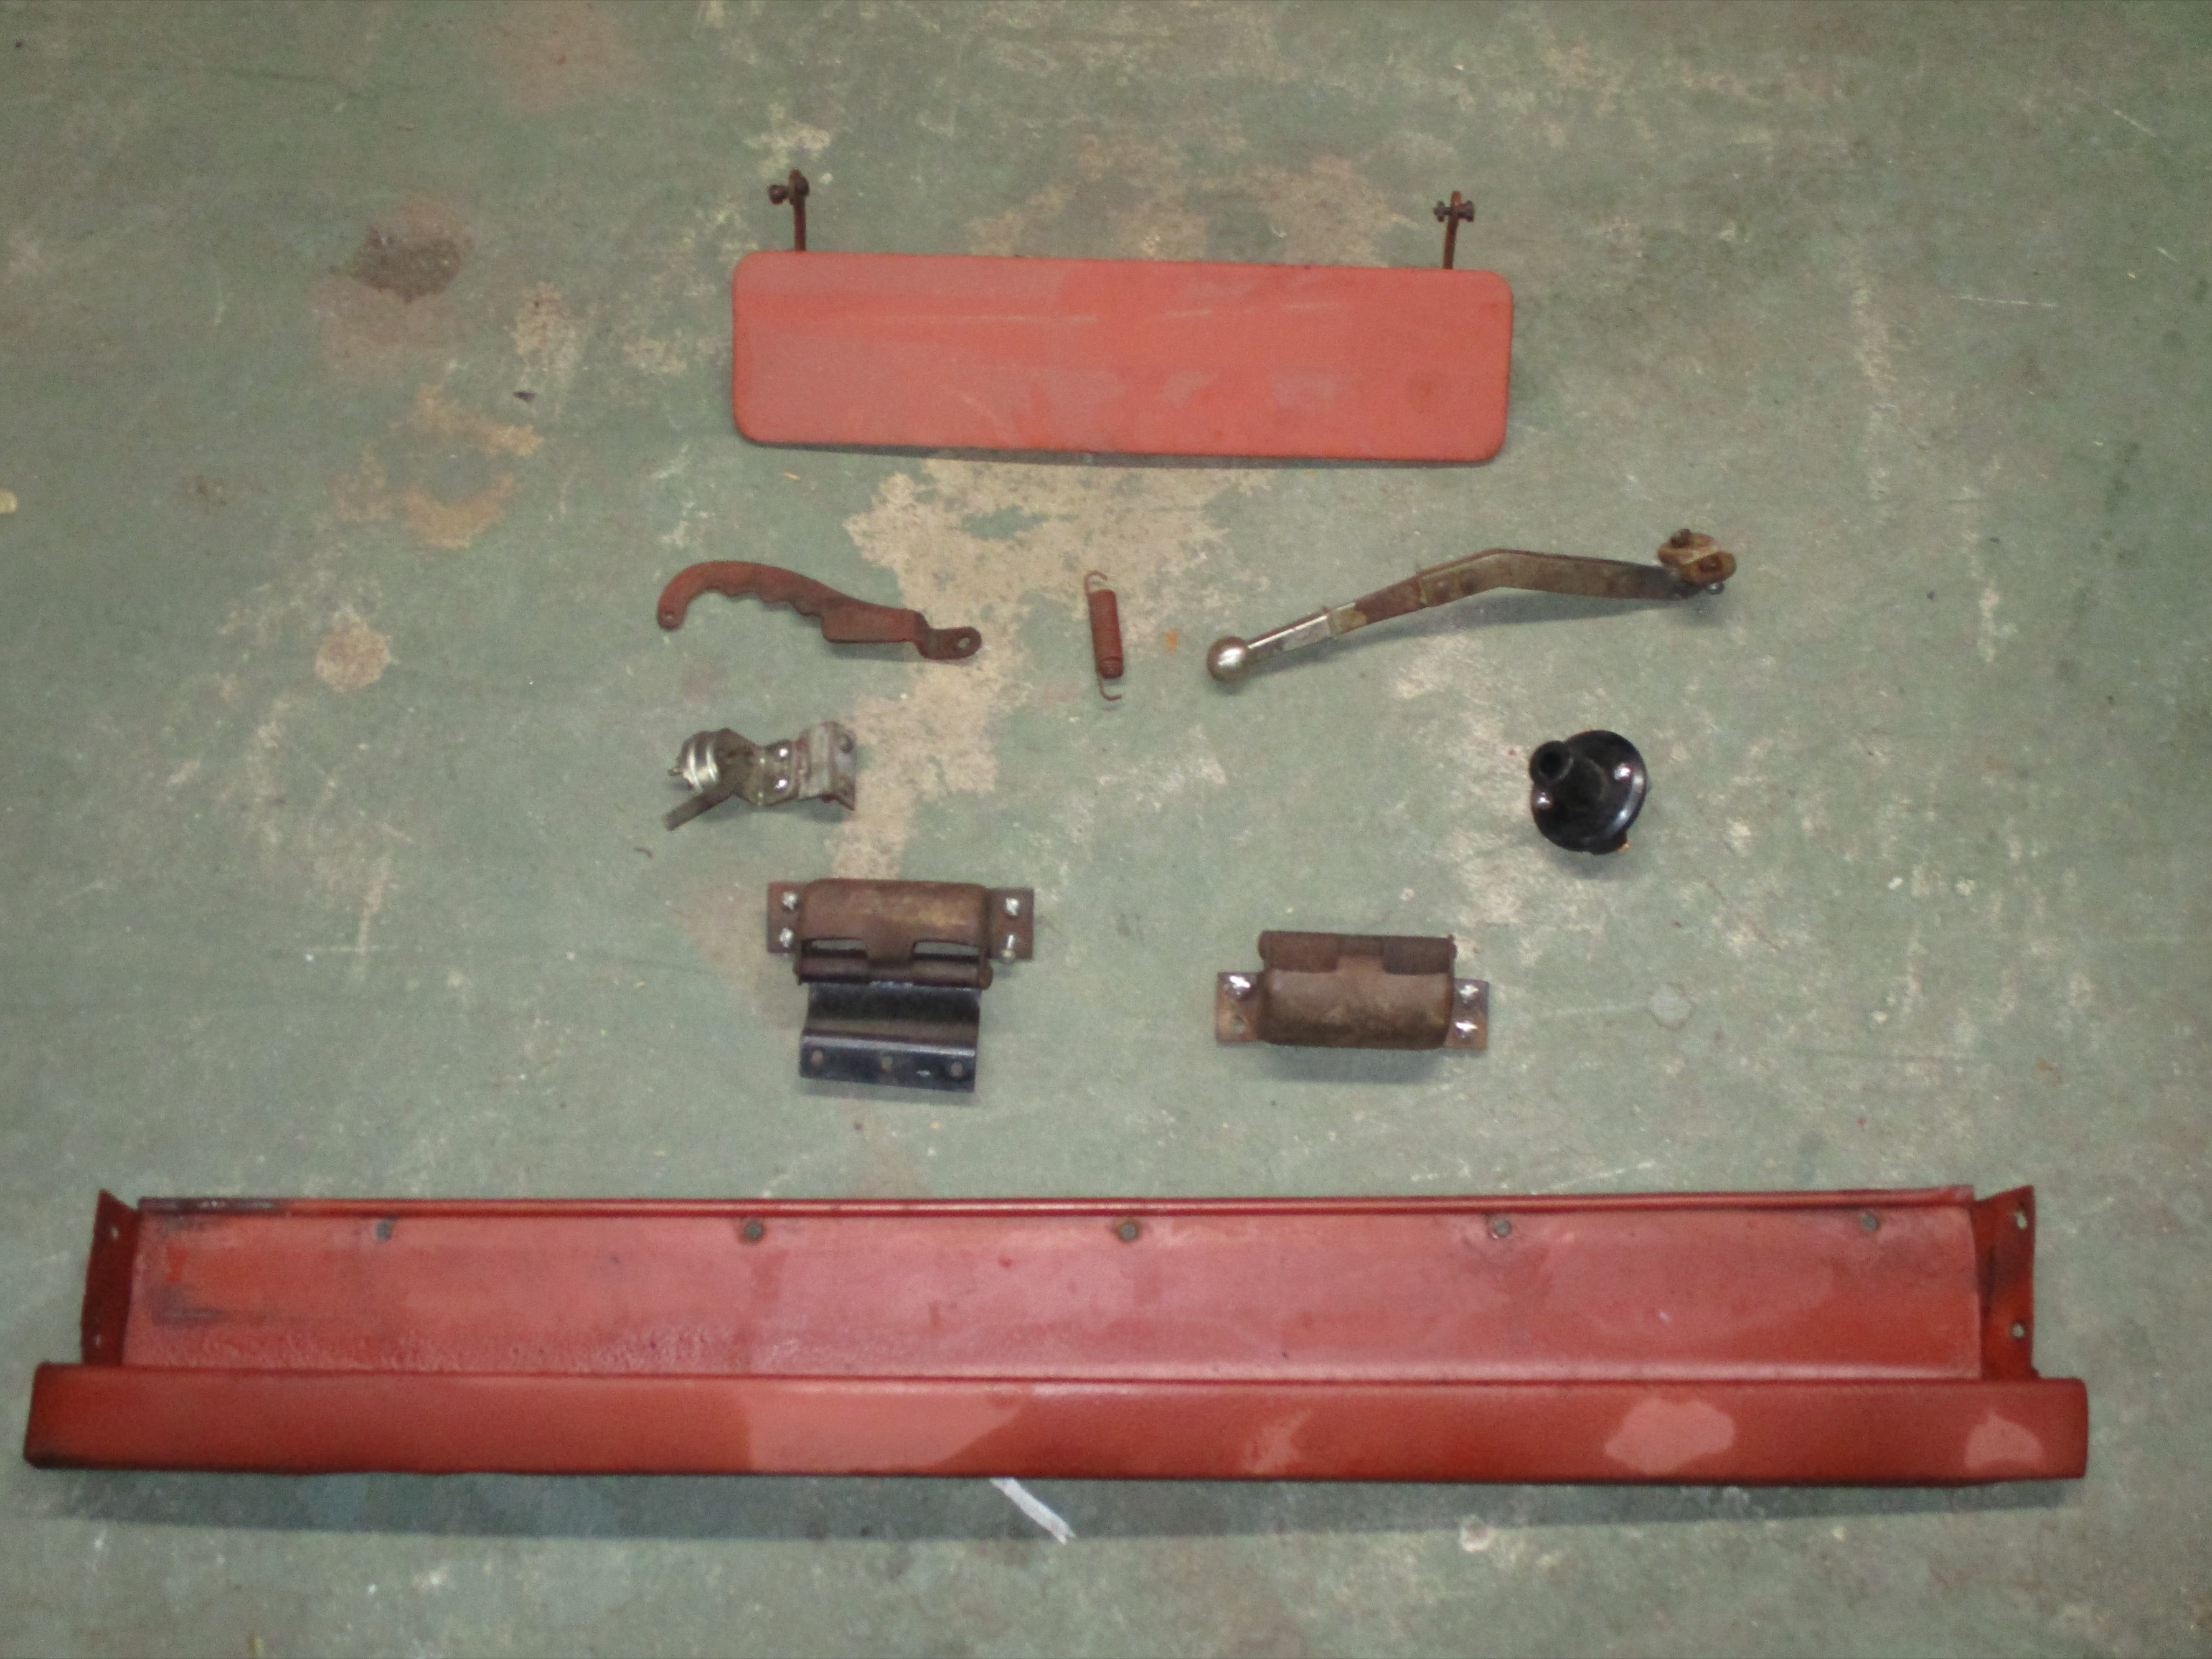
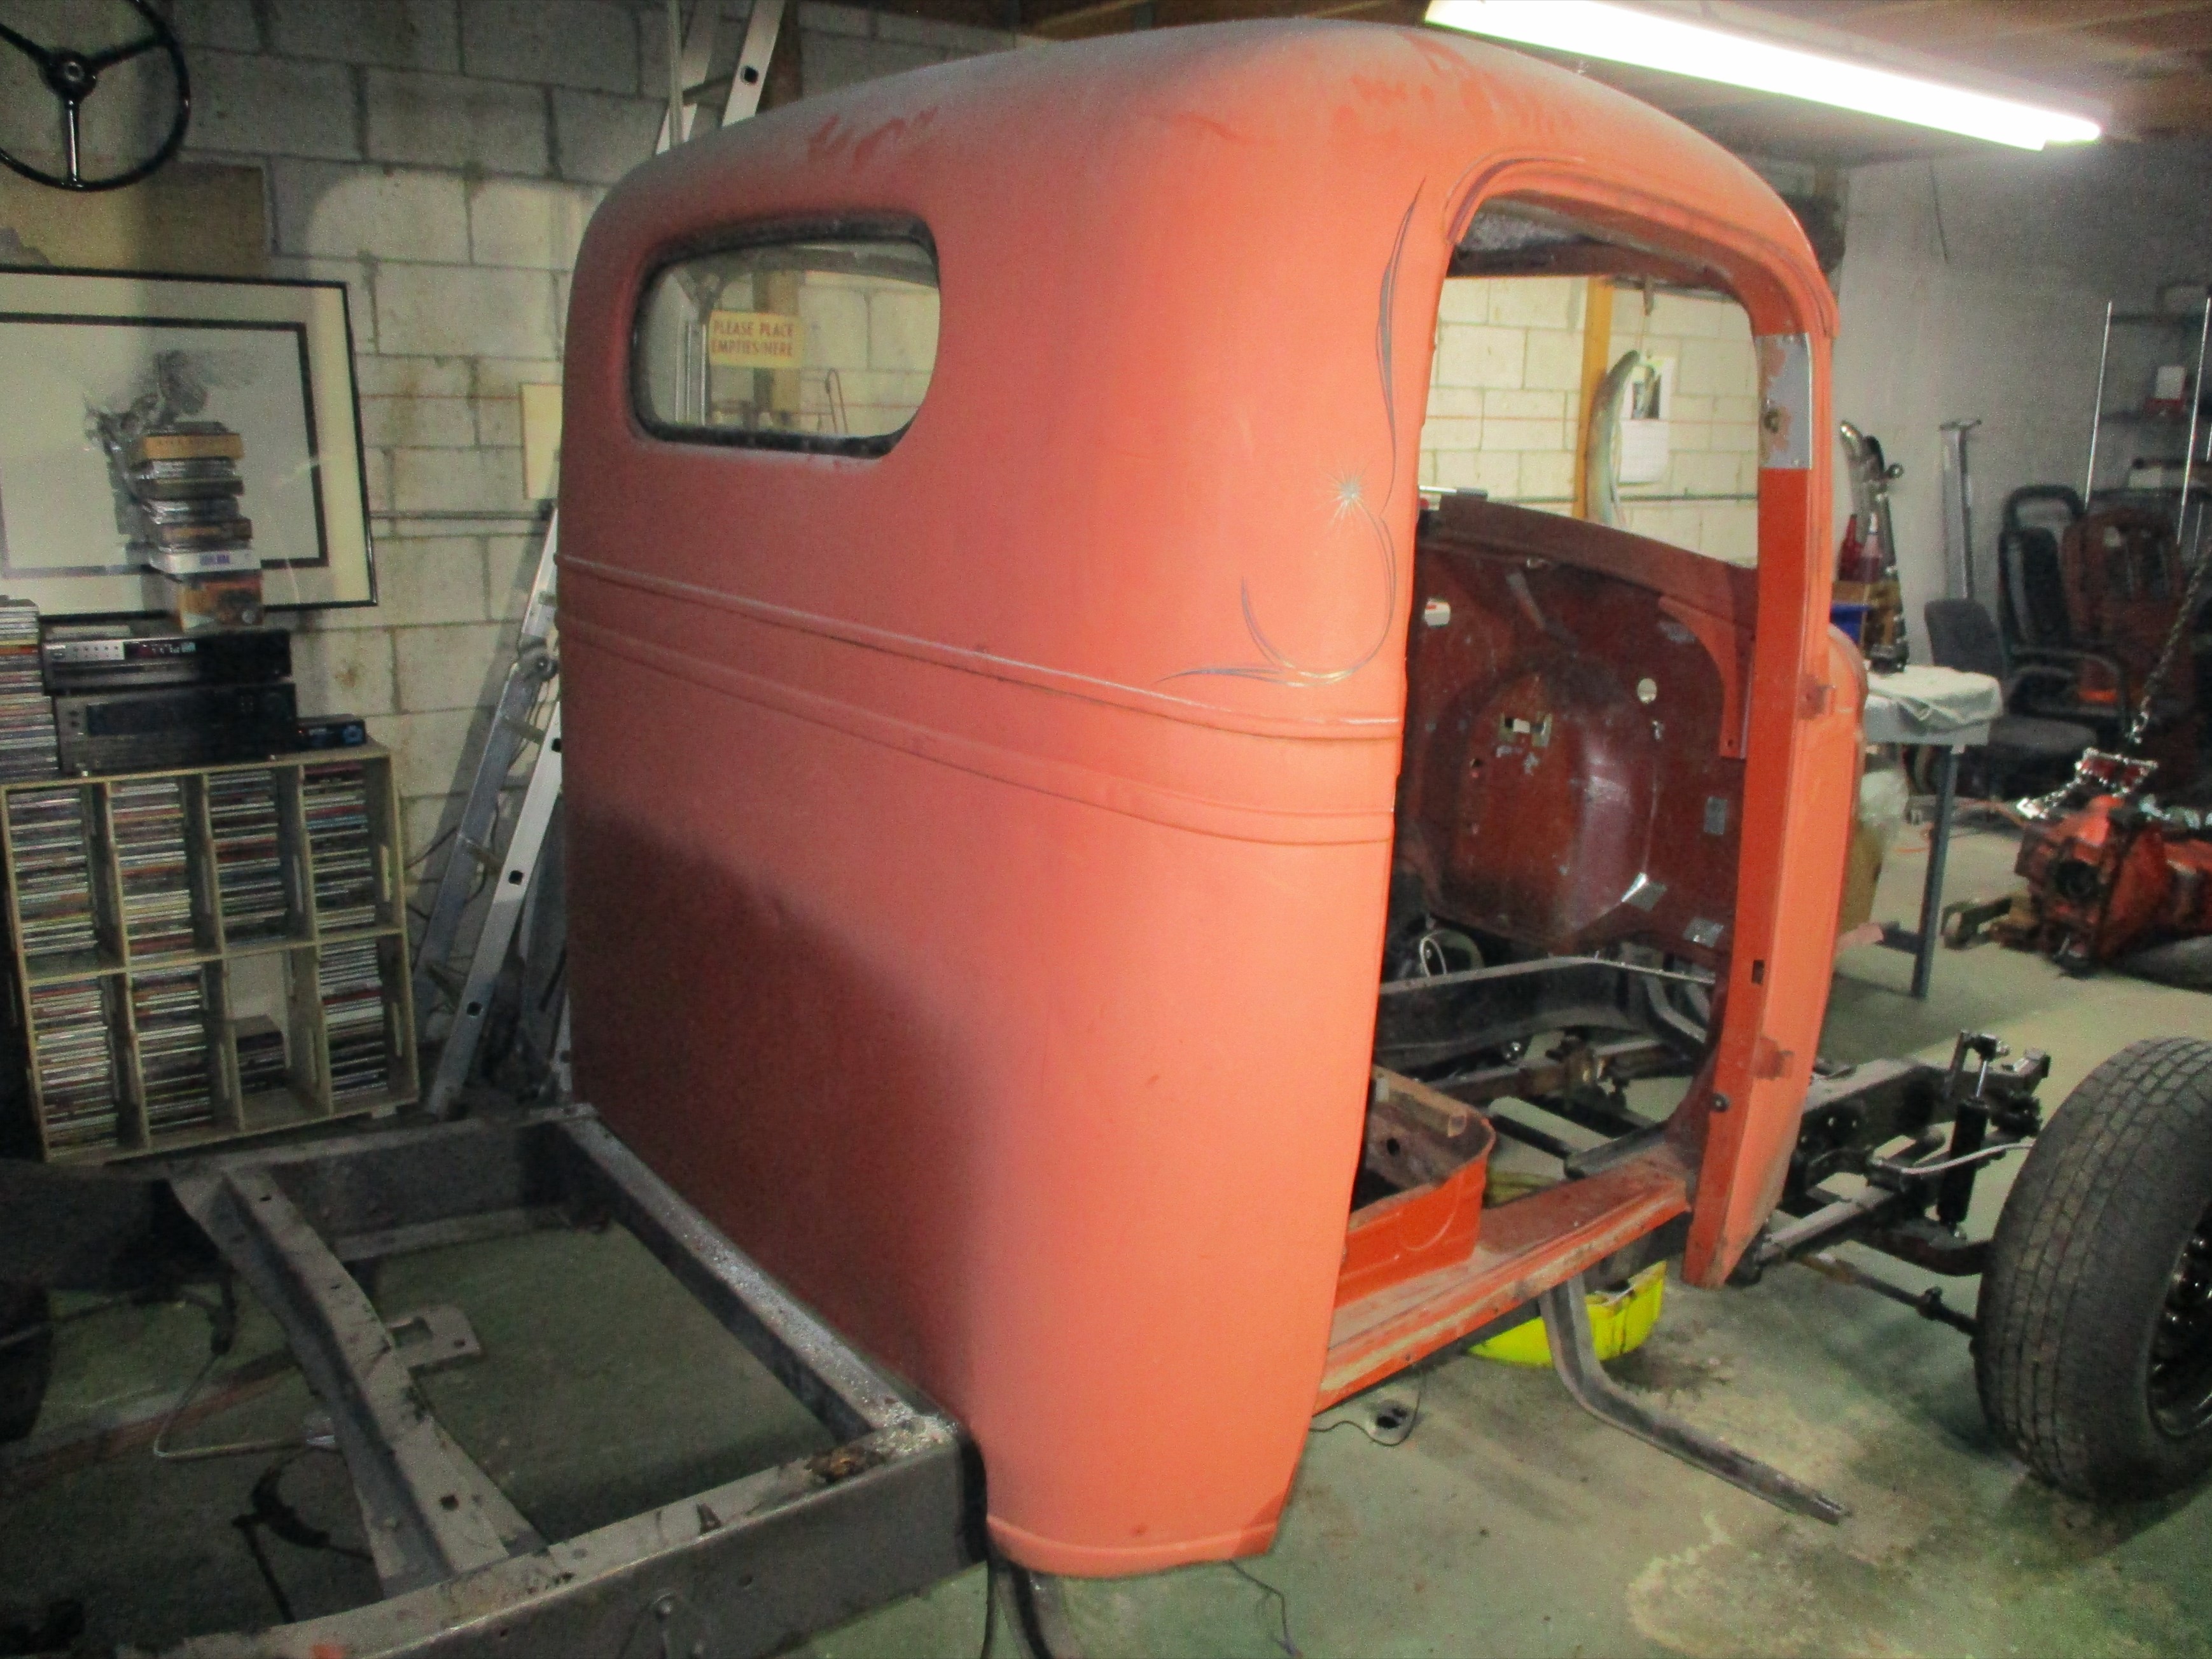
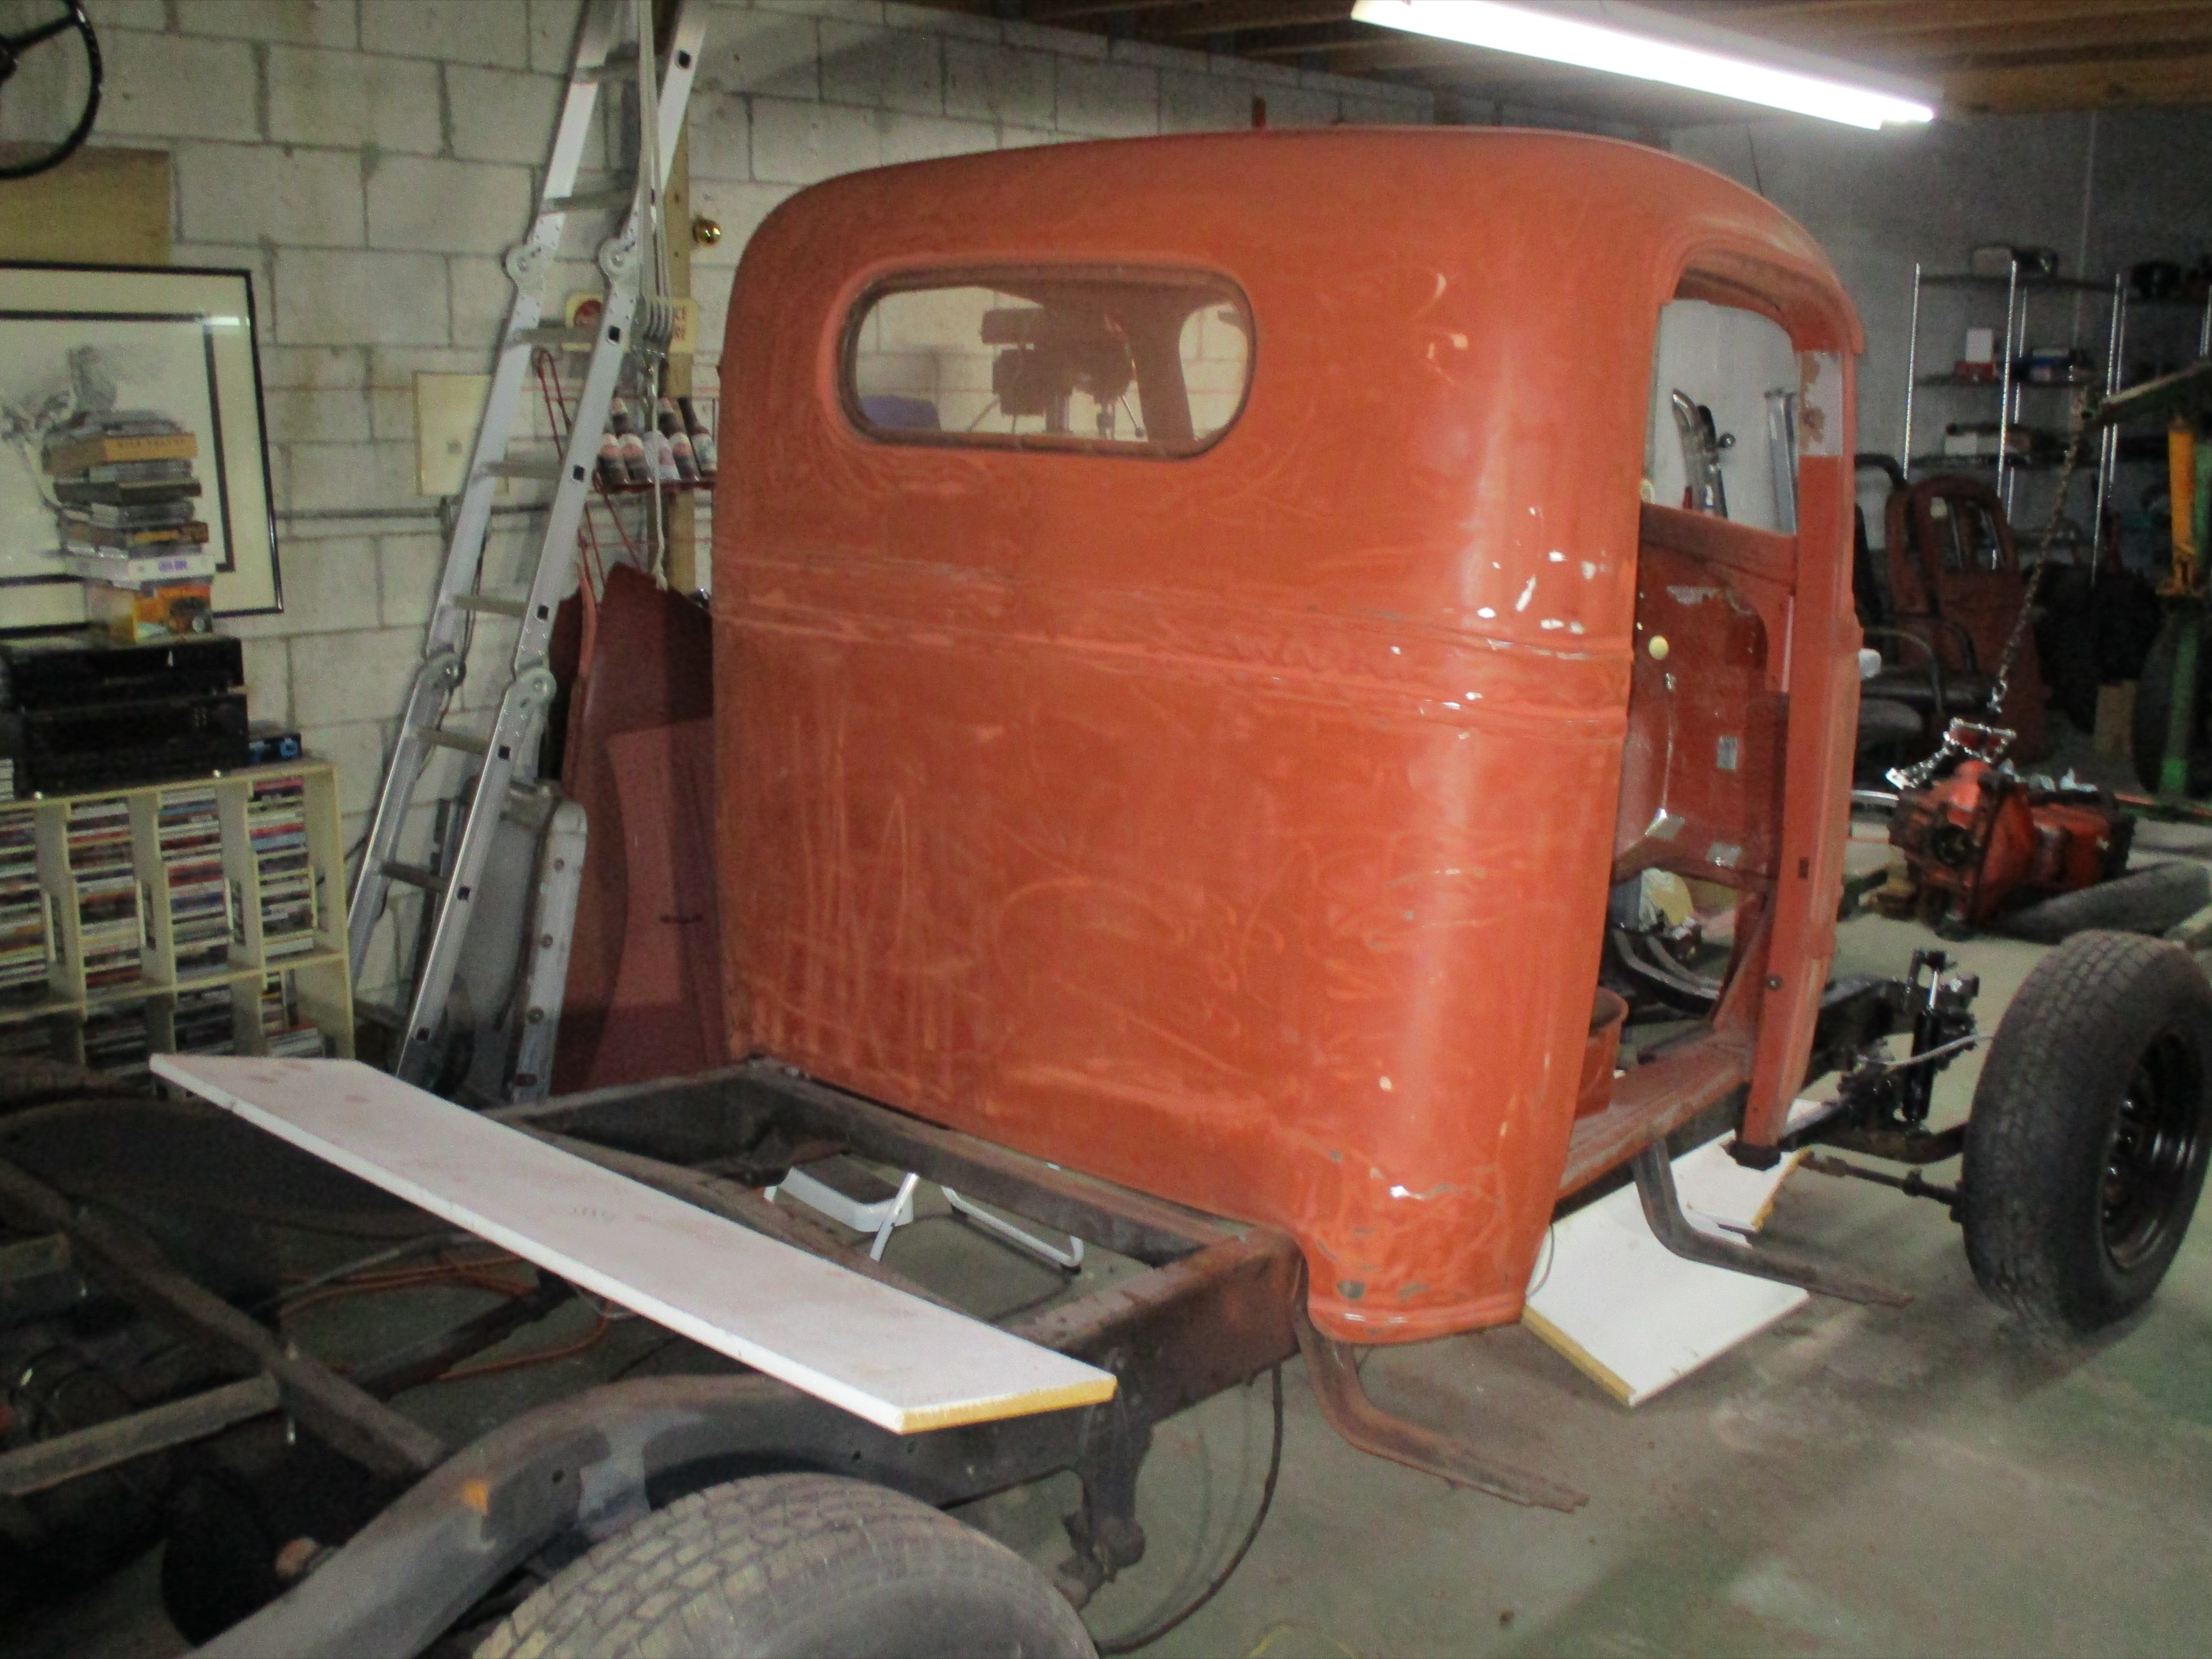
Removed the rest of the odds and ends from the cab interior. The crotch
cooler cowl vent assembly, the windshield hinges, kick panels
below the doors, brake light switch and battery cut off switch. Two of
the stovebolts (slotted screws) holding the passenger side kick panel
were frozen. Tried several methods to loosen them but no joy. I'll
grind them off over the weekend. Then we'll be
ready to strip the chalky primer paint off this
old boy.
February
21st 2020
Removed the rest of the odds and ends from the cab interior. The crotch
cooler cowl vent assembly, the windshield hinges, kick panels
below the doors, brake light switch and battery cut off switch. Two of
the stovebolts (slotted screws) holding the passenger side kick panel
were frozen. Tried several methods to loosen them but no joy. I'll
grind them off over the weekend. Then we'll be
ready to strip the chalky primer paint off this
old boy.
 February
24th 2020
After soaking the dissembled brake and clutch pedal assembly in
Oileater a few days,
"basting" the parts on occasion, I pulled them out of the soup to dry
off and paint. Some items also did a session in the Evapo-Rust bath.
February
24th 2020
After soaking the dissembled brake and clutch pedal assembly in
Oileater a few days,
"basting" the parts on occasion, I pulled them out of the soup to dry
off and paint. Some items also did a session in the Evapo-Rust bath.
 February
25th 2020
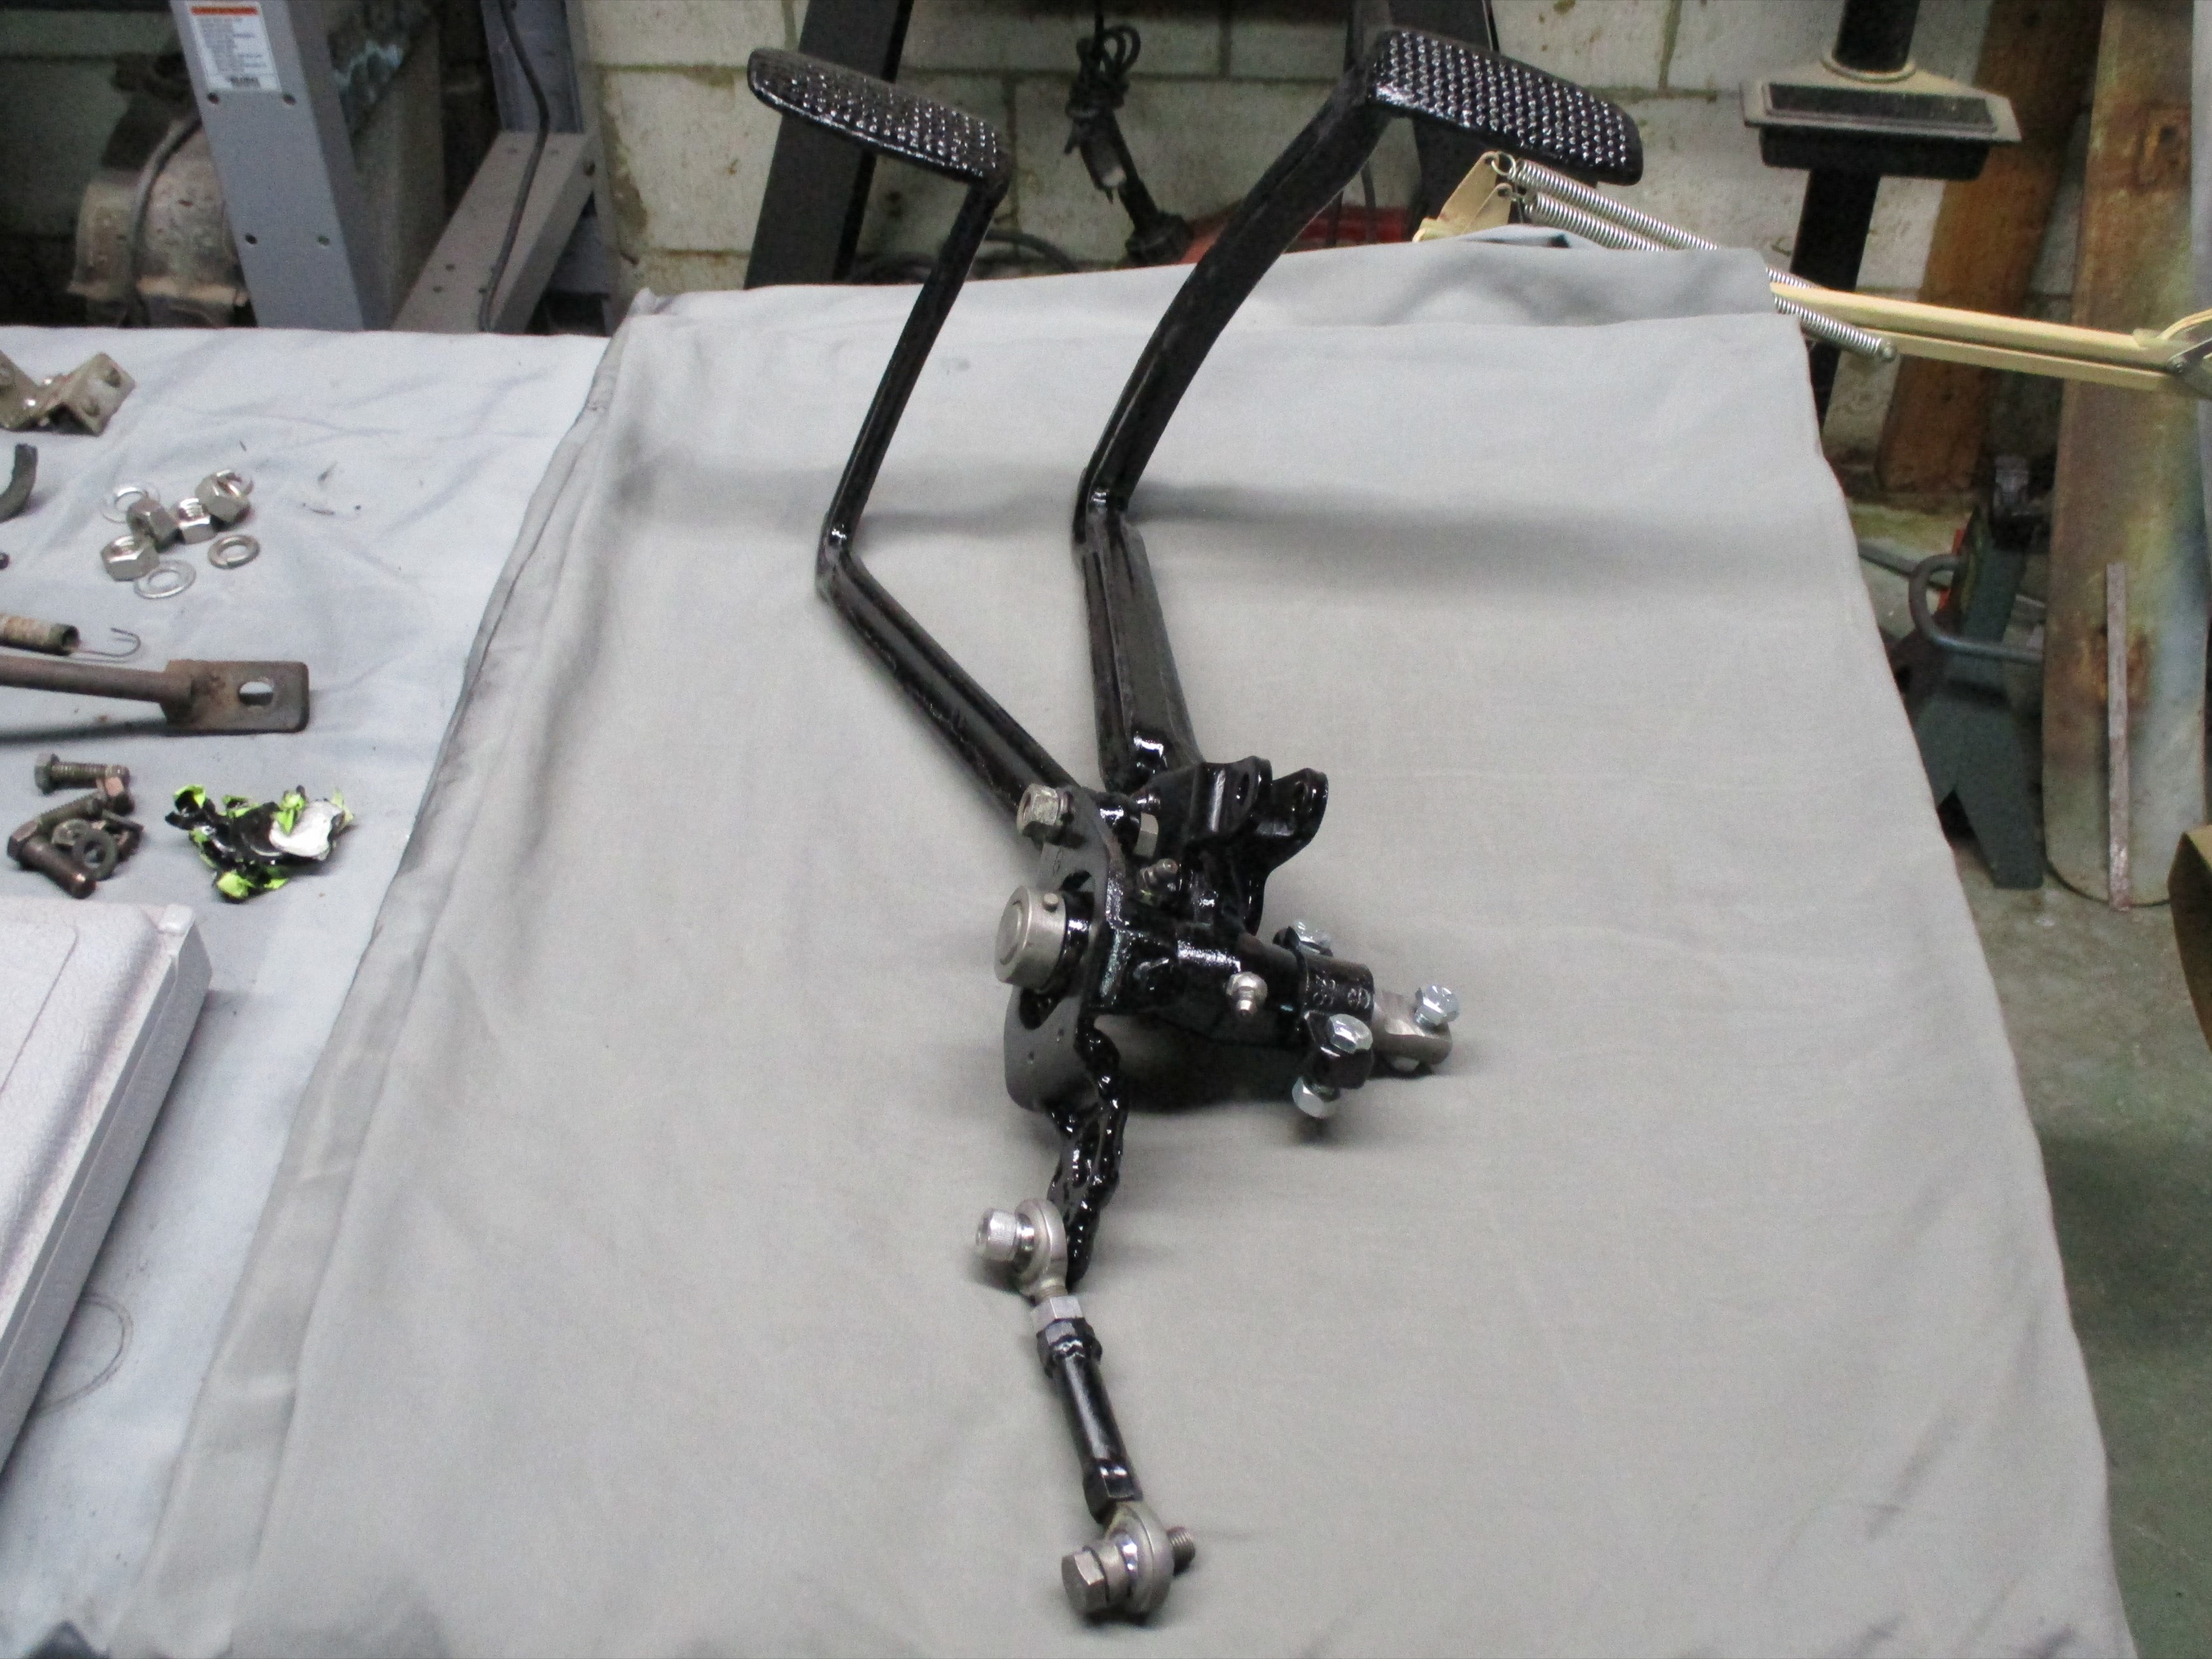
PRE Paint prepped and gave brake and clutch pedal parts two
coats of Eastwood's Extreme Chassis Black paint. Re-assembled the brake
and clutch pedal parts, with assembly lube and new fasteners if I could
find them in my
disorganized collection of nuts and bolts. This will now go in a
storage box to await its turn to be re-installed on the truck down the
road. Beer of the day was River Horse Brewing Co's Special Ale, an
American Amber.
February
25th 2020
PRE Paint prepped and gave brake and clutch pedal parts two
coats of Eastwood's Extreme Chassis Black paint. Re-assembled the brake
and clutch pedal parts, with assembly lube and new fasteners if I could
find them in my
disorganized collection of nuts and bolts. This will now go in a
storage box to await its turn to be re-installed on the truck down the
road. Beer of the day was River Horse Brewing Co's Special Ale, an
American Amber.
 February
26th 2020
Okay, got all the stuff off the cab I'm taking off. Anything left will
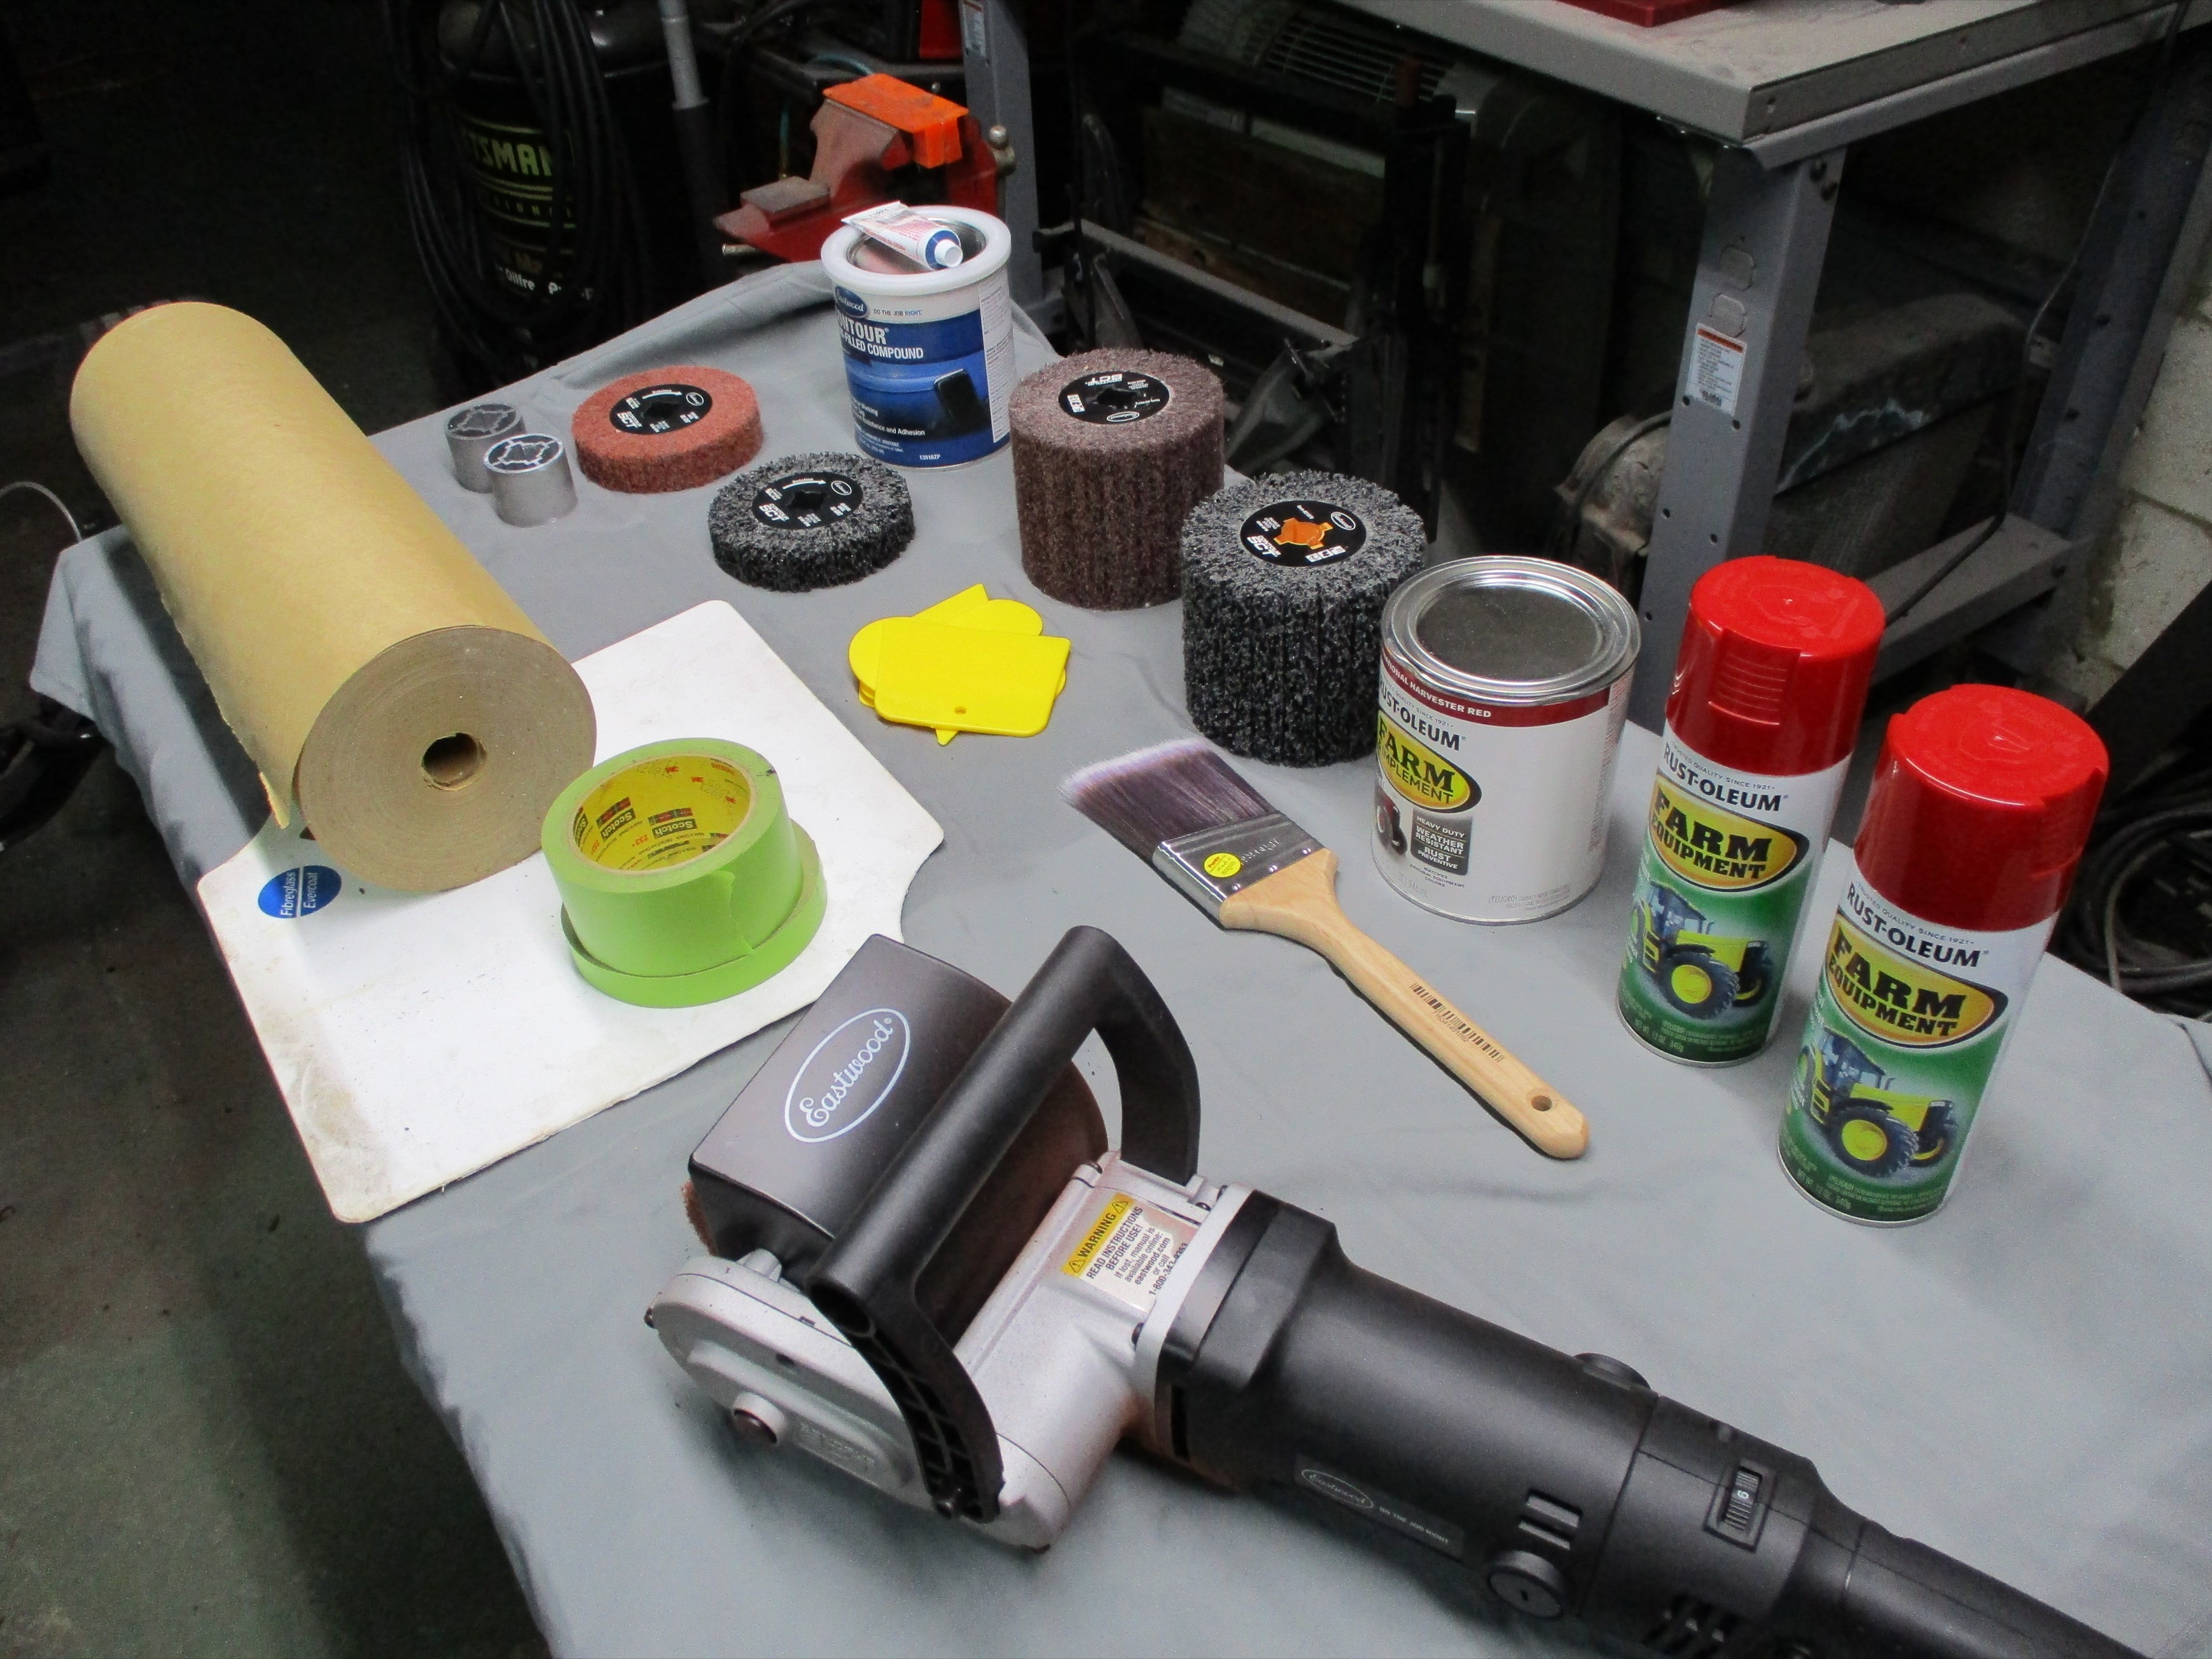
be masked during painting. Time to see if my new Eastwood gadget lives
up to expectations. Spent five minutes with the Contour SCT Surface
Conditioning Tool on the passenger side cowl panel to get a feel for
it. The 120 grit roll that it ships with made fast work with little
dust in the air. At full speed it doesn't throw me around. I'm gonna
miss the pinstripes by "Sir James" tho'.
February
26th 2020
Okay, got all the stuff off the cab I'm taking off. Anything left will
be masked during painting. Time to see if my new Eastwood gadget lives
up to expectations. Spent five minutes with the Contour SCT Surface
Conditioning Tool on the passenger side cowl panel to get a feel for
it. The 120 grit roll that it ships with made fast work with little
dust in the air. At full speed it doesn't throw me around. I'm gonna
miss the pinstripes by "Sir James" tho'.
 February
27th 2020
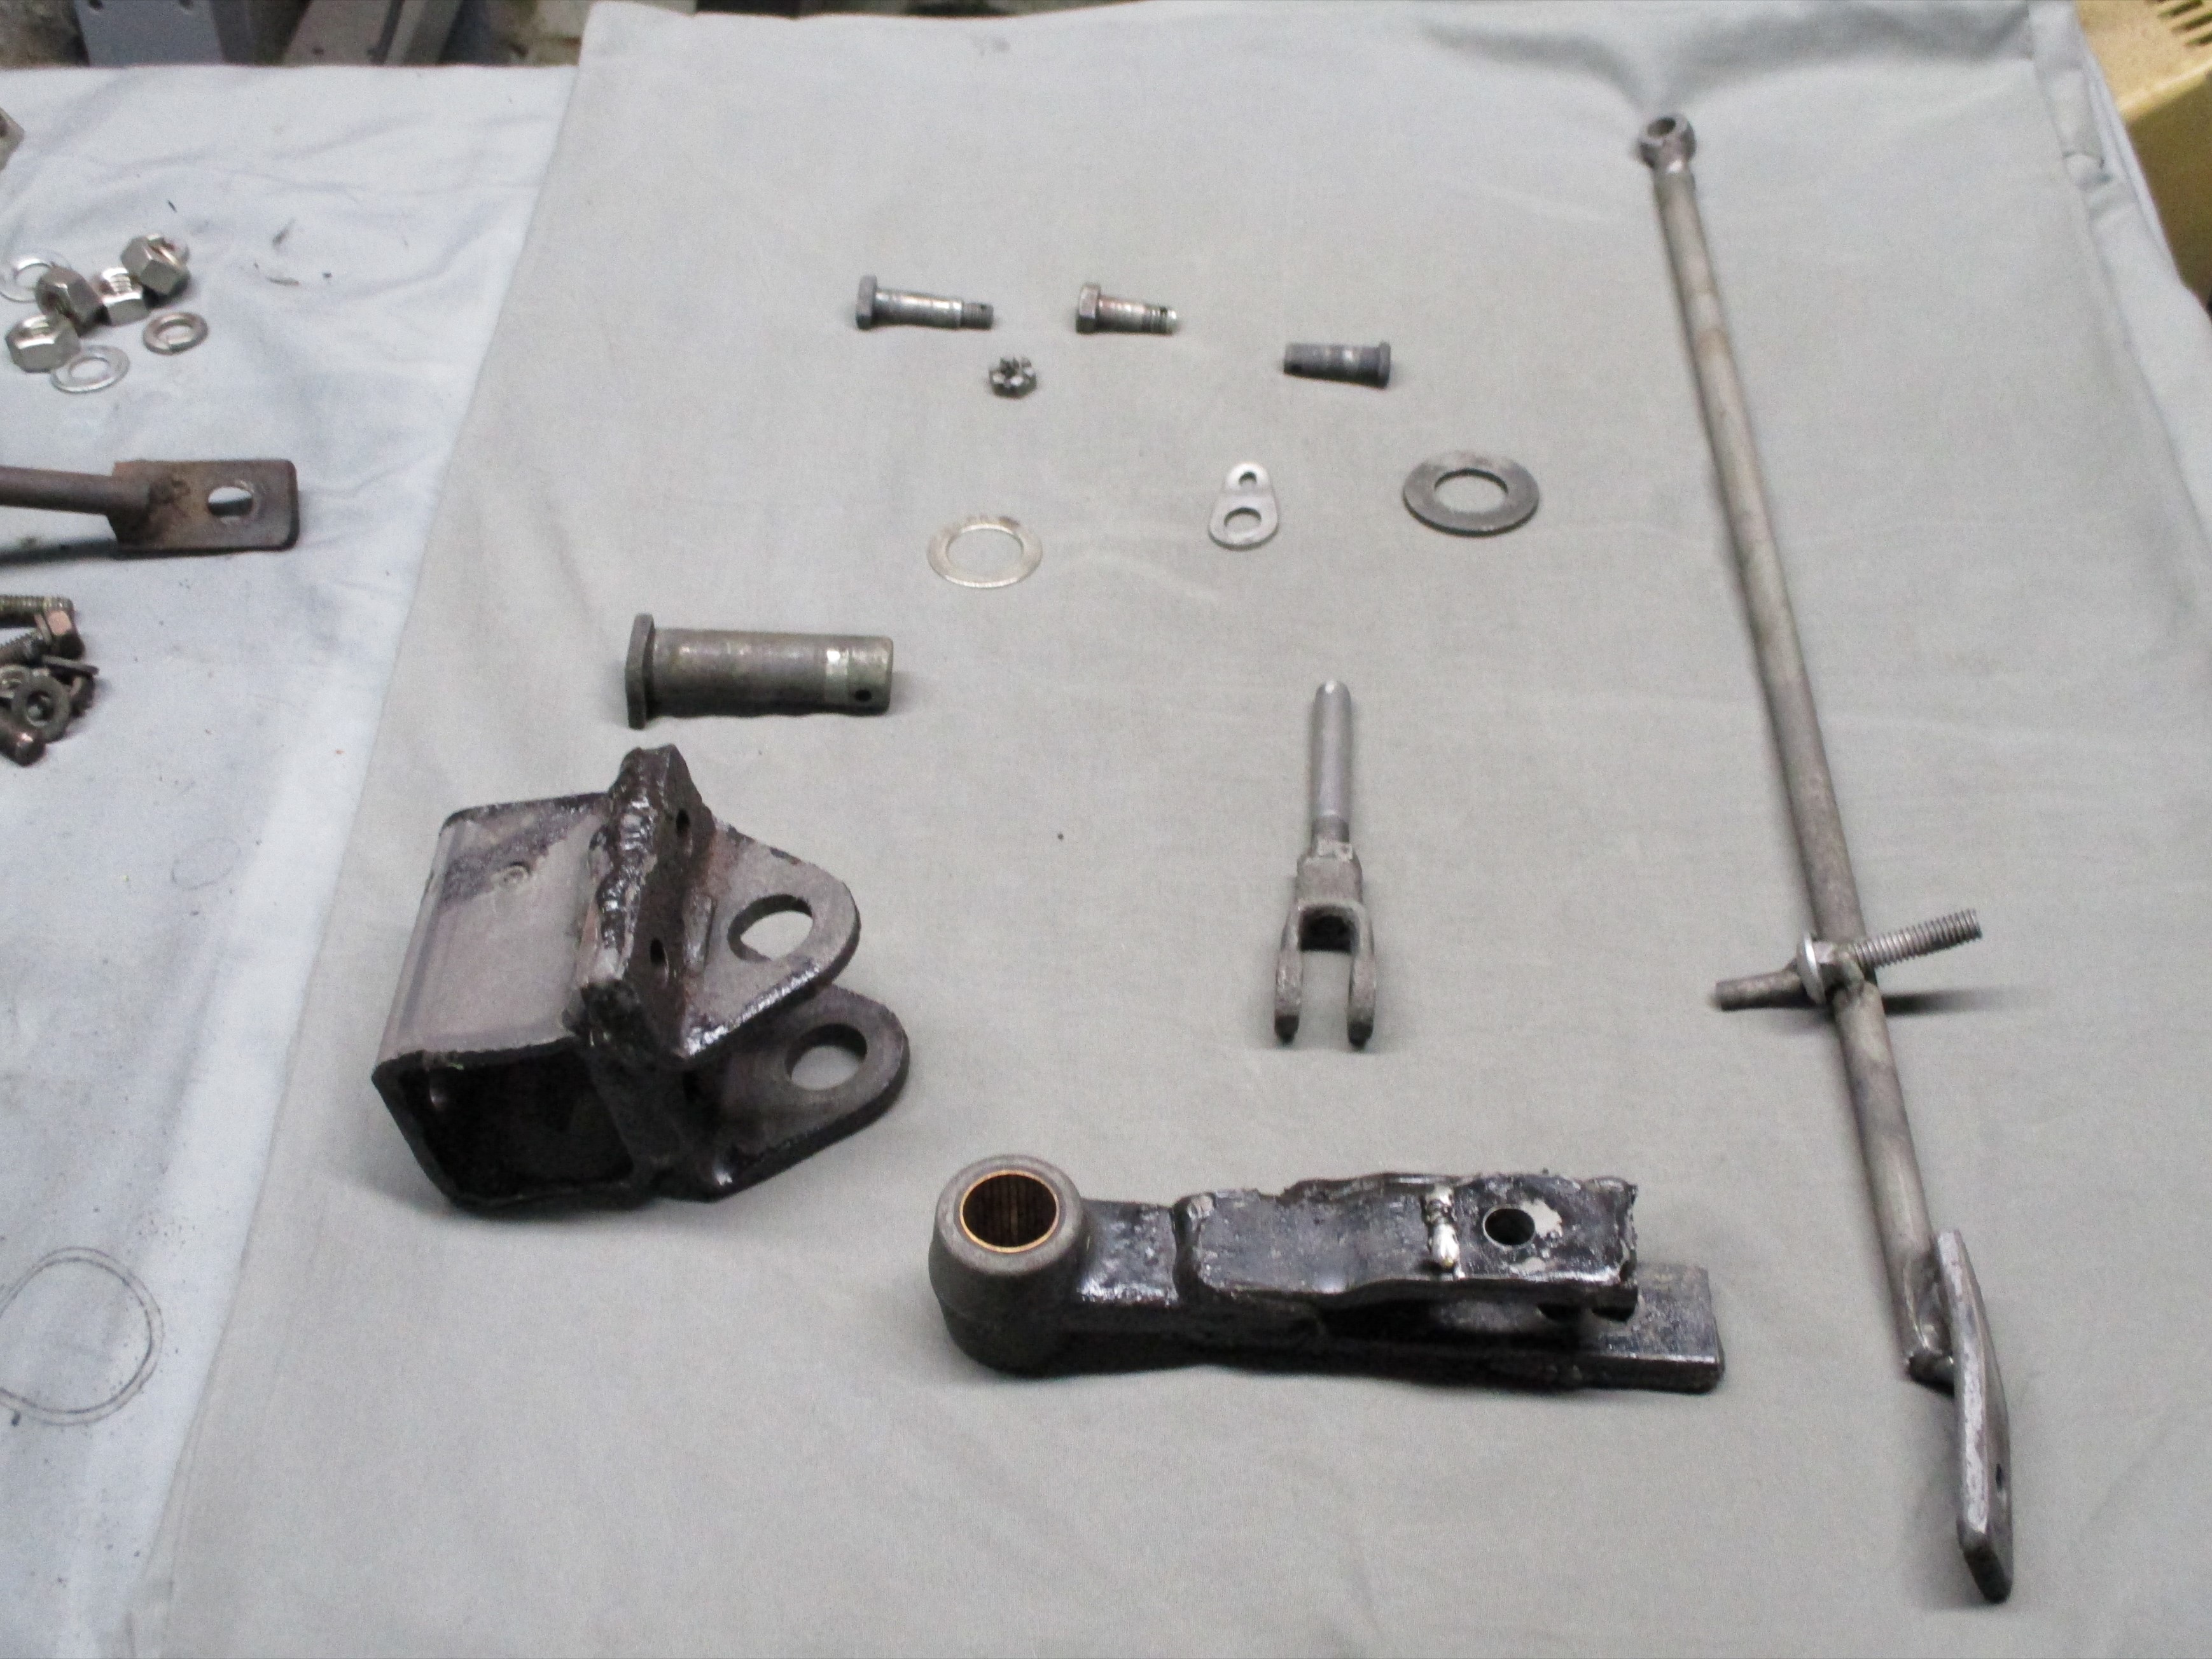
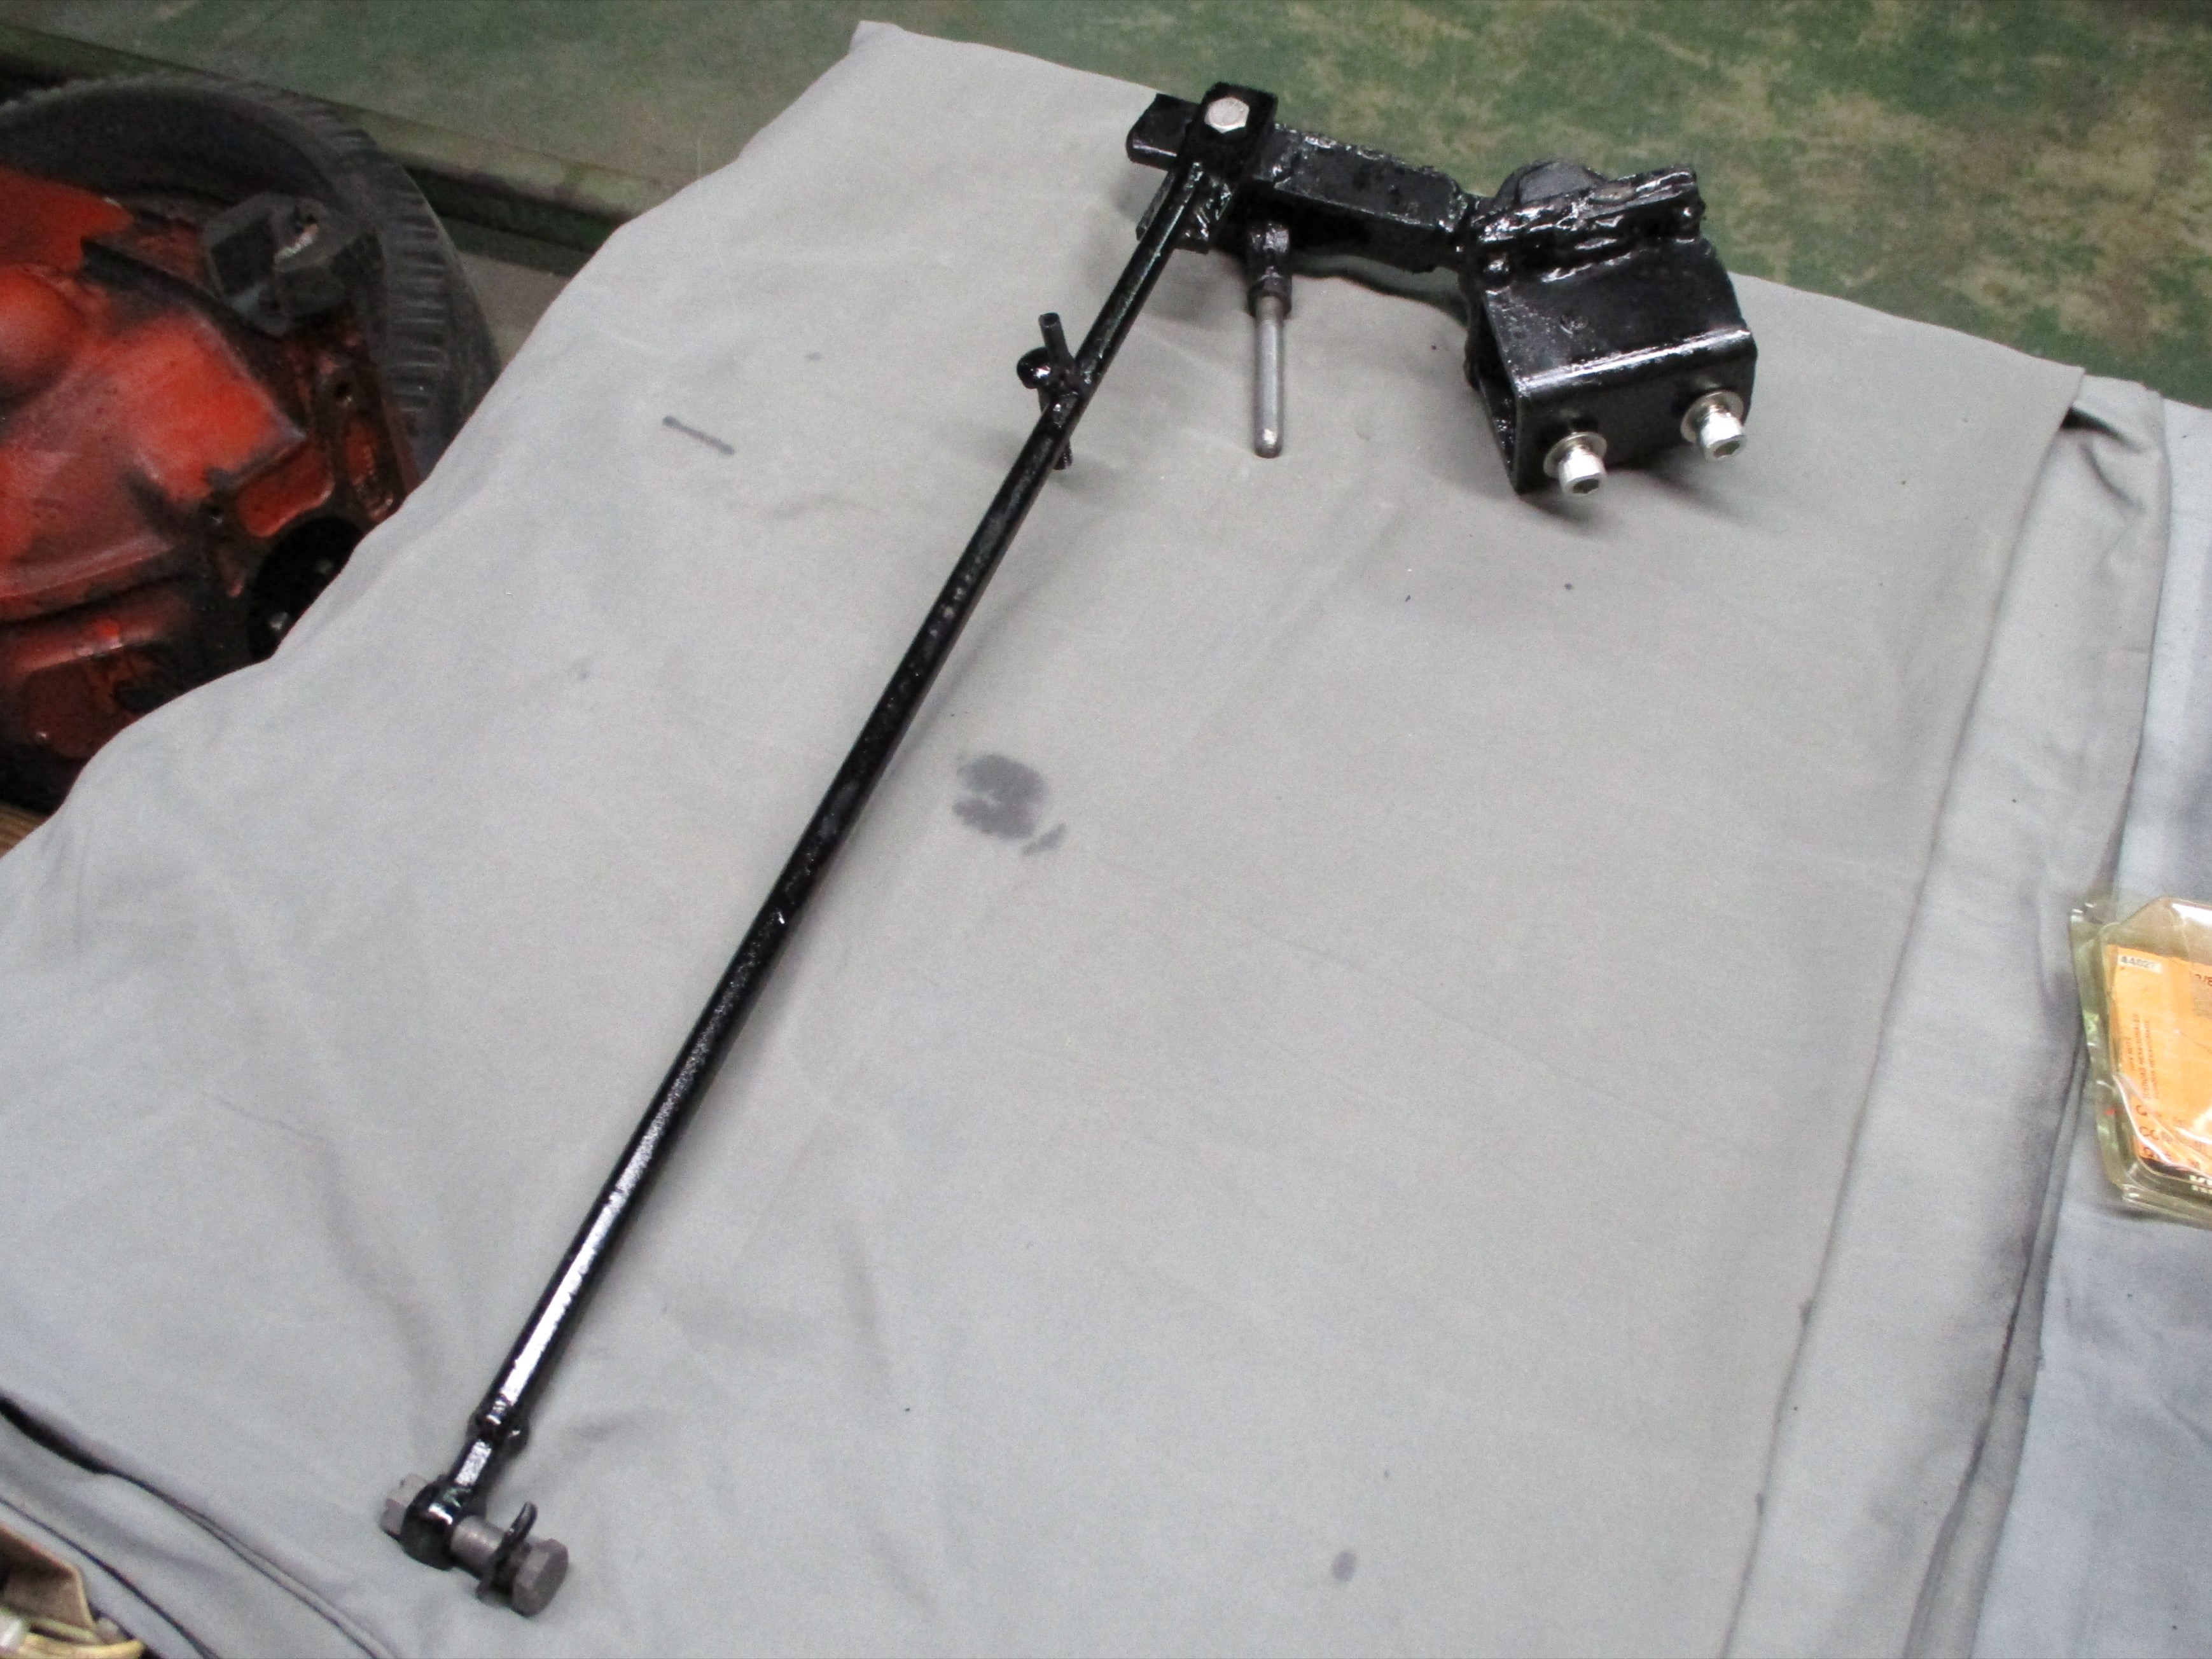
Took the brake rod swing arm assembly apart and all the parts either
received Oileater or Evapo-Rust treatments or both, Oileater first.
This is the second of the three components making up the brake and
clutch linkages. A rod connects to the top of the swing arm and to the
brake pedal and the master cylinder push rod connects to the bottom of
the swing arm. The rod between pedal and swing arm also activates the
brake light switch.
February
27th 2020
Took the brake rod swing arm assembly apart and all the parts either
received Oileater or Evapo-Rust treatments or both, Oileater first.
This is the second of the three components making up the brake and
clutch linkages. A rod connects to the top of the swing arm and to the
brake pedal and the master cylinder push rod connects to the bottom of
the swing arm. The rod between pedal and swing arm also activates the
brake light switch.
 February
28th 2020
The brake rod swing arm parts were masked, PRE Paint prepped and given
the Extreme Chassis Black treatment before being assembled again. I
found nice new mounting bolts, washers and hex nuts in my inventory but
failed to find the cotter pins I need. I remember buying a cotter pin
assortment but could find no evidence for that memory.
February
28th 2020
The brake rod swing arm parts were masked, PRE Paint prepped and given
the Extreme Chassis Black treatment before being assembled again. I
found nice new mounting bolts, washers and hex nuts in my inventory but
failed to find the cotter pins I need. I remember buying a cotter pin
assortment but could find no evidence for that memory.
An unexpected bonus is that I found three long bolts and they looked to be the same thread as the Jimmy head bolts. They were. I can cut the heads off two of them and use them as guide pins when the head is re mated to the block down the road. I put them aside for that purpose.
I ordered a cotter pin assortment and the
swing arm component will join the pedal assembly in the storage box for
future
installation when it arrives. Beer of the day was Fordham &
Dominion Brewing
Company's Winter Chills Ale.
 March
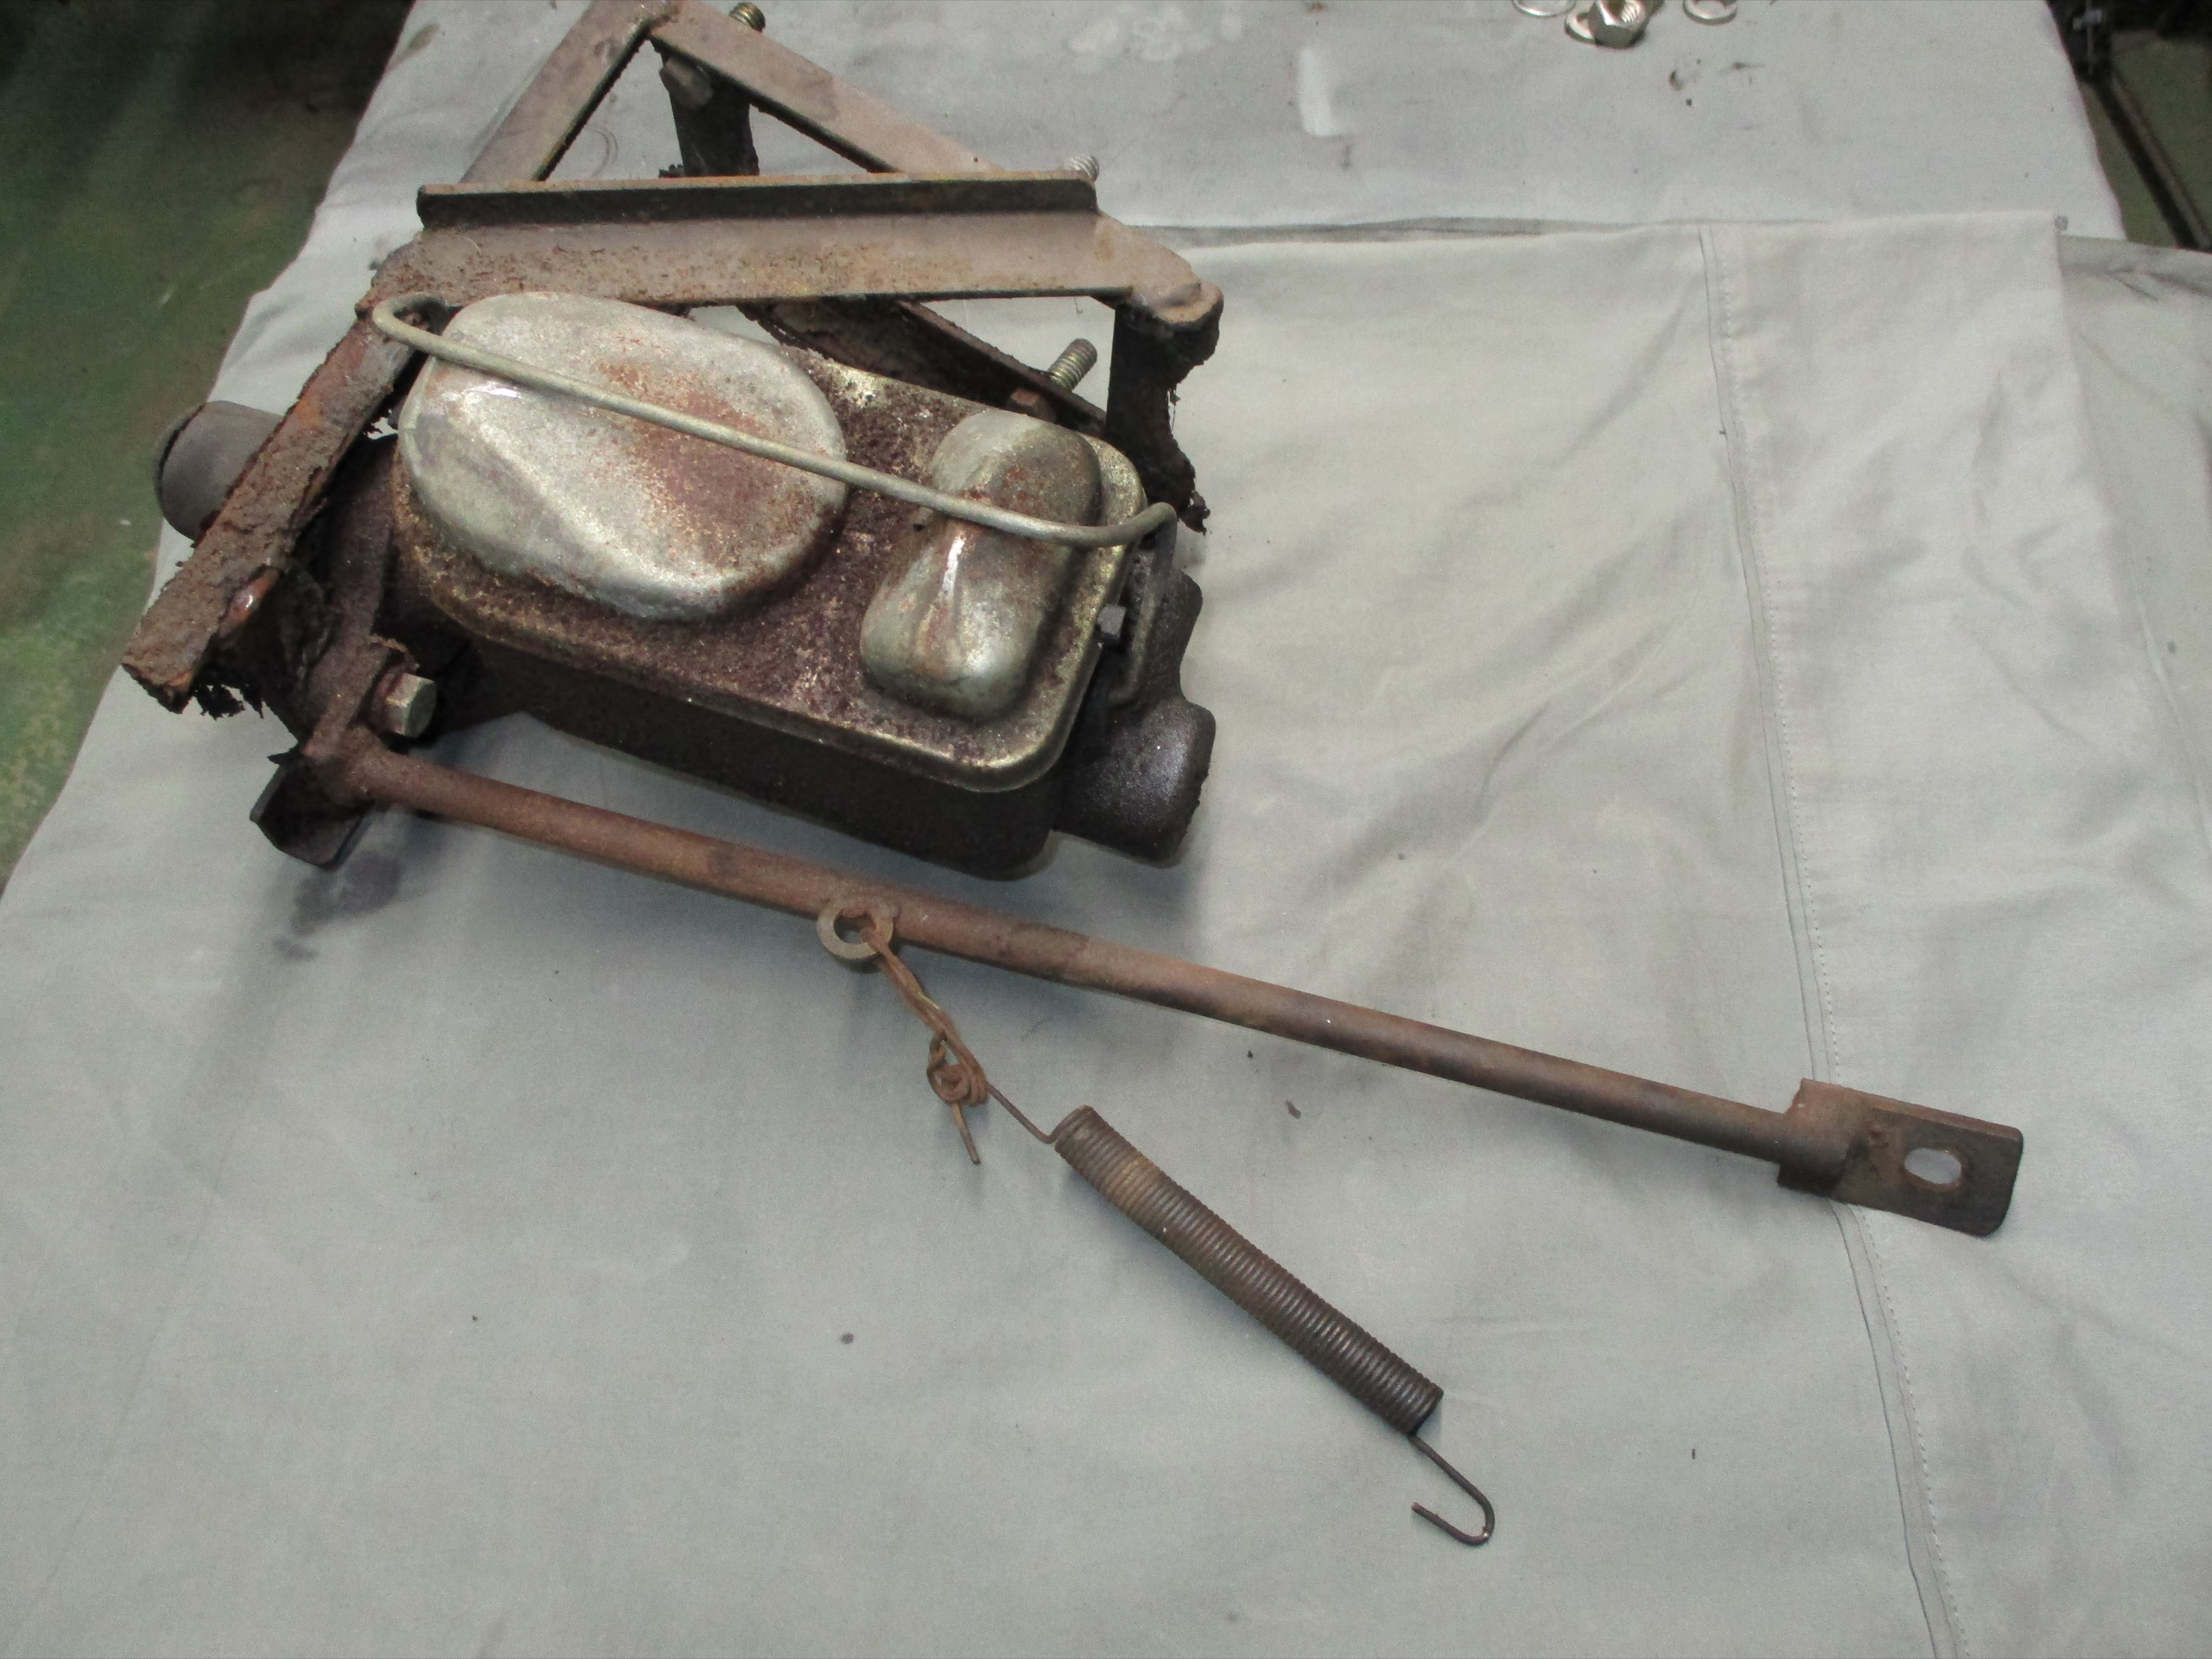
2nd 2020 The third and last of the components
making up the brake and
clutch linkages is the master cylinder and its support cage. I think
this master cylinder is a '75 Chevy 1/2 ton pickup, manual disc front
and drum rear brakes item, Raybestos #mc39177. At any rate, the spare I
bought back in 2011 looks like this one and that's what the spare is.
March
2nd 2020 The third and last of the components
making up the brake and
clutch linkages is the master cylinder and its support cage. I think
this master cylinder is a '75 Chevy 1/2 ton pickup, manual disc front
and drum rear brakes item, Raybestos #mc39177. At any rate, the spare I
bought back in 2011 looks like this one and that's what the spare is.
 March
3rd 2020 There wasn't much grease on the
master cylinder cage so, no Oileater soaking for this item. Most of the
paint was flaking off due to brake fluid contact and it was given a
session with wire cup in the Dremel motor tool instead. Then an
Evapo-Rust treatment got all the rusted parts ready for painting. The
spare
master cylinder was in the same place I remember storing it years ago.
It was a
good day.
March
3rd 2020 There wasn't much grease on the
master cylinder cage so, no Oileater soaking for this item. Most of the
paint was flaking off due to brake fluid contact and it was given a
session with wire cup in the Dremel motor tool instead. Then an
Evapo-Rust treatment got all the rusted parts ready for painting. The
spare
master cylinder was in the same place I remember storing it years ago.
It was a
good day.
 March
4th 2020
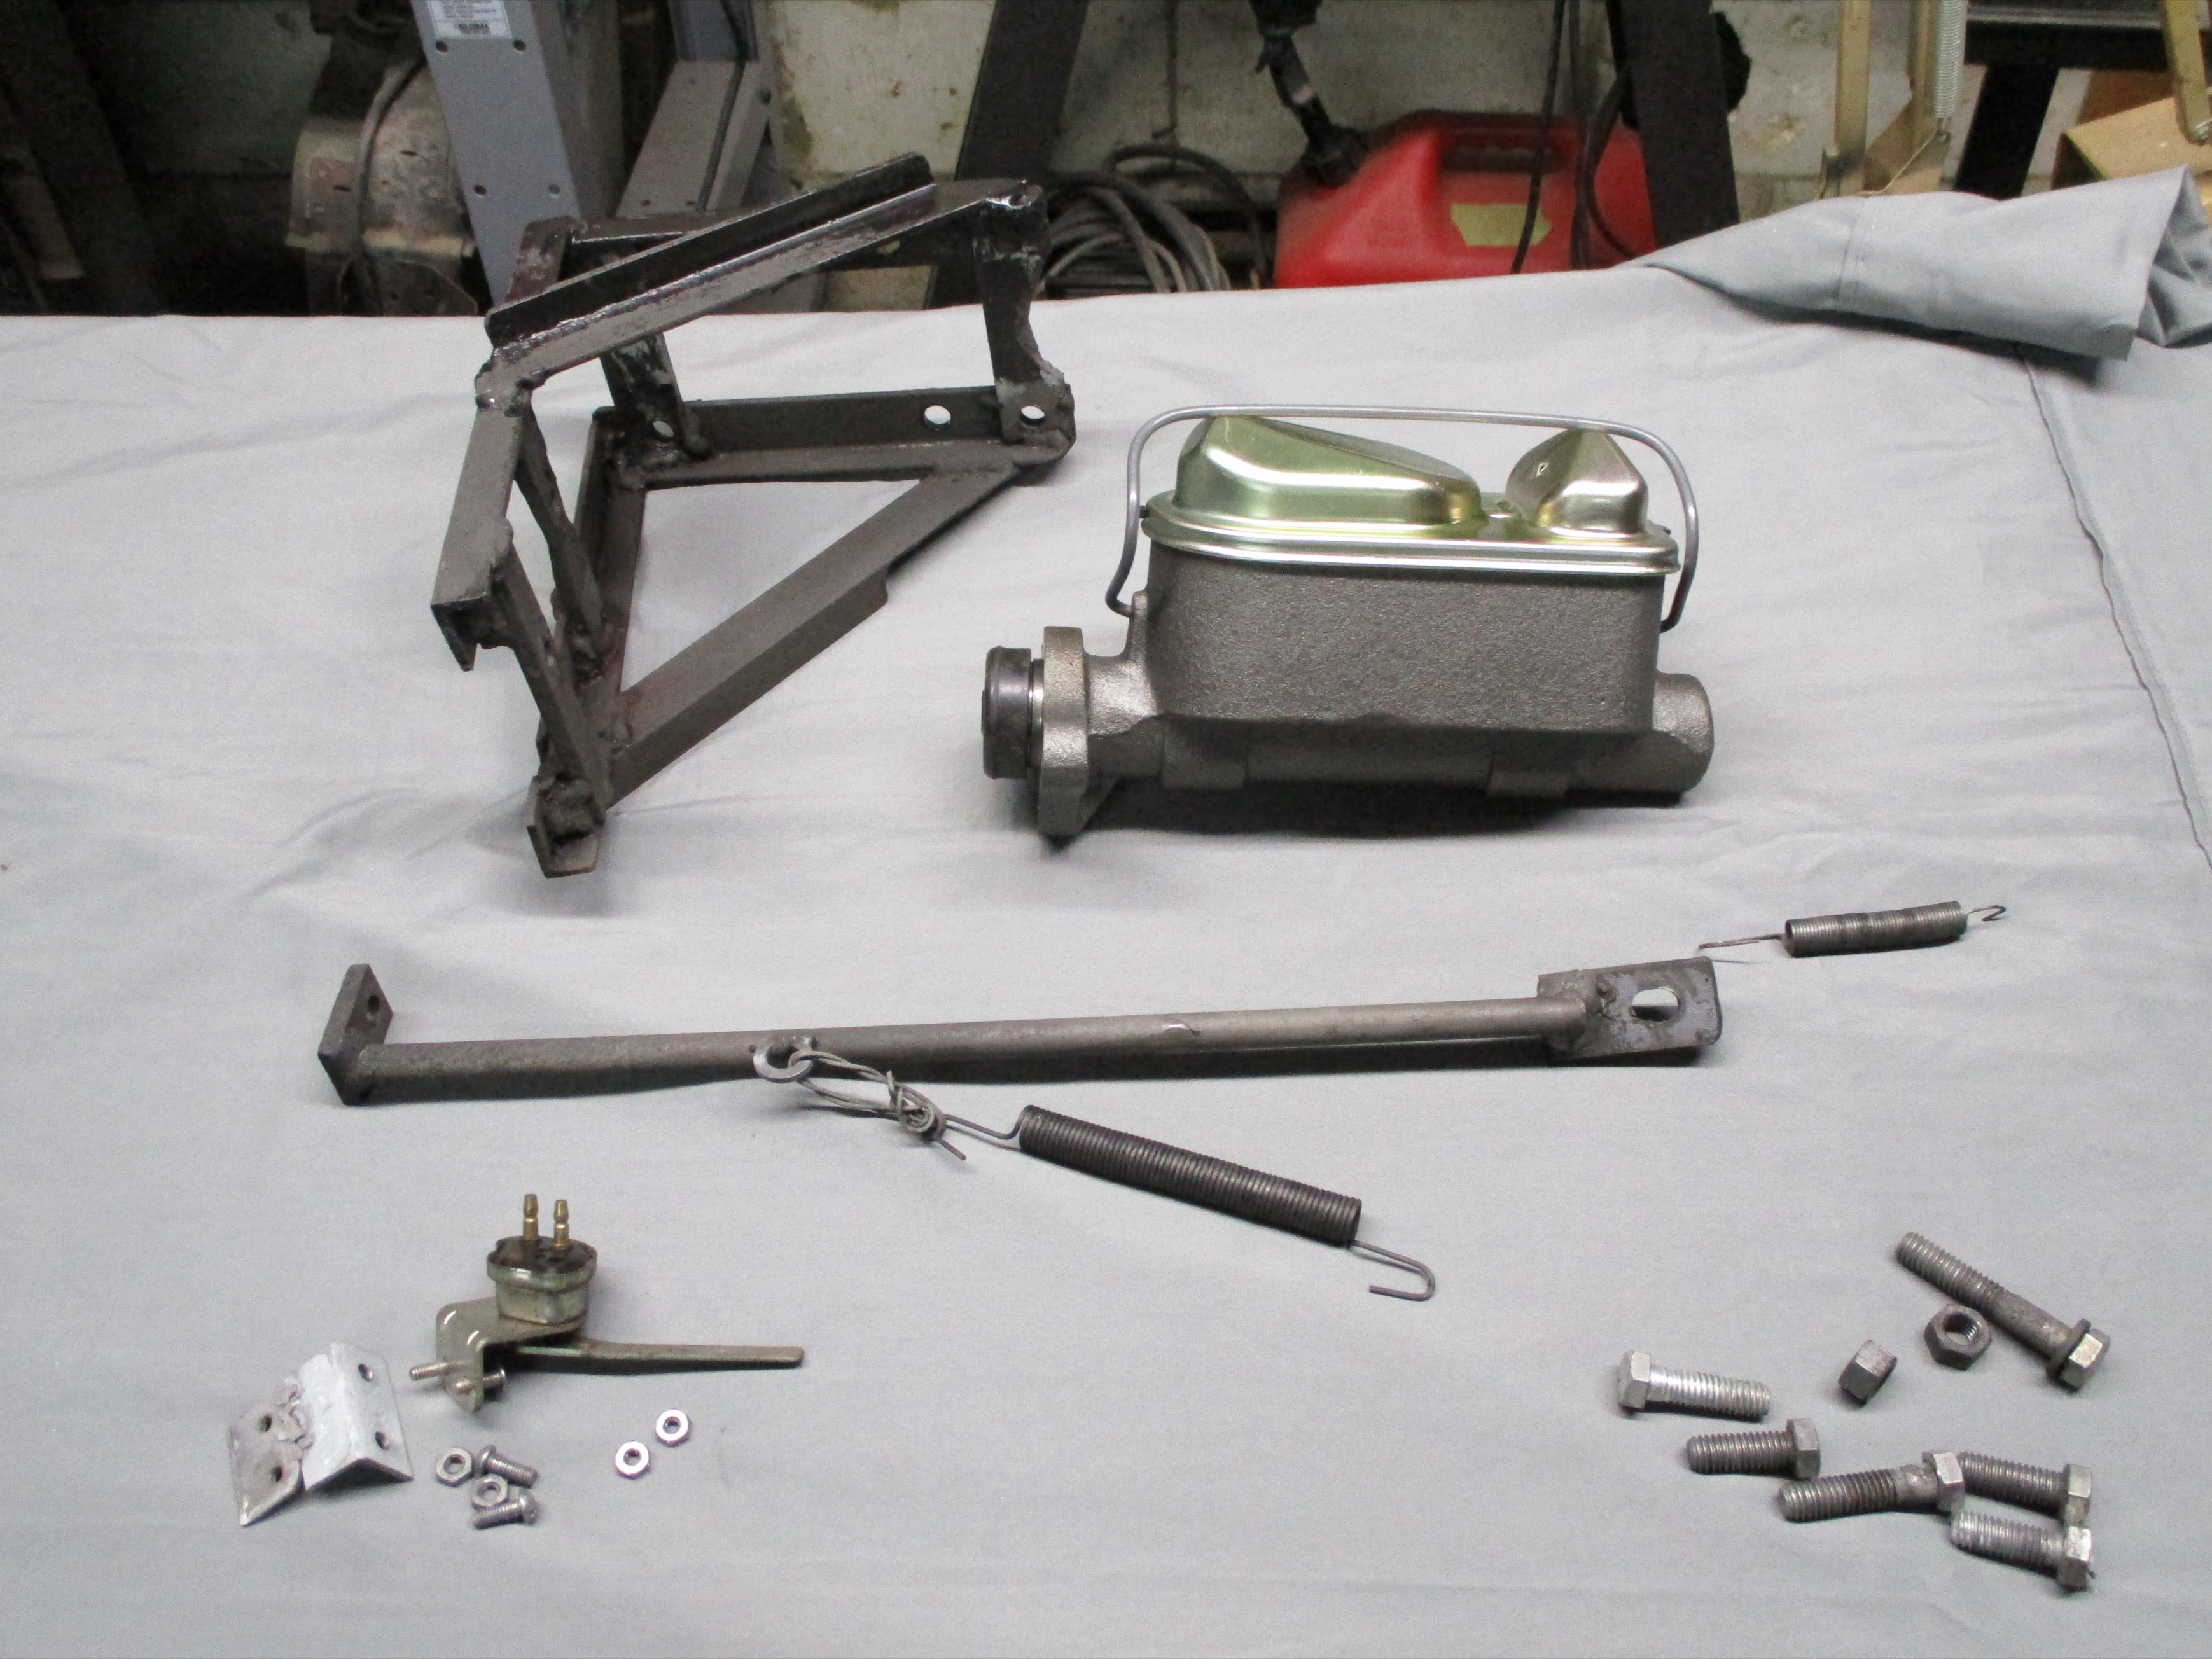
The master cylinder cage, support brace and other related items were
PRE Paint prepped and given the Eastwood Extreme Chassis Black spray
bomb treatment. Most of the new fasteners I needed were found in the
nuts and bolts inventory.
March
4th 2020
The master cylinder cage, support brace and other related items were
PRE Paint prepped and given the Eastwood Extreme Chassis Black spray
bomb treatment. Most of the new fasteners I needed were found in the
nuts and bolts inventory.
I have beaucoup 3/8" bolts, nuts and washers but am all out of 1" long hex bolts and flat washers. I need both so, an order was sent off to McMaster-Carr. Once upon a time, I would refinish my rusted nuts but time is too short now and most new fasteners I order are stainless steel to minimize the rust problem.
The cotter pin assortment arrived yesterday. When I got to the
BillyBob Shop, not a half hour passed before I stumbled over the
assortment I was looking for, high and low, last week. Damnation!
Just damn! The replacement master cylinder is close, but no
cigar. The mounting holes are off by about 3/16". I entered a deep
ponder mode session with the beer of the day which was Duclan Brewing
Co's Purple Passion Gose
Ale. Tastes like grape soda . . . kinda.
It's all in the packaging . If I took a swig of this out of a Nehi
bottle, I'd probably spit it back out.
 March
5th 2020
Gathered most of the tools I need to start the cab paint and bodywork.
Got additional drums for the Eastwood SCT Surface Conditioning Tool to
supplement the 120 grit drum that shipped with it. A more abrasive 40
grit drum to cut into existing body filler and narrow wheels in 40 and
80 grits for tight spots. Also a can of Aluminum body repair filler and
spreaders.
March
5th 2020
Gathered most of the tools I need to start the cab paint and bodywork.
Got additional drums for the Eastwood SCT Surface Conditioning Tool to
supplement the 120 grit drum that shipped with it. A more abrasive 40
grit drum to cut into existing body filler and narrow wheels in 40 and
80 grits for tight spots. Also a can of Aluminum body repair filler and
spreaders.
Got a quart and two spray bombs of Rustoleum Farm Implement
paint, International Red, and a Purdy 2-1/2 inch brush to get started.
Guess I'll have to dive into this task now, no more pussy-footin'
around it.
 March
6th 2020
Even tho' I'm paying Elvira due attention and cleaning her weekly, a
three cigar job, she became peevish last week and gave me tire pressure
warnings on more than one wheel on more than one day including e-mails
from OnStar. The first time
fooled me into firing up the air compressor and adding fifteen pounds
where none was needed. I know better now to check with a gauge.
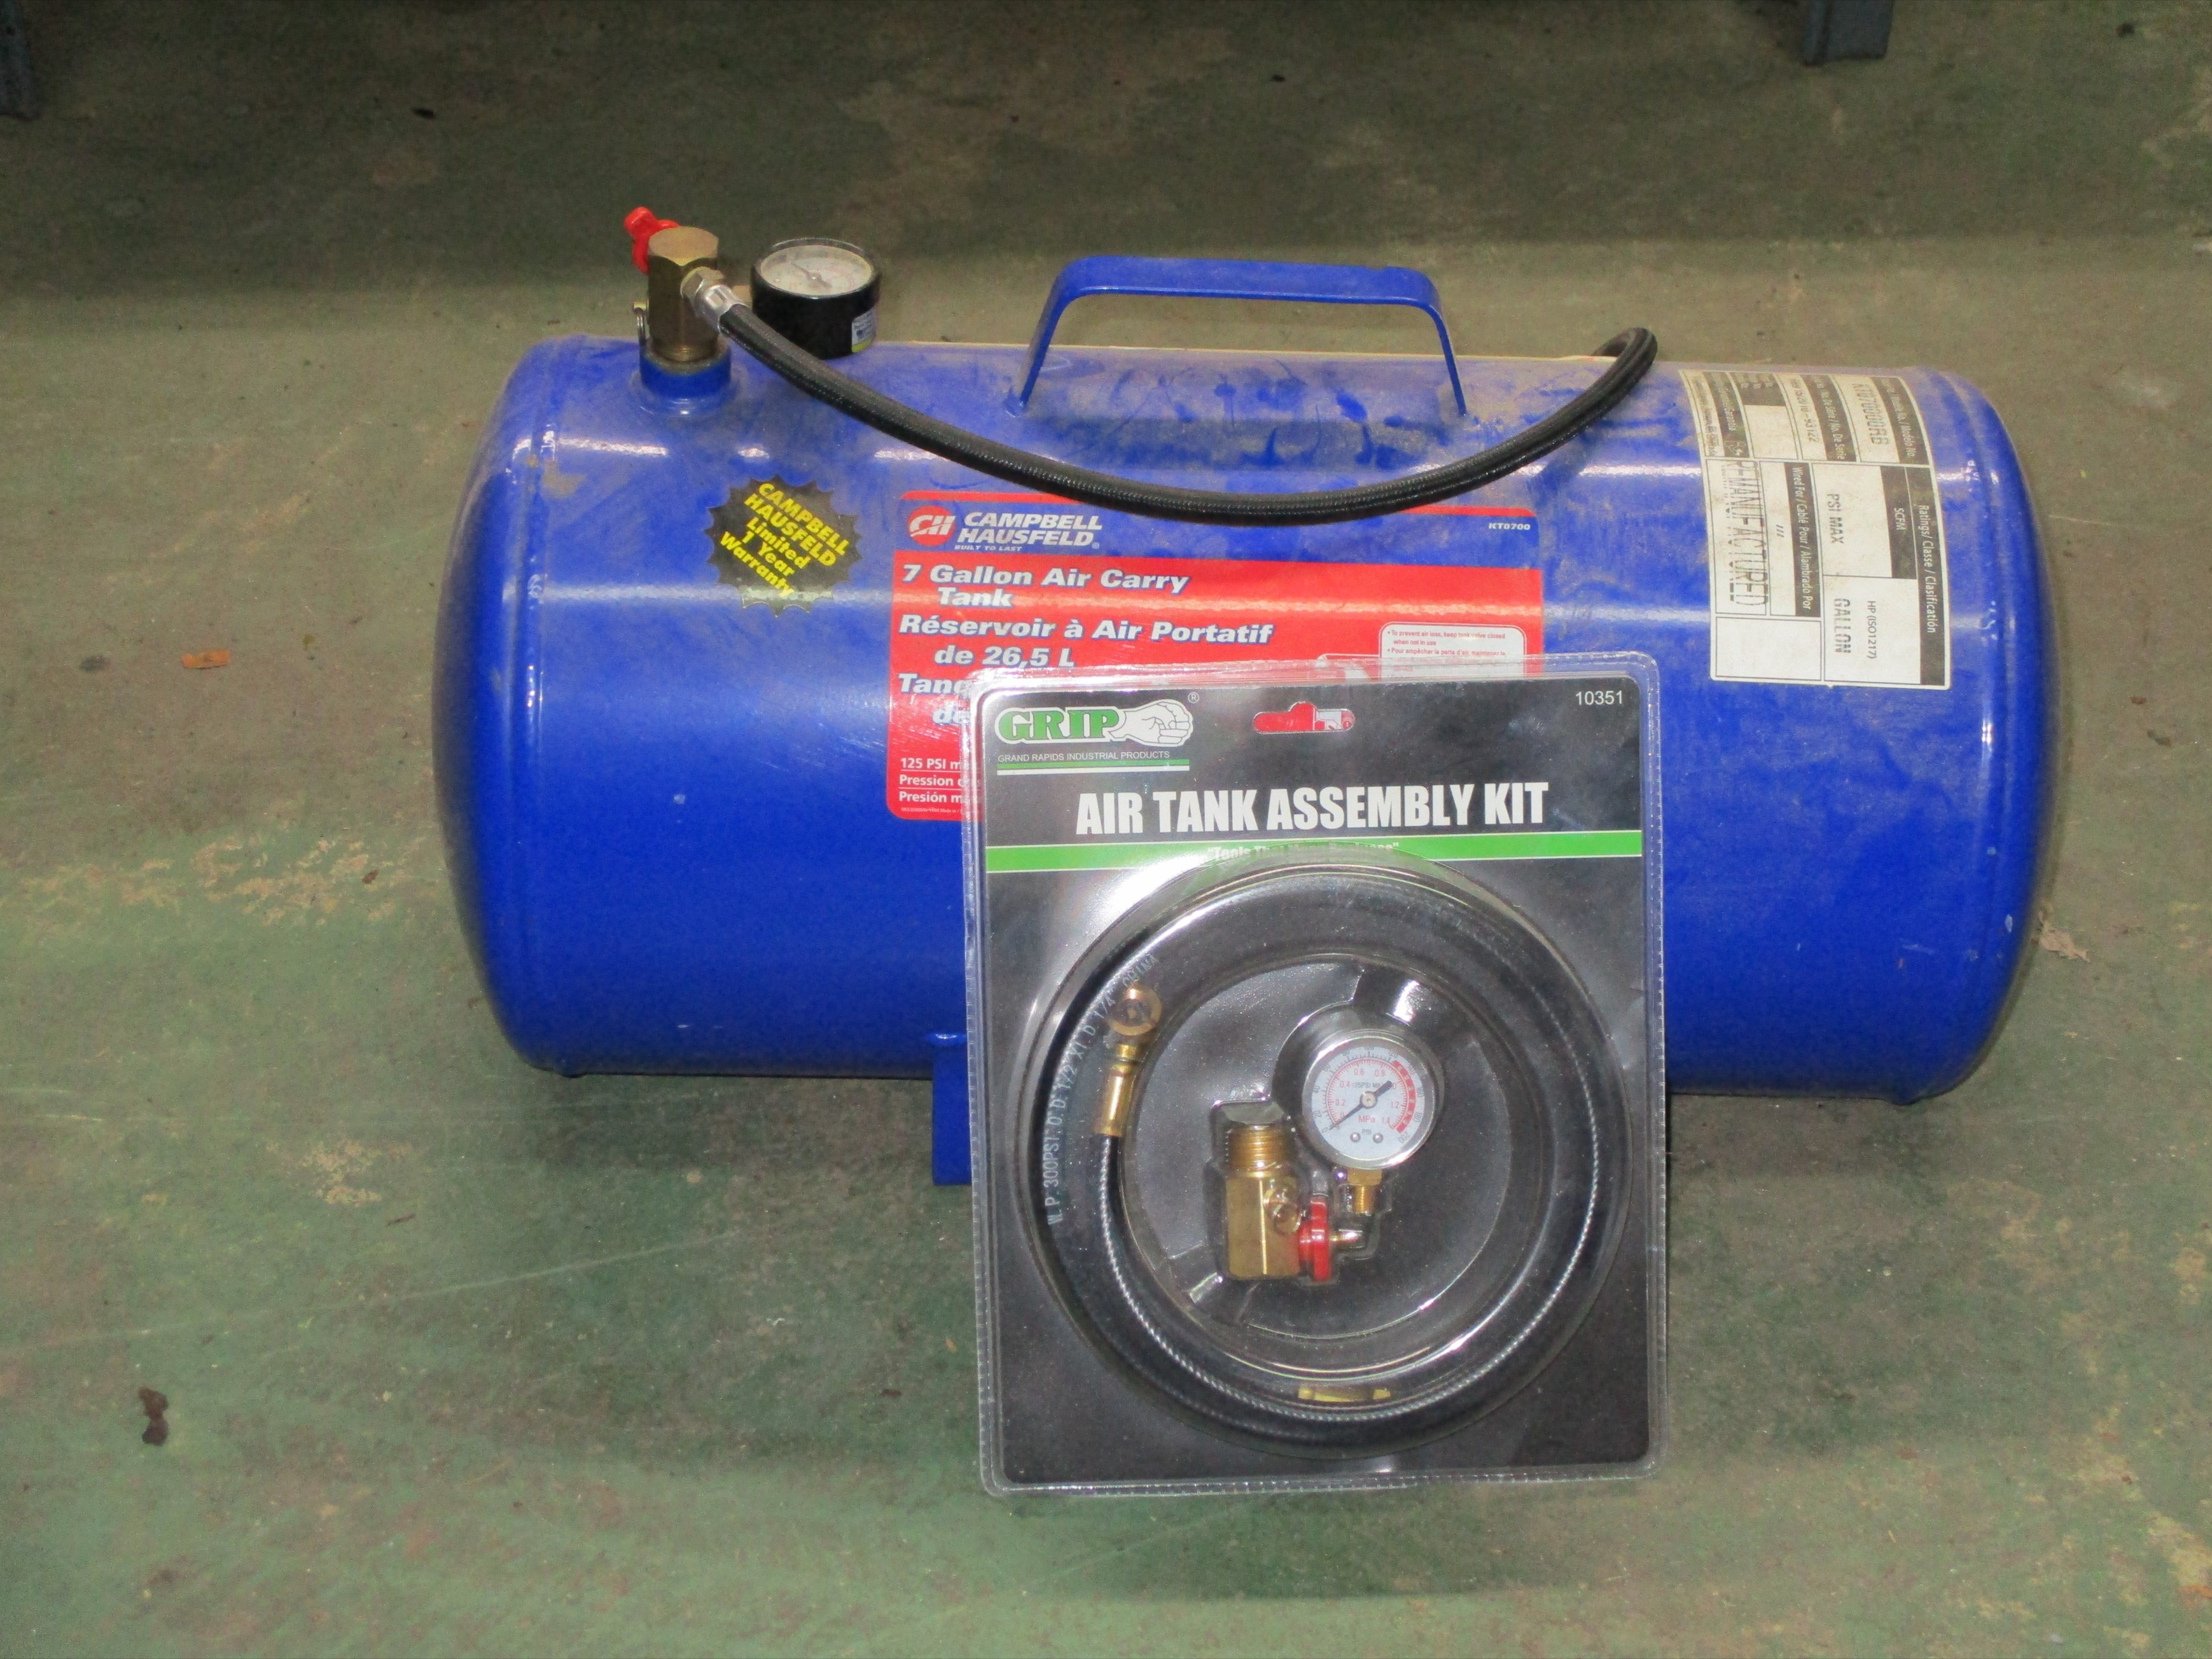
However, the incident spurred me into repairing my portable air tank so
it will hold air again and I won't have to fire up the air compressor
as often.
March
6th 2020
Even tho' I'm paying Elvira due attention and cleaning her weekly, a
three cigar job, she became peevish last week and gave me tire pressure
warnings on more than one wheel on more than one day including e-mails
from OnStar. The first time
fooled me into firing up the air compressor and adding fifteen pounds
where none was needed. I know better now to check with a gauge.
However, the incident spurred me into repairing my portable air tank so
it will hold air again and I won't have to fire up the air compressor
as often.
95 degrees and a 104 heat index temperature, mid-afternoon, in
the BillyBob
Shop's neighborhood
yesterday. First three digit heat index this year, I've seen. My new
shop discipline is soon to be tested I think.
 March
9th 2020
Vacuumed Deerslayer's exterior. It still had a layer of debris on it
from the warehouse re-roofing job eighteen months ago. Took the first
pass over the cab exterior with the Eastwood SCT Surface Conditioning
Tool. It put out a little more dust than I expected and wore about a
quarter inch off the 120 grit drum. The goal is not to get down to bare
metal, just to take the chalky layer off the existing epoxy primer to
make a base for the new paint.
March
9th 2020
Vacuumed Deerslayer's exterior. It still had a layer of debris on it
from the warehouse re-roofing job eighteen months ago. Took the first
pass over the cab exterior with the Eastwood SCT Surface Conditioning
Tool. It put out a little more dust than I expected and wore about a
quarter inch off the 120 grit drum. The goal is not to get down to bare
metal, just to take the chalky layer off the existing epoxy primer to
make a base for the new paint.
 March
10th 2020
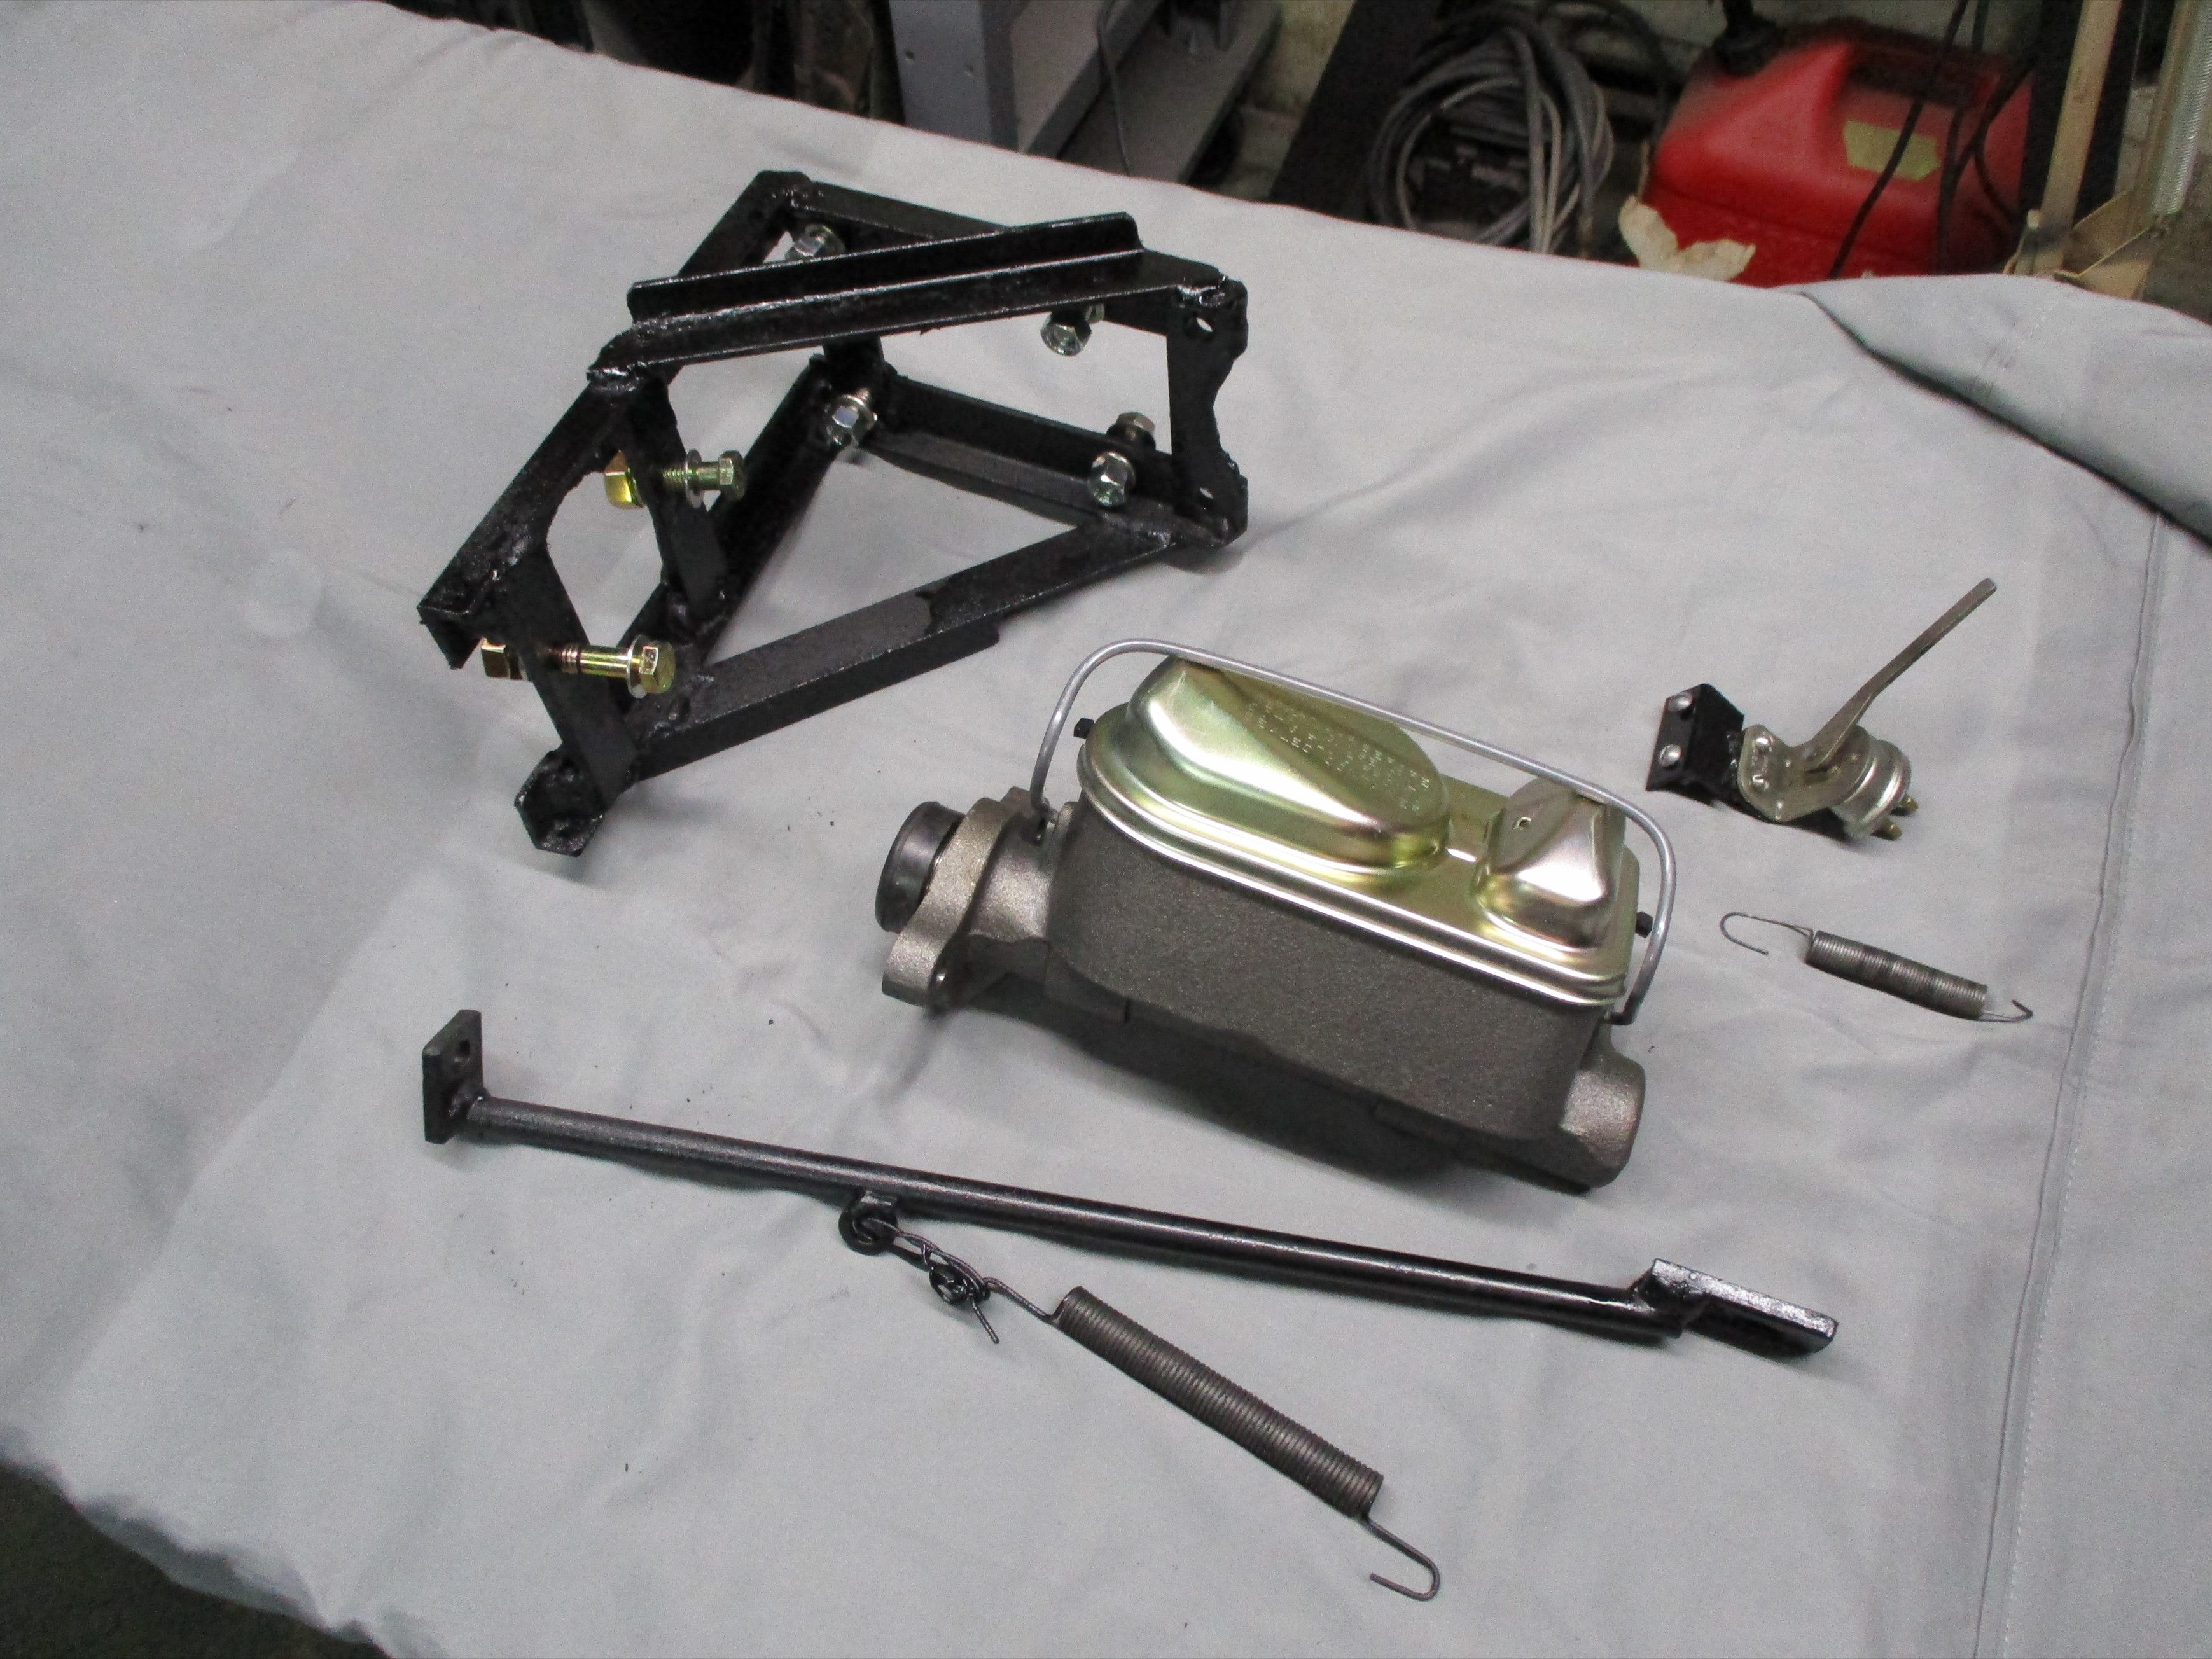
Elongated the master cylinder mounting holes in the cage 3/32" each to
fit the mounting holes on the replacement master cylinder. Both holes
were elongated to keep the geometry intact.
March
10th 2020
Elongated the master cylinder mounting holes in the cage 3/32" each to
fit the mounting holes on the replacement master cylinder. Both holes
were elongated to keep the geometry intact.
That was the plan but I couldn't find my die grinder burrs. I thought I could detect the soft laughter of my Dad's spirit on my shoulder. I can't put paid to this task just yet. Beer of the day was River Horse Brewing Co's Oatmeal Milk Stout.
| < Back
to Intro |
You can email me at ![]() webmaster@laroke.com
webmaster@laroke.com
Issued Tuesday March 10, 2020
copyright © 2008-2020 Larry R. Kephart all rights reserved
| | LRK Home | | Bio Info | | Krash Khronicles | | LAROKE | |
| | BettyLou | | BillyBob's Garage | | Rat Patrol | | Deerslayer | | Elvira | |
| | Land of the Free and Home of the Brave | |
| | Keppylou's Art | | WWI Soldier's Diary | |