| | LRK Home | | Bio Info | | Krash Khronicles | | LAROKE | |
| | BettyLou | | BillyBob's Garage | | Rat Patrol | | Deerslayer | | Elvira | |
| | Land of the Free and Home of the Brave | |
| | Keppylou's Art | | WWI Soldier's Diary | |
Tinkering with Deerslayer
![]()
DEERSLAYER LINKS including vendor sites for parts and tools as well as sites for old truck and hot rod organizations
![]()
TINKERING WITH DEERSLAYER chronicles the day-by-day maintenance and improvements episodes for Deerslayer, a '37 Chevy farm truck hot rod.
CRUISIN' WITH DEERSLAYER Roadtrips, cruise-in's and truck show stories and tall tales.
TONY'S DUNGEON Tony Pascarella's forum entries at OldGMCtrucks.com regarding Deerslayer, particularly the 302 GMC engine build in his farmhouse basement.
![]()
DEERSLAYER MAINTENANCE Ever changing detailing, oil change, lube, etc. maintenance routines specifically developed for Deerslayer, including required tools, materials and procedures.
PROJECT NAILHEAD Chronicles the rebuild of a 1954 Buick Roadmaster 322 nailhead engine as a future replacement for Deerslayer's Jimmy 302.
41. Sputtering Along
 March
4th 2019
The dust is settling on the BillyBob Shop expansion and it's time to
get back to the Deerslayer. I'm taking apart the driver side disk brake
with more care than I exercised on the passenger side. I think I know
why the passenger side rotor is turning tight and I want to use my work
on the driver side to confirm my suspicions, if possible.
March
4th 2019
The dust is settling on the BillyBob Shop expansion and it's time to
get back to the Deerslayer. I'm taking apart the driver side disk brake
with more care than I exercised on the passenger side. I think I know
why the passenger side rotor is turning tight and I want to use my work
on the driver side to confirm my suspicions, if possible.
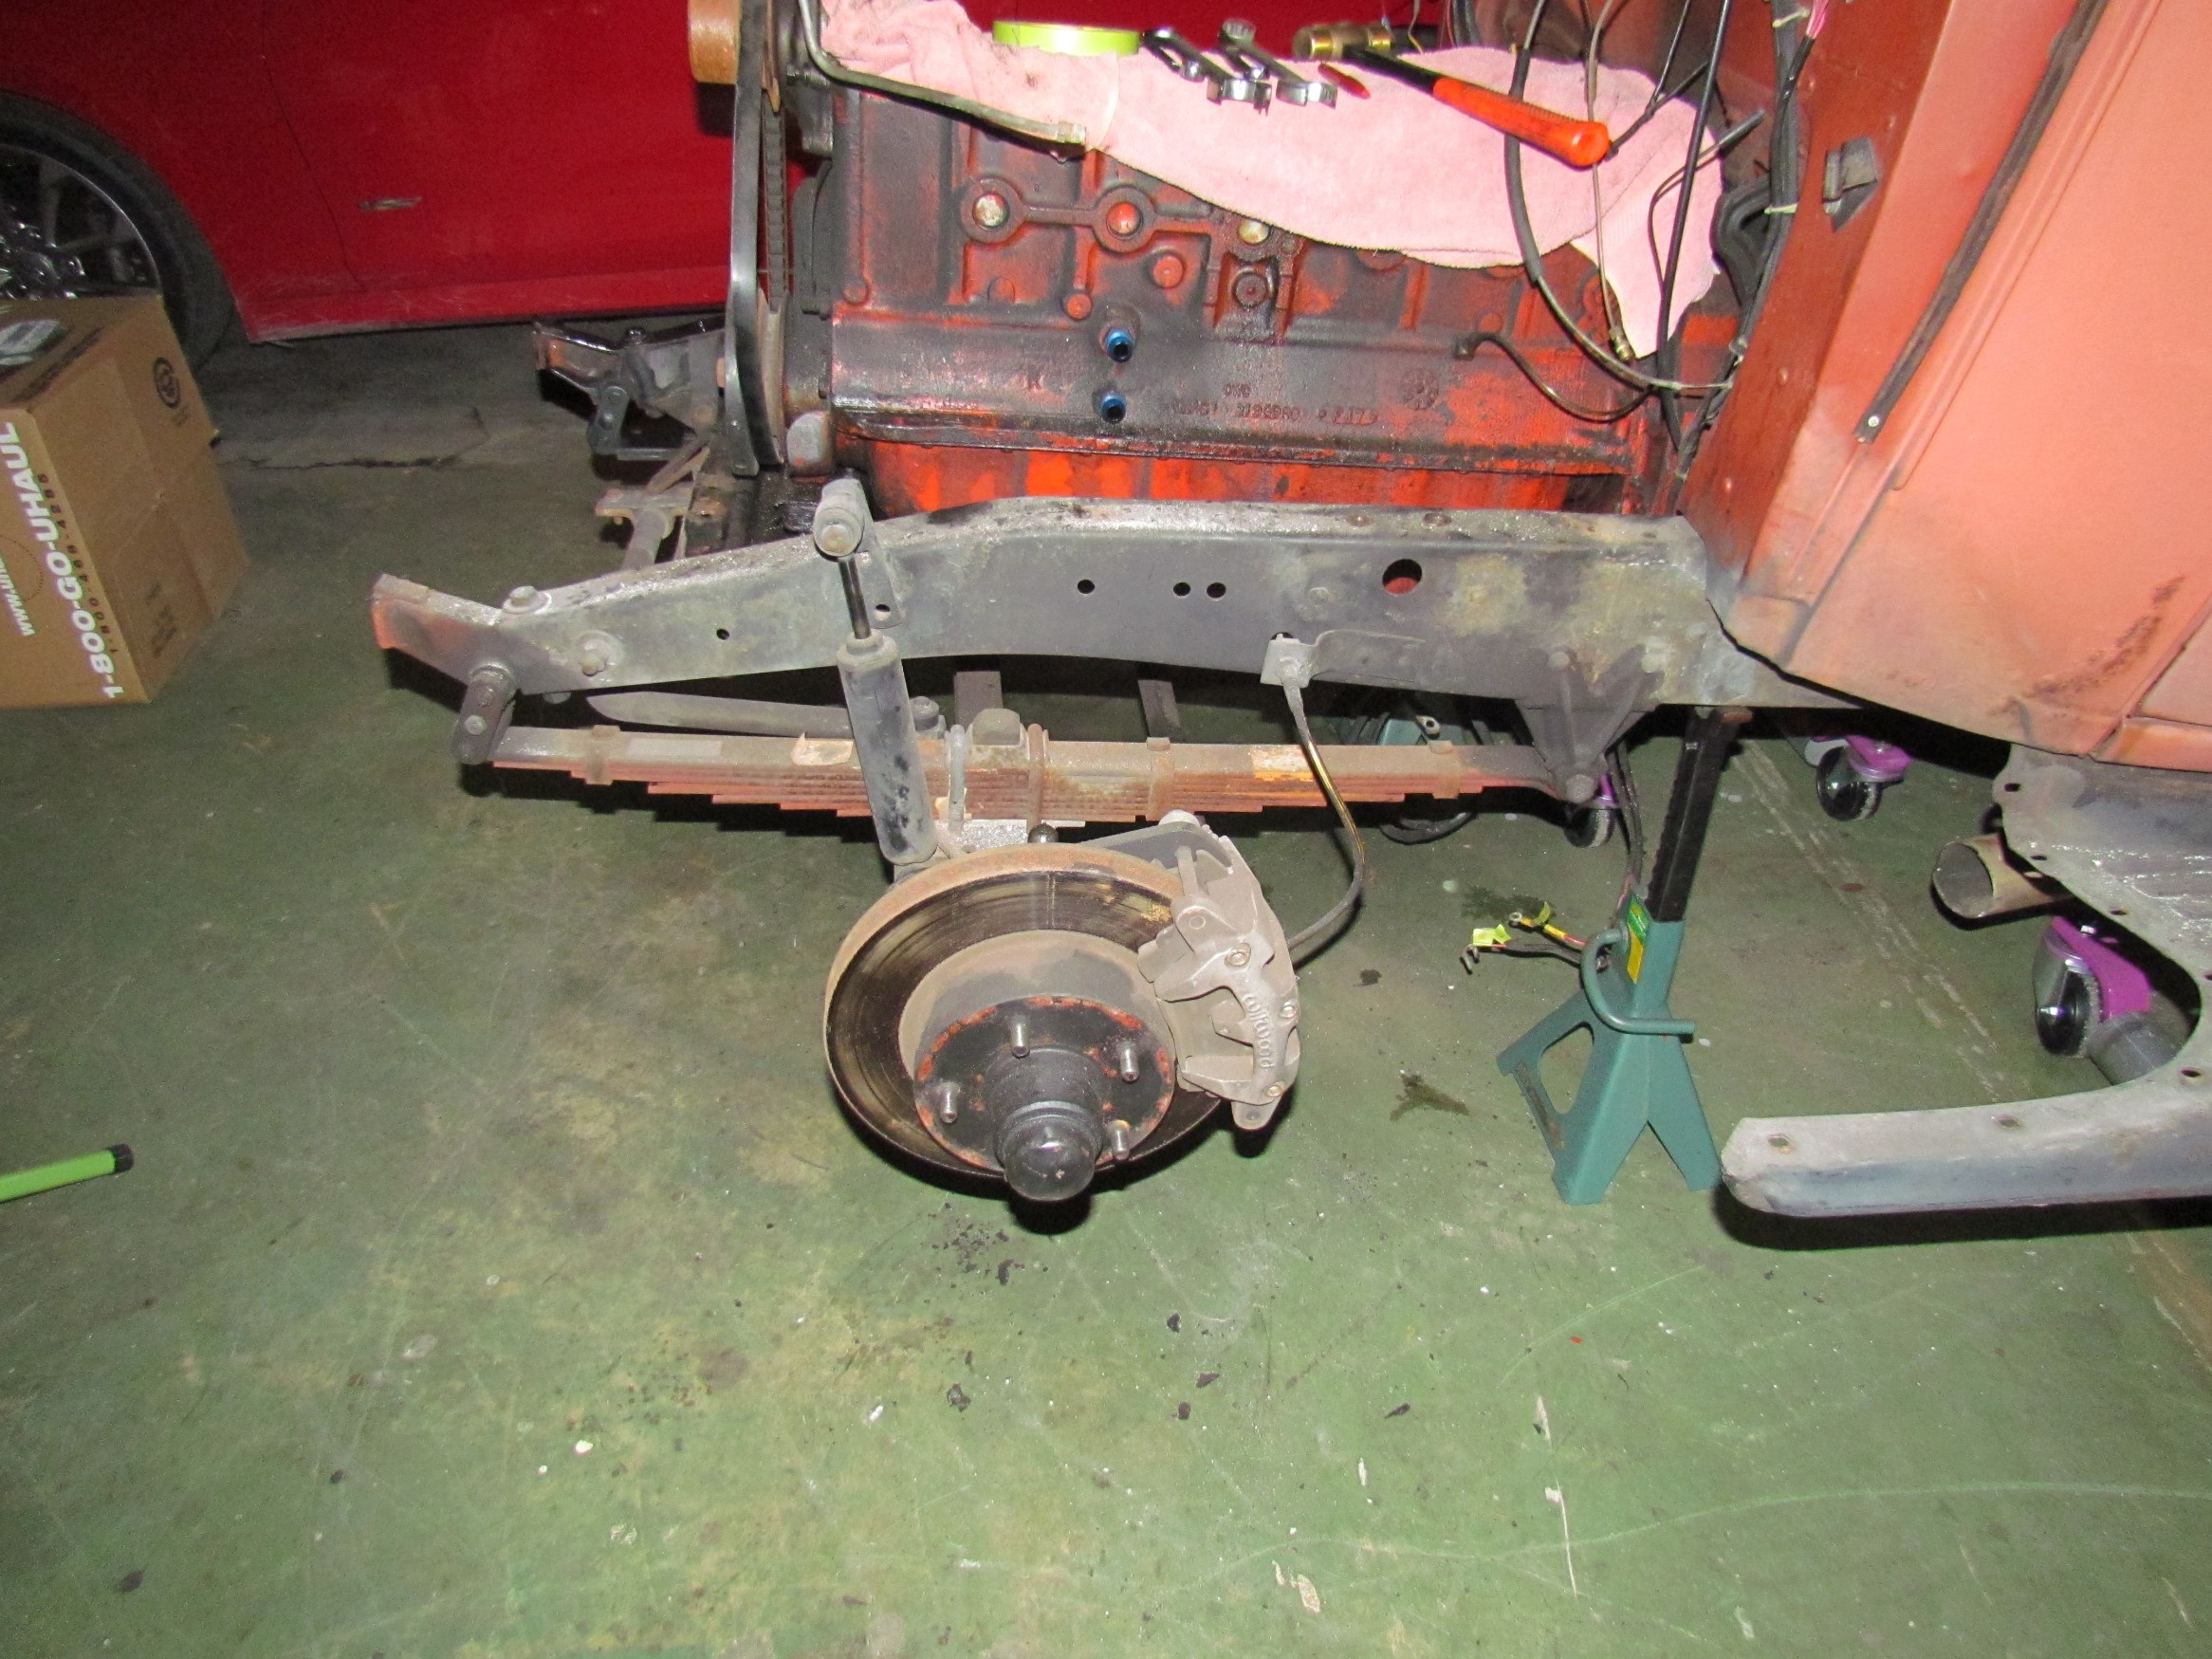
 March
16th 2019
The top shock mount hex nut was spot welded. This is the way Johan and
I found it when he installed new springs for me a few years back. Johan
searched his shop for twenty minutes looking for a fine thread 7/16"
nut but couldn't find one. I prevailed upon him to spot weld the old
stripped hex nut again. Johan doesn't willingly do cheezy work but he
relented. I ground off the spot weld and fixed the threads for the new
nut I got from McMaster-Carr. Johan can rest easy. I was cleaning this
steering arm, in place, when I discovered the ball that attaches
to the drag link is loose. This is beyond my experience so, it was
disconnected and cleaned to take to the Sunday morning coffee cruise-in
and put before the League of Extraordinary Assholes for opinions.
March
16th 2019
The top shock mount hex nut was spot welded. This is the way Johan and
I found it when he installed new springs for me a few years back. Johan
searched his shop for twenty minutes looking for a fine thread 7/16"
nut but couldn't find one. I prevailed upon him to spot weld the old
stripped hex nut again. Johan doesn't willingly do cheezy work but he
relented. I ground off the spot weld and fixed the threads for the new
nut I got from McMaster-Carr. Johan can rest easy. I was cleaning this
steering arm, in place, when I discovered the ball that attaches
to the drag link is loose. This is beyond my experience so, it was
disconnected and cleaned to take to the Sunday morning coffee cruise-in
and put before the League of Extraordinary Assholes for opinions.
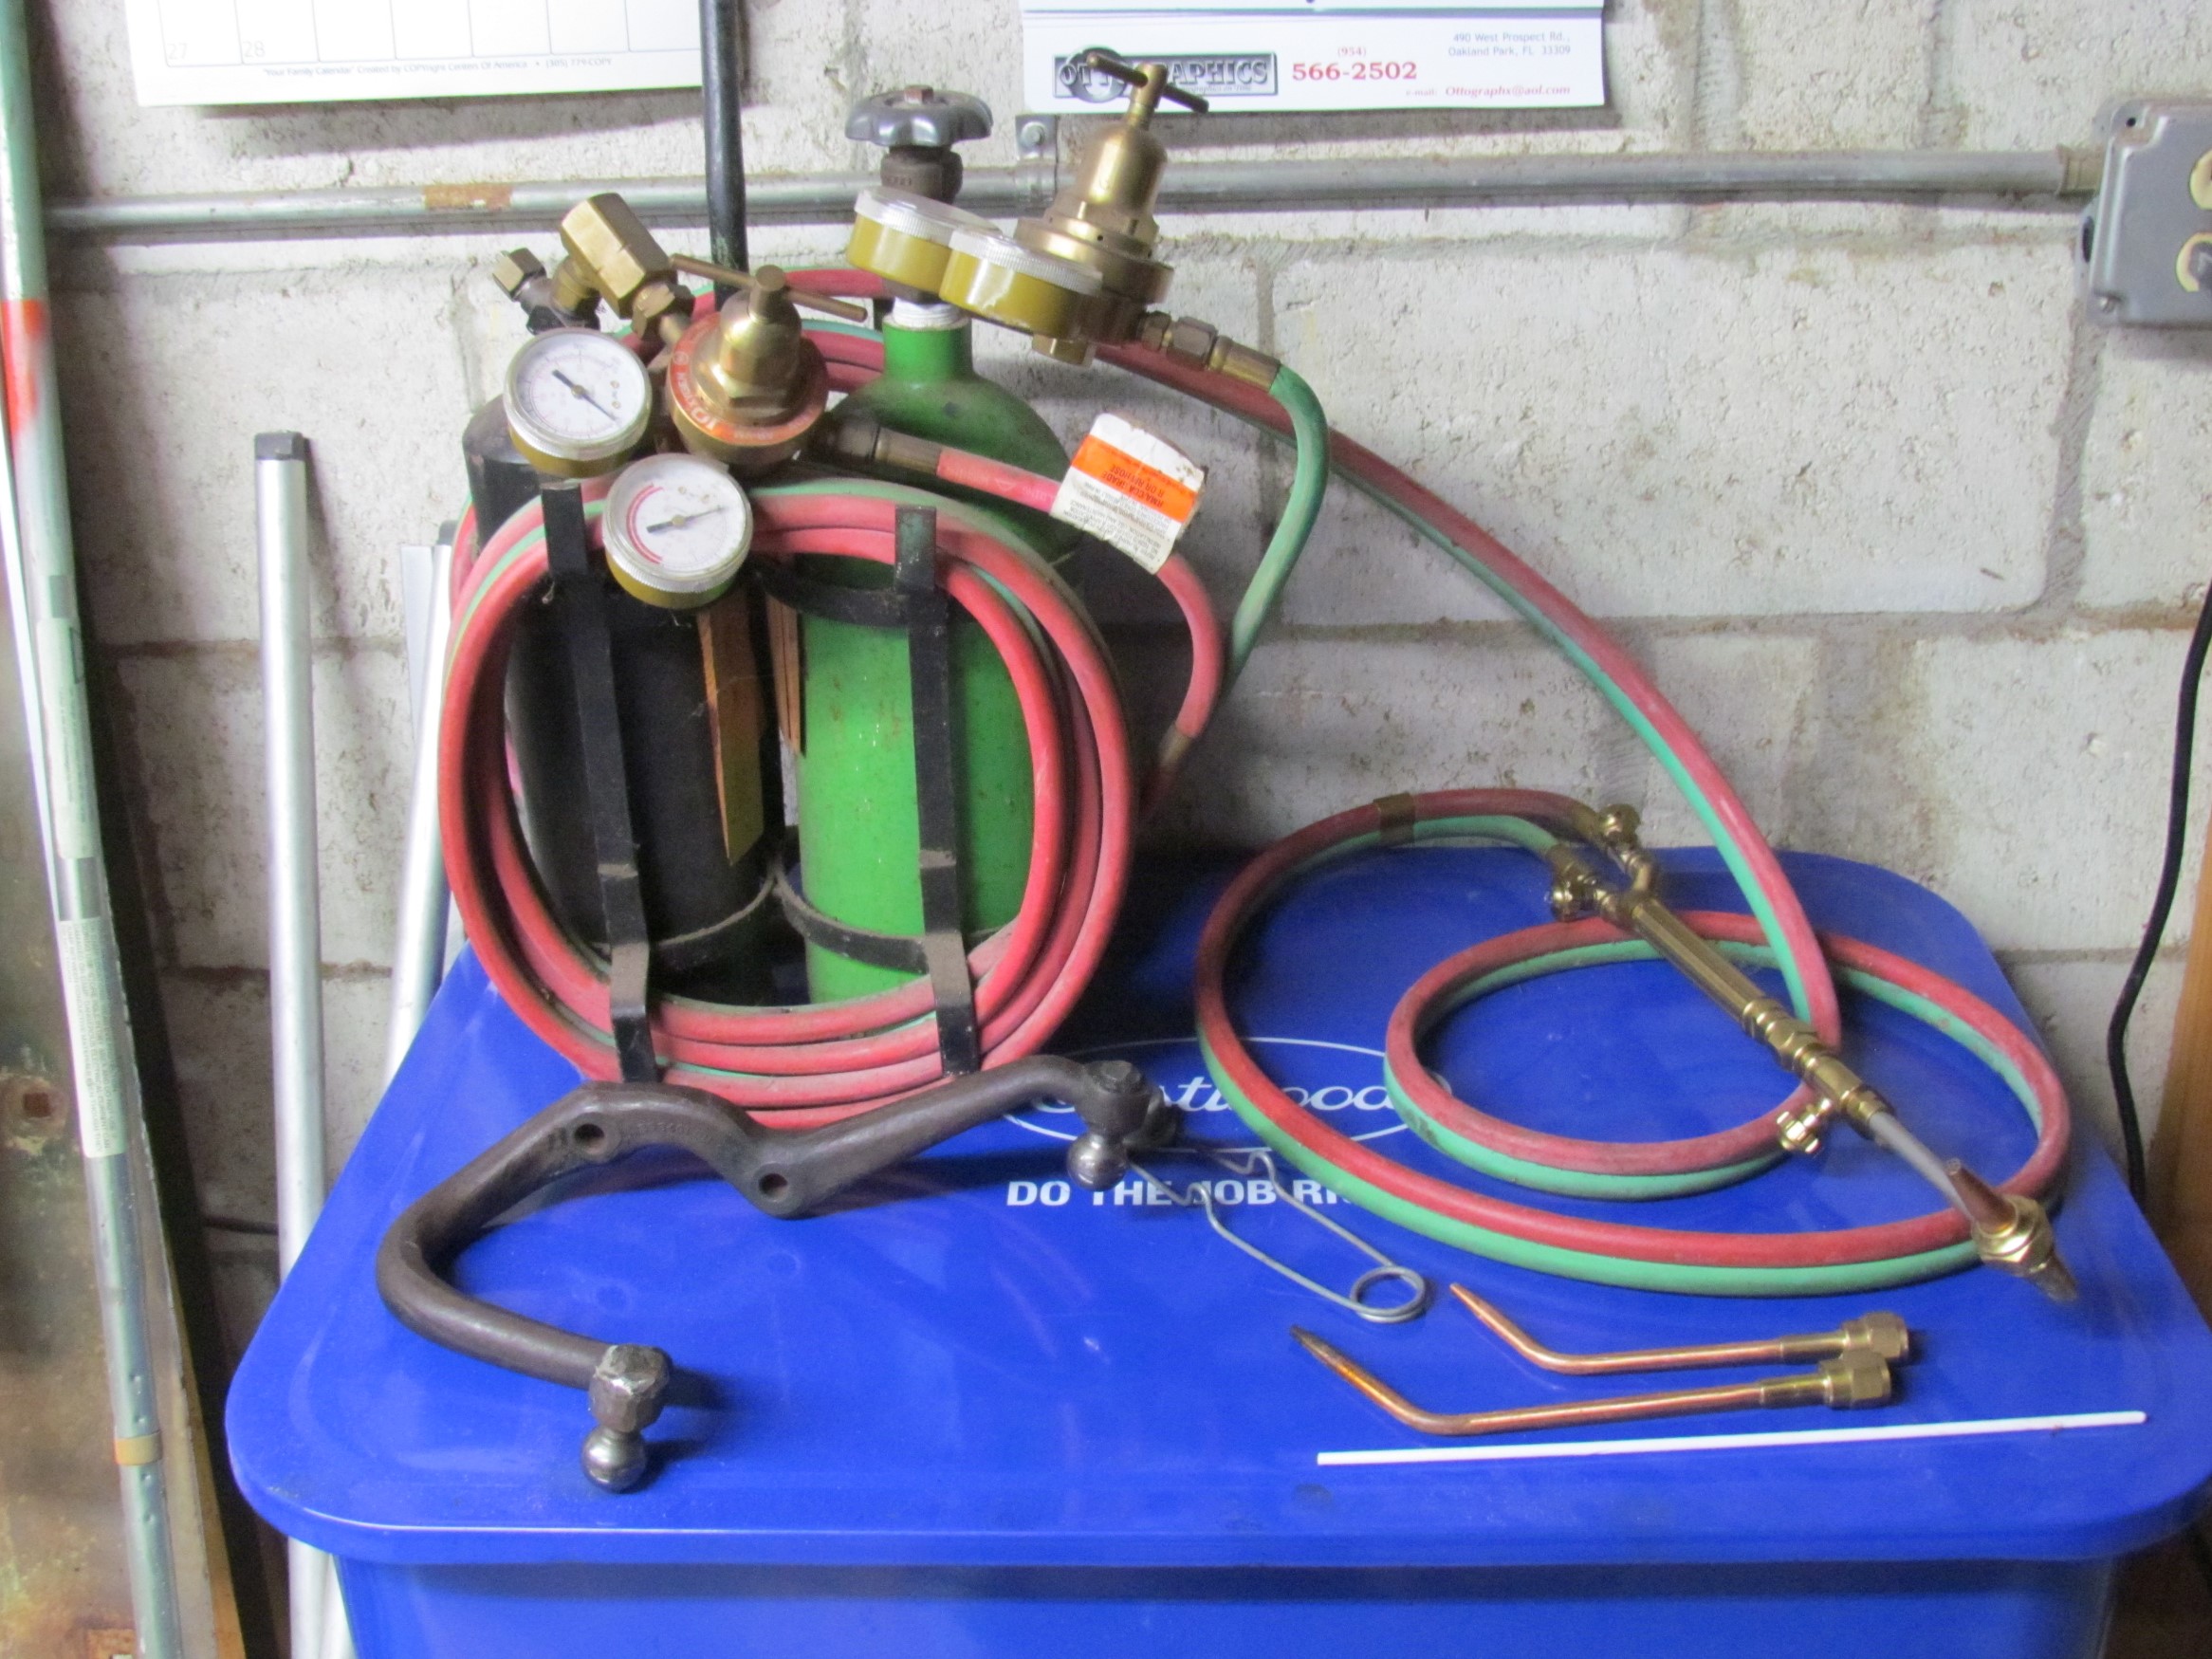 April
24th 2019 Lost my fragile momentum during the
BillyBob
Shop expansion. Now I'm struggling to get things going again. My
friends at coffee had several remedies for the steering arm issue.
Friend Lou tends to over think things as I do and suggested I drill and
pin the loose ball. Machinist friend, John Carey, said to heat it up
and swedge it or weld it. He offered to do it for me so I went with
that solution. John also gave me a small oxy/acetylene torch kit he had
quit using after getting a larger kit.
April
24th 2019 Lost my fragile momentum during the
BillyBob
Shop expansion. Now I'm struggling to get things going again. My
friends at coffee had several remedies for the steering arm issue.
Friend Lou tends to over think things as I do and suggested I drill and
pin the loose ball. Machinist friend, John Carey, said to heat it up
and swedge it or weld it. He offered to do it for me so I went with
that solution. John also gave me a small oxy/acetylene torch kit he had
quit using after getting a larger kit.
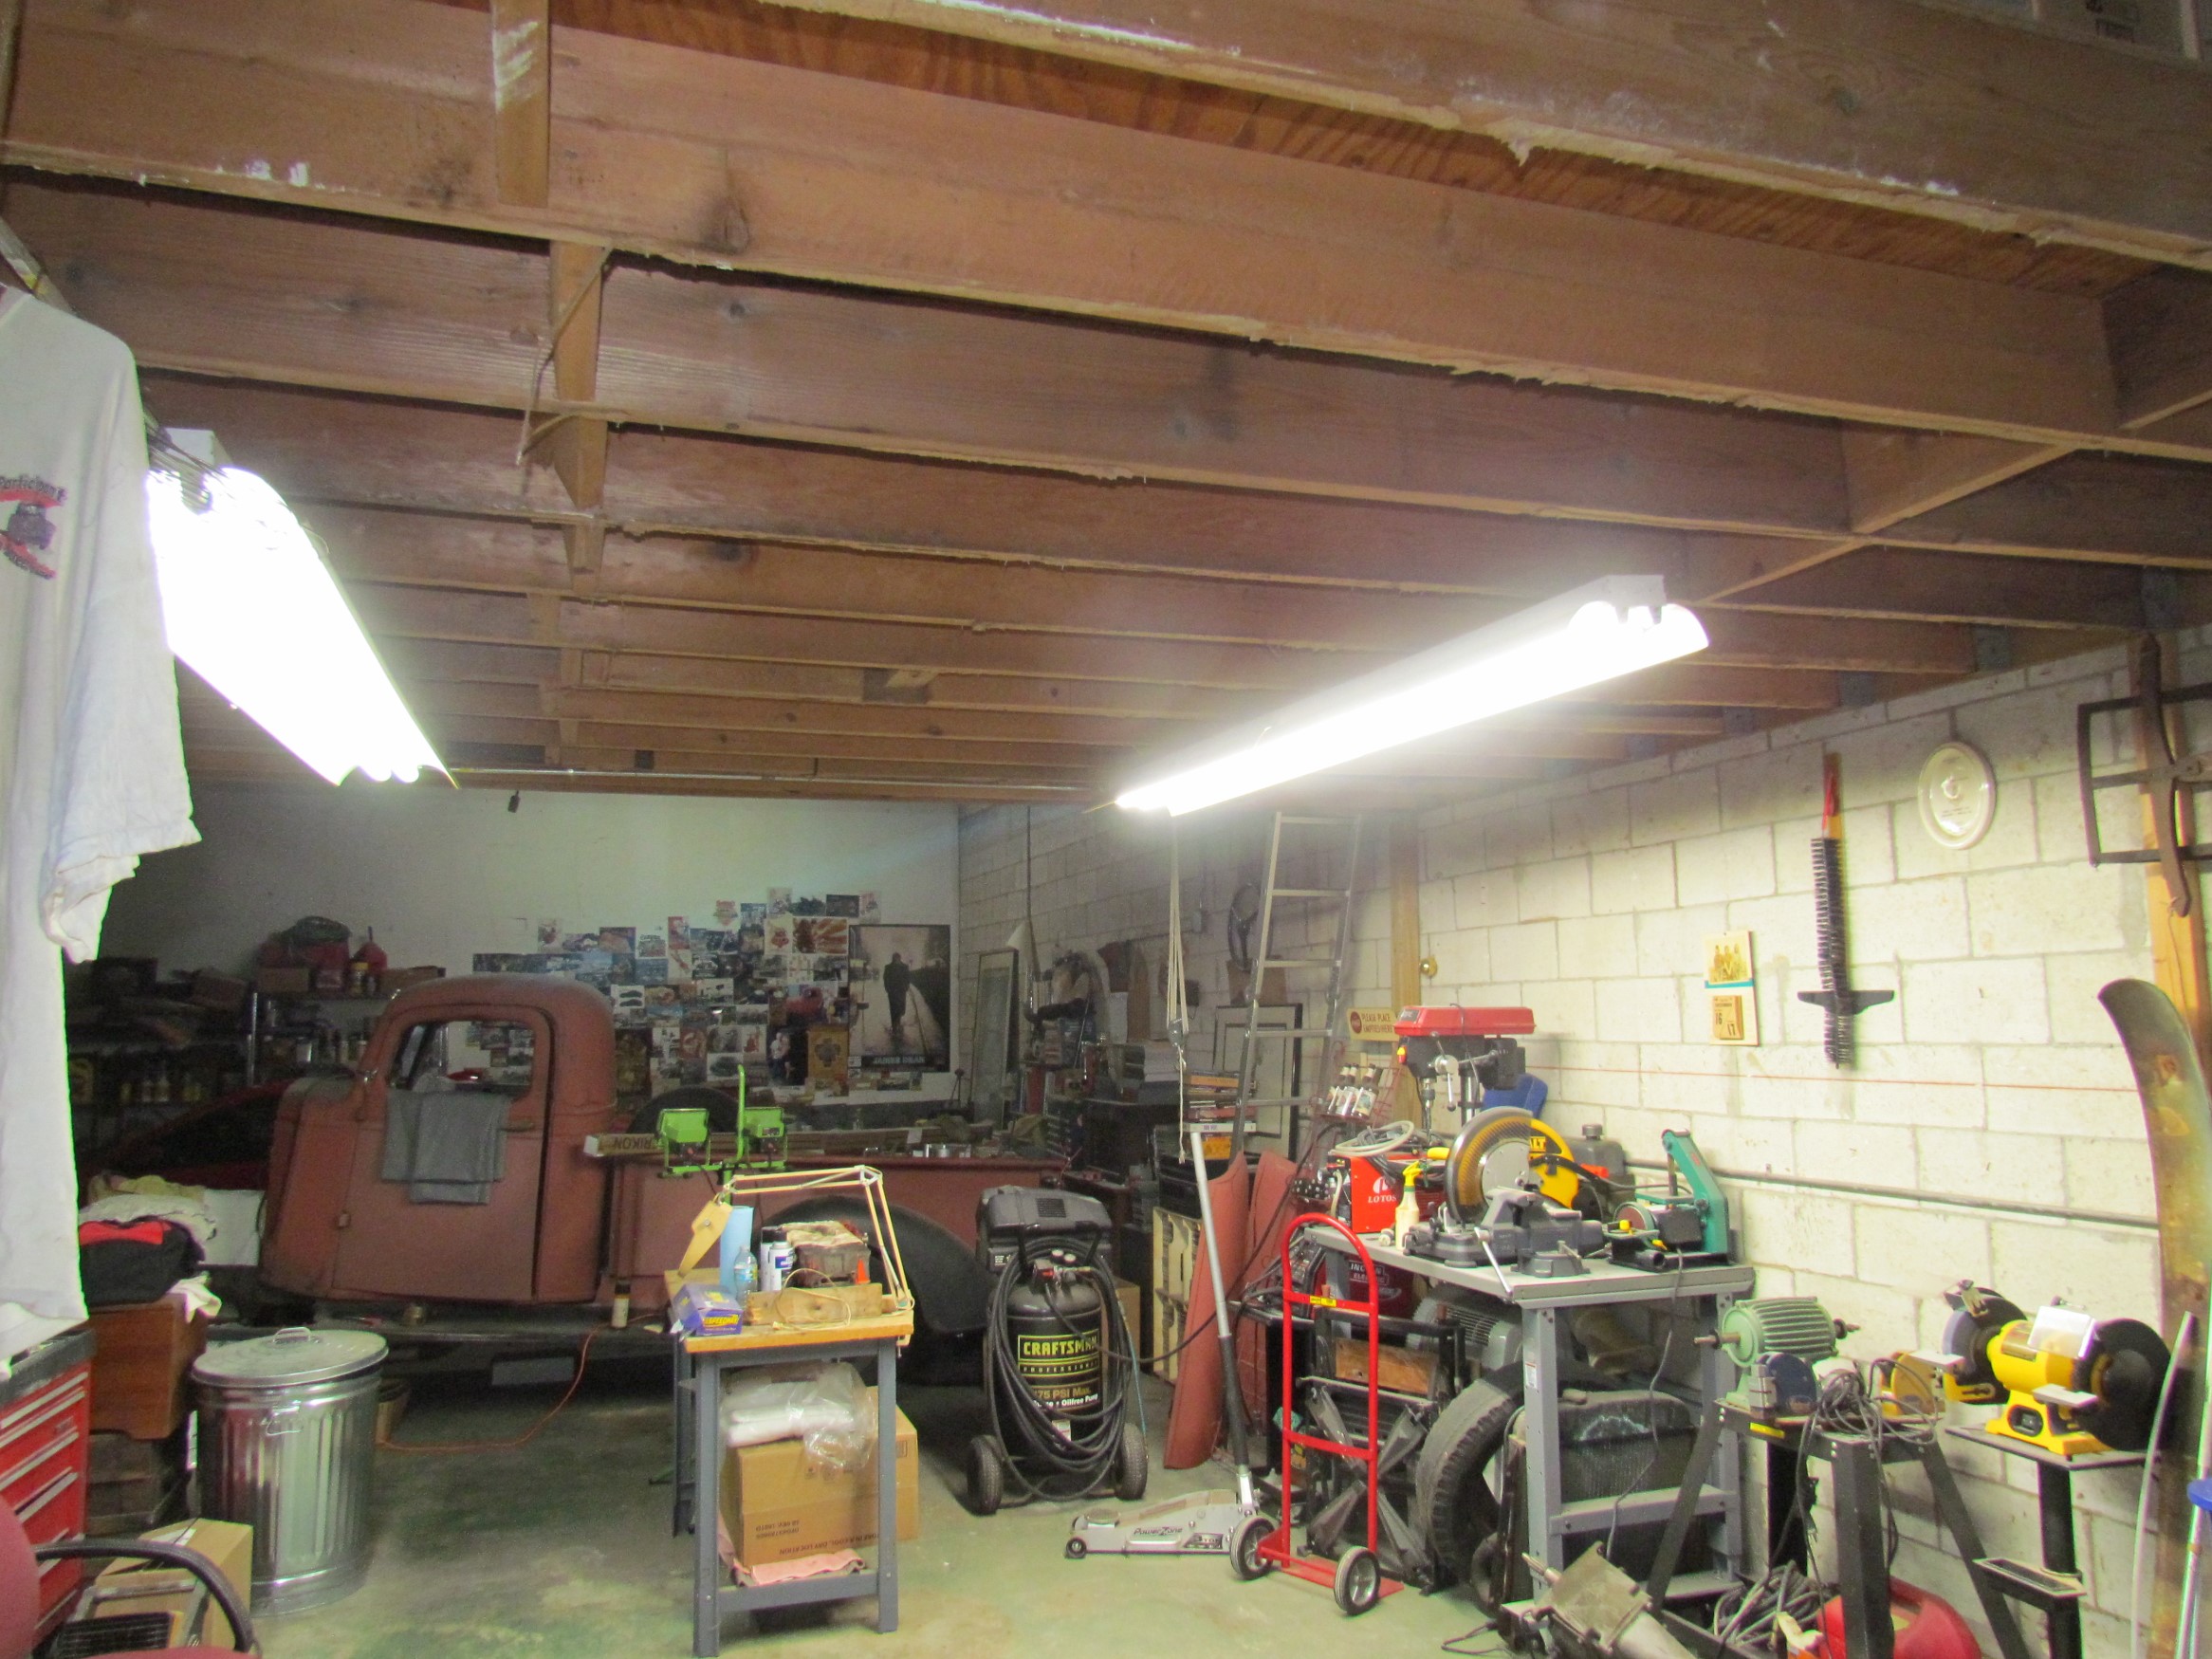 April
25th 2019
I was down to five tubes out of sixteen still working in my
light fixtures. Two of them under the loft and the only ones still
accessible to me. During the shop expansion, the landlord's contractor
"borrowed" my fourteen foot step ladder and as you might guess, that's
the last I ever saw of it. Both the rep and contractor are long gone
now and I've chalked it up to a school of hard knocks experience.
I installed eight foot LED tubes in the one fixture under the loft that
I could still reach. I had to rewire the fixture to bypass the ballast
and somebody had rewired it in the past so that took awhile to cipher
but I got it right the first time and now I have twice the light under
the loft.
April
25th 2019
I was down to five tubes out of sixteen still working in my
light fixtures. Two of them under the loft and the only ones still
accessible to me. During the shop expansion, the landlord's contractor
"borrowed" my fourteen foot step ladder and as you might guess, that's
the last I ever saw of it. Both the rep and contractor are long gone
now and I've chalked it up to a school of hard knocks experience.
I installed eight foot LED tubes in the one fixture under the loft that
I could still reach. I had to rewire the fixture to bypass the ballast
and somebody had rewired it in the past so that took awhile to cipher
but I got it right the first time and now I have twice the light under
the loft.
 October
14th 2019
My laziness ramped up as the heat of summer did the same until it
baked the ambition right out of me.
I didn't do a thing for the last five months. Now,
the heat index has dropped below 100 for more than two days in a row in
the BillyBob Shop for the first time since I don't know when. I started
back into the fray with cleaning and painting
ops on the driver side
frame rail, springs and spindle.
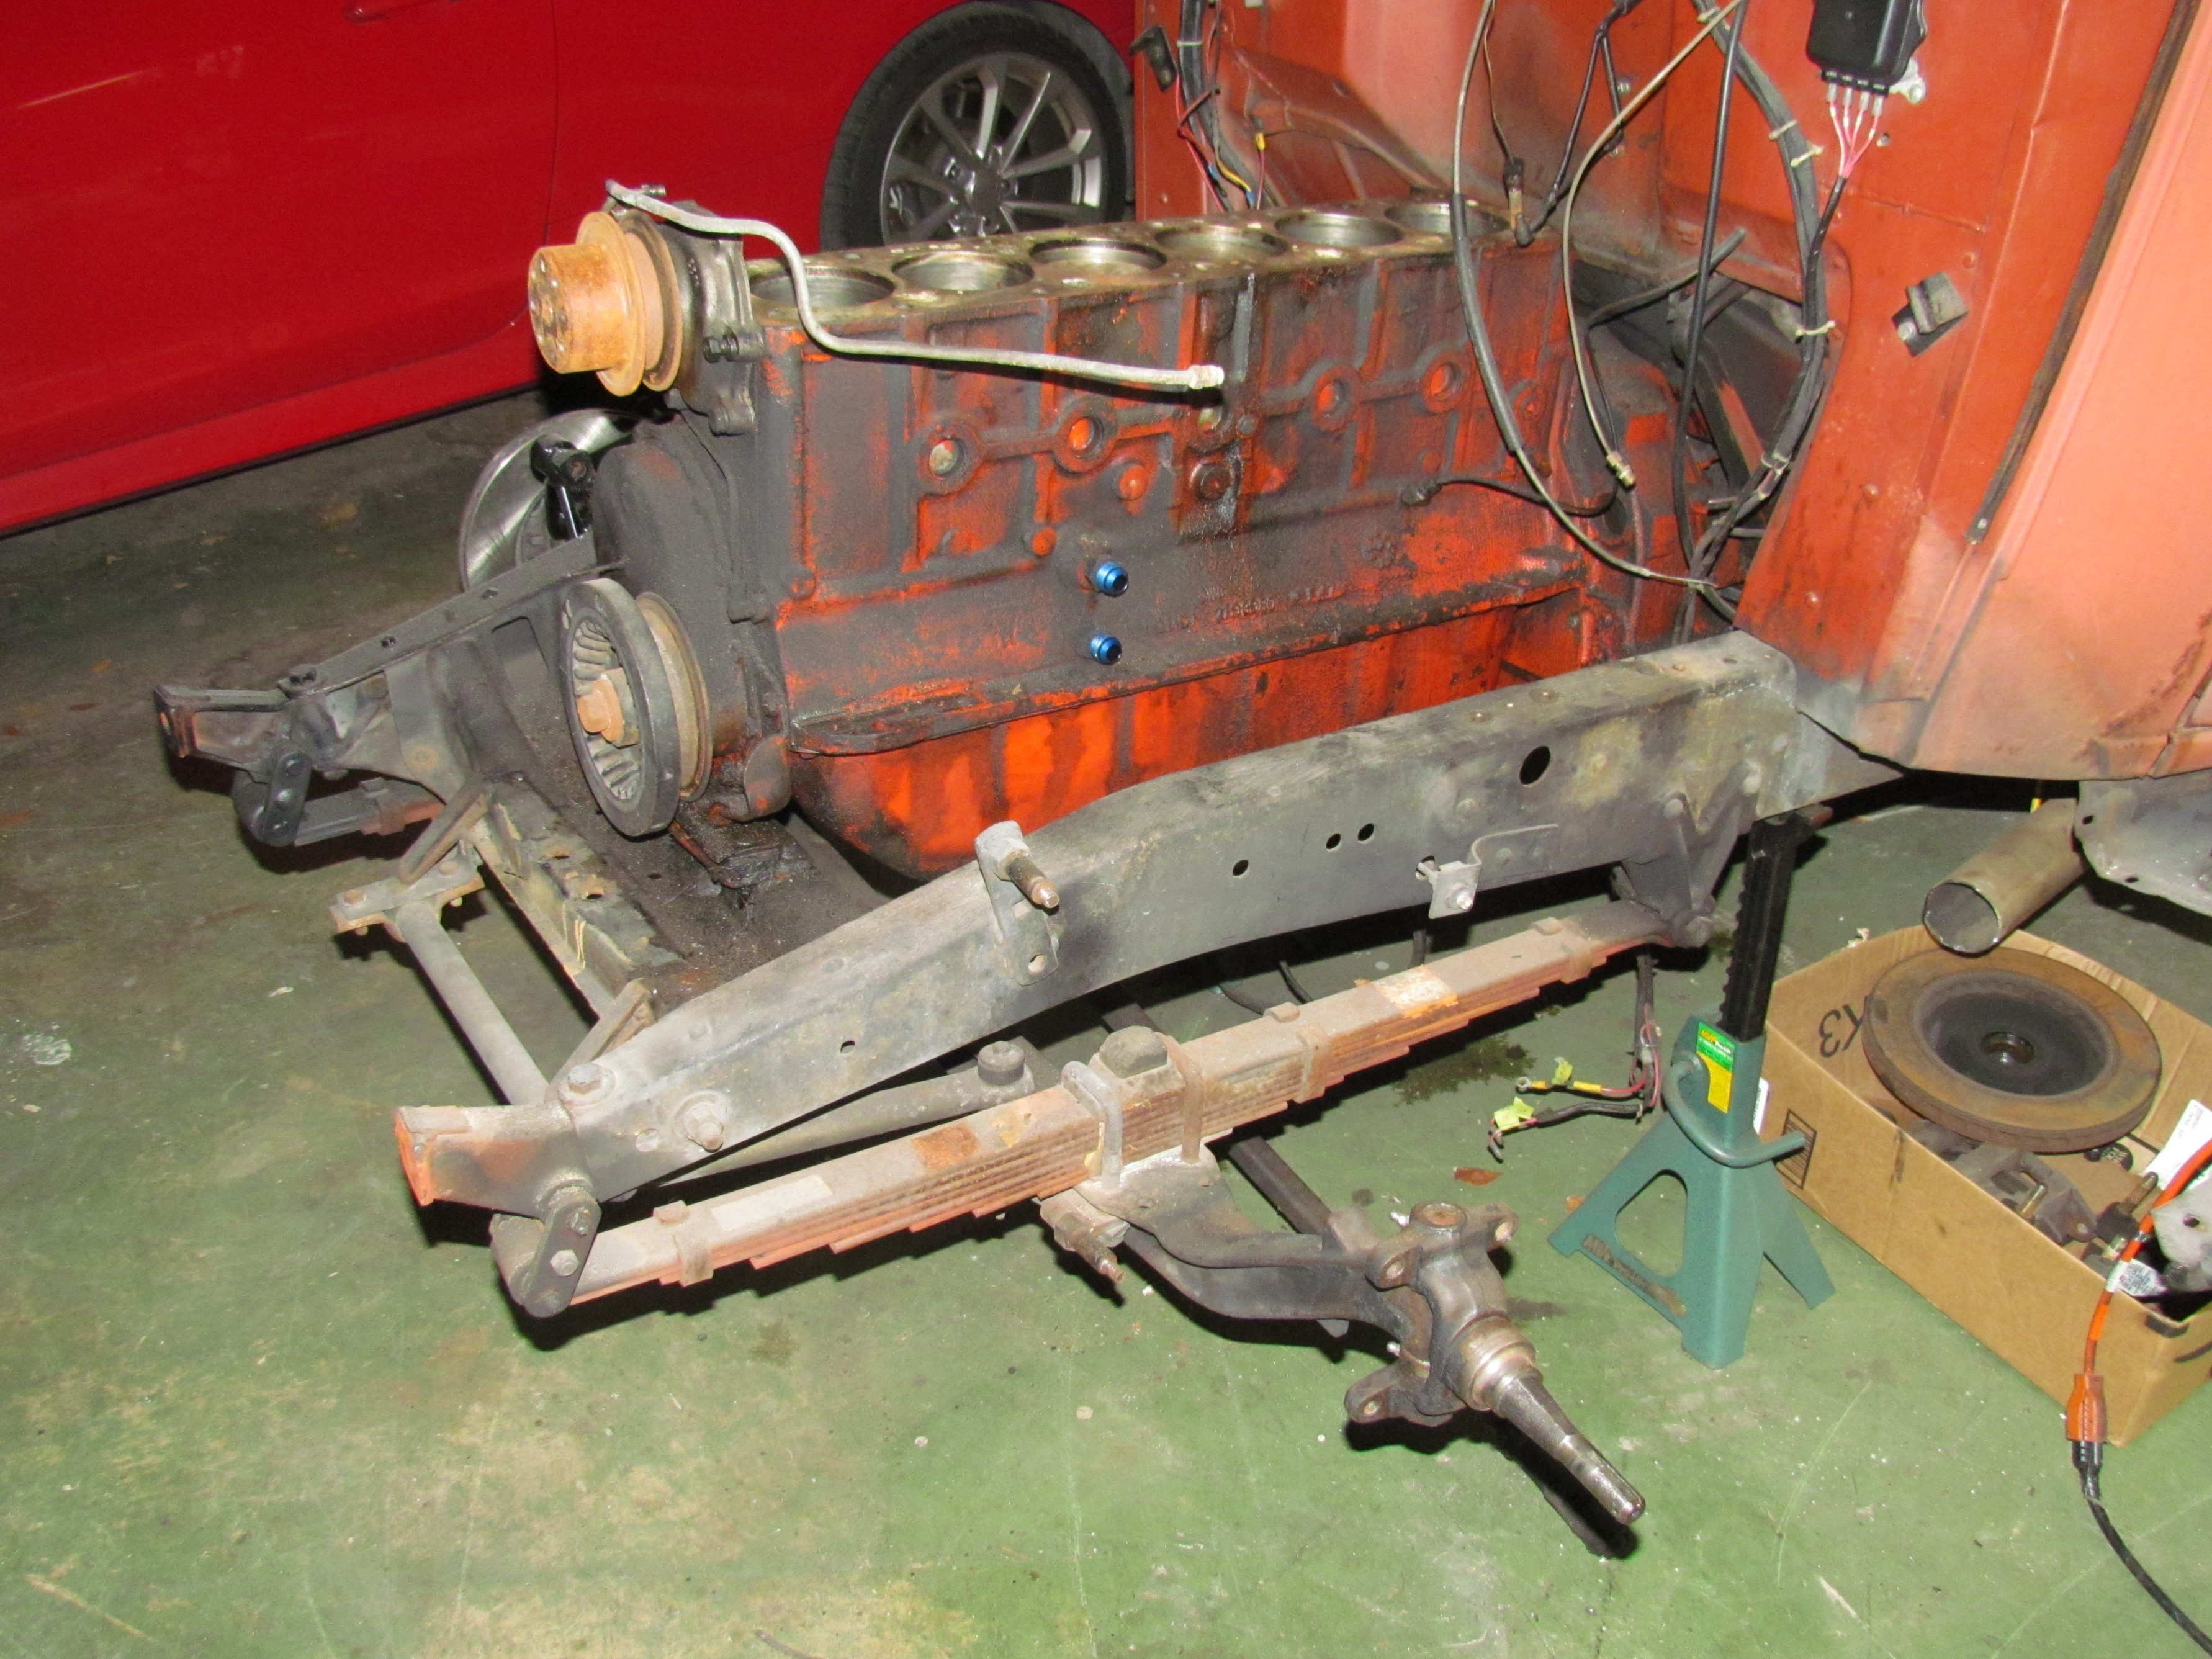
October
14th 2019
My laziness ramped up as the heat of summer did the same until it
baked the ambition right out of me.
I didn't do a thing for the last five months. Now,
the heat index has dropped below 100 for more than two days in a row in
the BillyBob Shop for the first time since I don't know when. I started
back into the fray with cleaning and painting
ops on the driver side
frame rail, springs and spindle.
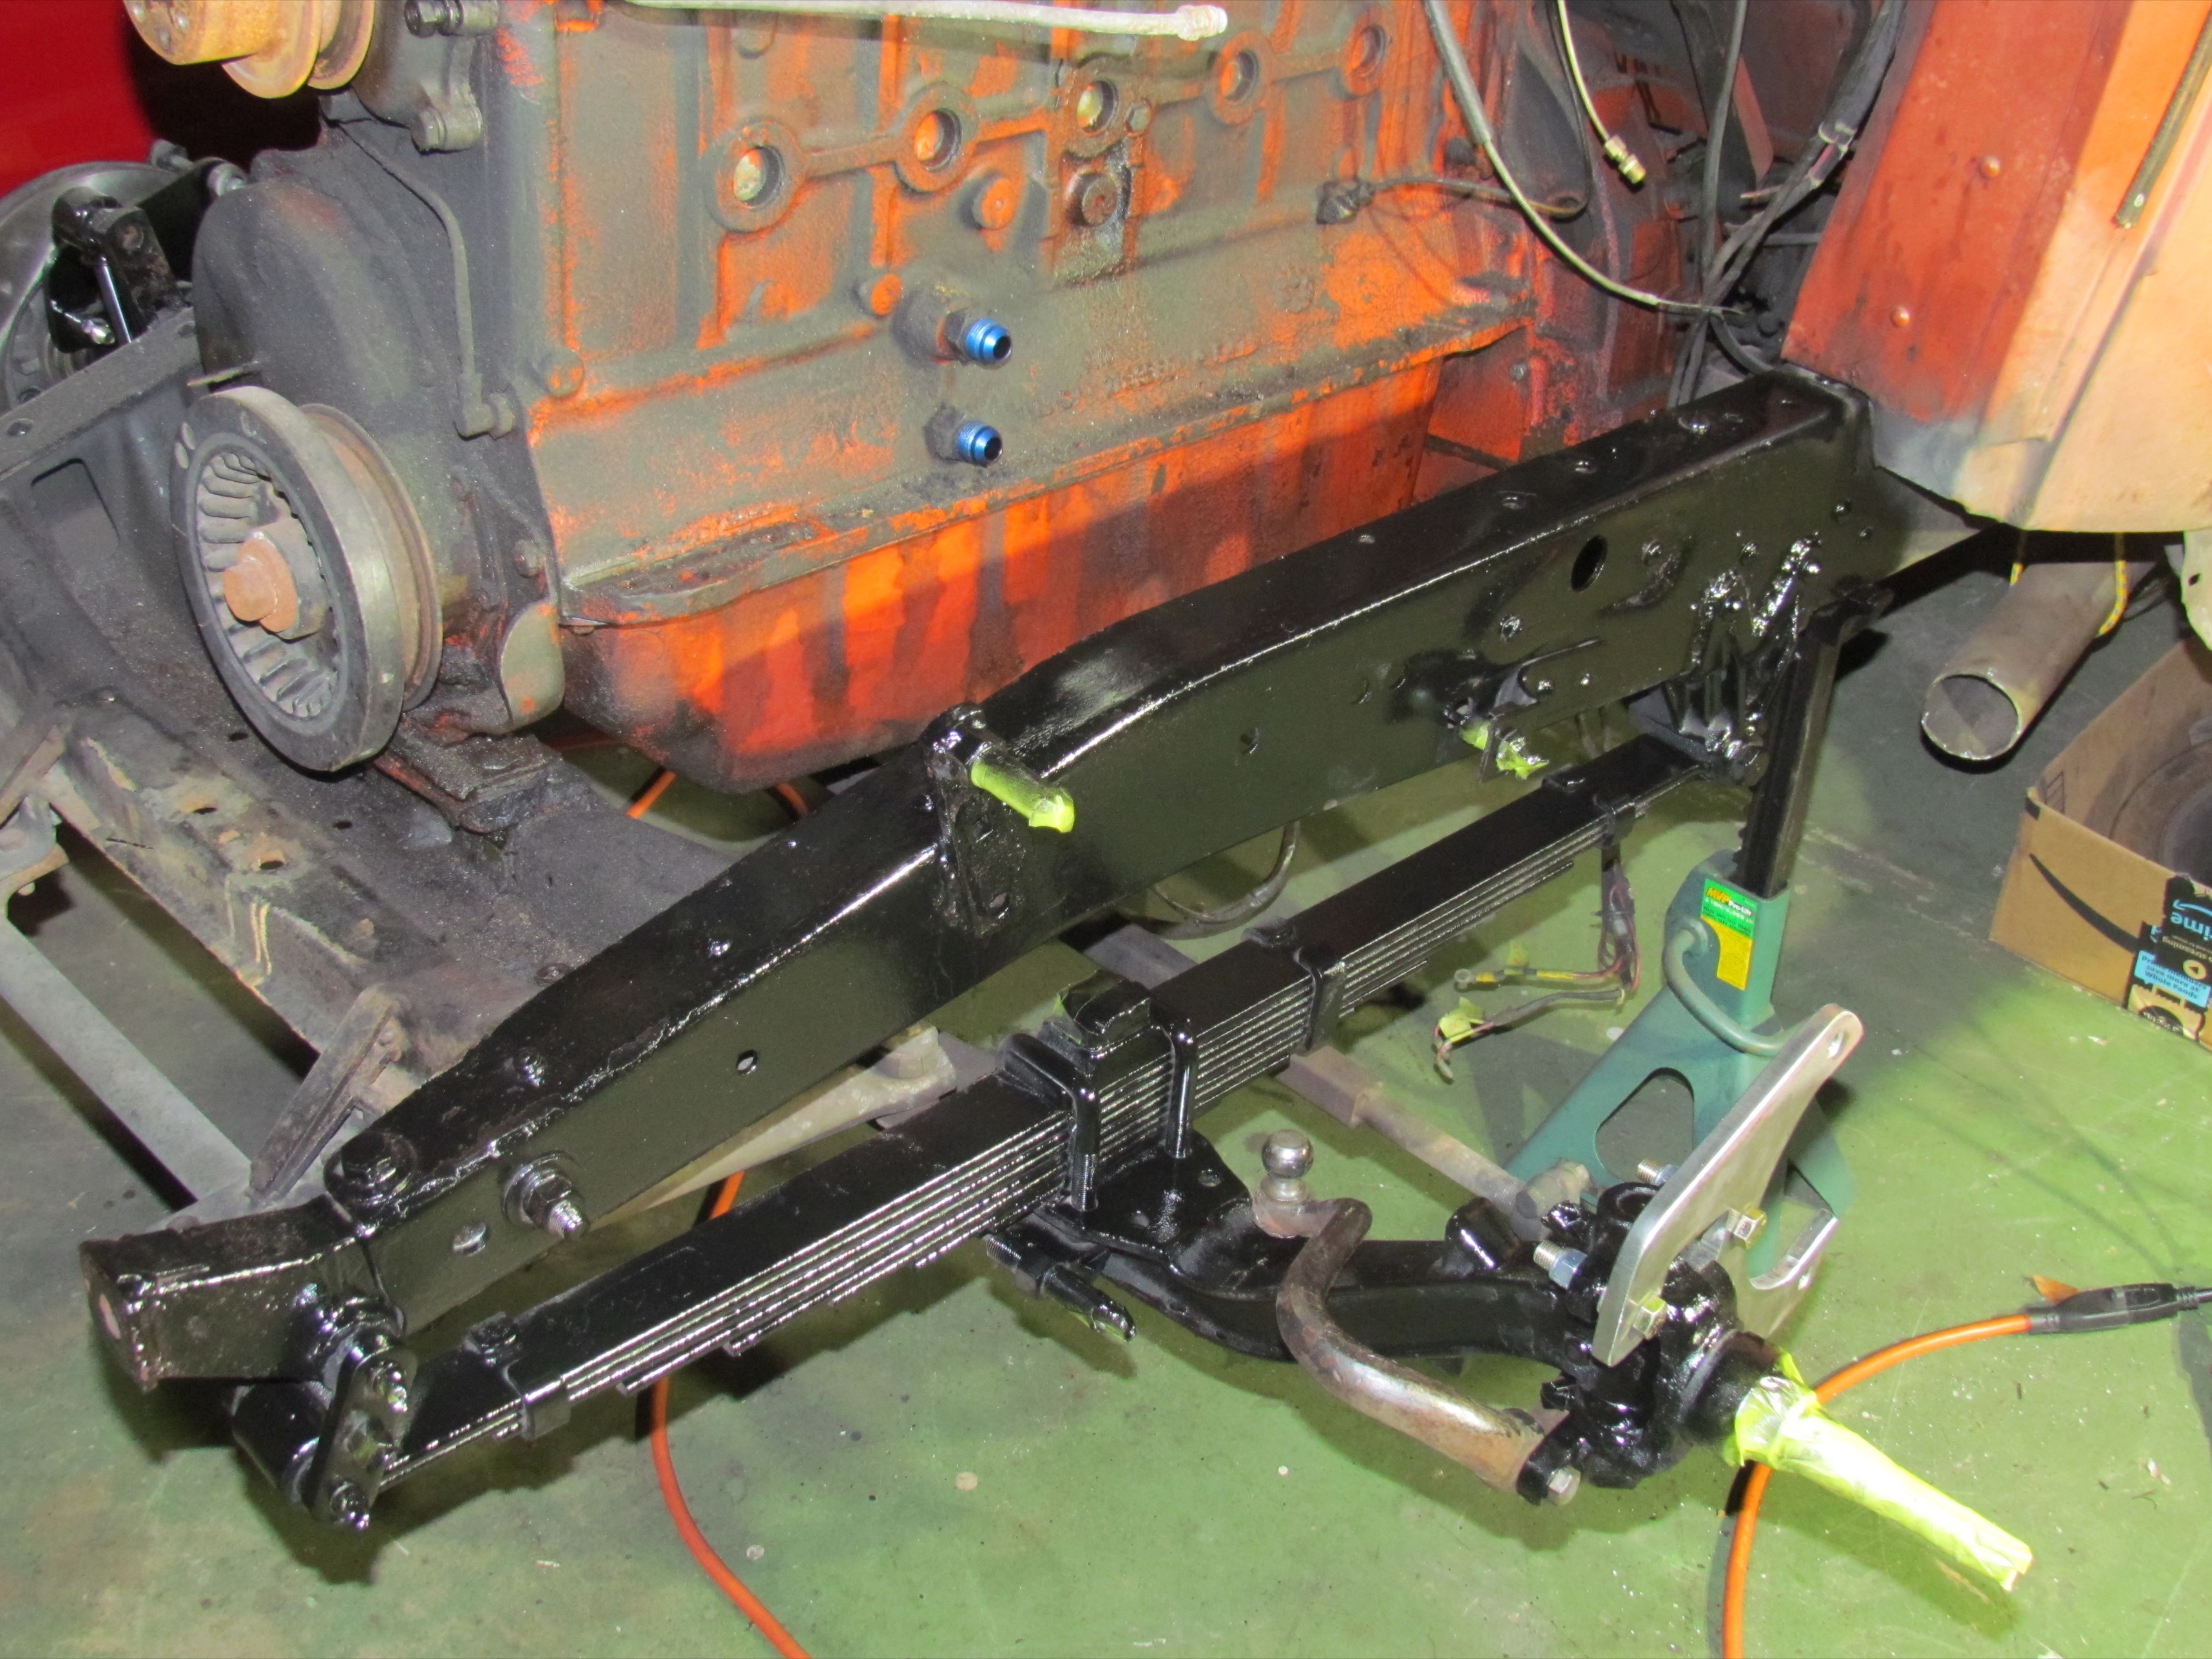 November
7th 2019
The heat wave returned but I started getting back into the habit of
spending an hour or so out in the shop every day regardless, mostly
detailing Elvira now that the roadwork in front of the BillyBob Shop is
done. Frame, axle end, spring and spindle were further degreased, wire
brushed, masked off and paint prepped before spraying Eastwood's Black
Rust Encapsulator on the leaf spring, followed by a coat of Eastwood's
Extreme Chassis Black over everything the next day. Brake support plate
and steering arm were installed next.
November
7th 2019
The heat wave returned but I started getting back into the habit of
spending an hour or so out in the shop every day regardless, mostly
detailing Elvira now that the roadwork in front of the BillyBob Shop is
done. Frame, axle end, spring and spindle were further degreased, wire
brushed, masked off and paint prepped before spraying Eastwood's Black
Rust Encapsulator on the leaf spring, followed by a coat of Eastwood's
Extreme Chassis Black over everything the next day. Brake support plate
and steering arm were installed next.
 November
10th 2019
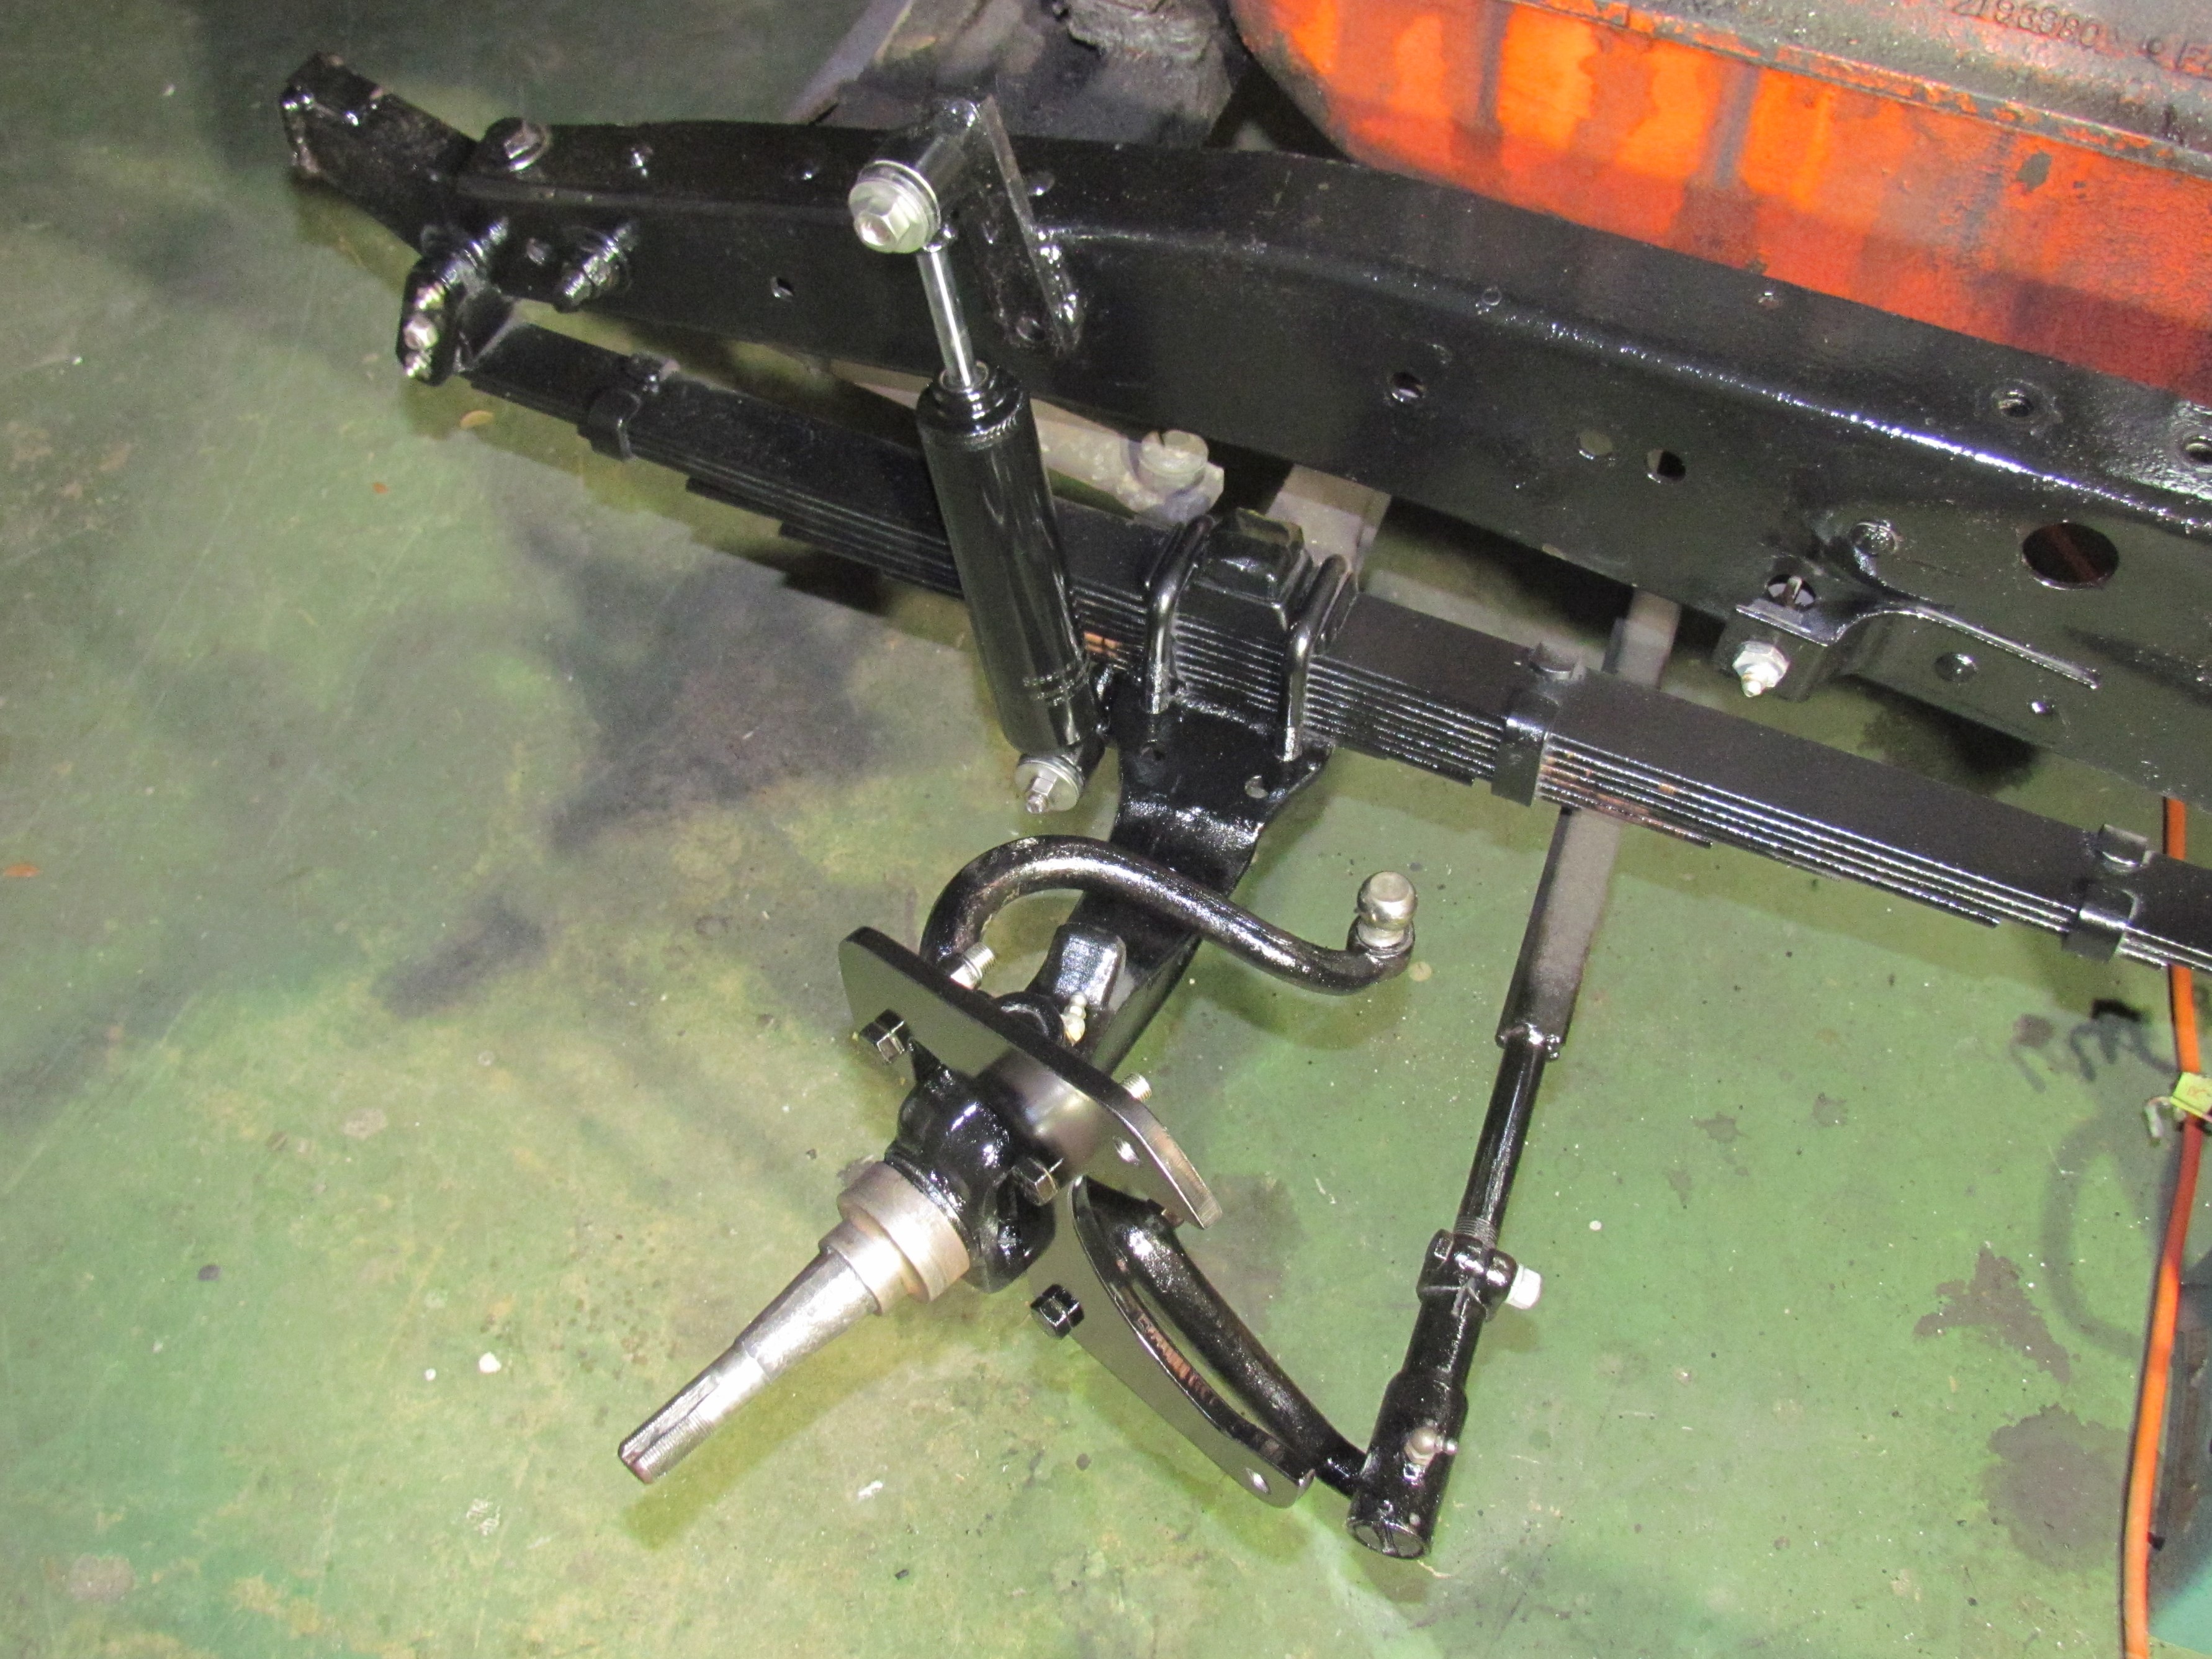
Put the dissembled tie rod end back together on the steering arm then
cleaned, masked and painted it, along with the steering arm and brake
bracket. Sunday, when the paint was dry, I put the new shock absorber
on. This five minute job turned into a two-Budweiser degree of
difficulty task. The shock bushings were tight on the pivots and
wouldn't go any farther than three-quarters of the way on. I rethought
things when I hit my thumb with a twelve pound sledge. The great
mechanic in the sky gave me a mulligan and it was a glancing blow that
barely broke the skin. I tried several things that didn't work, that
I'd rather not discuss, when I found a socket that fit over the
protruding portion of the bushing and seated against the metal portion
of the shock eye. That did the trick. I was able to pound on the socket
and seat both ends of the shock. Some fiddling with the new stainless
steel washers and hex nuts and I was done.
November
10th 2019
Put the dissembled tie rod end back together on the steering arm then
cleaned, masked and painted it, along with the steering arm and brake
bracket. Sunday, when the paint was dry, I put the new shock absorber
on. This five minute job turned into a two-Budweiser degree of
difficulty task. The shock bushings were tight on the pivots and
wouldn't go any farther than three-quarters of the way on. I rethought
things when I hit my thumb with a twelve pound sledge. The great
mechanic in the sky gave me a mulligan and it was a glancing blow that
barely broke the skin. I tried several things that didn't work, that
I'd rather not discuss, when I found a socket that fit over the
protruding portion of the bushing and seated against the metal portion
of the shock eye. That did the trick. I was able to pound on the socket
and seat both ends of the shock. Some fiddling with the new stainless
steel washers and hex nuts and I was done.
 November
12th 2019
Turned my attention to the late seventies Camaro rotor from the disk
brake conversion kit. The kit uses a Pinto/Mustang inner wheel bearing
so, the Camaro inner bearing race was tapped out with brass hammer and
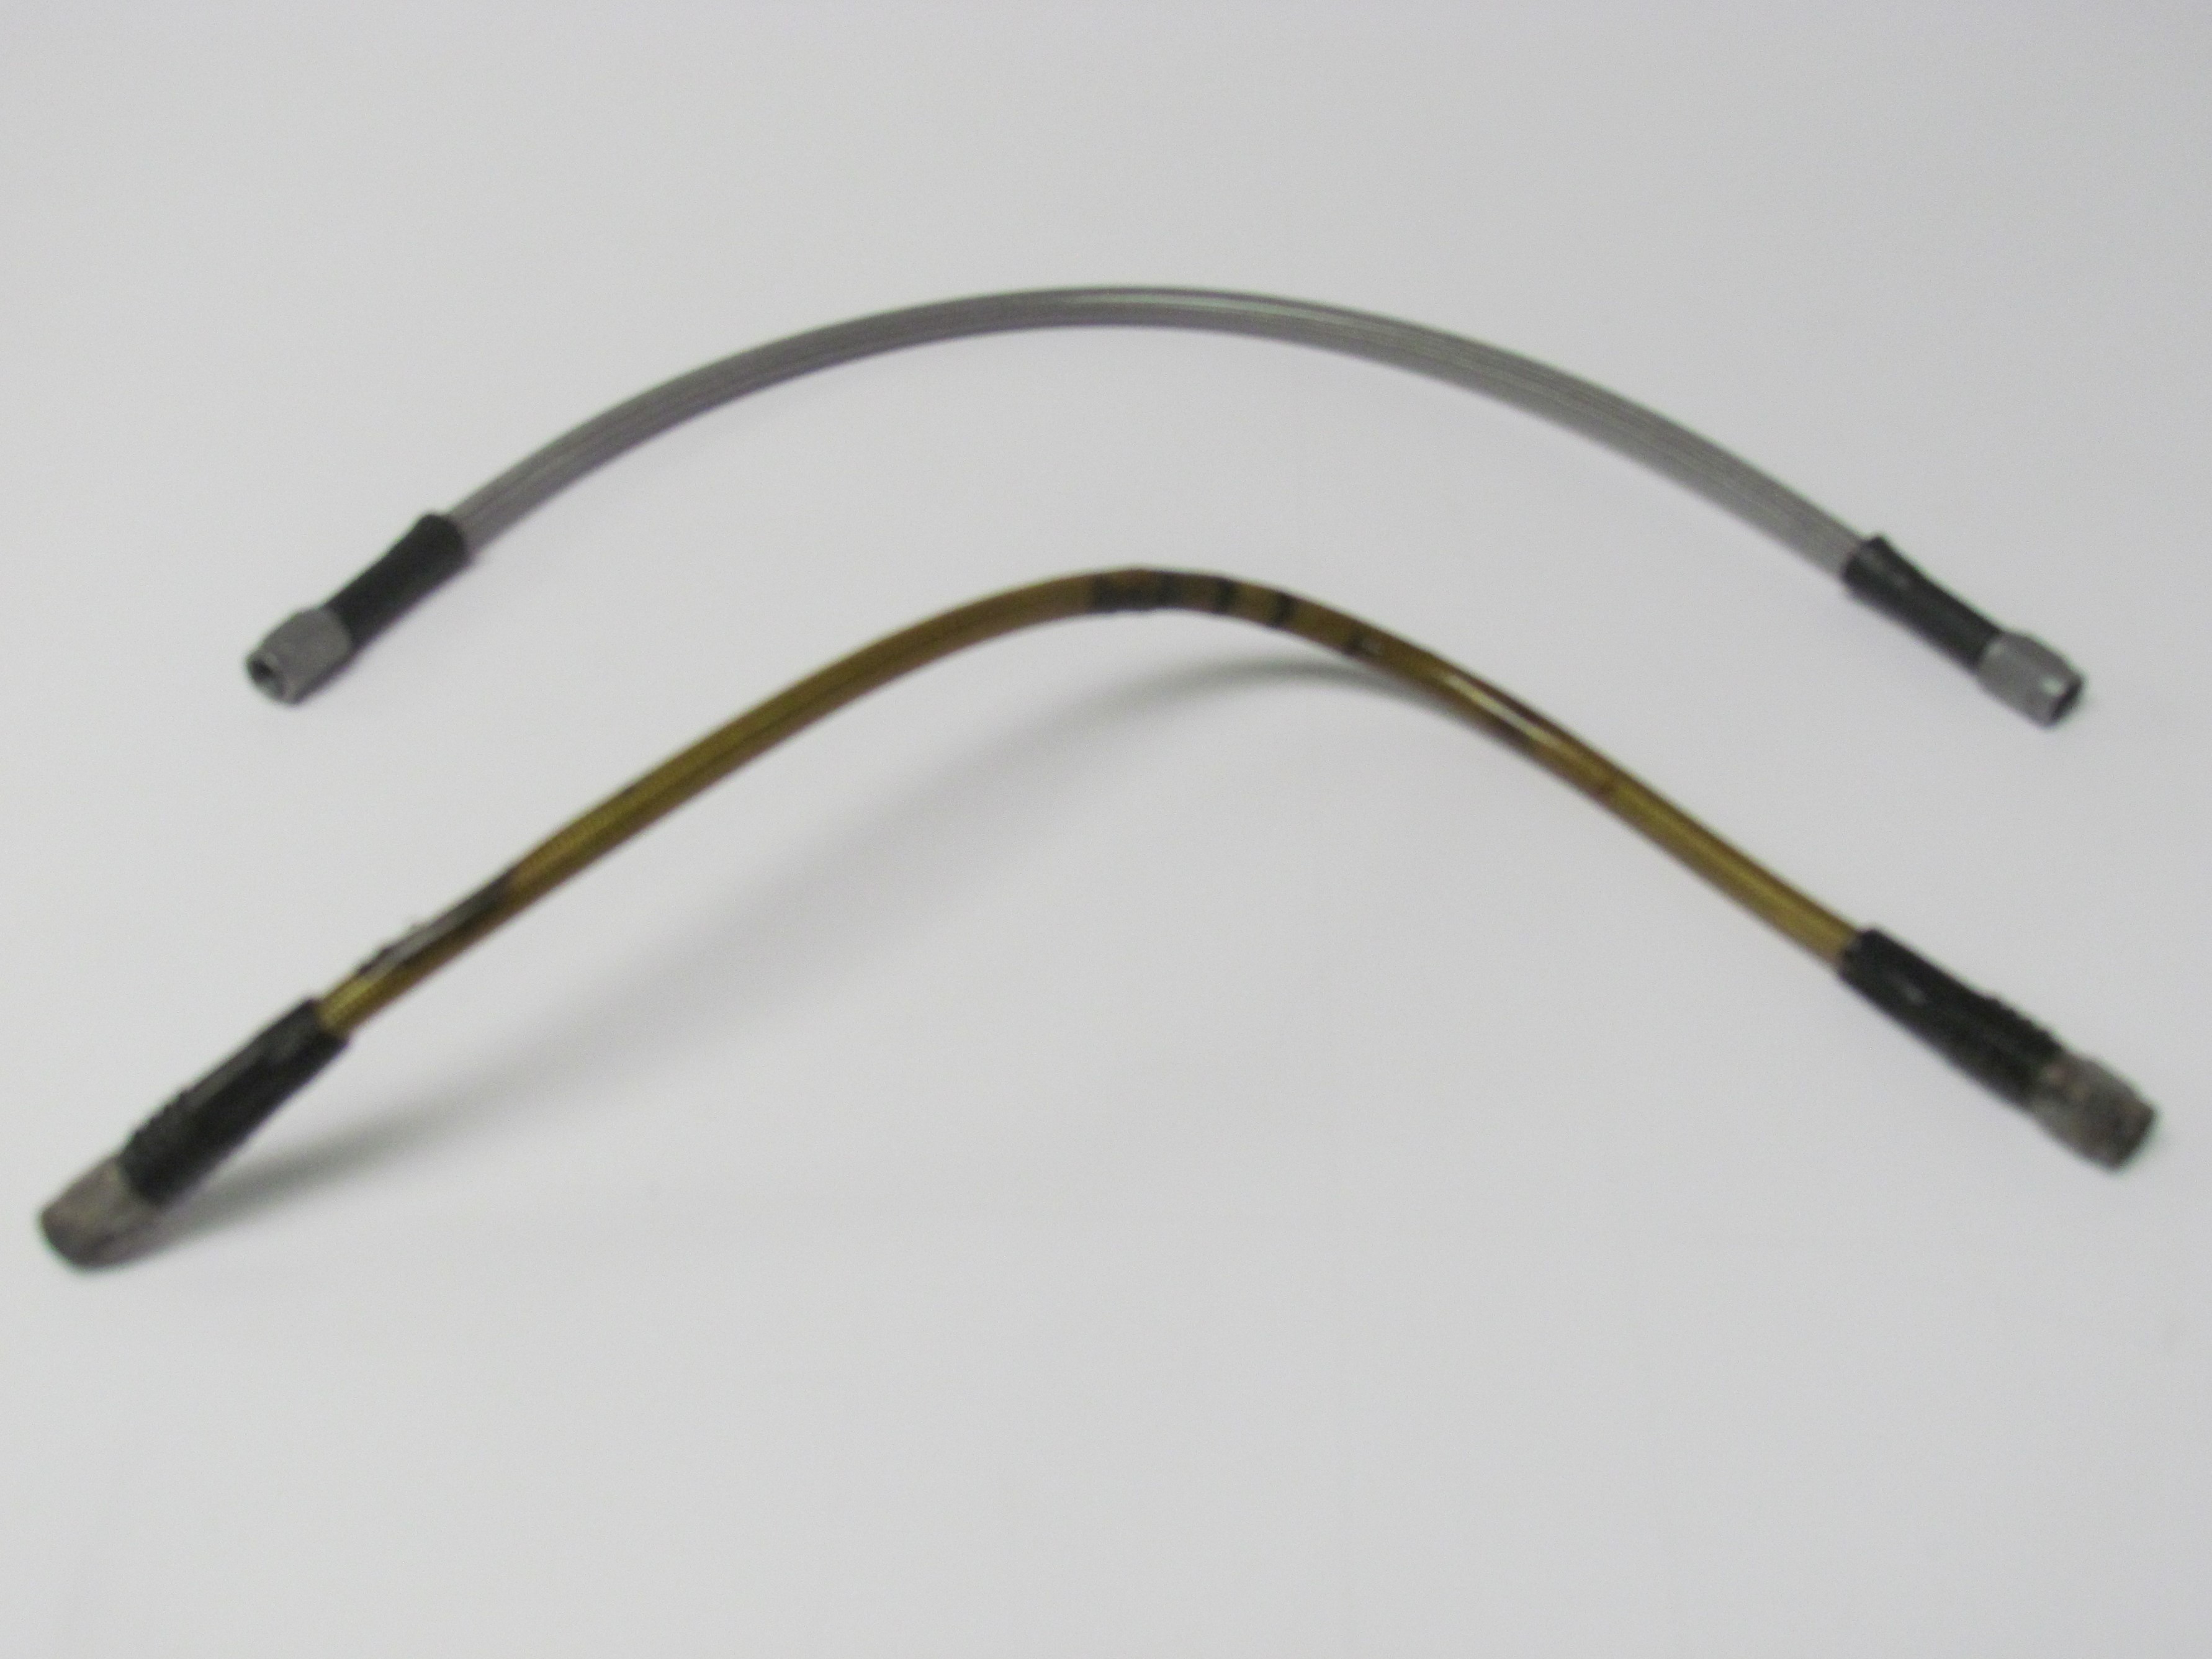
drift and the Ford race installed. Been dithering around on flex lines.
When Tony built the truck, he used Wilwood shielded lines. Finally
found what I think were the same items and ordered them from Summit. I
had let the old ones soak in the parts washer soup too long and it ate
the shielding. Tony had also used Wilwood calipers and the new kit came
with late seventies Camaro calipers. I still have to get -3 male to
3/8"-16 male adapters to fit the flex lines to the calipers.
November
12th 2019
Turned my attention to the late seventies Camaro rotor from the disk
brake conversion kit. The kit uses a Pinto/Mustang inner wheel bearing
so, the Camaro inner bearing race was tapped out with brass hammer and
drift and the Ford race installed. Been dithering around on flex lines.
When Tony built the truck, he used Wilwood shielded lines. Finally
found what I think were the same items and ordered them from Summit. I
had let the old ones soak in the parts washer soup too long and it ate
the shielding. Tony had also used Wilwood calipers and the new kit came
with late seventies Camaro calipers. I still have to get -3 male to
3/8"-16 male adapters to fit the flex lines to the calipers.
 November
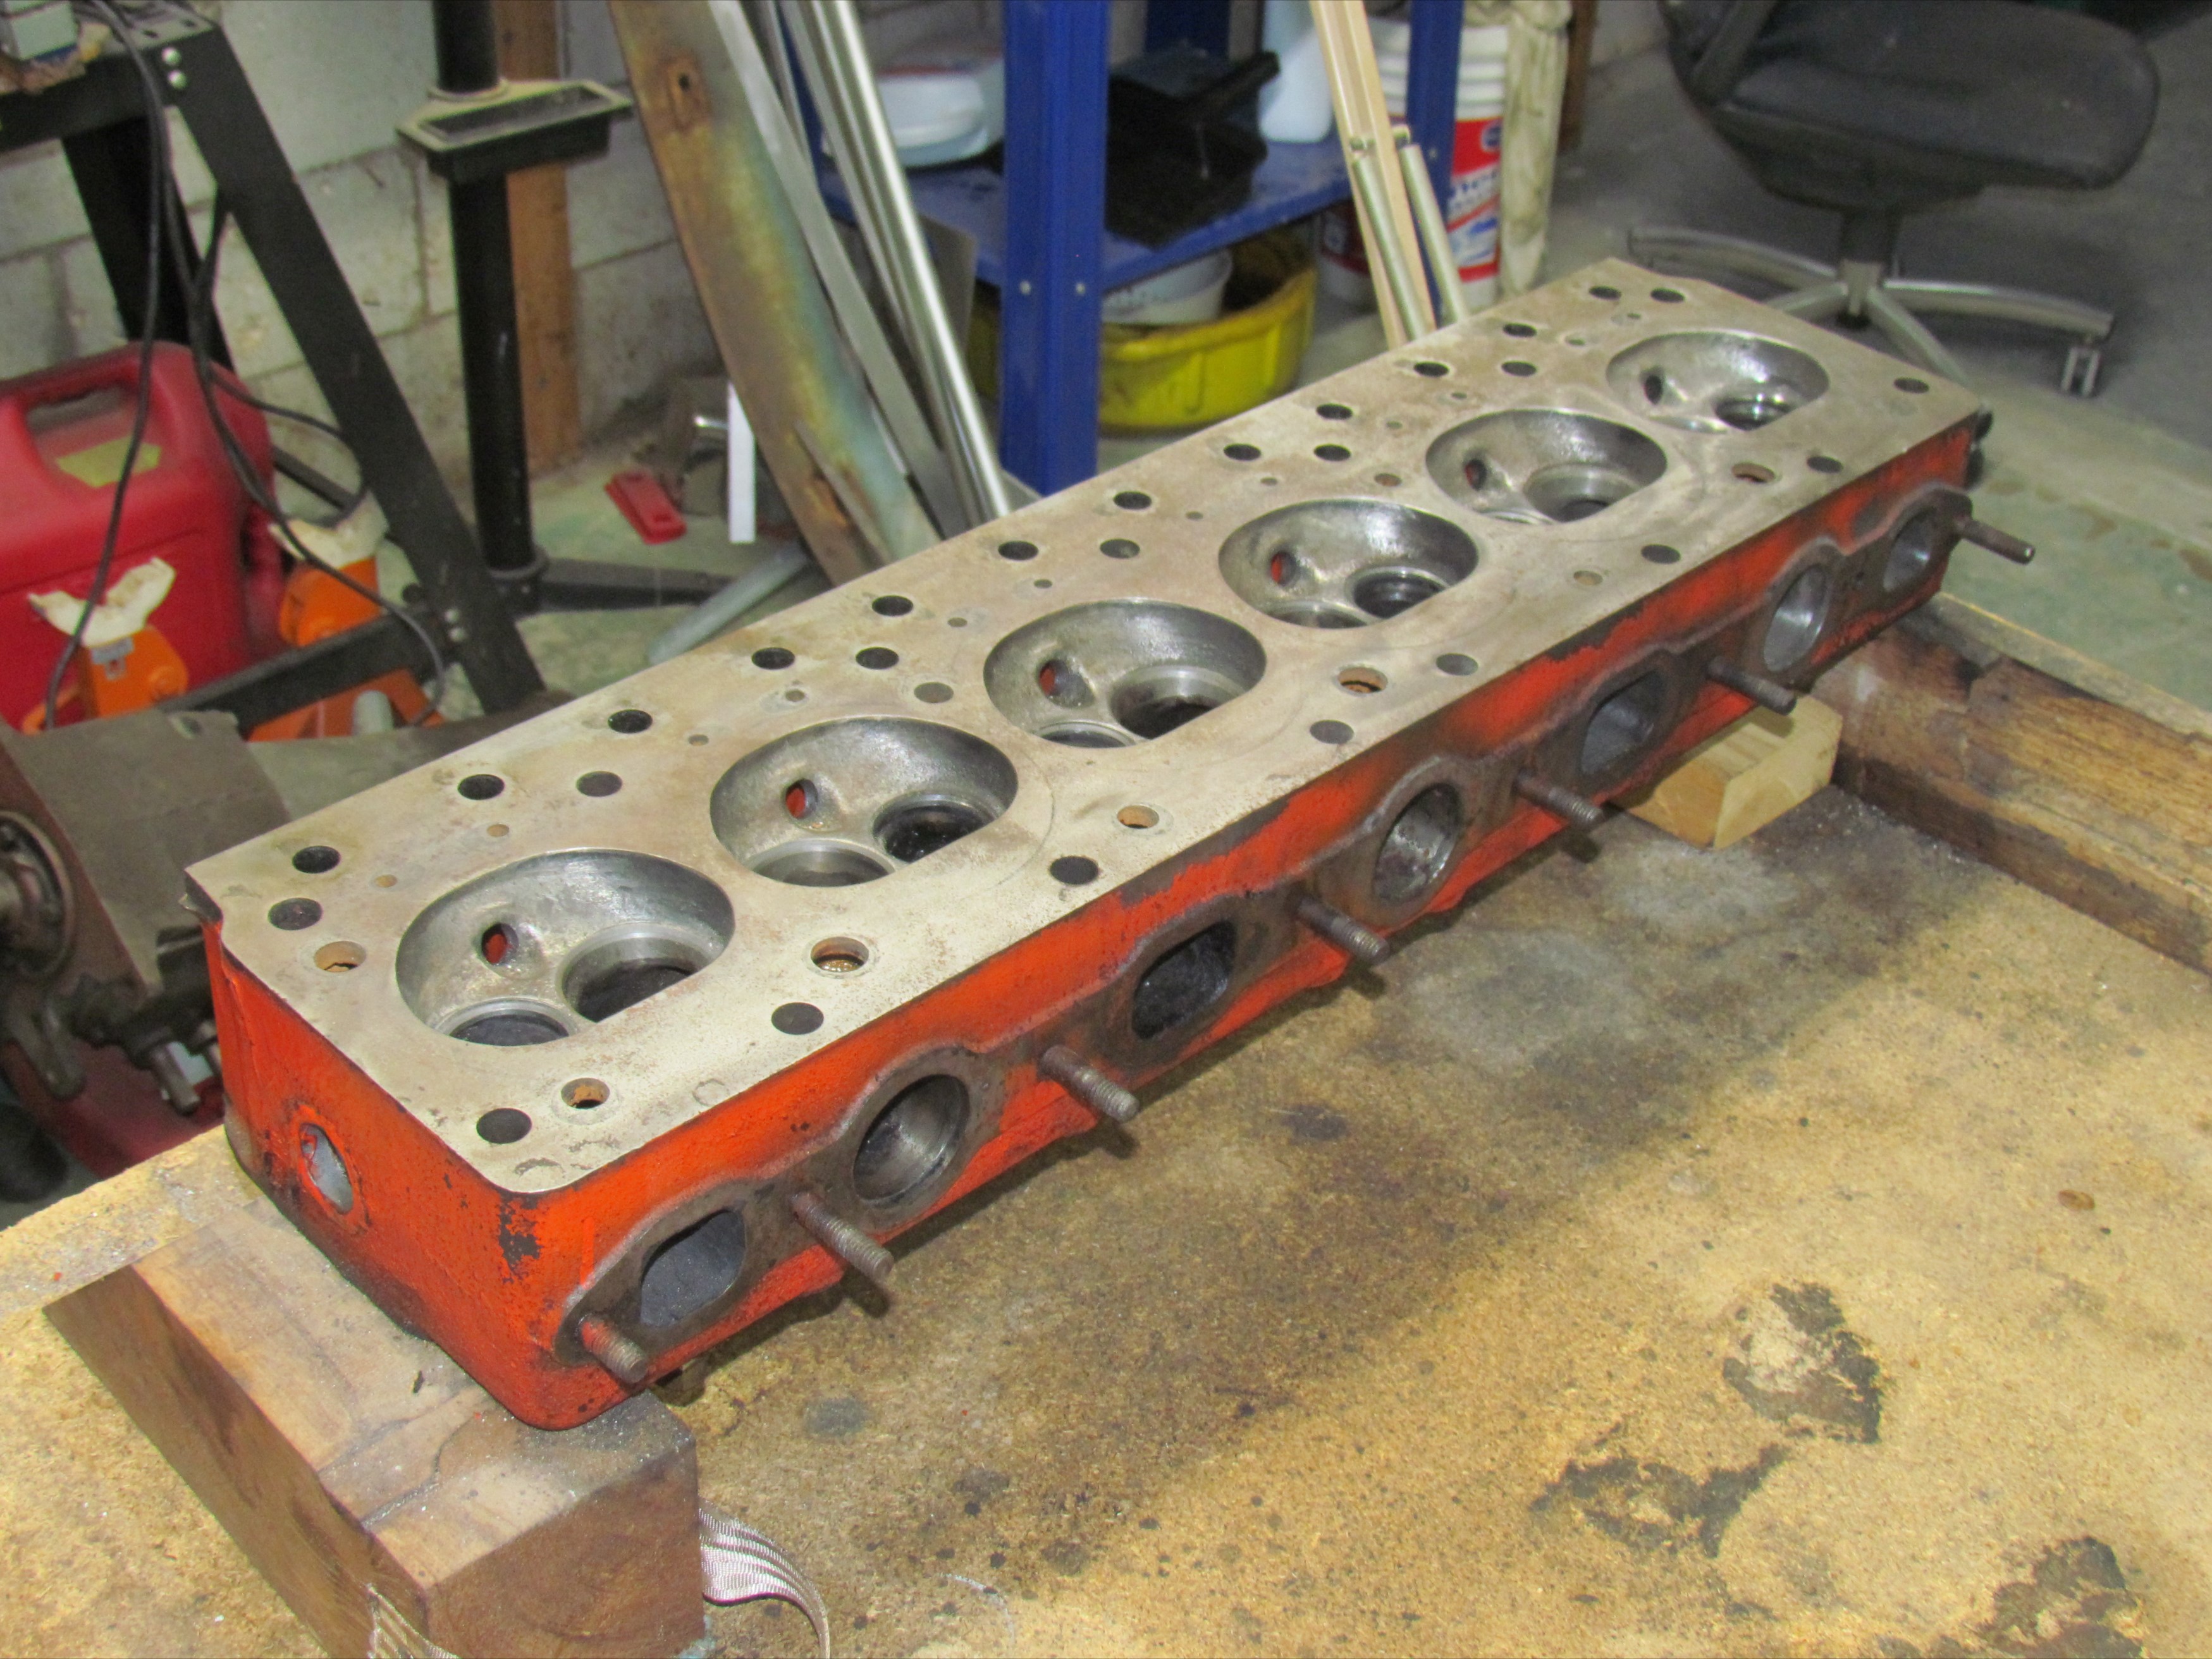
15th 2019
Waiting for some fittings to arrive to finish up the disk brakes. It's
time to clean up the work area and get back to another half-finished
task. The Jimmy 302 head is next on my list. I moved the workbench over
under the lights and cleared the deck. I was cleaning ports with Oil
Eater degreaser and Scotts Towels when I left off over a year ago.
Pondering my approach to this task was assisted by Florida Beer
Company's Swamp Ape Double India Pale Ale.
November
15th 2019
Waiting for some fittings to arrive to finish up the disk brakes. It's
time to clean up the work area and get back to another half-finished
task. The Jimmy 302 head is next on my list. I moved the workbench over
under the lights and cleared the deck. I was cleaning ports with Oil
Eater degreaser and Scotts Towels when I left off over a year ago.
Pondering my approach to this task was assisted by Florida Beer
Company's Swamp Ape Double India Pale Ale.
 November
19th 2019
When I assembled the rotor on the passenger side earlier in the year, I
packed the wheel bearings, installed the bearing seal and installed the
rotor.
The rotor turned with more resistance than I was happy with. I didn't
take it apart again. I suspected a tight bearing seal. To test that
theory. I put the driver side rotor on without packing the bearings or
installing the seal. It spins freely. Good. Packed the bearings and
installed the bearing seal. Ran some emery cloth over the bearing
seal surface and added a drop of oil and installed the rotor. Still
spins
with resistance but much better than the
passenger side.
November
19th 2019
When I assembled the rotor on the passenger side earlier in the year, I
packed the wheel bearings, installed the bearing seal and installed the
rotor.
The rotor turned with more resistance than I was happy with. I didn't
take it apart again. I suspected a tight bearing seal. To test that
theory. I put the driver side rotor on without packing the bearings or
installing the seal. It spins freely. Good. Packed the bearings and
installed the bearing seal. Ran some emery cloth over the bearing
seal surface and added a drop of oil and installed the rotor. Still
spins
with resistance but much better than the
passenger side.
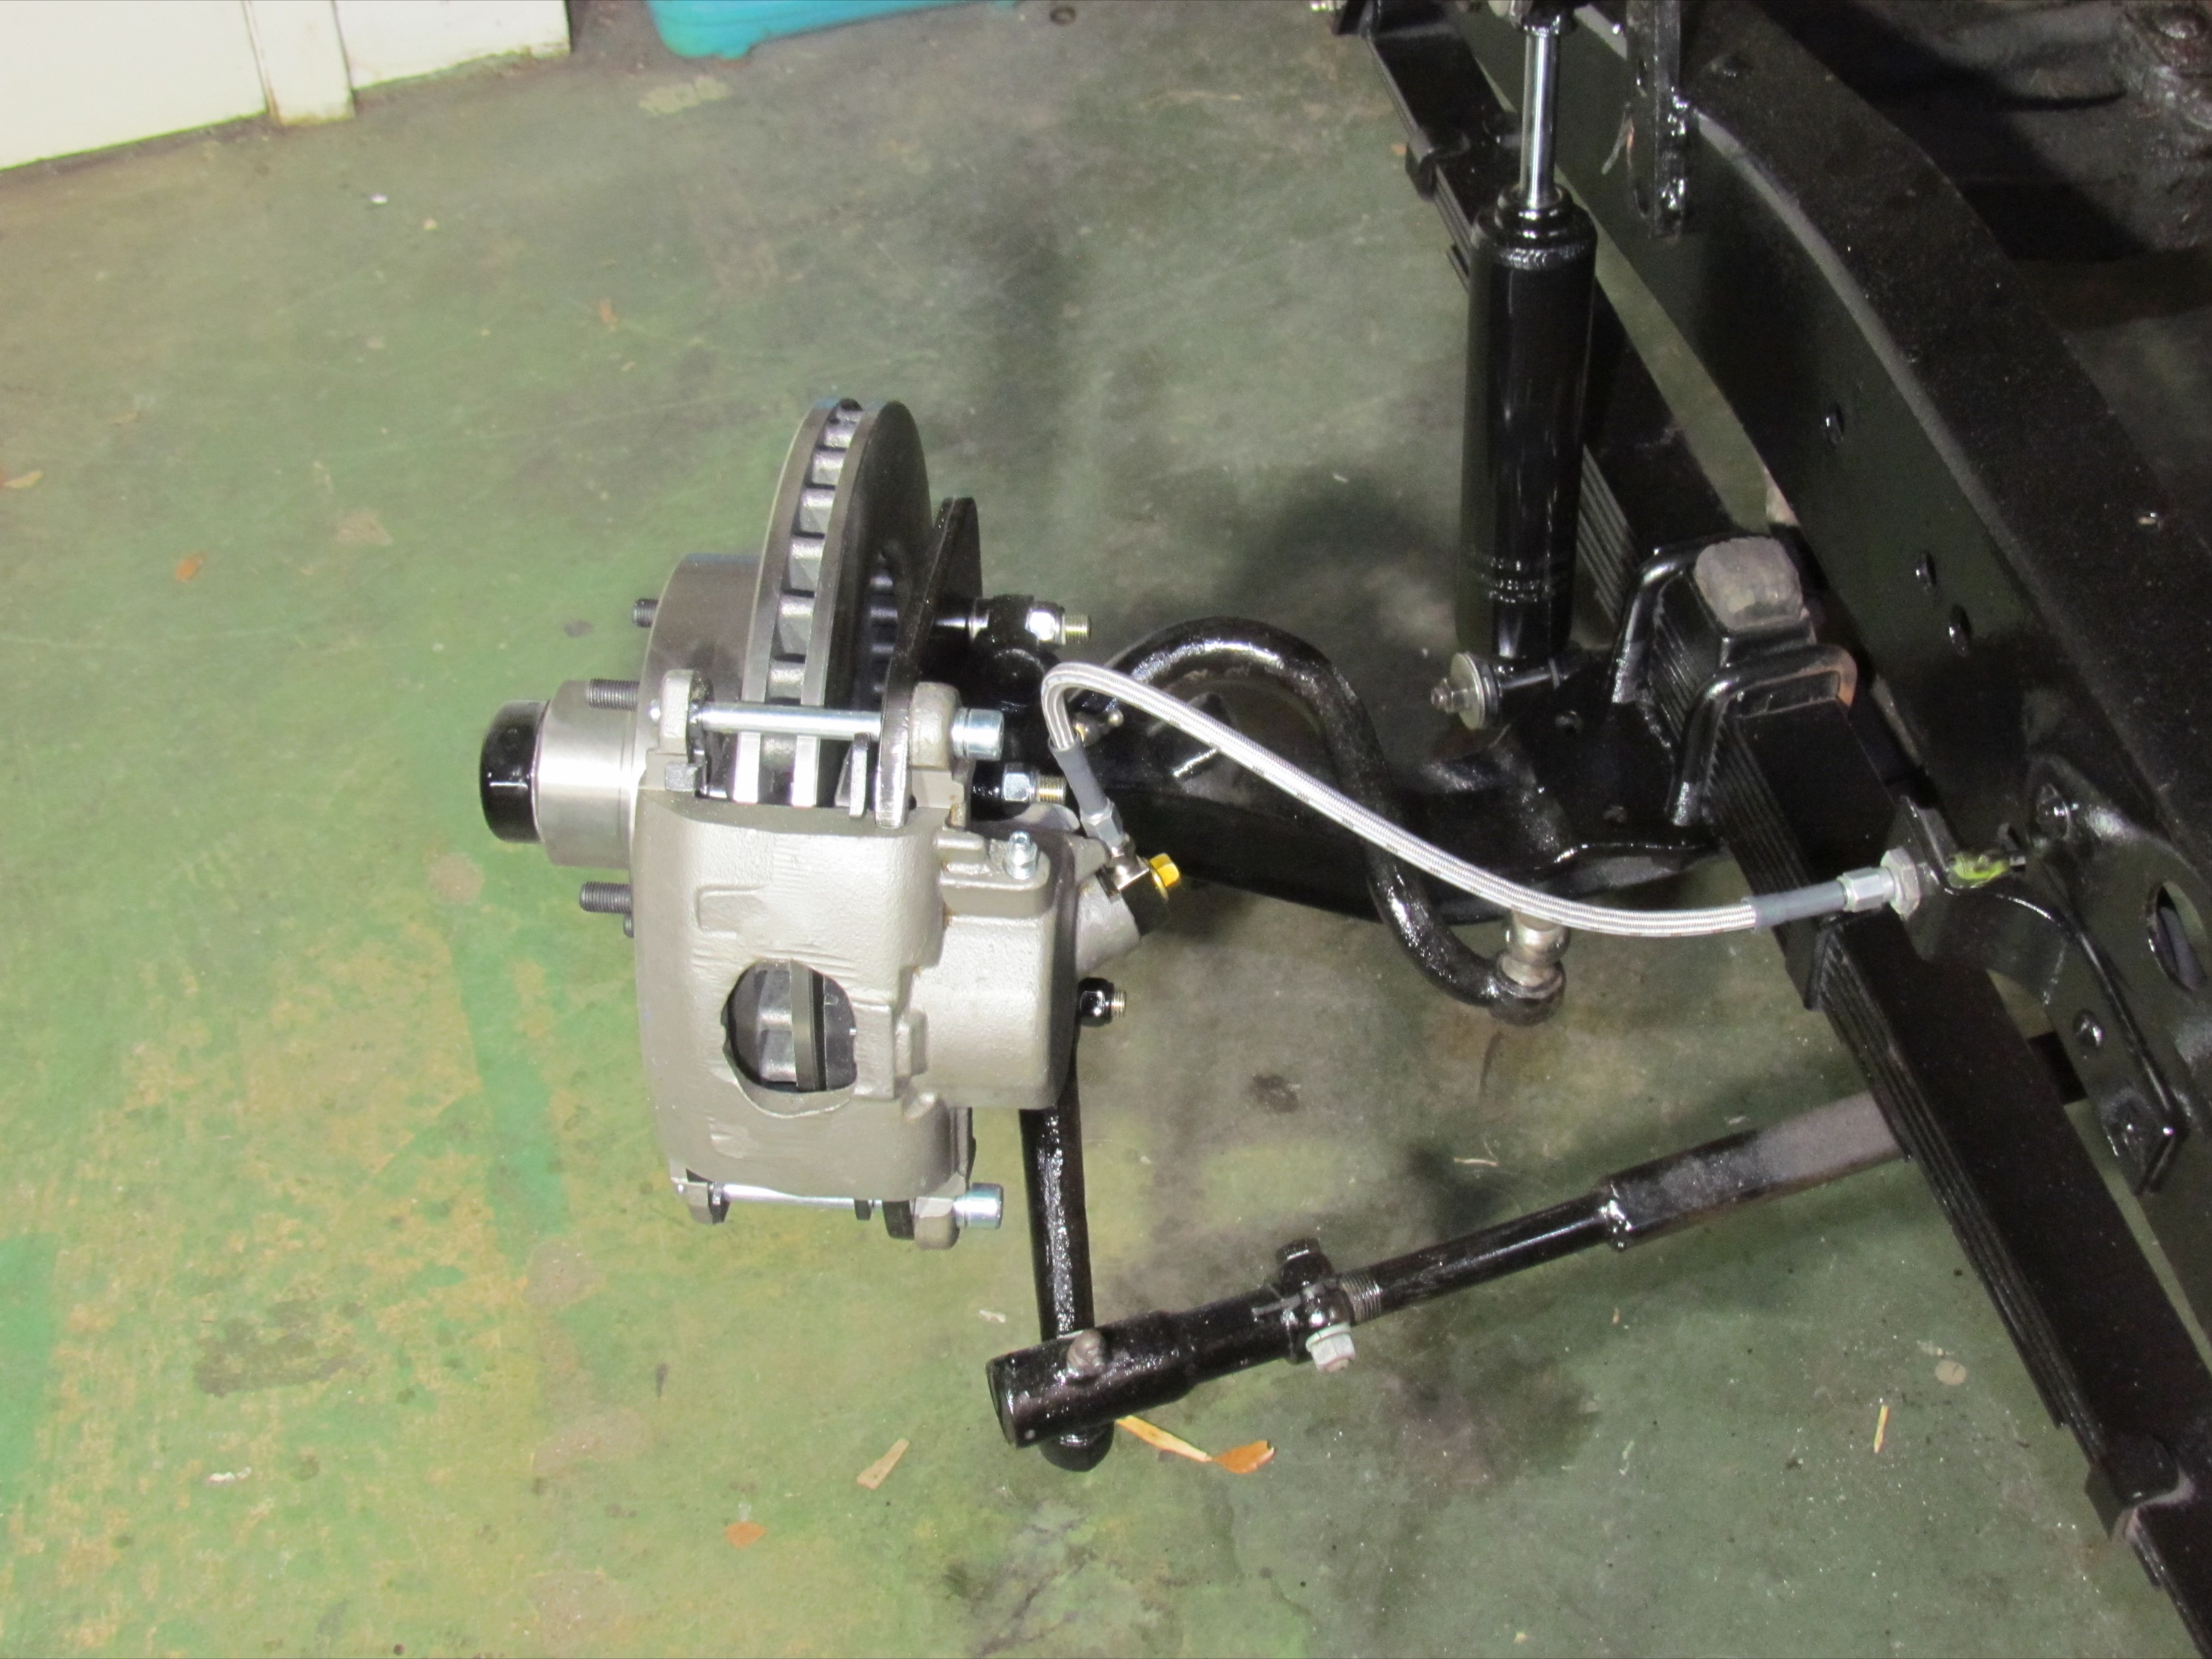
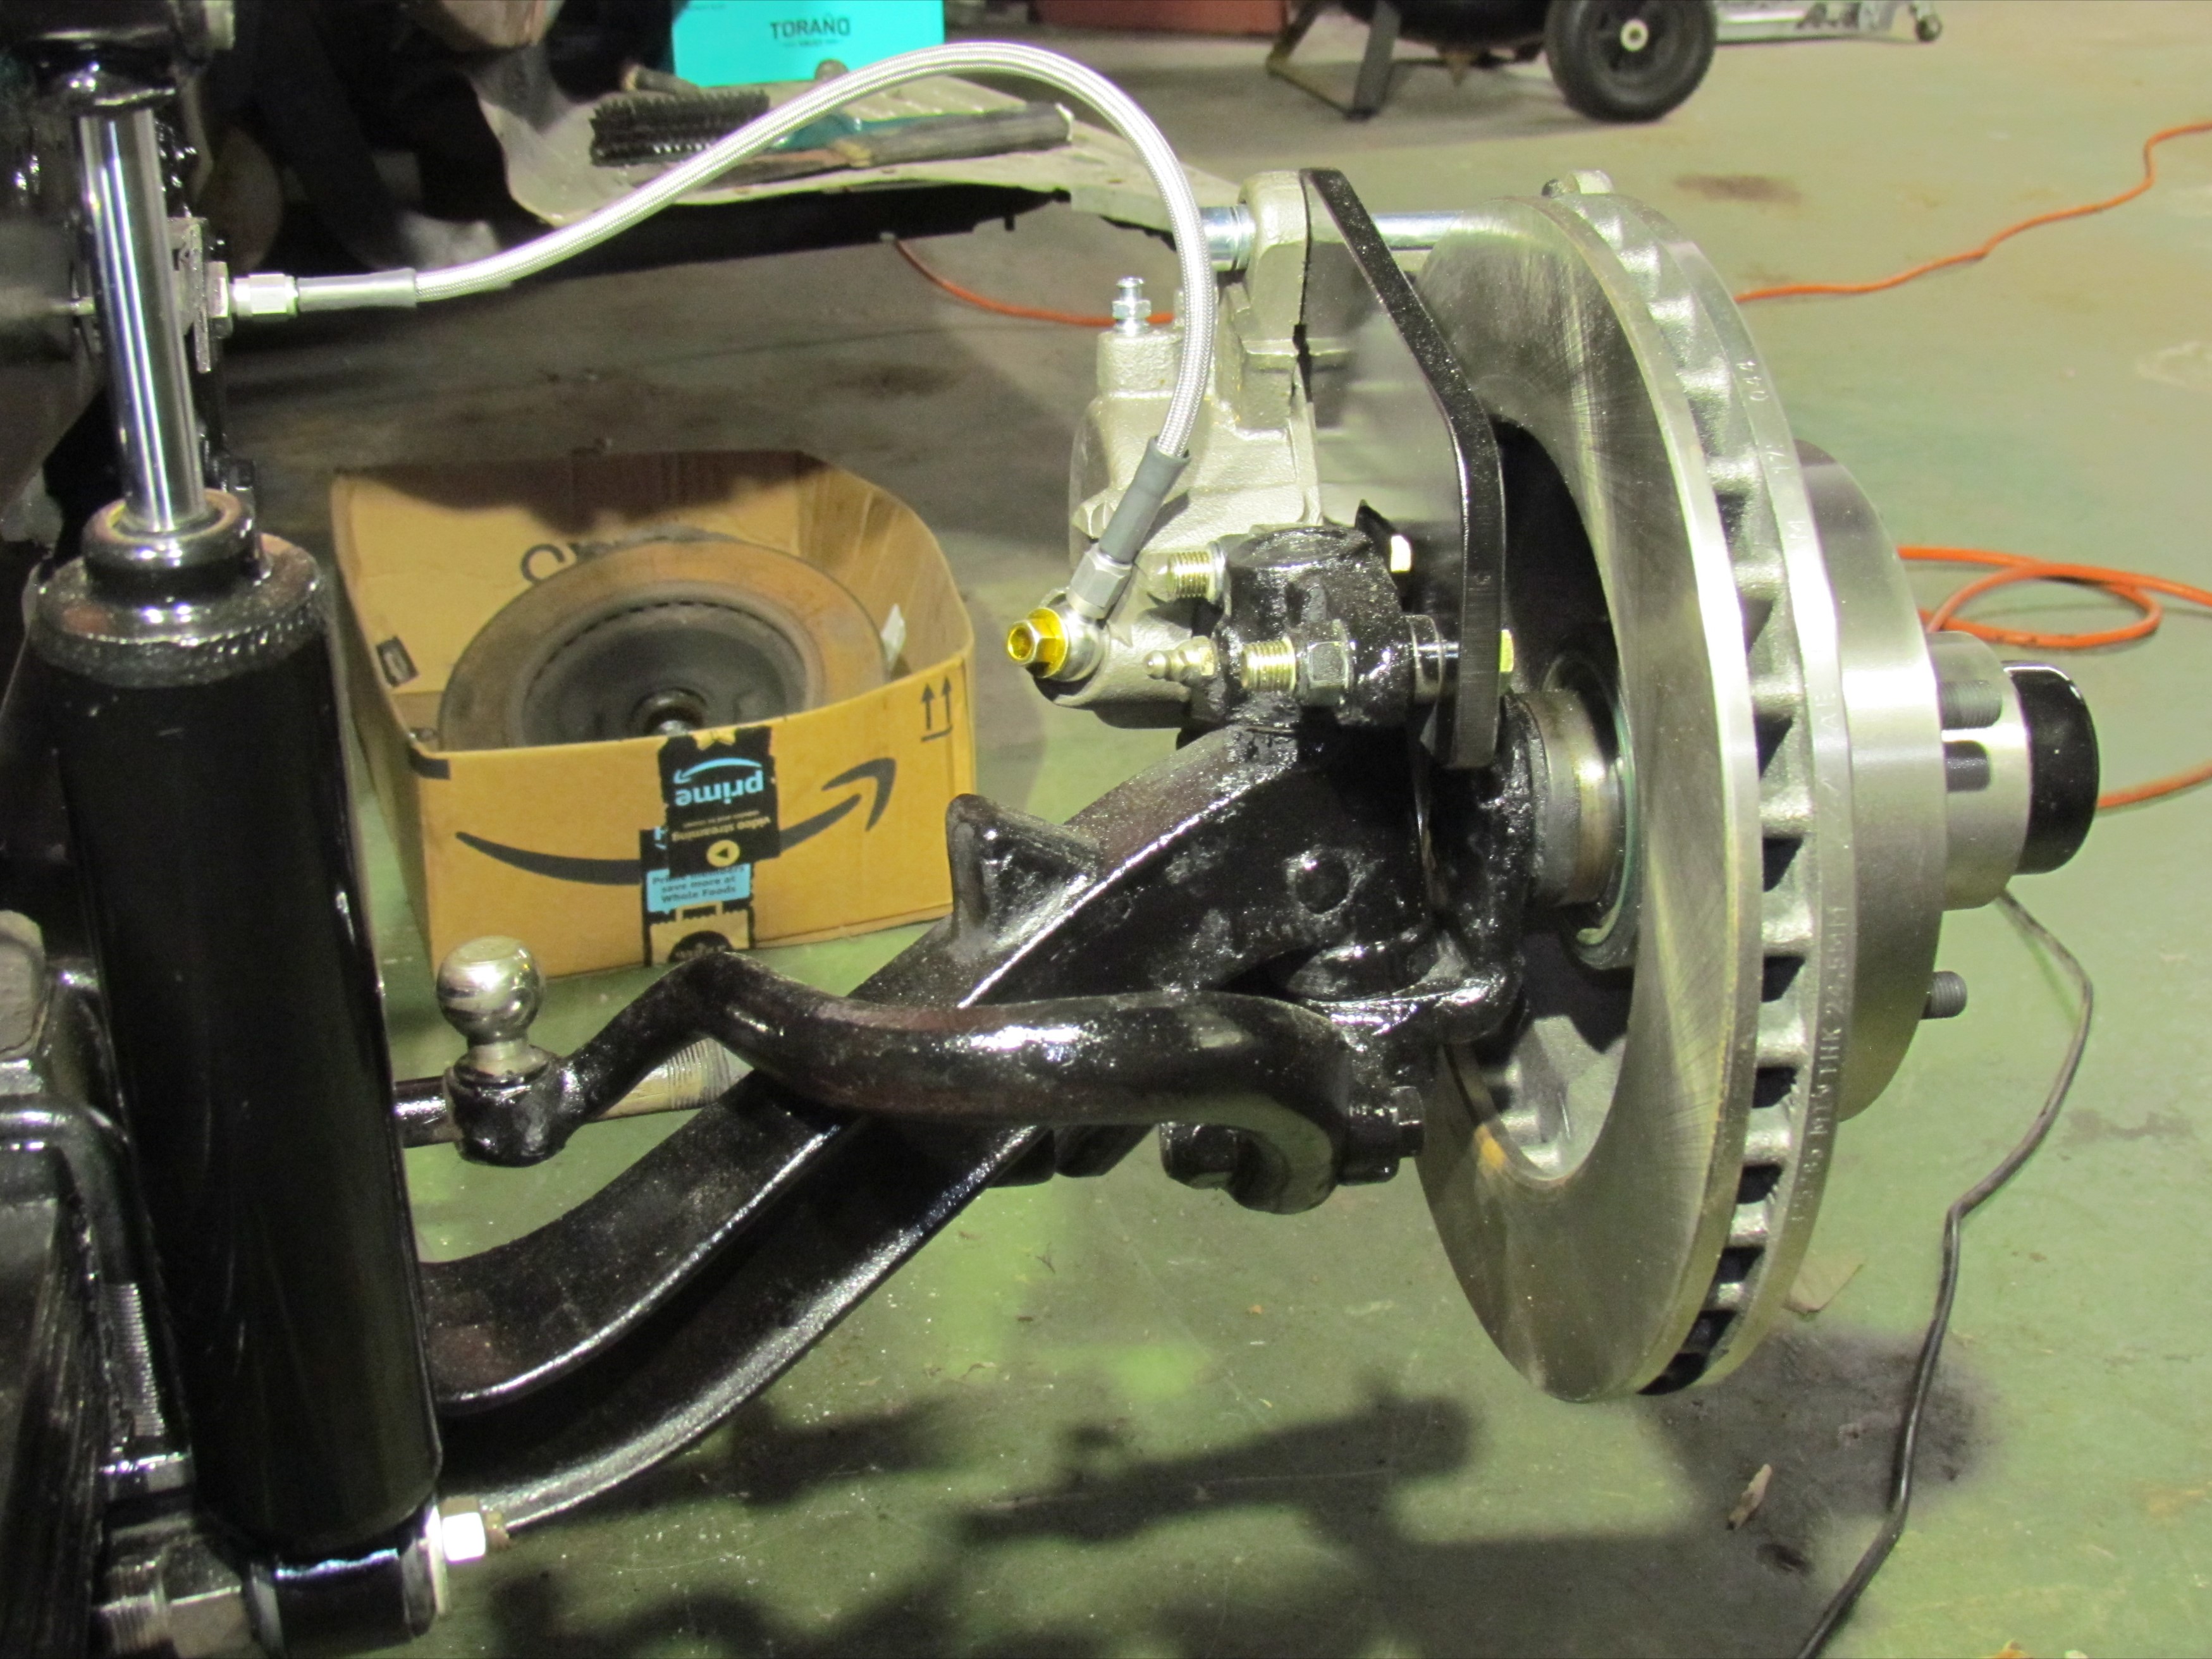
Camaro spindle dust caps arrived and proved too shallow to be usable. Enuf of this fun. I cannibalized BillyBob's dust caps. Some spifin' up with paint and we will be good to go.
I couldn't locate the flex line adapter fittings I wanted until I discovered that the Camaro calipers used banjo inlet fittings. I found a performance -3 thread banjo fitting and got stock banjo bolts elsewhere.
Installed the caliper on the bracket with much of the same profanity I employed on the other side. Mocked in the flex lines. I would like to put paid to this task but . . . som ting wong! Outside pads drag slightly (both wheels) and position of the rotor on the spindle varies more than an eighth inch from passenger side to driver side.
The observant will notice the banjo is not seated. The banjo
is rectangular and the caliper has a semi-circular shoulder around the
inlet. Yup, square peg, round hole situation.
Damnation! I'll have to go into deep ponder mode on this issue
until the sting of defeat fades away some. Back to the 302 head for now.
 November
26th 2019
Removed the manifold studs from the head and put them aside with the
head bolts. Added Dremel Motor Tool with flexible extension and
abrasive buffing and wire cup wheels to the Oil Eater and Scott Towels
to continue the tedjus work of cleaning the ports.
November
26th 2019
Removed the manifold studs from the head and put them aside with the
head bolts. Added Dremel Motor Tool with flexible extension and
abrasive buffing and wire cup wheels to the Oil Eater and Scott Towels
to continue the tedjus work of cleaning the ports.
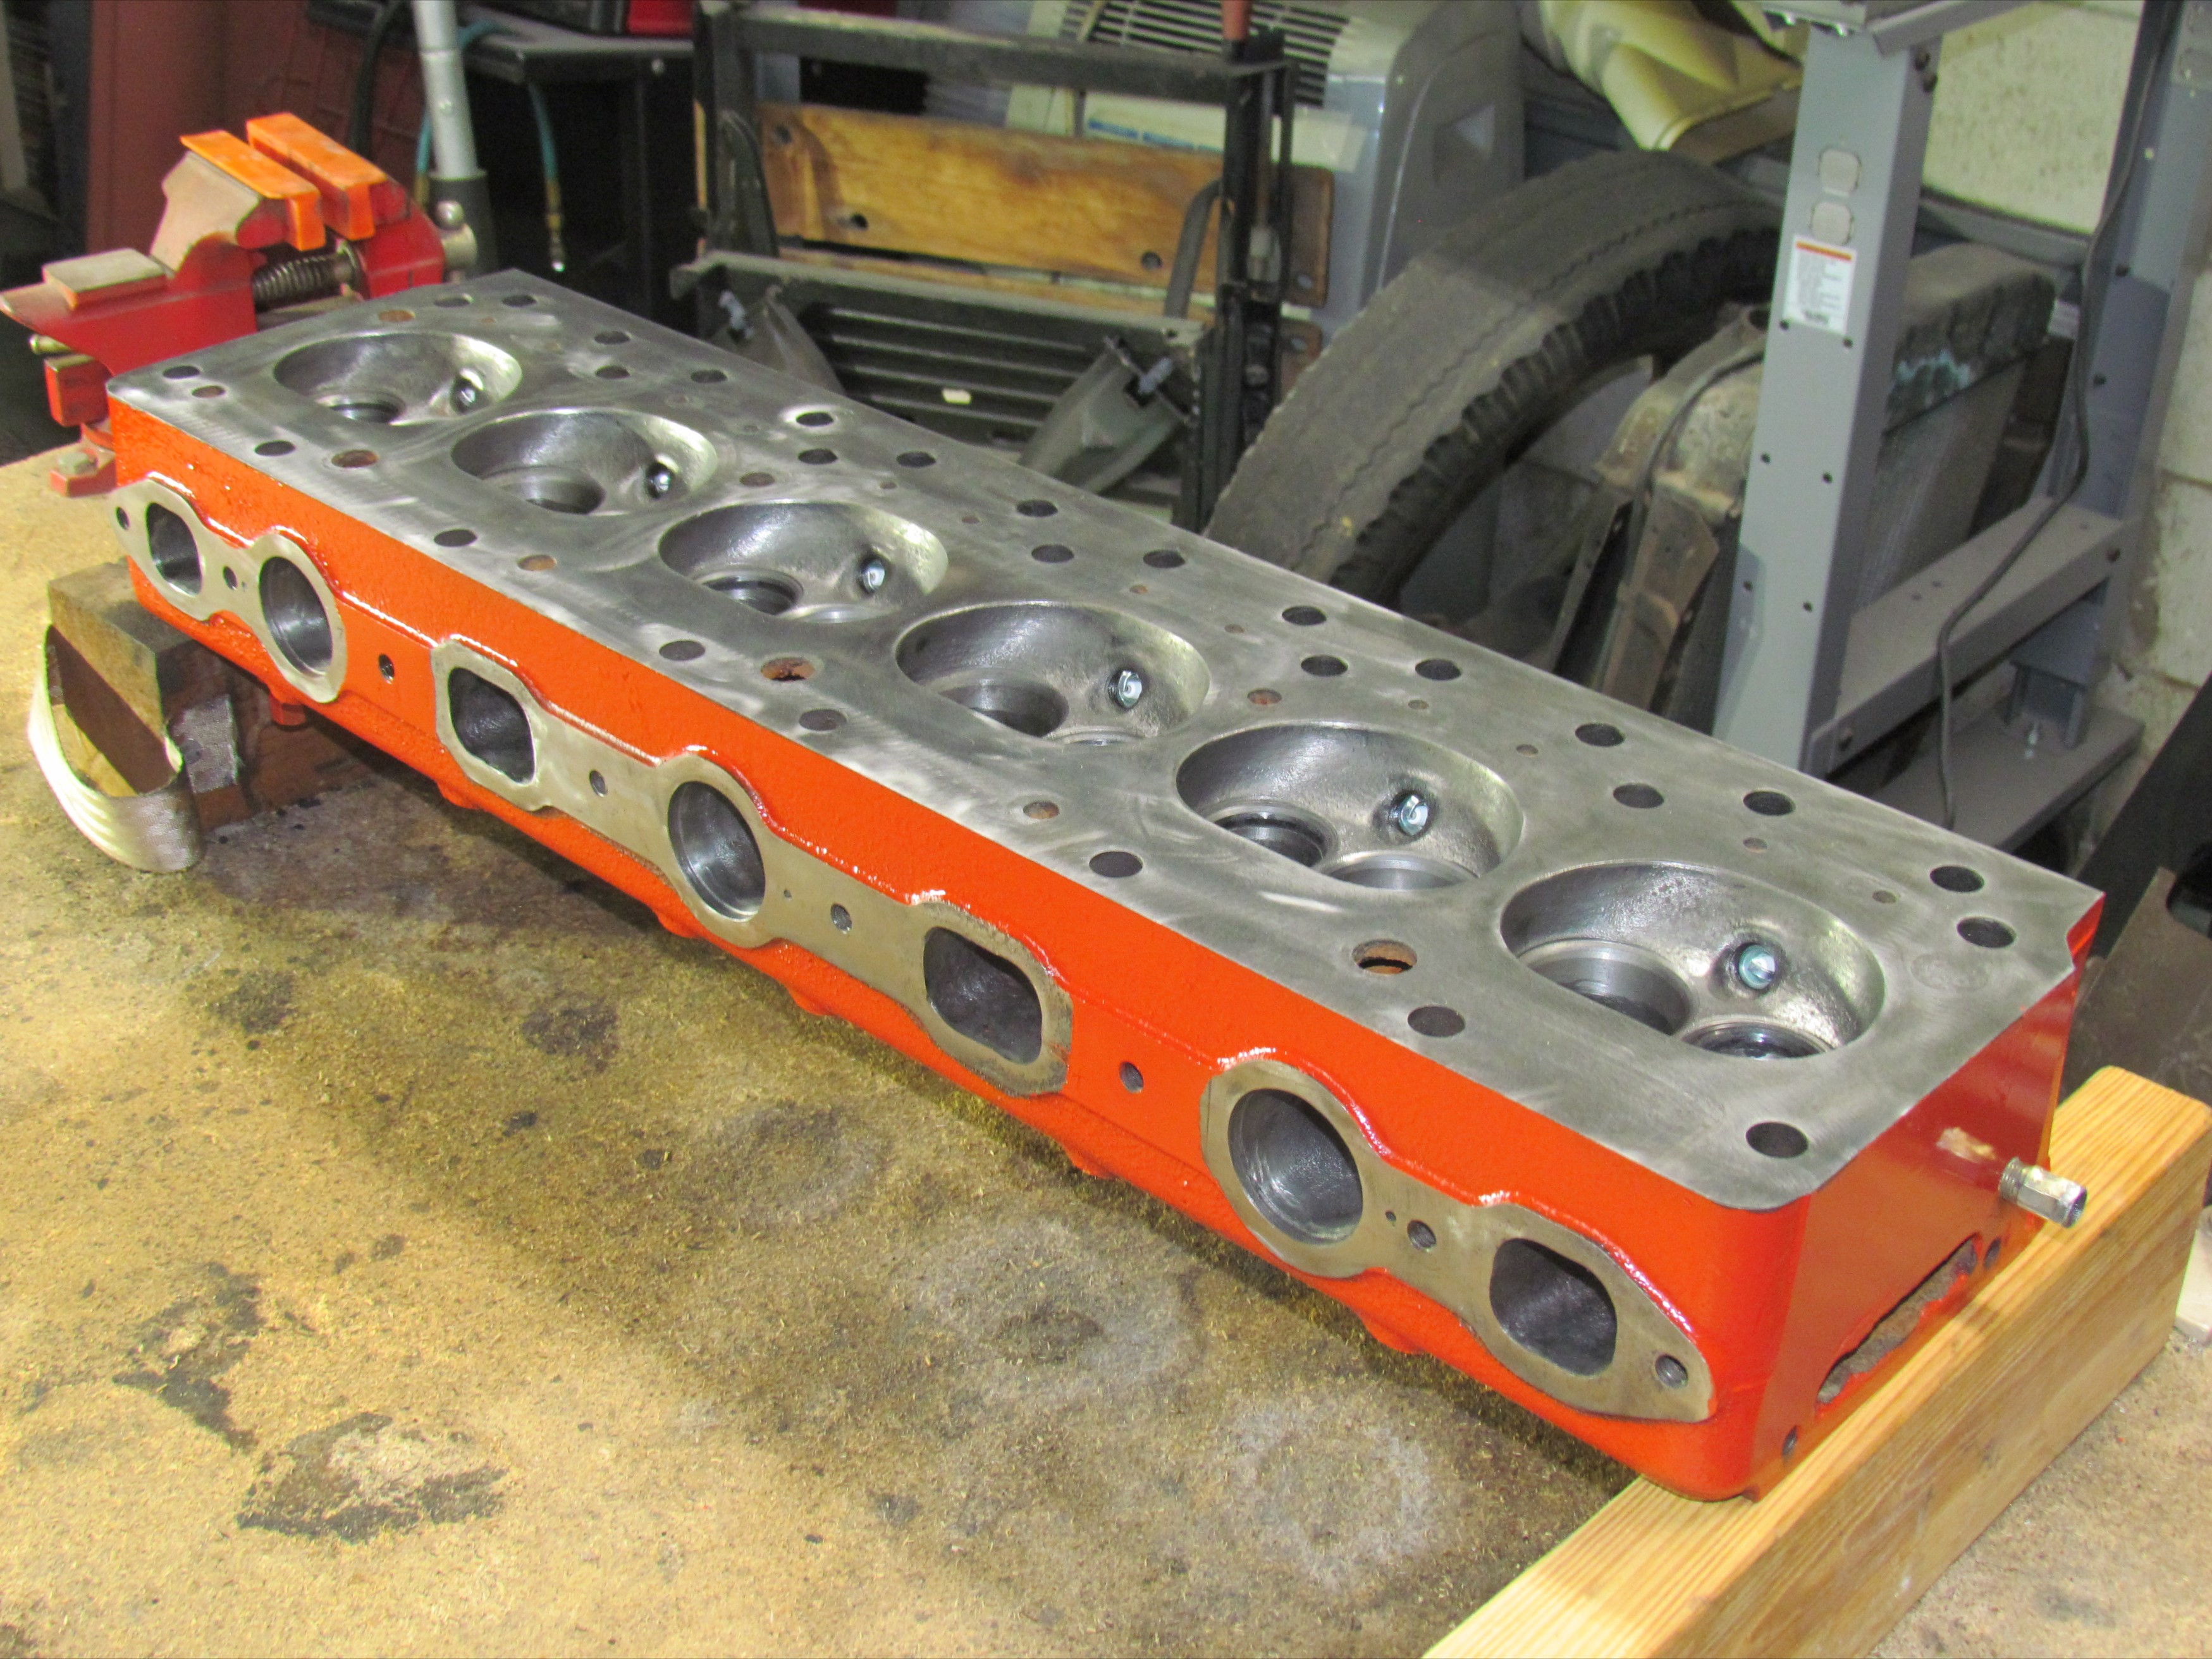
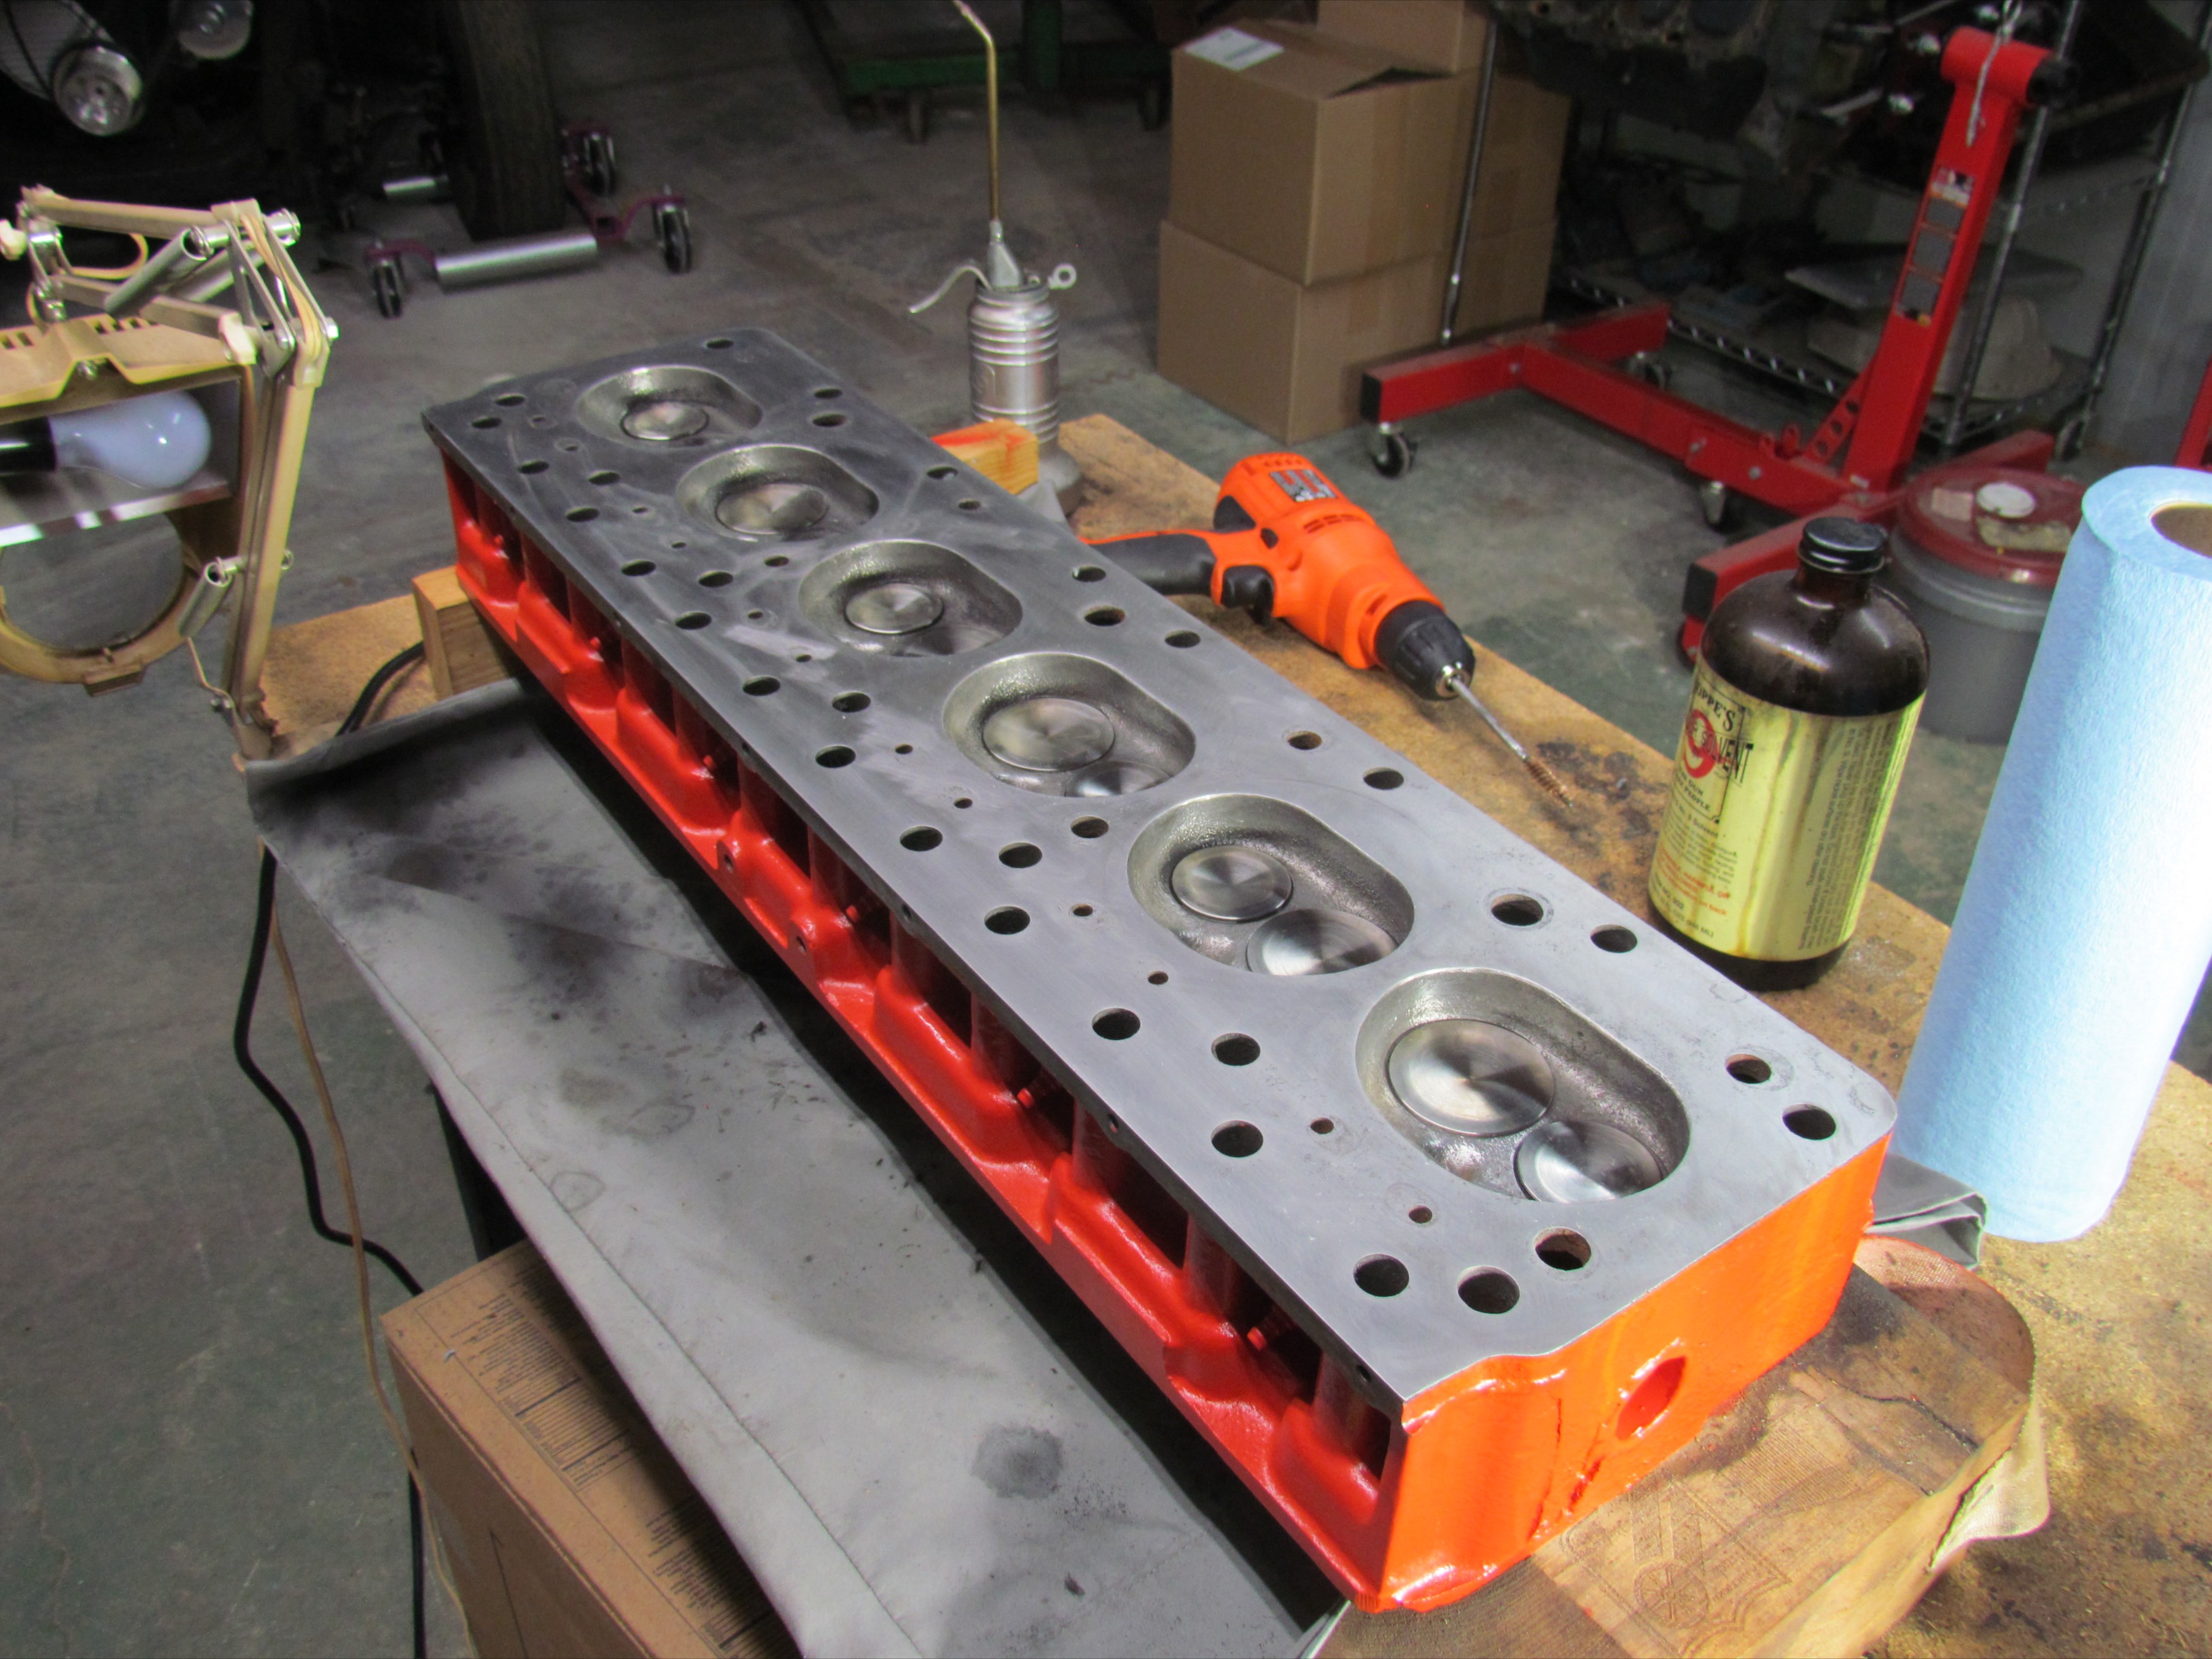
After a couple of ports, I switched from Oil Eater to Extreme Simple Green Aircraft and Precision cleaner. It appears to be more effective at dissolving the baked on carbon in the ports.
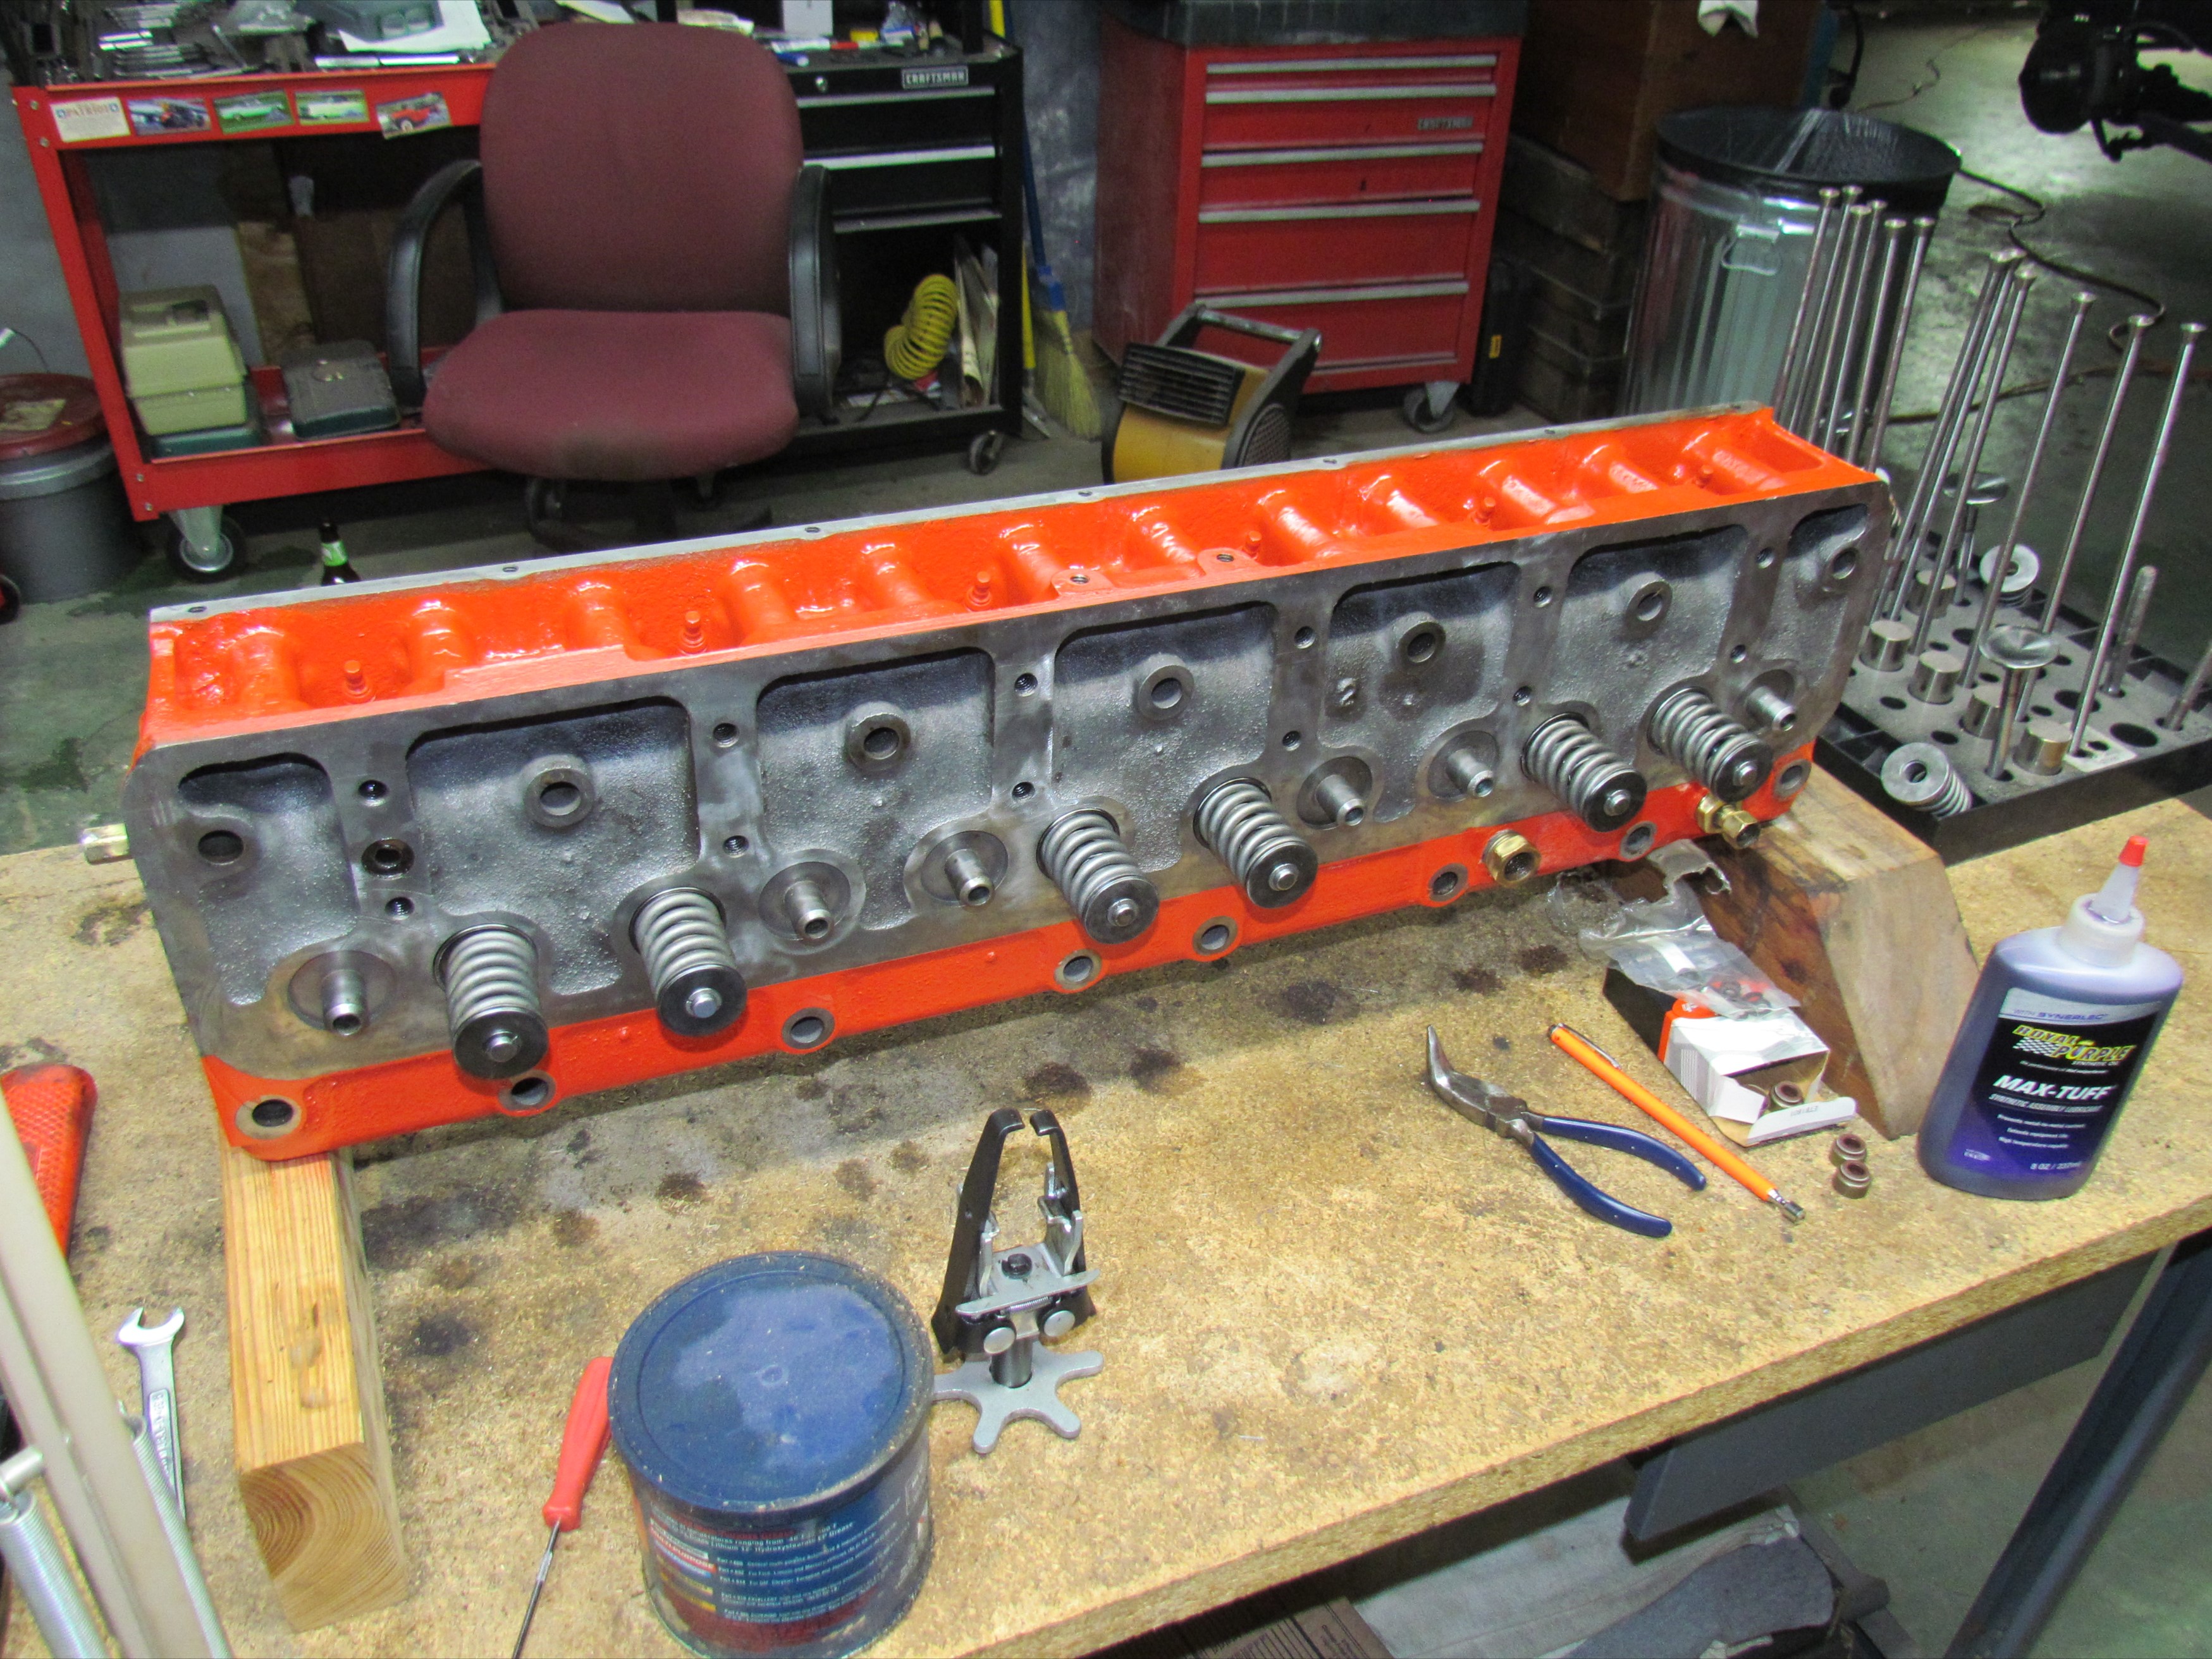
I put north of fifteen hours into cleaning the ports until I got close enuf for gov'ment work. Another four hours cleaning the combustion chambers with wire cup in an air-powered angle grinder and cleaning the machine surfaces with Scotchbrite "cookies" in the same angle grinder made me happy.
The painted surfaces were cleaned with Scotchbrite buffs in
the Dremel tool. The whole thing got a dose of PRE Paint Prep and a
wipe down before being masked off. Another treatment of PRE Paint Prep
to the areas to receive paint and the head was given two coats of
Duplicolor "Chevy Orange" engine paint. Bob's your uncle.
 November
29th 2019
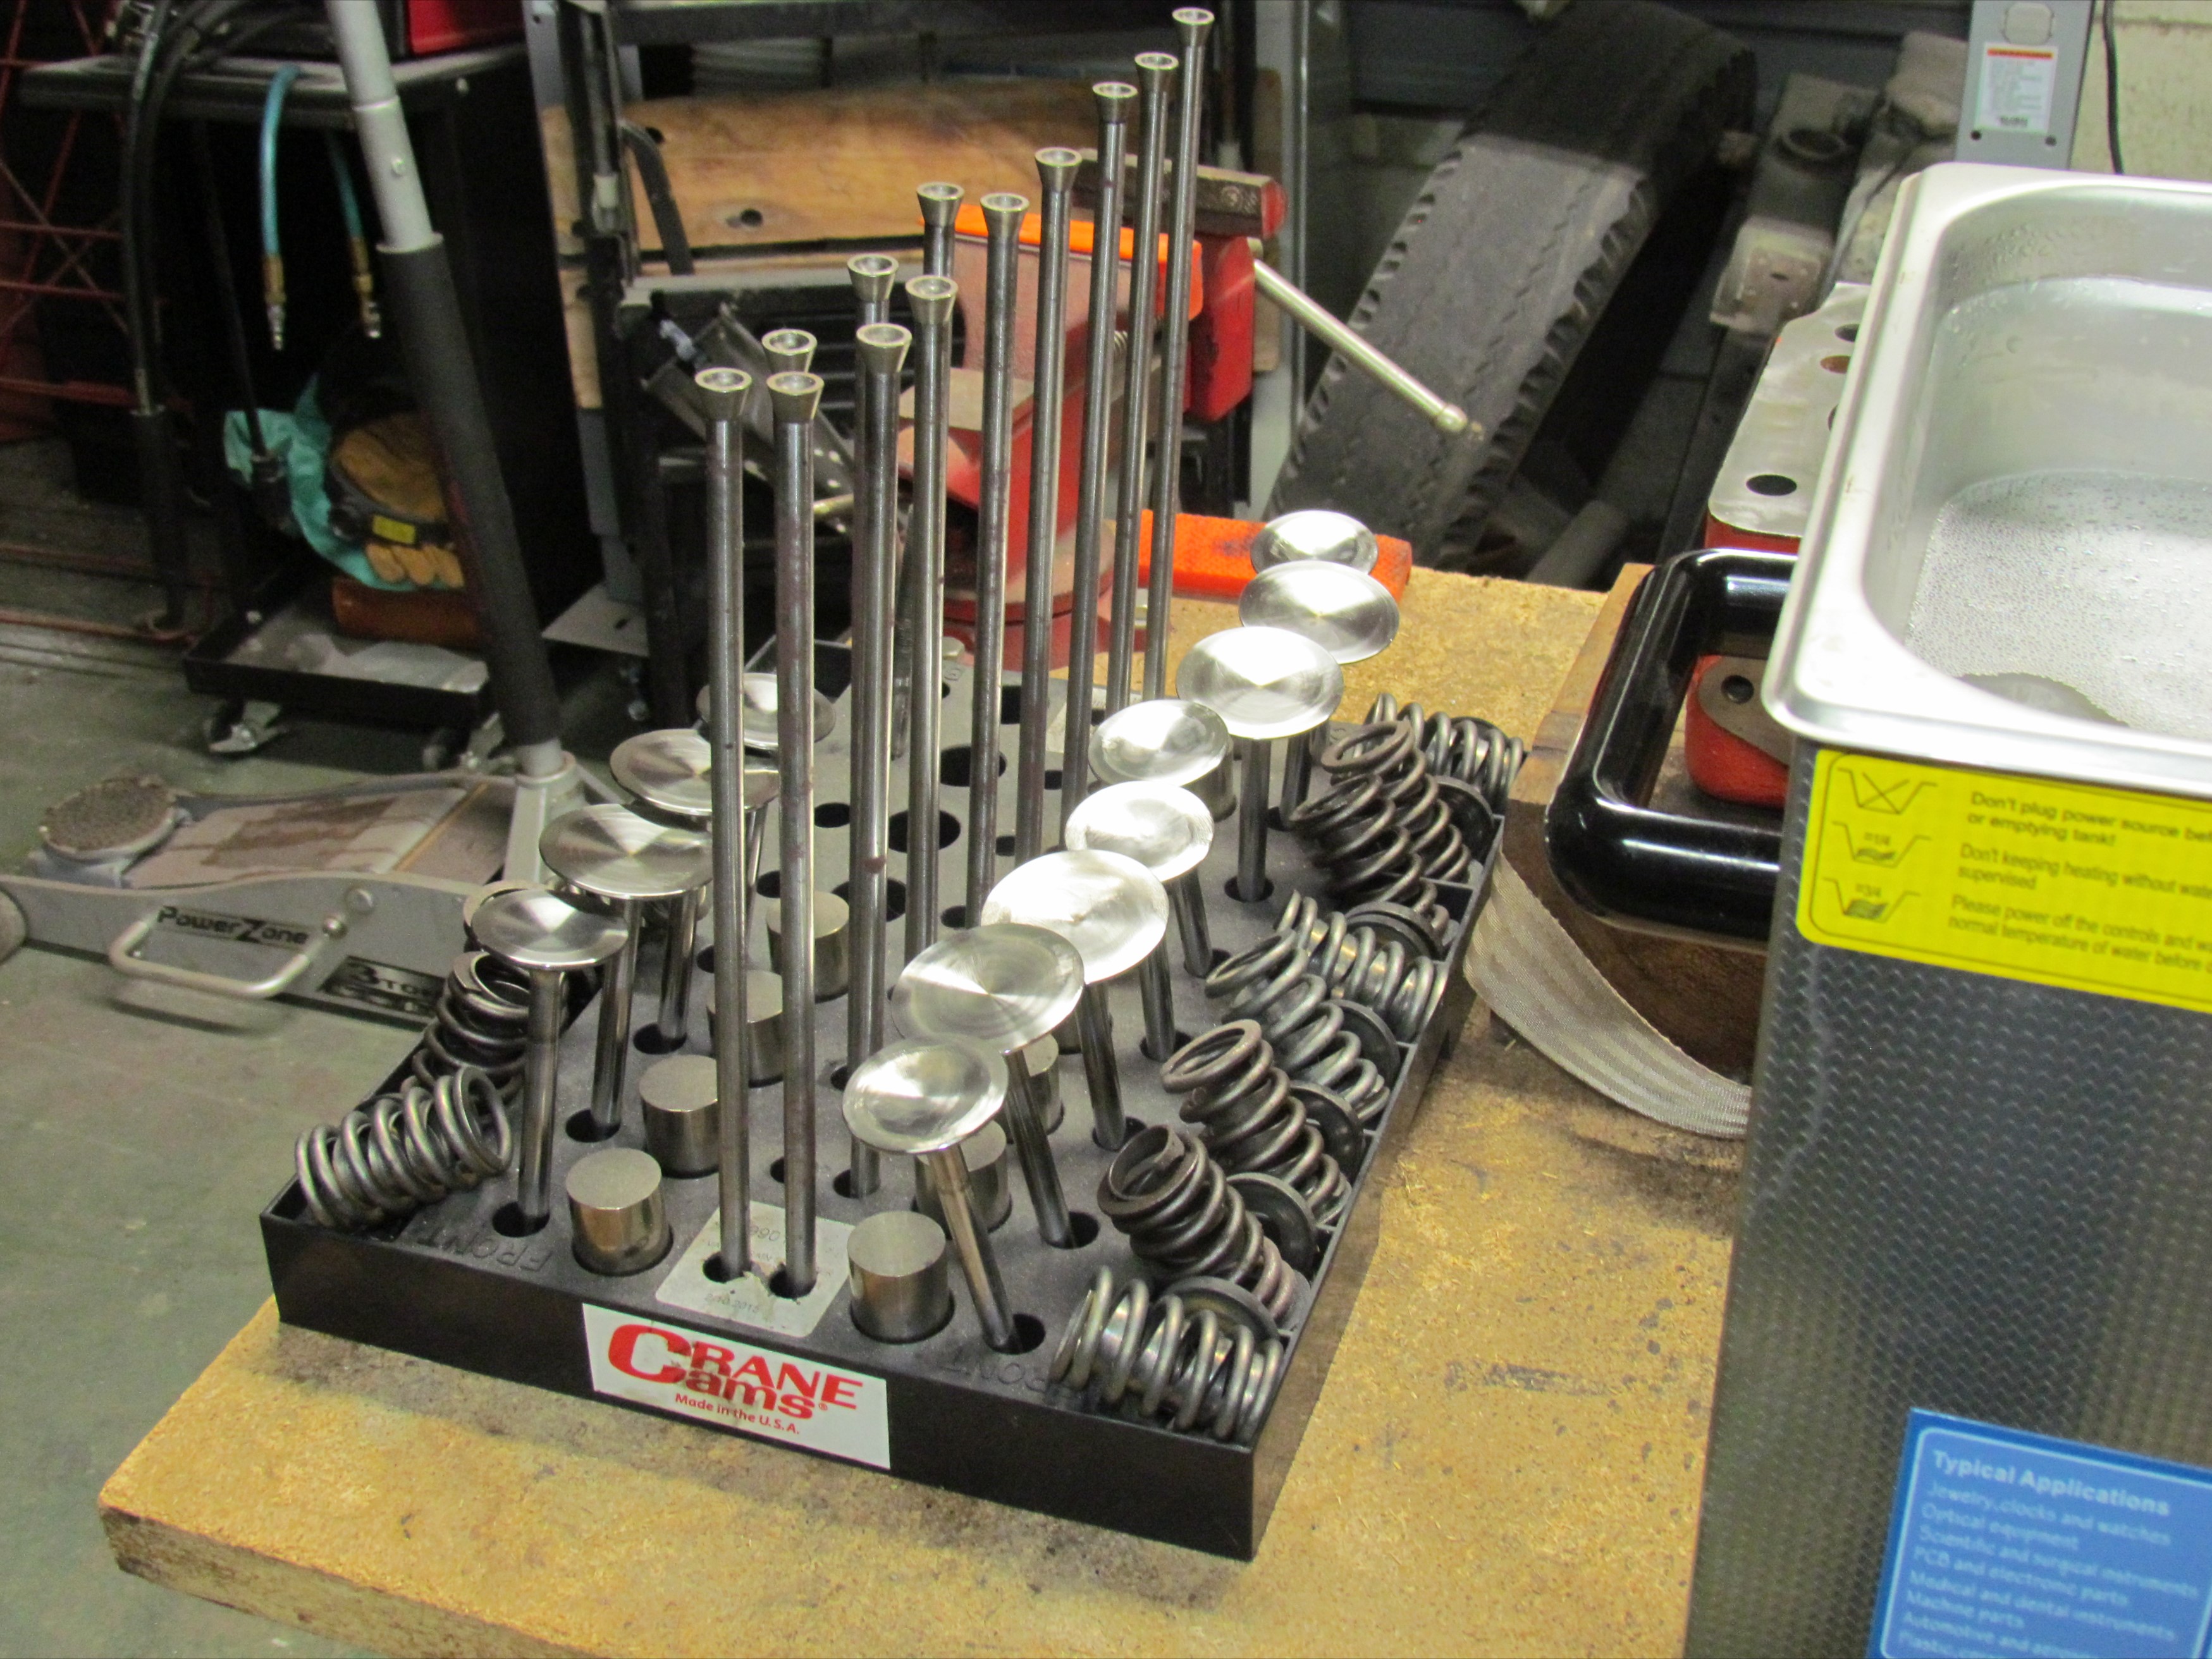
The ports and combustion chambers being fairly clean, it's time to get
back to lapping the valves and getting them back in the head. The valve
assemblies were cleaned once but that was 2016 and they are dirty again
so that is the first task. Gonna try some different methods this time.
Beer of the day for these deep ponder mode ruminations is Erie Brewing
Company's Railbender Scottish Style Ale.
November
29th 2019
The ports and combustion chambers being fairly clean, it's time to get
back to lapping the valves and getting them back in the head. The valve
assemblies were cleaned once but that was 2016 and they are dirty again
so that is the first task. Gonna try some different methods this time.
Beer of the day for these deep ponder mode ruminations is Erie Brewing
Company's Railbender Scottish Style Ale.
 December
2nd 2019
When the valves were cleaned three years ago, they were put in a
vibratory tumbler with water, plastic pyramid cutting media and a pinch
of metal wash. Came out fairly clean with the exception of the carbon
on the back of the exhaust valve heads. The carbon was still there, now
polished to a nice satin black sheen.
December
2nd 2019
When the valves were cleaned three years ago, they were put in a
vibratory tumbler with water, plastic pyramid cutting media and a pinch
of metal wash. Came out fairly clean with the exception of the carbon
on the back of the exhaust valve heads. The carbon was still there, now
polished to a nice satin black sheen.
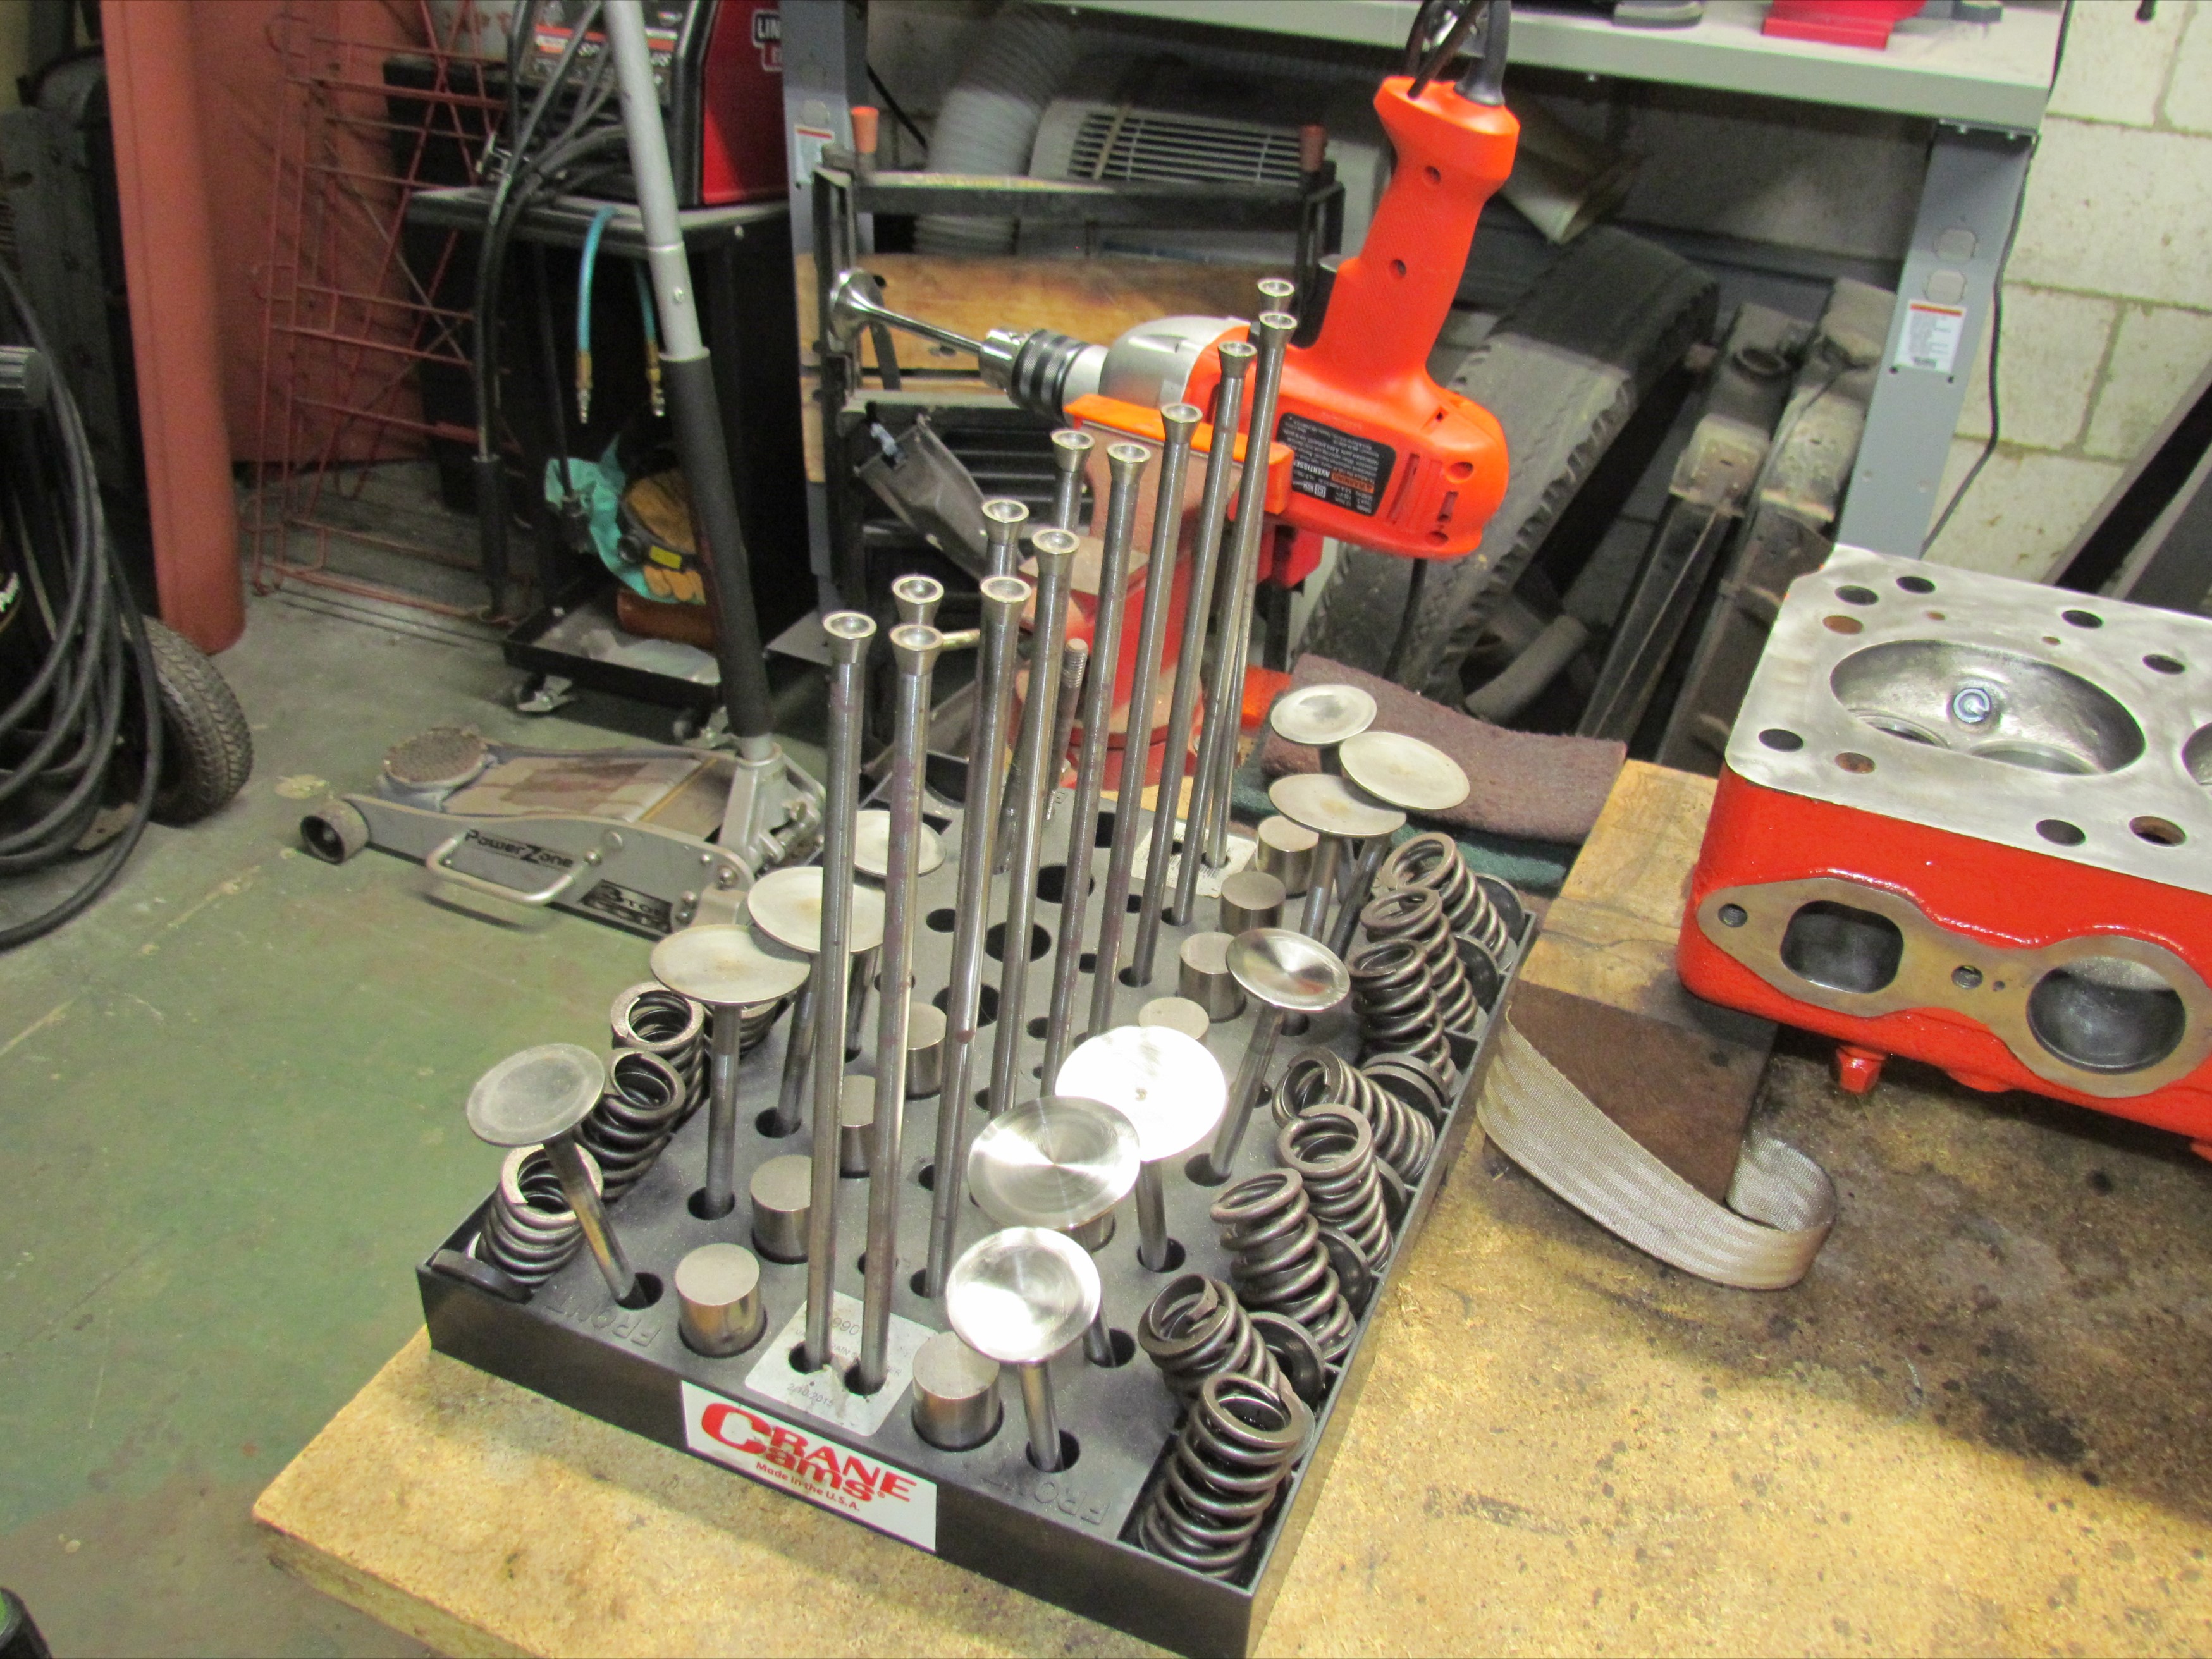
Original thoughts were to take off the carbon with the 8" wire wheel on my bench grinder but I had visions of the grinder ripping a valve out of my hands and flinging it across the shop or, worse yet, into my forehead. I took to the intarweb to pick up some Youtube master tech continuing education credits. I came back with a method I could modify to my use. Secured my 1/2" drill motor in the bench vice and chucked the first valve in it. Set it running and used green and red Scotchbrite Pads to clean and polish it. Took an amazingly short time before all twelve valves were clean.
When Truckedup (Tony Pascarella) built the engine, he had the
Jimmy head
machined for Chevy small block valves and these are Manley stainless
steel items. Next up is cleaning and checking the valve springs.
 December
3rd 2019
The valve springs were likewise cleaned three years ago in the
vibratory tumbler. This time, I dragged out the nine liter
heated ultrasonic cleaner to give it a try. These springs are Z-28
springs and that's about all I know about them. I'm pretty shure
they're all the same but, on the outside chance the exhaust springs are
different from the intake springs, I decided to do the exhaust
springs in the first batch and intake springs in the second.
December
3rd 2019
The valve springs were likewise cleaned three years ago in the
vibratory tumbler. This time, I dragged out the nine liter
heated ultrasonic cleaner to give it a try. These springs are Z-28
springs and that's about all I know about them. I'm pretty shure
they're all the same but, on the outside chance the exhaust springs are
different from the intake springs, I decided to do the exhaust
springs in the first batch and intake springs in the second.
The batches were run with a water and Pine-Sol solution for
sixty minutes at 70 degrees centigrade. The springs came out nicely
with an even gun metal finish. The base shim cups and top retainers,
not so much. Don't know what happened there. I cleaned them with the
small Scotchbrite buffs in the Dremel tool. Had to hold them tightly
with needlenose pliers during this operation.
 December
4th 2019
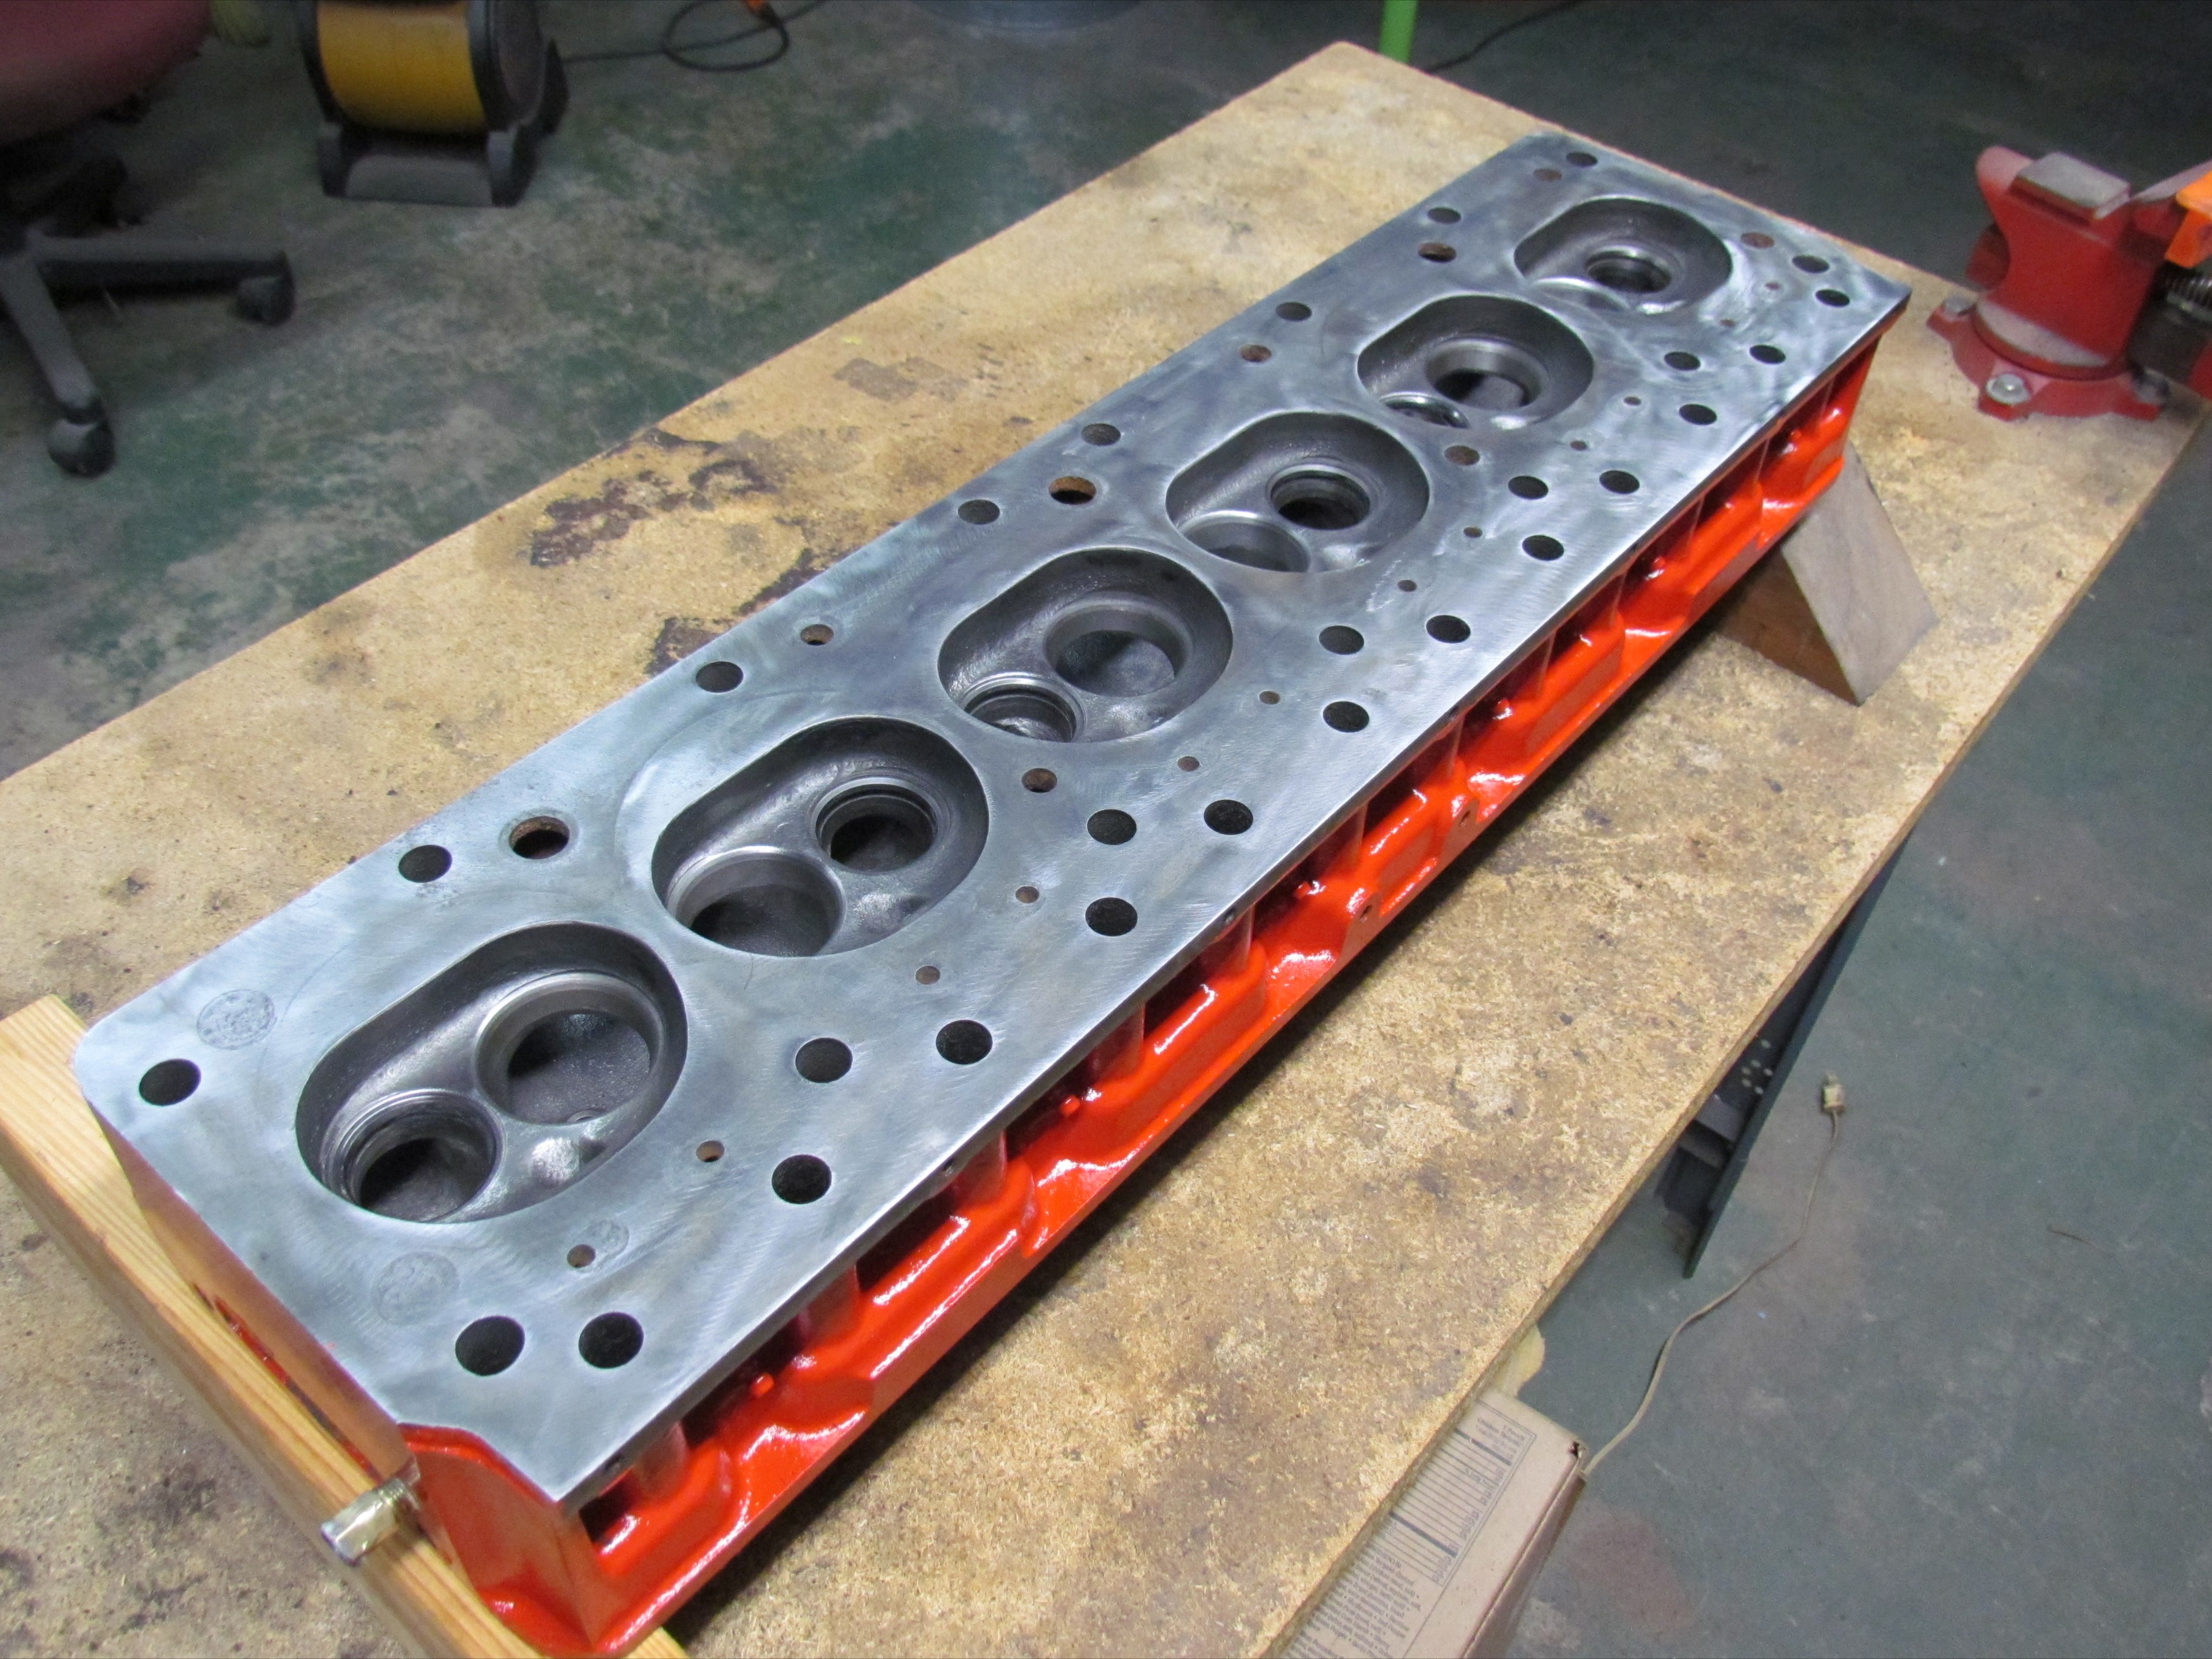
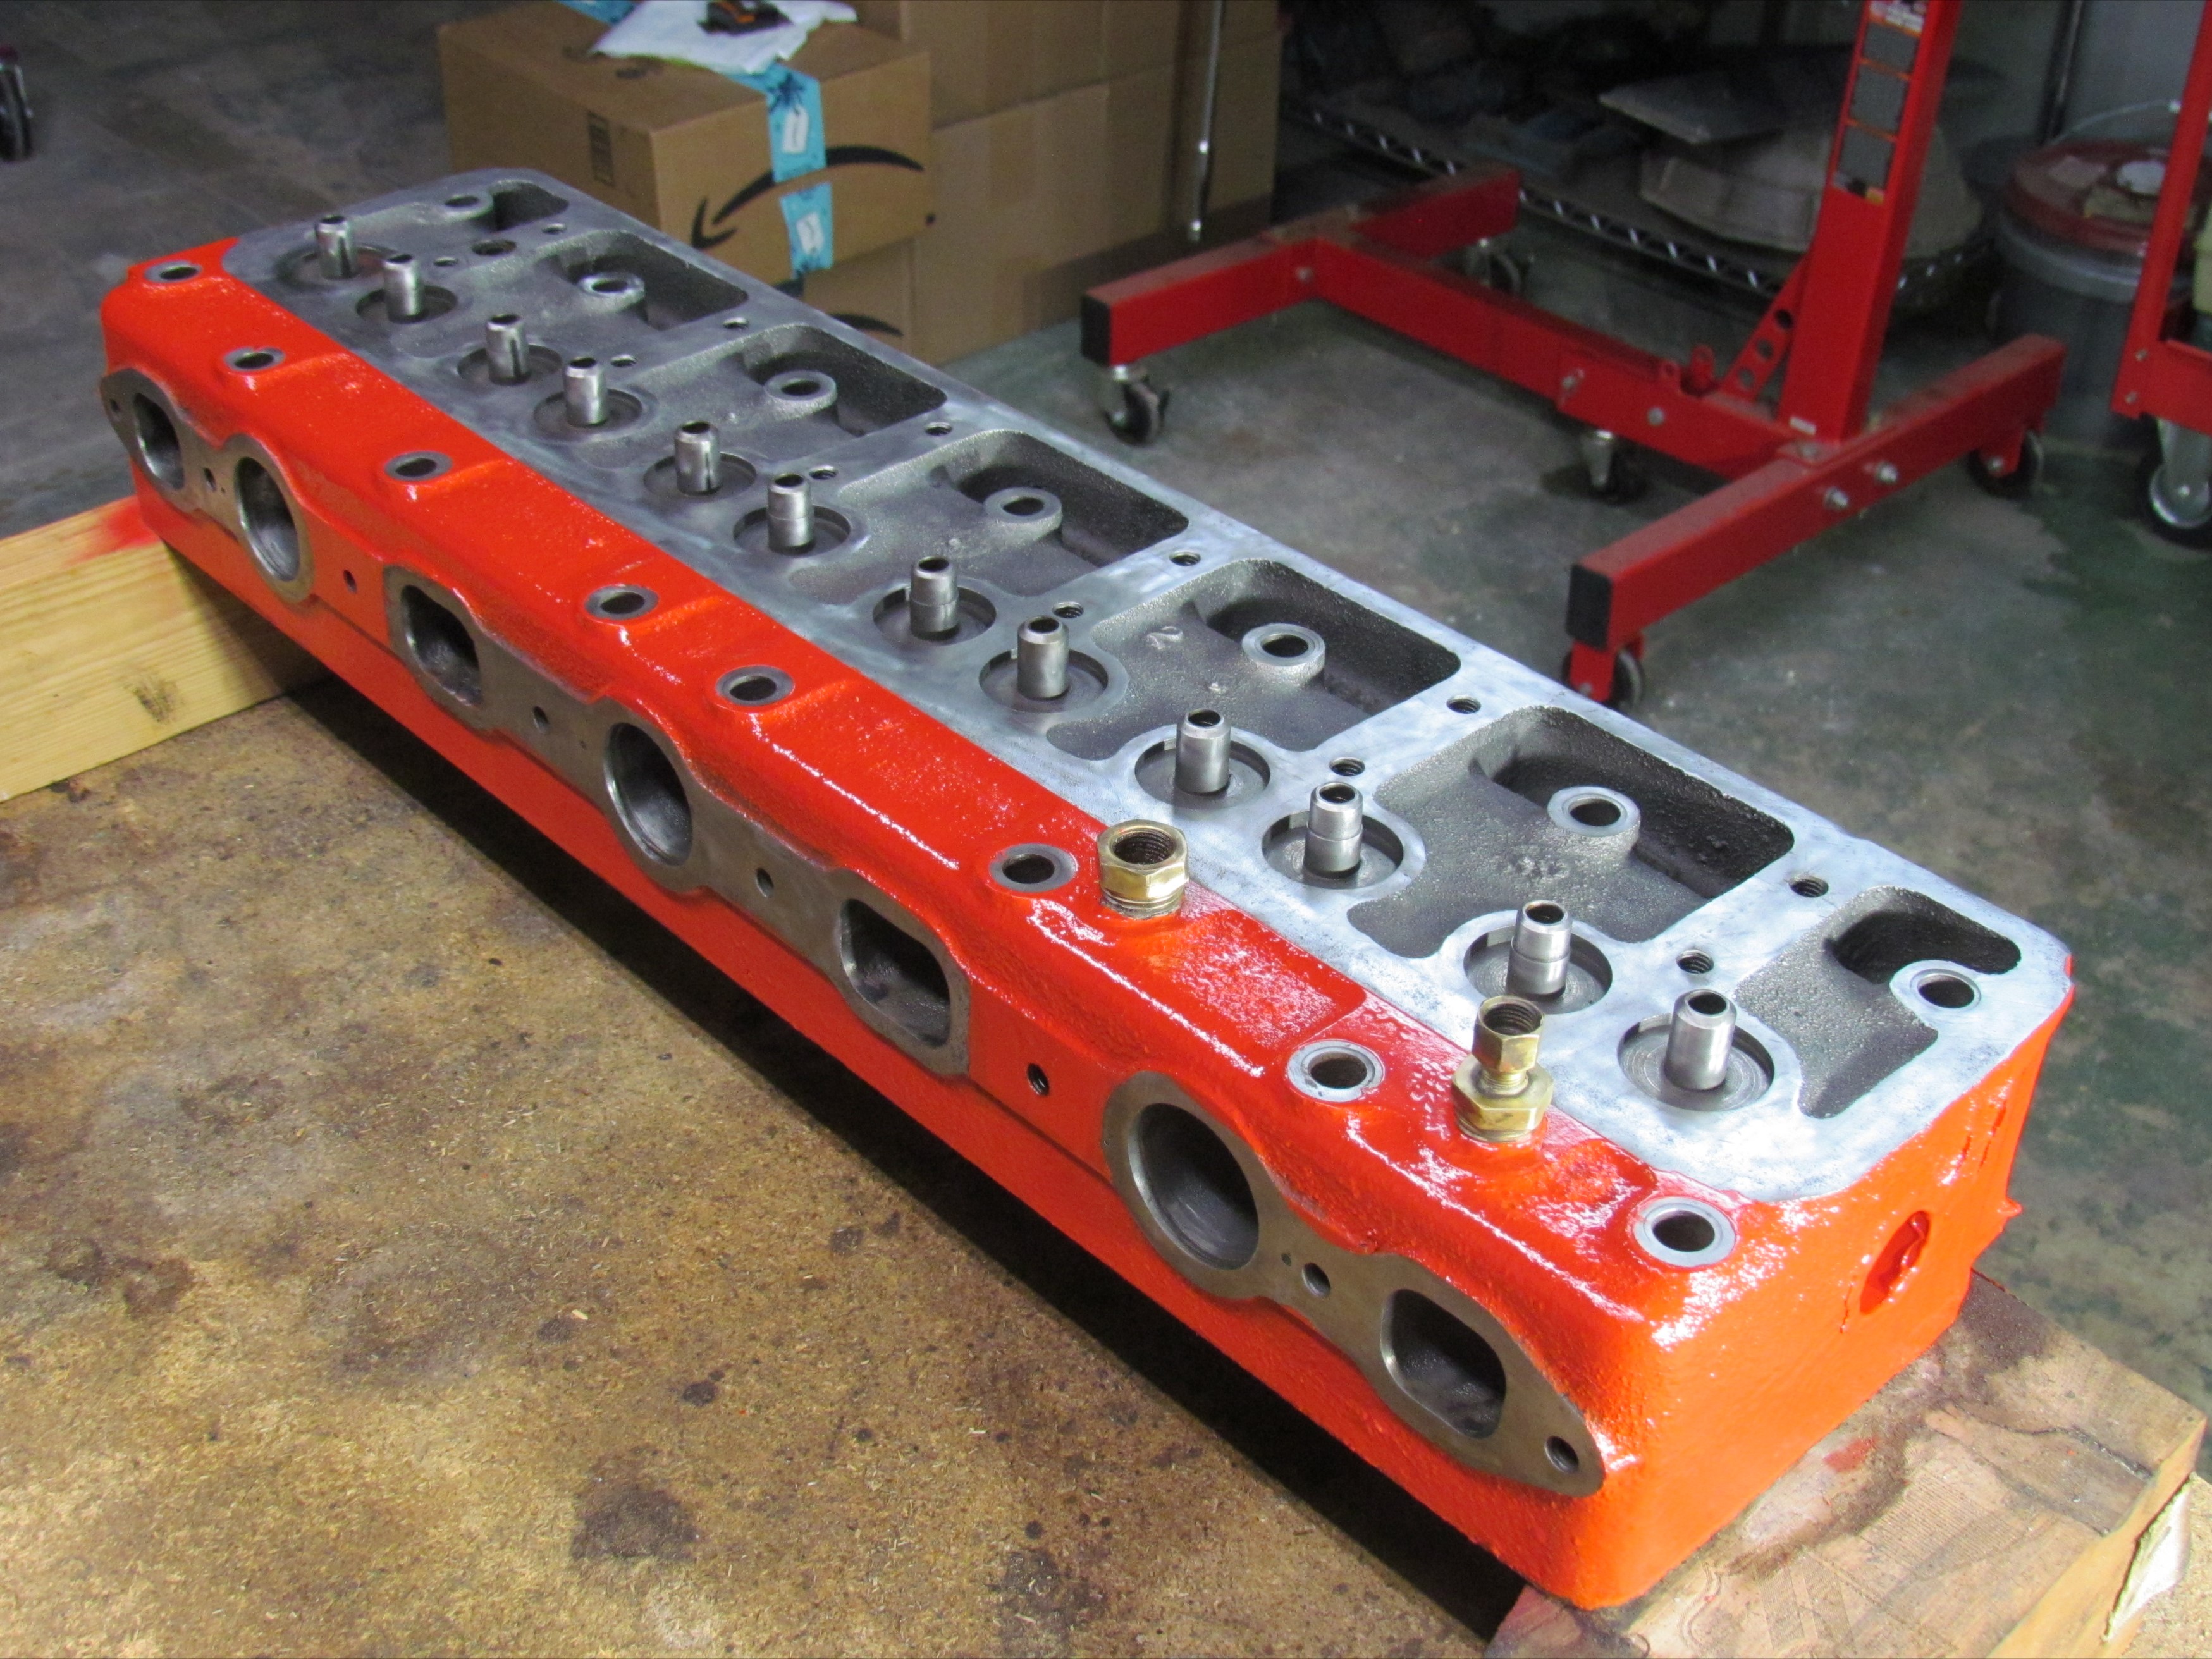
Rolled the head over upright to clean the top and paint the areas I
missed when it was bottom up. First, cleaned the rough casting areas
with Scotchbrite buffs
in the Dremel tool as well as rough up the old painted areas with the
same tool. then, cleaned the machined surfaces with Scotchbrite
"cookies" in the air-powered angle grinder. Finally, it was back to the
Dremel and buffs to clean the brass fittings (oil pressure and water
temperature sensor fittings) and the valve guide exteriors.
December
4th 2019
Rolled the head over upright to clean the top and paint the areas I
missed when it was bottom up. First, cleaned the rough casting areas
with Scotchbrite buffs
in the Dremel tool as well as rough up the old painted areas with the
same tool. then, cleaned the machined surfaces with Scotchbrite
"cookies" in the air-powered angle grinder. Finally, it was back to the
Dremel and buffs to clean the brass fittings (oil pressure and water
temperature sensor fittings) and the valve guide exteriors.
Masked the areas not to receive paint and PRE Paint prepped
the areas that were. Gave it two coats of Duplicolor Chevy Orange
engine paint. Beer of the day was Christian Moerlein Brewing Company's
Se7en Hefeweizen wheat.
 December
5th 2019
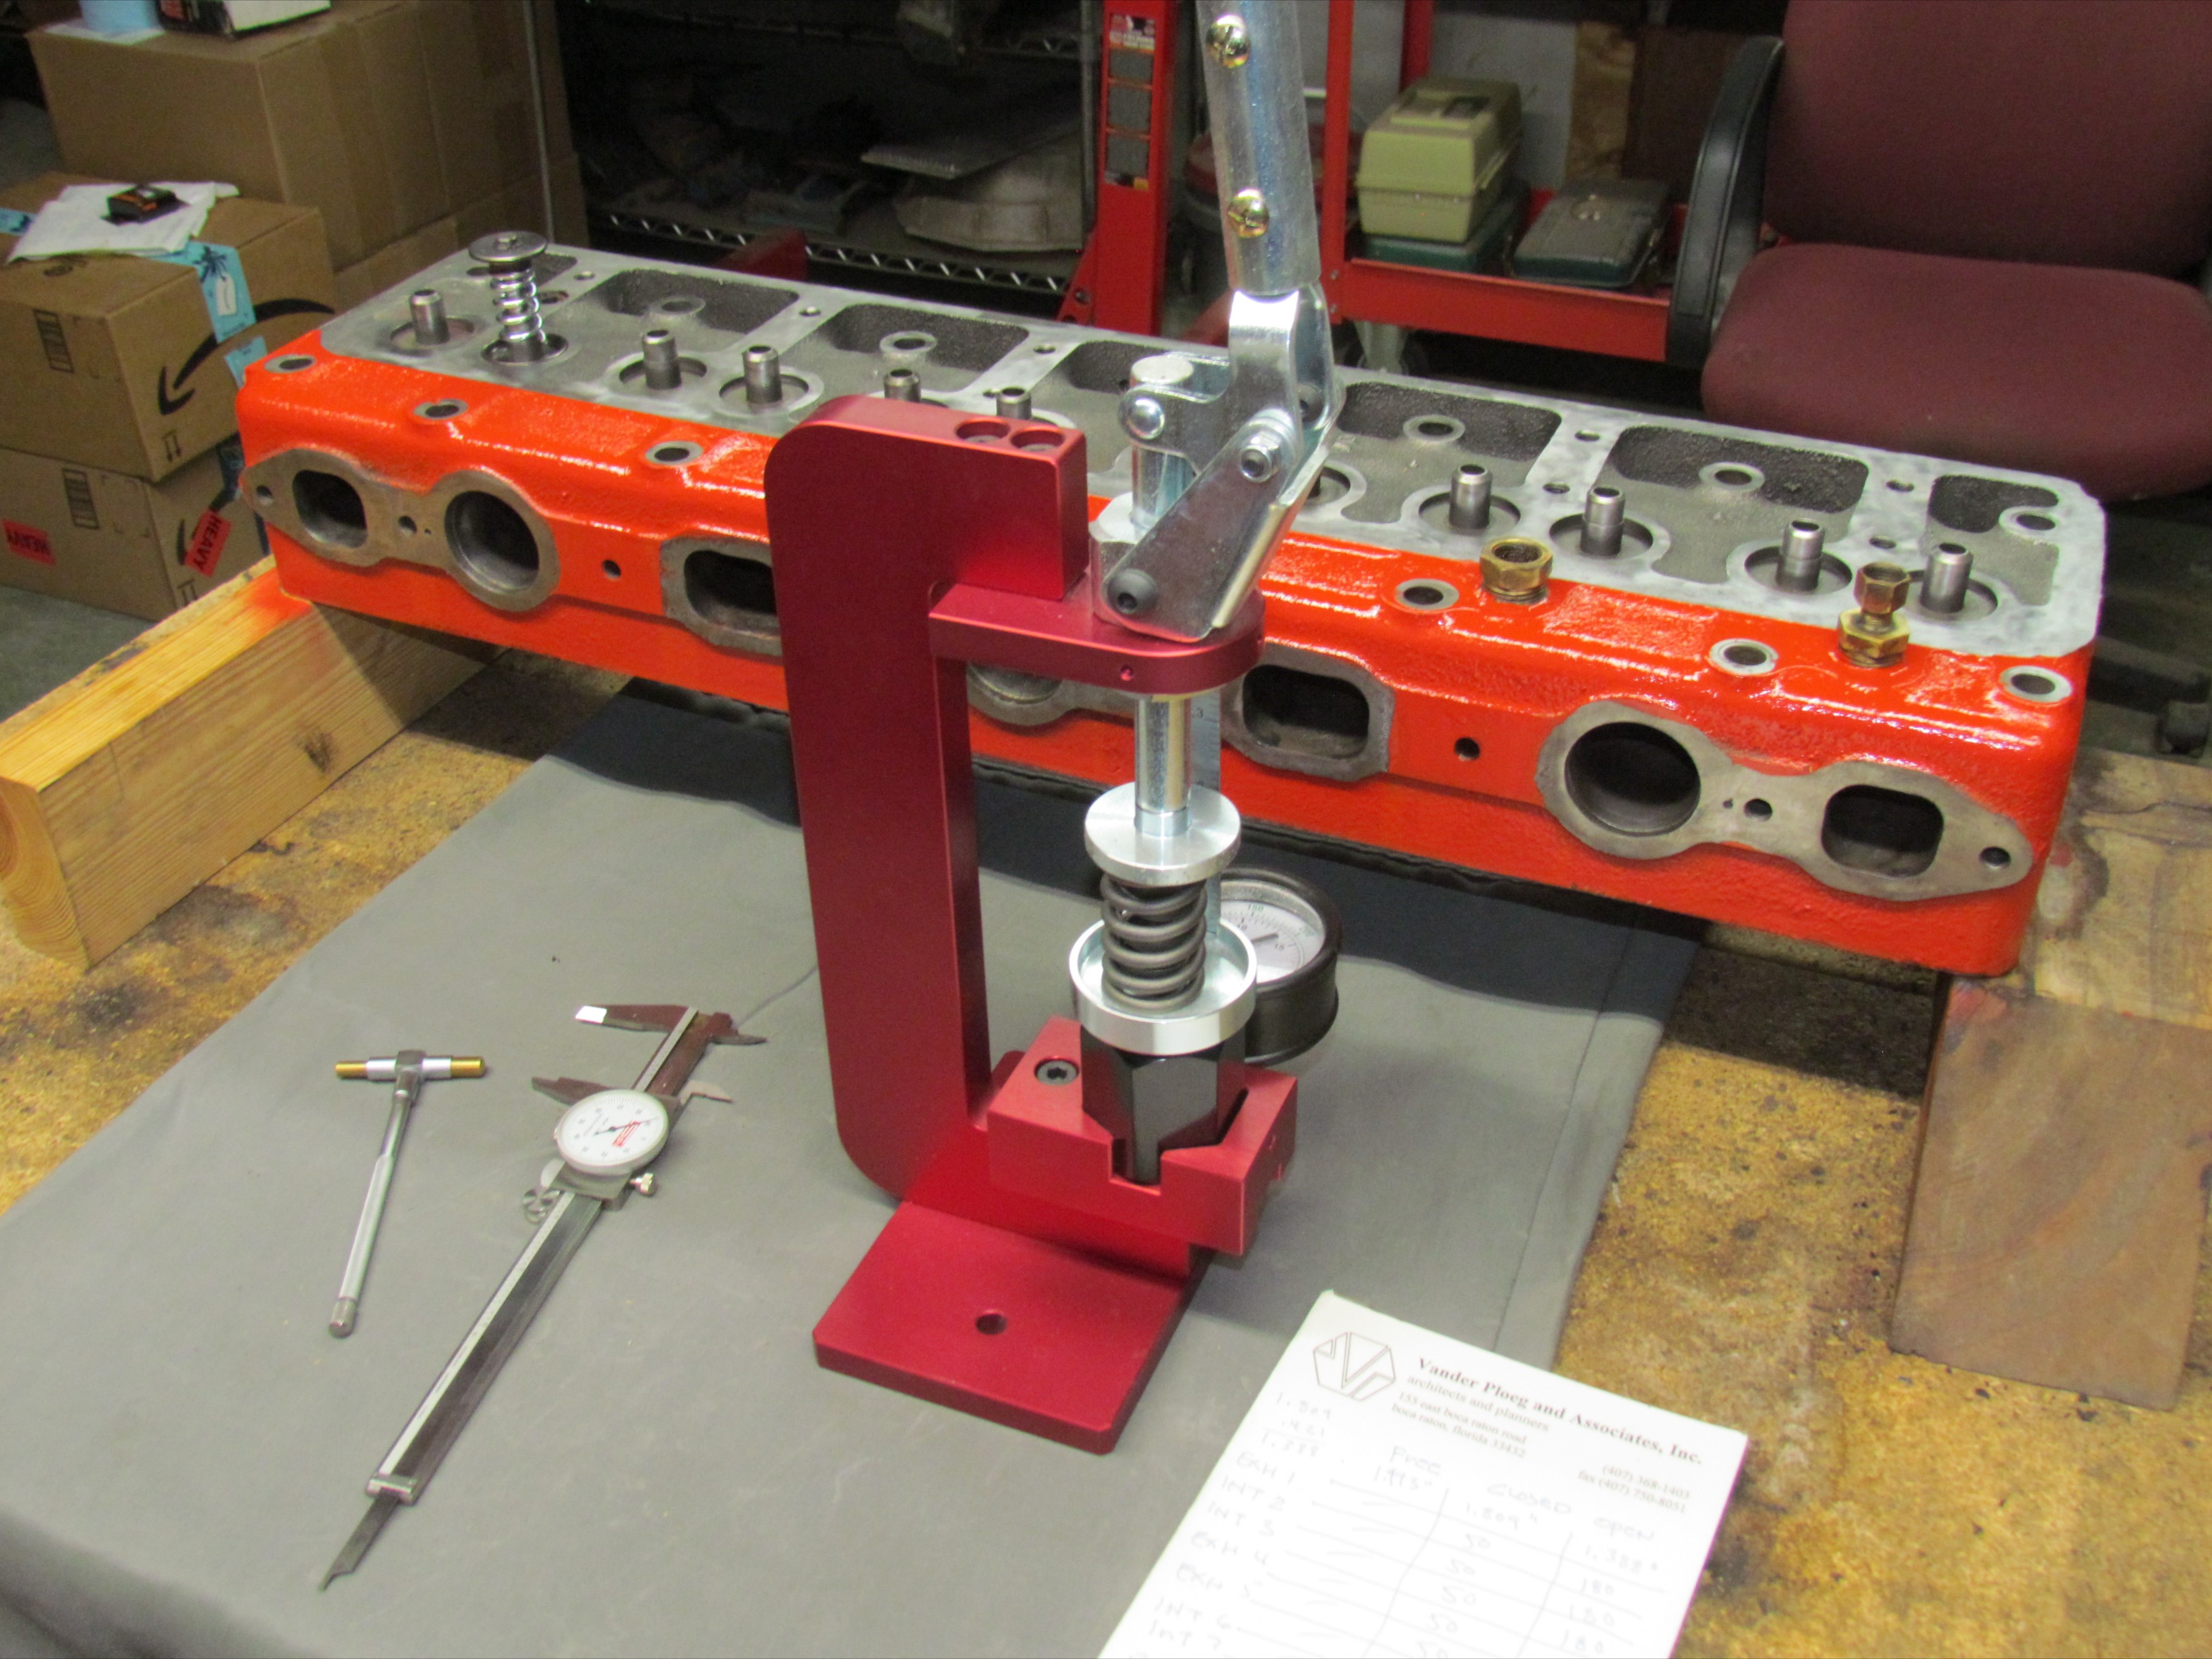
Proceeded to check the valve springs. Measured the free height to be
1.993 inches with vernier calipers. Installed valve #2 with a generic
spring just strong enuf to hold the valve assembly at its closed height
and measured it with a telescoping gauge to be 1.809 inches. From
Tony's writings at Oldgmctrucks.com, I believe the valve lift to be
0.425 inches. This subtracted from the valve closed height equals an
open height of 1.384 inches.
December
5th 2019
Proceeded to check the valve springs. Measured the free height to be
1.993 inches with vernier calipers. Installed valve #2 with a generic
spring just strong enuf to hold the valve assembly at its closed height
and measured it with a telescoping gauge to be 1.809 inches. From
Tony's writings at Oldgmctrucks.com, I believe the valve lift to be
0.425 inches. This subtracted from the valve closed height equals an
open height of 1.384 inches.
With the vernier calipers locked at 1.993 inches, each valve was checked in turn for free height. They were all equal in height. Next, the vernier calipers were set at the closed height of 1.809 inches and the telescoping gauge locked at that setting also. The springs were checked in turn with the spring tester. Using the telescoping gauge as a stopping point for the tester, all springs showed a closed spring to be exerting 50 lbs pressure. variations were too small for me to detect with my original equipment eyes. Finally, the vernier calipers and telescoping gauge were set at 1.384 inches and the process was repeated for open valve pressure which turned out to be 180 lbs. A few times, I got readings of 185 lbs but, I re-calibrated the telescoping gauge against the vernier calipers and reran the test to get 180 lbs, The gauge had slipped.
I don't consider this test precise due to my inexperience and
old eyes but I am confident that all the springs are within a RCP or
two of being the same.
 December
9th 2019
Valve guides were dirty again. I had gotten a Pferd valve guide brush
for this cleaning and I chucked it in the drill and went after the
first valve guide. It screwed itself down into the guide and twisted
off. Damnation! Took me twenty minutes to get it out. Went back to my
gun-cleaning kit and Hoppes #9 solvent for this task, the only
difference being that I chucked the gun-cleaning brush in the drill.
December
9th 2019
Valve guides were dirty again. I had gotten a Pferd valve guide brush
for this cleaning and I chucked it in the drill and went after the
first valve guide. It screwed itself down into the guide and twisted
off. Damnation! Took me twenty minutes to get it out. Went back to my
gun-cleaning kit and Hoppes #9 solvent for this task, the only
difference being that I chucked the gun-cleaning brush in the drill.
Chucked a valve-lapping tool into the drill next and lapped the valves with Permatex Rebuilders Aid Valve Grind Compound. I lapped them all even though the ones Yanni did three years ago didn't need any more than a cleaning pass. The specialized lapping tool in the drill was much preferred to the manual fire stick method.
Cleaned the valve guides again to remove any remains of
grinding compound that might have gotten in.
 December
10th 2019
Installed the intake valves as follows. Installed the base shim cup.
Installed the garter type valve seal. Slathered the valve stem with
assembly lube and installed. it. Install the spring and retainer and
compressed it. Install the o-ring on the valve stem followed by the
keepers. I used a dab of bearing grease on the keepers to hold them in
place. Slowly release the spring compressor and Bob's your uncle.
December
10th 2019
Installed the intake valves as follows. Installed the base shim cup.
Installed the garter type valve seal. Slathered the valve stem with
assembly lube and installed. it. Install the spring and retainer and
compressed it. Install the o-ring on the valve stem followed by the
keepers. I used a dab of bearing grease on the keepers to hold them in
place. Slowly release the spring compressor and Bob's your uncle.
A few snags were that the cheap valve spring compressor I
purchased required a John Armstrong to work and I didn't have the
strength for it. I had to revert to the palm-bruising wheel of torture
device. Also, I didn't have the correct valve seals to fit the exhaust
valves and I have to set about crafting the correct intarweb search
term to find the required umbrella type seals.
 December
11th 2019
Back to the almost finished Disk brakes. Got more suitable -3 banjo
fittings (round not rectangular). The
intarweb continually mocked me for my mistake by offering banjo fitting
ads on almost every page, both for the ones I should have got in the
first place. and for the wrong ones I purchased with the added sting of
a reduced price banner across the image.
December
11th 2019
Back to the almost finished Disk brakes. Got more suitable -3 banjo
fittings (round not rectangular). The
intarweb continually mocked me for my mistake by offering banjo fitting
ads on almost every page, both for the ones I should have got in the
first place. and for the wrong ones I purchased with the added sting of
a reduced price banner across the image.
After the Sunday morning coffee cruise-in of the Senile and Surly Car Club, Machinist friend John Carey followed me up to the shop to look at the Deerslayer disk brake problem. Car buddy Jim Mercini came along for a tour of the shop.
I couldn't figure out why the passenger side rotor was an eighth of an inch closer to the mounting bracket than the driver side rotor. Also, the end of the passenger side spindle projected too far to allow the dust cap to be installed.
John took some measurements, then tore down both disk brakes to take more measurements as this was an odd problem. He eventually found that the one eighth inch difference was in the spindles. The castings were not the same. Perhaps in Deerslayer's eighty-two year past, a spindle had been replaced with a different year spindle.
John said that I had assembled the brakes correctly and that was good news to me. He also determined that shaving the passenger side spindle end a bit so the dust cap would fit would do no harm.
I gave John my thanks and said I would take it from there.
John responded that he wasn't leaving until he put both brakes back
together and shaved the spindle because he didn't want my progress
delayed by two weeks or more. At this point, Jim Mercini made his
farewells and, as he was walking to his car, I yelled "Tell the coffee
club boys you saw activity up here at the BillyBob Shop." He hollered
back "I will. I'll tell 'em I saw John fixing your disk brakes."
Jeez! Everyone's a critic.
 December
12th 2019
At the Tijuana Taxi Sunday afternoon cruise-in, John Carey gave me some
valve seals that might work on the exhaust valve guides. He also lent
me his spring compressor. I have ordered umbrella seals and they are on
their way but I can see nothing wrong with the seals John gave me and I
started installing them. If they don't work, I can install the umbrella
seals. The one redeeming feature of the palm-bruising wheel of torture
compressor is that the springs can be removed with the head still on
the block.
December
12th 2019
At the Tijuana Taxi Sunday afternoon cruise-in, John Carey gave me some
valve seals that might work on the exhaust valve guides. He also lent
me his spring compressor. I have ordered umbrella seals and they are on
their way but I can see nothing wrong with the seals John gave me and I
started installing them. If they don't work, I can install the umbrella
seals. The one redeeming feature of the palm-bruising wheel of torture
compressor is that the springs can be removed with the head still on
the block.
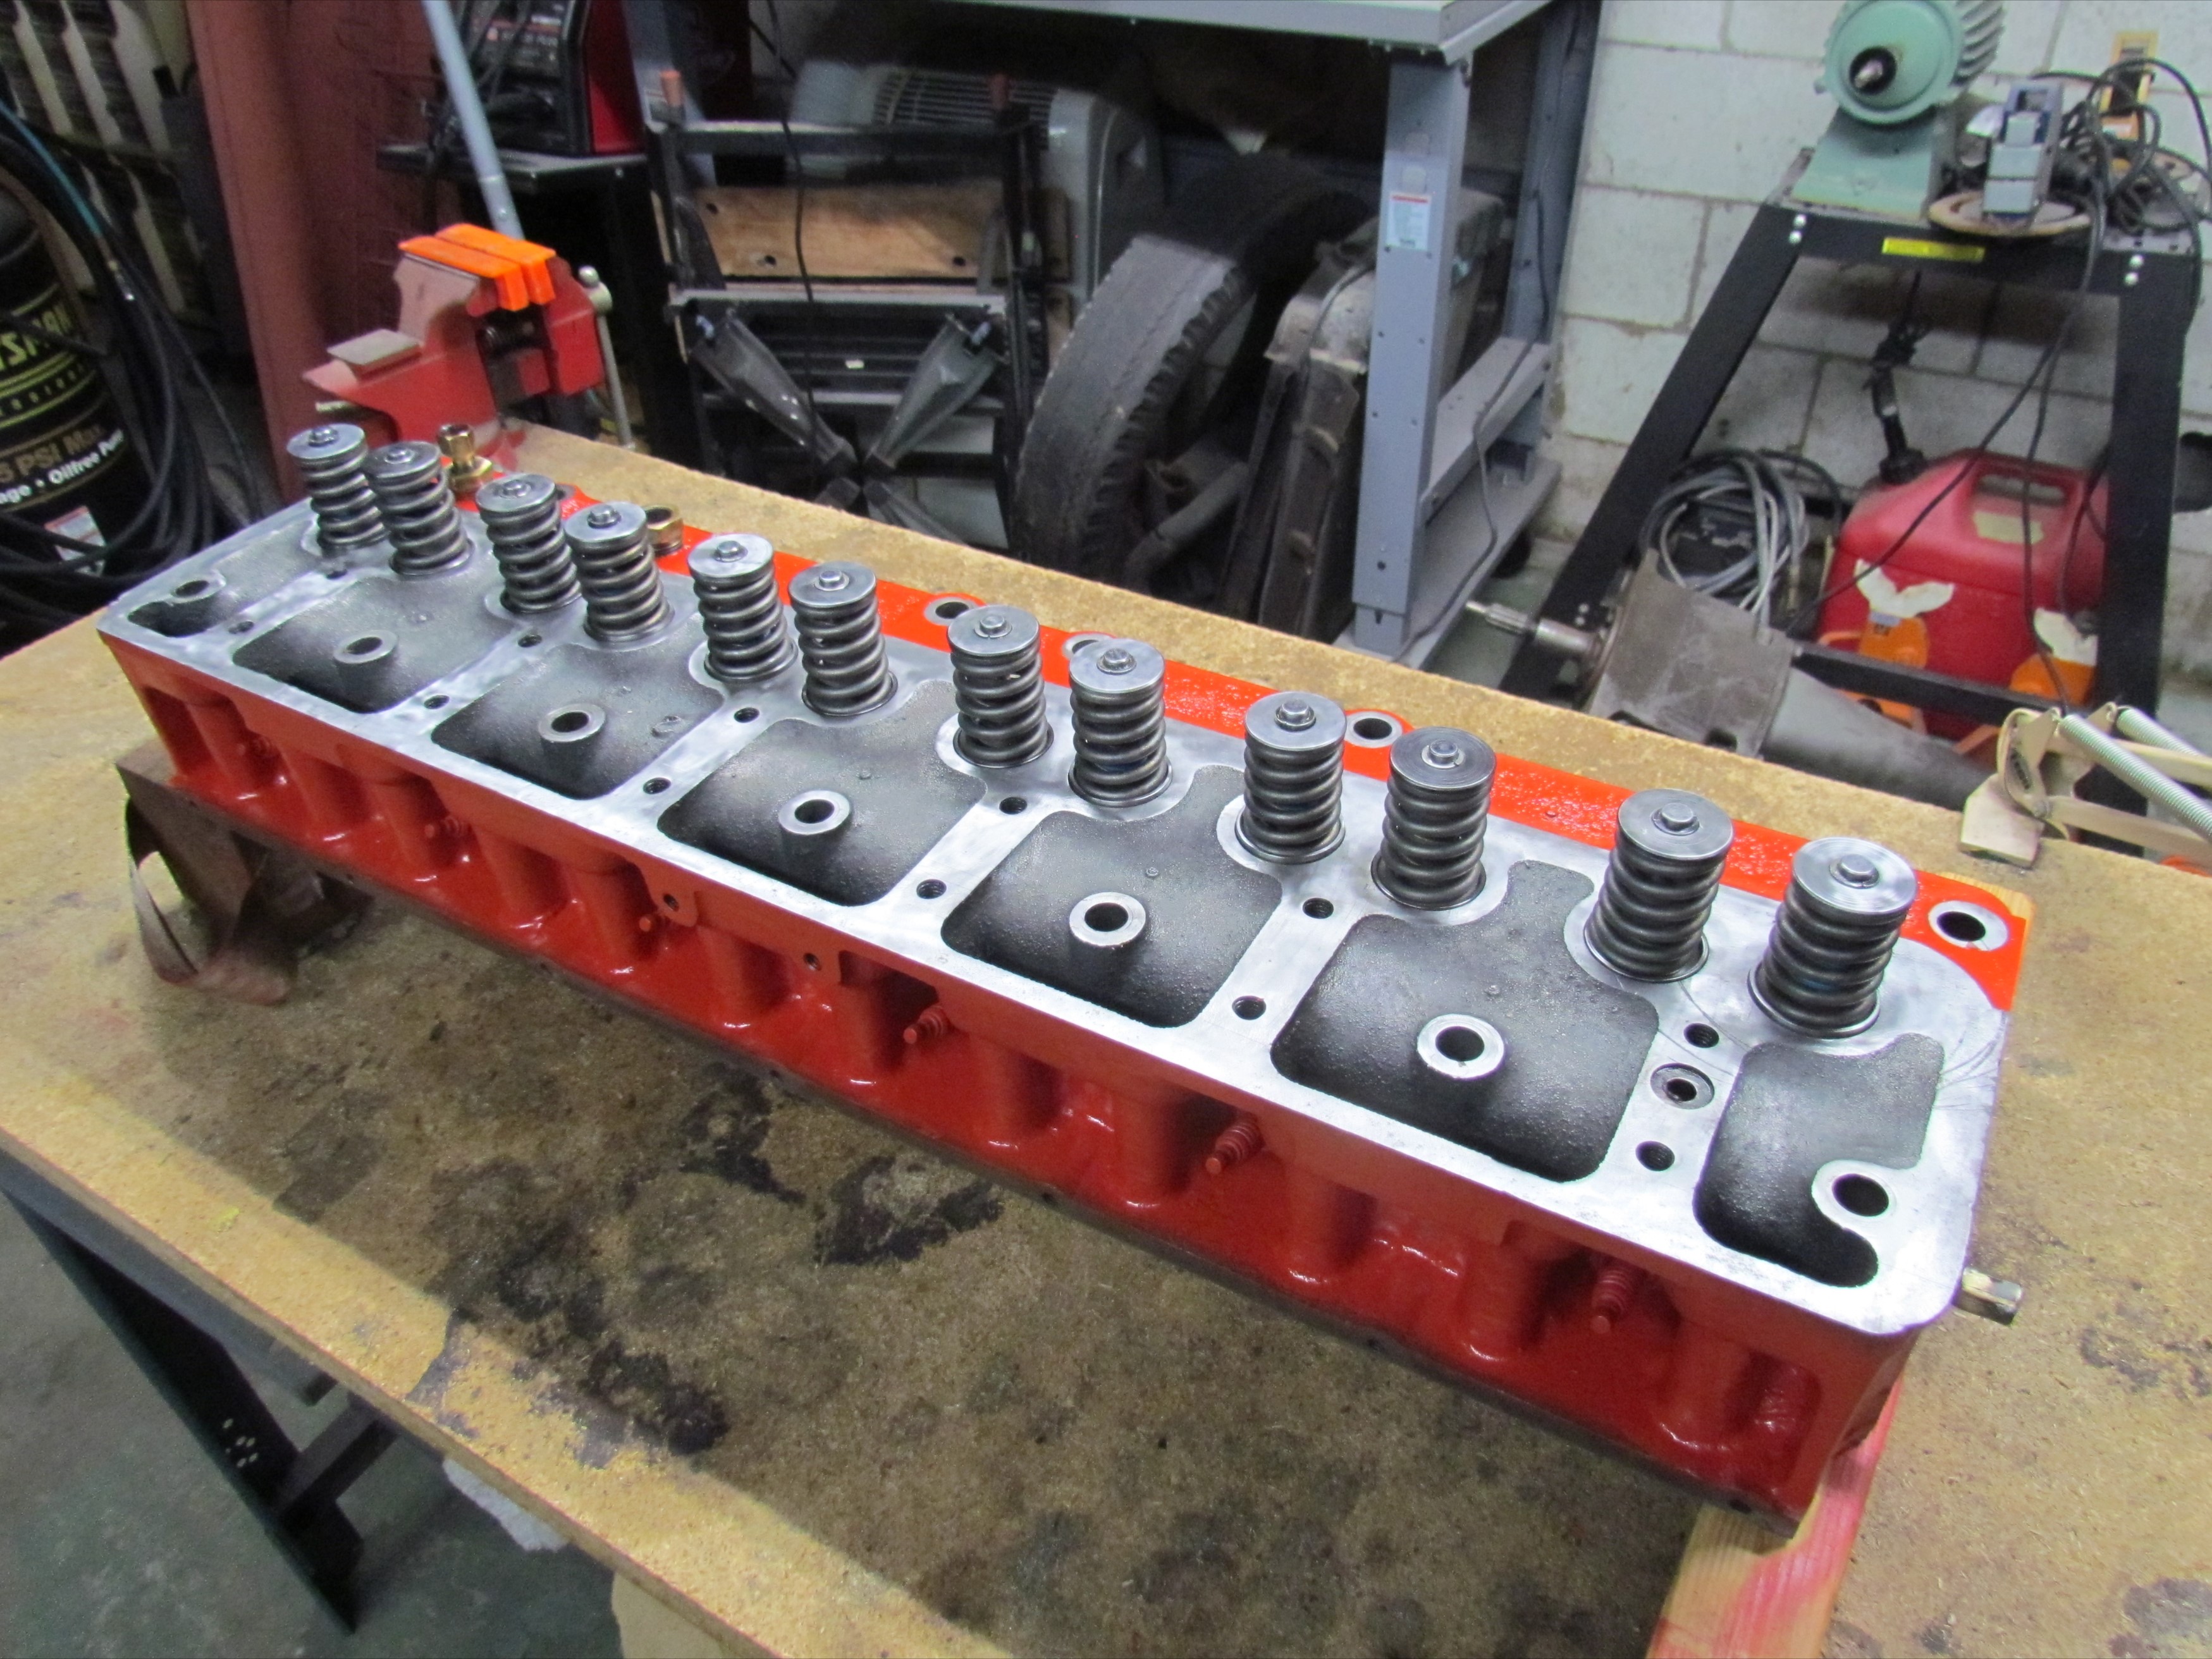
In the meantime, John's spring compressor worked great and I
was done in short time using the same procedure I used for the intake
valves. The keepers in three of the springs didn't look quite seated
when I took the picture so I redid them with the wheel of torture.
Time to mist and wipe down the bare metal surfaces with Marvel
Mystery Oil, Seran Wrap it and hoist the head down unto a furniture
dolly for storage
until that time when it goes back on the engine. Beer of the day is
Wild Ride Brewing's Brenna A Amber Lager.
| < Back
to Intro |
You can email me at ![]() webmaster@laroke.com
webmaster@laroke.com
Issued Monday December 12, 2019
copyright © 2008-2019 Larry R. Kephart all rights reserved
| | LRK Home | | Bio Info | | Krash Khronicles | | LAROKE | |
| | BettyLou | | BillyBob's Garage | | Rat Patrol | | Deerslayer | | Elvira | |
| | Land of the Free and Home of the Brave | |
| | Keppylou's Art | | WWI Soldier's Diary | |