| | LRK Home | | Bio Info | | Krash Khronicles | | LAROKE | |
| | BettyLou | | BillyBob's Garage | | Rat Patrol | | Deerslayer | | Elvira | |
| | Land of the Free and Home of the Brave | |
| | Keppylou's Art | | WWI Soldier's Diary | |
BillyBob Work-in-Progress Log
![]()
TRUCK LINKS including vendor sites for old parts, custom parts, and tools as well as sites for classic car and truck organizations
STORE Operating in association with Amazon.com, books, recordings and tools can be purchased.
PLANNING for the restoration including project schedule and cost estimates.
![]()
WORK-IN-PROGRESS is the restoration of parts of BillyBob that I can accomplish without a garage.
PRE-RESTORATION includes log entries of minor repairs and and adventures between time of purchase and the time when I started restoration, a piece at a time.
JR'S KORNER JR's Korner is the history of BillyBob before I got him authored by my brother, Wm. C. Kephart.
![]()
BILLYBOB MAINTENANCE Ever changing detailing, oil change, lube, etc. maintenance routines specifically developed for BillyBob, including required tools, materials and procedures.
11. To Chrome or not to Chrome: Bumpers
May 11th 2001 I'd planned to detail the Jeep Renegade over the Memorial Day weekend and, after the idea percolated in my head for awhile, decided that May will be "Spring Cleaning" month. I'll also put some spit 'n polish on BillyBob (at least the new parts I've added so far) and clean and categorize my tools and parts inventory. That may be too ambitious for one month of Sundays so, the effort might bleed over into June. I started today by picking up a bag of cheap kitty litter at the pet store when I was buying some "Euell Gibbons trail mix" for Wingnut, my parrot. The kitty litter will be used to soak up all the oil and grease on the floor up at BillyBob's warehouse bay.
May 28th 2001 I detailed Renegade on Saturday and tried to do similar cleaning on BillyBob on Sunday with limited success. First of all, I've found no suitable way to wax a Rustoleum paint job yet (nor do I think I ever will). I've limited myself to cleaning 'an applying Rain-X to the glass and cleaning/conditioning the parts of the truck I've restored over the last eighteen months.
 June
2nd 2001 Got started
early. Hurricane Season is here and it's gonna be hot today. Storms are
forecast for late afternoon. Back in January, when I purchased the
(#LG823) 54-59 Rear License Bracket Assembly from American
Classic Truck Parts, I couldn't figure out how it mounted.
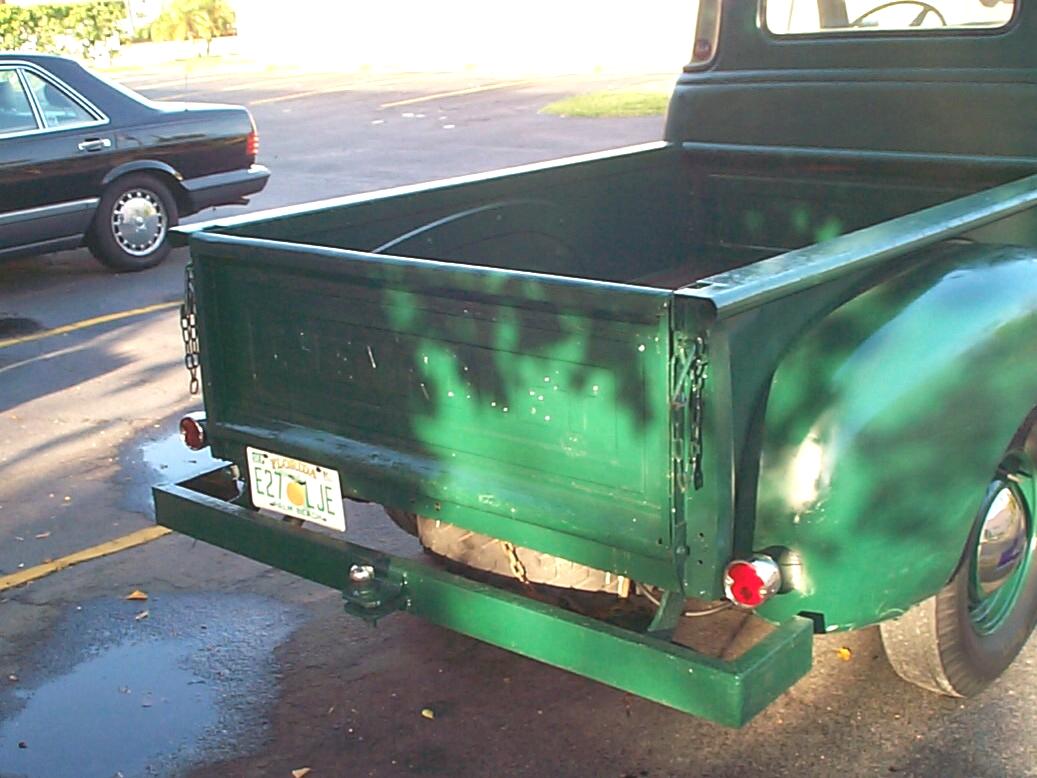
Well, It hangs under the tailgate, in the middle. My problem now is
that the redneck-engineered channel bumper fashioned by a previous
owner is in the way. I started looking for an original rear bumper.
Most of the vendors carry these bumpers and you can have any finish you
want as long as you want chrome. After weighing the pros and cons in my
noggin' for awhile, I ordered a chrome rear bumper and bumper brackets
from Chevy-Duty.
Then, wot the heck, in for a penny, in for a pound, I ordered a
matching chrome front bumper and nine bumper bolts with stainless steel
caps for the two bumpers.
June
2nd 2001 Got started
early. Hurricane Season is here and it's gonna be hot today. Storms are
forecast for late afternoon. Back in January, when I purchased the
(#LG823) 54-59 Rear License Bracket Assembly from American
Classic Truck Parts, I couldn't figure out how it mounted.
Well, It hangs under the tailgate, in the middle. My problem now is
that the redneck-engineered channel bumper fashioned by a previous
owner is in the way. I started looking for an original rear bumper.
Most of the vendors carry these bumpers and you can have any finish you
want as long as you want chrome. After weighing the pros and cons in my
noggin' for awhile, I ordered a chrome rear bumper and bumper brackets
from Chevy-Duty.
Then, wot the heck, in for a penny, in for a pound, I ordered a
matching chrome front bumper and nine bumper bolts with stainless steel
caps for the two bumpers.
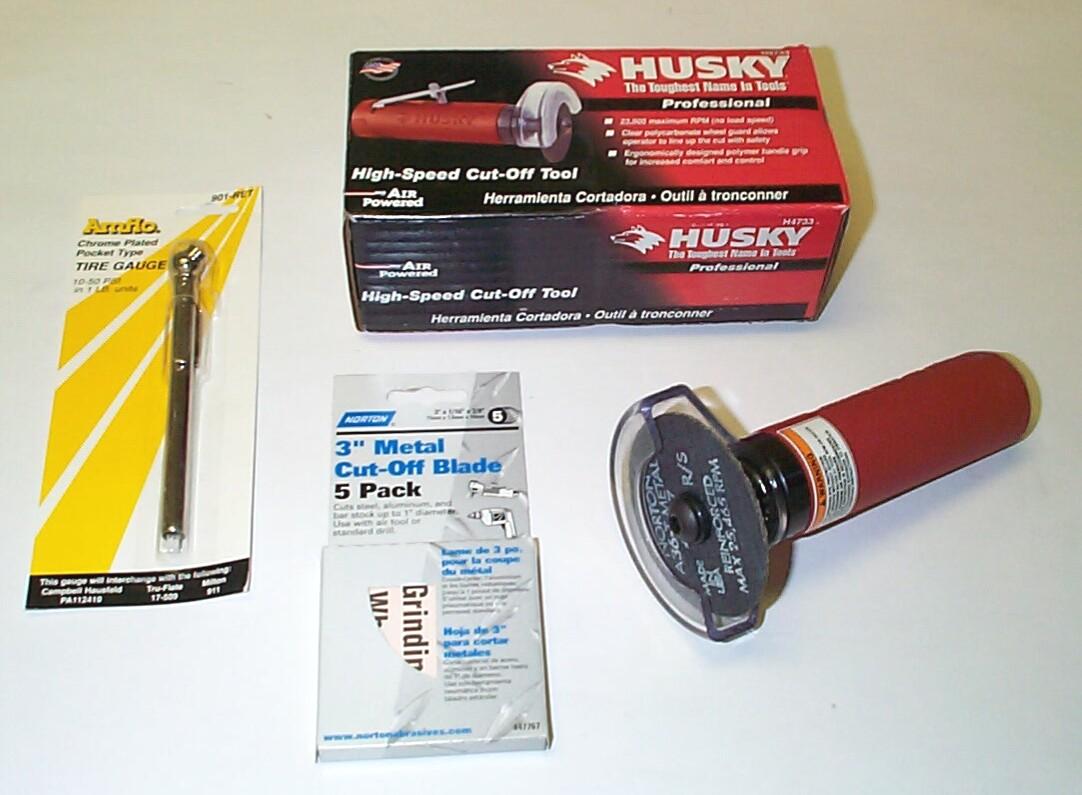 The
bolts holding on the existing bumper are nasty, well-rusted,
square-headed beasts. I went to Sears earlier in the week to get a
cut-off tool, but Sears is re-arranging their whole hardware department
and no one was in a mood to help me, so I went down the road to Home
Depot and picked up a Husky 3" Air Cut-Off Tool, a Northern 5-Pak of
Cut-Off wheels, and a tire gauge for good measure. This morning, after
BillyBob was jacked-up, I discovered I needed a 7/32" Allen wrench to
tighten/loosen the arbor screw on the cut-off tool. I also discovered I
didn't have one. I wasn't dirty yet, so I fired-up the Boss's
Panzerwagon for a trip to the NAPA jobber a few blocks away. They had
one SAE set of Allen wrenches in stock and a half-dozen sets of metric.
I got the last SAE set.
The
bolts holding on the existing bumper are nasty, well-rusted,
square-headed beasts. I went to Sears earlier in the week to get a
cut-off tool, but Sears is re-arranging their whole hardware department
and no one was in a mood to help me, so I went down the road to Home
Depot and picked up a Husky 3" Air Cut-Off Tool, a Northern 5-Pak of
Cut-Off wheels, and a tire gauge for good measure. This morning, after
BillyBob was jacked-up, I discovered I needed a 7/32" Allen wrench to
tighten/loosen the arbor screw on the cut-off tool. I also discovered I
didn't have one. I wasn't dirty yet, so I fired-up the Boss's
Panzerwagon for a trip to the NAPA jobber a few blocks away. They had
one SAE set of Allen wrenches in stock and a half-dozen sets of metric.
I got the last SAE set.
 Back
at the Krash Lab, I removed the taillight because the wiring was in the
way (the bullet connectors I used when wiring this a few months ago
made this an easy operation). I donned goggles and went after the
hardest to reach bolt on the passenger side first. I cut half way
through the nut and bolt and twisted it the rest of the way off with an
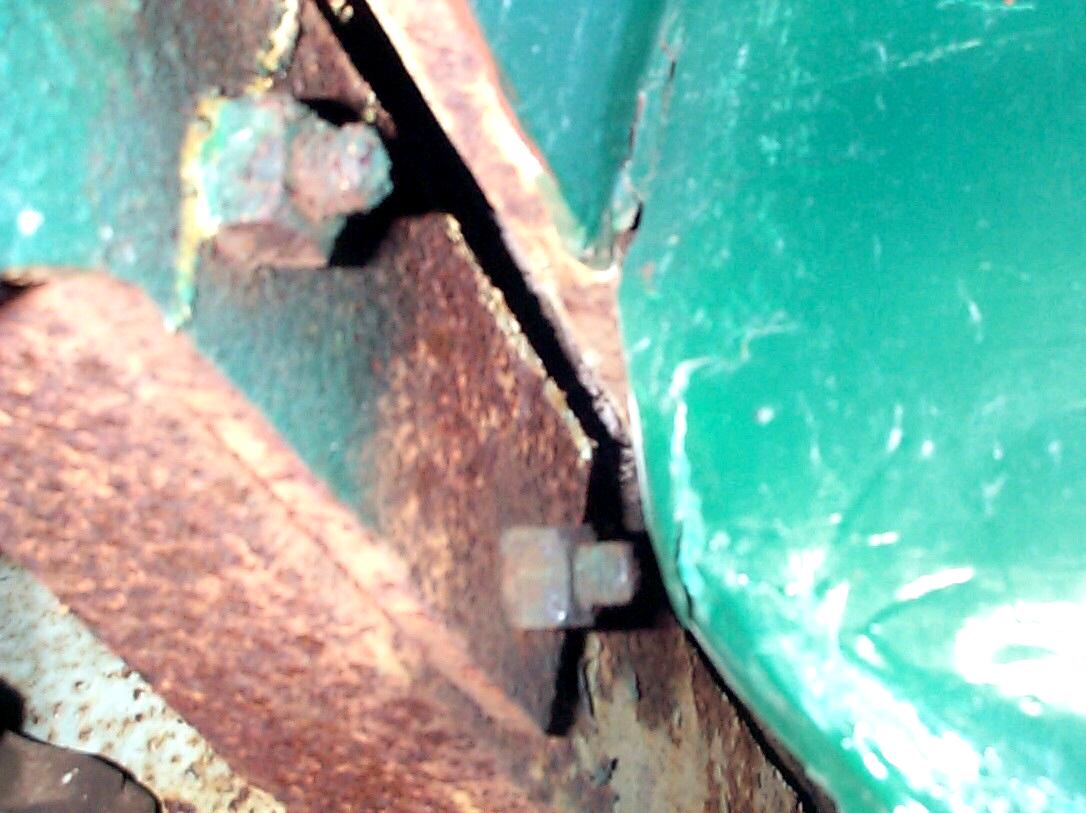
open end wrench. The rest of the ~!@#$%^
bolt did not want to back out of the opening! I hammered at it awhile
with a ball-peen, but there's not much room inside the rear fender to
swing here. It should have moved, but did not budge. Could the previous
owner have threaded it into the 1/4" plate steel s/he used as a
bracket? Can't get at the square bolt-head from the other side with the
open-end wrench 'cause it's inside the Cee-section of the frame rail.
I'll have to get an eight-point socket, 13/16", I think, to get at it.
Back
at the Krash Lab, I removed the taillight because the wiring was in the
way (the bullet connectors I used when wiring this a few months ago
made this an easy operation). I donned goggles and went after the
hardest to reach bolt on the passenger side first. I cut half way
through the nut and bolt and twisted it the rest of the way off with an
open end wrench. The rest of the ~!@#$%^
bolt did not want to back out of the opening! I hammered at it awhile
with a ball-peen, but there's not much room inside the rear fender to
swing here. It should have moved, but did not budge. Could the previous
owner have threaded it into the 1/4" plate steel s/he used as a
bracket? Can't get at the square bolt-head from the other side with the
open-end wrench 'cause it's inside the Cee-section of the frame rail.
I'll have to get an eight-point socket, 13/16", I think, to get at it.
Then it started raining (earlier than forecast) . . . An' my boss arrived with his eight year old son, Max . . . An' Max wanted me to show him how to make a Website . . . An' then our DSL Internet connection went out . . . An' then a previous client called with questions 'cause he couldn't reach the consultant he replaced me with . . . An' then, Oh well, you get the picture.
 June
9th 2001 Last Sunday,
when the sporadic DSL Internet connection was working again, I was able
to get online long enuf to order a pair of 13/16" 8-point 1/2" drive
sockets from the McMaster-Carr Website. They
arrived on Tuesday. With the eight-point socket and breaker bar, the
other nut on the passenger side gave way and by the time it was out,
the other broken bolt from last week came loose too. These bolts were
not threaded into the bracket, just rusted in place. The operation of
the breaker bar was awkward and I don't have a half-inch drive ratchet.
The eight points on the socket were not equal and only four points
would engage the 13/16" square nut. I had to have ninety degrees of
swing minimum and there was barely room between the fender and the
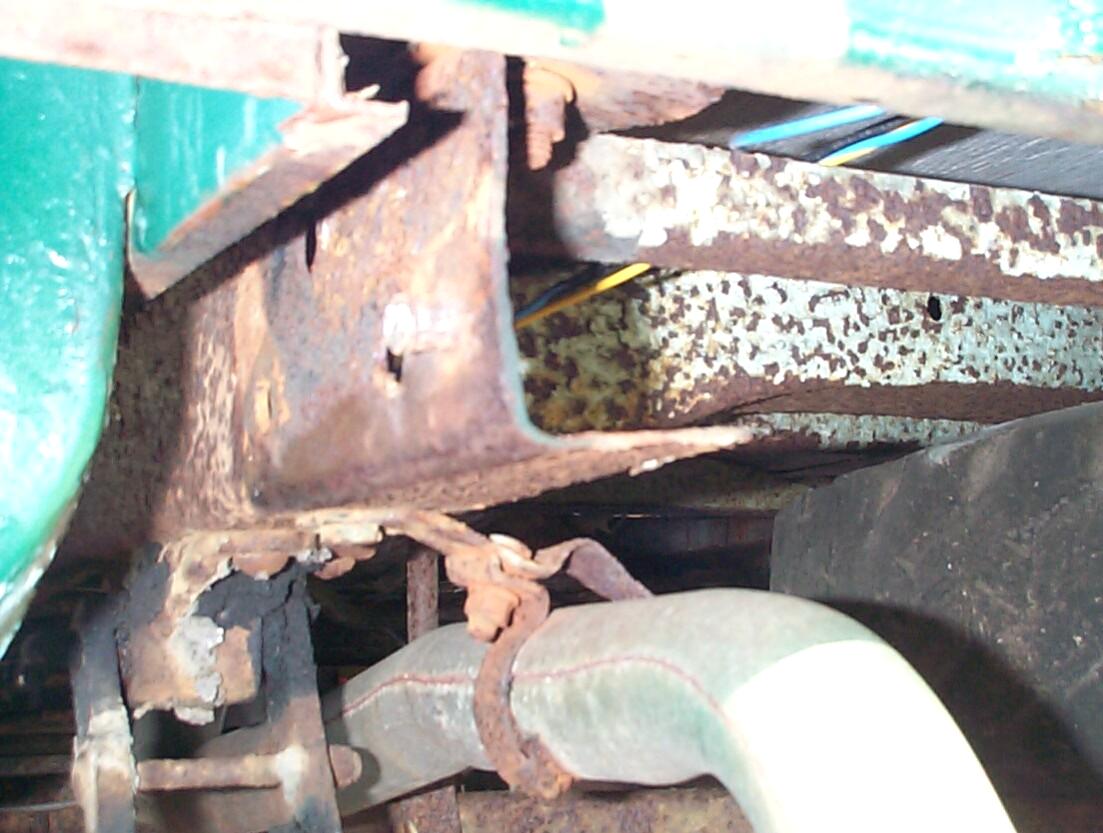
channel bumper to do the deed. One bolt was frozen in its hole on the
driver side. Even after the nut twisted off, the bolt head had not
moved. The hammer routine didn't have any effect either. Got out the
MAPP torch and heated the bolt up, then tried the hammer again . . .
That did the trick.
June
9th 2001 Last Sunday,
when the sporadic DSL Internet connection was working again, I was able
to get online long enuf to order a pair of 13/16" 8-point 1/2" drive
sockets from the McMaster-Carr Website. They
arrived on Tuesday. With the eight-point socket and breaker bar, the
other nut on the passenger side gave way and by the time it was out,
the other broken bolt from last week came loose too. These bolts were
not threaded into the bracket, just rusted in place. The operation of
the breaker bar was awkward and I don't have a half-inch drive ratchet.
The eight points on the socket were not equal and only four points
would engage the 13/16" square nut. I had to have ninety degrees of
swing minimum and there was barely room between the fender and the
channel bumper to do the deed. One bolt was frozen in its hole on the
driver side. Even after the nut twisted off, the bolt head had not
moved. The hammer routine didn't have any effect either. Got out the
MAPP torch and heated the bolt up, then tried the hammer again . . .
That did the trick.
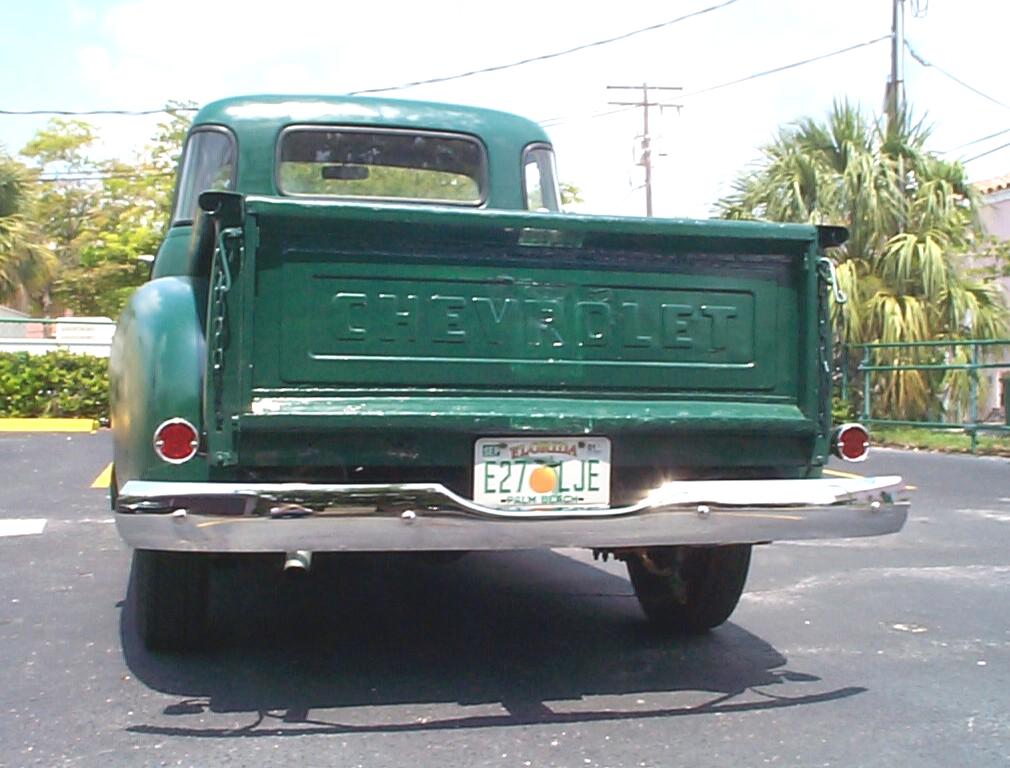 It
was getting hot by this time, afternoon thunderstorms are forecast, an'
I'm gettin' winded from the exertion. I'm not in shape, and until I
start exercising more than restraint during the week, I'm gonna have to
be careful not to overdo it. I hooked up the license plate holder and
light below the tailgate, then attached the bumper brackets to the
frame with the 1/2" - 13 x 1-3/4" long bolts, flat washers and hex nuts
supplied with the brackets by Chevy Duty. With the bracket bolts finger
tight, the rear bumper was bolted onto the brackets with four of the
stainless steel capped bumper bolts. All bolts were then tightened, and
this is the result.
It
was getting hot by this time, afternoon thunderstorms are forecast, an'
I'm gettin' winded from the exertion. I'm not in shape, and until I
start exercising more than restraint during the week, I'm gonna have to
be careful not to overdo it. I hooked up the license plate holder and
light below the tailgate, then attached the bumper brackets to the
frame with the 1/2" - 13 x 1-3/4" long bolts, flat washers and hex nuts
supplied with the brackets by Chevy Duty. With the bracket bolts finger
tight, the rear bumper was bolted onto the brackets with four of the
stainless steel capped bumper bolts. All bolts were then tightened, and
this is the result.
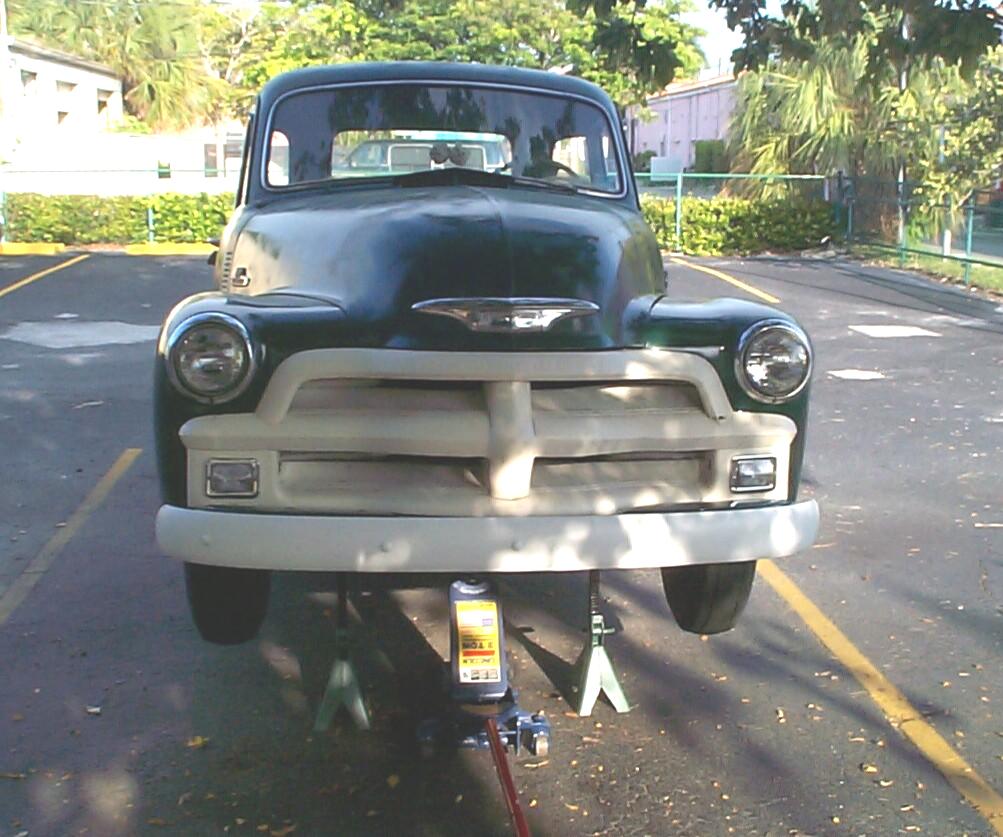 June
16th 2001 Gonna be
'nother hot one. Got started on removing the front bumper by wire
brushing the hex nuts and threads, then spraying with Kroil/AeroKroil
Penetrating Oil, whackin' a few times with the hammer, then spraying
some more penetrating oil. The hex nuts then came off without too much
trouble, for a change, using the breaker bar and a 13/16" 6-point
impact wrench socket. The center bumper bolt is cosmetic and held in
place with a "spring nut" which I broke upon removal. I will have to
get a new one for the new bumper. The bumper bolts also hold the front
splash apron in place . . . The lower part of the grille or the bumper
brackets have to come off to get it completely out, however.
June
16th 2001 Gonna be
'nother hot one. Got started on removing the front bumper by wire
brushing the hex nuts and threads, then spraying with Kroil/AeroKroil
Penetrating Oil, whackin' a few times with the hammer, then spraying
some more penetrating oil. The hex nuts then came off without too much
trouble, for a change, using the breaker bar and a 13/16" 6-point
impact wrench socket. The center bumper bolt is cosmetic and held in
place with a "spring nut" which I broke upon removal. I will have to
get a new one for the new bumper. The bumper bolts also hold the front
splash apron in place . . . The lower part of the grille or the bumper
brackets have to come off to get it completely out, however.
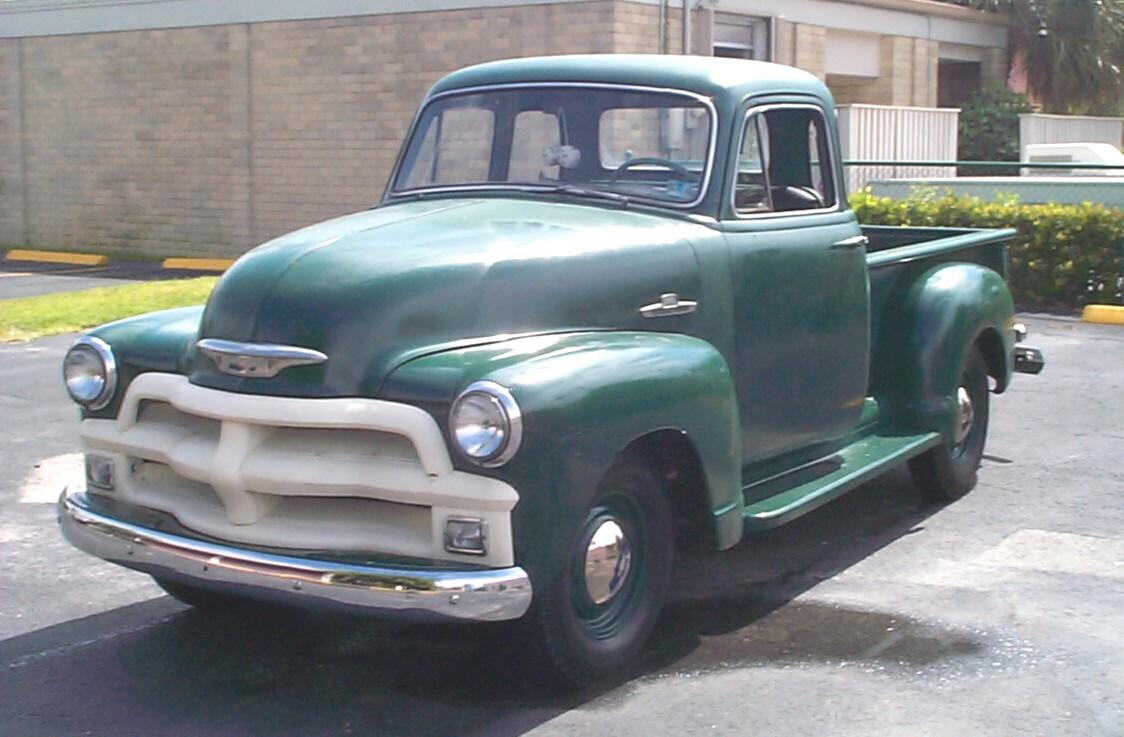 The
new Chevy Duty chrome bumper was bolted in place with four more of the
stainless steel capped bolts. I also picked up some 1/2" lock washers
to use with these bolts during the past week at Discount Auto Parts.
The packing "goo" was cleaned off and silicone lubricant was applied to
the bumper bolt nuts and threads to slow down corrosion. I'll deal with
the bumper brackets and splash apron somewhere down the road. Spent the
rest of the day dodgin' thunderstorms and detailing the front wheels
and recording the process for a new area of BillyBob's garage called "BillyBob Maintenance".
The
new Chevy Duty chrome bumper was bolted in place with four more of the
stainless steel capped bolts. I also picked up some 1/2" lock washers
to use with these bolts during the past week at Discount Auto Parts.
The packing "goo" was cleaned off and silicone lubricant was applied to
the bumper bolt nuts and threads to slow down corrosion. I'll deal with
the bumper brackets and splash apron somewhere down the road. Spent the
rest of the day dodgin' thunderstorms and detailing the front wheels
and recording the process for a new area of BillyBob's garage called "BillyBob Maintenance".
June 23rd 2001 Not much got done today. I took the rear bumper and brackets off again to clean up and paint the frame rail ends, but there is not much room to operate a wire brush here. I decided to postpone this operation until my next Stage I project which will expose more of the frame in this area to work on. When I put the brackets and bumper back on, I added lock washers to the fastener mix. Finished up the day by cleaning and detailing the rear wheels to match the front ones detailed last week. I'm layin' low and doin' things that don't cost much 'til the bulge (the chrome bumpers made) in my budget levels back out. Then I'll be onto an "Undercover Frame Job" project.
| < Back
to Intro |
You can email me at ![]() webmaster@laroke.com
webmaster@laroke.com
Issued Saturday June 23, 2001
Updated Wednesday May 17, 2017
copyright © 1996-2017 Larry Robert Kephart all rights reserved
| | LRK Home | | Bio Info | | Krash Khronicles | | LAROKE | |
| | BettyLou | | BillyBob's Garage | | Rat Patrol | | Deerslayer | | Elvira | |
| | Land of the Free and Home of the Brave | |
| | Keppylou's Art | | WWI Soldier's Diary | |