| | LRK Home | | Bio Info | | Krash Khronicles | | LAROKE | |
| | BettyLou | | BillyBob's Garage | | Rat Patrol | | Deerslayer | | Elvira | |
| | Land of the Free and Home of the Brave | |
| | Keppylou's Art | | WWI Soldier's Diary | |
BillyBob Work-in-Progress Log
![]()
TRUCK LINKS including vendor sites for old parts, custom parts, and tools as well as sites for classic car and truck organizations
STORE Operating in association with Amazon.com, books, recordings and tools can be purchased.
PLANNING for the restoration including project schedule and cost estimates.
![]()
WORK-IN-PROGRESS is the restoration of parts of BillyBob that I can accomplish without a garage.
PRE-RESTORATION includes log entries of minor repairs and and adventures between time of purchase and the time when I started restoration, a piece at a time.
JR'S KORNER JR's Korner is the history of BillyBob before I got him authored by my brother, Wm. C. Kephart.
1. Slight Facelift
After the kidnapping incident, I didn't have the necessary confidence in my landlord's management team to take BillyBob back to the scene of the crime (see episode eight of the Pre-Restoration Log). I managed to rent a warehouse bay near my office to keep him in. This had the disadvantage of extra expense which would postpone that day of teardown and restoration farther into the future. The good news was that the truck would deteriorate slower now that it was no longer exposed to the great outdoors.
 I
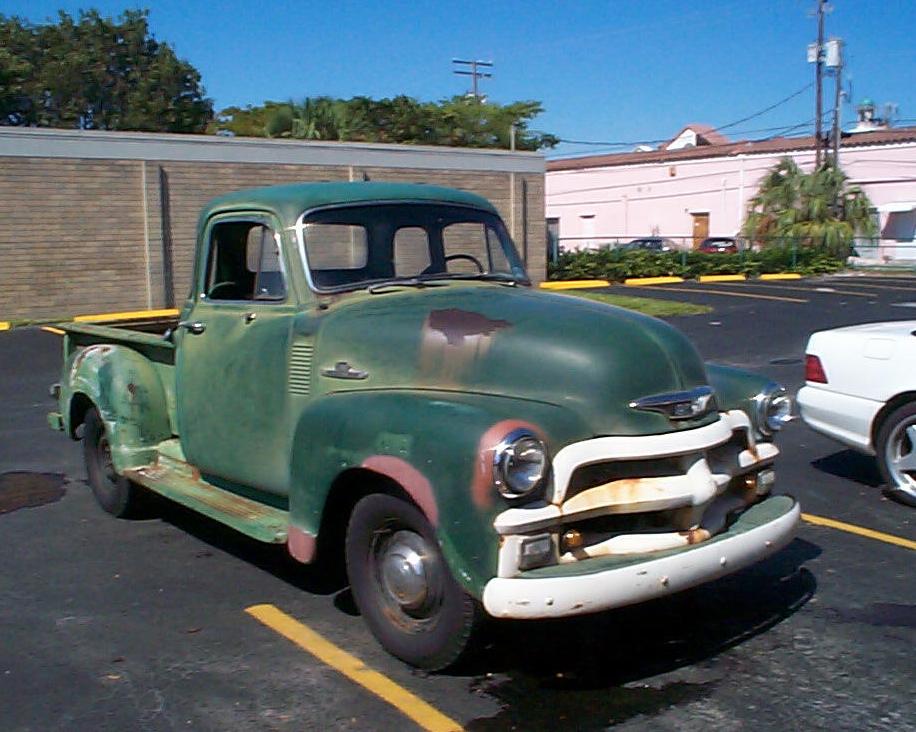
determined now was the time to spruce up Billybob's appearance just a
little. He's lookin' pretty ragtag even tho' grown men and boys will
walk right past sparkling ferraris and porsches in any given parking
lot to admire BillyBob since those cars are as common in South Florida
as a hound with fleas. I still don't have a place to work, so this will
involve preparation with the Corroless Rust Stabilizer I obtained from
Eastwood in February and "Hunter Green" Rustoleum with "Shell White"
Rustoleum grille and bumper. This is a far from ideal solution, but he
will look far better than he does now.
I
determined now was the time to spruce up Billybob's appearance just a
little. He's lookin' pretty ragtag even tho' grown men and boys will
walk right past sparkling ferraris and porsches in any given parking
lot to admire BillyBob since those cars are as common in South Florida
as a hound with fleas. I still don't have a place to work, so this will
involve preparation with the Corroless Rust Stabilizer I obtained from
Eastwood in February and "Hunter Green" Rustoleum with "Shell White"
Rustoleum grille and bumper. This is a far from ideal solution, but he
will look far better than he does now.
Early in the year I had approached three different paint shops about a cheap paint job. I told each of them I was not expecting any miracles here, but nobody would touch it. Well, hell . . . If I do it myself, I can't pitch a bitch about how it comes out - right? After all, I'm only looking for a result that looks OK at a distance, like Tammy Faye Baker.
I picked up a Black and Decker 13.2v Cordless 3/8" drill and a variety pak of foam paint brushes at the local Home Depot superstore. My plan was to paint BillyBob a section at a time. Every sunny saturday I get, I'd pick him up at the warehouse for his weekly exercise run. At the Krash Lab, I'd work on BillyBob while the computers were running their maintenance routines inside.
 October
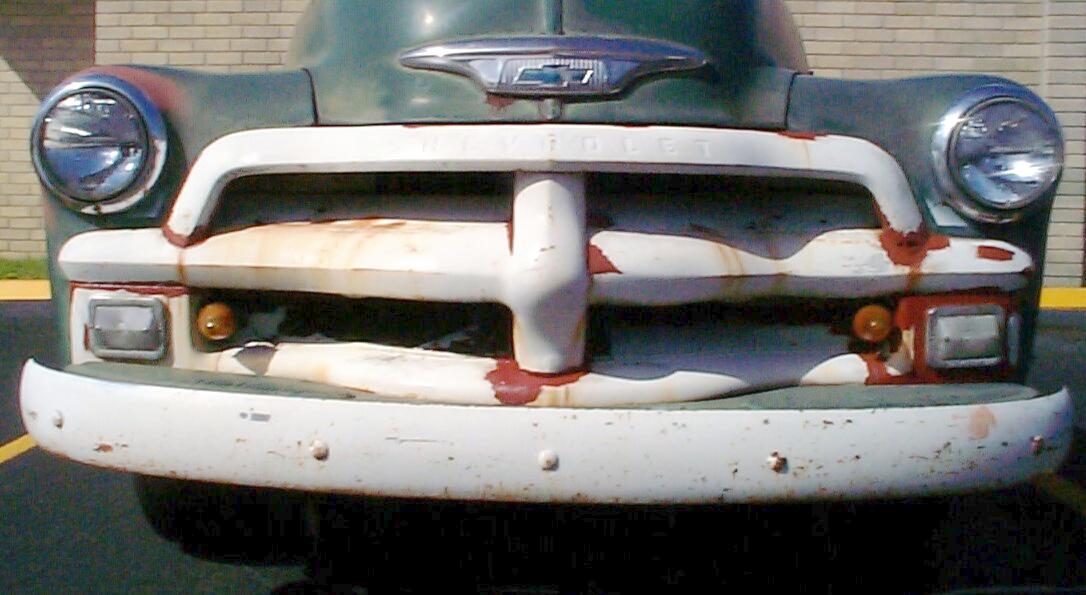
30th 1999 I decided to start with
the grille. I should have done the bumper at the same time, but I was
half way finished before that dawned on me like a slap upside the head.
The grille was wire-brushed, then treated with compressed air from a
can. The wire brush operation had opened up a couple of rust-thru holes
where the top grille bar joined the middle grille bar at the right-hand
side, but in keeping with the spirit of a temporary fix, I'm not going
to address the holes at this time, just paint over them as best I can.
The Corroless Rust Stabilizer was applied with one of the small foam
brushes. I'm not sure the foam brush is compatible with the Corroless
as it reached the consistency of soggy bread by the time I was finished.
October
30th 1999 I decided to start with
the grille. I should have done the bumper at the same time, but I was
half way finished before that dawned on me like a slap upside the head.
The grille was wire-brushed, then treated with compressed air from a
can. The wire brush operation had opened up a couple of rust-thru holes
where the top grille bar joined the middle grille bar at the right-hand
side, but in keeping with the spirit of a temporary fix, I'm not going
to address the holes at this time, just paint over them as best I can.
The Corroless Rust Stabilizer was applied with one of the small foam
brushes. I'm not sure the foam brush is compatible with the Corroless
as it reached the consistency of soggy bread by the time I was finished.
Since this is the kind of operation my paternal grandfather might have performed on his pickup, I like to play Patsy Cline on the portable CD player to set the mood while I'm working on BillyBob. She was his favorite female vocalist and one of mine too.
During the following week, I obtained automotive masking tape in 1/2" and 2" widths along with a 3M Automotive Paint & Body Scuff Pad at the local Discount Auto Parts store. I got one can each of Rustoleum's Premium "Outdoor Decor" Enamel in the Shell White and Hunter Green colors along with a 12" roll of masking paper at the Home Depot store.
 November
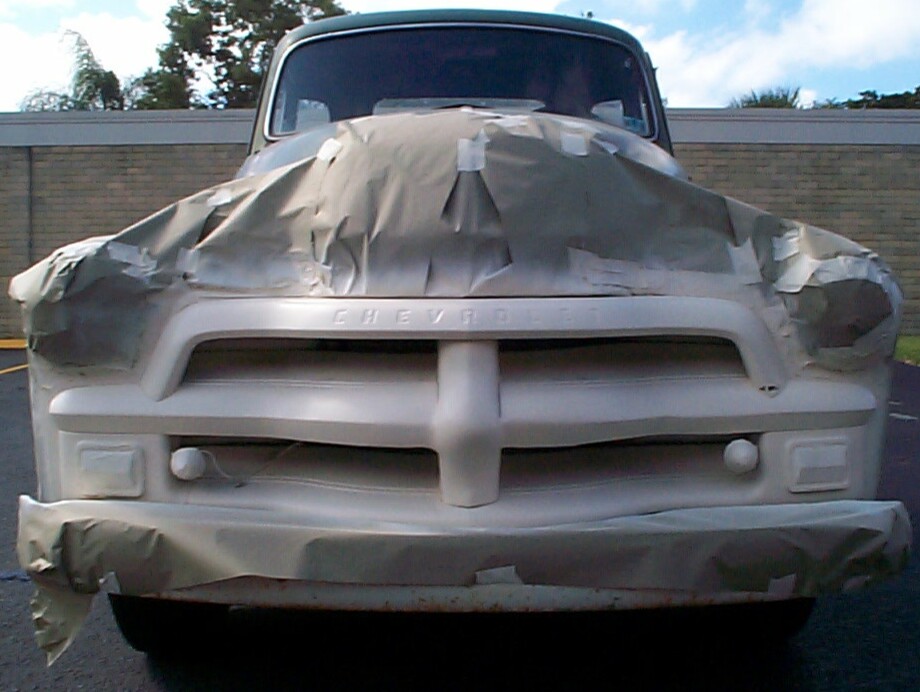
6th 1999 It's windy today, so I'm
painting the grille in the calms between wind gusts . . . The wind is
from the south, and I can time the gusts by watching the palm trees
across the street. Masking wasn't as hard as I thought it would be and
I even remembered to put masking paper behind the grille to protect the
radiator core. A fellow in a uniform of some type walked by eyeing me
suspiciously. I was annoyed by the passing thought he might be a code
enforcement official, and was going to cite me or my boss for
spray-painting, on private property, without a permit within the city
limits of Boca Raton, but he passed on without comment.
November
6th 1999 It's windy today, so I'm
painting the grille in the calms between wind gusts . . . The wind is
from the south, and I can time the gusts by watching the palm trees
across the street. Masking wasn't as hard as I thought it would be and
I even remembered to put masking paper behind the grille to protect the
radiator core. A fellow in a uniform of some type walked by eyeing me
suspiciously. I was annoyed by the passing thought he might be a code
enforcement official, and was going to cite me or my boss for
spray-painting, on private property, without a permit within the city
limits of Boca Raton, but he passed on without comment.
I sprayed two coats about fifty minutes apart and it doesn't look too bad for what it is. The "Shell White" is an off-white, ivory color and is just what I wanted.
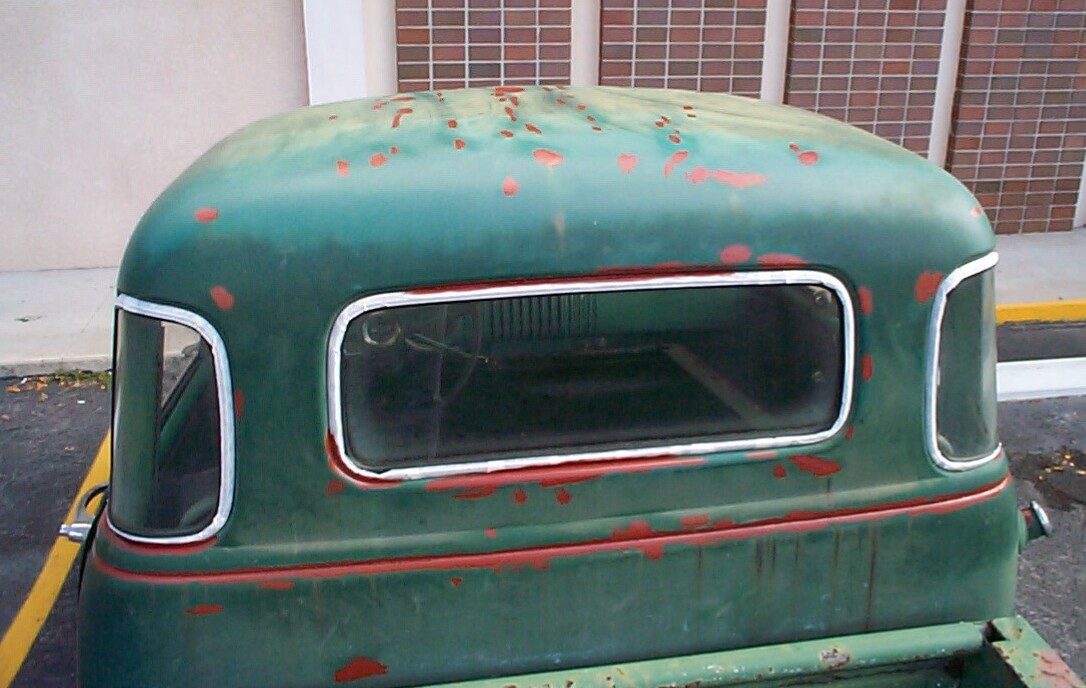
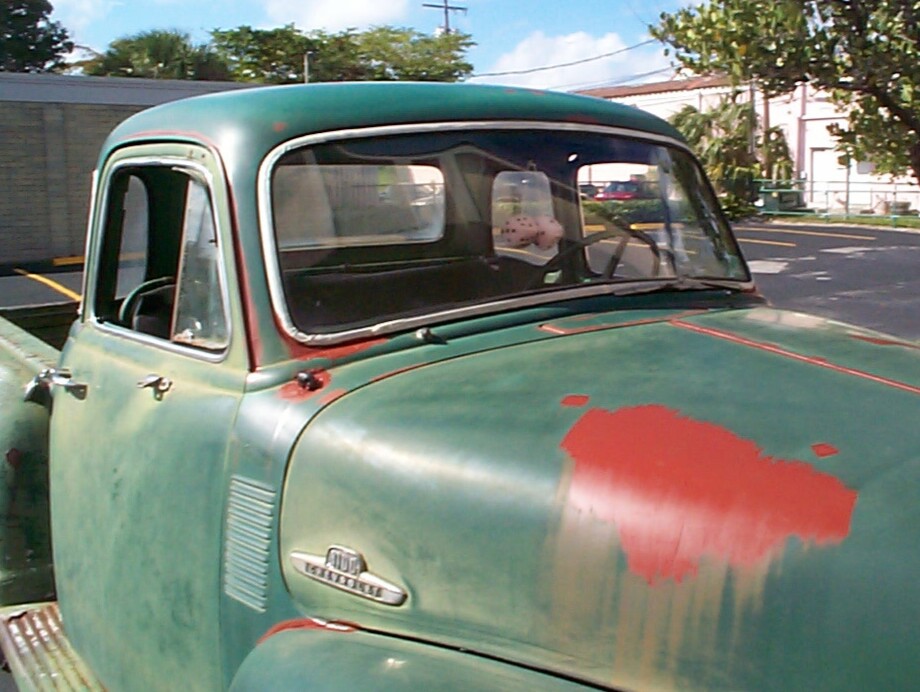
November 13th 1999 Decided to tackle the body next. When I get that done, the worst will be over . . . I think. Started with the wire brush, both drill-assisted and by hand, to prep for the Corroless Rust Stabilizer. Got a lot of small rusted areas in seams, around windows and doors and the cowl vent. Like I said, a lot of these little spots . . . every time I think I'm finished, I see another spot I missed.
 Tried
to remove the windshield wipers . . . The passenger side wiper came off
easily. Heck, it almost fell off. Not so with the driver side wiper. I
tried for awhile with pliers, but gave up before I broke anything.
Guess I'll have to do some research. The debris and dust was blown away
with canned air and I started with the Corroless. The foam brushes
definitely do not like the rust stabilizer. I dissolved two of them and
they were too gooey to get the rust spots close to the window rubber
and trim. I'll get some more precise tools before next time.
Tried
to remove the windshield wipers . . . The passenger side wiper came off
easily. Heck, it almost fell off. Not so with the driver side wiper. I
tried for awhile with pliers, but gave up before I broke anything.
Guess I'll have to do some research. The debris and dust was blown away
with canned air and I started with the Corroless. The foam brushes
definitely do not like the rust stabilizer. I dissolved two of them and
they were too gooey to get the rust spots close to the window rubber
and trim. I'll get some more precise tools before next time.
I stopped long enough to mask the windows, then finished up for today. Some youngster walked by and gave me a flyer for a new "Candle and Tobacco Accessory" shop opening up nearby. I noticed he didn't put any under the wipers of my employer's two Mercedes, the only other cars in the lot. I guess I fit the Deadhead profile pretty well (or Parrothead for that matter. This is Jimmy Buffett territory, after all). I determined to add an extra step here that I didn't do with the grille. Next week I'll rough up the existing paint surface and wash the area to be painted with soap and water. The paint will follow up the next sunny Saturday I get after that.
November 20th 1999 I went to Home Depot yesterday and purchased four cans of Rustoleum "Hunter Green" in their "Hard Hat" Enamel to paint the cab next week. The "Outdoor Decor" Enamel that I painted the grille with is a semi-gloss and I want a touch more shine in the green finish. I picked up a spray bottle of "Goo Off" cleaner too, but haven't tried the stuff out yet.
 I
started out today by wire-brushing and treating the hood with the
Corroless Rust Stabilizer. I attempted to remove the three chrome hood
medallion trim pieces, but I didn't have the right tools. I abandoned
the attempt before I ruined the fasteners. One thing I learned from my
dad - "Use the right tool for the job". With his skills, he could get
by in a pinch by improvising, but he didn't like it. In JR's Korner of
this site, my brother's episode "A"
Team Mission Accomplished, relates a tale where my dad
torqued head bolts with a breaker bar (don't try this at home, kids). I
myself witnessed him removing internal snap rings from the old
three-speed transmission of my '59 Ford with a pair of flat blade
screwdrivers. It took him a few seconds and I had been trying all day
to do the same thing without success! I purchased the snap-ring pliers
the next day for $7.95 (a considerable sum for a college student
without a job in 1967). He also showed me how to keep the individual
roller bearings in place with axle grease during reassembly of the same
transmission. These are tricks that you have to learn from a master
mechanic because you won't find them in the Chilton's manual.
I
started out today by wire-brushing and treating the hood with the
Corroless Rust Stabilizer. I attempted to remove the three chrome hood
medallion trim pieces, but I didn't have the right tools. I abandoned
the attempt before I ruined the fasteners. One thing I learned from my
dad - "Use the right tool for the job". With his skills, he could get
by in a pinch by improvising, but he didn't like it. In JR's Korner of
this site, my brother's episode "A"
Team Mission Accomplished, relates a tale where my dad
torqued head bolts with a breaker bar (don't try this at home, kids). I
myself witnessed him removing internal snap rings from the old
three-speed transmission of my '59 Ford with a pair of flat blade
screwdrivers. It took him a few seconds and I had been trying all day
to do the same thing without success! I purchased the snap-ring pliers
the next day for $7.95 (a considerable sum for a college student
without a job in 1967). He also showed me how to keep the individual
roller bearings in place with axle grease during reassembly of the same
transmission. These are tricks that you have to learn from a master
mechanic because you won't find them in the Chilton's manual.
After prepping the hood, I went over the cab with the 3M Auto-pak Scuff Pad I got a few weeks ago. It does a good job in short order. The cab was washed with some "Raindance" car wash solution and water, then rinsed. I'm ready now to mask and paint the cab next Saturday if the sun shines.
November 27th 1999 Started out today trying to find the best location in the parking lot to paint Billybob's body. My employer is in the Big Apple for the Macy's Thanksgiving Day parade. He would rather be in the Orange Bowl today watching his beloved Hurricanes (how 'bout dem Canes?) with his buddies, but SWMBO decided otherwise. Problem is, his big black mercedes panzer is parked where I usually work on BillyBob.
Initially, I parked BillyBob on the other side of the lot, but it is a little too close to our neighbor's building for my liking. The building is owned and occupied by a law firm, nuff said. I started masking off the windows and cab trim. By the time I got the windshield and rear windows masked, I found the keys to the panzer. This darn thing is a "Tiger" class behemoth (a 420 SEL sedan) but I managed to move it by myself to the far end of the lot. BillyBob was blindly jockeyed into the vacated space using only the side windows. Same side windows and door trim were then masked off.
Today is a good day for painting . . . not too much wind. I used a dust mask and goggles that I had purchased earlier in the week from Amazon.com's new Home Improvement area of their site. I got a few runs on the first pass . . . As I said earlier, like Tammy Faye is good enough. When the paint job is completely done, I'll probably experiment a bit to see if I can clean the finish up somewhat.
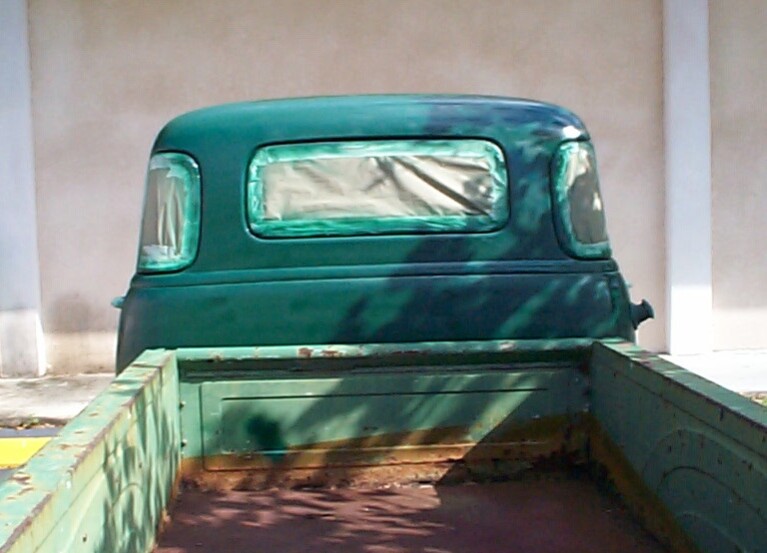 When
I got to the second coat and second can of Rustoleum, I noticed that
three of the four cans of Rustoleum "Hard Hat" enamel I had purchased
at Home Depot were labled in Spanish, not English. I was hoping that
"Finish Acabado Finition" was the same as "Hunter Green" at this point.
I sprayed a small amount inside the pickup bed to make sure and it was.
I sprayed two light coats about 45 minutes apart for a total of three.
When
I got to the second coat and second can of Rustoleum, I noticed that
three of the four cans of Rustoleum "Hard Hat" enamel I had purchased
at Home Depot were labled in Spanish, not English. I was hoping that
"Finish Acabado Finition" was the same as "Hunter Green" at this point.
I sprayed a small amount inside the pickup bed to make sure and it was.
I sprayed two light coats about 45 minutes apart for a total of three.
Due to my inexperience and the everchanging wind patterns, I achieved a lackluster finish (always wanted to use that word in context). Hopefully, I'll improve with practice. I learned another lesson - Don't leave the masking tape in place too long. Anybody who lives in a hurricane zone has seen "X" patterns on window panes where people have taped them during storm preparations and not removed the tape immediately afterwards - The adhesive becomes baked in place by the sun. I found nearly the same effect on BillyBob. In future sessions I will remove all masking tape before taking BillyBob back to his warehouse. Looks like I'm gonna get a shot at trying out that "Goo Off" cleaner stuff after all.
| < Back
to Intro |
You can email me at ![]() webmaster@laroke.com
webmaster@laroke.com
Issued Saturday March 4, 2000
Updated Tuesday April 11, 2017
copyright © 1996-2017 Larry Robert Kephart all rights reserved
| | LRK Home | | Bio Info | | Krash Khronicles | | LAROKE | |
| | BettyLou | | BillyBob's Garage | | Rat Patrol | | Deerslayer | | Elvira | |
| | Land of the Free and Home of the Brave | |
| | Keppylou's Art | | WWI Soldier's Diary | |