| | LRK Home | | Bio Info | | Krash Khronicles | | LAROKE | |
| | BettyLou | | BillyBob's Garage | | Rat Patrol | | Deerslayer | | Elvira | |
| | Land of the Free and Home of the Brave | |
| | Keppylou's Art | | WWI Soldier's Diary | |
Tinkering with Deerslayer
![]()
DEERSLAYER LINKS including vendor sites for parts and tools as well as sites for old truck and hot rod organizations
![]()
TINKERING WITH DEERSLAYER chronicles the day-by-day maintenance and improvements episodes for Deerslayer, a '37 Chevy farm truck hot rod.
CRUISIN' WITH DEERSLAYER Roadtrips, cruise-in's and truck show stories and tall tales.
TONY'S DUNGEON Tony Pascarella's forum entries at OldGMCtrucks.com regarding Deerslayer, particularly the 302 GMC engine build in his farmhouse basement.
![]()
DEERSLAYER MAINTENANCE Ever changing detailing, oil change, lube, etc. maintenance routines specifically developed for Deerslayer, including required tools, materials and procedures.
PROJECT NAILHEAD Chronicles the rebuild of a 1954 Buick Roadmaster 322 nailhead engine as a future replacement for Deerslayer's Jimmy 302.
49. Change of Plans
For the last three years, the game plan has been to rebuild Deerslayer first with his Jimmy 302 engine. Then to rebuild BillyBob with his blown stovebolt engine. Finally, if I'm still here, rebuild the 322 Buick nailhead with the Latham supercharger as a replacement engine for Deerslayer's Jimmy.
By the end of summer, I'd collected ninety-five percent of the
parts I needed to build the nailhead the way I wanted so, I moved the
Deerslayer - Buick configuration to the head of the list. Refurbishing
the Jimmy 302 will now come after the BillyBob rebuild.
 March
22nd 2021
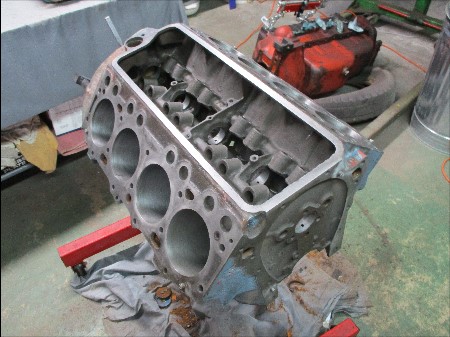
Continued the nailhead block cleaning operations. Used a ball hone on a
drill motor to refresh the cylinder bores and get the 45 degree
cross-hatch. Marvel Mystery Oil provided lubrication.
Did a final pass of the machined surfaces with a 320 grit drum in the SCT tool. Cleaned the cylinders, lifter bores and oil passages with nylon bottle brushes, Oileater and Hoppes number 9 passes.
Chased all the bolt holes with thread straightener
taps after cleaning with telescoping magnet and compressed air passes.
The block is now ready for its hot soapy water cleaning. Background
music was Eddie Cochran and Friends One minute to one, Vol II.
 March
25th 2021
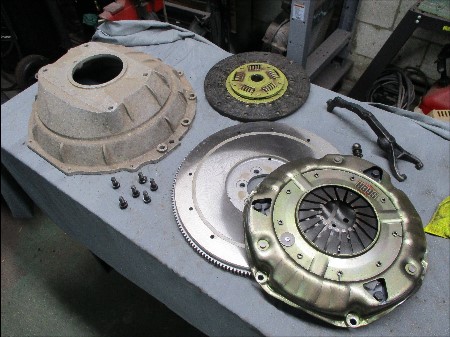
Need to free up the engine hoist by getting the 302 Jimmy to a better
storage location than on its side in the middle of the floor. It's
current position is a good one for access to the clutch, however, so I
decided to try to extract the clutch before moving the engine. I want
to find
out if the Hays clutch will fit the nailhead flywheel and Trans-Dapt
HC-25 Adapter bellhousing.
Turned out to be easier than I anticipated. It was out and on the workbench in about fifteen minutes. The Hays 11" Street/Strip pressure plate mounting circle pattern is about 1/4" too big and the flywheel will have to be re-drilled if I use the Hays clutch. It looks like it will work but drilling a flywheel is beyond my experience and I need some Deep Ponder Mode musing on this.
Good news is that the Jimmy's ball pivot for the throw-out
bearing fork is a direct bolt-in for the Trans-Dapt bellhousing. Beer
of the day was Wooden Cask Brewing Company's The Scotchman Scotch Ale.
 April
8th 2021
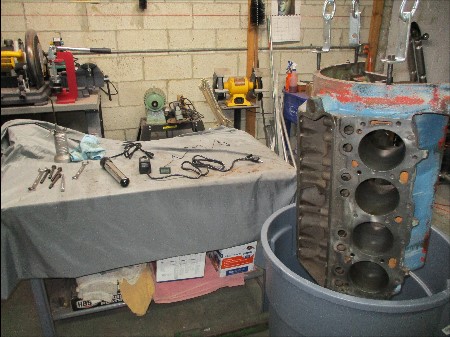
Started setting up a DIY hot tank for the engine cleaning. Cleaned a
plastic trash
can the landlord's contractor left behind when he absconded with my
fourteen foot step ladder. Found a hole in the bottom which was
probably the reason he left it. Ordered one off the intarweb.
Filled it with water and
lowered the nailhead block into it. Placed a submersible spa pump for
circulation and a submersible heating element, digital thermometer and
a small amount of
Dawn dishwashing soap and watched a bit to see that the suds didn't get
out of control. Background music was Stone Free, A Tribute to Jimi
Hendrix.
 April
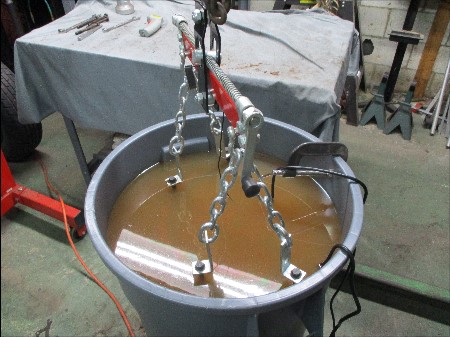
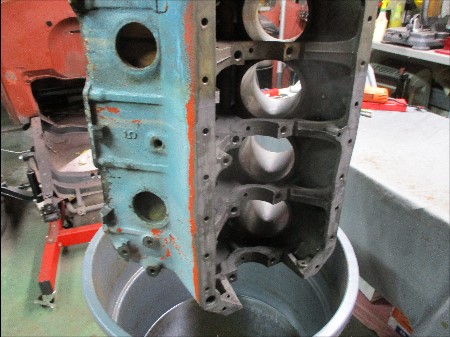
12th 2021 Took almost thirty-five gallons to
submerge the
block. Had to monitor the operation closely as the heating element
would have the water boiling if left alone. No switch or thermostat on
it. The pump turned out to be more of an aquarium pump than a spa pump.
I kept the heat between 130 and 140 degrees as I did not know how much
heat the plastic tub could take. The water
moved in a slow circular pattern without suds. When the nailhead was
pulled from the dirty soup, it was blown dry with
my electric weed blower and an air hose.
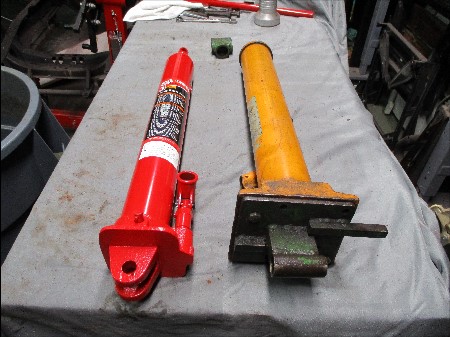
And then the wheels fell off. The hydraulic ram on the Carroll
and Taylor engine hoist malfunctioned and quit working. I settled into
Deep Ponder Mode to sort things out with the beer of the day, Florida
Beer Company's Sunshine State Amber Lager.
 April
15th 2021 Short detour to repair the engine hoist.
Searched the intarweb with the hydraulic ram name plate info and found
it to be a common item so, I ordered a replacement that most closely
matched the same specs and crossed my fingers. The price was low enough
that it didn't make sense for me to stop my barely noticeable momentum
to try to repair
the old ram at this time.
The new ram works and it almost fits, like all things chicom. Needs a little drillin' of the base pivot and grinding on the pivot bracket and we should be good to go. Background music was Country Joe and the Fish, Electric Music for the Mind and Body.
 May 5th
2021 When the engine hoist broke, I
sidetracked into
a lazy streak for a couple of weeks but I think I'm back on track now.
Onward to the nailhead
derusting ops. The
water was drained and replaced
with twenty gallons of Evapo-Rust for the waterjacket derusting. Since
I didn't have
the quantity needed to completely submerge the block, the operation has
to be a two-step dance, front half first, then the rear half of the
block, two days in the soup for each. Beer of the day was Bent River
Brewing Company's Undercurrent IPA.
 May
28th
2021Sidetracked again, this time by a nearly immobilizing,
nasty, oozing rash that had me feeling sorry for myself most of the
time I wasn't at the office. It has pretty much run it's course and now
I'm back at it again.
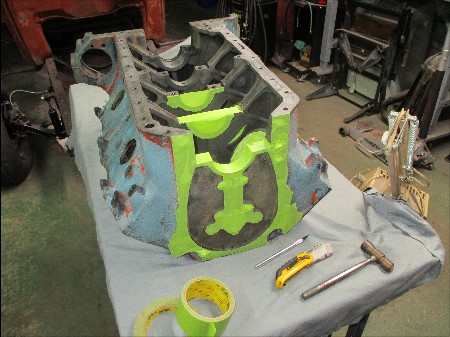
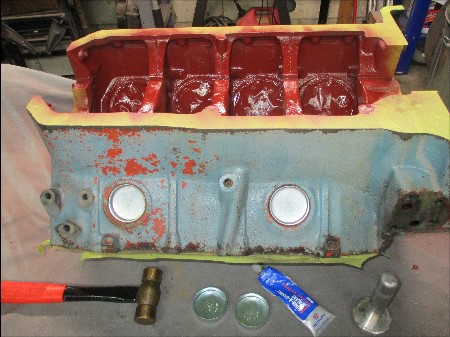
Cleaned up after the derusting operations and began preparing the nailhead block for painting. Plugged threaded holes and started masking off machined surfaces for the first stage of painting. My masking Kung Fu is not strong and it's tedjus work. I did use the trick of trimming the masking tape at sharp edges by using a small brass ball-peen hammer to make a cut line in the tape.
Beer of the day was Florida Brewing Company's Hurricane Reef
IPA.
 June
16th
2021Fellow HAMBer from Sweden, J.Hansen suggested using a file
in lieu of the brass hammer to trim the masking tape. Tried it and had
moderate success. It's a skill I have to hone some. Masked the rest of
the crankcase and turned the block right side up.
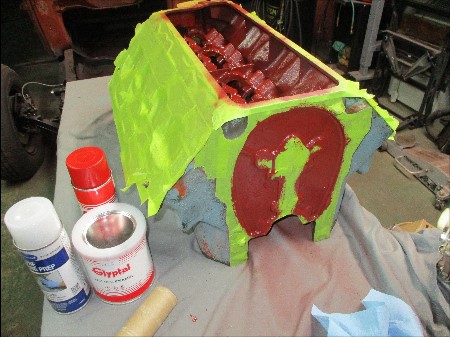
Used the old throw away juice lifters to mask the lifter bores. That saved some time. The cam bearings, not so much. Fingers are too big to get the masking tape in the confined space. Had to retreat for some deep ponder mode thinking.
Brought a paper towel roll tube back to the shop with me from the office. It was a smidgen greater diameter than the cam bearings. I was able to slit it and cut it into rings that masked the cam bearings nicely.
Cleaned some creeping flash rust with wire cup in Dremel tool
and
blew off with electric leaf blower. Gave it a few cycles of PRE Paint
Prep dosings followed by more leaf blower blow-offs.
Painted as much of the lifter valley with Glyptal red
insulating enamel paint as I could reach by brush and finished up what
I couldn't
reach with spray-bomb. Background music was Dylan and the Dead.
 June
18th
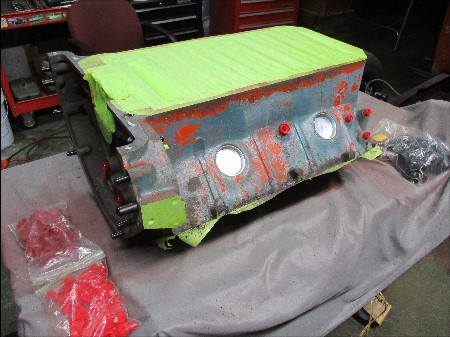
2021 Flipped the nailhead block over tango uniform again and
painted the cathedral nave crankcase with Glyptal after the PRE
Paint
Prep treatment and repairing some of the masking dislocated by the
first flip.
Installed new freeze plugs with Permatex Form-A-Gasket #1.
This operation is terra incognita to me and I buggered the first run at
it as I'm apt to do. It was a do over but by the time I installed the
fourth one, I was feeling semi-pro and a little cocky.
Ordered a pair
of block drain petcocks. Started the second stage of masking for the
nailhead green
engine paint from Bill Hirsch. This involves sealing the block interior
areas and trimming the masking tape using the gasket set as guide
templates. Beer of the day was Bent River Brewing Company's Uncommon
Stout Oatmeal Stout with Coffee.
 June
21st
2021 Got the bottom block masking in place and trimmed, then
came across three assortments of paint masking hole plugs I picked up
on an impulse buy in the last century. These plugs saved a lot of time
masking the numerous holes on the sides and back of the nailhead block.
Gave the sides and back of the block the PRE Paint Prep
treatment which led to a setback. The old Pontiac blue paint did not
like the paint prep and started to flake off. I retired to the deep
ponder mode chair. Father's Day background music was a Dean Martin mix
CD my Mom made up in my Dad's memory. Slow Boat to China made me think
of his time in the CBI during the war.
 June
23rd
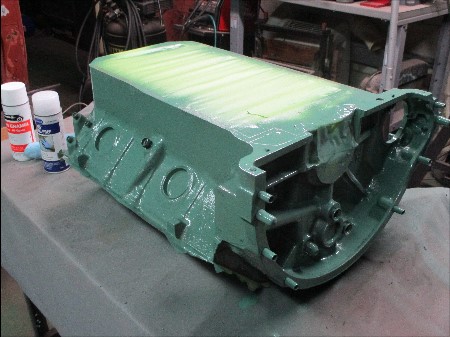
2021 Went over the block with scotchbrite cookies in the air
powered angle grinder to remove all the loose paint remnants,
blew it off with the air hose, then applied the PRE Paint Prep again.
This time, the surface remained stable and I followed up with two coats
of the Bill Hirsch Engine Enamel spray bomb.
The Buick nailhead green is an acquired taste. Some have nicknamed it
puke green. They also put these engines in medium duty Chevy trucks
from
1956 to 1959 when the Chevy 348 was introduced. I didn't research
Chevy's color for the 322 because I like the green. Beer of the day was
Free State Brewing Company's Oatmeal Stout.
 June
24th
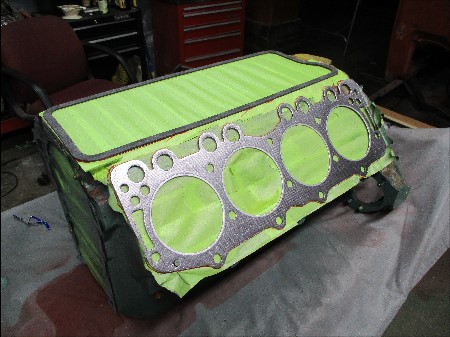
2021 Flipped the block right side up again and finished
trimming the masking tape around the head and valley cover gaskets by
running a sharpie line around the gaskets and trimming just inside the
line with X-Acto knife.
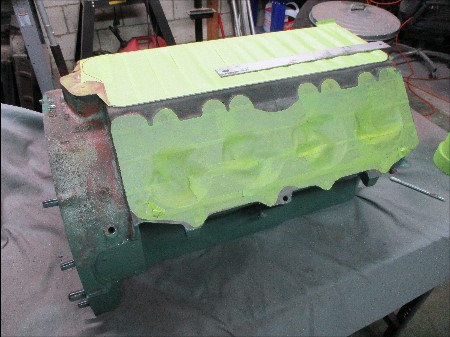 The paint
is still tacky. The weather, here in South Florida, is muggy this week.
After the top of the nailhead is painted and the masking comes off,
touch ups can be made at any time by spraying a few blasts of paint in
a cup and dabbing it on with a Q-Tip. Background music was the Rolling
Stones It's only Rock and Roll.
 June
28th
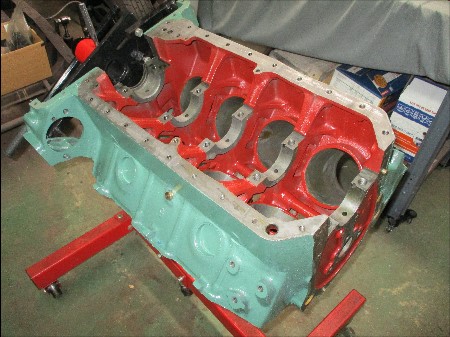
2021 Plugged some more holes, PRE Paint Prepped and painted
the upper nailhead block surfaces with two coats. Let the paint cure
for a couple of days and mounted the block back on the engine stand.
Removed the masking, cleaned the machined surfaces and wiped them with
Marvel Mystery Oil.
Matt Martin, of Centerville Auto Repair, commented about the block drain petcocks and I decided to go with his practice of using plugs. The petcocks will go in the parts box for radiator spares. I got 1/4" NPT brass plugs for the nailhead and installed them with Threadlocker blue. Beer of the day is Hanger 24 Craft Brewing's Orange Wheat American Wheat Ale.
Time to post this log entry. Next up for the nailhead will be
piston assemblies and crankshaft.
| < Back
to Intro |
You can email me at ![]() webmaster@laroke.com
webmaster@laroke.com
Issued Tuesday June 29, 2021
copyright © 2008-2021 Larry R. Kephart all rights reserved
| | LRK Home | | Bio Info | | Krash Khronicles | | LAROKE | |
| | BettyLou | | BillyBob's Garage | | Rat Patrol | | Deerslayer | | Elvira | |
| | Land of the Free and Home of the Brave | |
| | Keppylou's Art | | WWI Soldier's Diary | |