| | LRK Home | | Bio Info | | Krash Khronicles | | LAROKE | |
| | BettyLou | | BillyBob's Garage | | Rat Patrol | | Deerslayer | | Elvira | |
| | Land of the Free and Home of the Brave | |
| | Keppylou's Art | | WWI Soldier's Diary | |
Tinkering with Deerslayer
![]()
DEERSLAYER LINKS including vendor sites for parts and tools as well as sites for old truck and hot rod organizations
![]()
TINKERING WITH DEERSLAYER chronicles the day-by-day maintenance and improvements episodes for Deerslayer, a '37 Chevy farm truck hot rod.
CRUISIN' WITH DEERSLAYER Roadtrips, cruise-in's and truck show stories and tall tales.
TONY'S DUNGEON Tony Pascarella's forum entries at OldGMCtrucks.com regarding Deerslayer, particularly the 302 GMC engine build in his farmhouse basement.
![]()
DEERSLAYER MAINTENANCE Ever changing detailing, oil change, lube, etc. maintenance routines specifically developed for Deerslayer, including required tools, materials and procedures.
PROJECT NAILHEAD Chronicles the rebuild of a 1954 Buick Roadmaster 322 nailhead engine as a future replacement for Deerslayer's Jimmy 302.
33. More Useful Things
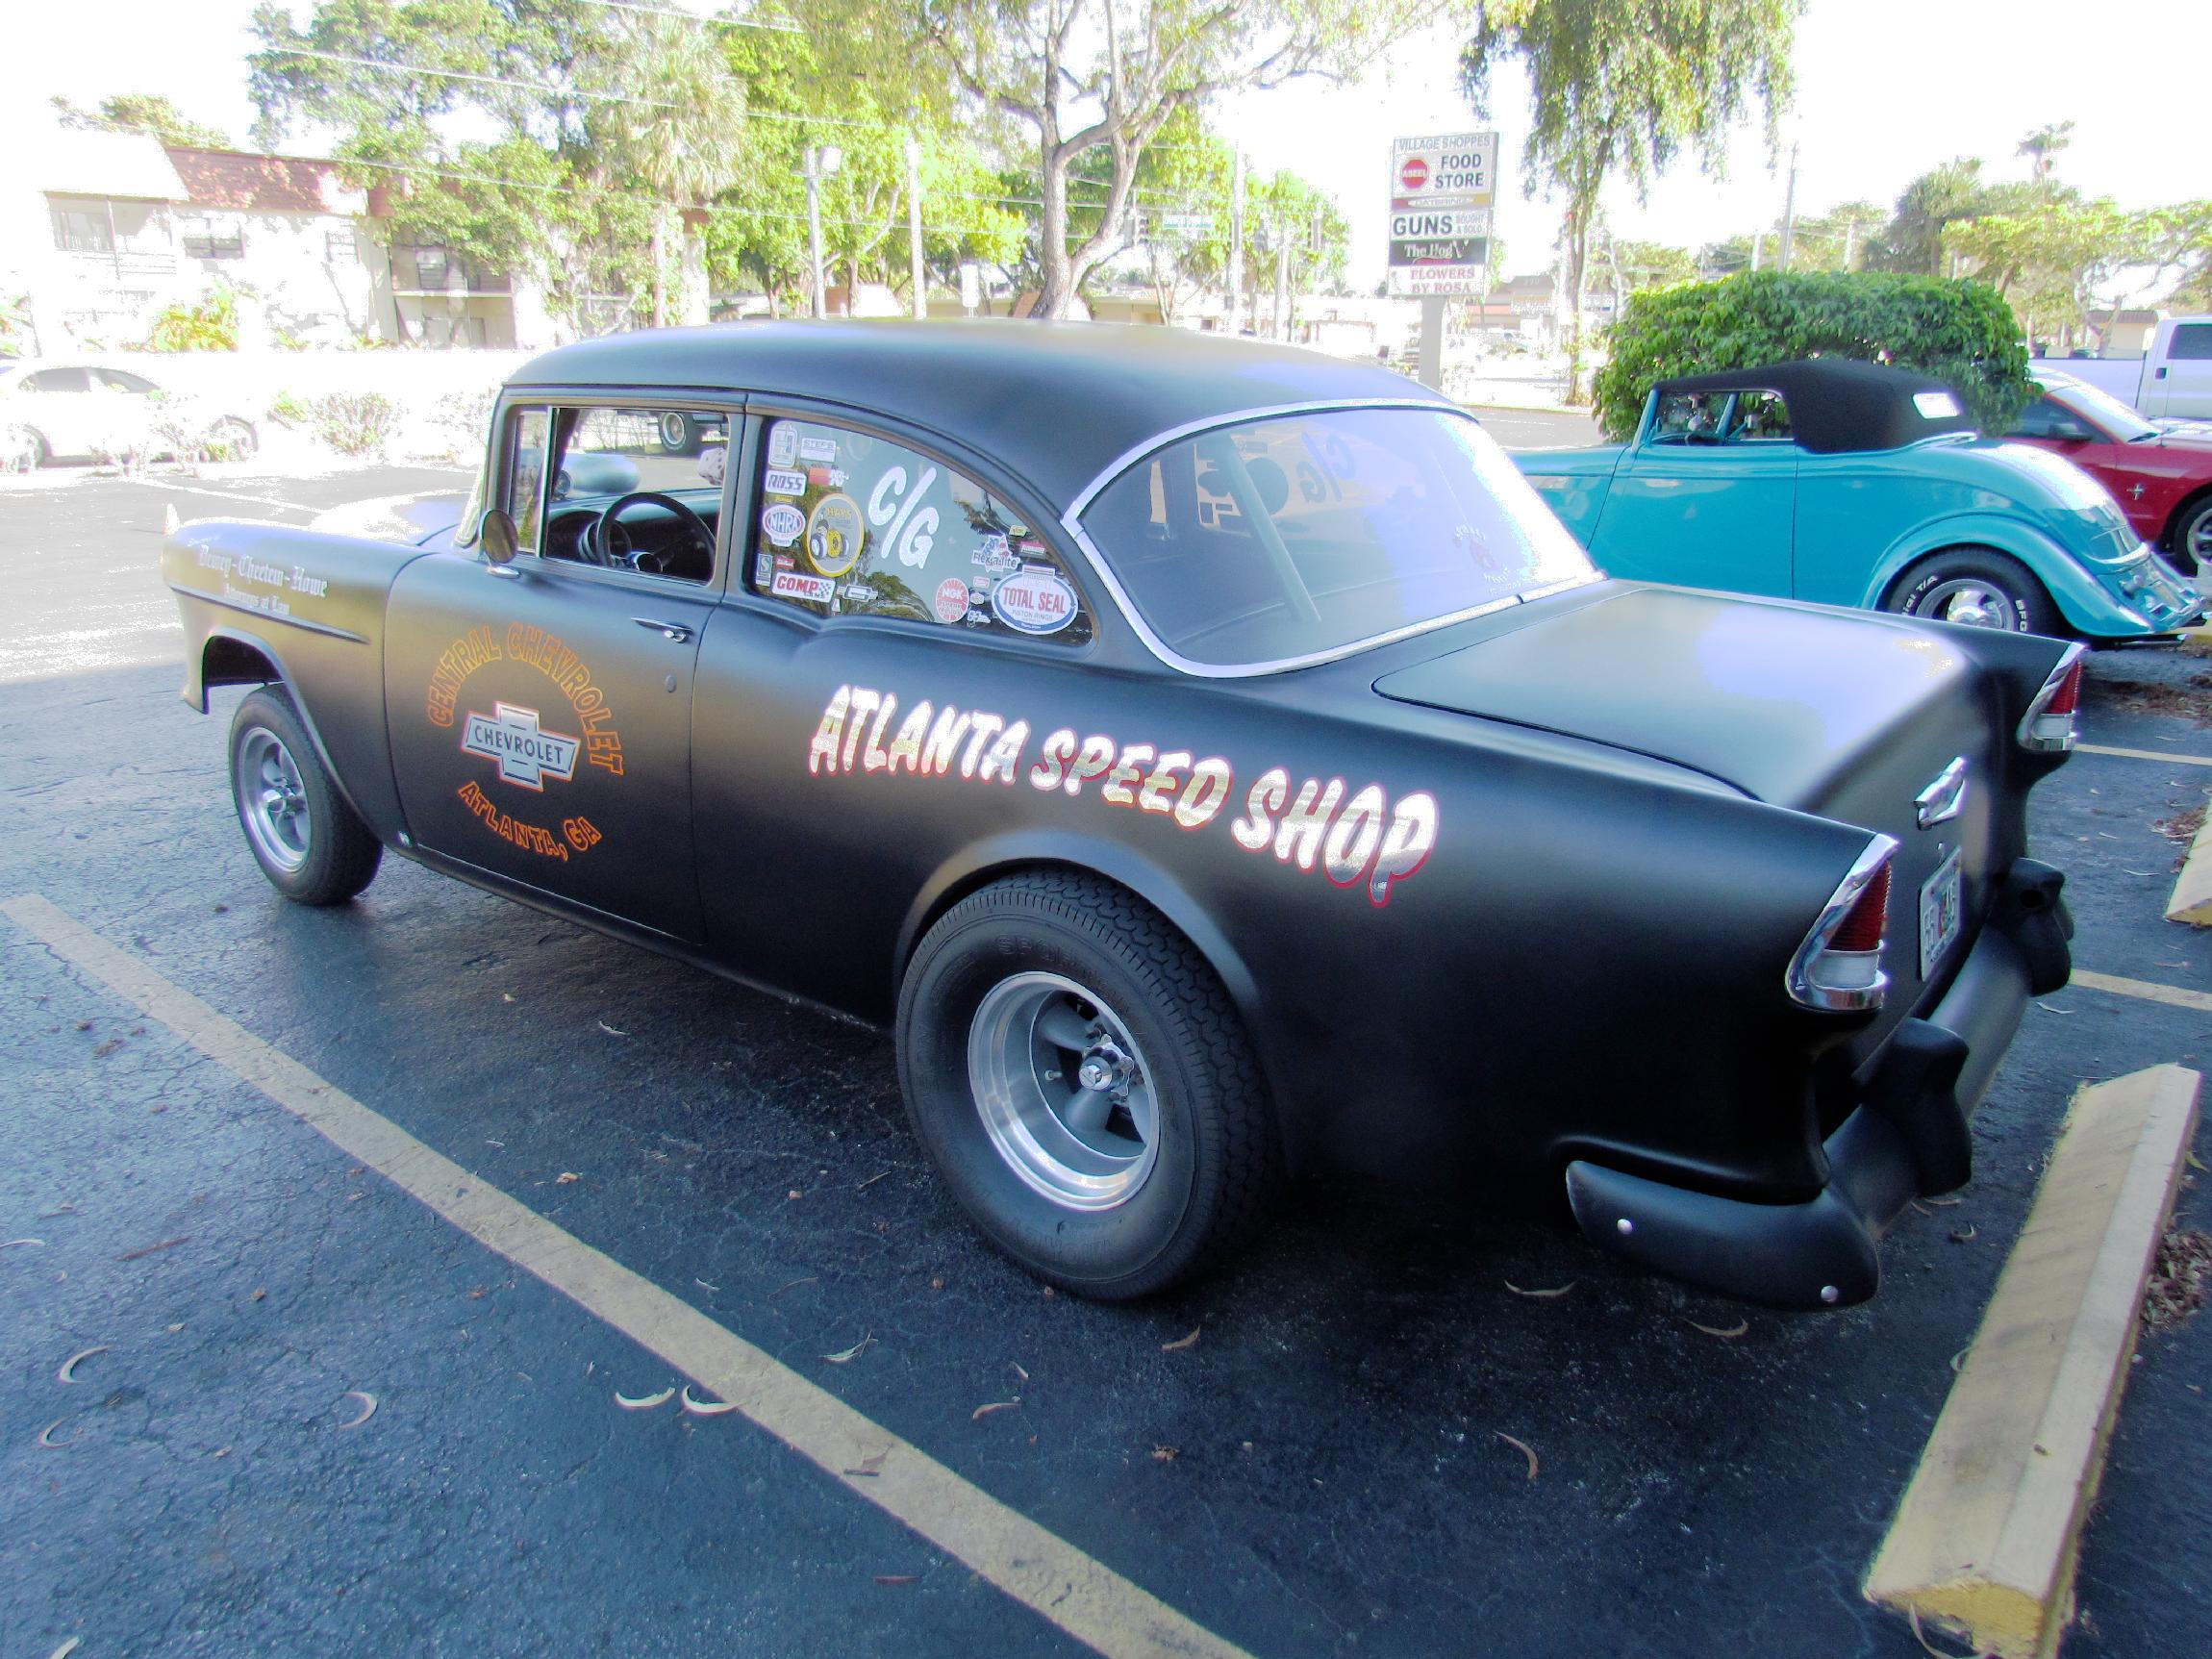
March 5th 2014 Imagine, if you will, a saturday nite, 2 am, U.S.Route 1 in North Fort Lauderdale. A '37 Chevy hot rod farm truck sits at a light next to a '55 Chevy gasser. No cars in front of them. The light changes . . . Both rides roll across the intersection then, they hit it. It was a short block to the next light. I was never in front of the gasser but he only had me by a nose for the first half of the block before he pulled away. At the next light, he offered to spot me three car lengths but I declined. This is a well patrolled area and I can't afford the legalities. We both motored on sedately. That's the way I remember it. We'll see what he has to say about it the next time I see him.
 I
met up with George a week later to compare notes. He said the
Deerslayer looked a little squirrely to him at one point which I
assumed was the hard 1st to 2nd shift which bumped the rear end
sideways a few inches. George didn't realize it until we parted ways
that night but he lost his fan belt in the encounter. He guestimated it
left the pulleys when he touched 7200 rpm.
I
met up with George a week later to compare notes. He said the
Deerslayer looked a little squirrely to him at one point which I
assumed was the hard 1st to 2nd shift which bumped the rear end
sideways a few inches. George didn't realize it until we parted ways
that night but he lost his fan belt in the encounter. He guestimated it
left the pulleys when he touched 7200 rpm.
 March
7th 2014 When Gato
moved the two-post lift I bought from him between our shops, it broke
his engine hoist. I lent him mine and he's been using it ever since. I
decided to give it to him for helping me install the lift when I get
the pump fixed (the last thing on my list). Now, I'm short an engine
hoist. My friend, Bill Carroll, had one for sale. This morning,
Deerslayer and I took a couple of hours off from the Krash Lab and went
to pick it up. This thing is a heavy duty monster and it has a history.
Bill was the driver of the Bill Carroll and Roger Taylor Drag Racing
Team and they campaigned a 40 Willys gasser in the sixties,
winning the Indy Nationals in 1966. They were inducted into the East
Coast Drag Racing Hall of Fame in 2009. This hoist was used during
their racing days. I asked him if he wanted to sign the engine hoist
for me and he just gave me a "Don't be an asshole" look.
March
7th 2014 When Gato
moved the two-post lift I bought from him between our shops, it broke
his engine hoist. I lent him mine and he's been using it ever since. I
decided to give it to him for helping me install the lift when I get
the pump fixed (the last thing on my list). Now, I'm short an engine
hoist. My friend, Bill Carroll, had one for sale. This morning,
Deerslayer and I took a couple of hours off from the Krash Lab and went
to pick it up. This thing is a heavy duty monster and it has a history.
Bill was the driver of the Bill Carroll and Roger Taylor Drag Racing
Team and they campaigned a 40 Willys gasser in the sixties,
winning the Indy Nationals in 1966. They were inducted into the East
Coast Drag Racing Hall of Fame in 2009. This hoist was used during
their racing days. I asked him if he wanted to sign the engine hoist
for me and he just gave me a "Don't be an asshole" look.
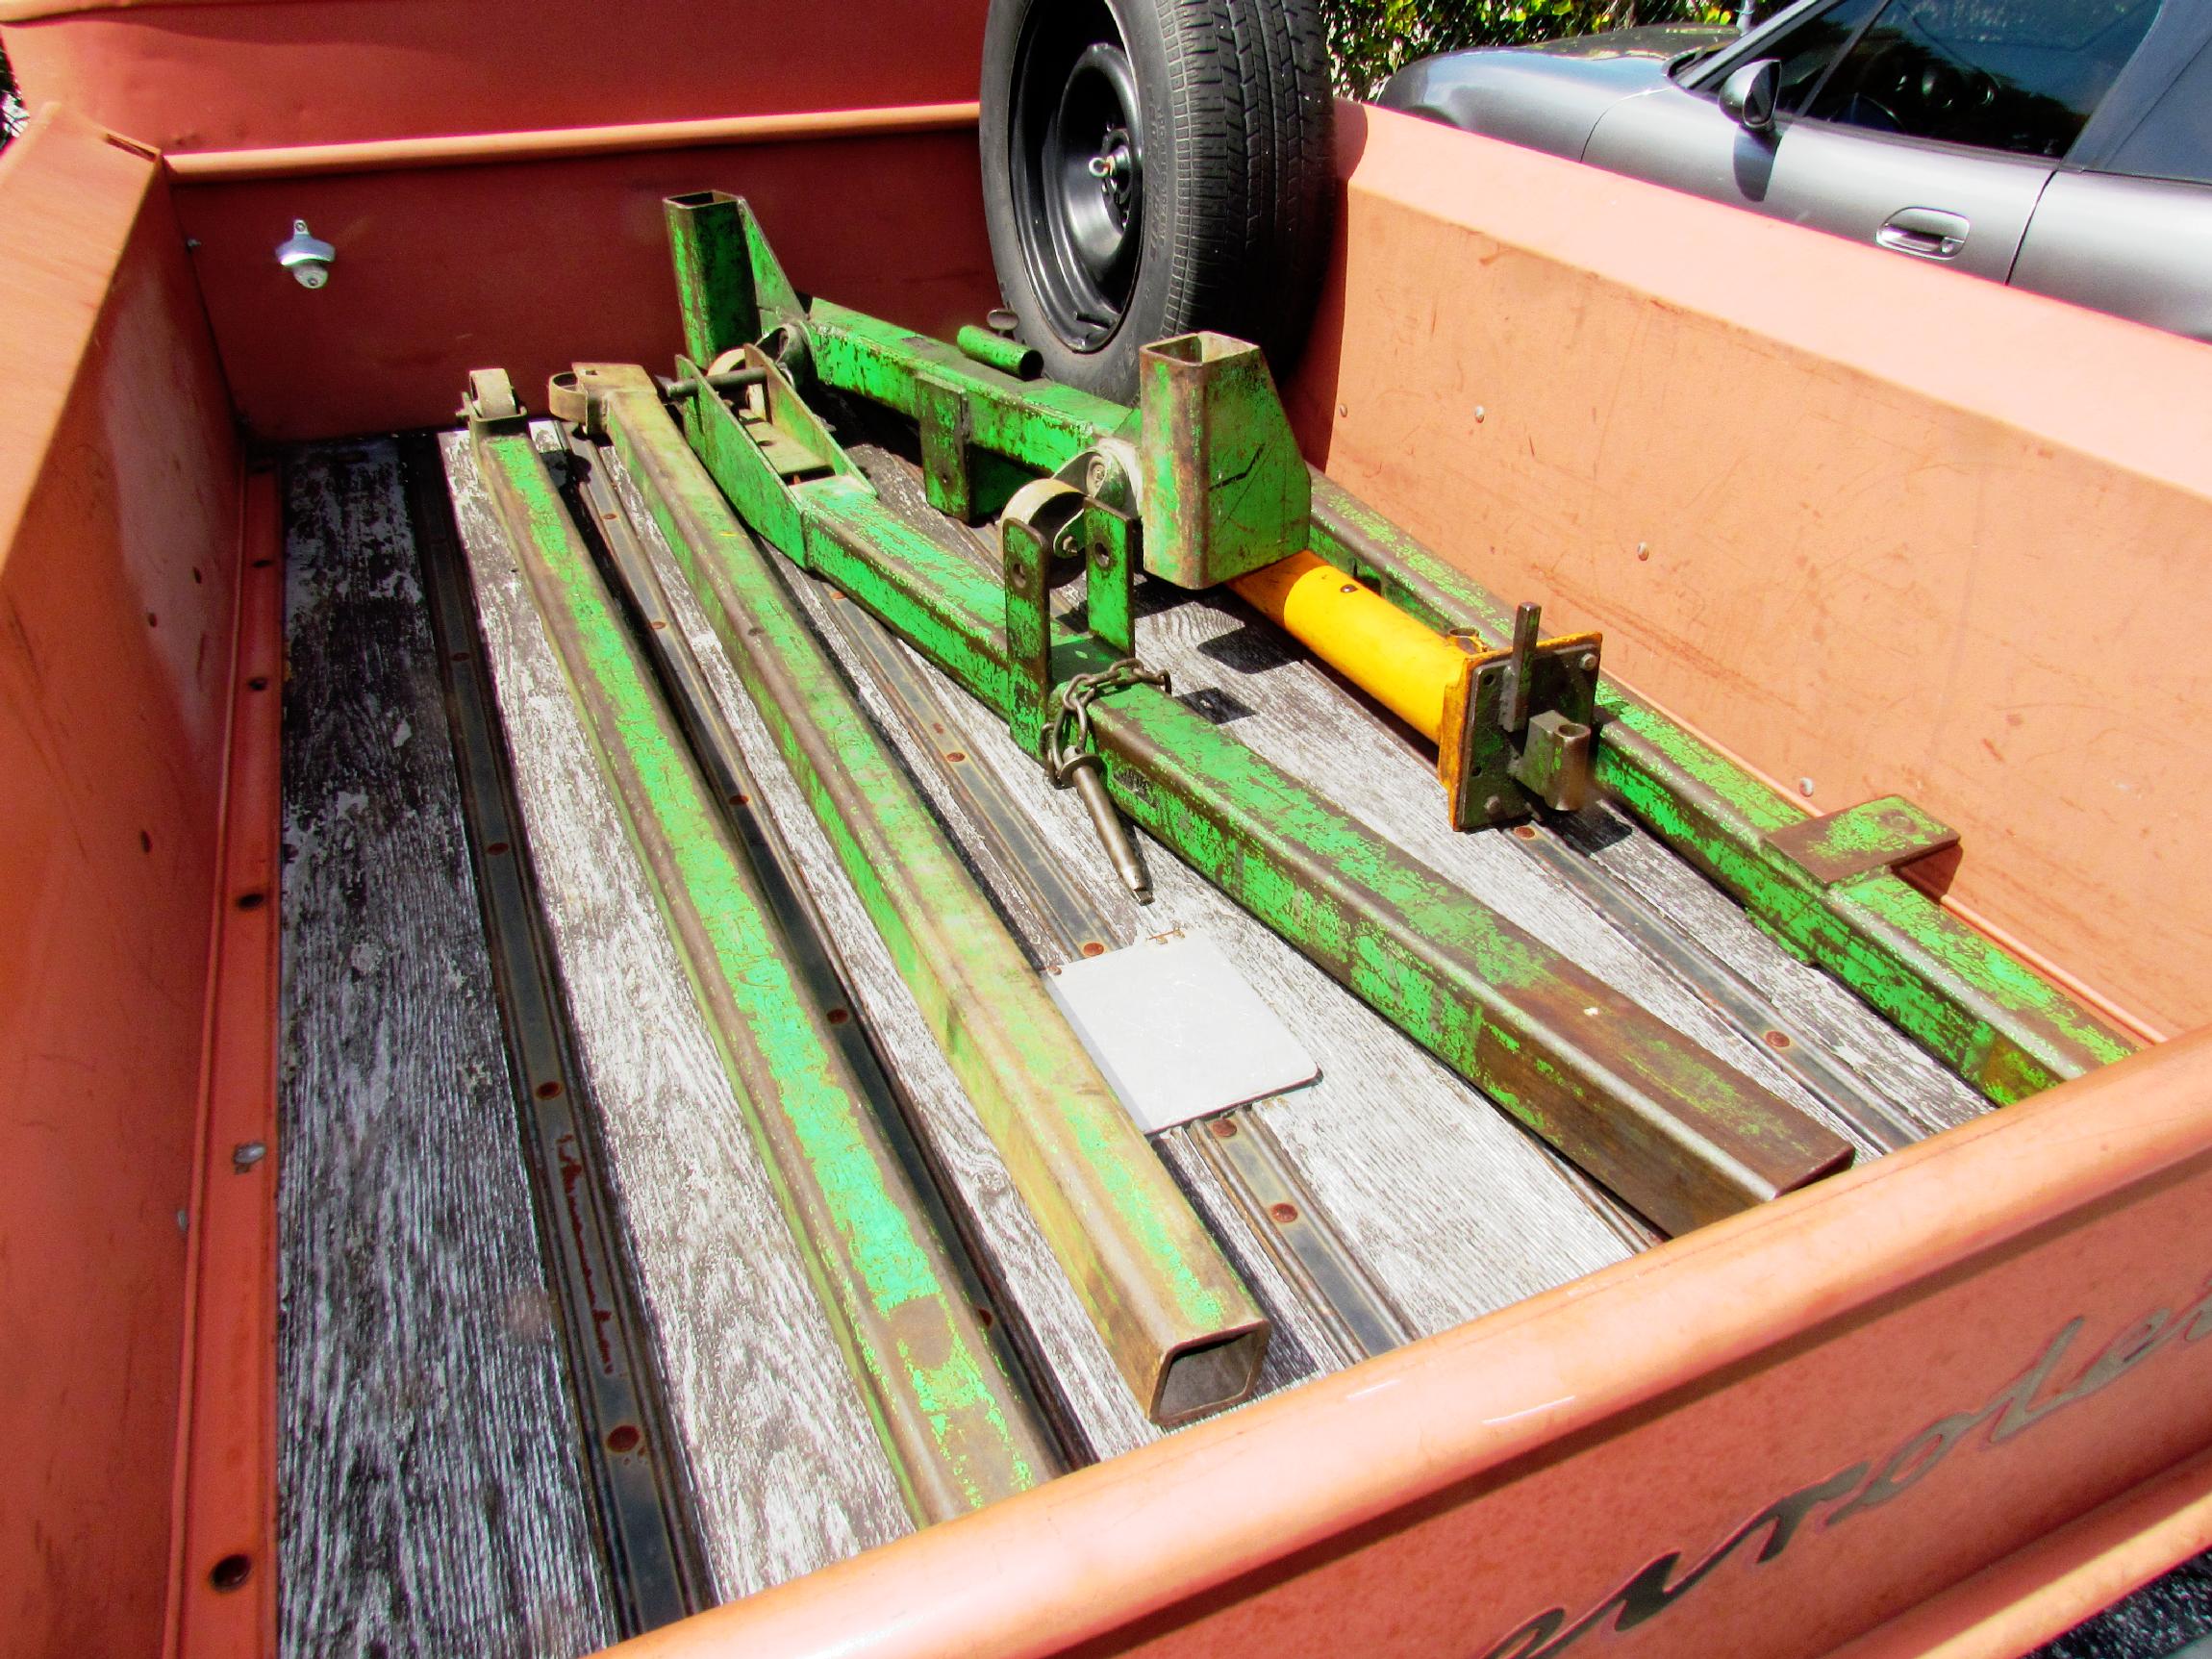
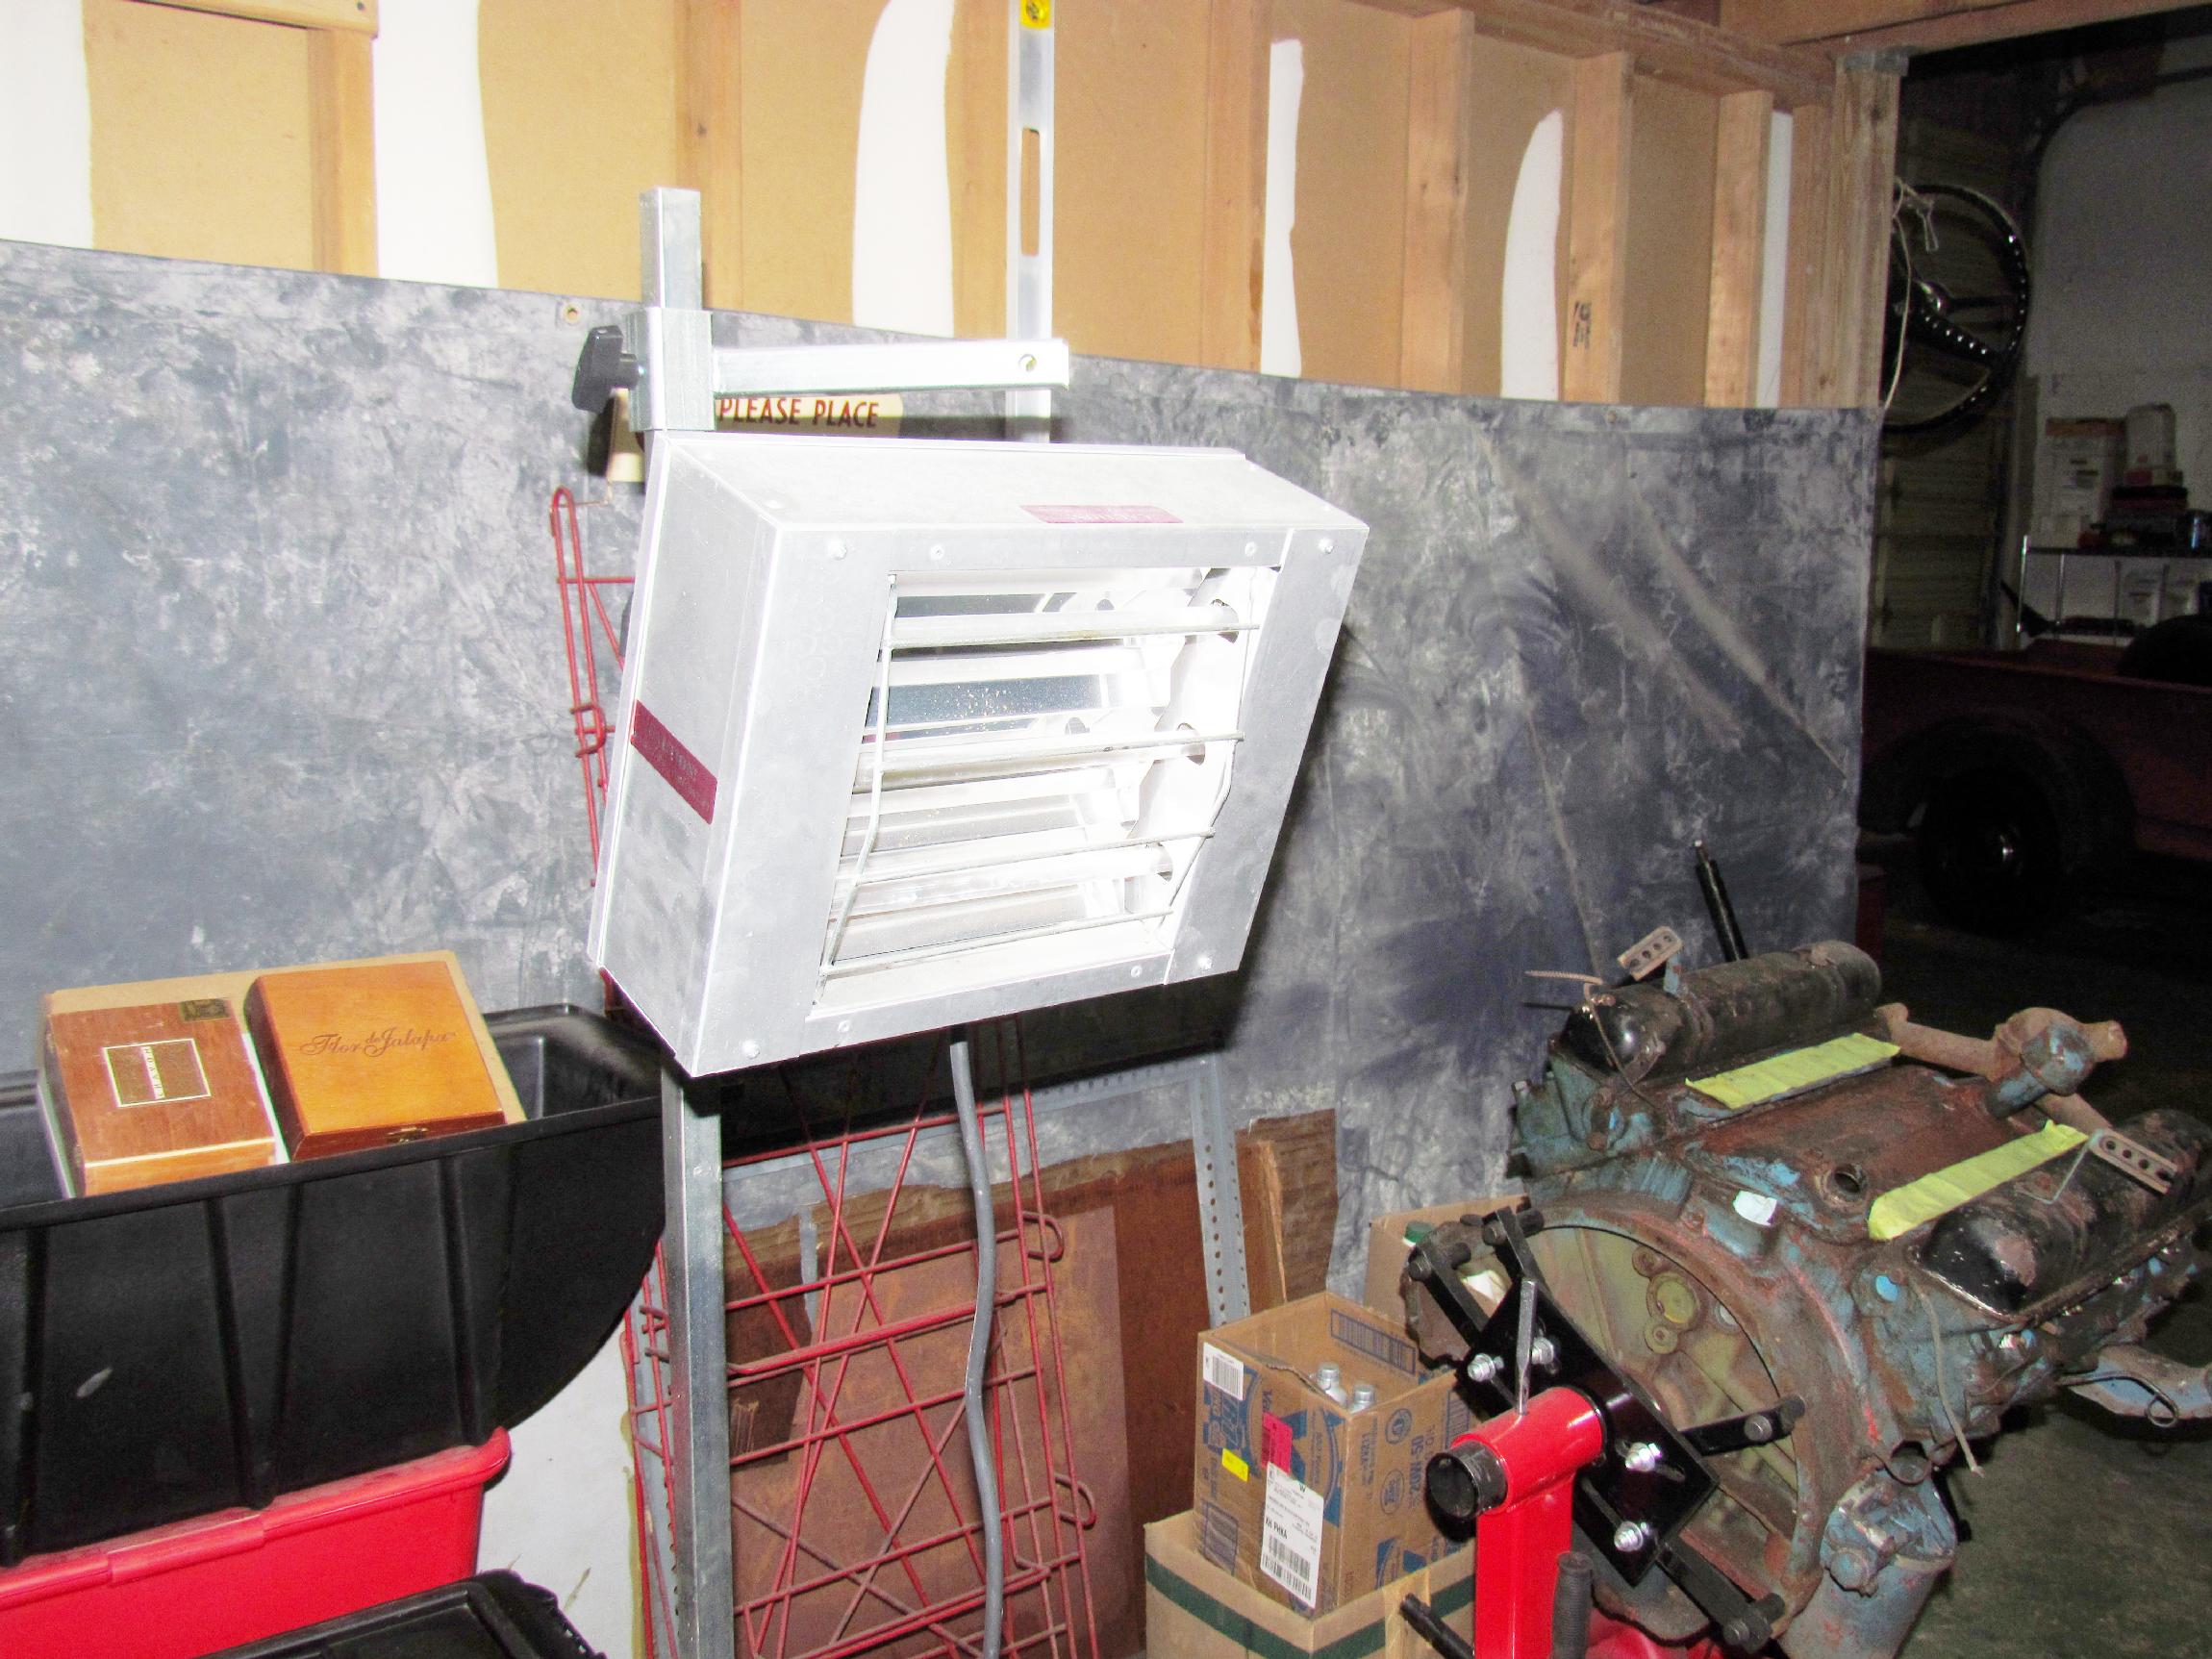
March 10th 2014 On saturday, I got the hoist off the truck and stowed away. A couple of strong young guys had loaded it but I'm moving on in years and always aware of how easy it is to injure myself these days. Anyway, it went well and I'll figure out how to put it together when I'm ready to move BillyBob's engine.
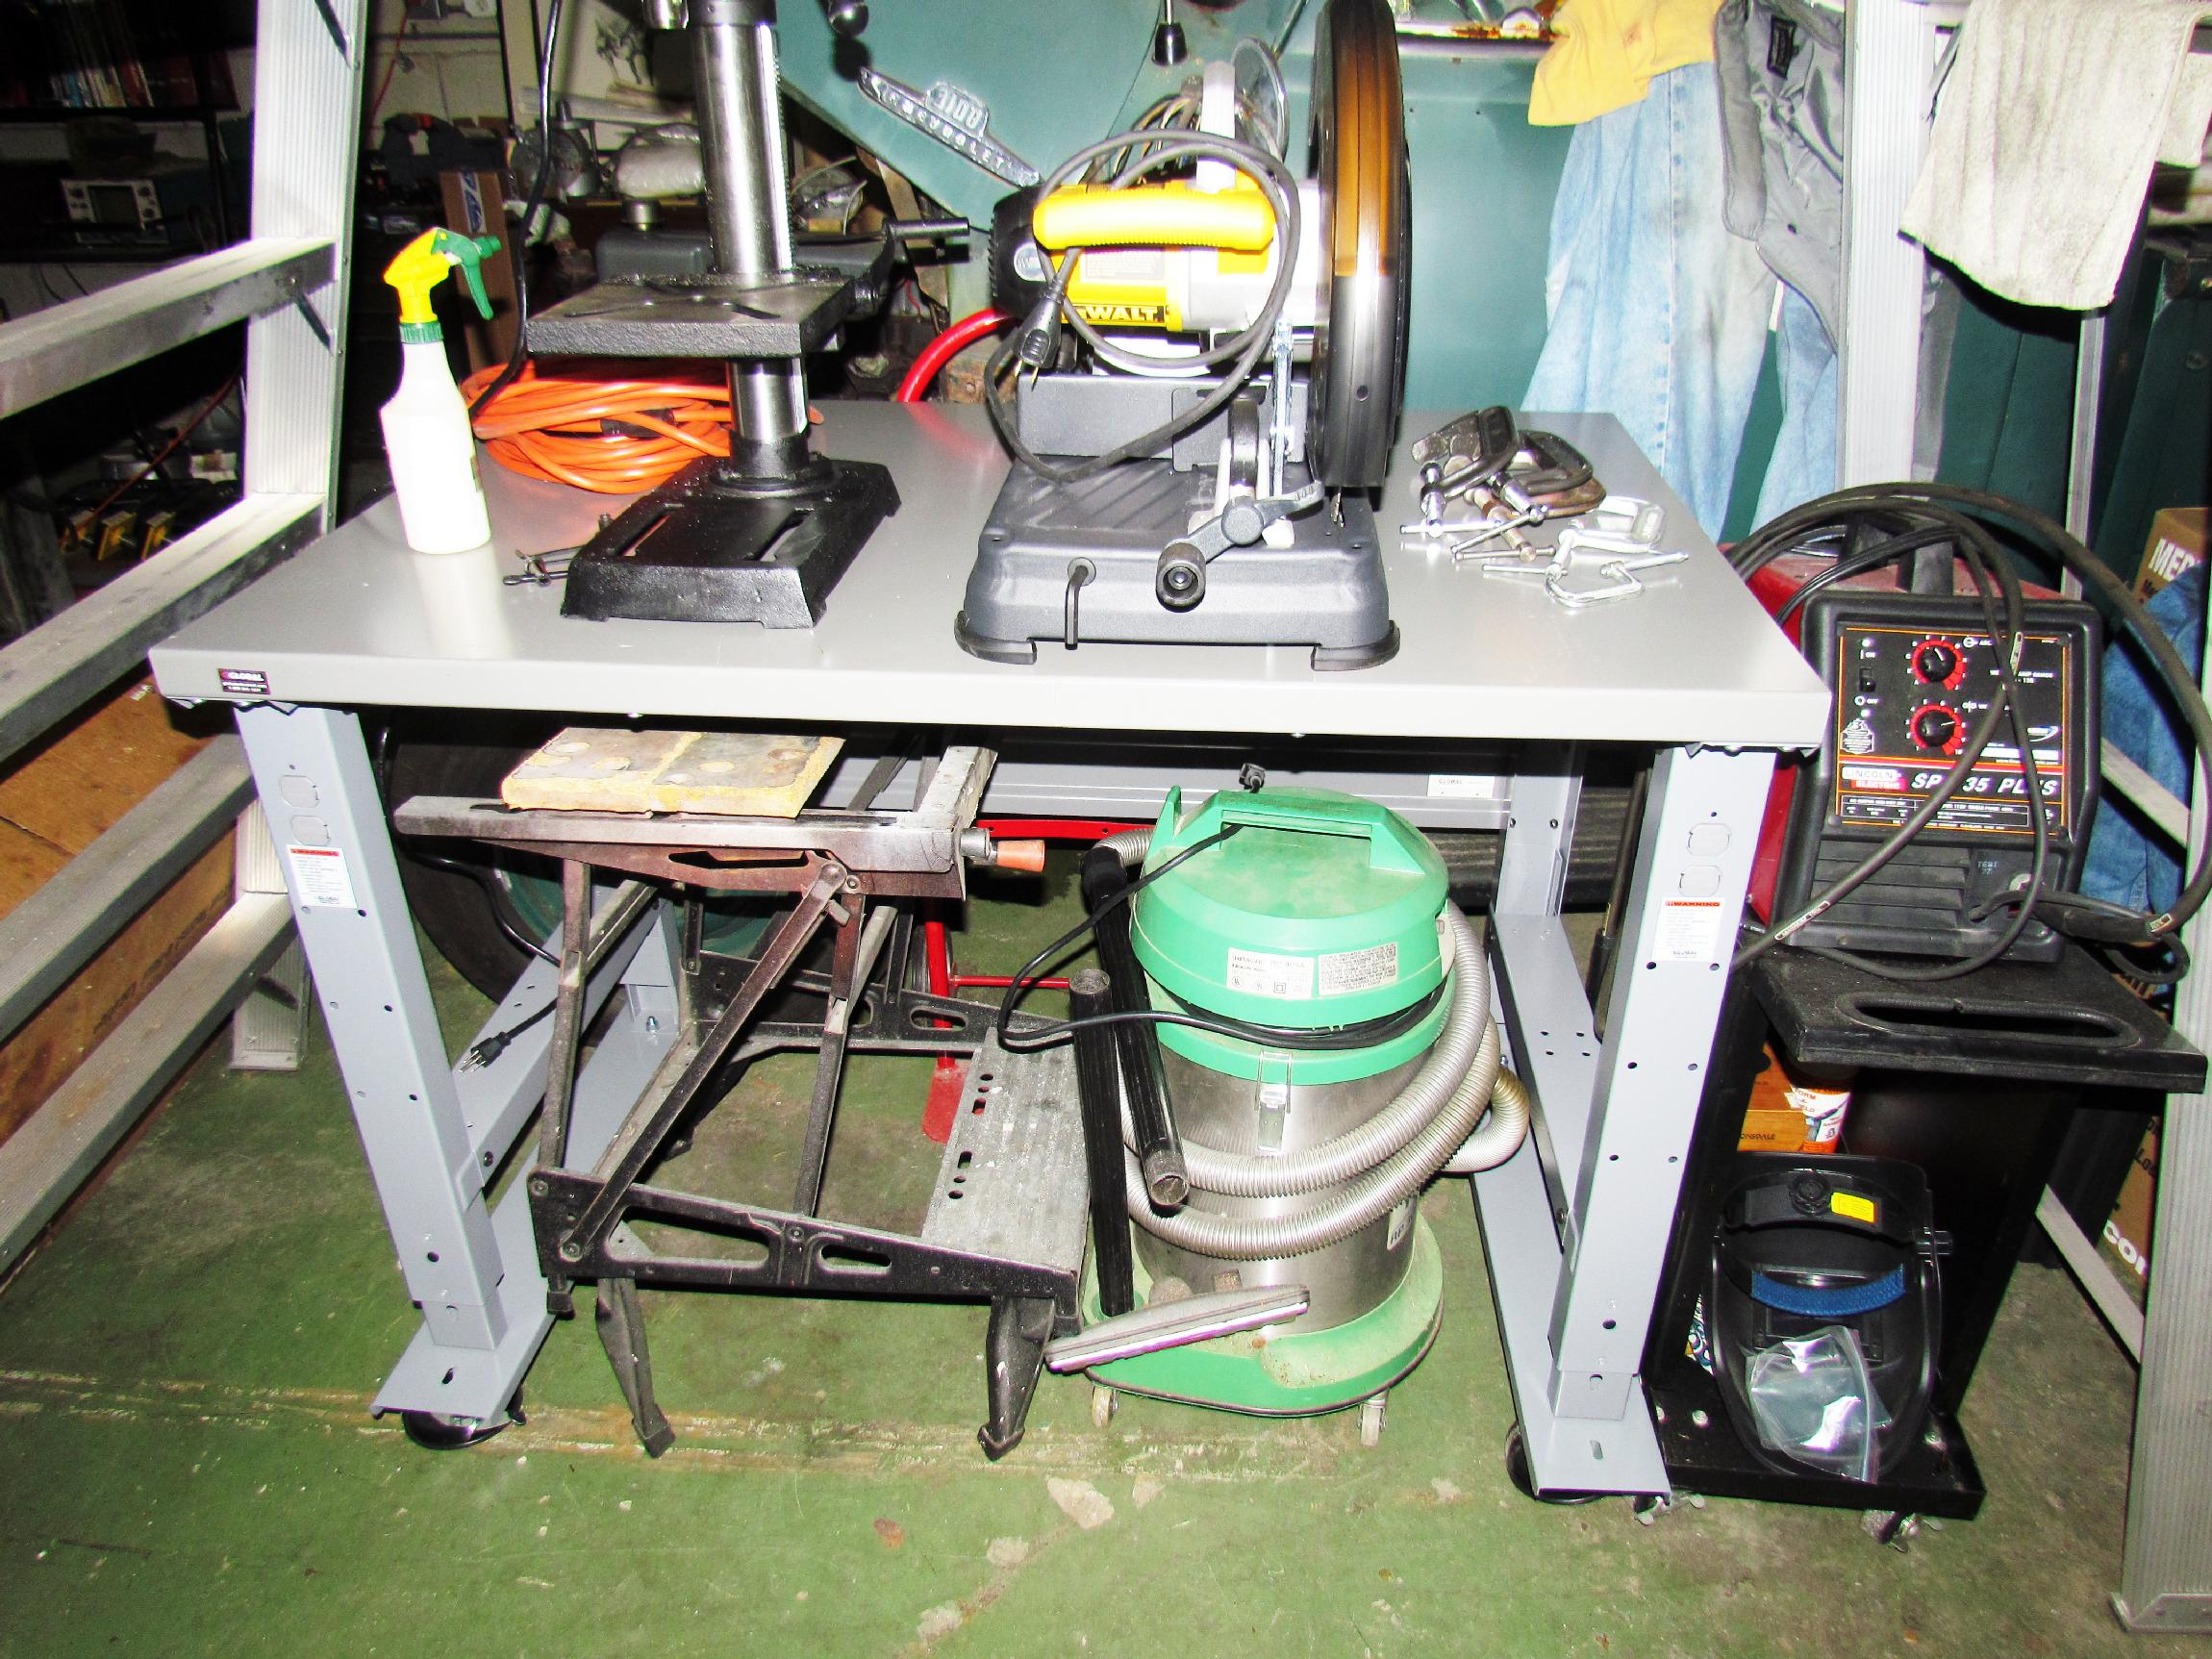 Then,
spent a few hours putting together a workbench from Global Equipment.
I'm getting a collection of bench tools but have no workbench to put
them on and rotating them on and off the Black & Decker
Workmate is getting old. I wanted a mobile unit so I could wheel it
around and keep the flying metal bits from collecting in corners of the
shop. There were a few units I liked better than this 30" x 48" inch
model but they were shipped fully assembled and I am rarely at the
BillyBob Shop during delivery hours so I have things shipped to the
Krash Lab where I can load them in Deerslayer's bed. I am therefore
limited to the size of shipments. It took some head scratching to put
this thing together as there were no step-by-step instructions and the
general hodge podge collection of SAE - Metric, allen head machine
screws and self-taping sheet metal screws were provided. I laid
everything out and studied it awhile with a cigar before diving in.
When I finished and manhandled it upright, I had a good base of
operations for future metalwork.
Then,
spent a few hours putting together a workbench from Global Equipment.
I'm getting a collection of bench tools but have no workbench to put
them on and rotating them on and off the Black & Decker
Workmate is getting old. I wanted a mobile unit so I could wheel it
around and keep the flying metal bits from collecting in corners of the
shop. There were a few units I liked better than this 30" x 48" inch
model but they were shipped fully assembled and I am rarely at the
BillyBob Shop during delivery hours so I have things shipped to the
Krash Lab where I can load them in Deerslayer's bed. I am therefore
limited to the size of shipments. It took some head scratching to put
this thing together as there were no step-by-step instructions and the
general hodge podge collection of SAE - Metric, allen head machine
screws and self-taping sheet metal screws were provided. I laid
everything out and studied it awhile with a cigar before diving in.
When I finished and manhandled it upright, I had a good base of
operations for future metalwork.
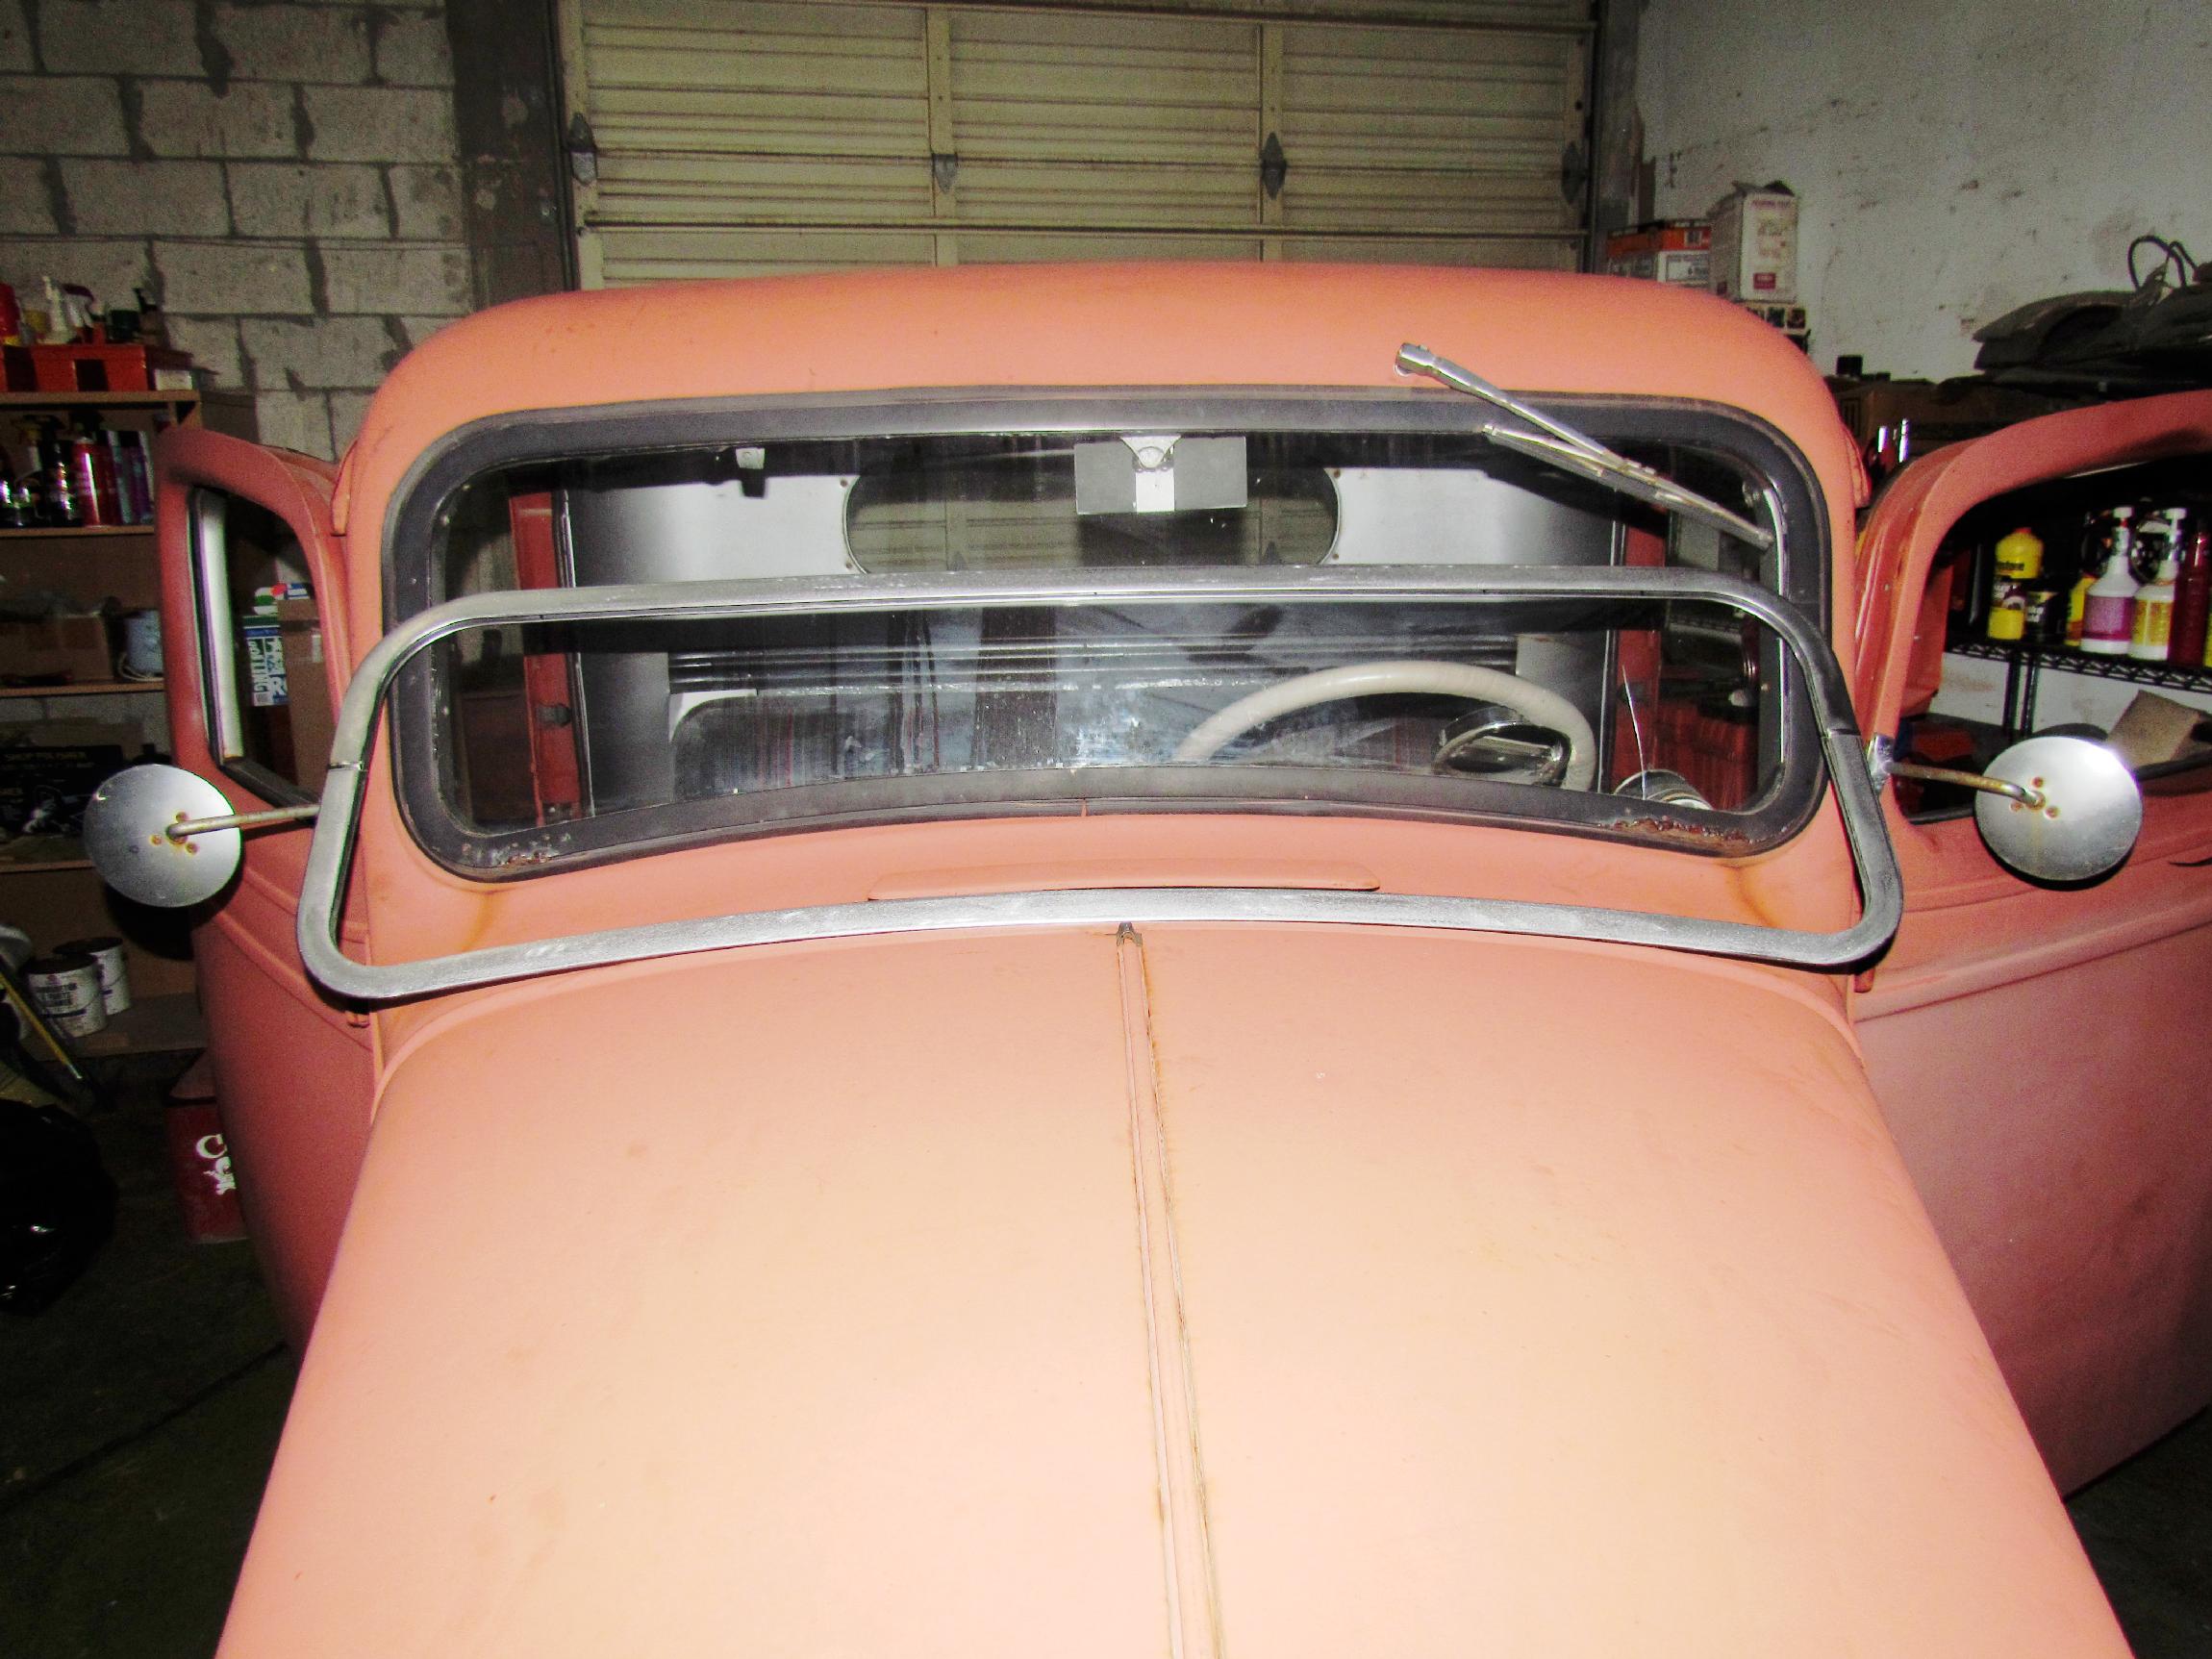
 March
17th 2014 The
windshield regulator on the Deerslayer broke a long time ago. A month
or two back, I found a replacement on eBay. I determined to install it
on saturday morning. First, the glovebox door and glovebox came out to
gain access to the regulator without removing the dashboard. Then, the
windshield was pushed out to get access to the regulator ribbon
connection to the windshield frame. Then the wheels fell off this
project. The ribbon is connected to the frame with two blade type
machine screws and one of them was frozen and slightly buggered. I
finished that job and had it completely buggered by the time I gave up
trying to get it out. There is no good angle to apply a screwdriver. An
impact tool can't be used because it might break the windshield glass
and heat can't be applied because it will let the smoke escape from the
rubber weatherstripping.
March
17th 2014 The
windshield regulator on the Deerslayer broke a long time ago. A month
or two back, I found a replacement on eBay. I determined to install it
on saturday morning. First, the glovebox door and glovebox came out to
gain access to the regulator without removing the dashboard. Then, the
windshield was pushed out to get access to the regulator ribbon
connection to the windshield frame. Then the wheels fell off this
project. The ribbon is connected to the frame with two blade type
machine screws and one of them was frozen and slightly buggered. I
finished that job and had it completely buggered by the time I gave up
trying to get it out. There is no good angle to apply a screwdriver. An
impact tool can't be used because it might break the windshield glass
and heat can't be applied because it will let the smoke escape from the
rubber weatherstripping.
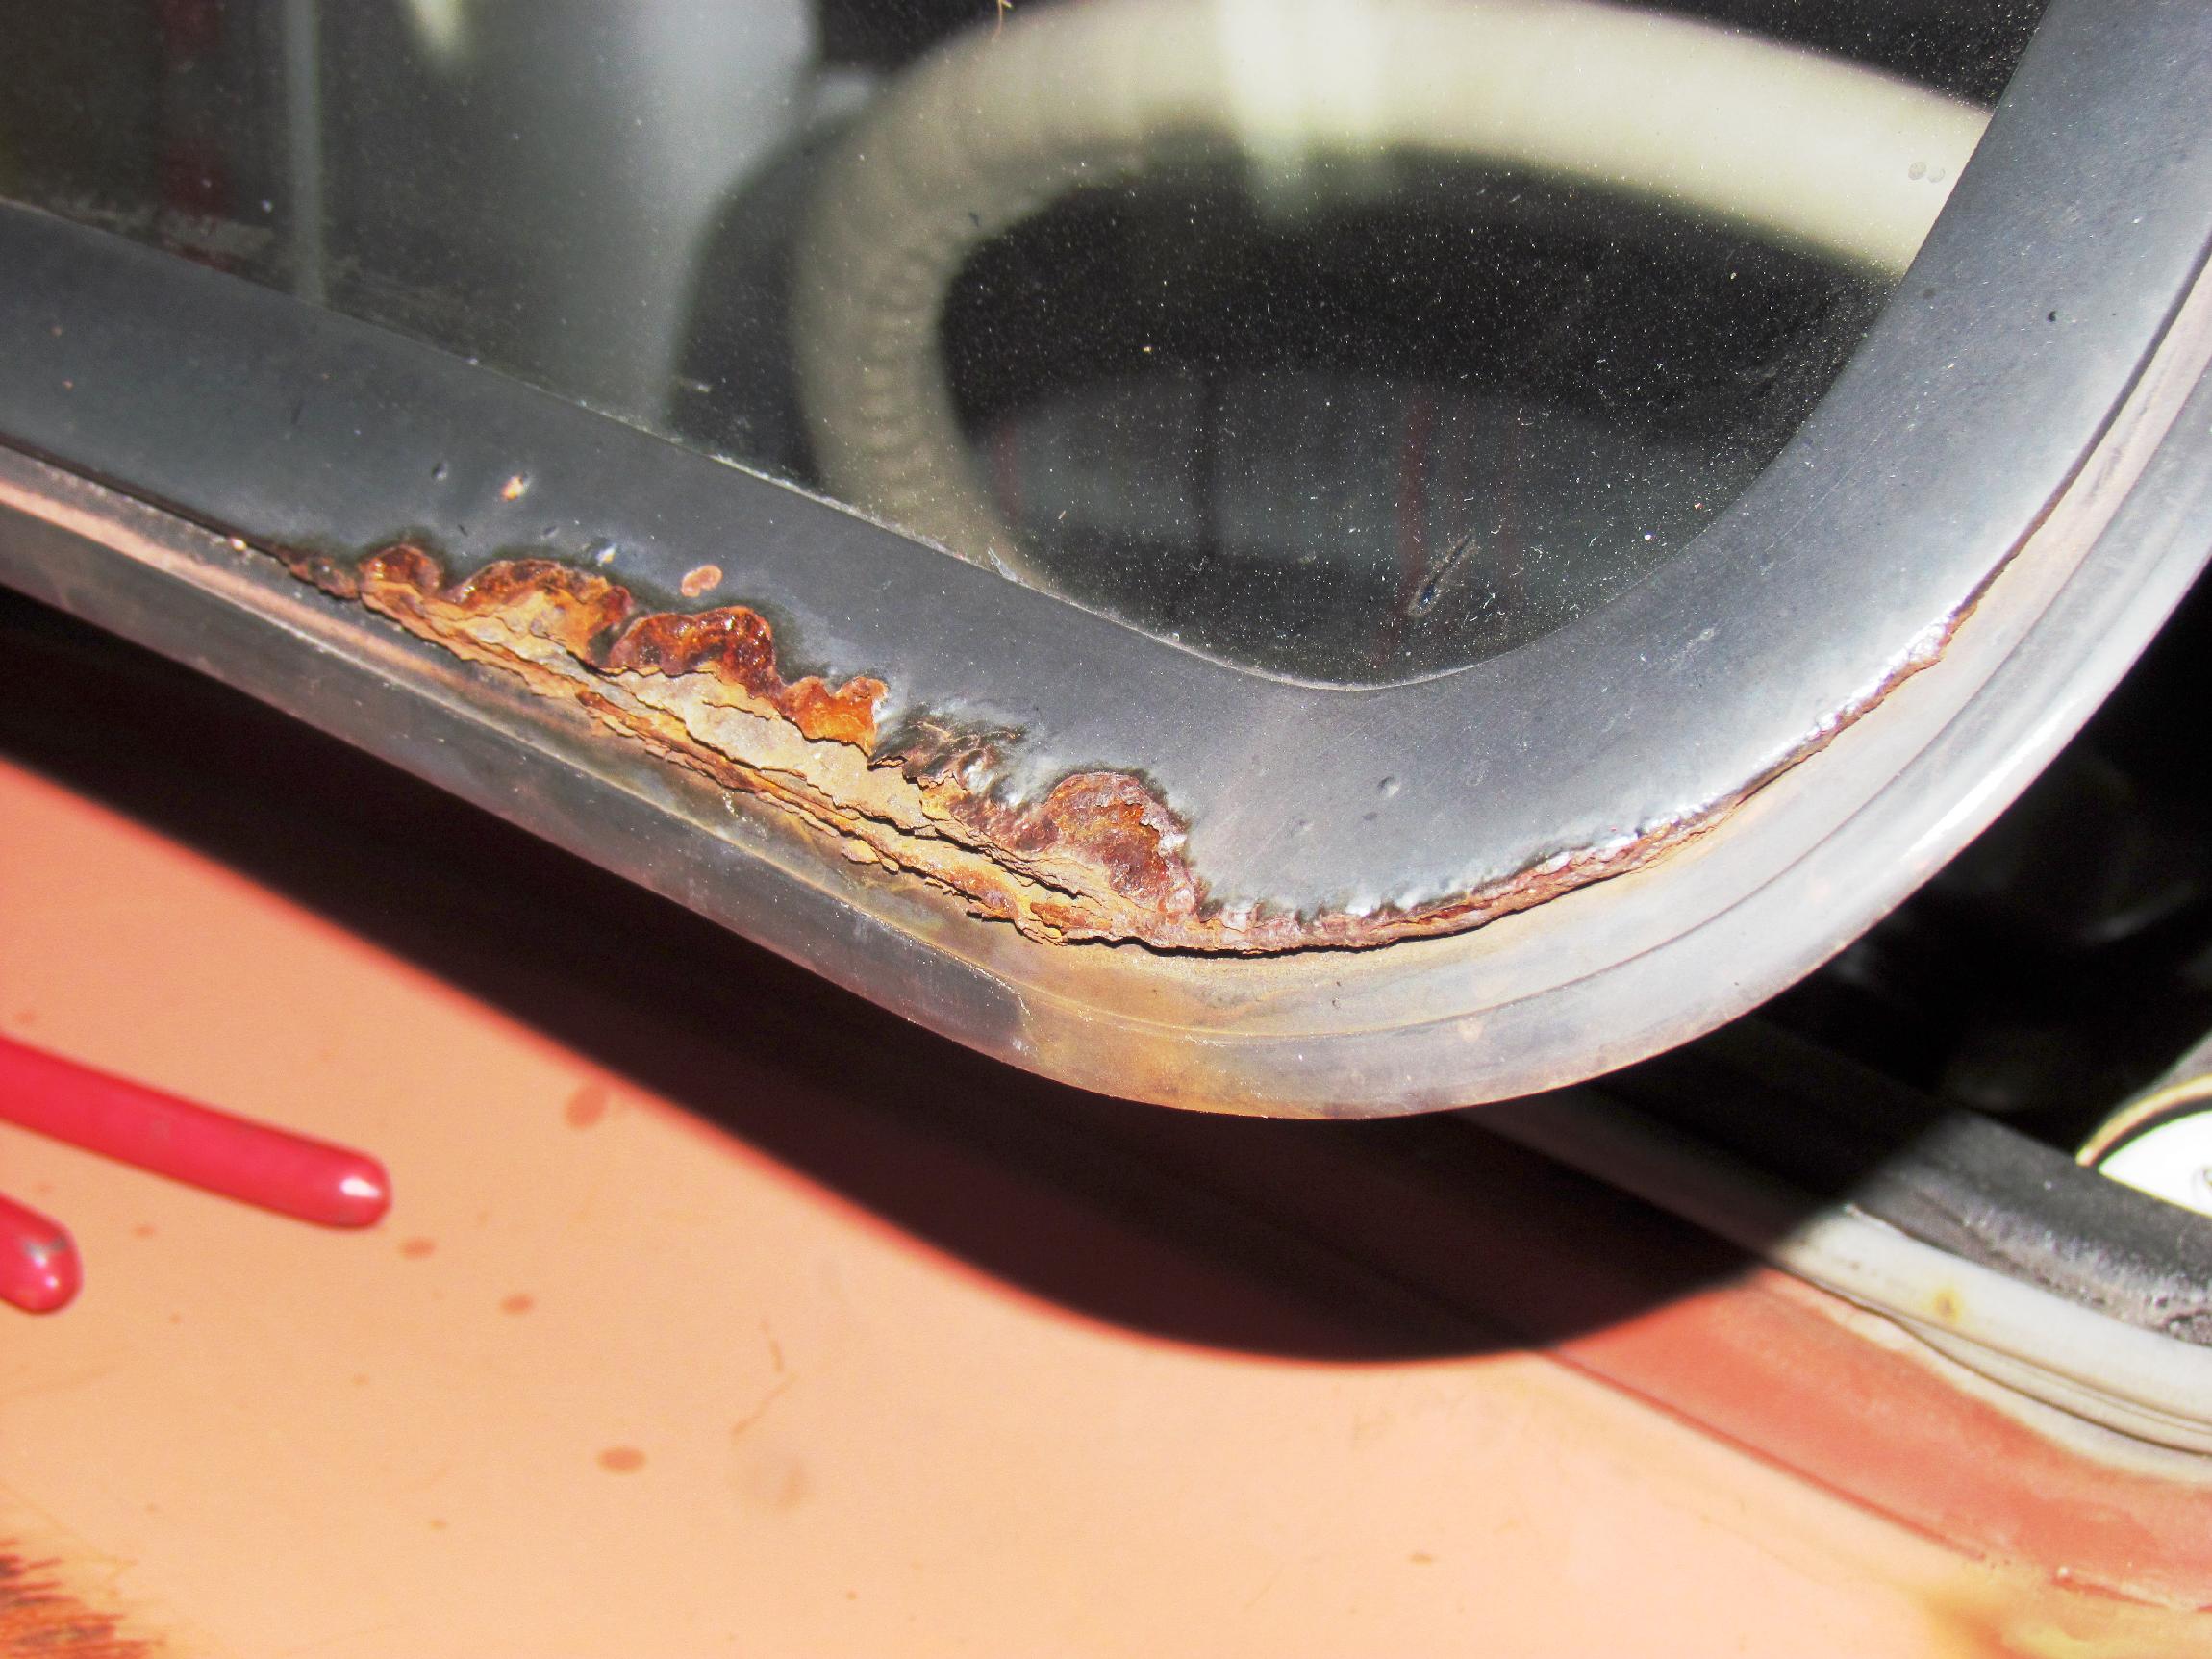 I've
neglected the rusting of the windshield frame for some time and the
damage on the lower corners is now severe. The regulator job will have
to be postponed until I can get a replacement windshield frame. I
connected the old regulator back up for the time being. When I get the
new windshield frame, the old frame can be disconnected from its hinges
and laid flat on the hood. Then the buggered screw head can be ground
off and the regulator separated from the frame.
I've
neglected the rusting of the windshield frame for some time and the
damage on the lower corners is now severe. The regulator job will have
to be postponed until I can get a replacement windshield frame. I
connected the old regulator back up for the time being. When I get the
new windshield frame, the old frame can be disconnected from its hinges
and laid flat on the hood. Then the buggered screw head can be ground
off and the regulator separated from the frame.
 Foiled
by the windshield regulator, went on to something else. A year or so
back when I got my hands on a '35 Chevy Deluxe glove box door with the
ashtray and clock for the Deerslayer, it came with a broken clock.
These clocks are pricey if you can find them and I don't need to tell
time that bad. I really wanted it for the ashtray. Took the clock out
and wondered what to do with the resulting hole. On the way to my
solution to stuff a shop rag in the hole for easy access during window
fogging (no heater or defroster on this baby), a vacuum gauge was
obtained. It turned out to be too small for the opening and I shelved
it.
Foiled
by the windshield regulator, went on to something else. A year or so
back when I got my hands on a '35 Chevy Deluxe glove box door with the
ashtray and clock for the Deerslayer, it came with a broken clock.
These clocks are pricey if you can find them and I don't need to tell
time that bad. I really wanted it for the ashtray. Took the clock out
and wondered what to do with the resulting hole. On the way to my
solution to stuff a shop rag in the hole for easy access during window
fogging (no heater or defroster on this baby), a vacuum gauge was
obtained. It turned out to be too small for the opening and I shelved
it.
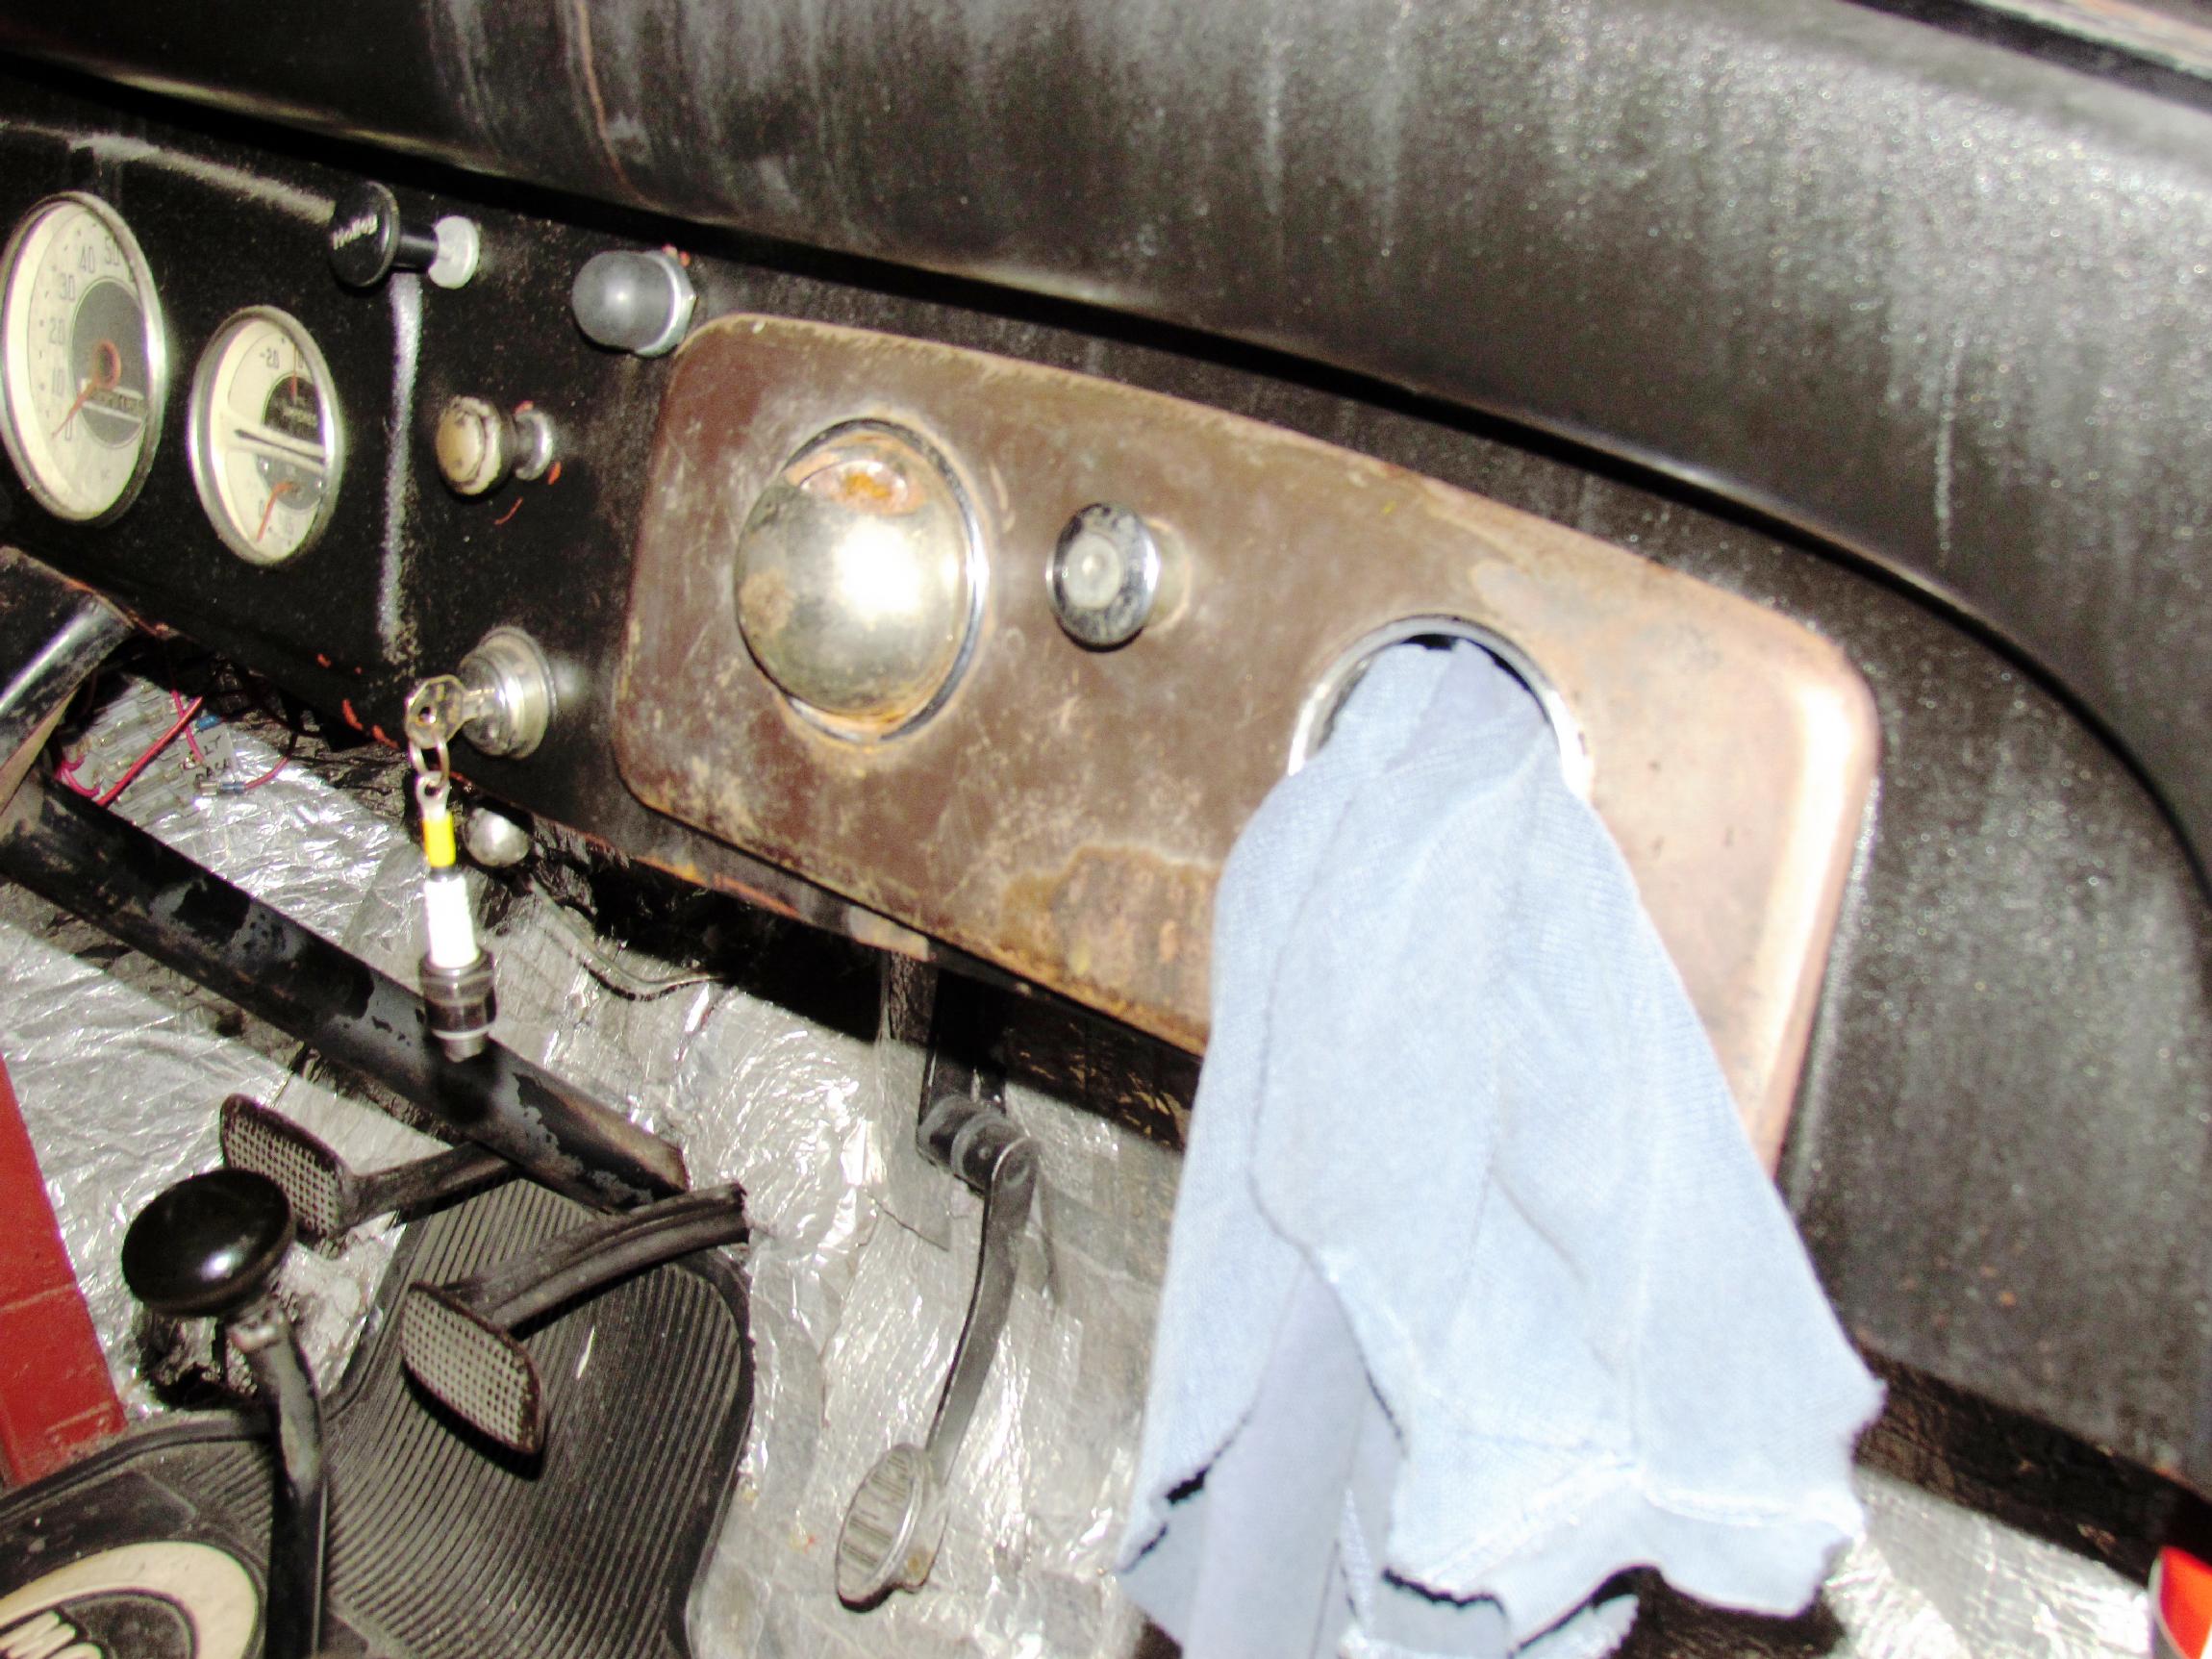
 A
vacuum gauge can be helpful for troubleshooting and tuning carbureted
engines. The gauge and kit was taken down off the shelf and dusted off.
Decided to mount it on the firewall, as others have done, so I can see
it when tinkering with the engine. It's a 2" gauge so a 2-1/16" hole
was cut with a hole saw on a hand drill after removing the air cleaner
for access and taping up plastic sheeting to catch the metal chips.
Drill placement restrictions (room to work the drill) determined where
the gauge would be placed.
A
vacuum gauge can be helpful for troubleshooting and tuning carbureted
engines. The gauge and kit was taken down off the shelf and dusted off.
Decided to mount it on the firewall, as others have done, so I can see
it when tinkering with the engine. It's a 2" gauge so a 2-1/16" hole
was cut with a hole saw on a hand drill after removing the air cleaner
for access and taping up plastic sheeting to catch the metal chips.
Drill placement restrictions (room to work the drill) determined where
the gauge would be placed.
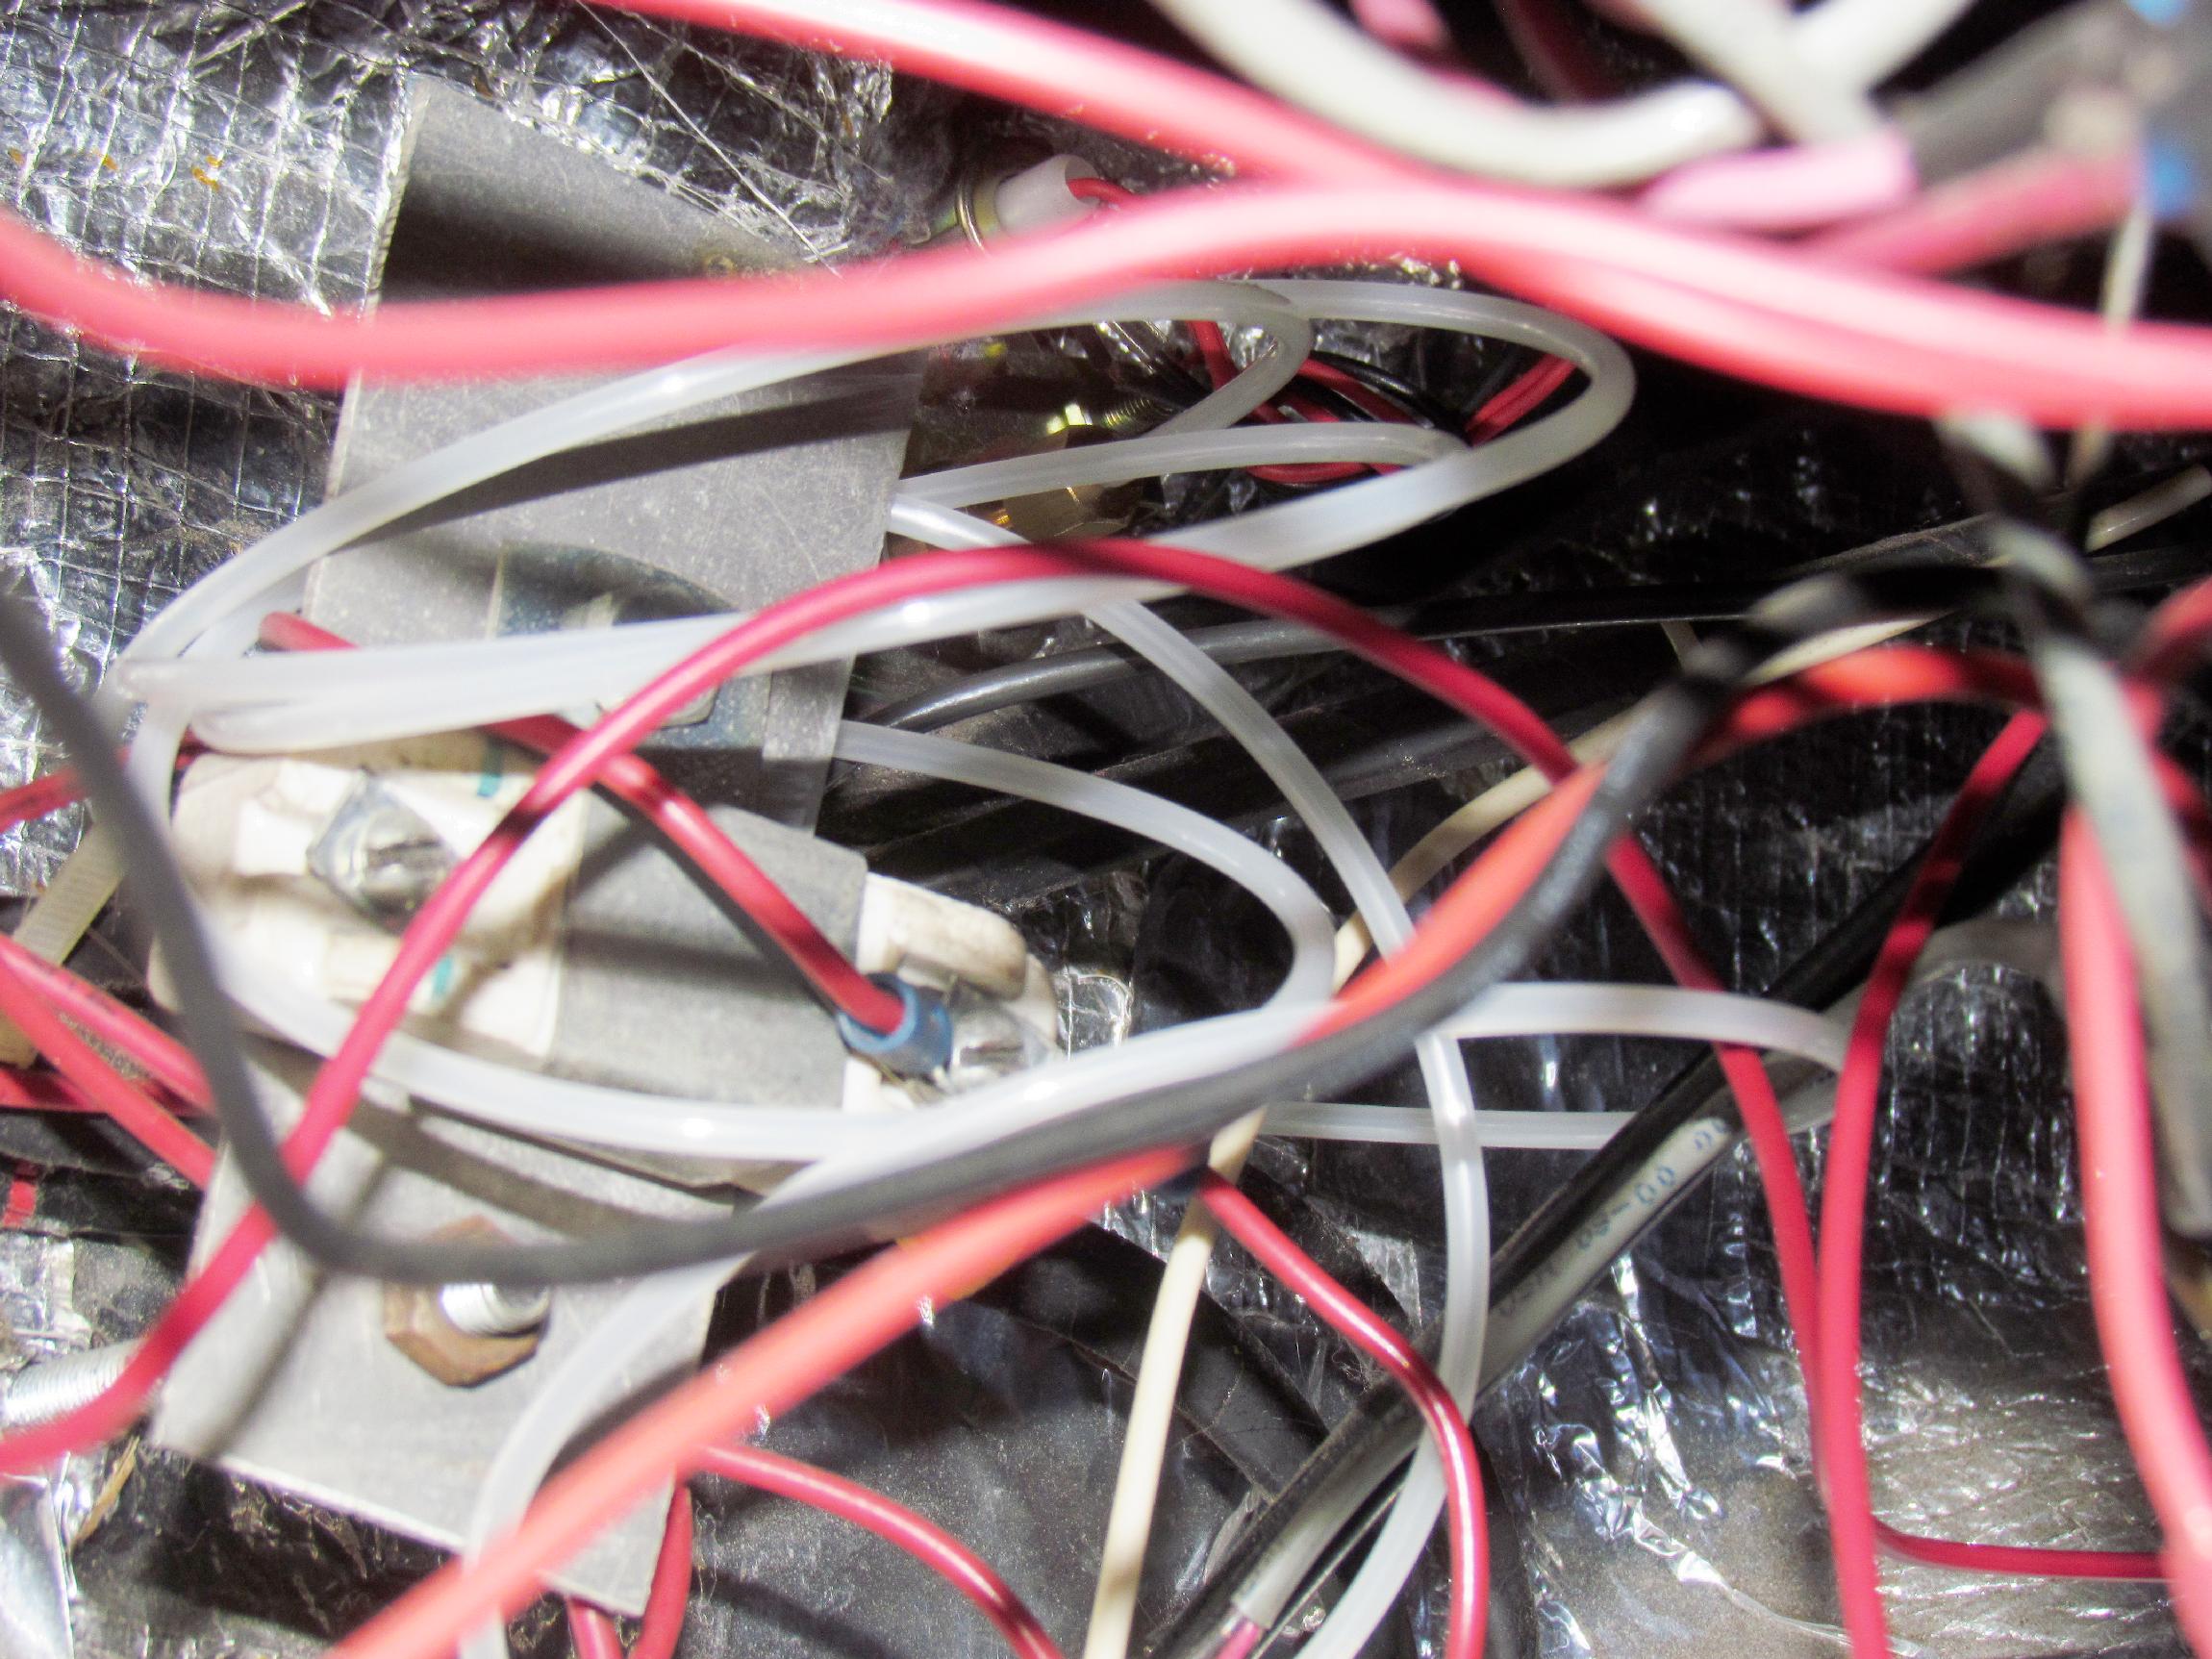 After
cutting thru the firewall and insulation, the vacuum gauge was cursed
into place. On the cab interior side of the firewall, the location of
the gauge turned out to be behind a rat's nest of wiring. Almost
anywhere else would have been better. Murphy is in the house. The
vacuum line to the engine was attached to the gauge before installing
the gauge in the firewall as it would be a real pain to attach it once
the gauge was in place. Now, all I had to deal with were the small hex
nuts on the gauge bracket which were challenging enough by their own
selves.
After
cutting thru the firewall and insulation, the vacuum gauge was cursed
into place. On the cab interior side of the firewall, the location of
the gauge turned out to be behind a rat's nest of wiring. Almost
anywhere else would have been better. Murphy is in the house. The
vacuum line to the engine was attached to the gauge before installing
the gauge in the firewall as it would be a real pain to attach it once
the gauge was in place. Now, all I had to deal with were the small hex
nuts on the gauge bracket which were challenging enough by their own
selves.
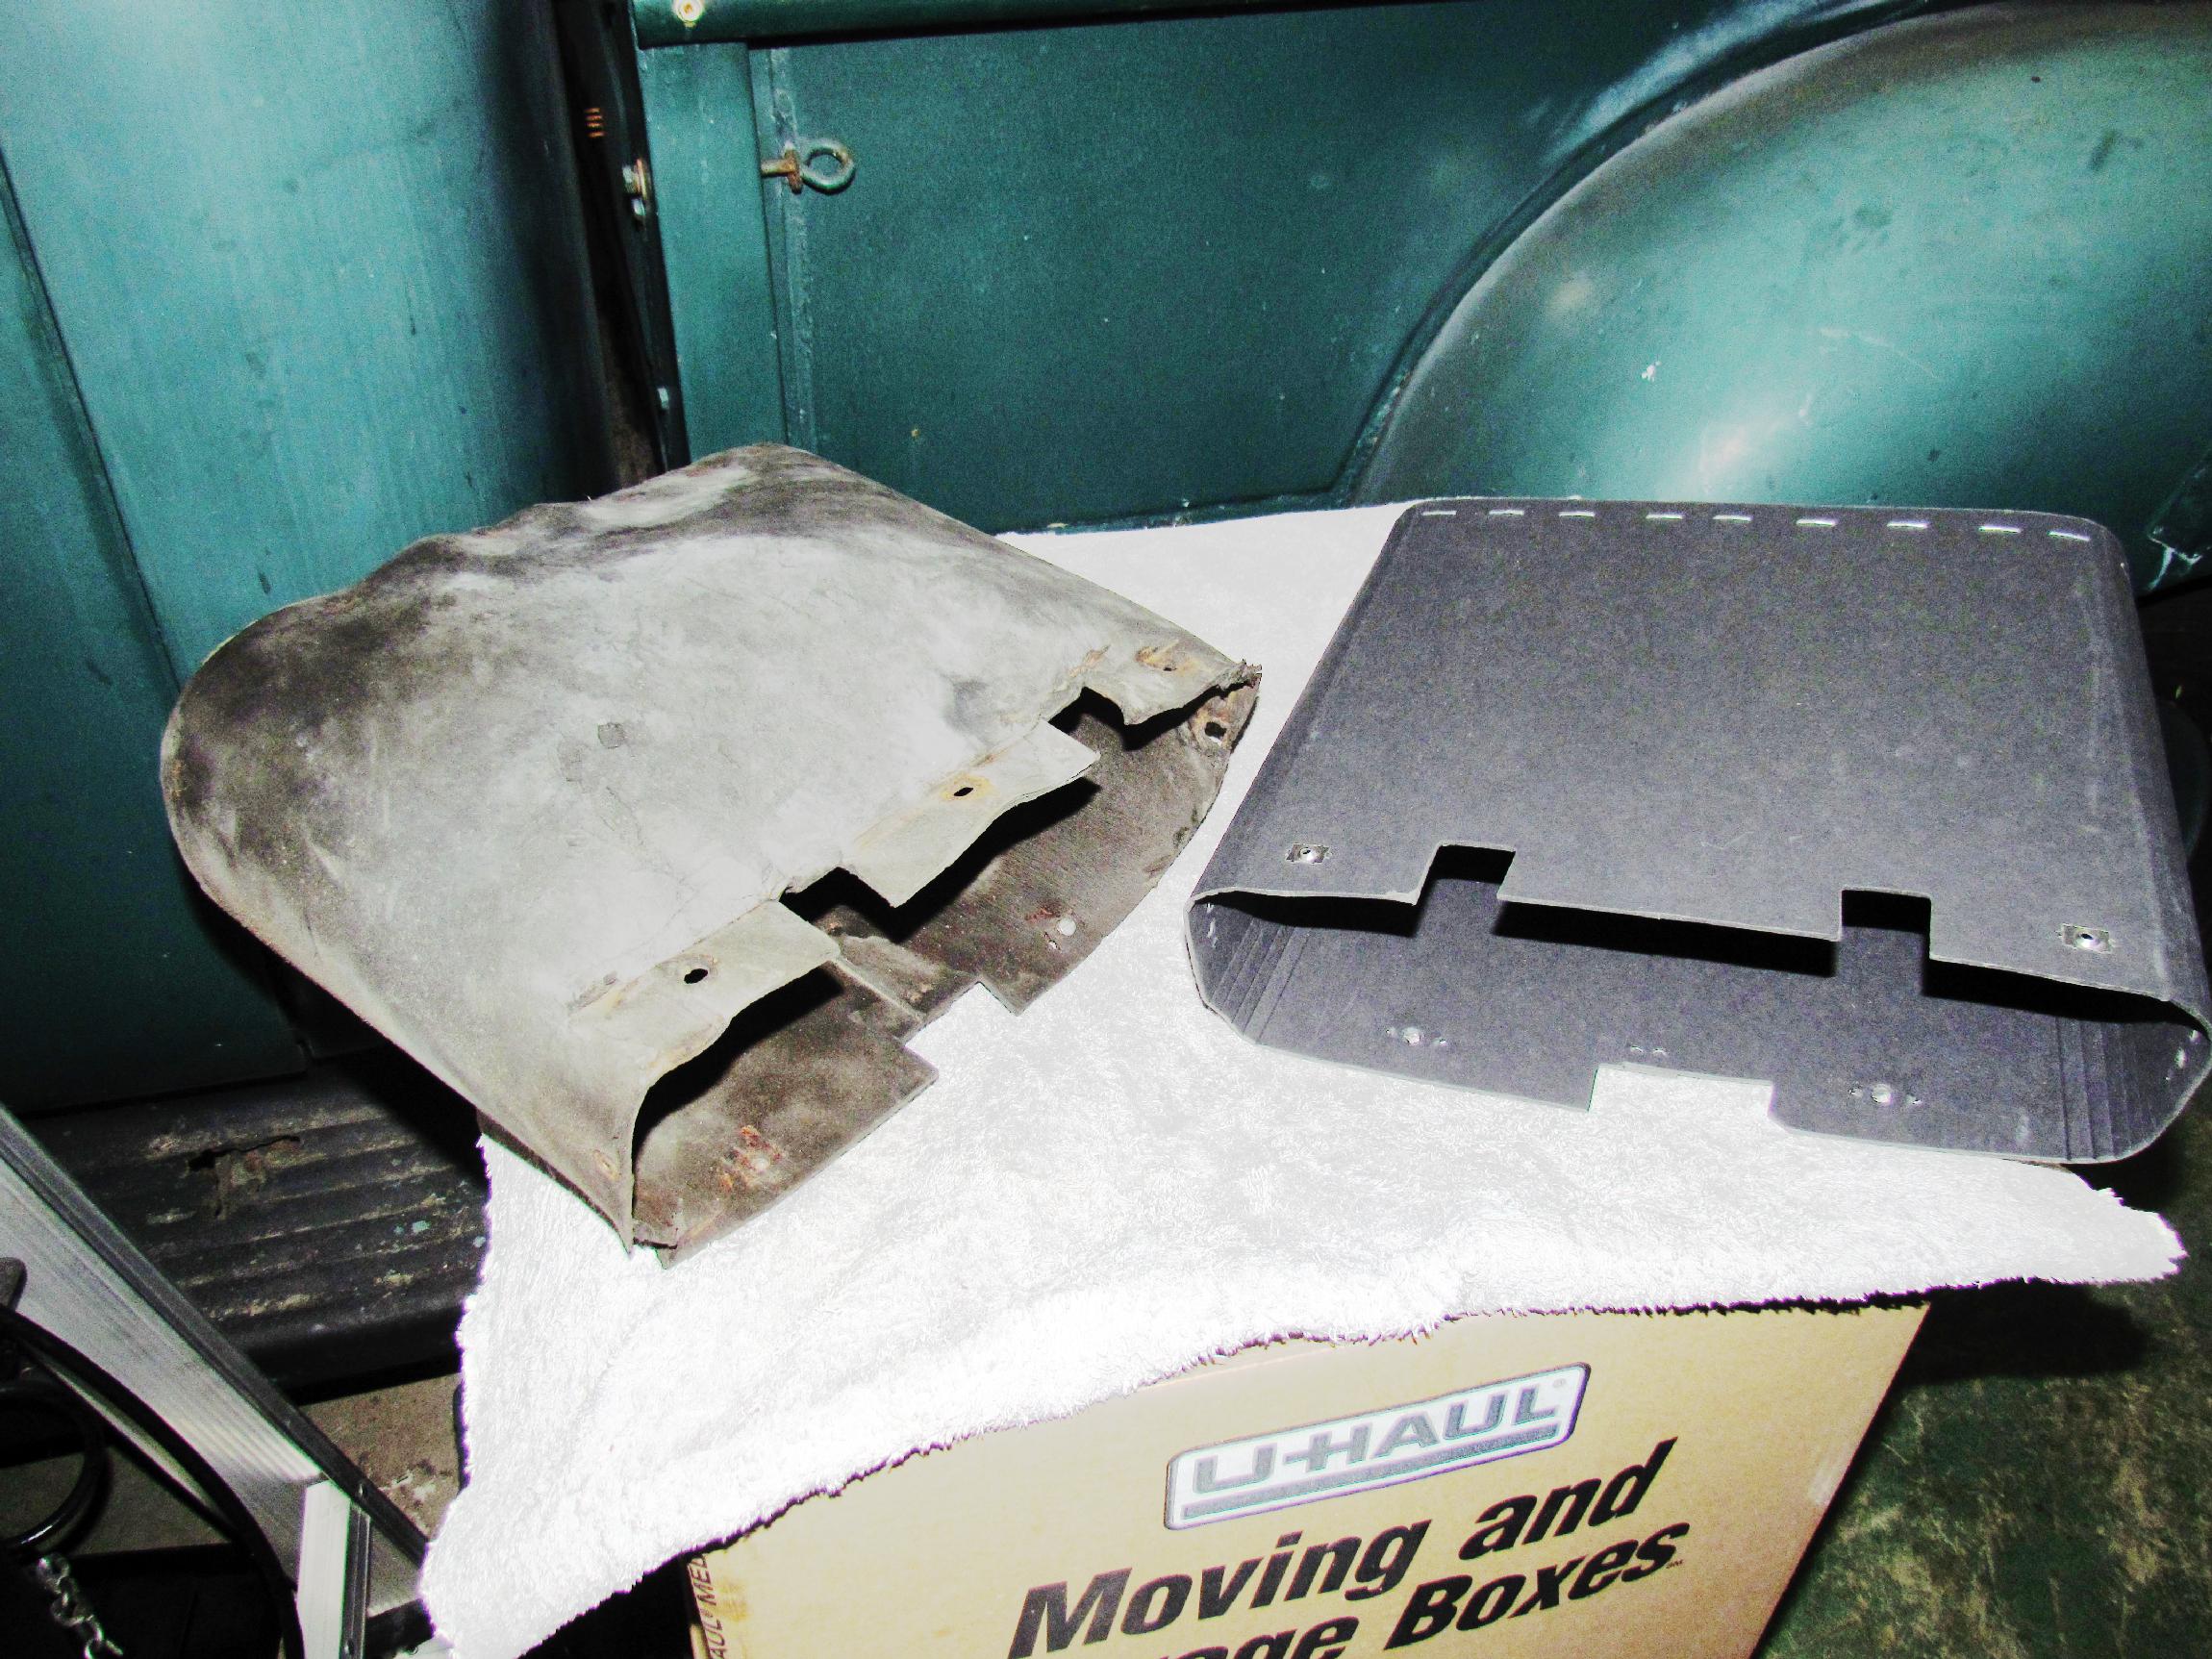 The
engine end of the vacuum gauge line will be finished next week. I was
finished under the dashboard for the time being so the glovebox and
glovebox door were reinstalled. The old cardboard glovebox had been
mutated by wetting and drying cycles caused by the leaking windshield
but still served its purpose. Over half of the screw attachment inserts
had disappeared, however, from these wetting sessions. Last time it was
out, I wasn't sure I could reinstall it many more times so, I got a new
repop from Chevs of the 40's and consigned the old glovebox to the
trash pile.
The
engine end of the vacuum gauge line will be finished next week. I was
finished under the dashboard for the time being so the glovebox and
glovebox door were reinstalled. The old cardboard glovebox had been
mutated by wetting and drying cycles caused by the leaking windshield
but still served its purpose. Over half of the screw attachment inserts
had disappeared, however, from these wetting sessions. Last time it was
out, I wasn't sure I could reinstall it many more times so, I got a new
repop from Chevs of the 40's and consigned the old glovebox to the
trash pile.
 March
24th 2014 On sunday,
after the coffee cruise-in with the holeshot in the wall gang,
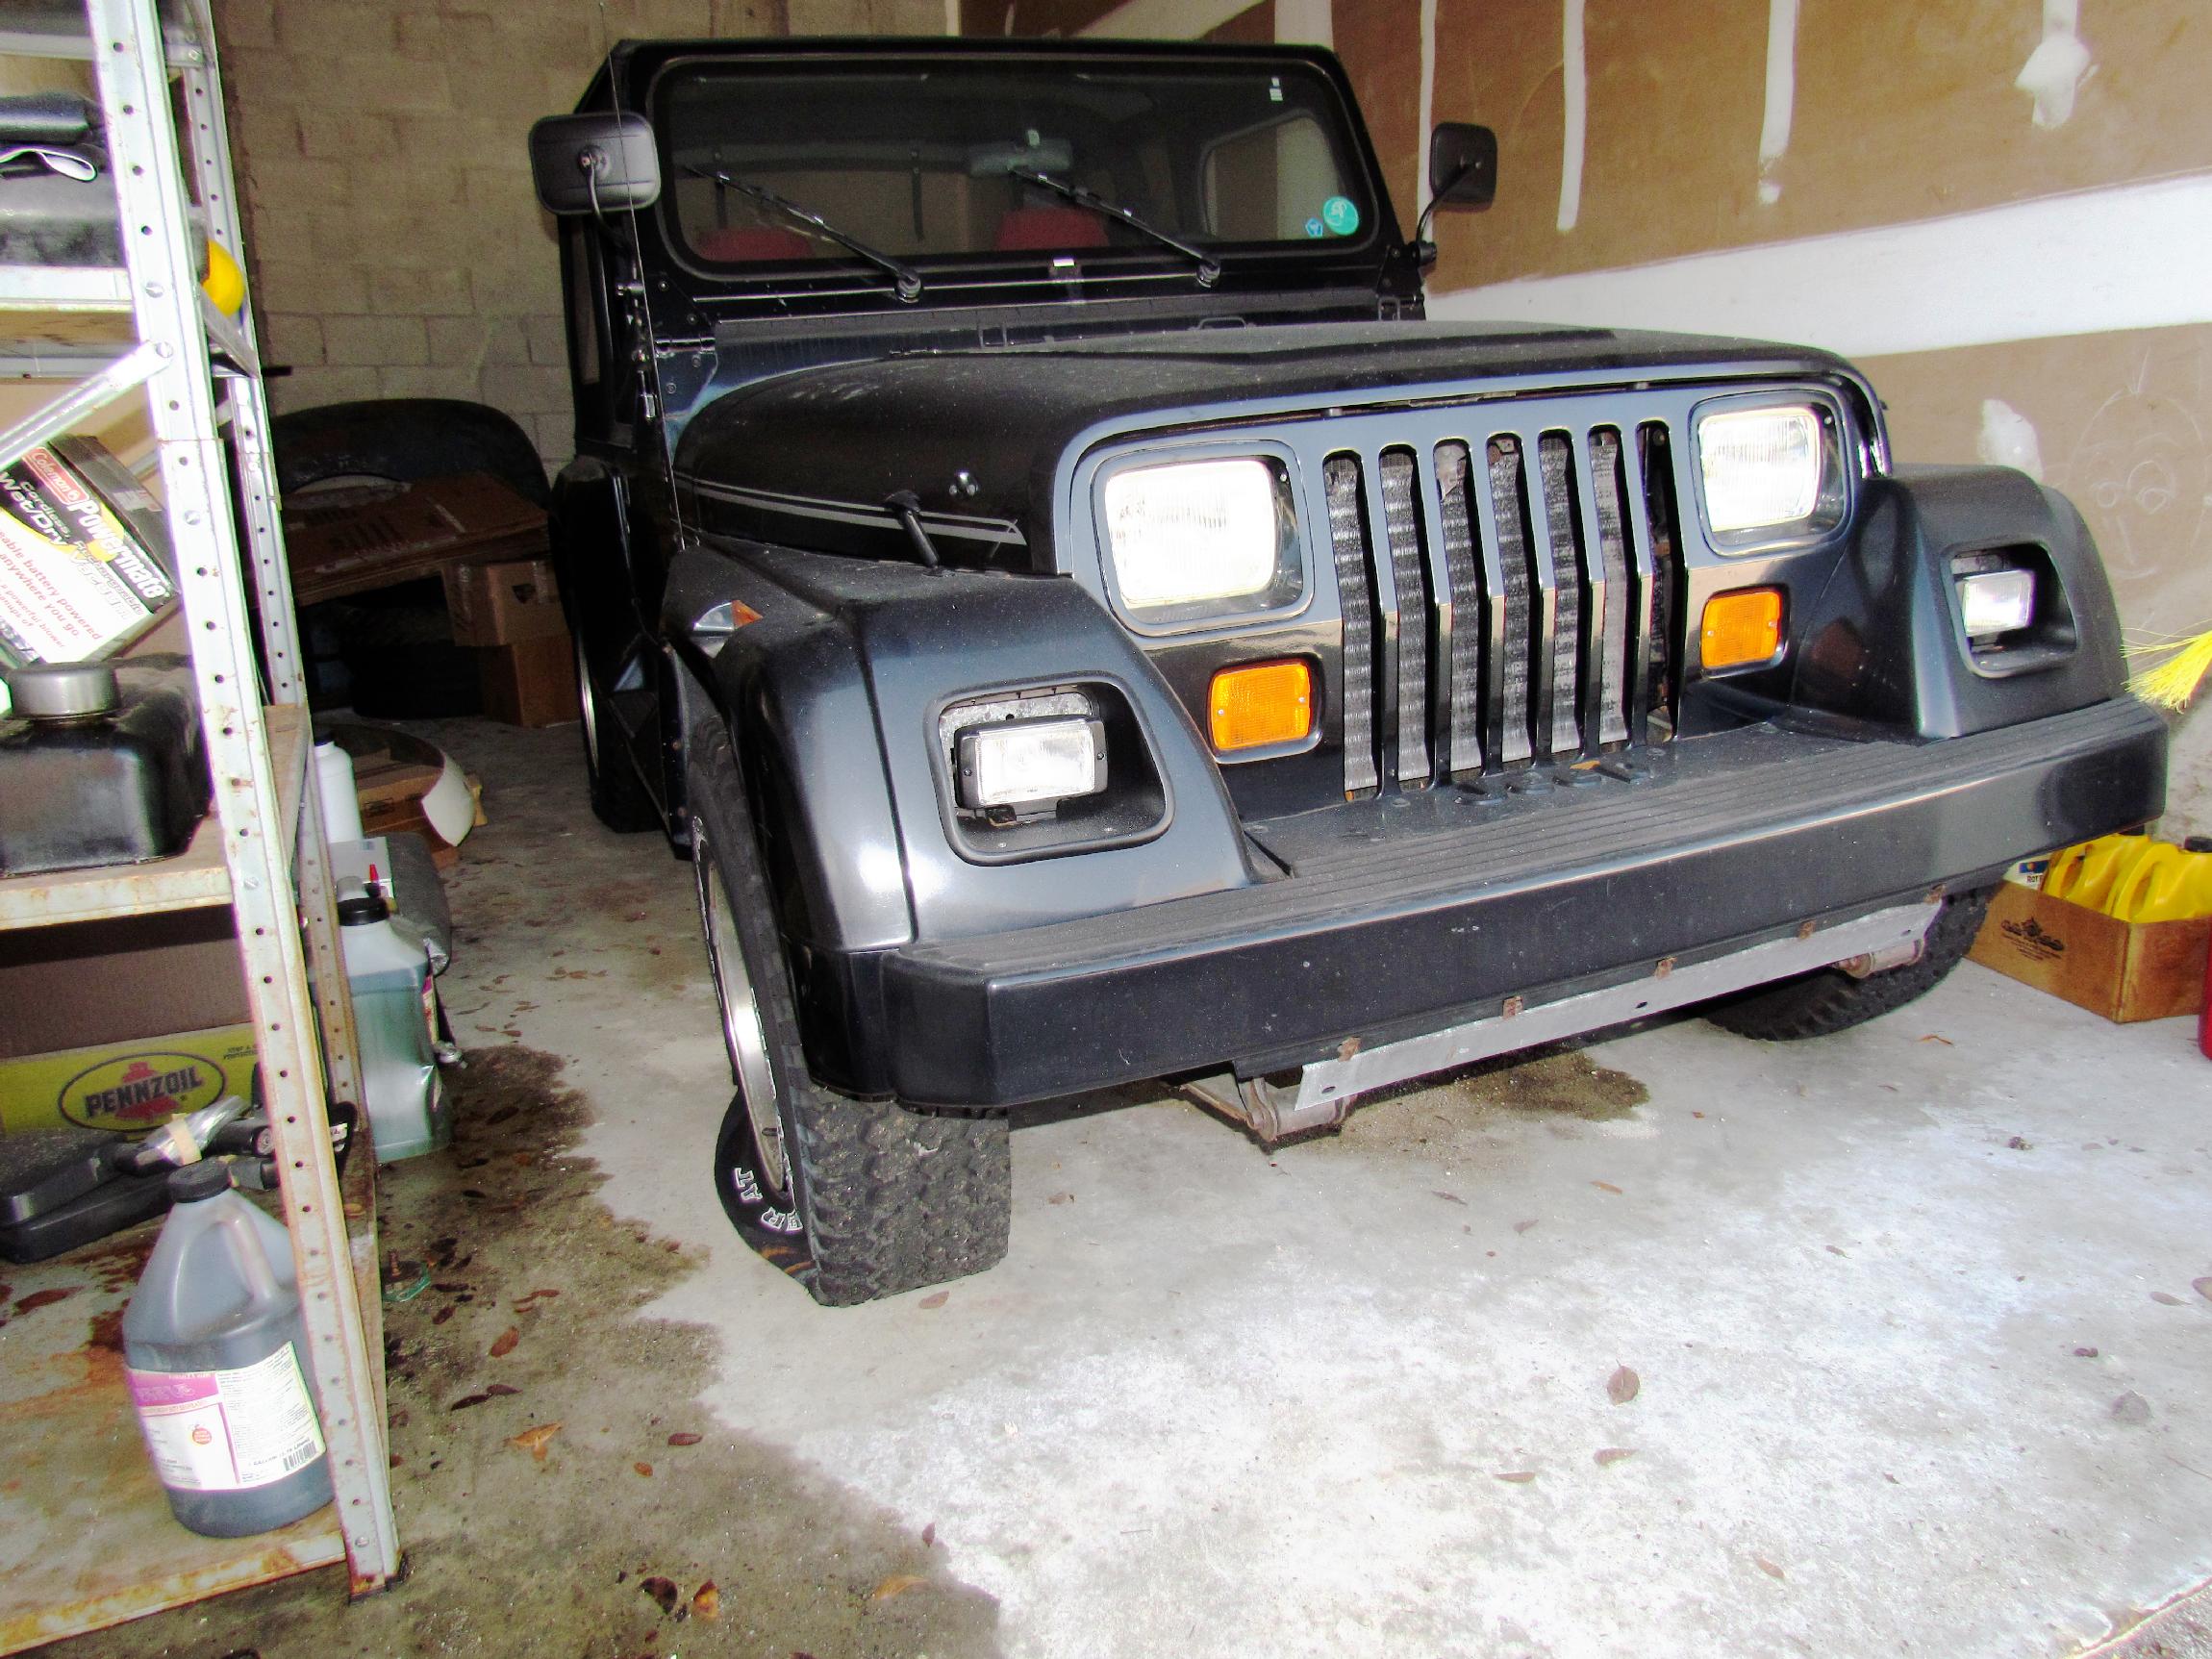
Deerslayer and I visited my Boca warehouse bay. I haven't been here in
awhile and one of the tires on the Renegade had gone flat. I had a
portable air tank with me and was happy to see it bring the tire back
up to about forty pounds. The Jeep hasn't moved in a few years and I
have to get it running again so I will have transportation in case
Deerslayer breaks down to the point where he will be laid up for awhile.
March
24th 2014 On sunday,
after the coffee cruise-in with the holeshot in the wall gang,
Deerslayer and I visited my Boca warehouse bay. I haven't been here in
awhile and one of the tires on the Renegade had gone flat. I had a
portable air tank with me and was happy to see it bring the tire back
up to about forty pounds. The Jeep hasn't moved in a few years and I
have to get it running again so I will have transportation in case
Deerslayer breaks down to the point where he will be laid up for awhile.
 Loaded
up Deerslayer with some stuff to take back to the BillyBob Shop,
including a powdercoating kit and curing lamp. One of the results of
moping around during the great recession is that I have to learn all
over again how to use tools. I need a powdercoating refresher for when
the new Deerslayer windshield frame gets here. Need to find the
directions for this thing. I lost track of 'em last time I reorganized
to make my stuff easier to find.
Loaded
up Deerslayer with some stuff to take back to the BillyBob Shop,
including a powdercoating kit and curing lamp. One of the results of
moping around during the great recession is that I have to learn all
over again how to use tools. I need a powdercoating refresher for when
the new Deerslayer windshield frame gets here. Need to find the
directions for this thing. I lost track of 'em last time I reorganized
to make my stuff easier to find.
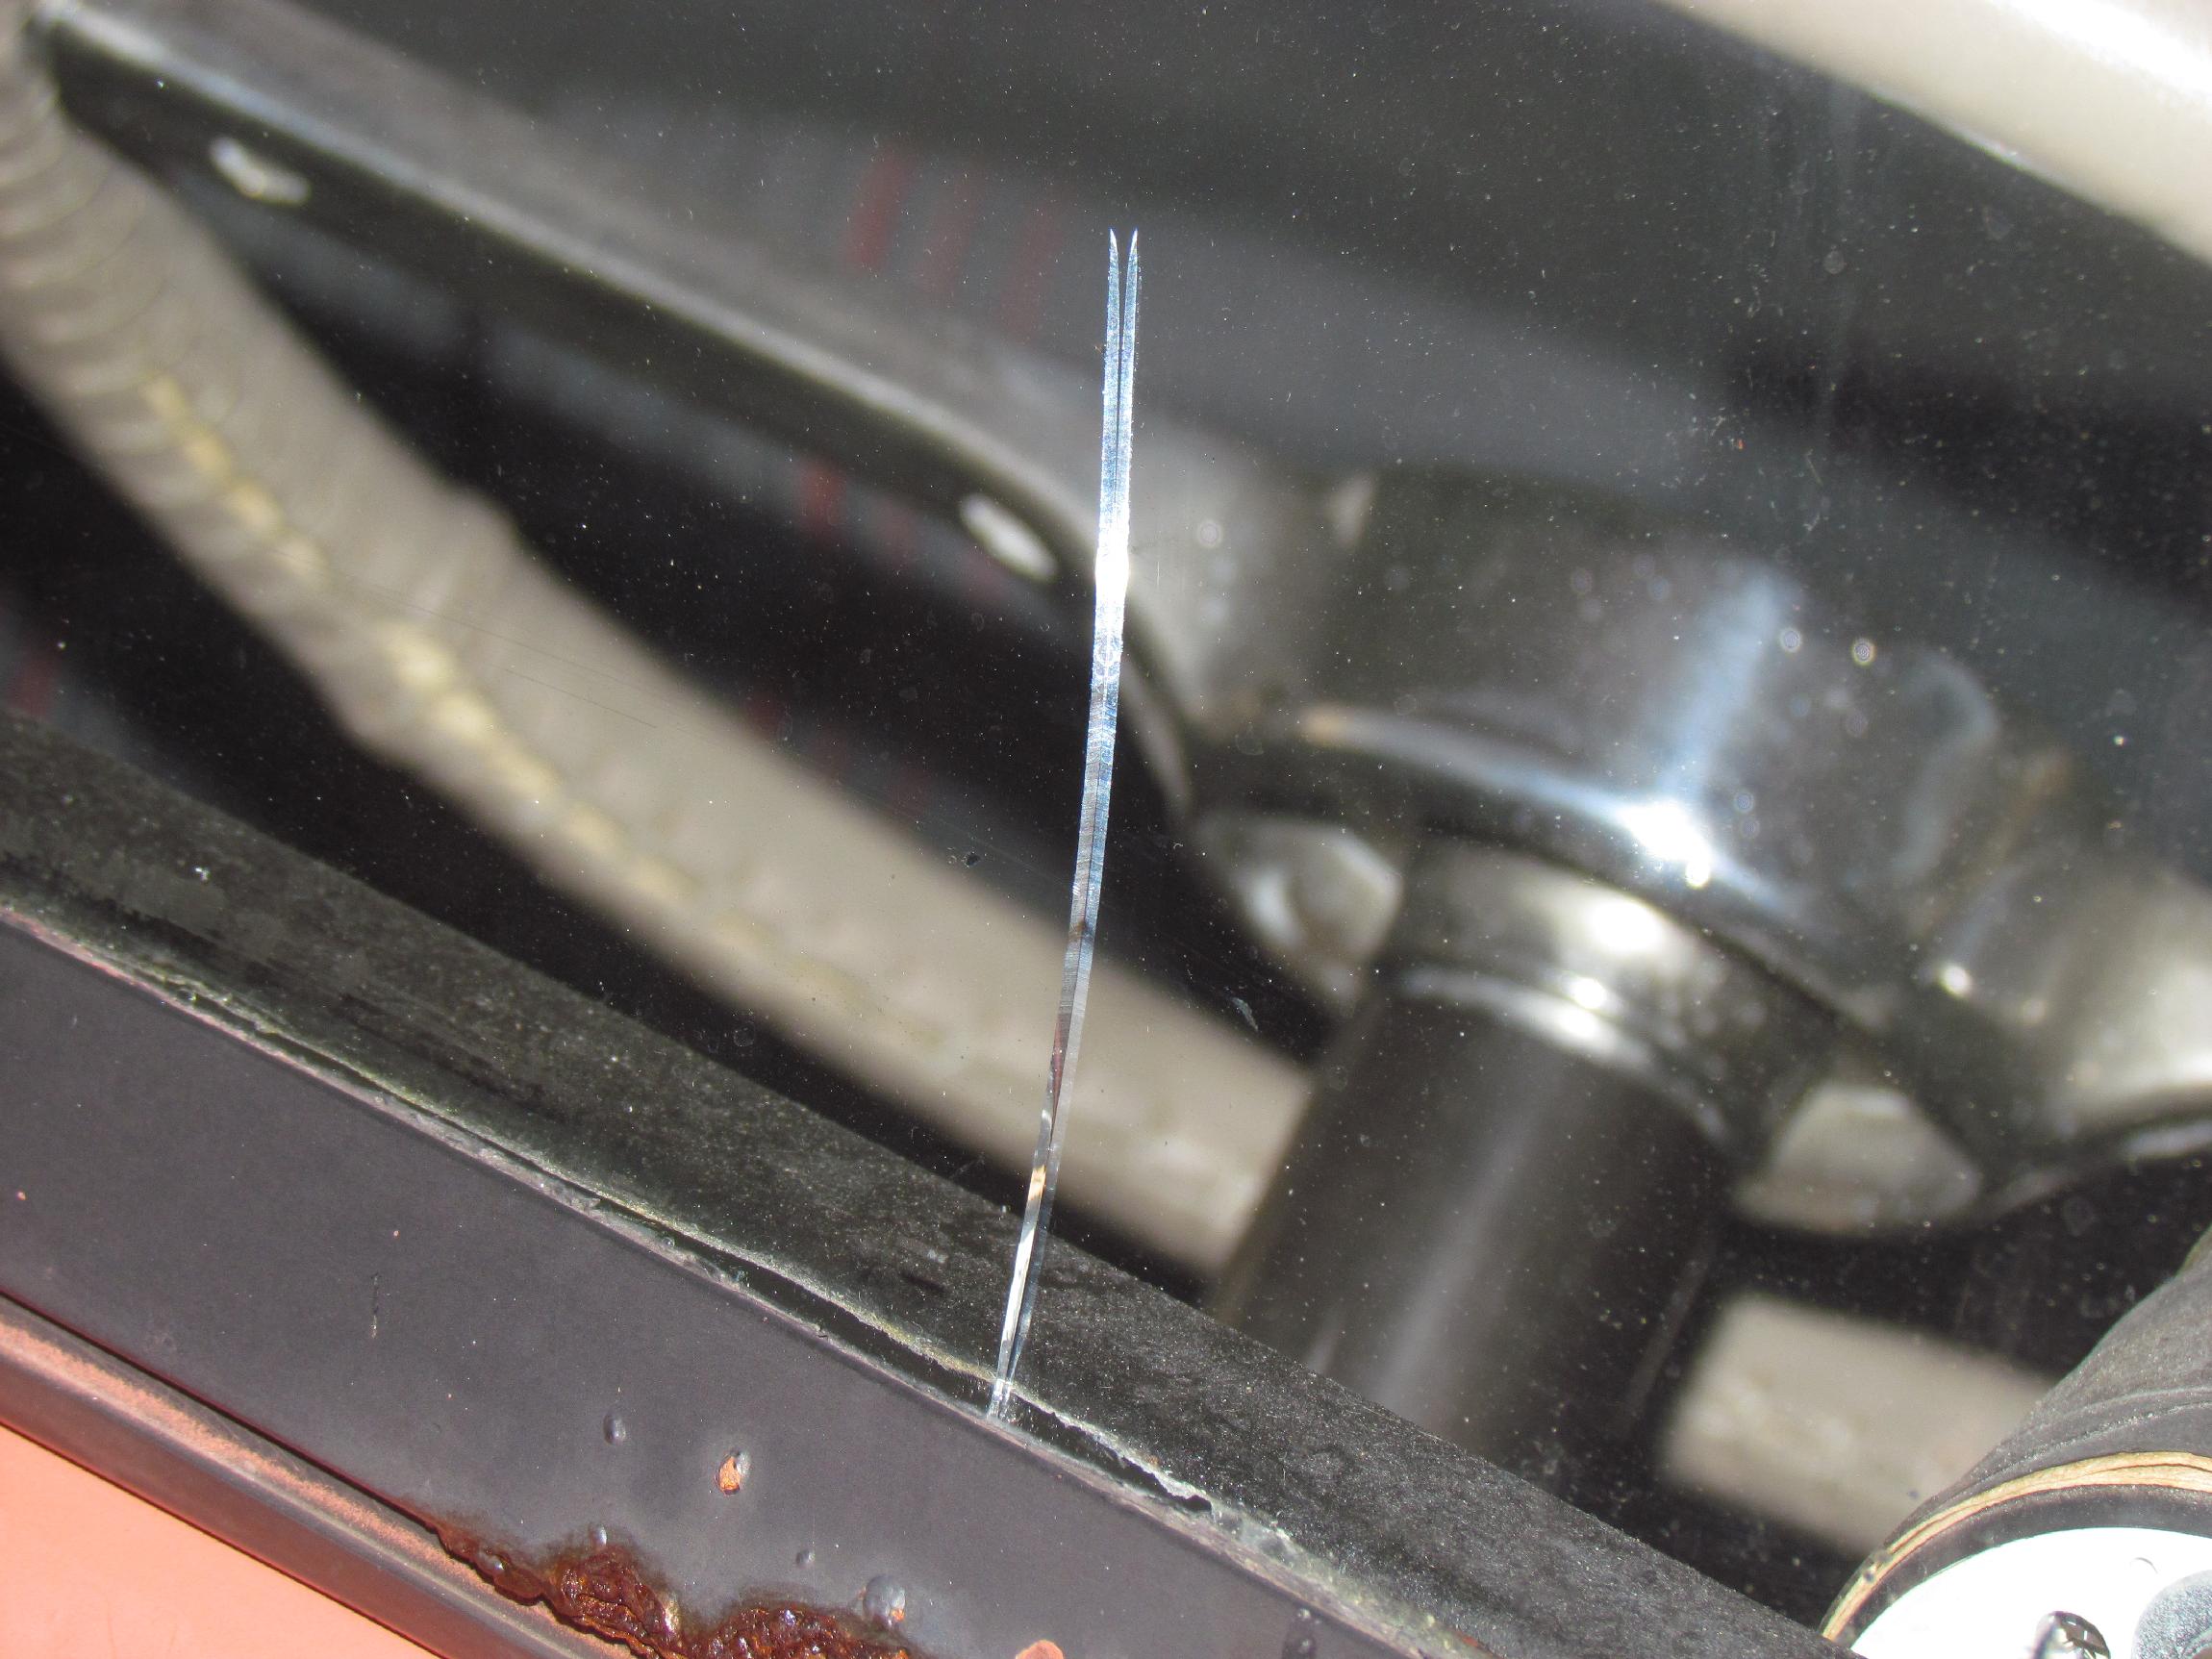 March
26th 2014 Went to the
Delray Beach tuesday nite cruise-in at Duffies last night. When I came
out of the restaurant, I noticed something amiss across the parking
lot. Walked over to the Deerslayer to find a five inch crack in the
windshield. Damnation! No sign of mischief. It just happened. The
silver lining to this dark cloud is that it will make the new
windshield frame job easier. I will be able to build an entire new
windshield frame, new windshield glass and new weatherstripping
assembly prior to removing the old one. Then the swap should only take
a couple of hours instead of the all day marathon that I was
anticipating to get the Deerslayer back on the road.
March
26th 2014 Went to the
Delray Beach tuesday nite cruise-in at Duffies last night. When I came
out of the restaurant, I noticed something amiss across the parking
lot. Walked over to the Deerslayer to find a five inch crack in the
windshield. Damnation! No sign of mischief. It just happened. The
silver lining to this dark cloud is that it will make the new
windshield frame job easier. I will be able to build an entire new
windshield frame, new windshield glass and new weatherstripping
assembly prior to removing the old one. Then the swap should only take
a couple of hours instead of the all day marathon that I was
anticipating to get the Deerslayer back on the road.
 March
31st 2014 The
windshield frame arrived at the Krash Lab on thursday. Saturday
morning, I unpacked it. It is in good shape without any shipping
damage. When the glass gets here, I will check the fit before ordering
weatherproofing rubber and setting tape.
March
31st 2014 The
windshield frame arrived at the Krash Lab on thursday. Saturday
morning, I unpacked it. It is in good shape without any shipping
damage. When the glass gets here, I will check the fit before ordering
weatherproofing rubber and setting tape.
 Also
trying to pick up the pace on Project Nailhead. I've found a source for
adjustable rockers for the old engine but I will have to send in my old
rocker assemblies in exchange so I pulled the valve covers to see how
much gunk I was going to have to clean up for shipping. Pleasantly
surprised to see how clean the existing assemblies are.
Also
trying to pick up the pace on Project Nailhead. I've found a source for
adjustable rockers for the old engine but I will have to send in my old
rocker assemblies in exchange so I pulled the valve covers to see how
much gunk I was going to have to clean up for shipping. Pleasantly
surprised to see how clean the existing assemblies are.
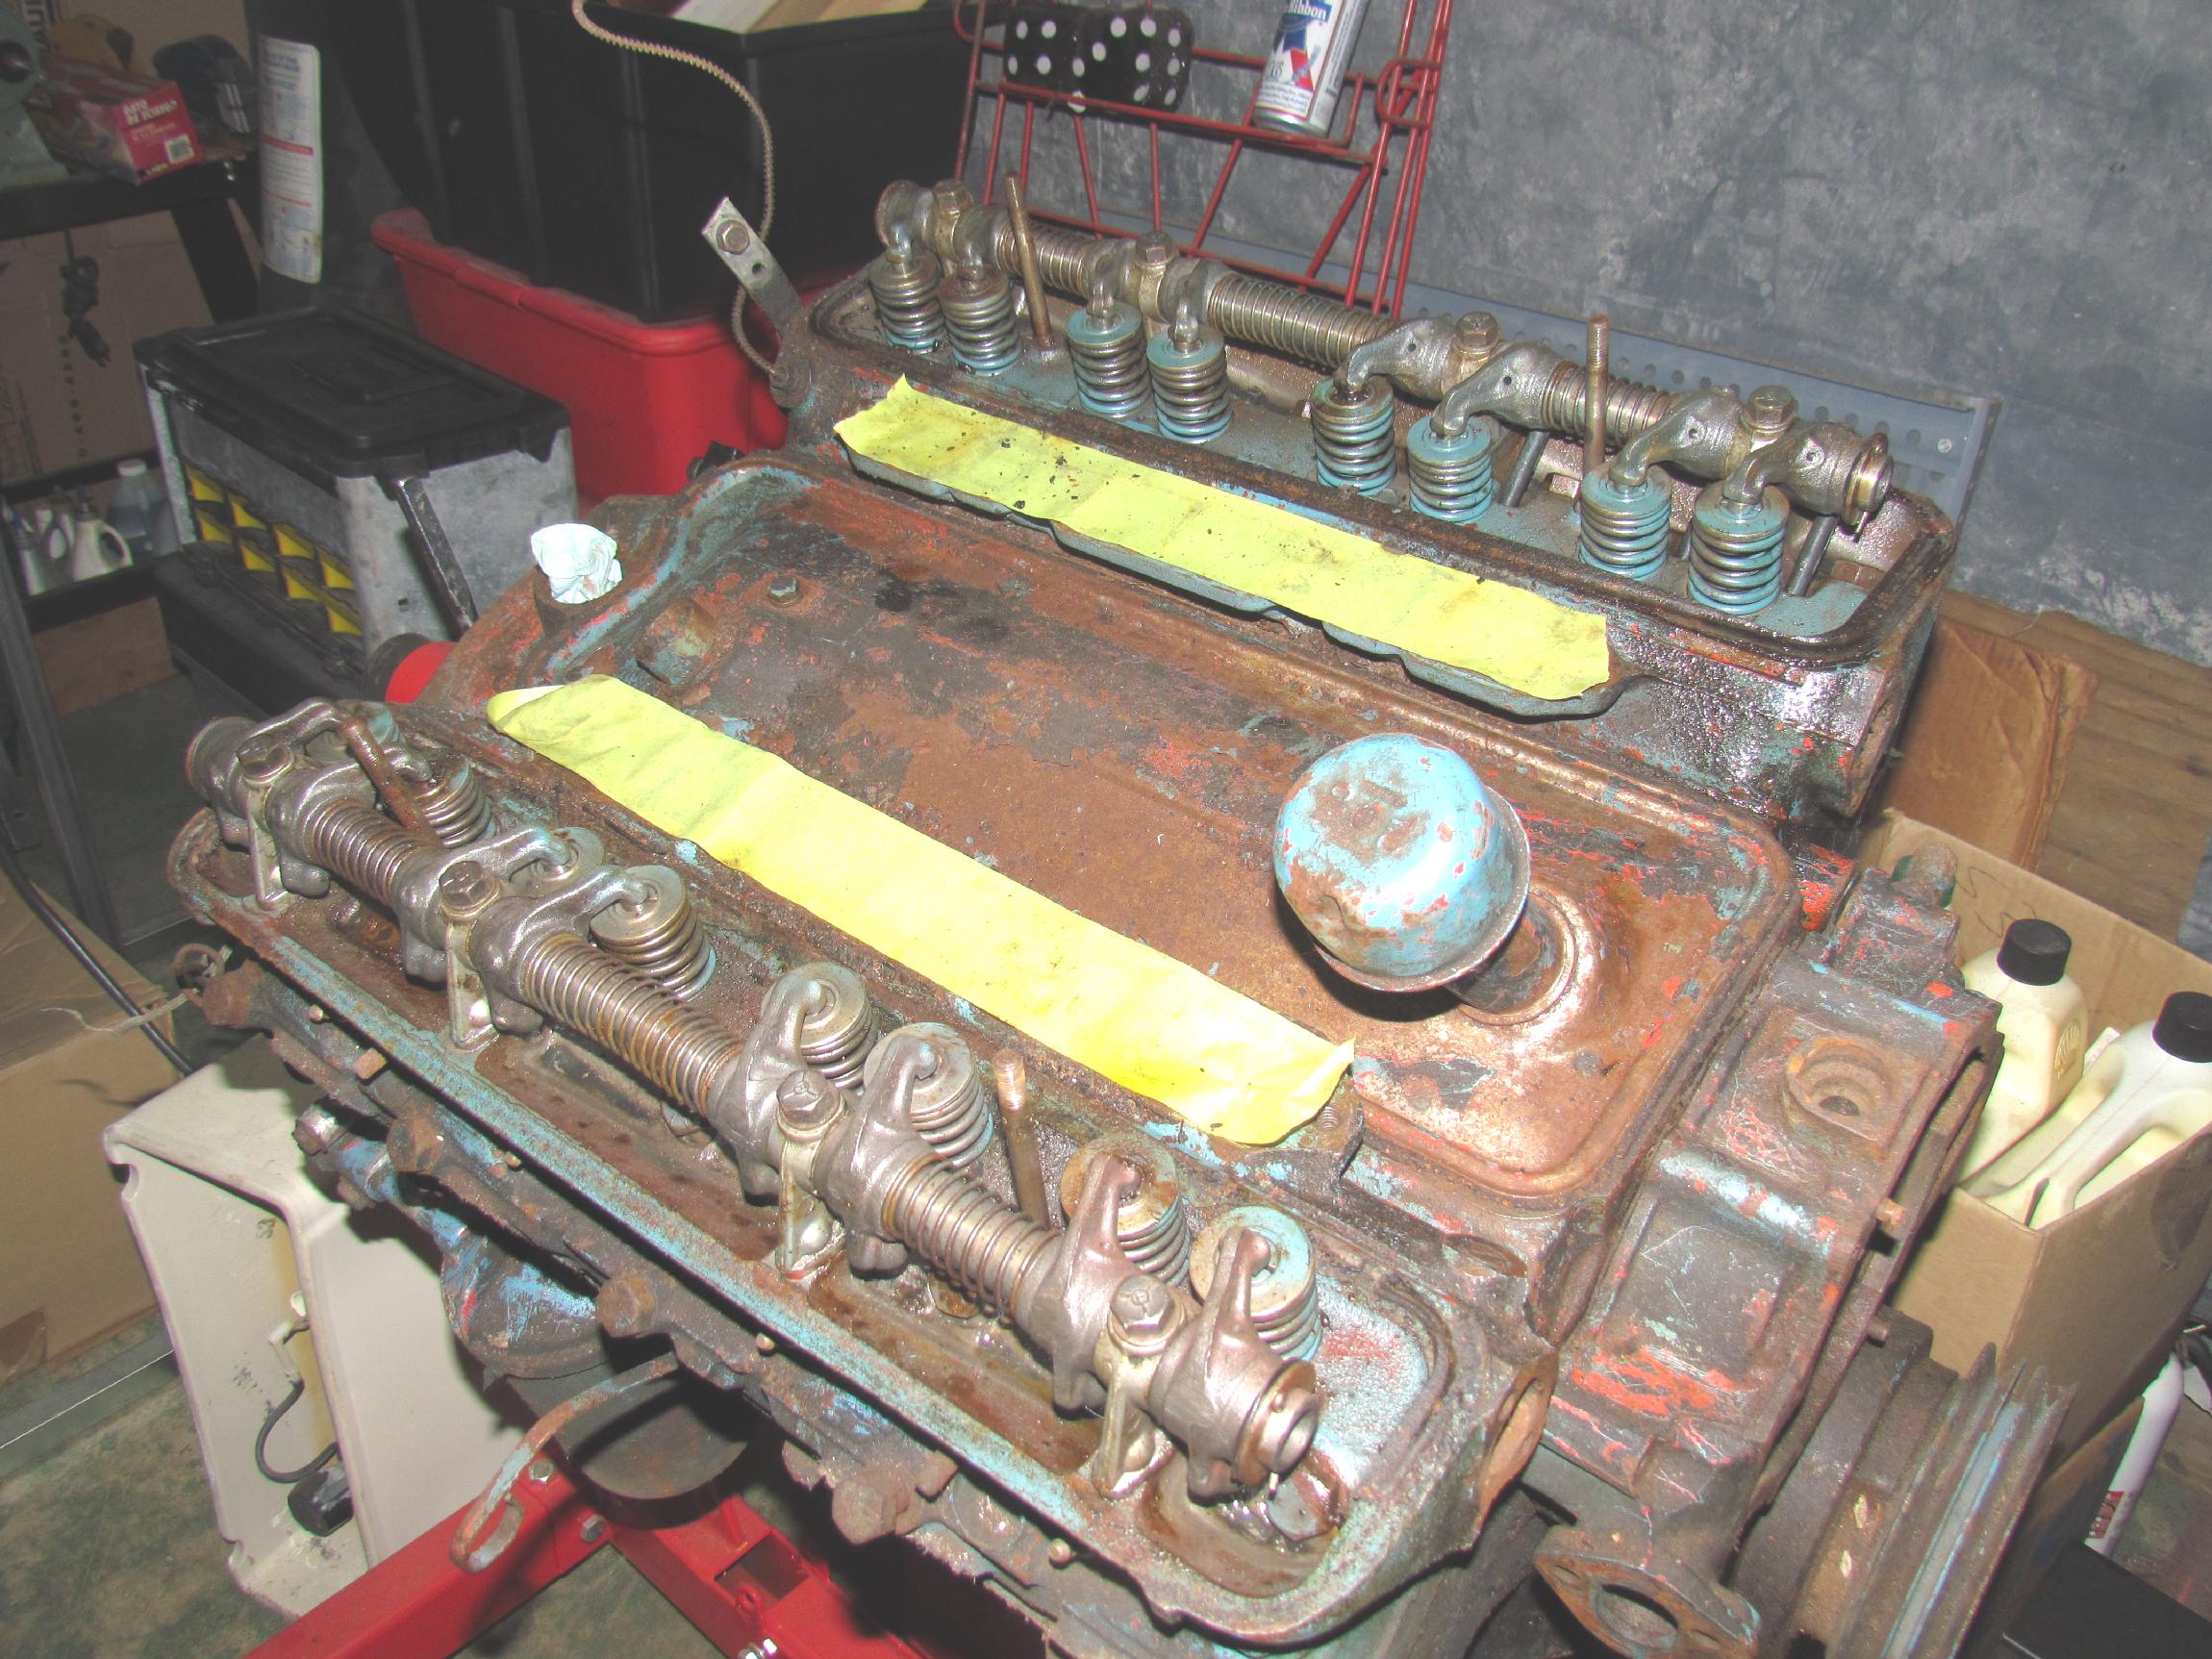
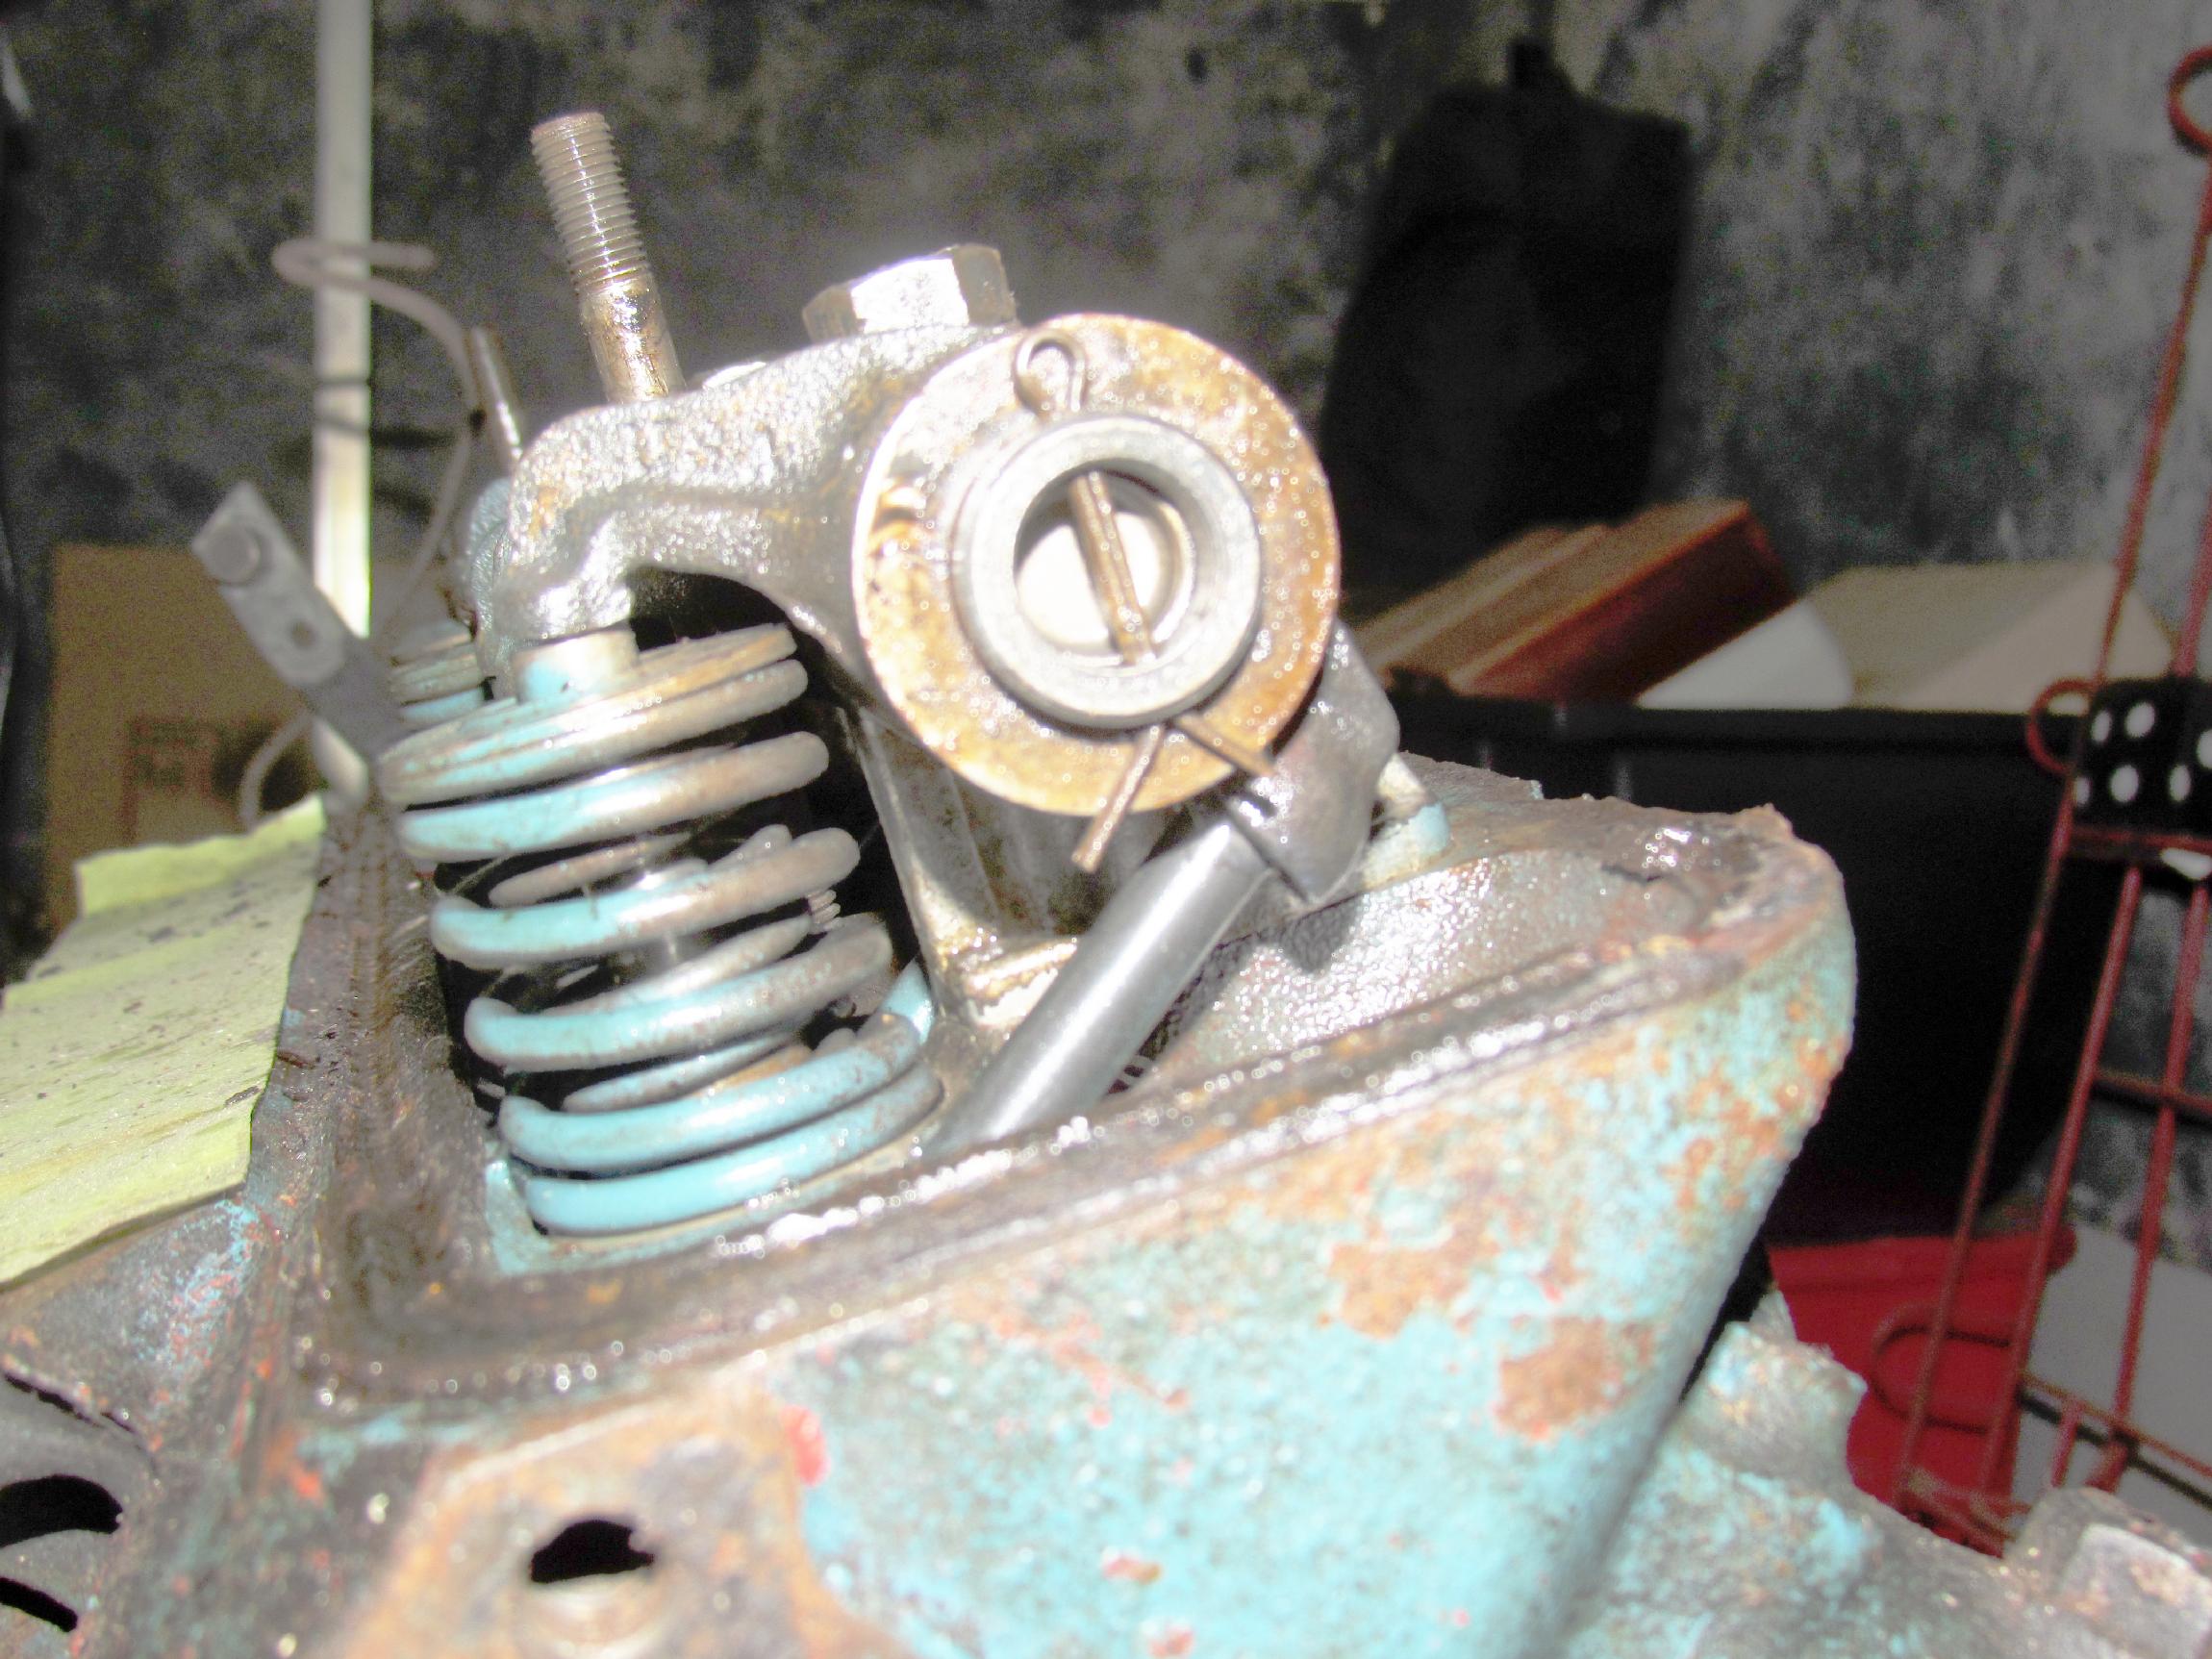 The
Buick nailhead valve train is somewhat unique in that the push rods
from the camshaft in the valley pass by the valve stems to the rockers
on the outside of the head and the valves are vertical on the inside of
the head as displayed in this shot. It's pretty busy where the push
rods pass the valve stems and the valves are diminished in diameter
with long stems. Their proportions make them look like nails, hence the
nickname nailhead for this engine. A cross section of the
engine indicates this better than I can with words alone.
The
Buick nailhead valve train is somewhat unique in that the push rods
from the camshaft in the valley pass by the valve stems to the rockers
on the outside of the head and the valves are vertical on the inside of
the head as displayed in this shot. It's pretty busy where the push
rods pass the valve stems and the valves are diminished in diameter
with long stems. Their proportions make them look like nails, hence the
nickname nailhead for this engine. A cross section of the
engine indicates this better than I can with words alone.
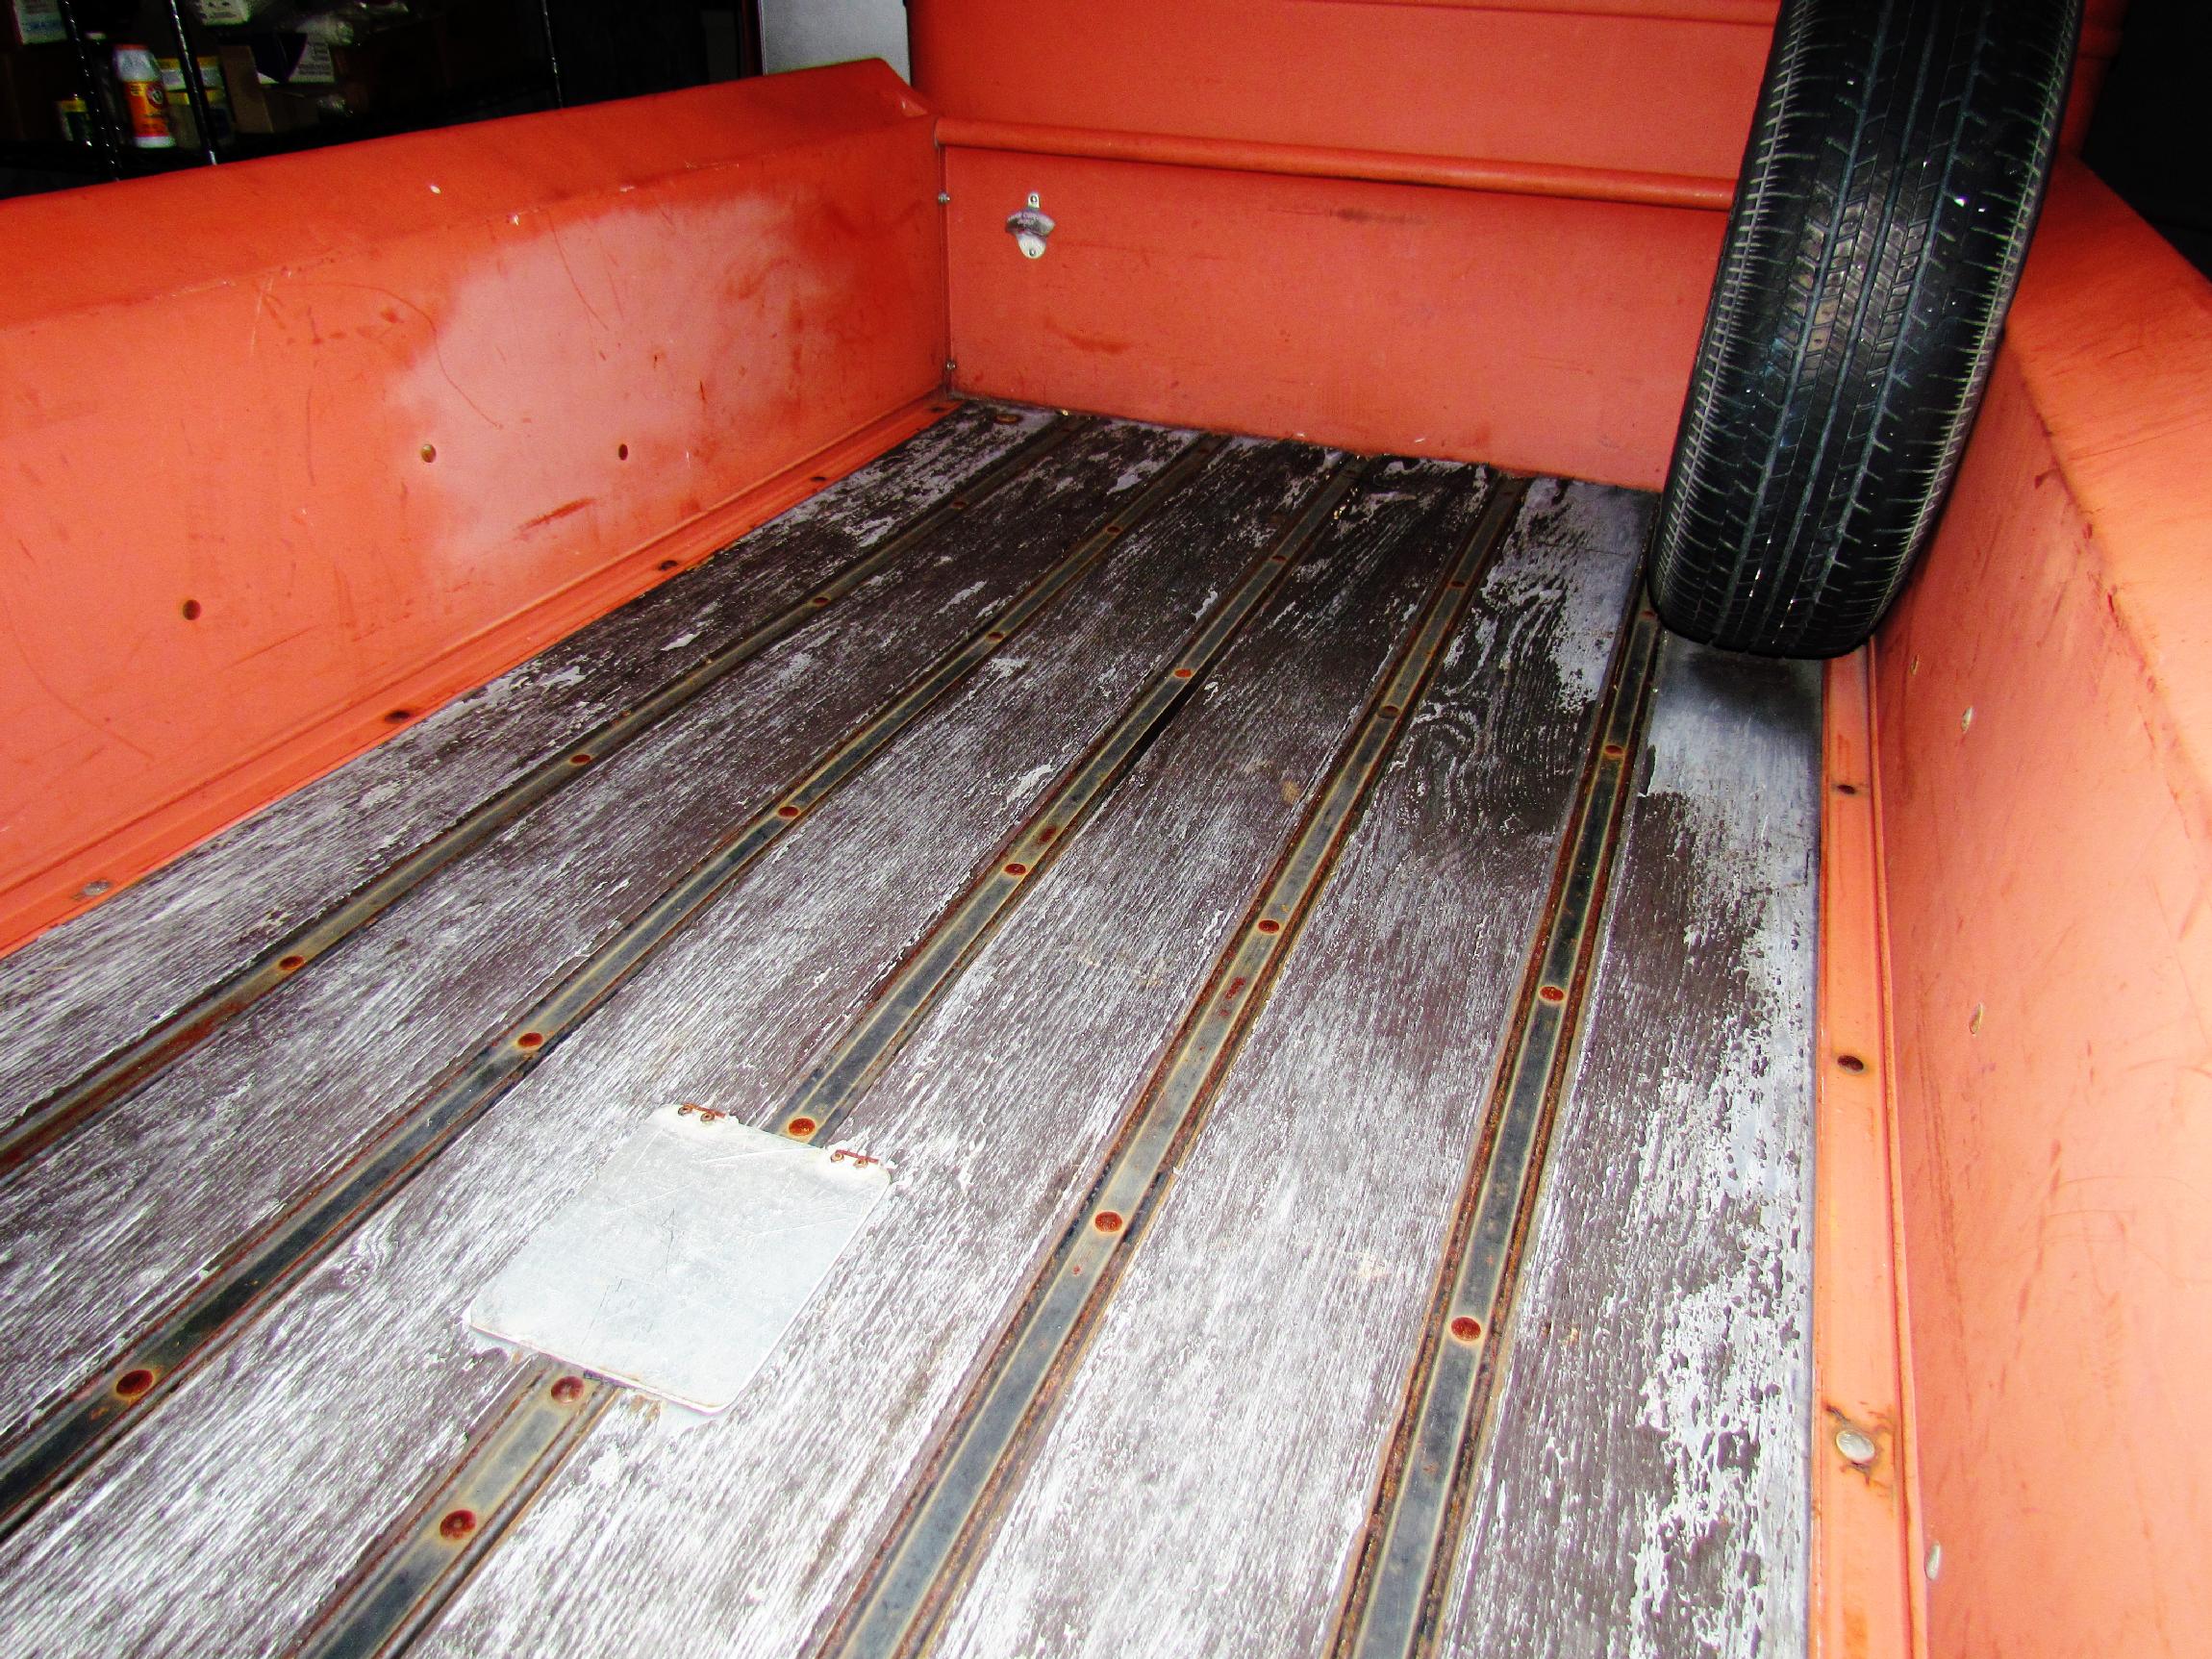 Another
job I started, by gathering materials, but not yet finished, is sanding
and varnishing Deerslayer's bed. I need to attend to that before one of
my friends gets a splinter in their ass. I have a quart of generic spar
varnish because I was not impressed with the "good stuff" I suckered
myself into buying last time. Picked up a Black & Decker hand
sander too.
Another
job I started, by gathering materials, but not yet finished, is sanding
and varnishing Deerslayer's bed. I need to attend to that before one of
my friends gets a splinter in their ass. I have a quart of generic spar
varnish because I was not impressed with the "good stuff" I suckered
myself into buying last time. Picked up a Black & Decker hand
sander too.
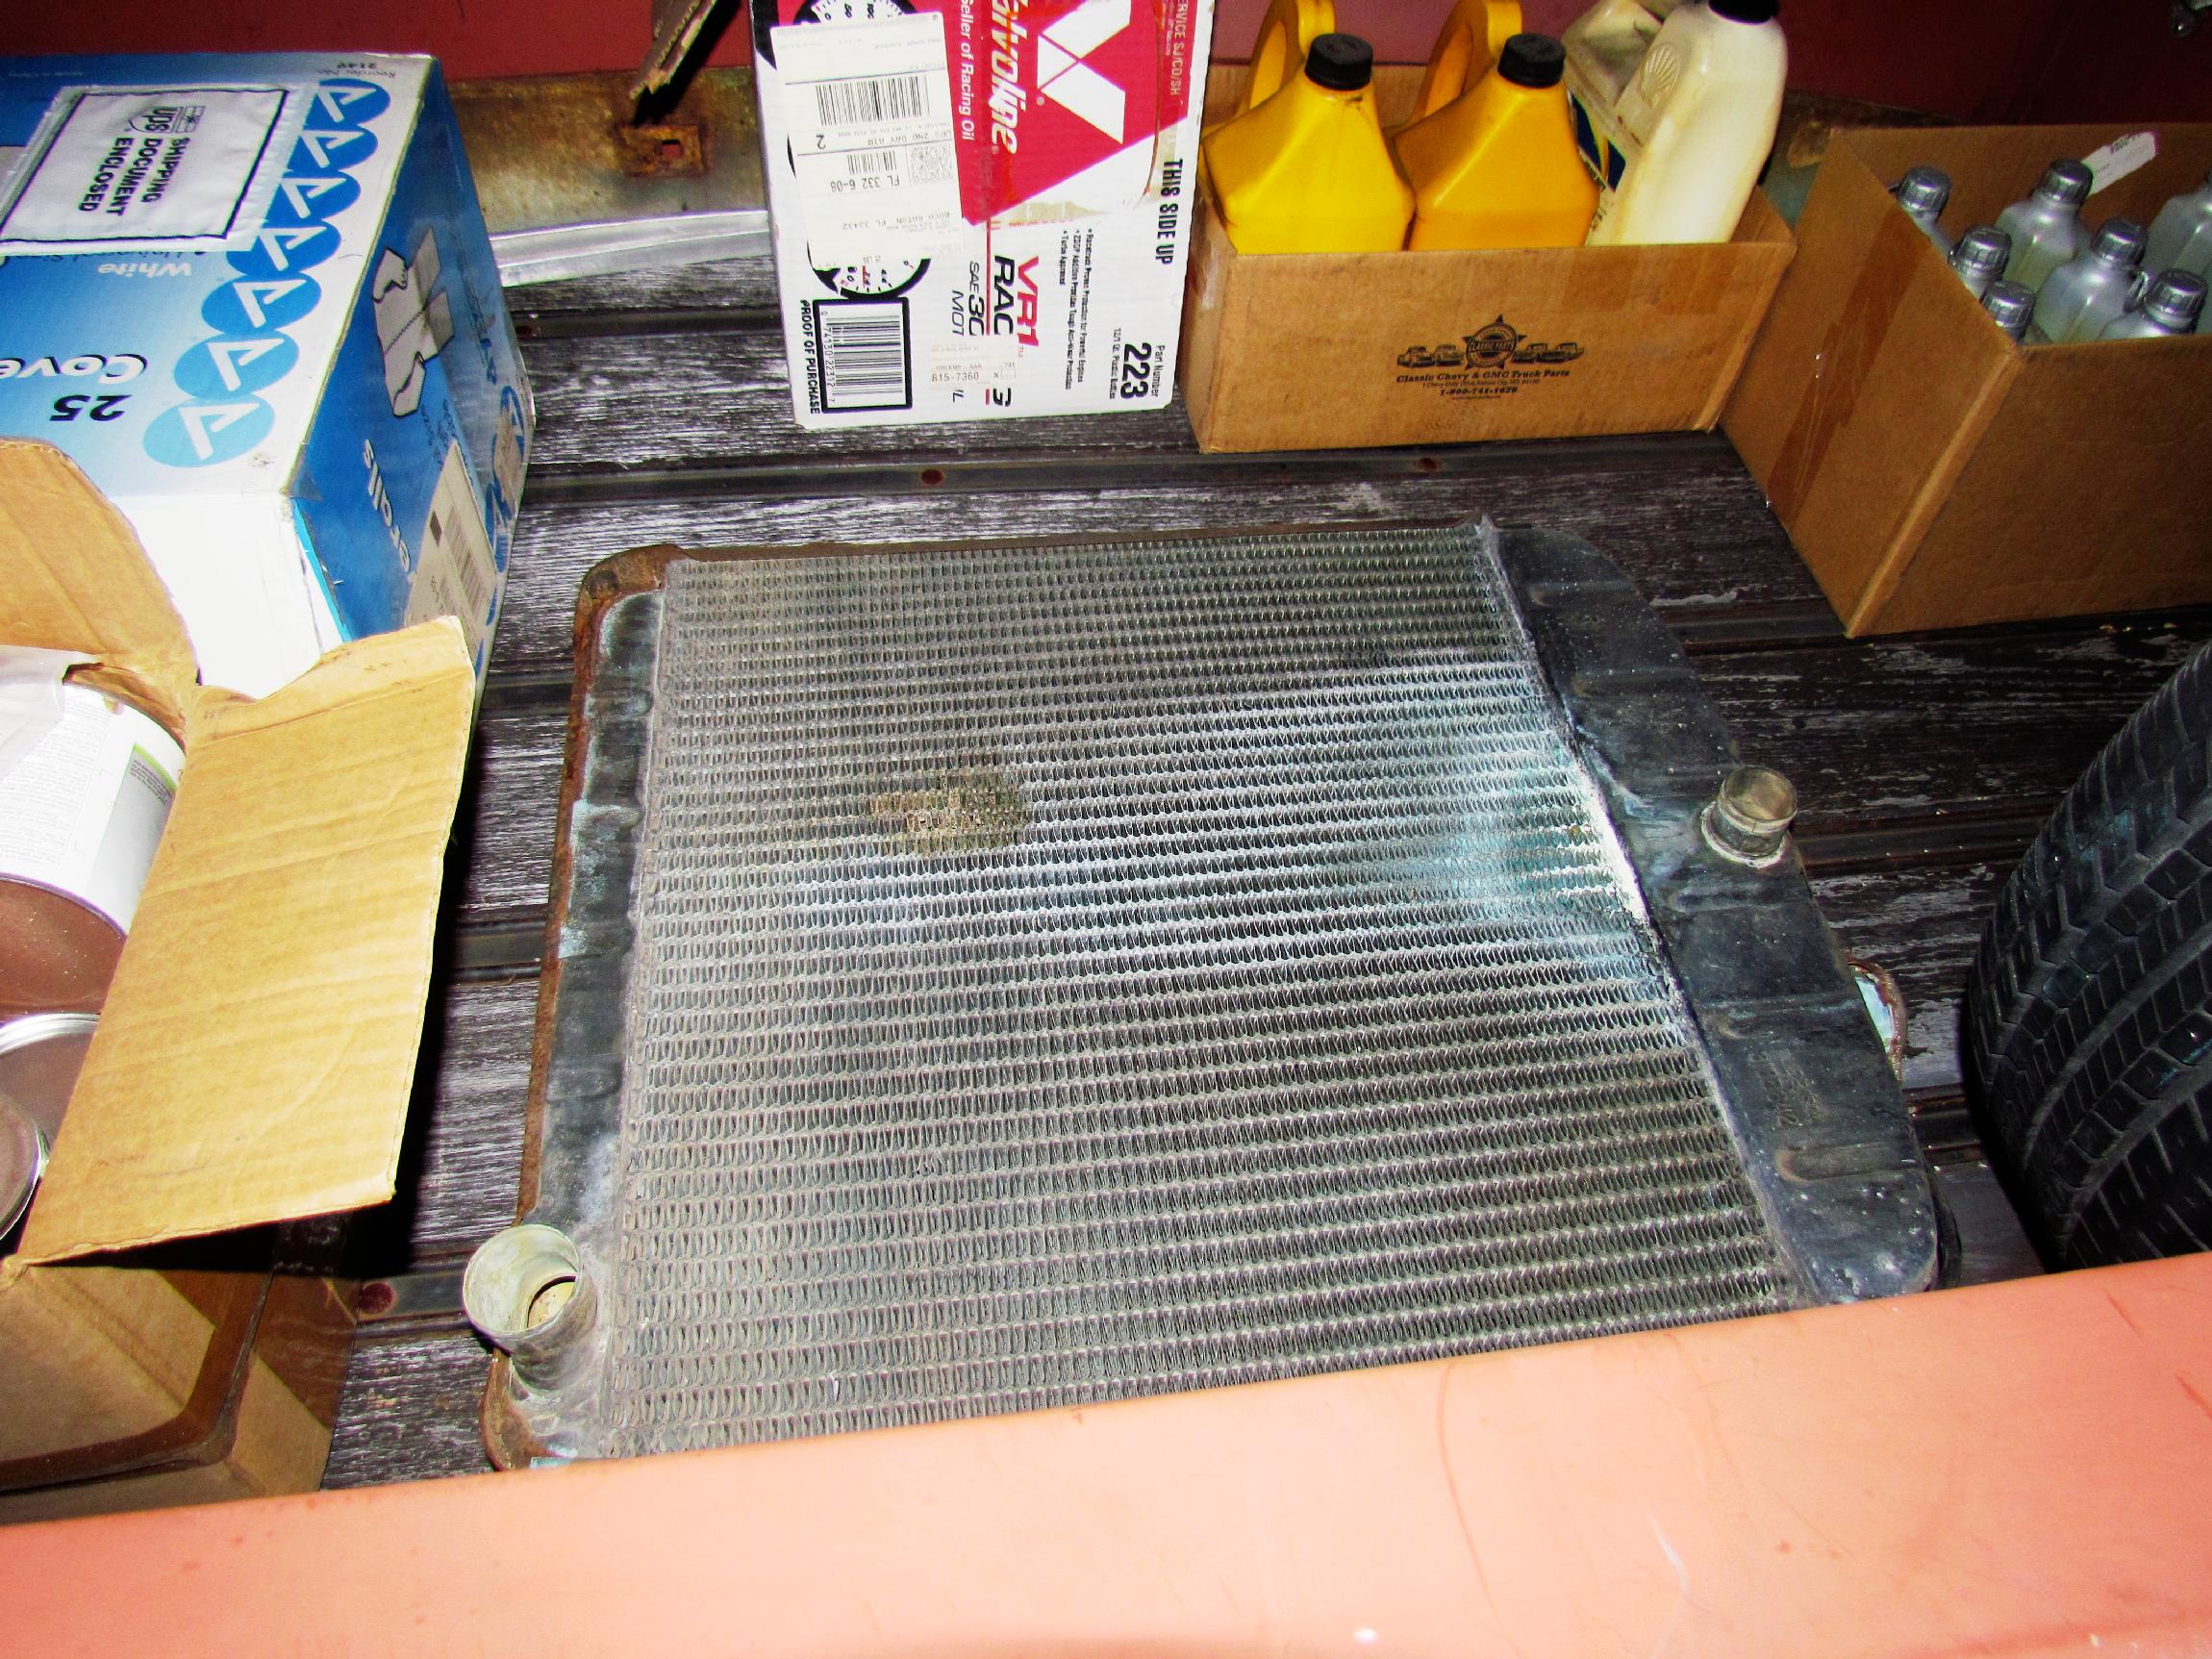 On
sunday morning, I met the breakfast bunch in Hollywood for coffee.
George LeMieux gave me a radiator from the '55 2nd series Chevy truck
he's building. It looks a lot like BillyBob's 1st series radiator and
it might be adaptable. I've gone thru 2 repop radiators in BillyBob and
I've had a belly full. The fins begin to crumble within a year. The
same with a replacement radiator in my Jeep. Yet, these almost sixty
year old radiators do not have that problem. Why is that?
On
sunday morning, I met the breakfast bunch in Hollywood for coffee.
George LeMieux gave me a radiator from the '55 2nd series Chevy truck
he's building. It looks a lot like BillyBob's 1st series radiator and
it might be adaptable. I've gone thru 2 repop radiators in BillyBob and
I've had a belly full. The fins begin to crumble within a year. The
same with a replacement radiator in my Jeep. Yet, these almost sixty
year old radiators do not have that problem. Why is that?
After coffee, Deerslayer and I made our way up to the warehouse bay in Boca for another load of stuff to bring back to the BillyBob Shop. A long, pleasant drive up the coast road A-1-A with a cigar.
| < Back
to Intro |
You can email me at ![]() webmaster@laroke.com
webmaster@laroke.com
Issued Tuesday April 1, 2014
Updated Wednesday June 13, 2018
copyright © 2008-2018 Larry R. Kephart all rights reserved
| | LRK Home | | Bio Info | | Krash Khronicles | | LAROKE | |
| | BettyLou | | BillyBob's Garage | | Rat Patrol | | Deerslayer | | Elvira | |
| | Land of the Free and Home of the Brave | |
| | Keppylou's Art | | WWI Soldier's Diary | |