| | LRK Home | | Bio Info | | Krash Khronicles | | LAROKE | |
| | BettyLou | | BillyBob's Garage | | Rat Patrol | | Deerslayer | | Elvira | |
| | Land of the Free and Home of the Brave | |
| | Keppylou's Art | | WWI Soldier's Diary | |
Tinkering with Deerslayer
![]()
DEERSLAYER LINKS including vendor sites for parts and tools as well as sites for old truck and hot rod organizations
![]()
TINKERING WITH DEERSLAYER chronicles the day-by-day maintenance and improvements episodes for Deerslayer, a '37 Chevy farm truck hot rod.
CRUISIN' WITH DEERSLAYER Roadtrips, cruise-in's and truck show stories and tall tales.
TONY'S DUNGEON Tony Pascarella's forum entries at OldGMCtrucks.com regarding Deerslayer, particularly the 302 GMC engine build in his farmhouse basement.
![]()
DEERSLAYER MAINTENANCE Ever changing detailing, oil change, lube, etc. maintenance routines specifically developed for Deerslayer, including required tools, materials and procedures.
PROJECT NAILHEAD Chronicles the rebuild of a 1954 Buick Roadmaster 322 nailhead engine as a future replacement for Deerslayer's Jimmy 302.
31. Bling for Deerslayer
December 23rd 2013 In the past five years of austerity, I've been mostly dealing with paying down debt and sticking with the necessities. I do splurge a bit on my birthday and Christmas, sometimes. Last year at Christmas is when I purchased the used two-post lift that I am close to installing but not quite there yet. If I don't have something in mind, I just skip getting anything. That was the situation this year when I was searching eBay for steering wheel trim to cover the gap between the '46 repop steering wheel and the steering column mast.
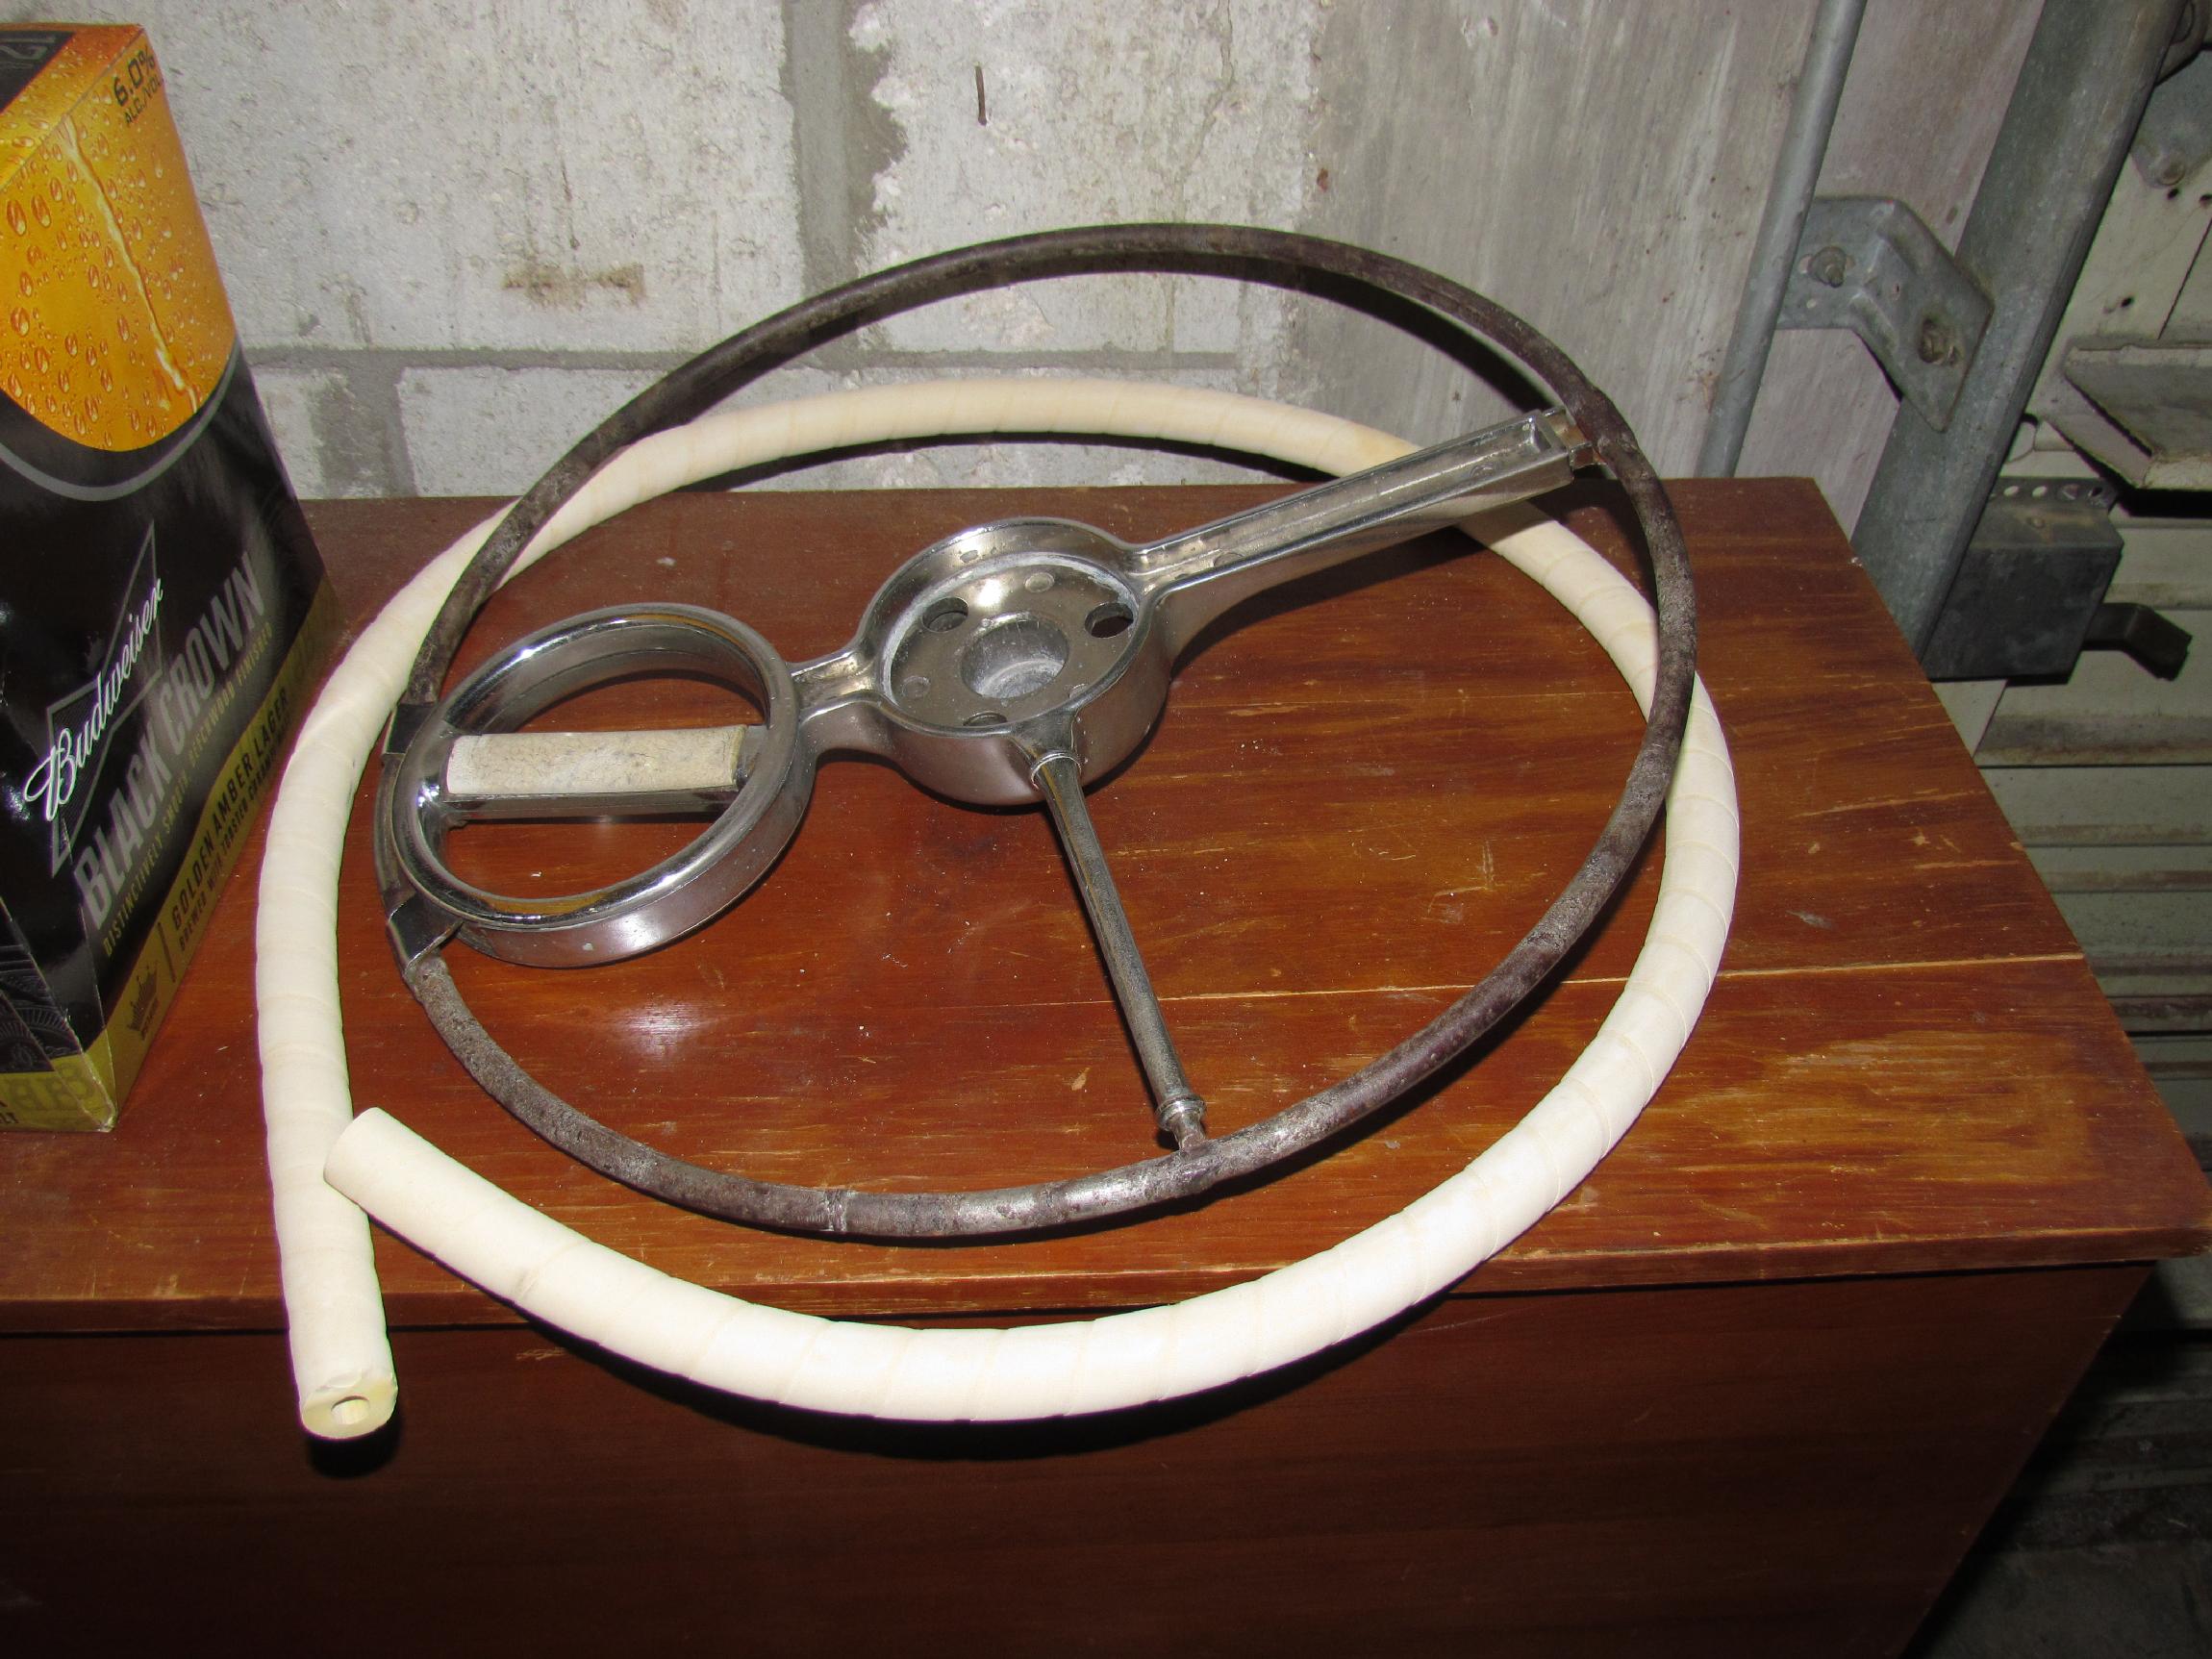
I stumbled across an item that I knew existed, but had never seen on eBay or "in the wild" for that matter: a 1940 Chevrolet De Luxe "spinner" steering wheel. When I saw it, I had to have it for Deerslayer. Had a buy-it-now price of four c-notes. I held off for a day, then popped for the buy-it-now price. I am now impatiently waiting for it to arrive here at the Krash Lab the day after Christmas if the Postal Service doesn't lose it.
December 27th 2013 The USPS delivered the spinner wheel yesterday. All the plastic is gone. My plan is to wrap the existing rim armature with rubber tubing to give me a base for another leather cover from wheelskins.com. The spline looks like it might be a match for the '46 column but I'll have to wait to check that out. This morning I placed an online order to McMaster-Carr for "Abrasion-Resistant Gum Rubber Tubing Vacuum Rated, 3/8" ID, 7/8" OD, 1/4" Wall, Tan, 5 ft. Length ". We'll see late next week if this was a good selection.
 January
3rd 2014 The tubing
arrived yesterday. Shipping is a smidgeon slow, I suspect due to the
holiday overload and the winter storms raging north of here. I may have
gotten the inside diameter a bit tight but the length seems about
right. Now, I need to figure out how to slit the tubing longitudinally
to get it over the steering wheel rim. I'll fiddle around with that
tomorrow.
January
3rd 2014 The tubing
arrived yesterday. Shipping is a smidgeon slow, I suspect due to the
holiday overload and the winter storms raging north of here. I may have
gotten the inside diameter a bit tight but the length seems about
right. Now, I need to figure out how to slit the tubing longitudinally
to get it over the steering wheel rim. I'll fiddle around with that
tomorrow.
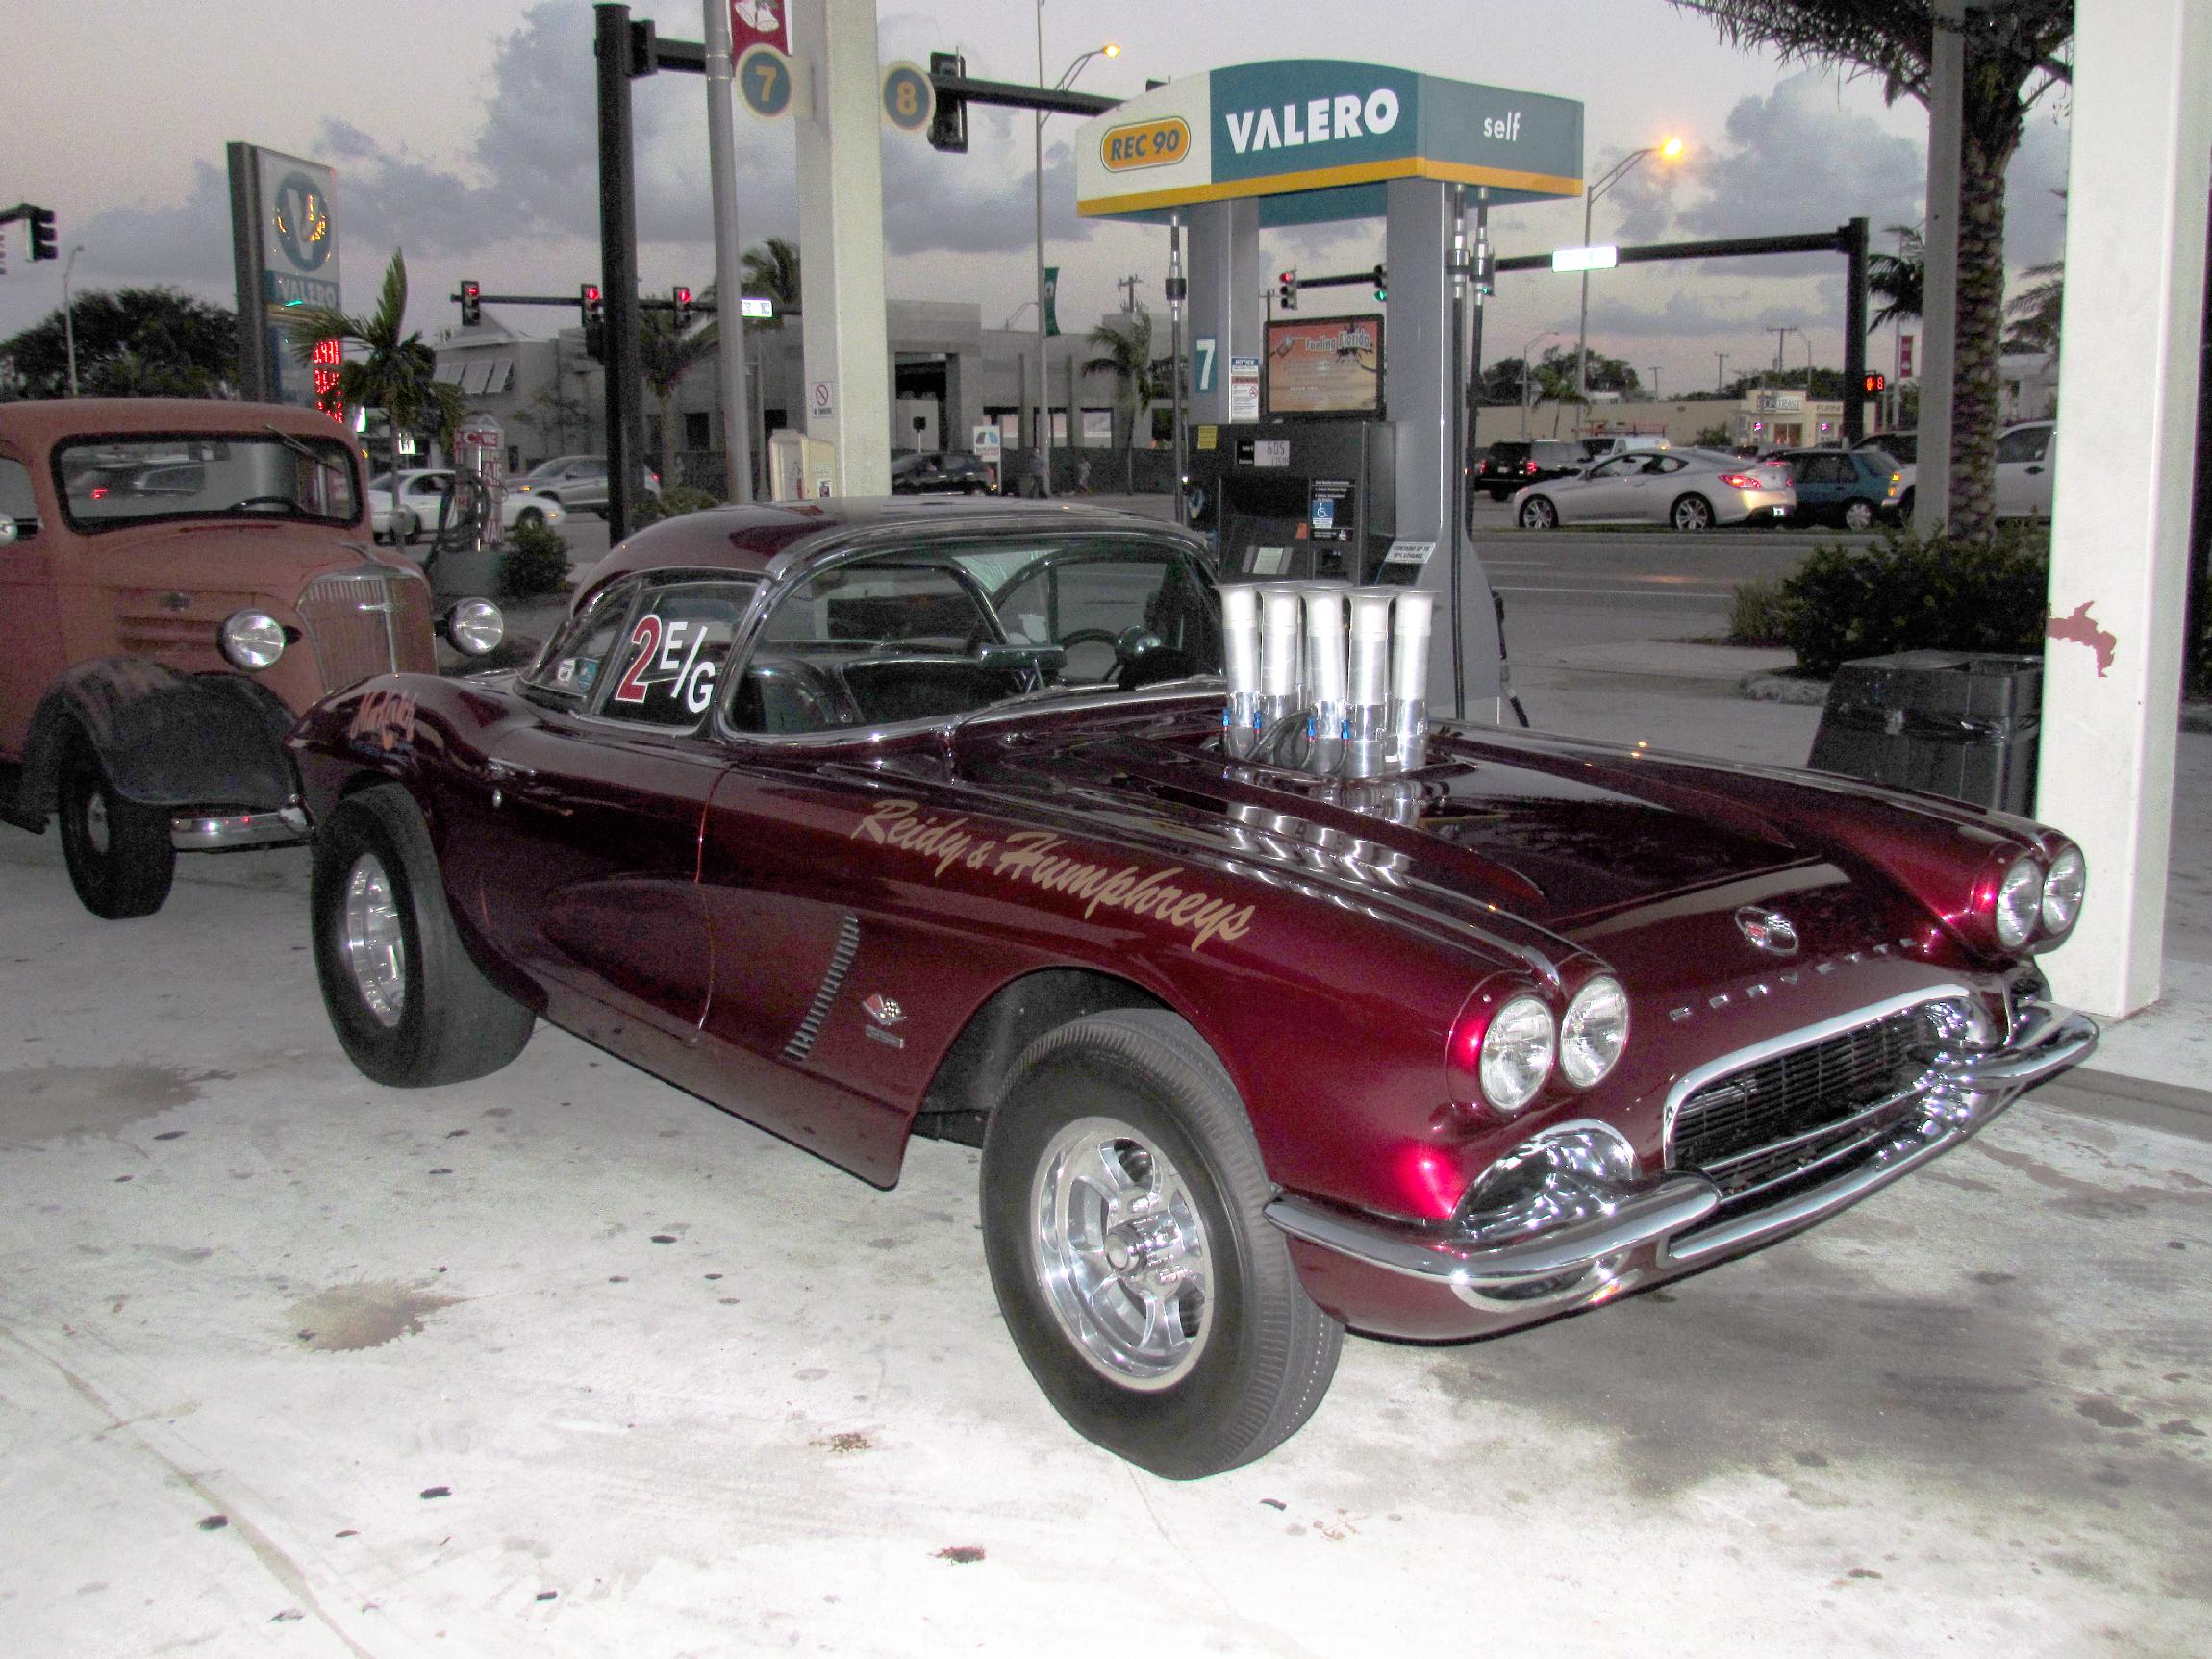 Yesterday,
my friend, Eugene, called me to see if I could transport his DJ
equipment to the thursday nite cruise-in at the Hog so he could drive
his finally finished '62 Corvette gasser tribute to the cruise-in. I
got to his house a little after five and we headed out. We stopped for
gas at one of the few stations around that has a non-ethanol pump. The
vette was running good for it's maiden voyage.
Yesterday,
my friend, Eugene, called me to see if I could transport his DJ
equipment to the thursday nite cruise-in at the Hog so he could drive
his finally finished '62 Corvette gasser tribute to the cruise-in. I
got to his house a little after five and we headed out. We stopped for
gas at one of the few stations around that has a non-ethanol pump. The
vette was running good for it's maiden voyage.
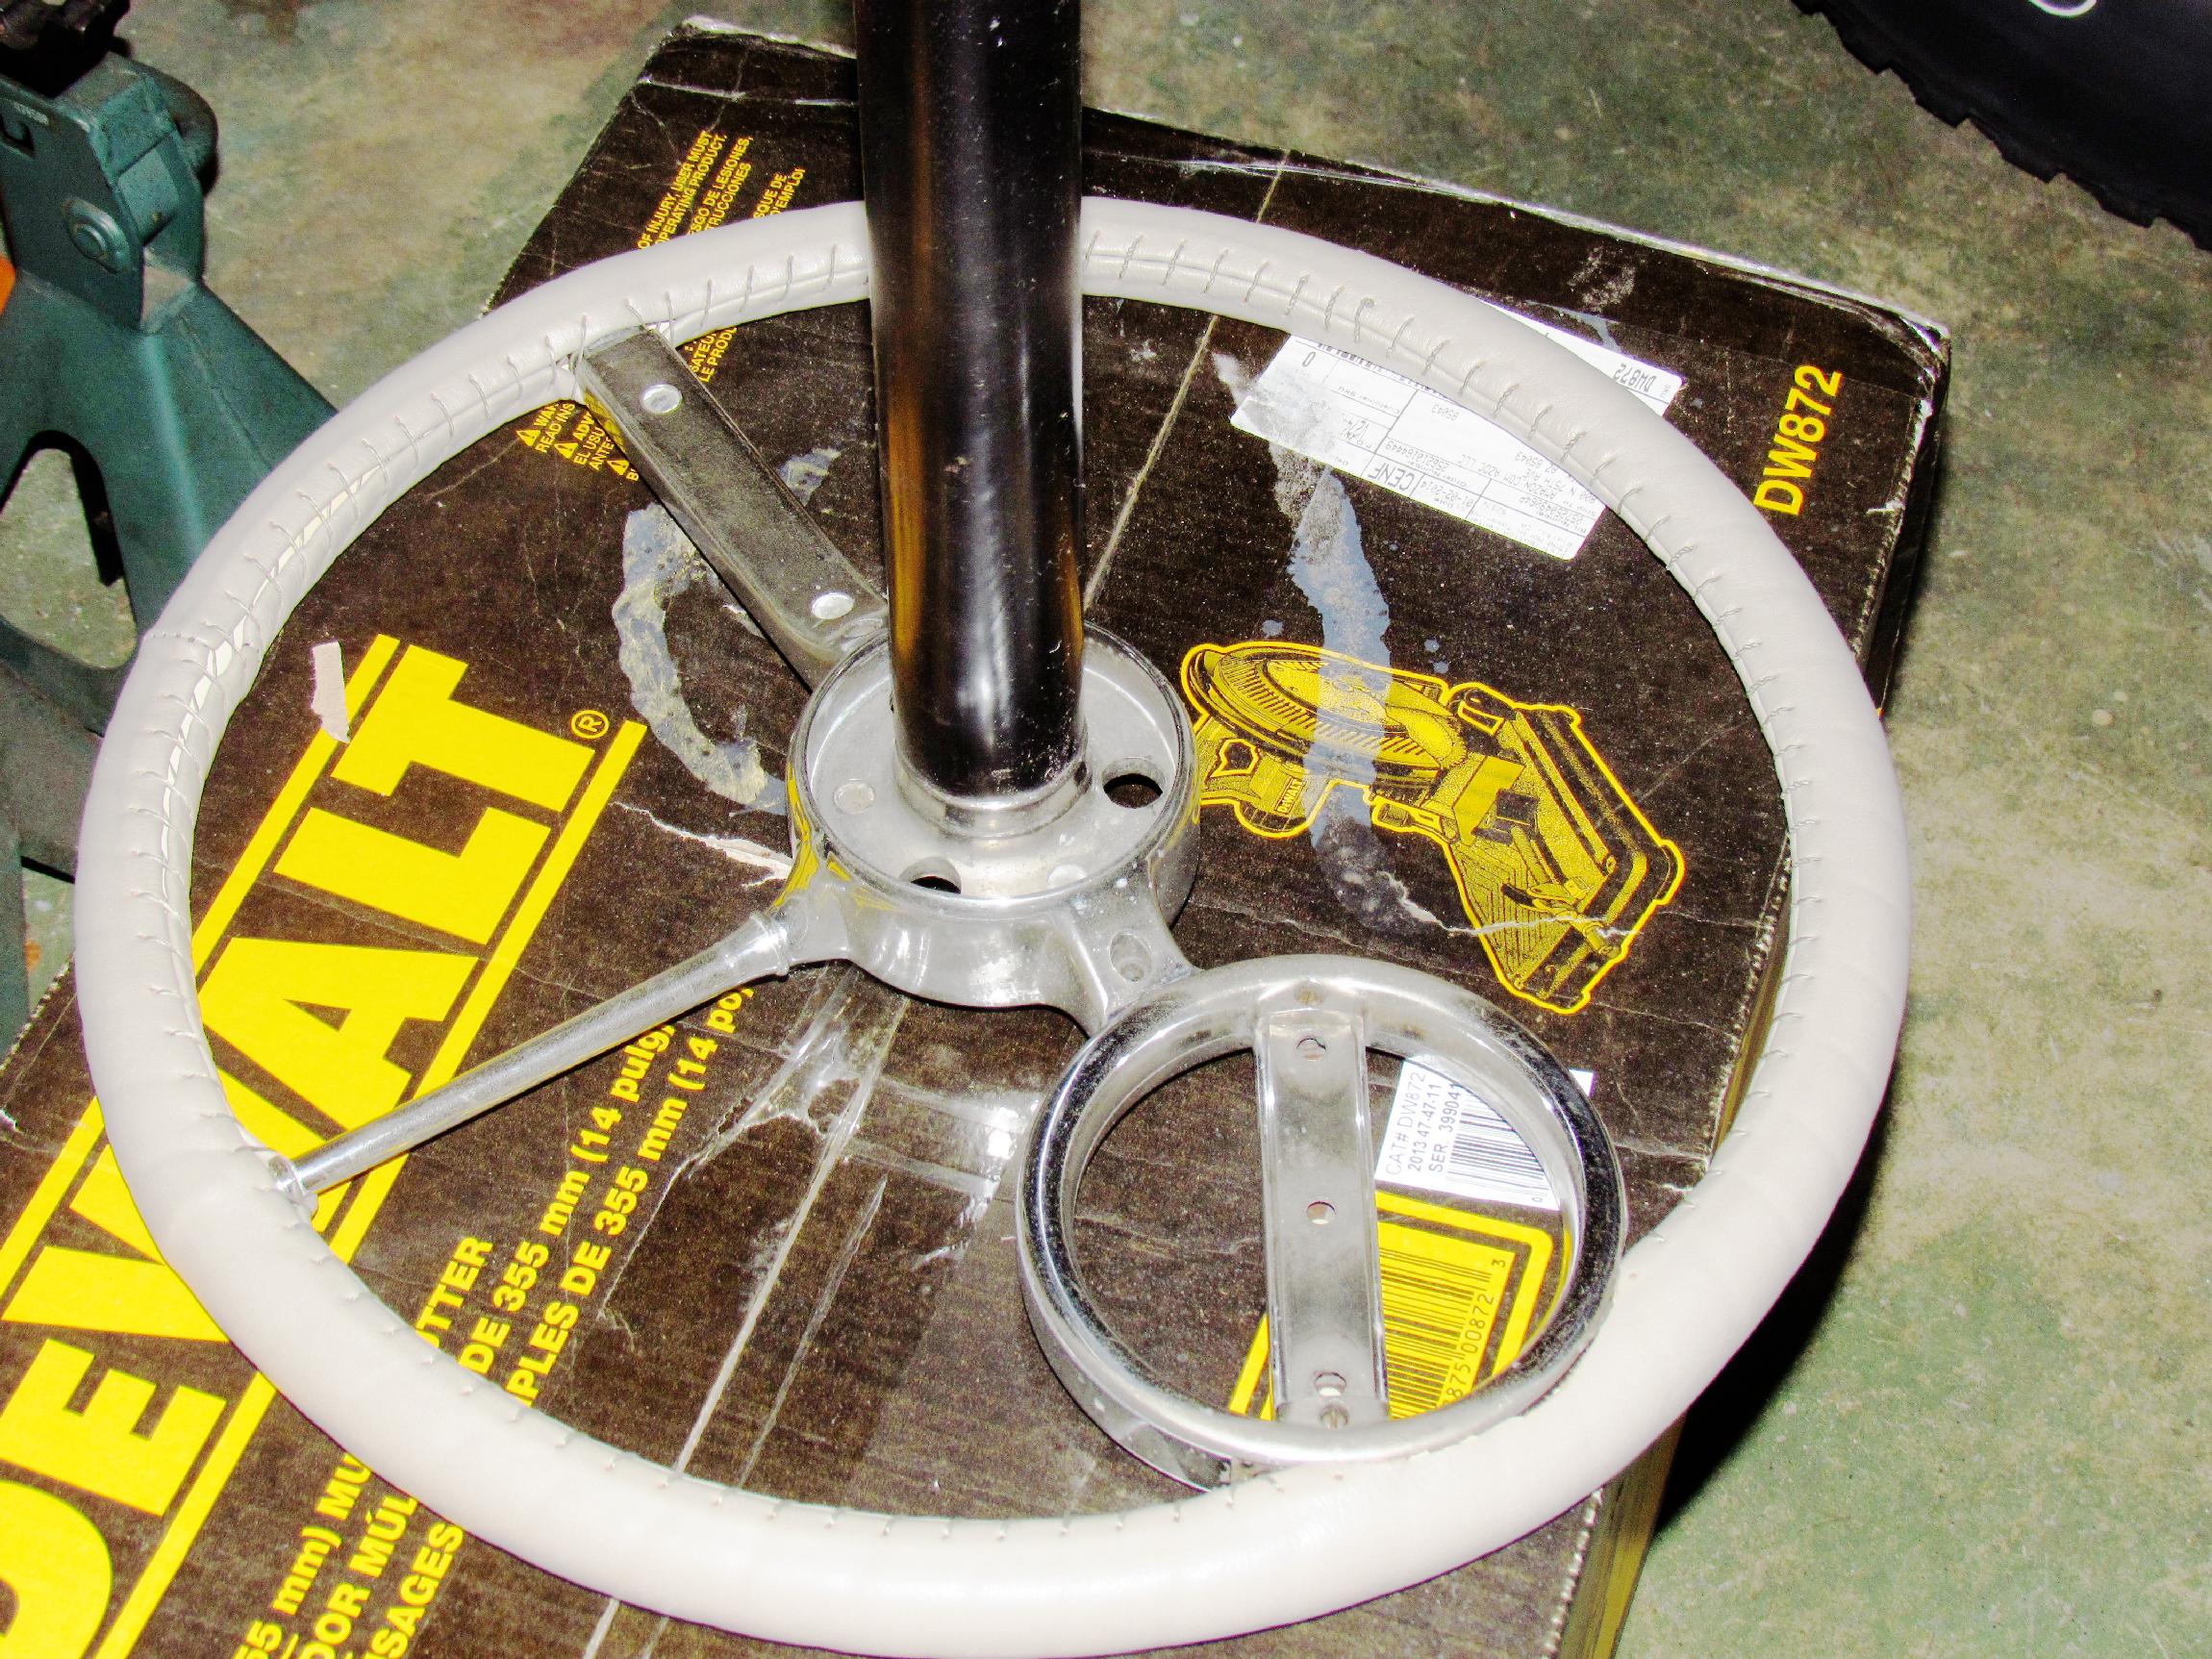
 January
6th 2014 Saturday,
there was a big show scheduled for late in the afternoon. I started out
early in the shop with some Deerslayer monthly maintenance. Then, began
messin' with the spinner wheel. Put the rubber tubing in a bench vise
and started slitting it with a box cutter. When that was done, it was
time to see if the forty de luxe chevy wheel would fit on the forty-six
chevy truck column. It did (the spline was the same) and I breathed a
sigh of relief. The rubber tubing was worked onto the spinner wheel for
fit. Now, I have enuf info to order a custom leather wheelskin. The
dimensions required for the order turns out to be 17-1/2" for the
overall wheel diameter and 3-1/4" for the rim circumference. Before I
got a chance to detail Deerslayer for the show, it was canceled due to
crappy weather.
January
6th 2014 Saturday,
there was a big show scheduled for late in the afternoon. I started out
early in the shop with some Deerslayer monthly maintenance. Then, began
messin' with the spinner wheel. Put the rubber tubing in a bench vise
and started slitting it with a box cutter. When that was done, it was
time to see if the forty de luxe chevy wheel would fit on the forty-six
chevy truck column. It did (the spline was the same) and I breathed a
sigh of relief. The rubber tubing was worked onto the spinner wheel for
fit. Now, I have enuf info to order a custom leather wheelskin. The
dimensions required for the order turns out to be 17-1/2" for the
overall wheel diameter and 3-1/4" for the rim circumference. Before I
got a chance to detail Deerslayer for the show, it was canceled due to
crappy weather.
On sunday, after the coffee cruise-in, I cleaned up the BillyBob Shop and replaced some burned out light tubes.
January 9th 2014 Performed some light shop organization and Deerslayer maintenance monday nite. Tuesday nite only six rides showed up at the first Delray cruise-in of the year due to cold, misty weather. It was a garden spot, however, compared to what the rest of the country is going thru with the "polar vortex". Yesterday, the wheelskin arrived at the Krash Lab, sooner than I expected it. A nice surprise.
I wuz gonna stop at a FLAPS to pick up some rubber-to-metal glue but it was raining so I went straight to the BillyBob Shop instead. After a bit of thrashin' around, I found some Gorilla brand superglue. Good enuf. Removed the spinner wheel, noting that it should be repositioned 'bout forty-five degrees counter-clockwise when reinstalling to be straight when traveling straight down the road.
PRE-Paint prepped the wheel rim and let it dry while I trimmed the gum rubber tubing some more so that it would not rub in the area of the spinner. Put the wheel back on and did a couple of test fittings of the rubber tubing. Applied the superglue around the rim and snapped the tubing in place to set up.
Positioned the Wheelskins leather cover and started stitching it in place, starting just north of the spinner element. Last time I did this I botched it up. I went slower with more care this time and did somewhat better. It's a mess at first 'cause you have to pull the entire length of twine (seven feet or so) thru every stitch and the twine appears to think its mission in life is to tangle and knot up at every opportunity. It gets easier as you get closer to completion and the twine line gets shorter.
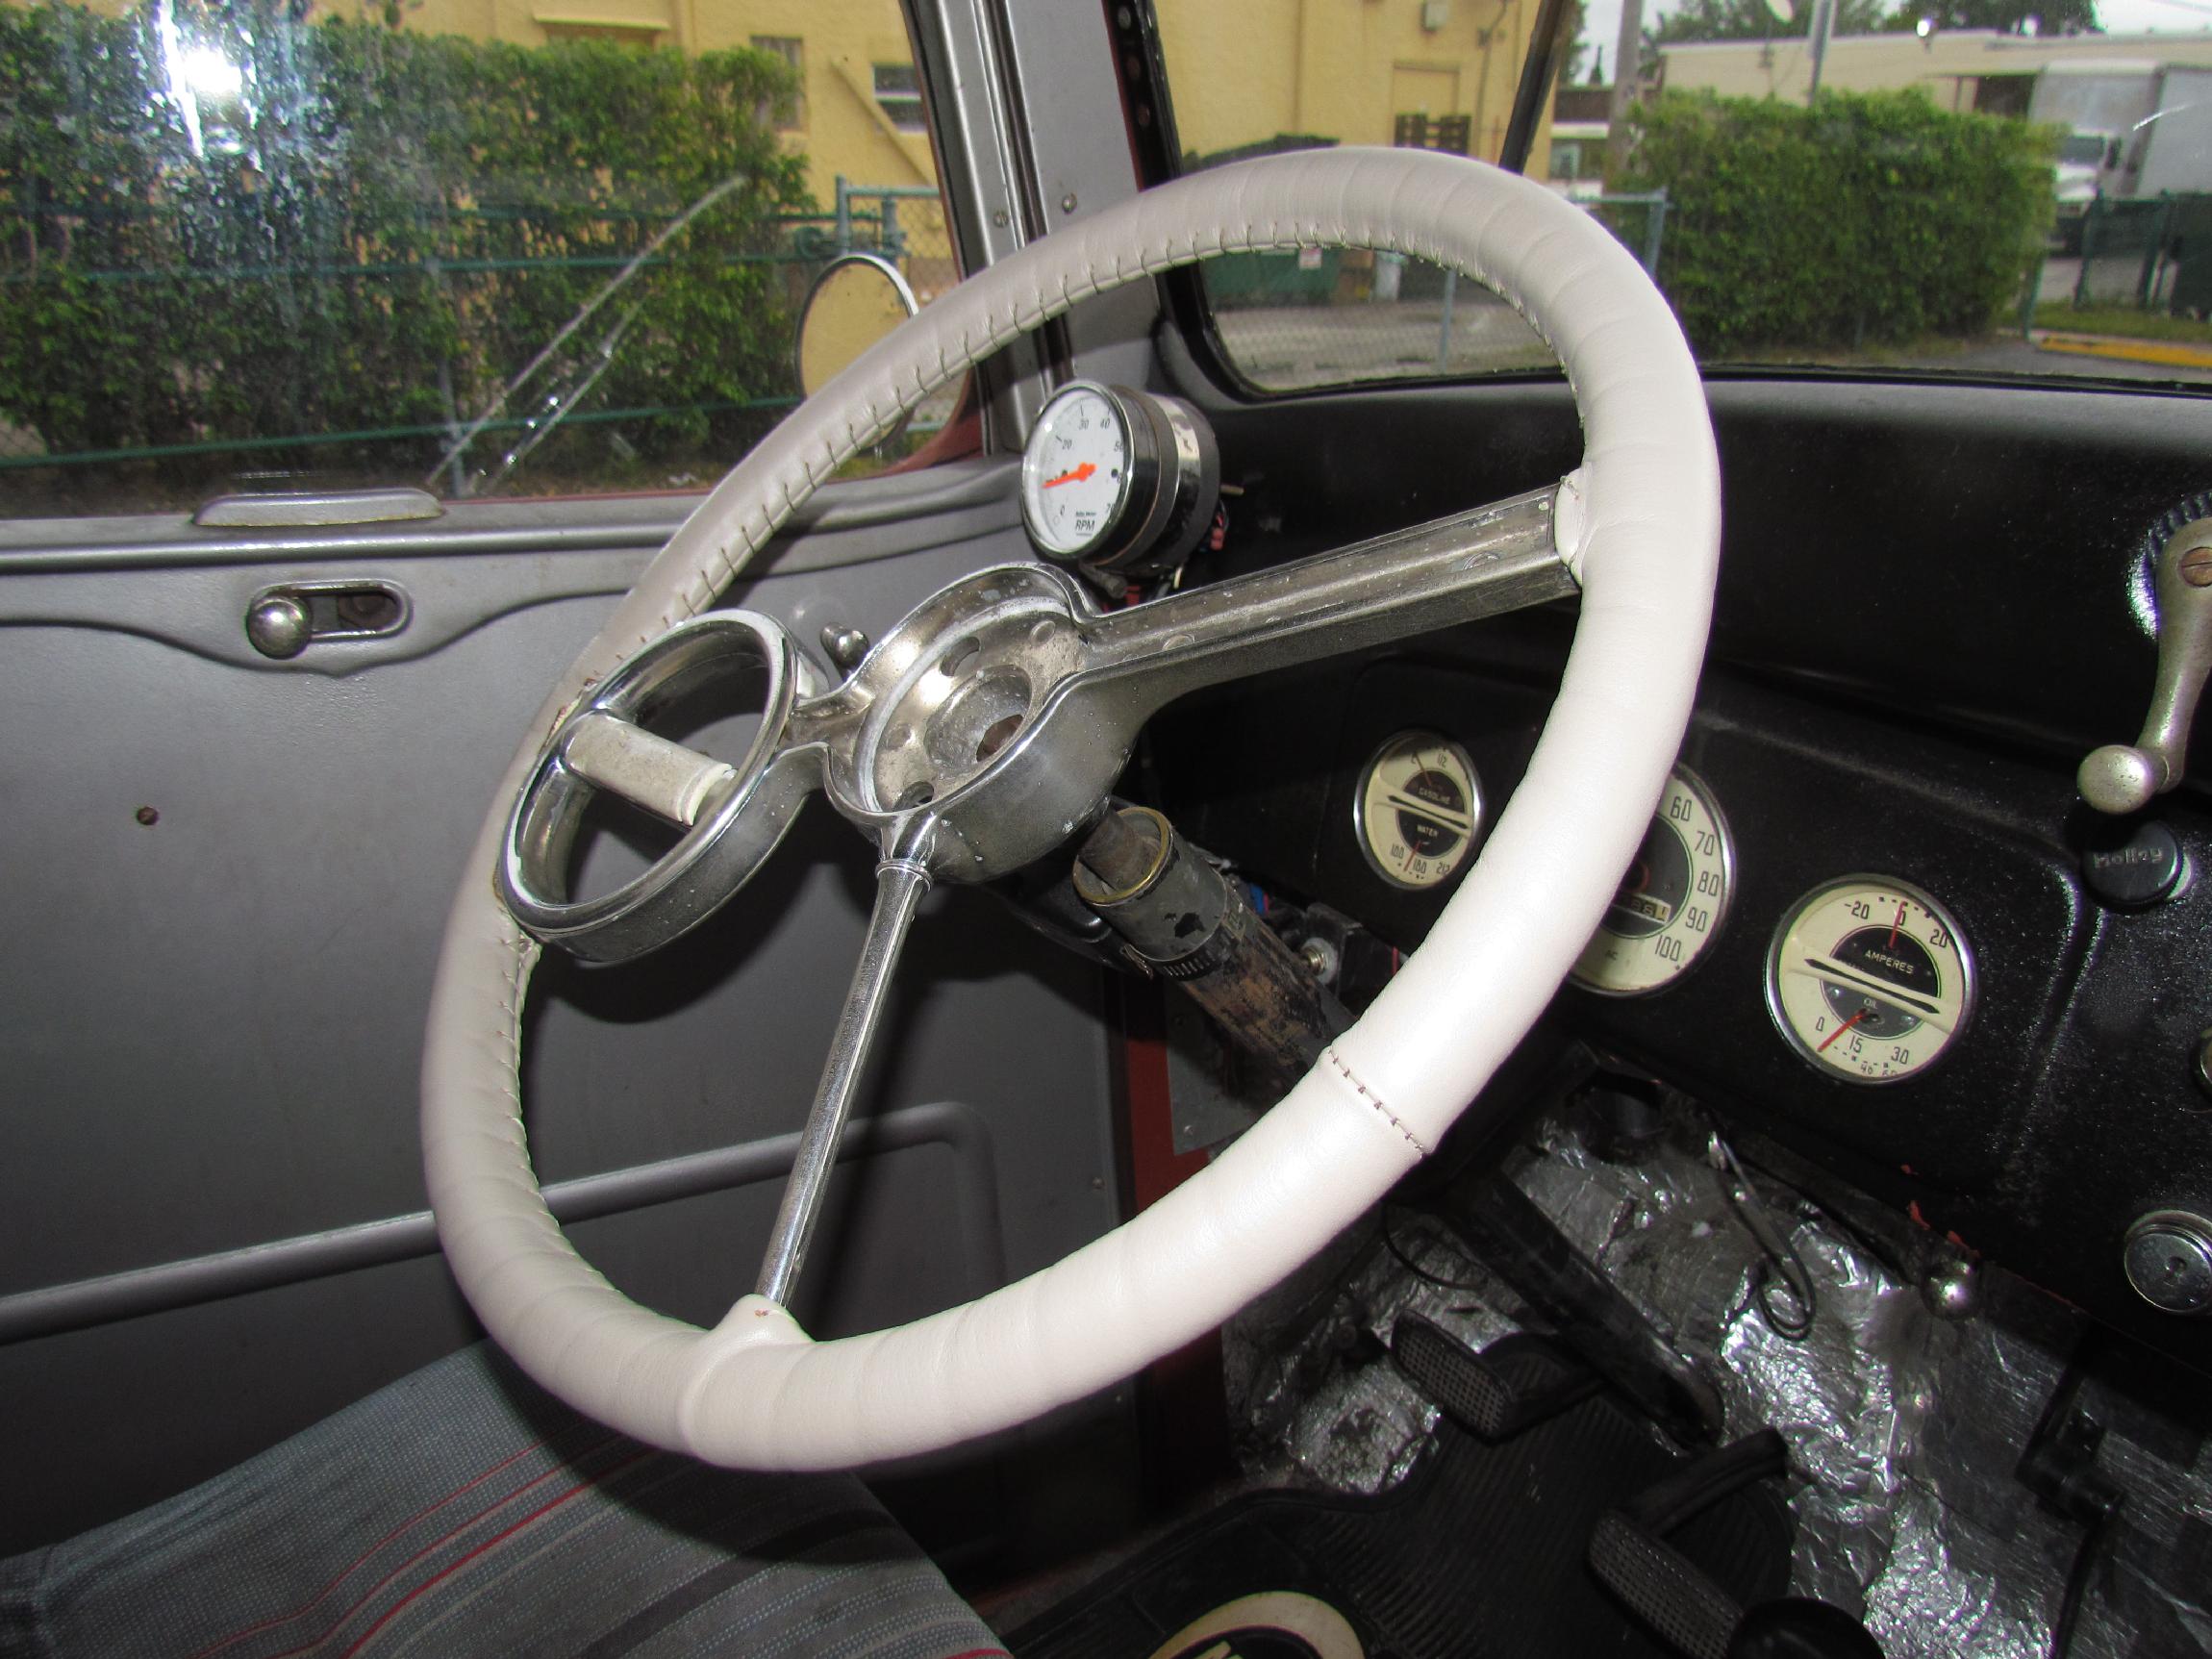 Four
hours, two Budweiser Black Crowns and a ceegar later, the stitching was
done. The quality was about half way between what I did last time and
what I would expect from a professional. I still had to deal with the
five inch stretch around the spinner element where I couldn't place any
stitching. The wheel was removed again and I trimmed the leather back
from the spinner on both front and back so the spinner would spin
freely. Last step was to superglue the trimmed leather to the gum
rubber substrate and cross my fingers. So far, so good.
Four
hours, two Budweiser Black Crowns and a ceegar later, the stitching was
done. The quality was about half way between what I did last time and
what I would expect from a professional. I still had to deal with the
five inch stretch around the spinner element where I couldn't place any
stitching. The wheel was removed again and I trimmed the leather back
from the spinner on both front and back so the spinner would spin
freely. Last step was to superglue the trimmed leather to the gum
rubber substrate and cross my fingers. So far, so good.
 January
13th 2014 Didn't get
anything done over the weekend other than attending the sunday morning
coffee cruise-in. On friday, I ordered a chunk of "Easy-to-Weld
4130 Alloy Steel Round Tube, 1.750" OD, .120" Wall Thickness, 1' Long "
from McMaster-Carr to fill the gap between the top of the steering
column mast and the bottom of the spinner wheel. It arrived today at
the Krash Lab and I can see it wasn't the best choice (much too heavy)
but it was the only item I could find with the correct inside diameter
to fit over the steering mast. It will do for now but I need a better
solution down the road.
January
13th 2014 Didn't get
anything done over the weekend other than attending the sunday morning
coffee cruise-in. On friday, I ordered a chunk of "Easy-to-Weld
4130 Alloy Steel Round Tube, 1.750" OD, .120" Wall Thickness, 1' Long "
from McMaster-Carr to fill the gap between the top of the steering
column mast and the bottom of the spinner wheel. It arrived today at
the Krash Lab and I can see it wasn't the best choice (much too heavy)
but it was the only item I could find with the correct inside diameter
to fit over the steering mast. It will do for now but I need a better
solution down the road.
January 22nd 2014 Although I'm spending more time in the shop, I'm not up to speed yet and, apparently, not movin' fast enuf for Murphy. On the way to the Krash Lab yesterday morning, I noticed that Deerslayer's charging system was malfunctioning. Most of the trip, it was not charging. The ammeter needle would flicker for a few seconds, occasionally, but most of the time would be pegged on discharge due to the headlights. Blipping the engine RPM had no effect.
I mentally fussed over it all day and left the Krash Lab before dark so I didn't have to use headlights. At the BillyBob Shop I put Deerslayer on the battery tender and once again plundered the BillyBob roadtrip supplies for a fresh voltage regulator. I don't have the skill set to troubleshoot this and the voltage regulator is the easist part to replace first. This morning, I waited until daylight to head up to the Krash Lab. There was no joy. The ammeter behaviour did not improve.
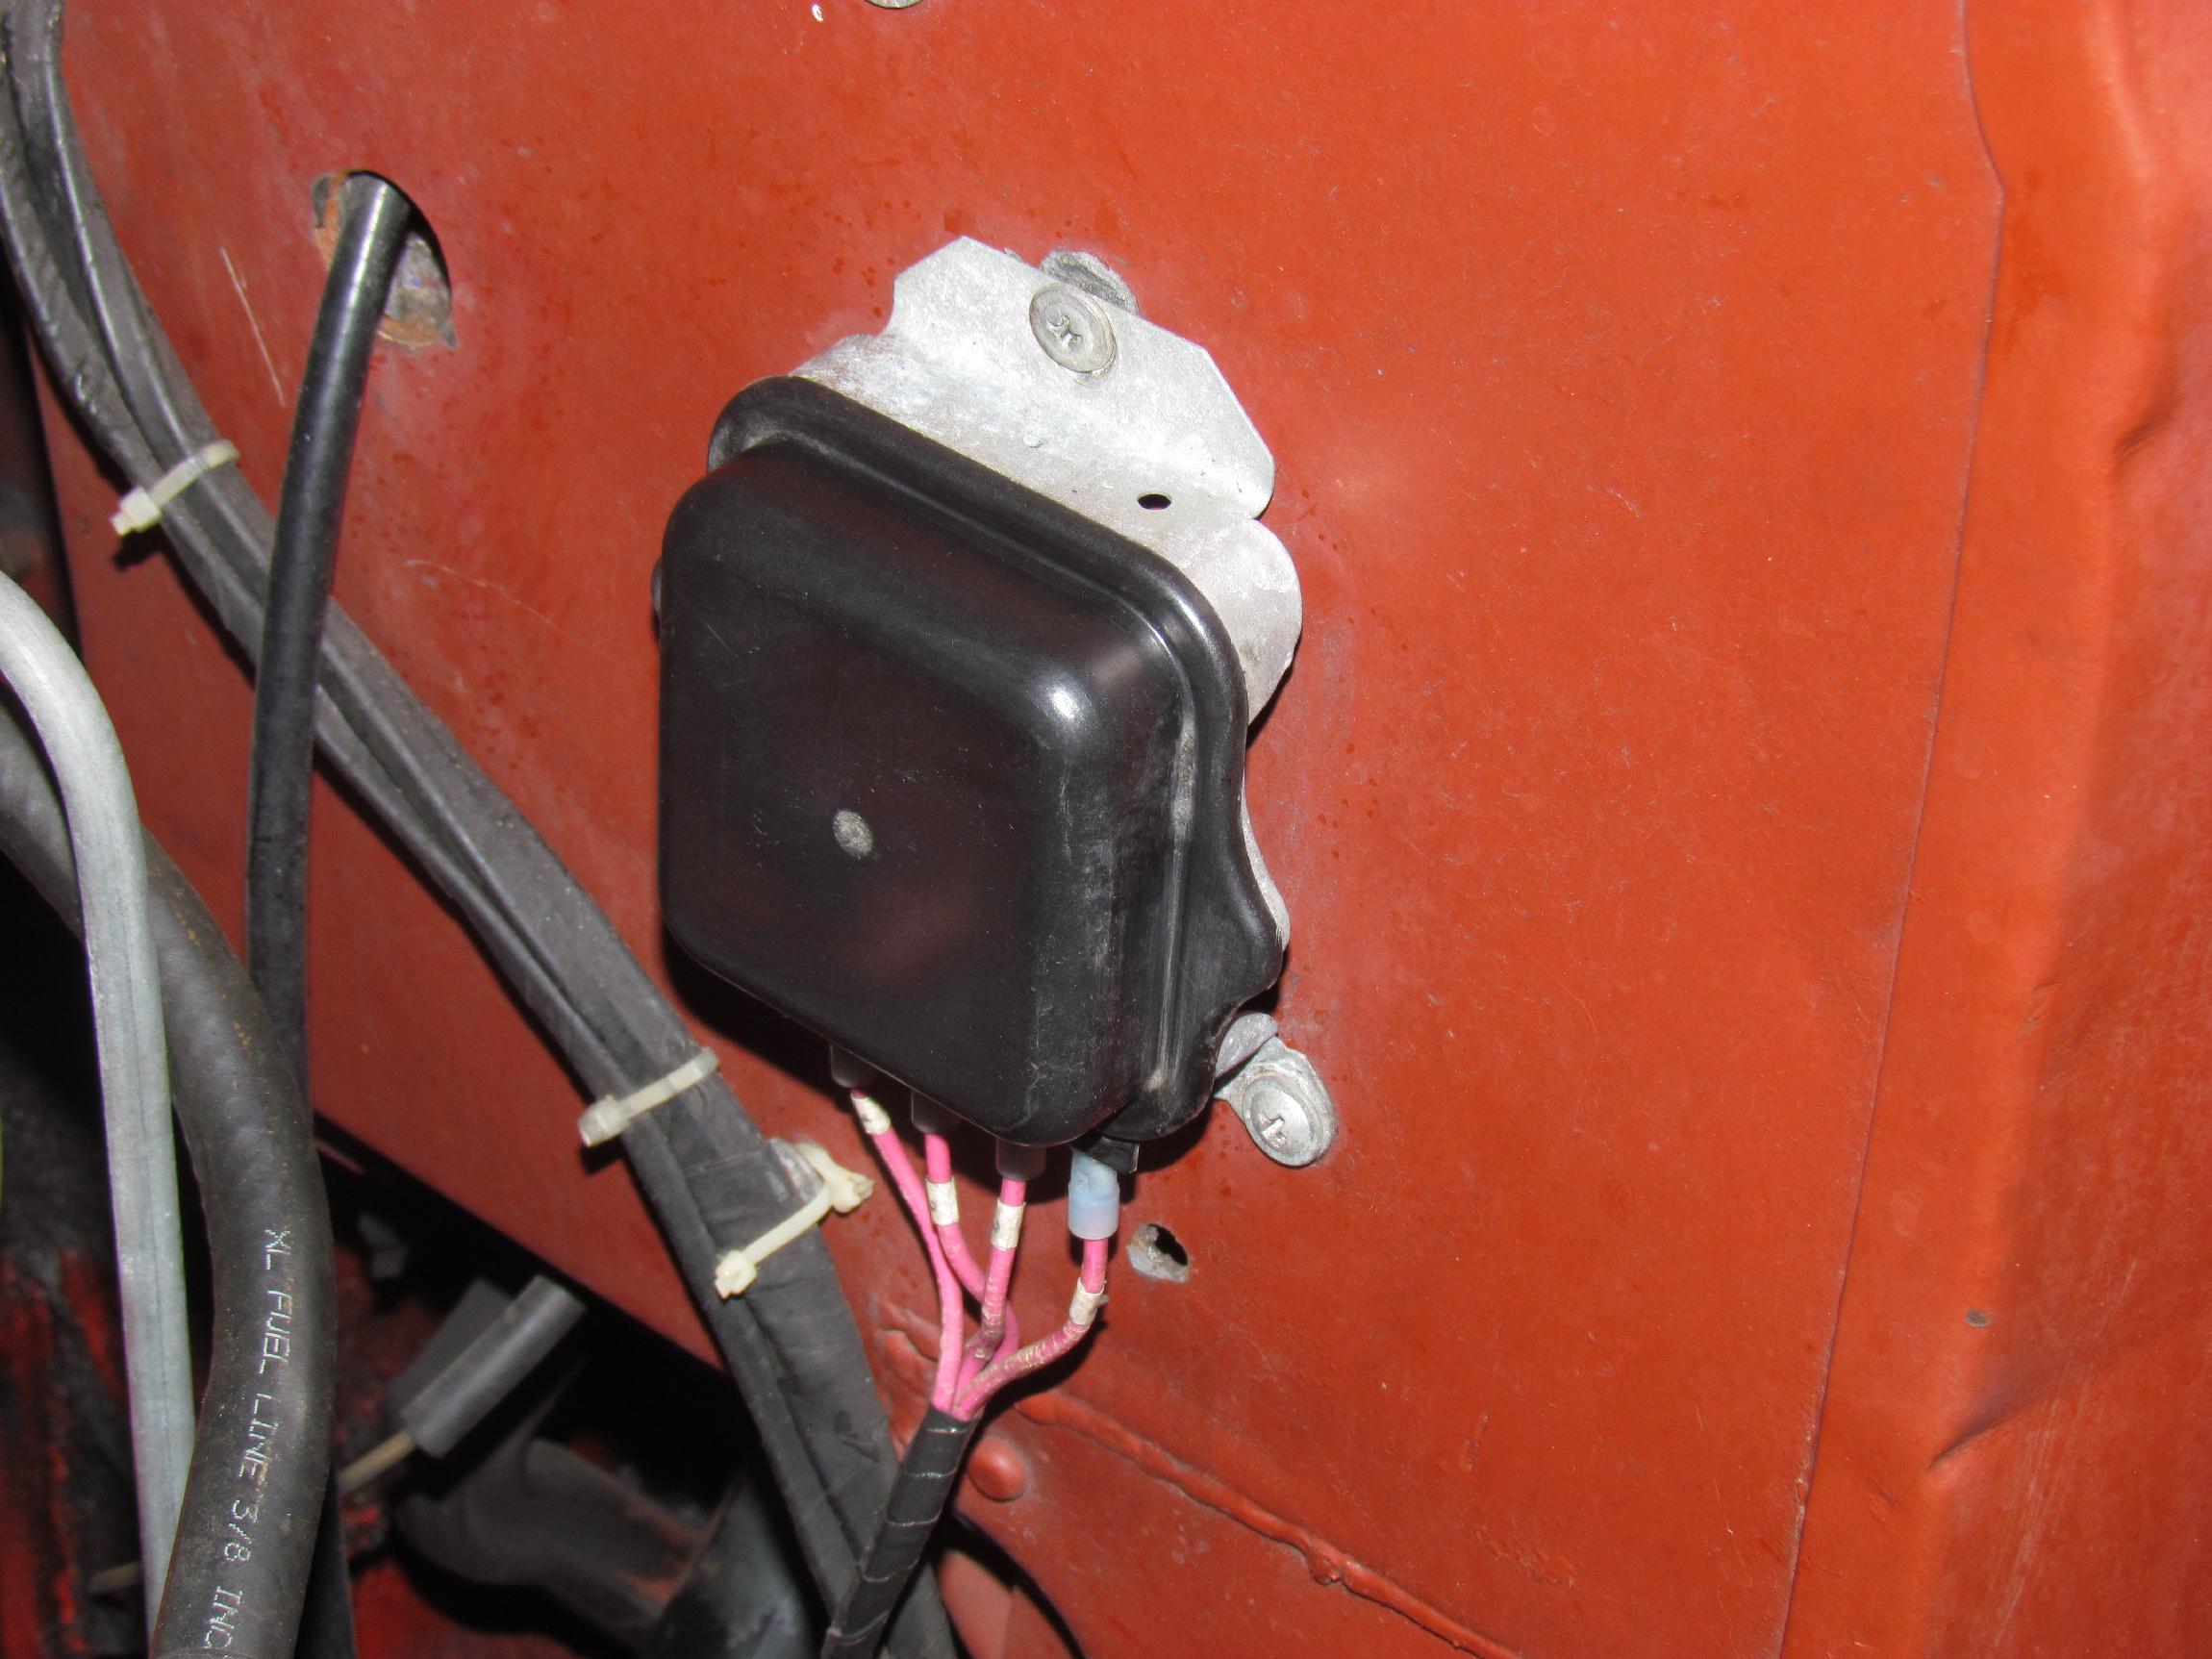 January
23rd 2014 Knowing that
some new parts are defective out of the box, I tried the voltage
regulator swap one more time last nite, this time with a solid state
unit that was known to be working when it was removed during the
BillyBob teardown. There was no change in ammeter behaviour on the way
to the Krash Lab this morning. I plan on taking a vacation day tomorrow
to try to swap alternators without removing any bodywork.
January
23rd 2014 Knowing that
some new parts are defective out of the box, I tried the voltage
regulator swap one more time last nite, this time with a solid state
unit that was known to be working when it was removed during the
BillyBob teardown. There was no change in ammeter behaviour on the way
to the Krash Lab this morning. I plan on taking a vacation day tomorrow
to try to swap alternators without removing any bodywork.
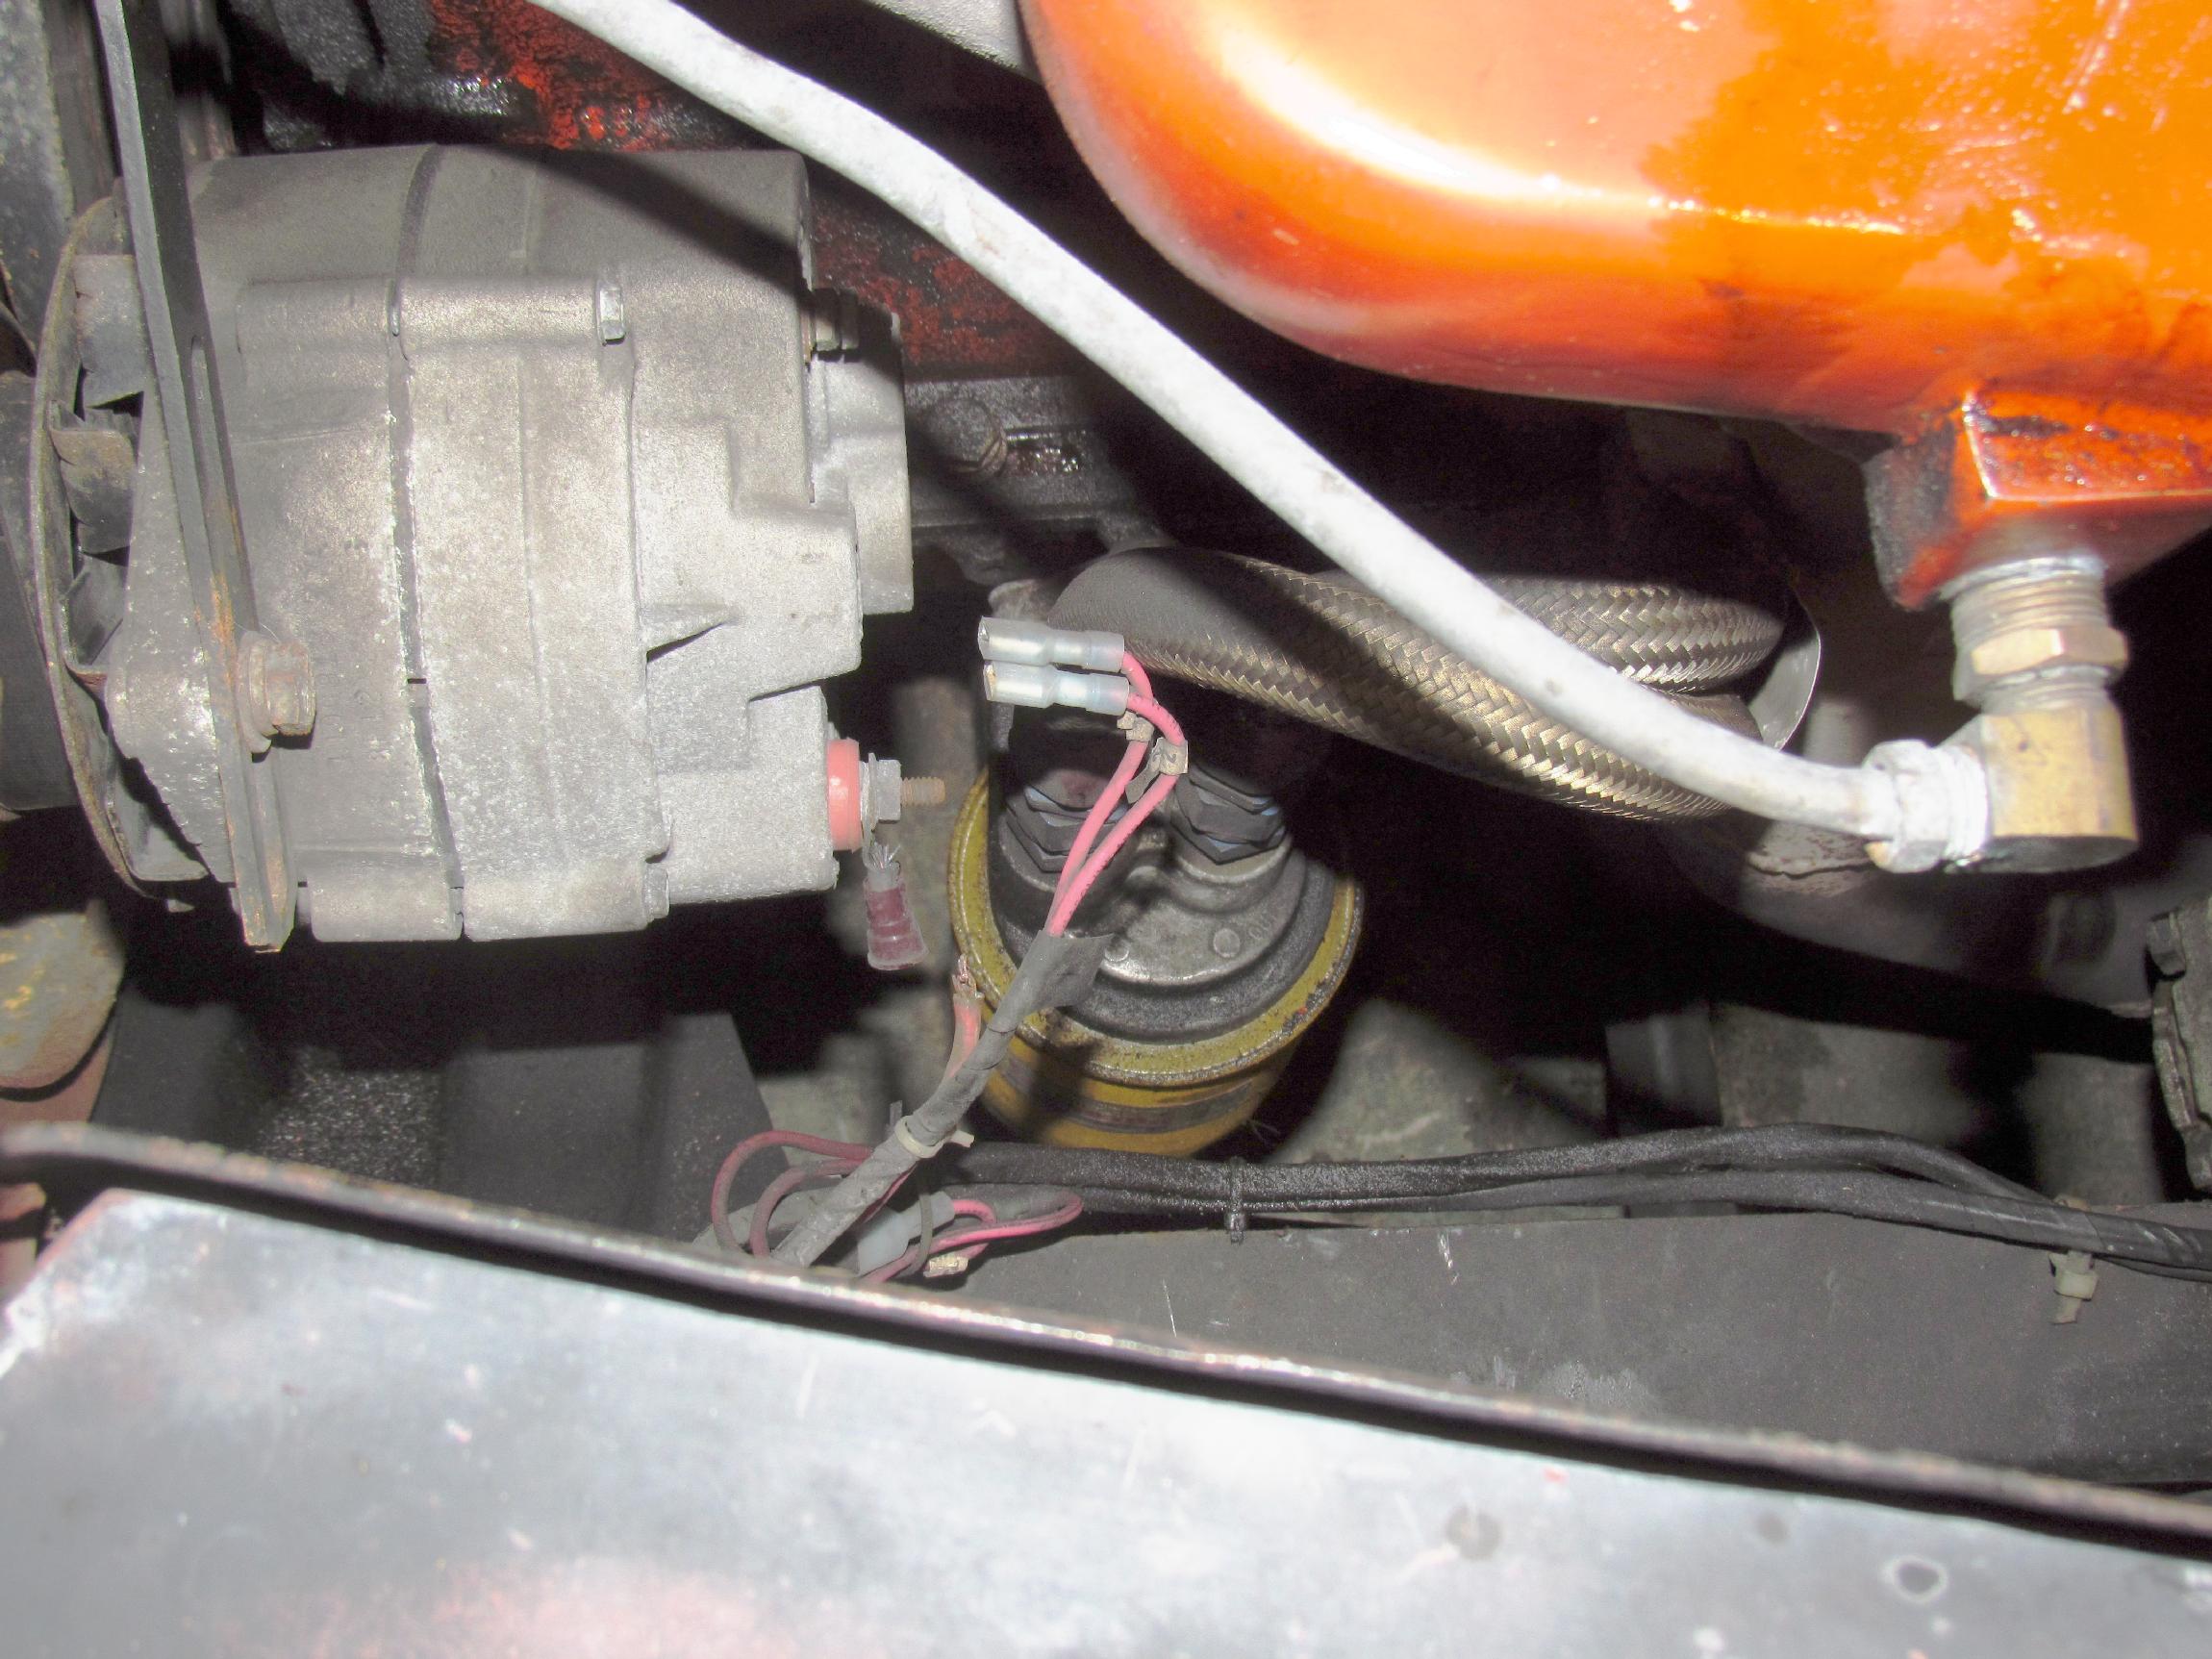 January
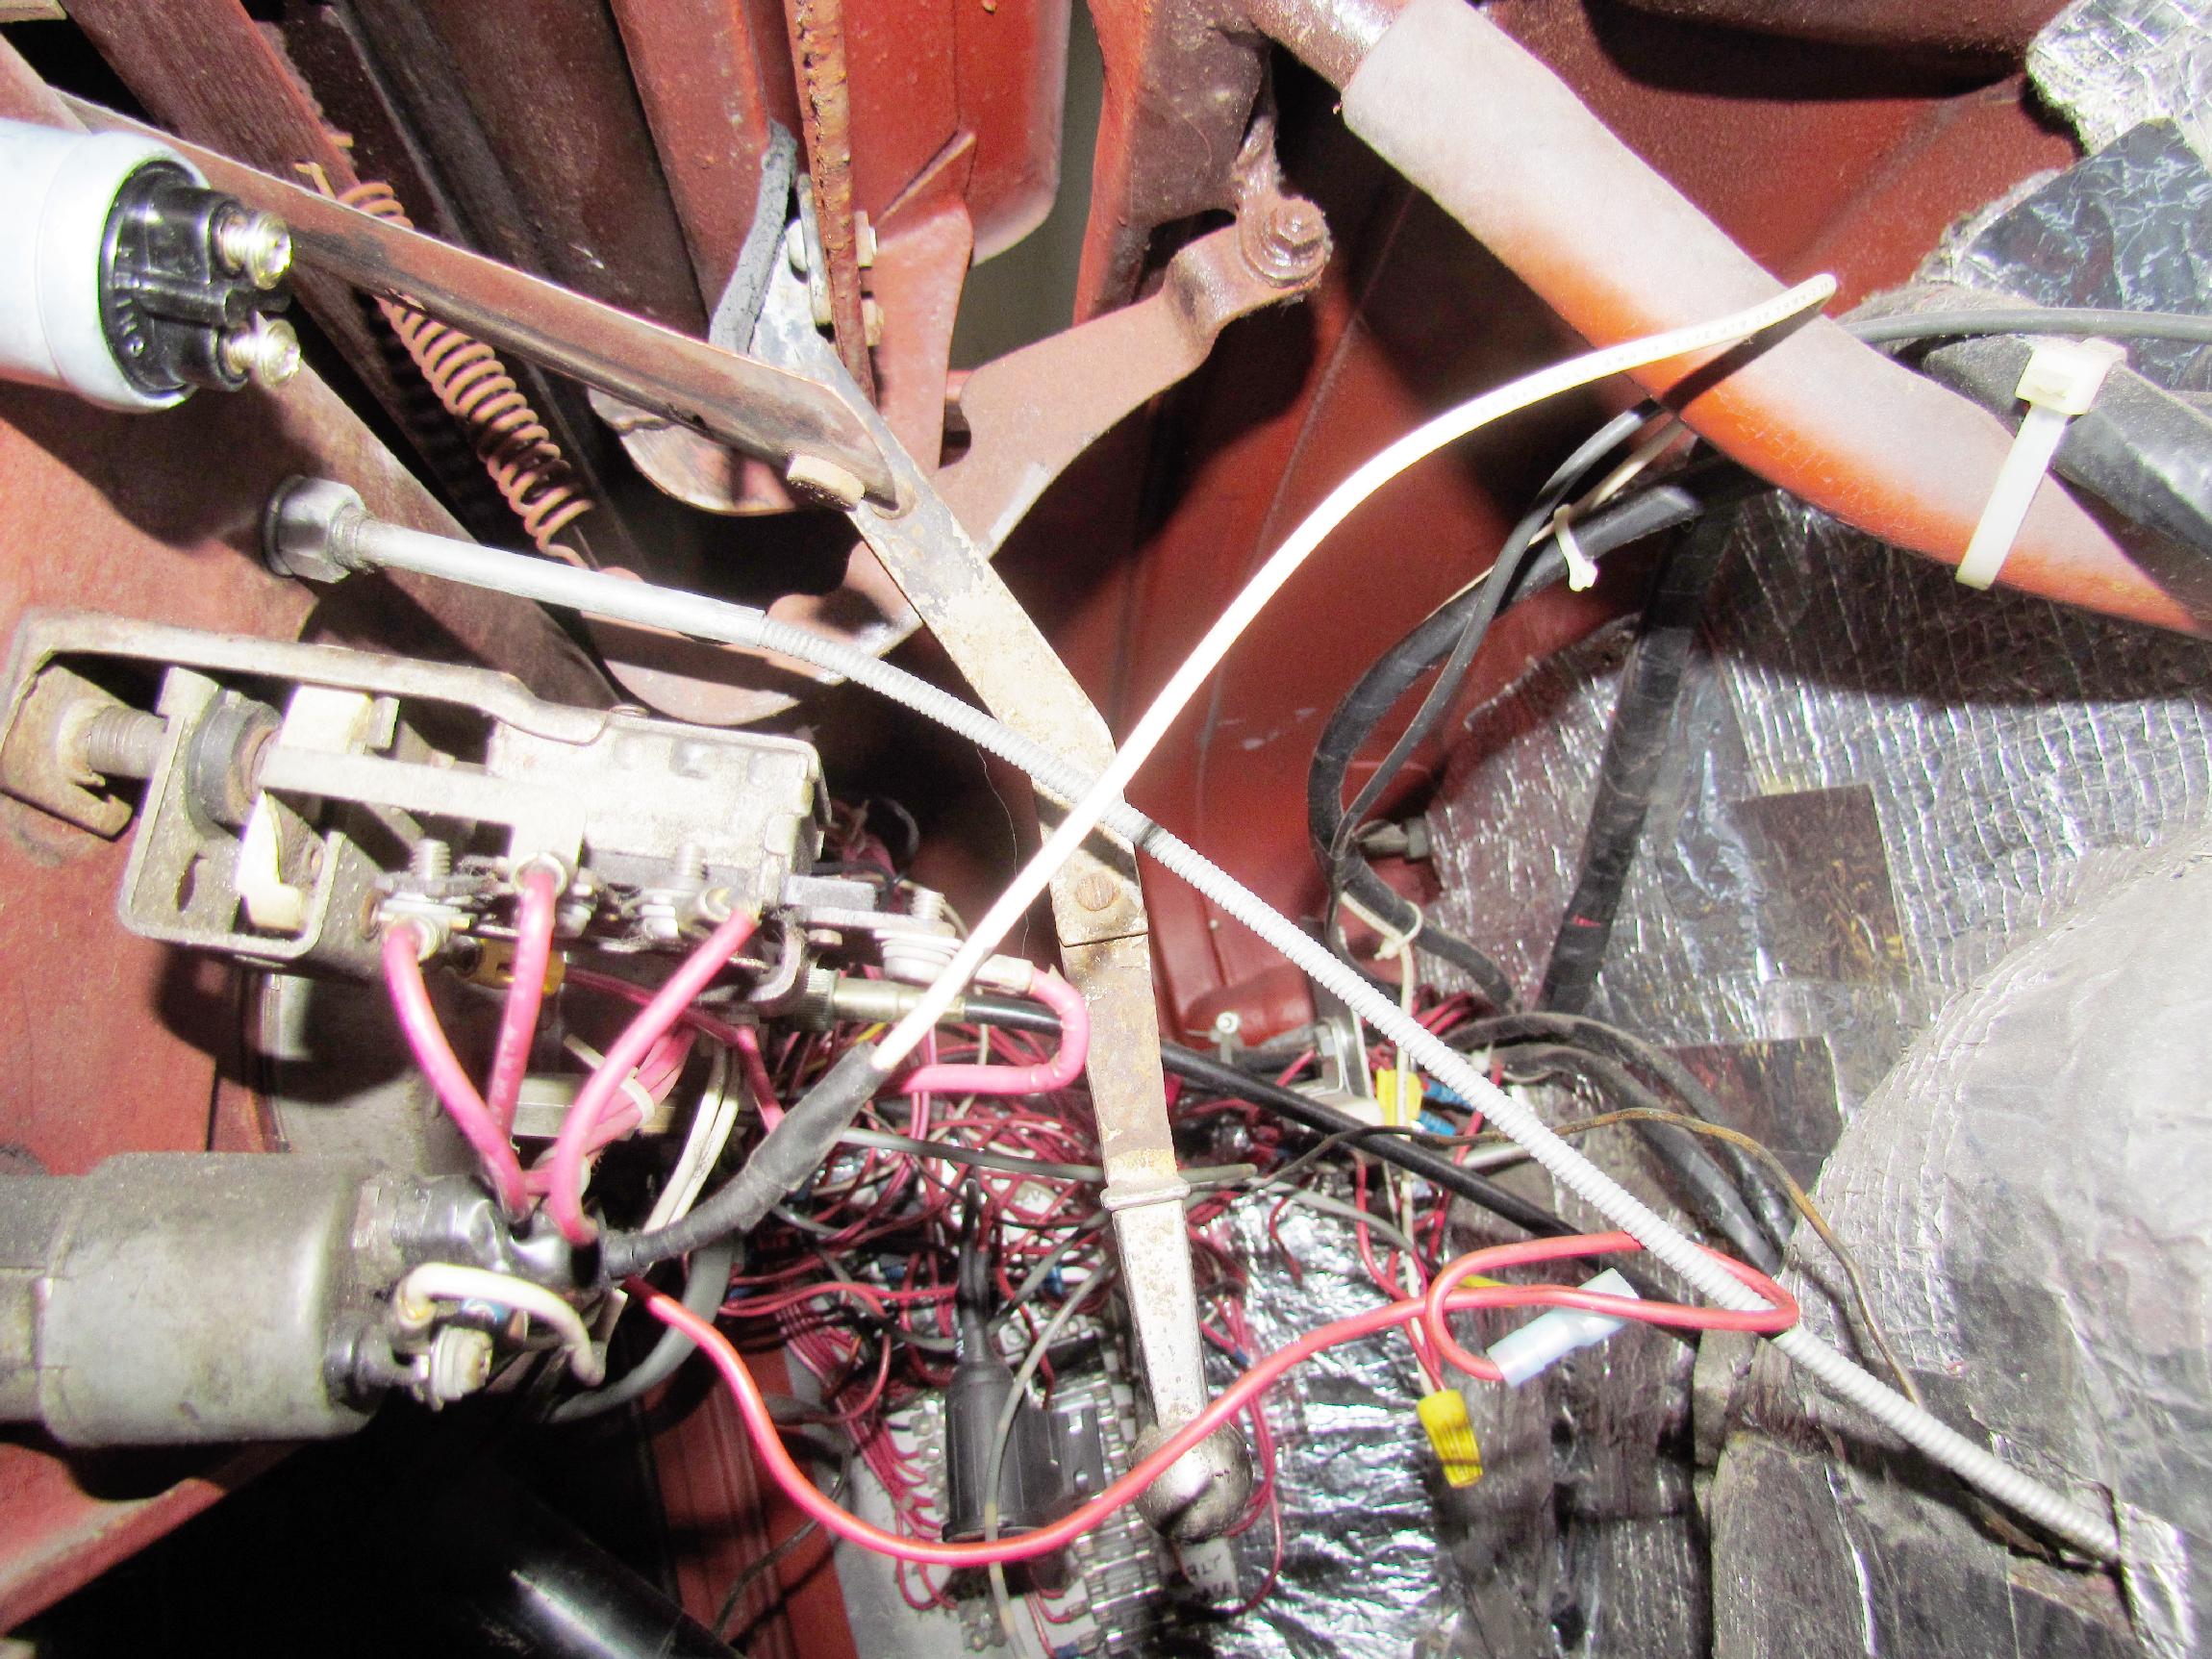
27th 2014 With my
fingers crossed, I started in on the alternator swap on friday morning.
My fingers were crossed as I hoped that the swap would not require the
removal of any bodywork due to the depth of the pulleys and belt into
the nose. As soon as I started disconnecting the three wires from the
alternator, I found the problem. All three wires were tie-wrapped
together. The ten gauge charging wire had severed completely inside the
ring terminal boot and remained there, held in place by the wire tie.
January
27th 2014 With my
fingers crossed, I started in on the alternator swap on friday morning.
My fingers were crossed as I hoped that the swap would not require the
removal of any bodywork due to the depth of the pulleys and belt into
the nose. As soon as I started disconnecting the three wires from the
alternator, I found the problem. All three wires were tie-wrapped
together. The ten gauge charging wire had severed completely inside the
ring terminal boot and remained there, held in place by the wire tie.
Floundered around fer awhile looking for a suitable ring terminal in the BillyBob Shop but there was no joy. Ended up cannibalizing BillyBob's wiring harness for its ring terminal and a few inches of ten gauge wire. It was spliced to the broken wire on the Deerslayer harness in the best tradition of trailer park engineering and we were good-to-go. I took a test ride, then did an oil and filter change in preparation for a cruise north to the Westgate River Ranch Rod Run on saturday, a three hundred mile round trip. It went well without problems with Deerslayer. One thing tho' I'm gonna have to get working on BillyBob again before he becomes a donor truck for Deerslayer.
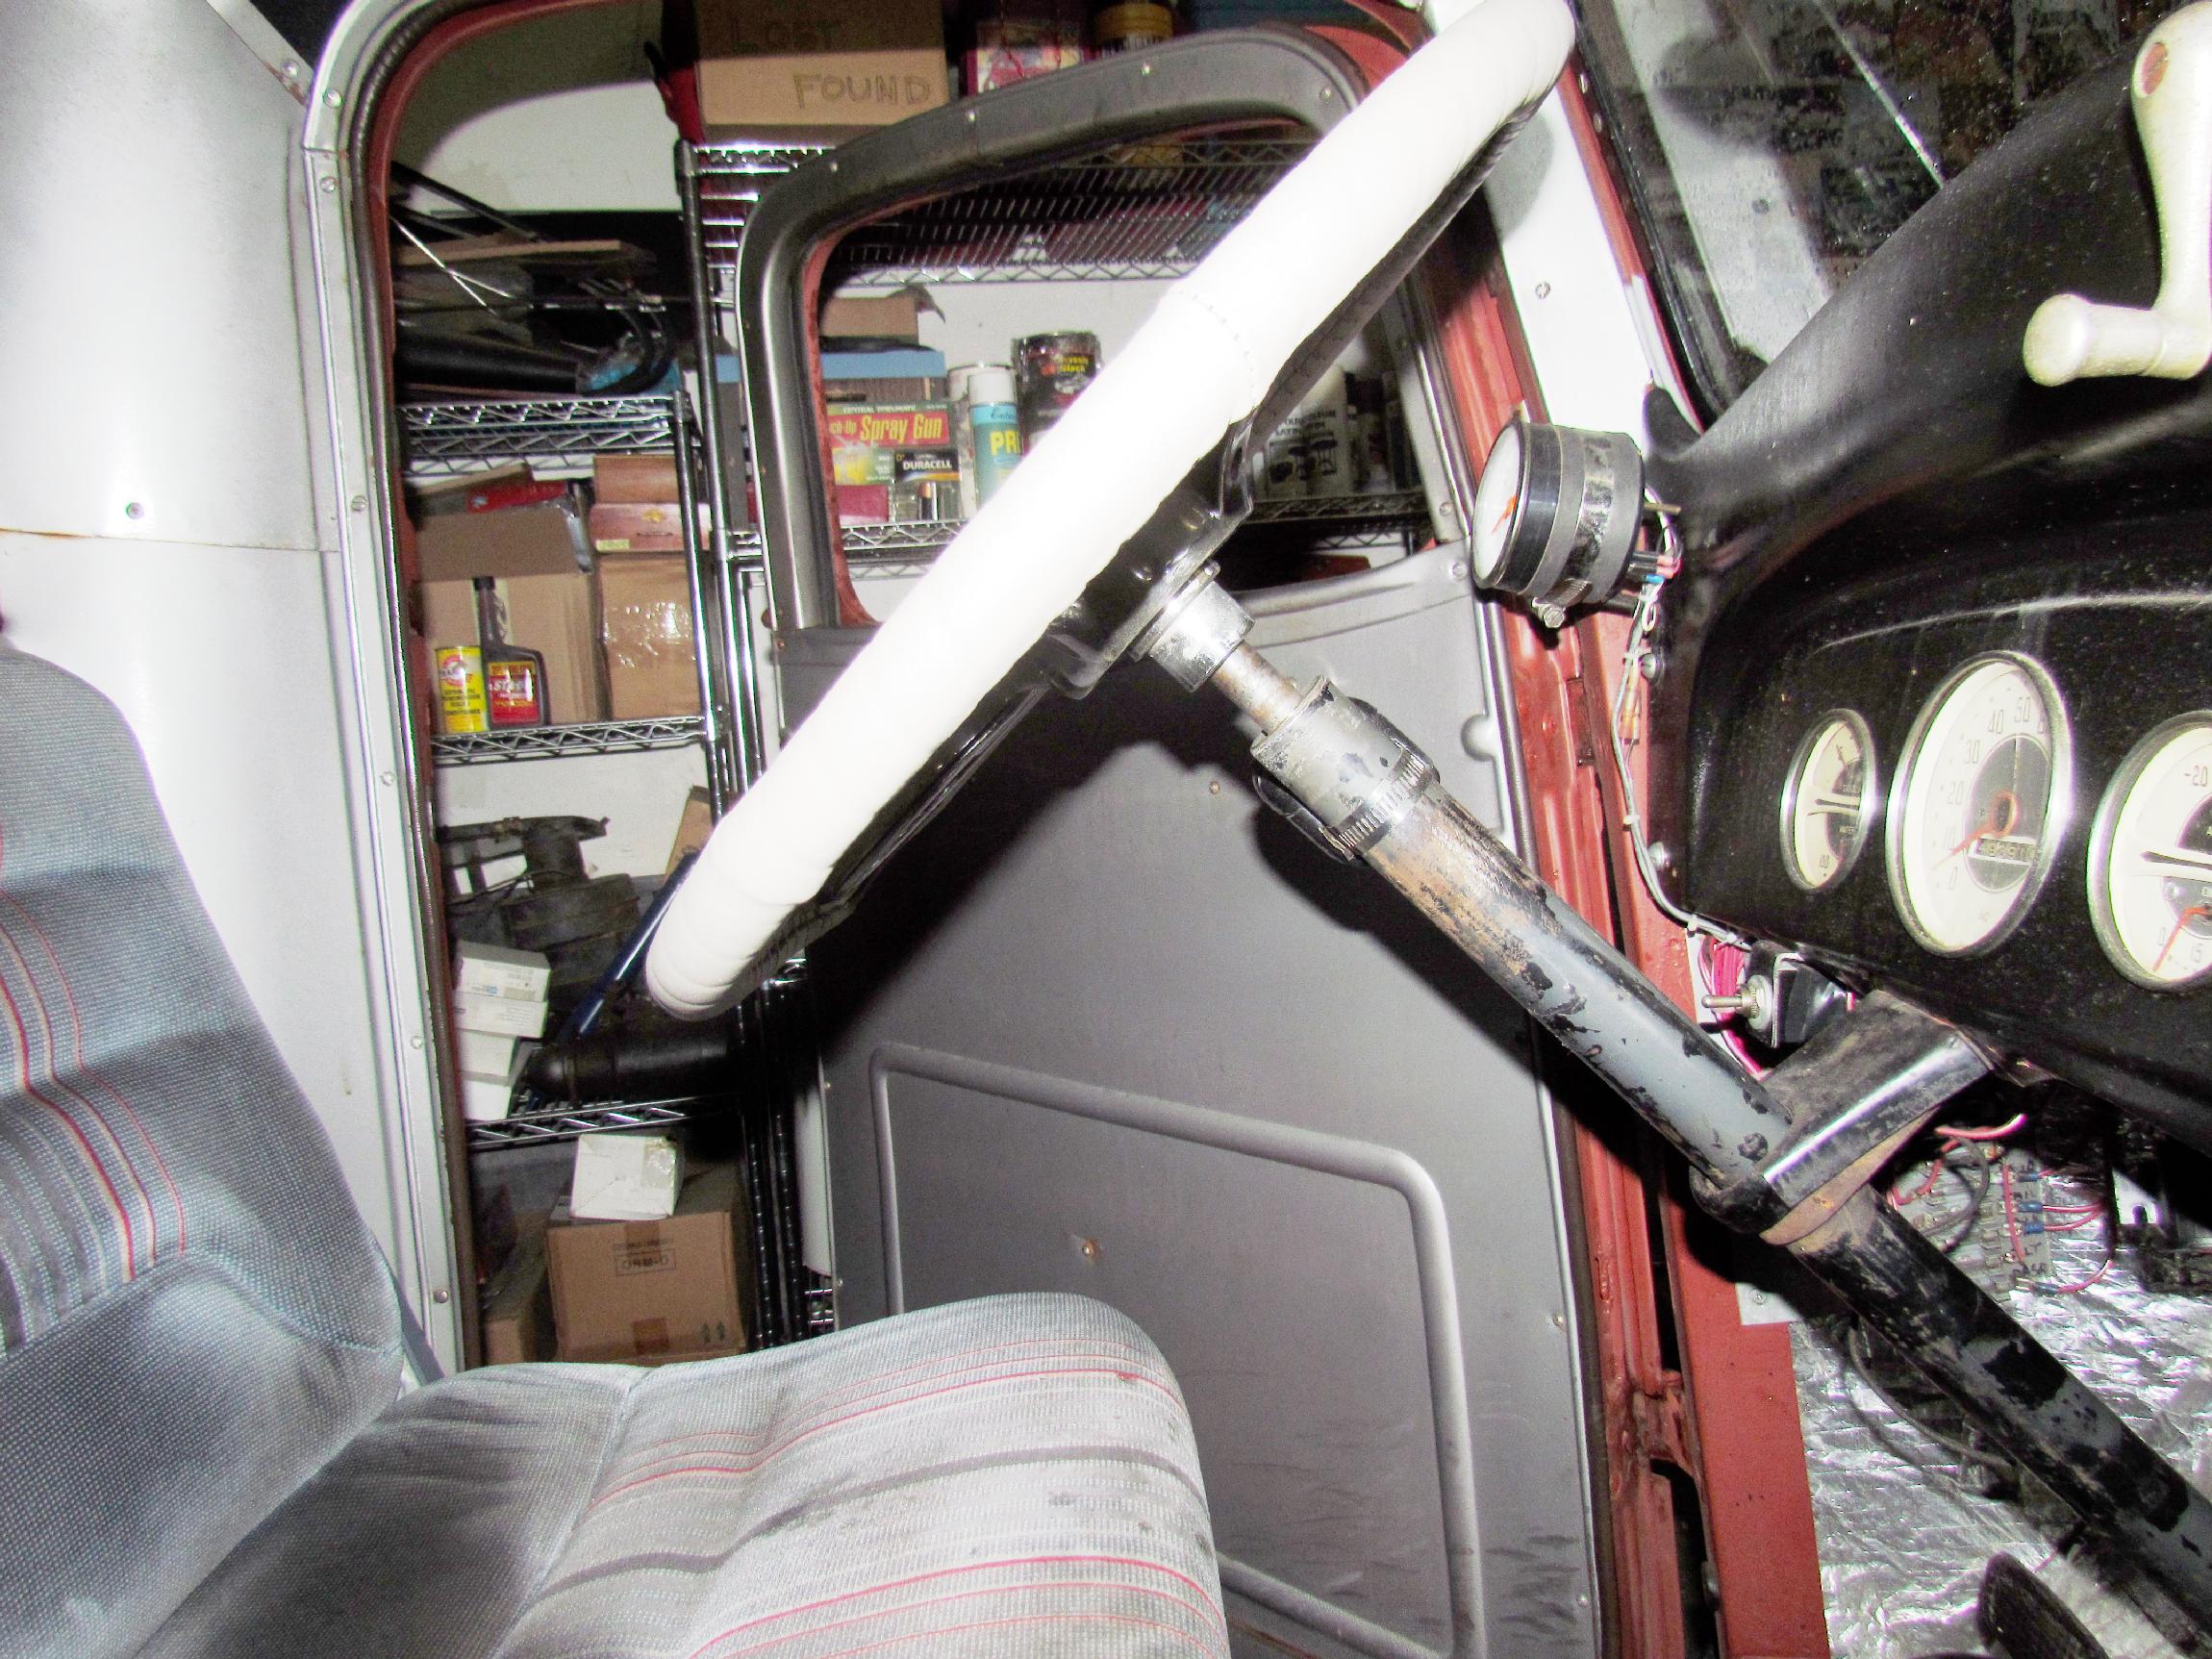
January 28th 2014 Last nite at the BillyBob Shop started out with some shop cleanup and Monthly Maintenance on the Deerslayer. Then I got back to the Steering Wheel and the pipe collar to cover the gap between the bottom of the wheel and the steering column mast. It turns out that the Pipe inside diameter is just a RCH too tight to fit the mast. As is the usual case, I began to think on a solution that was more complicated than it had to be. I planned to ask my friend, John Carey, to ream out one end of the pipe on his basement lathe. I explained this to my shop neighbor, Gato, on saturday and he rummaged around and handed me two air powered die grinders to try first.
 Took
off the spinner wheel and set the pipe in my vice. Then I donned my
full face shield and started hogging out one end of the pipe to about a
one inch depth. I only ran the die grinder for about twenty seconds
before I took off the face mask and took the pipe to the Deerslayer to
test the fit. Went thru the iteration of
vice-mask-grinder-mask-vice-fit about ten more times and I had the snug
fit I was looking for. I oiled Gato's die grinder and sat it aside.
Checked the pipe fit on the spinner wheel before re-installing the
wheel. Later, I will measure and cut the pipe to size.
Took
off the spinner wheel and set the pipe in my vice. Then I donned my
full face shield and started hogging out one end of the pipe to about a
one inch depth. I only ran the die grinder for about twenty seconds
before I took off the face mask and took the pipe to the Deerslayer to
test the fit. Went thru the iteration of
vice-mask-grinder-mask-vice-fit about ten more times and I had the snug
fit I was looking for. I oiled Gato's die grinder and sat it aside.
Checked the pipe fit on the spinner wheel before re-installing the
wheel. Later, I will measure and cut the pipe to size.
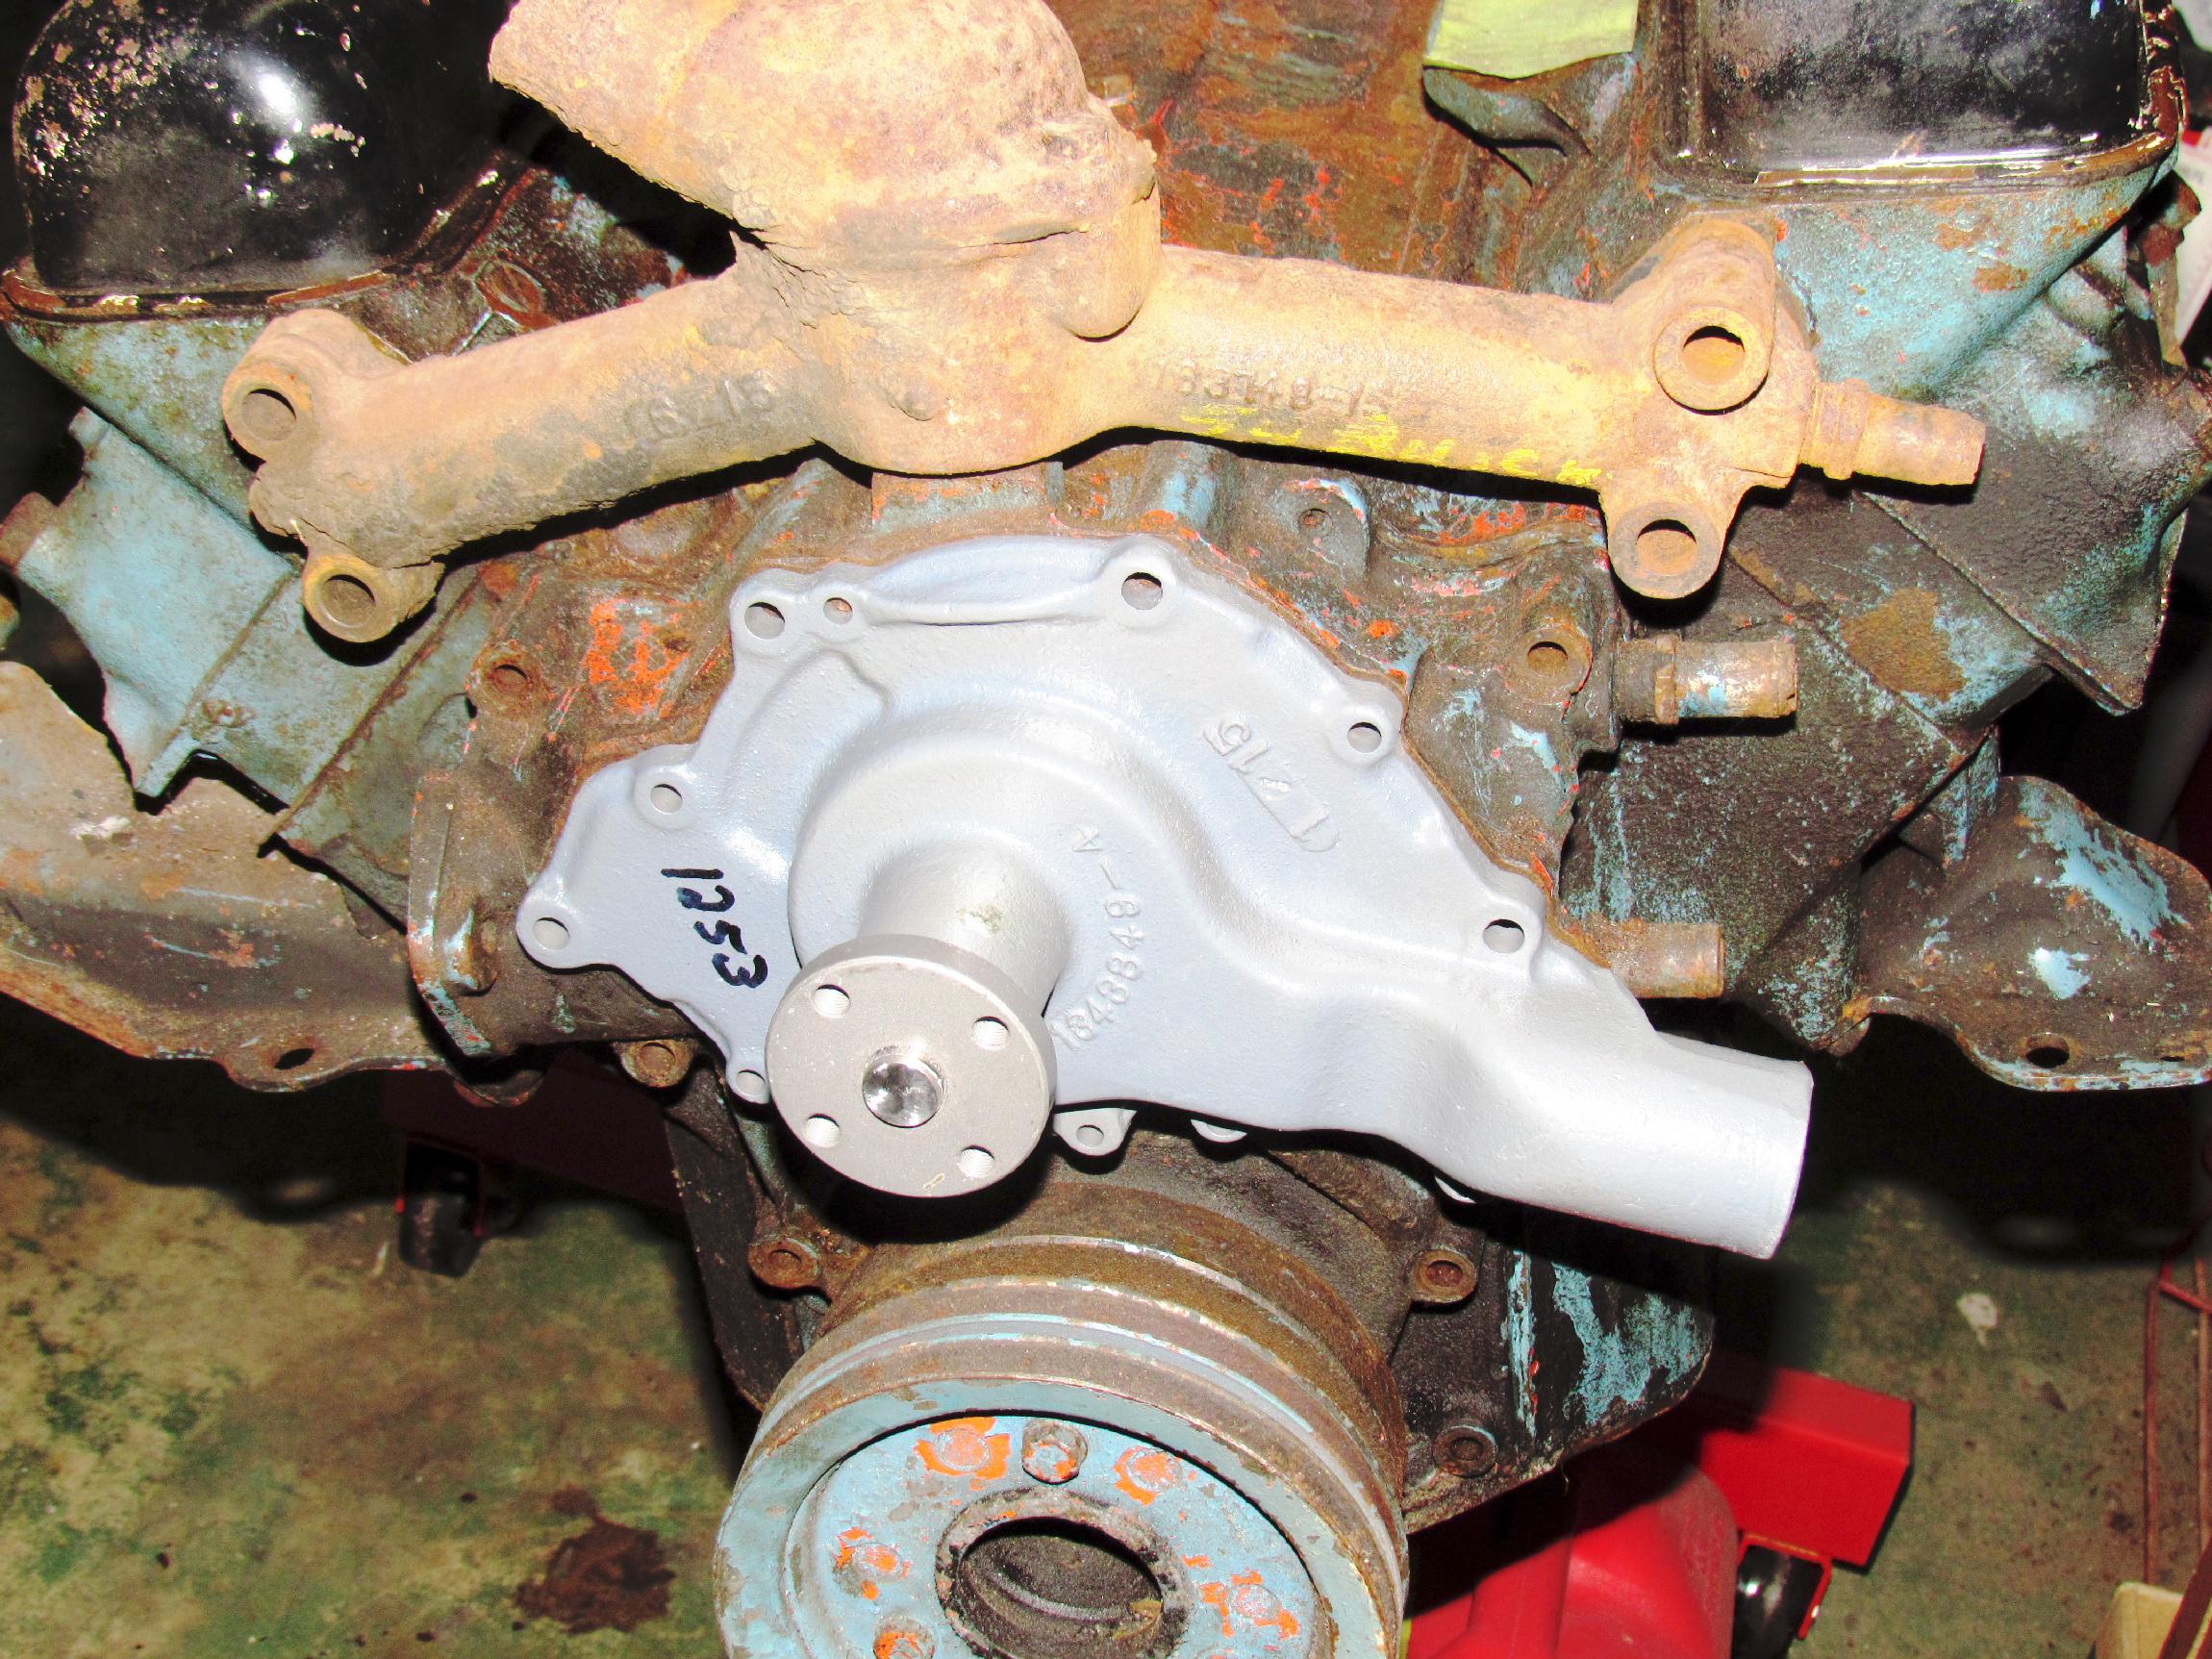 Wasn't
quite finished with my beer (Budweiser Black Crown) so I messed around
with the nailhead a bit before calling it a nite. The donor engine did
not come with a water pump. I'd been looking on eBay for one but most
of the vendors require a core. Last week I found a remanufactured pump
for the same price the other vendors were asking but no core was
required. Paid the buy-it-now price and it arrived on friday. I checked
it for fit and stored it with the rest of the nailhead parts.
Wasn't
quite finished with my beer (Budweiser Black Crown) so I messed around
with the nailhead a bit before calling it a nite. The donor engine did
not come with a water pump. I'd been looking on eBay for one but most
of the vendors require a core. Last week I found a remanufactured pump
for the same price the other vendors were asking but no core was
required. Paid the buy-it-now price and it arrived on friday. I checked
it for fit and stored it with the rest of the nailhead parts.
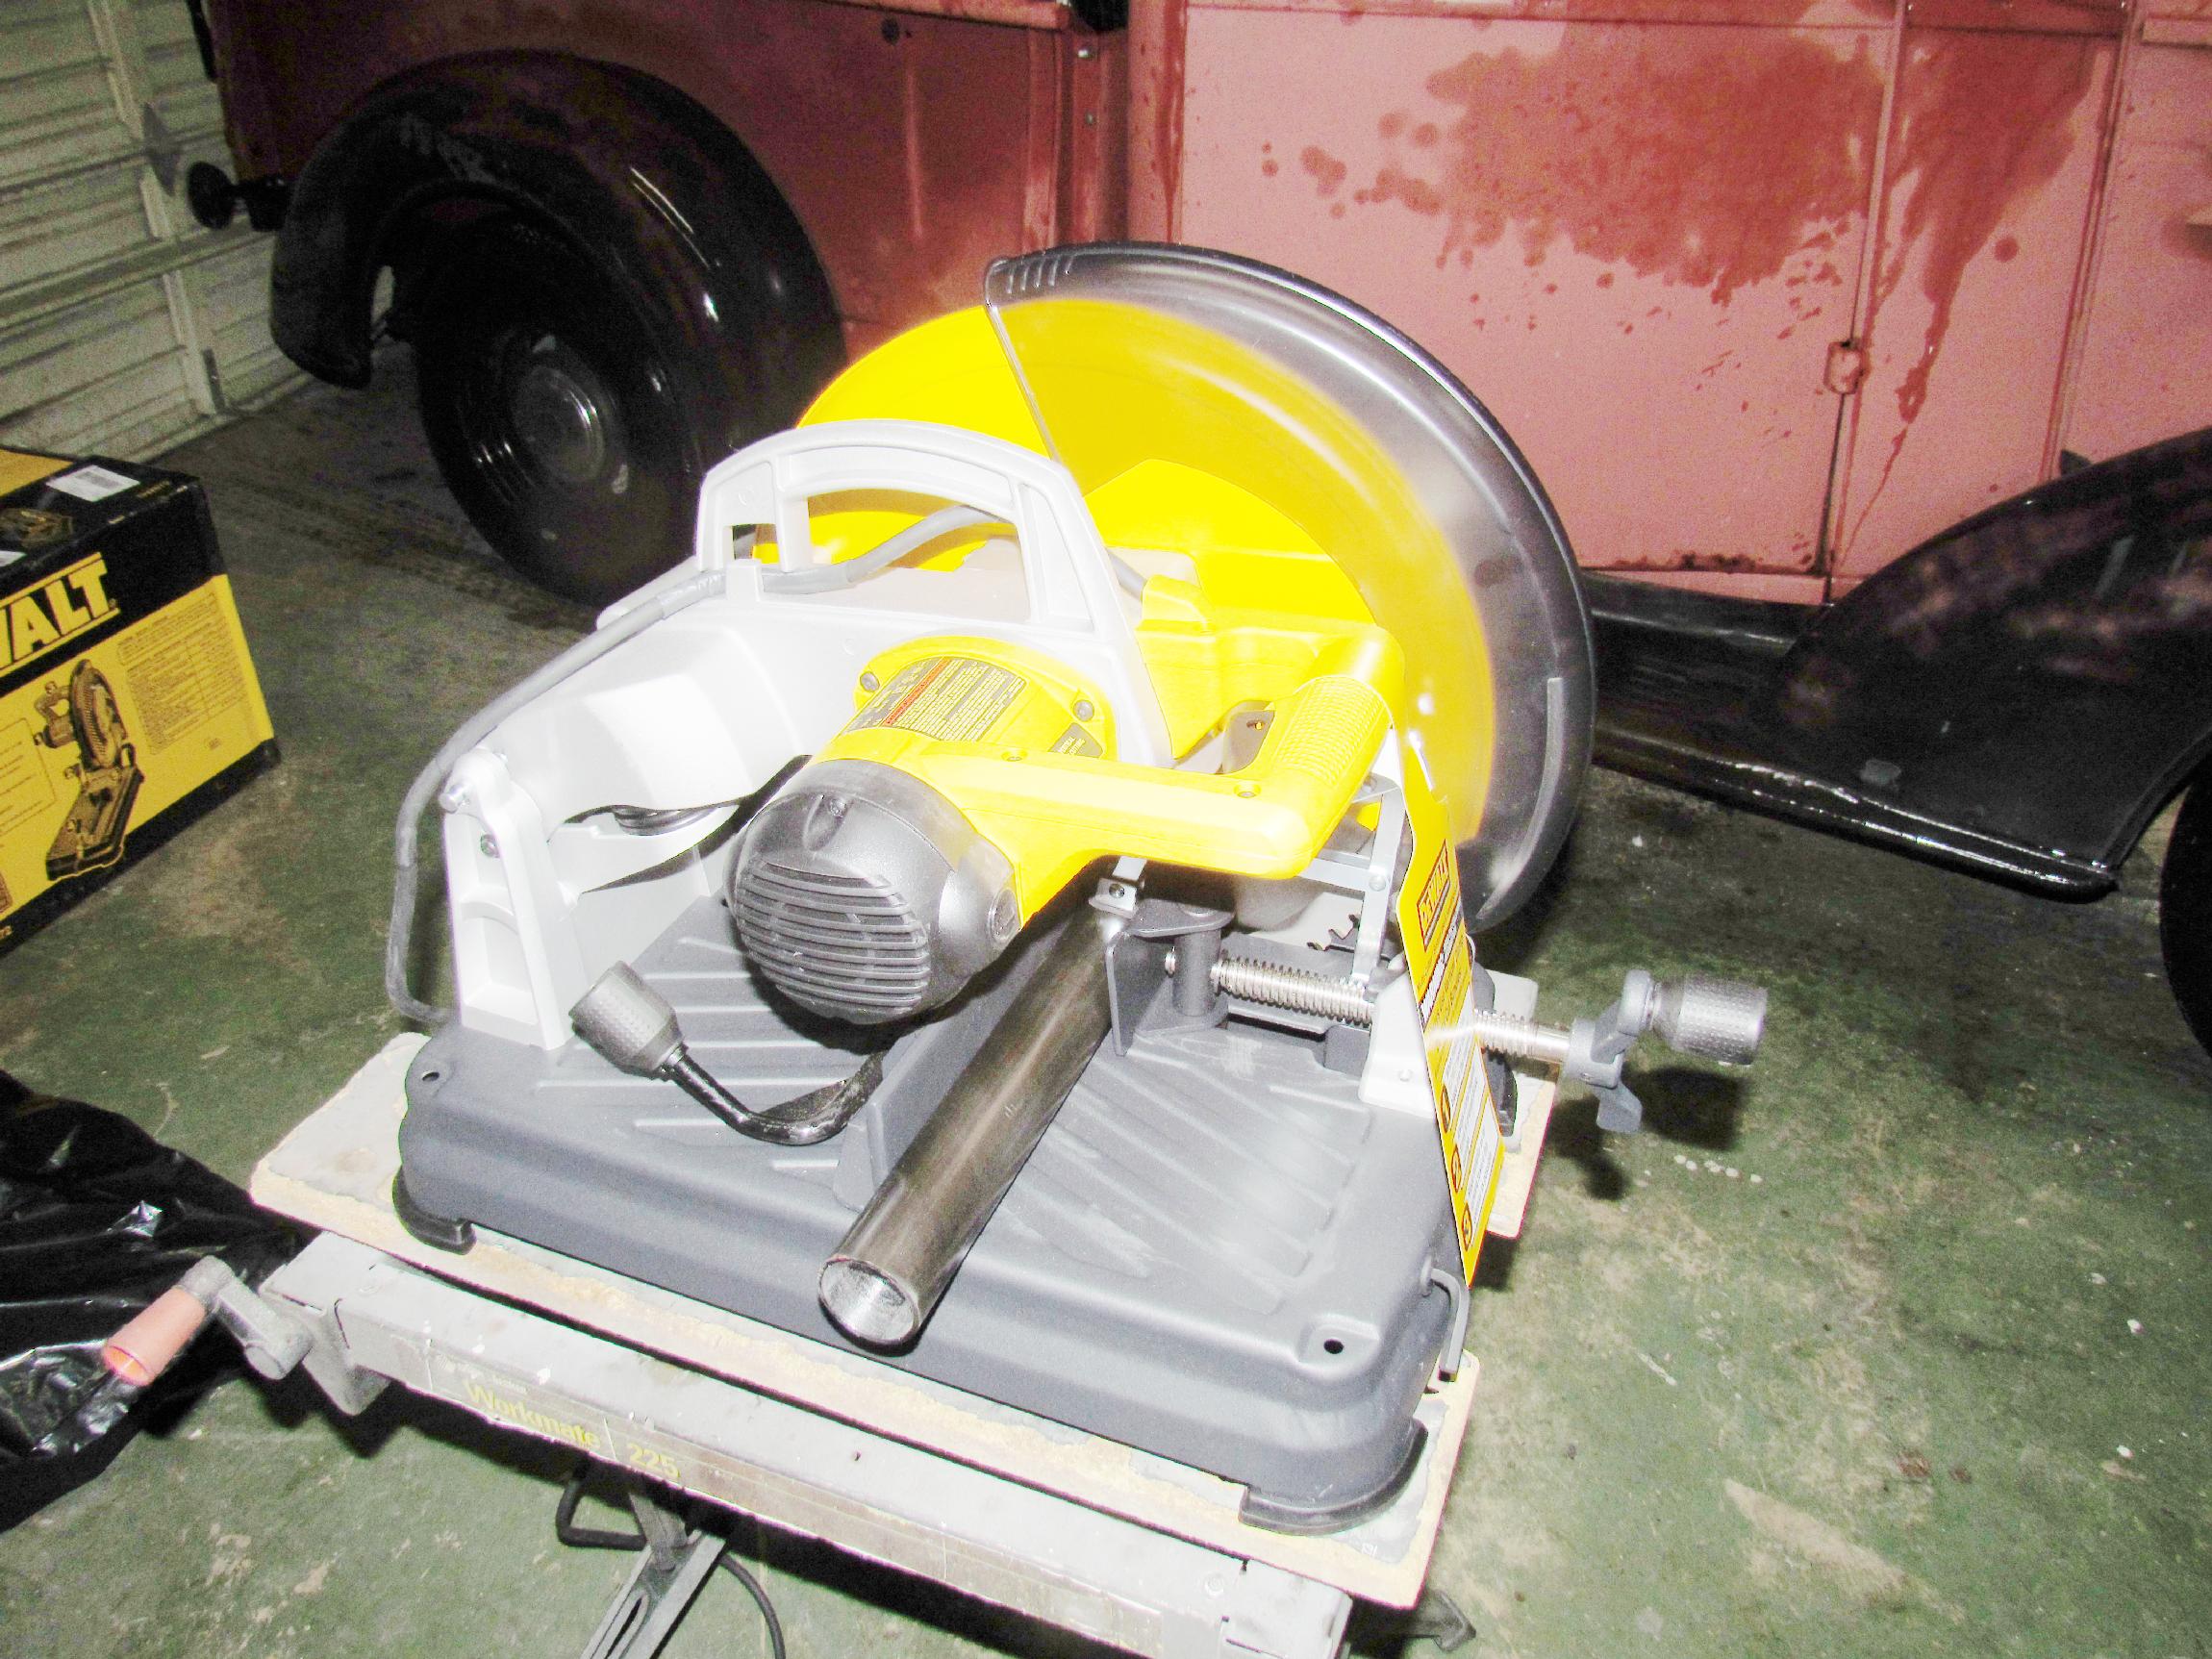 January
31st 2014 Tuesday was
Delray Beach cruise night and wednesday nite I just puttered around the
shop. A couple of weeks ago, I splurged and got a 14" dry-cut DeWalt
chop saw. Took it out of the box and set it up, and did a fast read of
the manual. I went for the more expensive dry-cut saw rather than the
abasive type since cleanup is one of my weak points. Last nite was the
thursday night cruise-in at the Hog in Pompano. It rained all day
yesterday and turnout was light. Only three rides, including
Deerslayer, were there. Everyone else came in their mundane drivers.
January
31st 2014 Tuesday was
Delray Beach cruise night and wednesday nite I just puttered around the
shop. A couple of weeks ago, I splurged and got a 14" dry-cut DeWalt
chop saw. Took it out of the box and set it up, and did a fast read of
the manual. I went for the more expensive dry-cut saw rather than the
abasive type since cleanup is one of my weak points. Last nite was the
thursday night cruise-in at the Hog in Pompano. It rained all day
yesterday and turnout was light. Only three rides, including
Deerslayer, were there. Everyone else came in their mundane drivers.
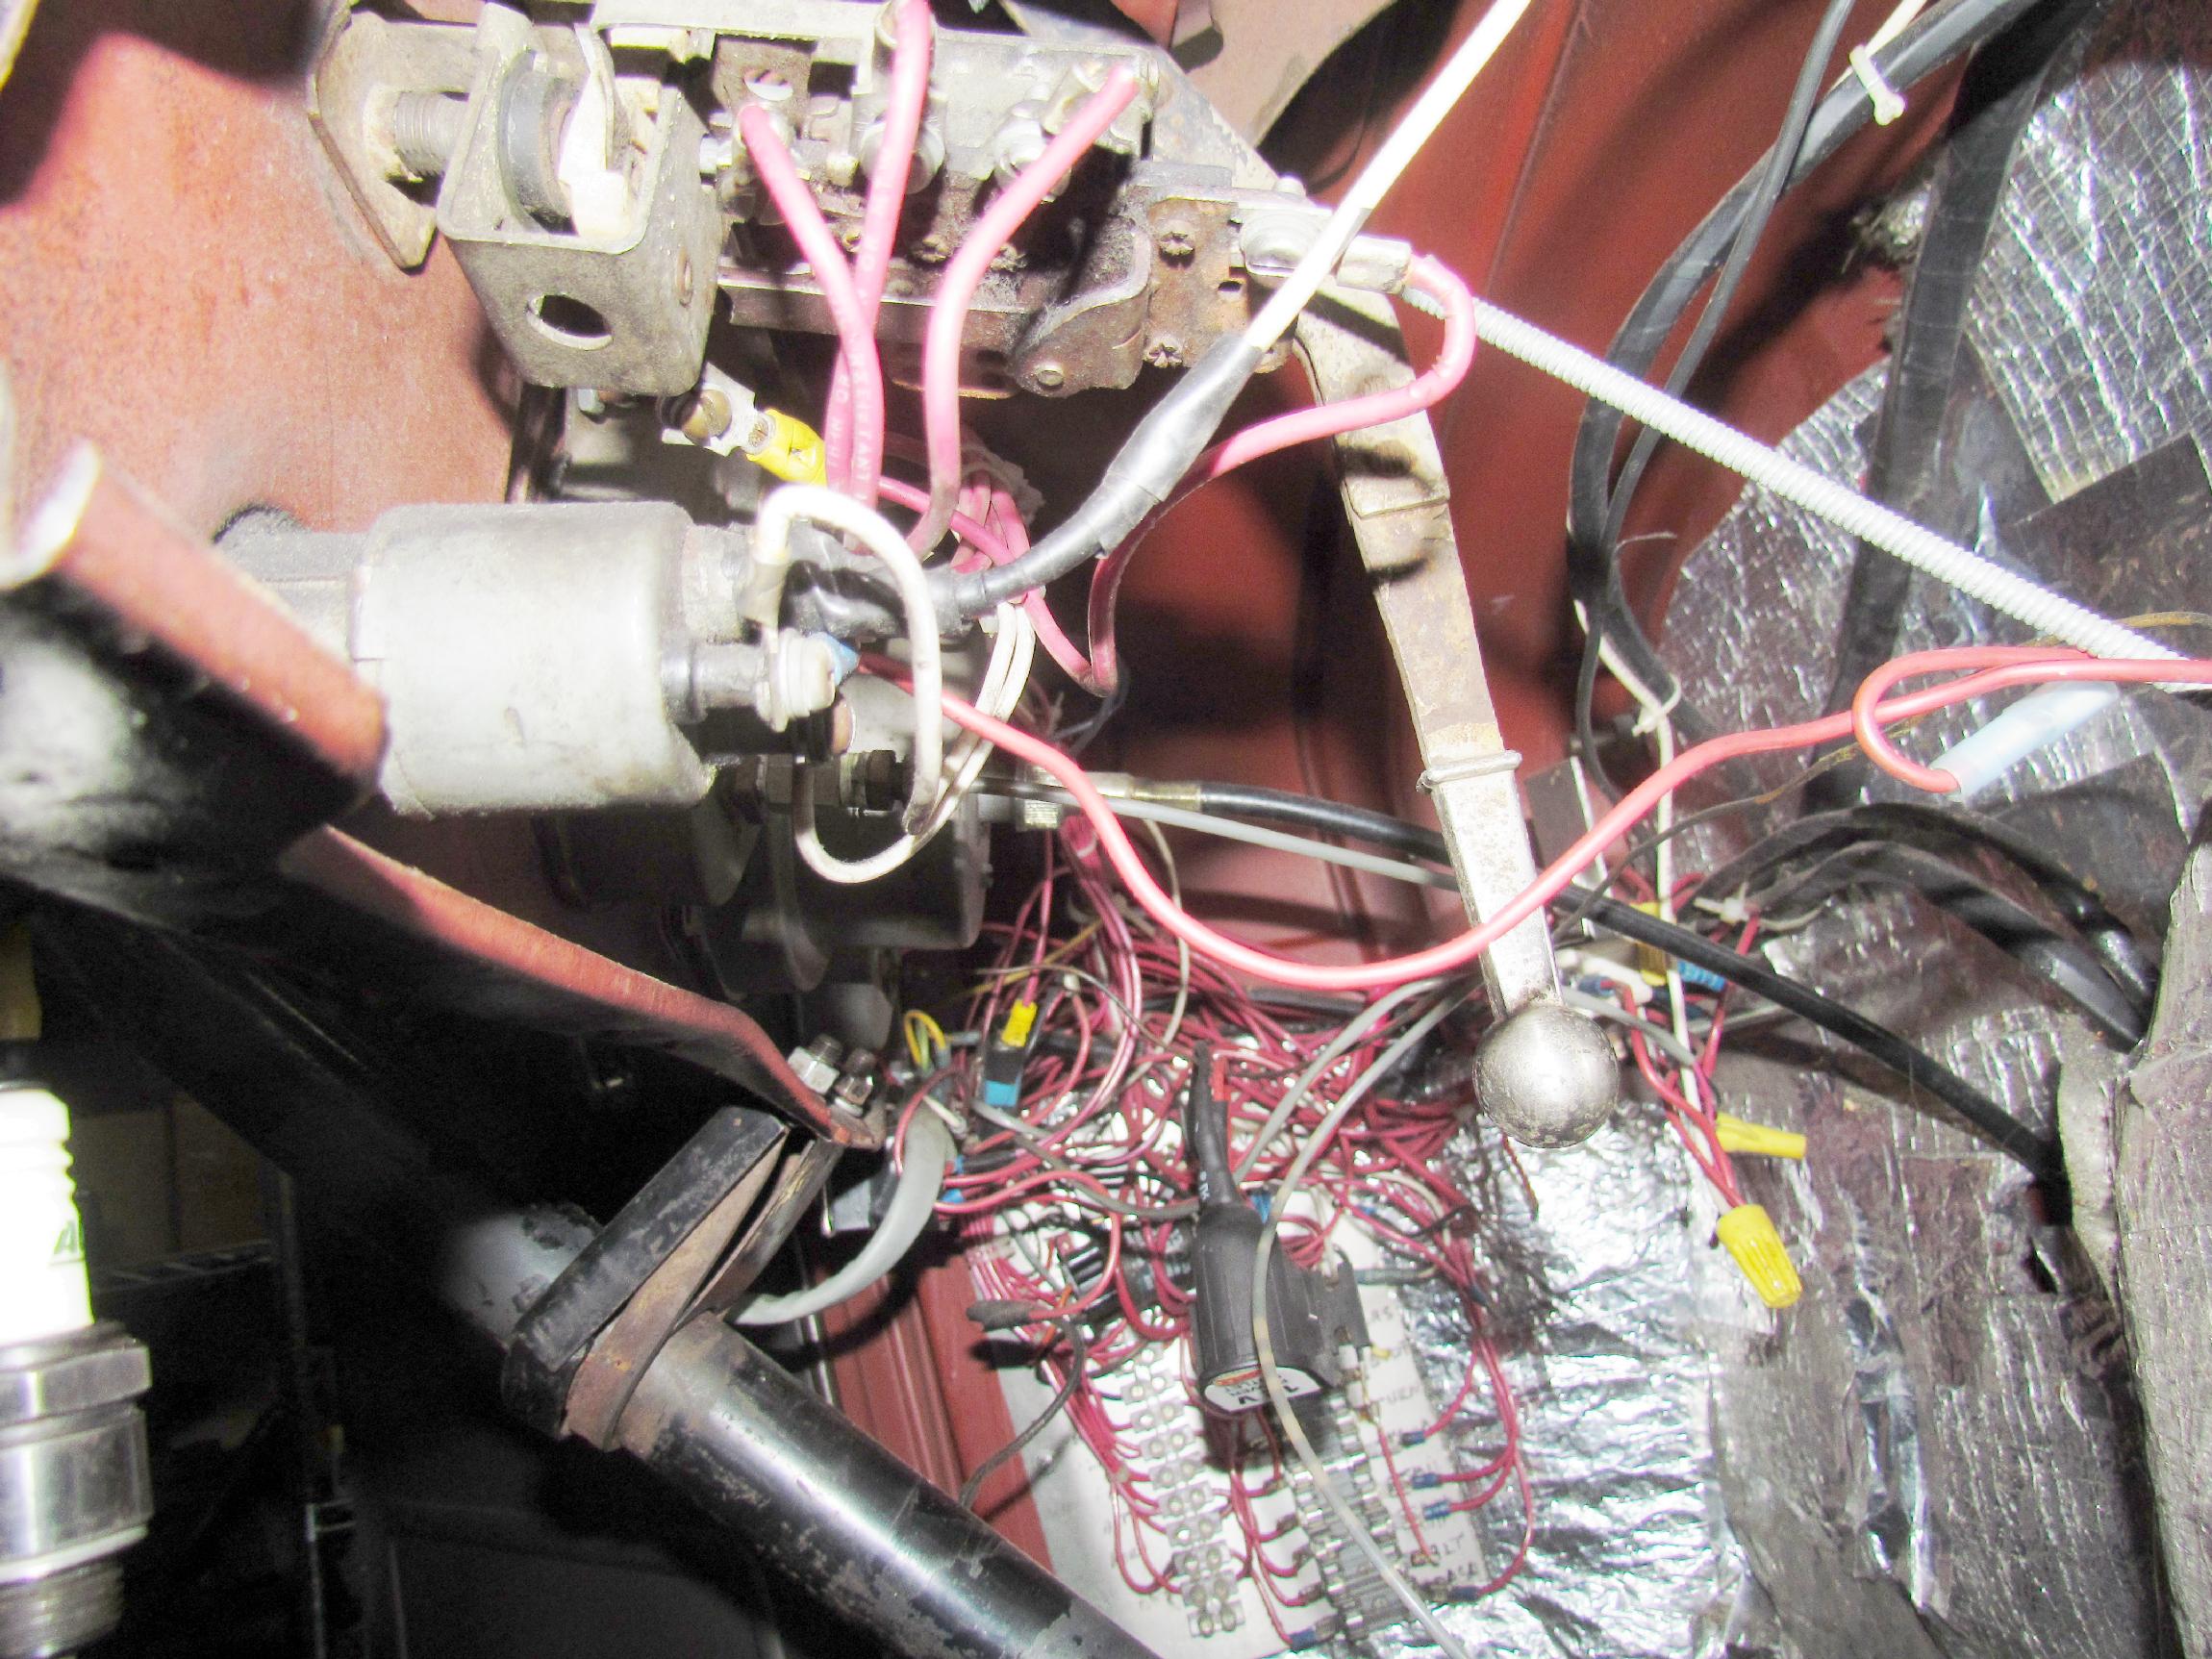 February
1st 2014 Got started in
the shop early. Wus thinking about removing the Deerslayer dash board
to get access for installing a dash mounted horn button. Taking the
dashboard off is pretty straightforward. What concerned me was
disturbing the wiring behind it. After pondering on it with my first
cigar of the day, I decided to remove the glove box door and glovebox
cardboard first. With the glove box out of the way, I had room to work.
February
1st 2014 Got started in
the shop early. Wus thinking about removing the Deerslayer dash board
to get access for installing a dash mounted horn button. Taking the
dashboard off is pretty straightforward. What concerned me was
disturbing the wiring behind it. After pondering on it with my first
cigar of the day, I decided to remove the glove box door and glovebox
cardboard first. With the glove box out of the way, I had room to work.
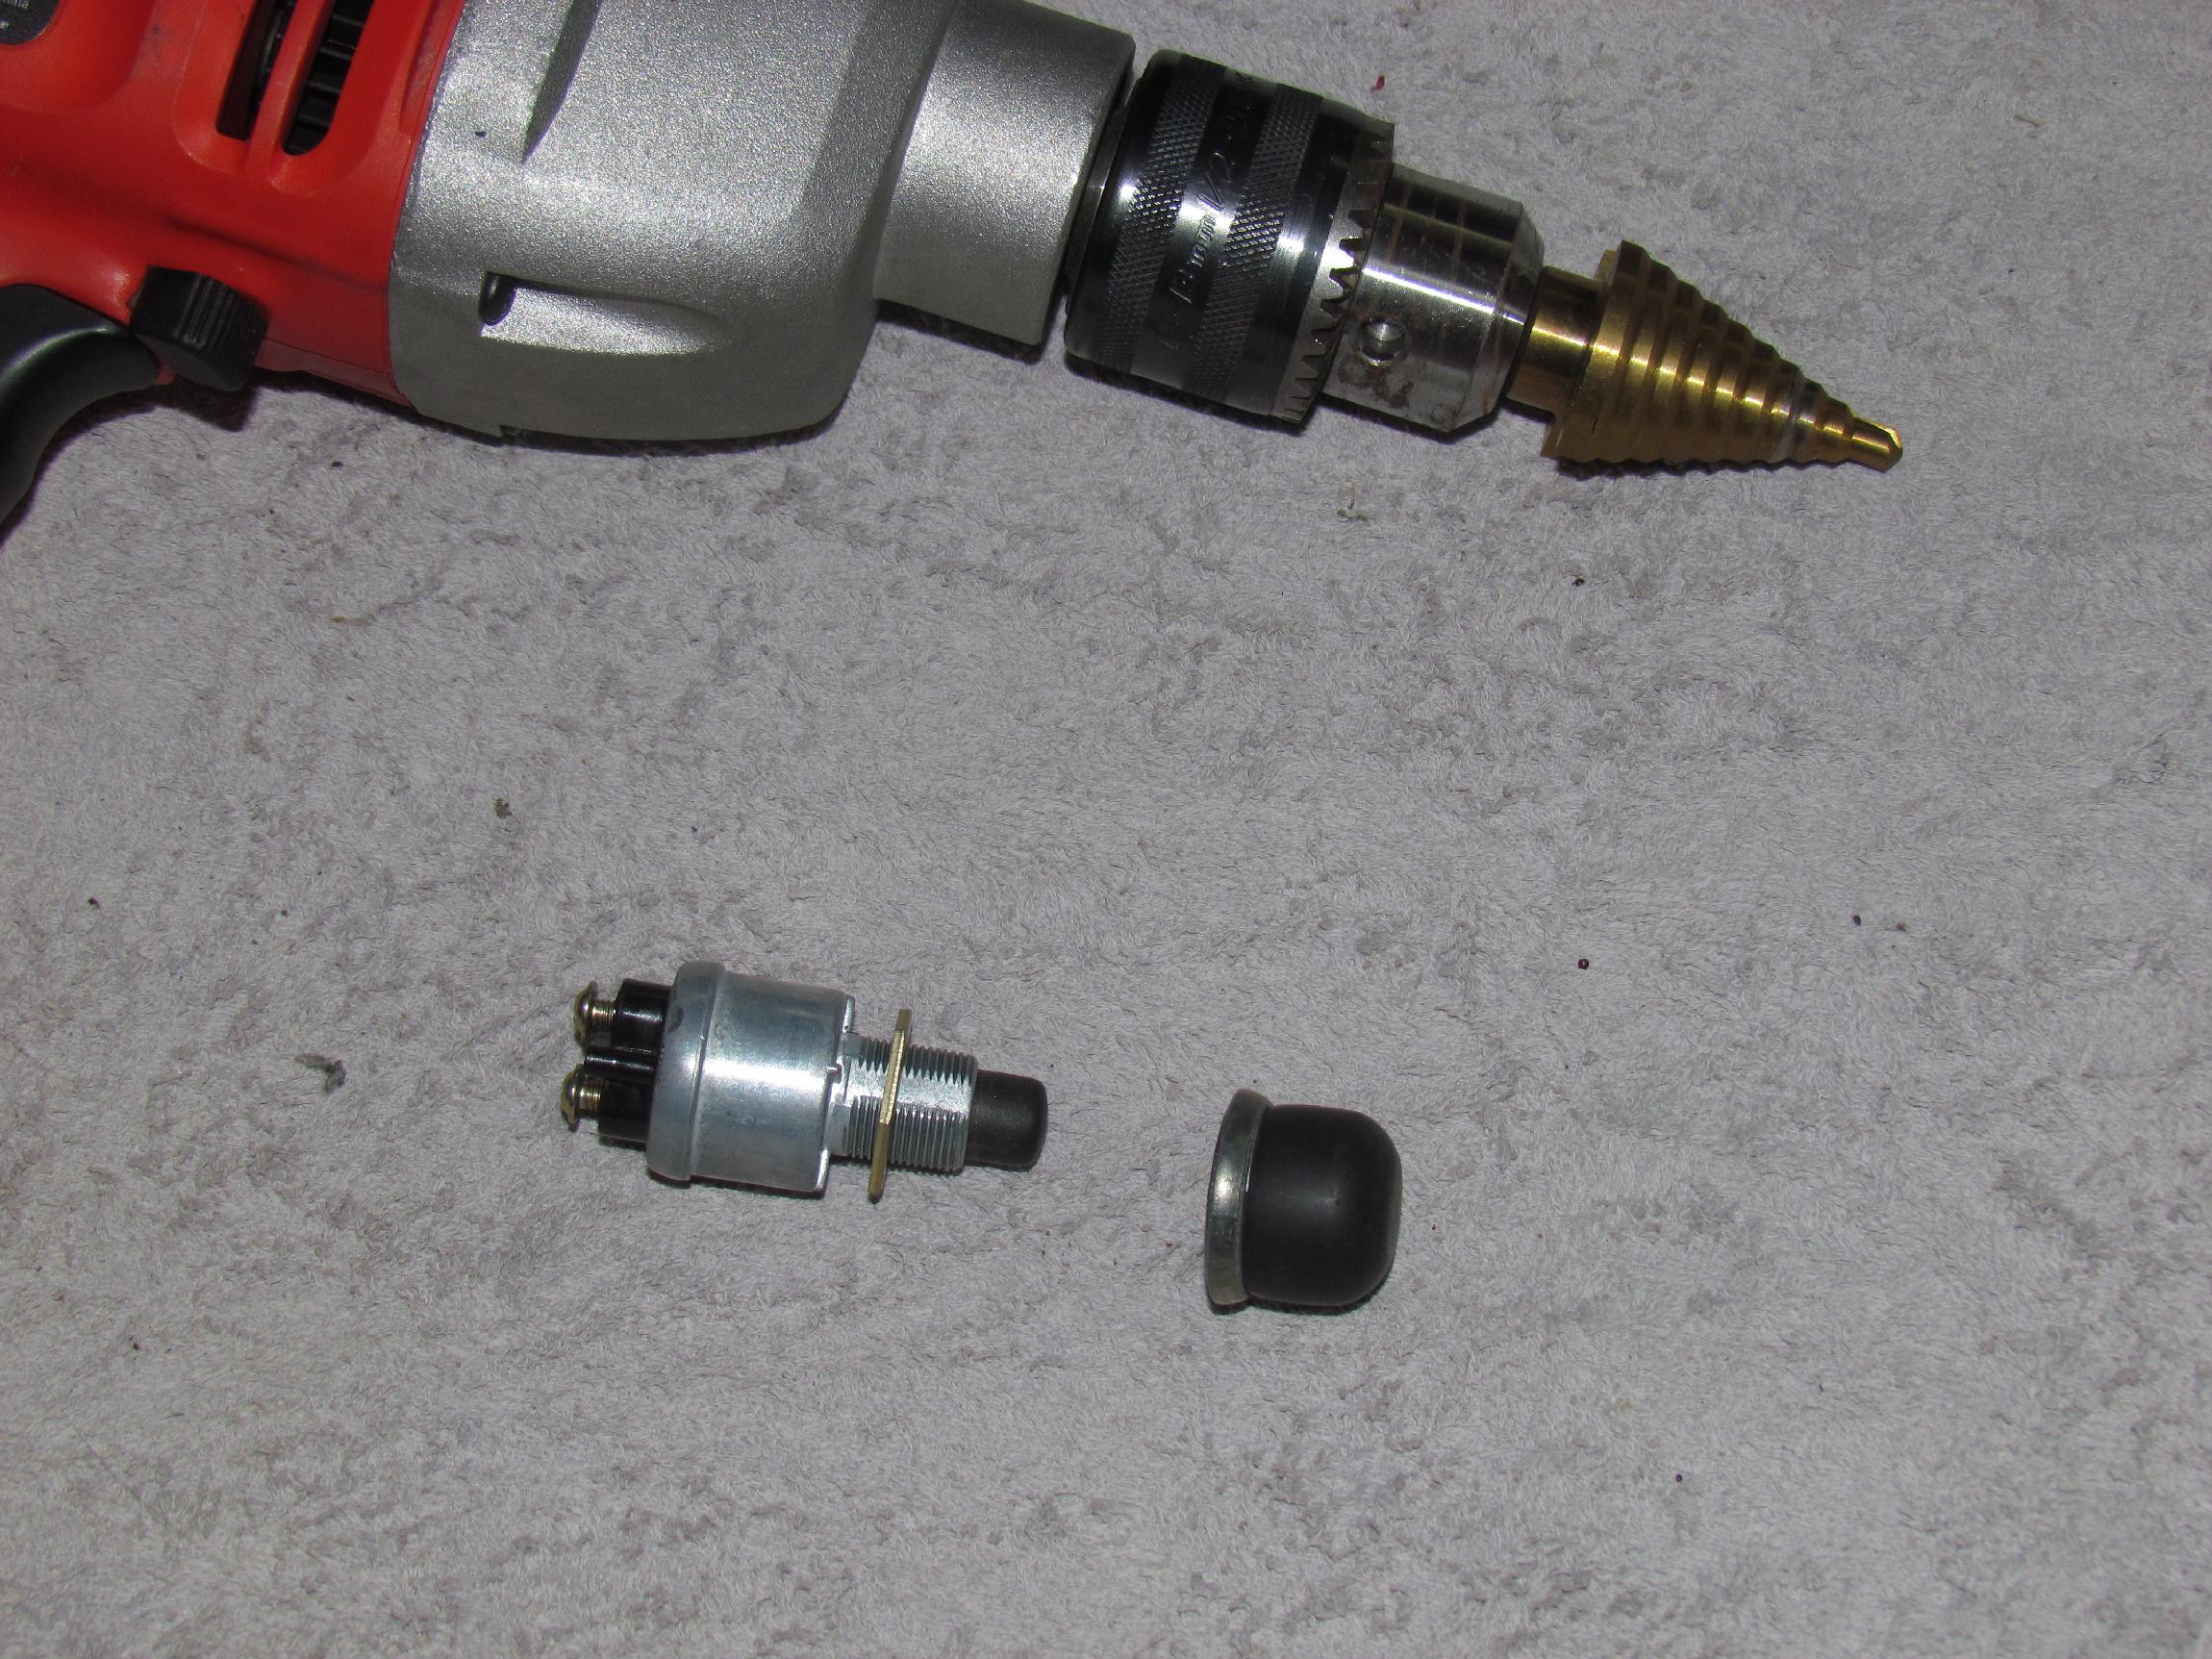 My
idea for a horn button was something on the order of a COE truck
starter switch. I settled for a Dorman boat starter button. It required
a 5/8" hole. There was a plastic button cover already in the dash next
to the glove box above the light and ignition switches. I removed it
and used a step drill bit to enlarge it to 5/8". It was darn close to
the correct size to begin with.
My
idea for a horn button was something on the order of a COE truck
starter switch. I settled for a Dorman boat starter button. It required
a 5/8" hole. There was a plastic button cover already in the dash next
to the glove box above the light and ignition switches. I removed it
and used a step drill bit to enlarge it to 5/8". It was darn close to
the correct size to begin with.
 The
button was checked for fit and then wired up. I had some red wire so I
kept with Tony's red wire theme. Crimped some ring connectors for the
switch and ground and crimped a splice to the horn wire that had been
dangling since the steering column change a couple of months back.
Good! I have a horn again. I put the glove box back together and moved
on to the steering wheel.
The
button was checked for fit and then wired up. I had some red wire so I
kept with Tony's red wire theme. Crimped some ring connectors for the
switch and ground and crimped a splice to the horn wire that had been
dangling since the steering column change a couple of months back.
Good! I have a horn again. I put the glove box back together and moved
on to the steering wheel.
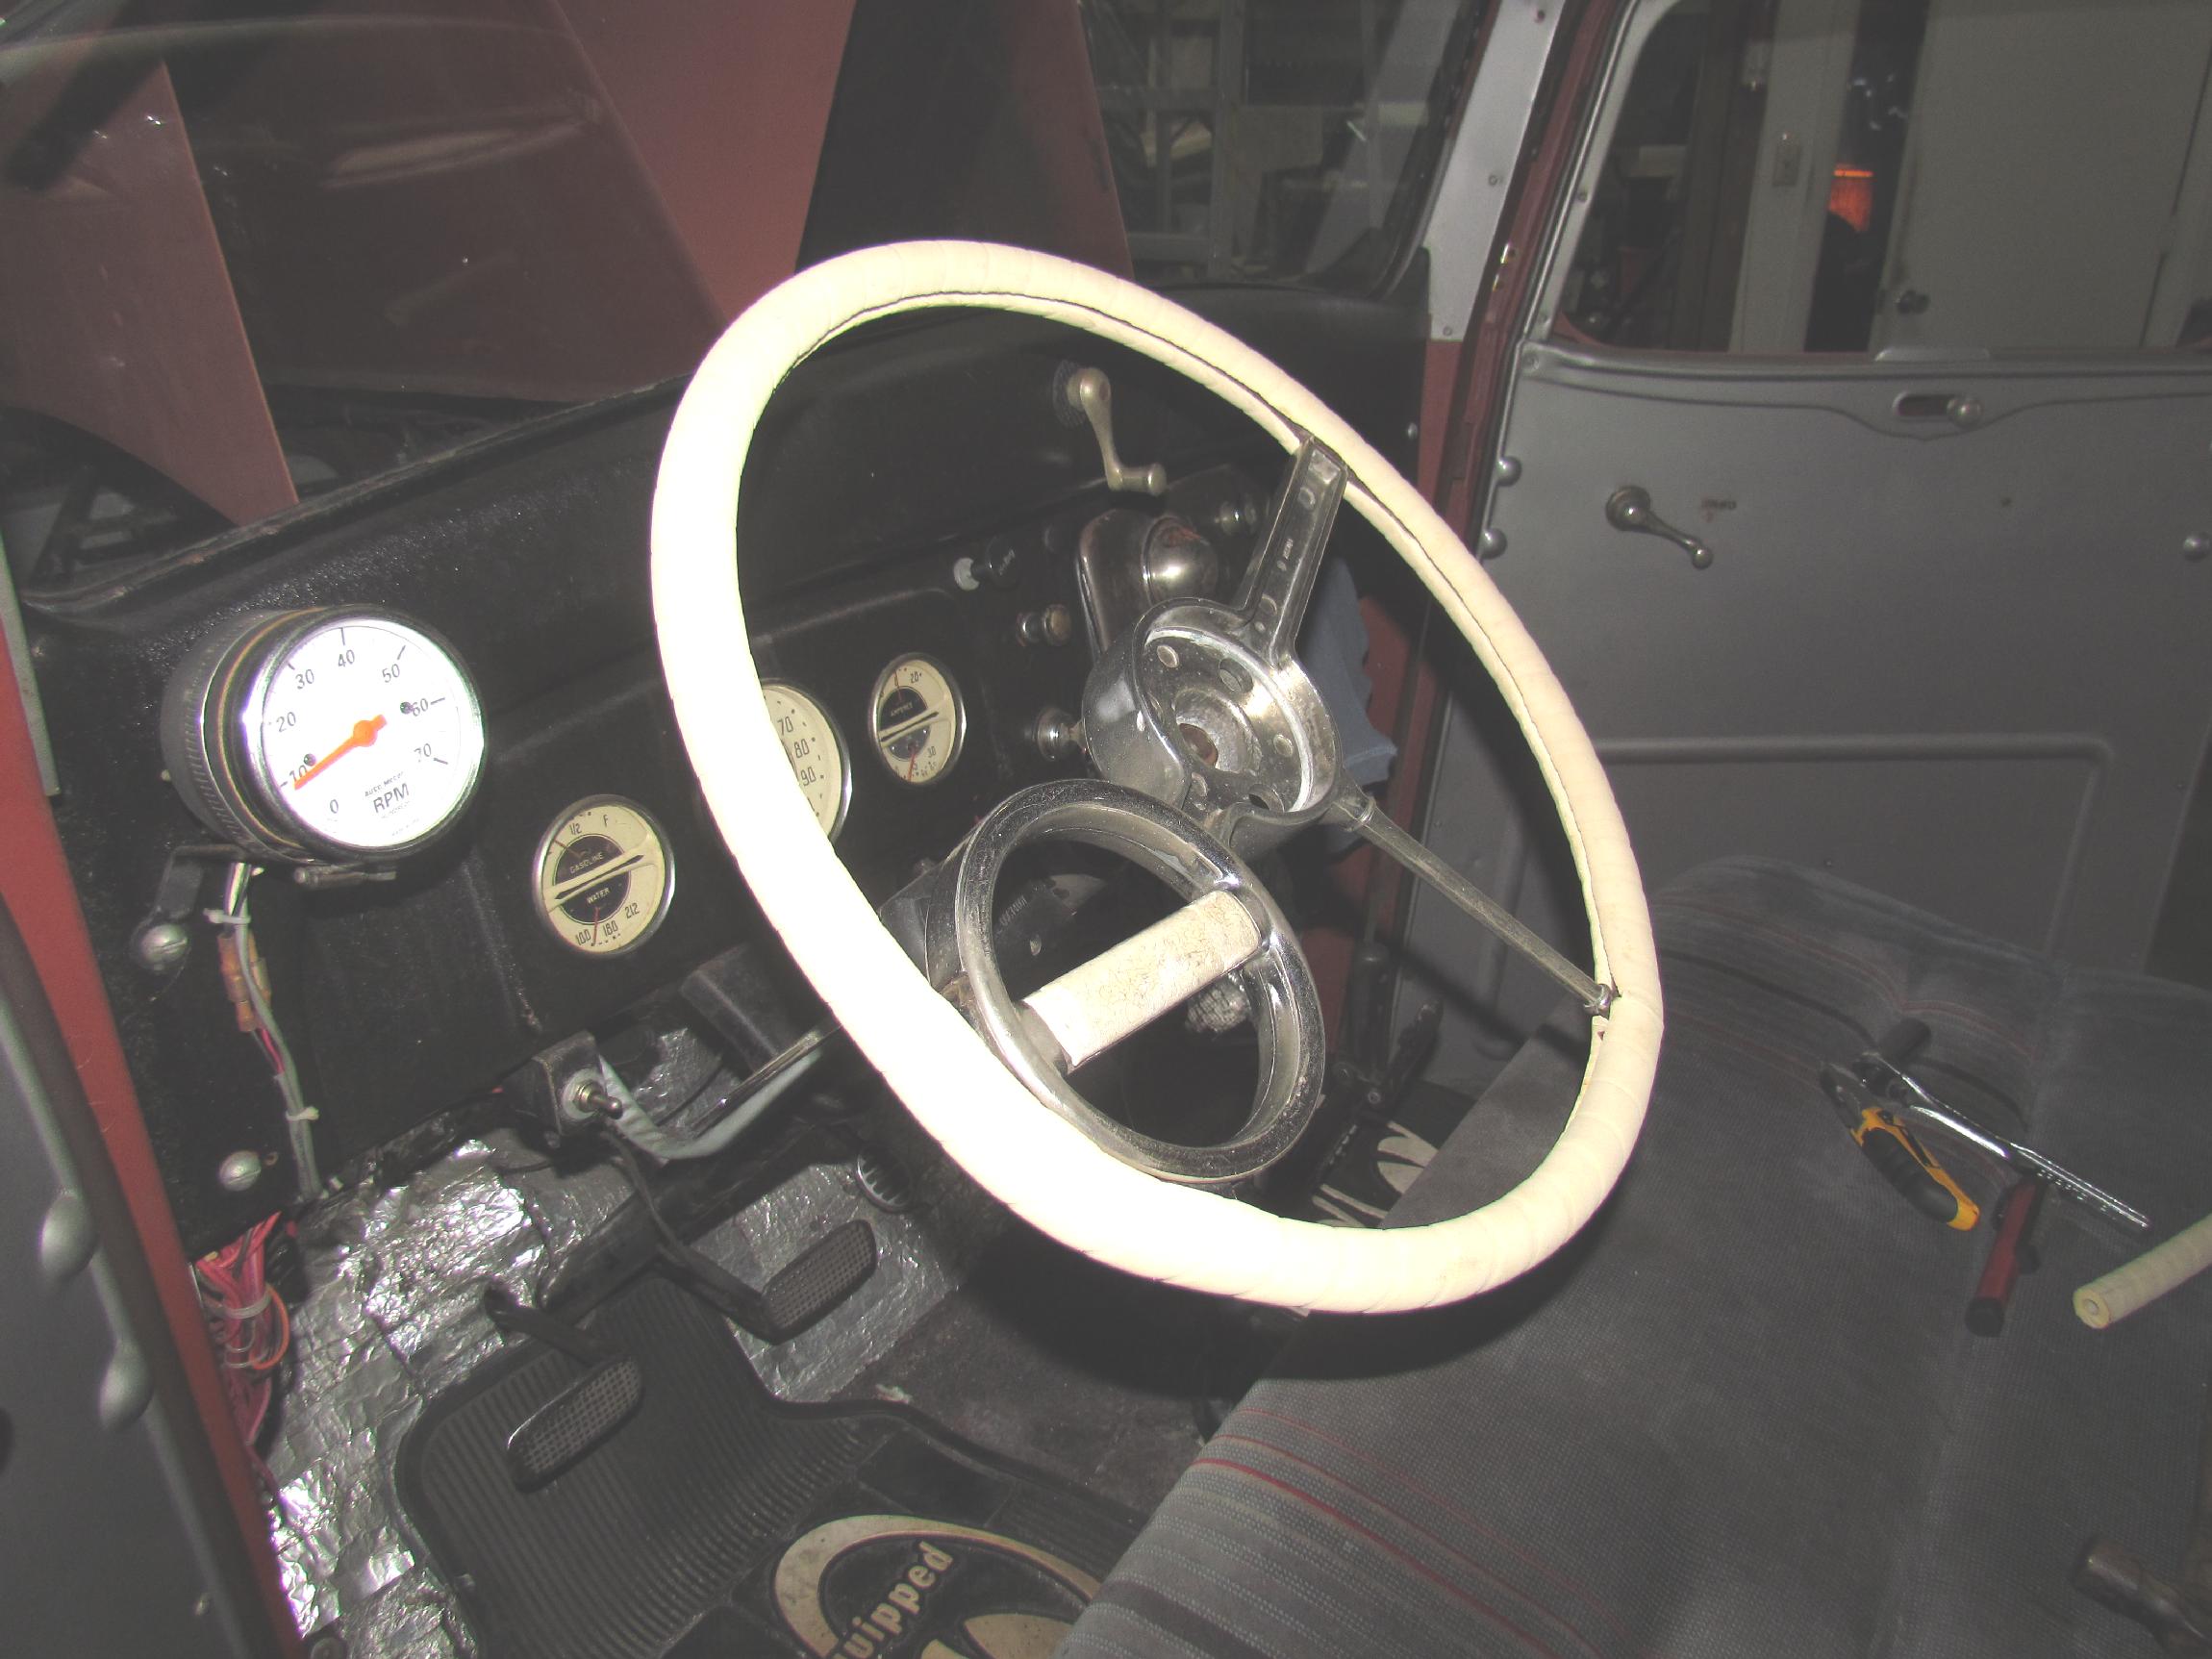
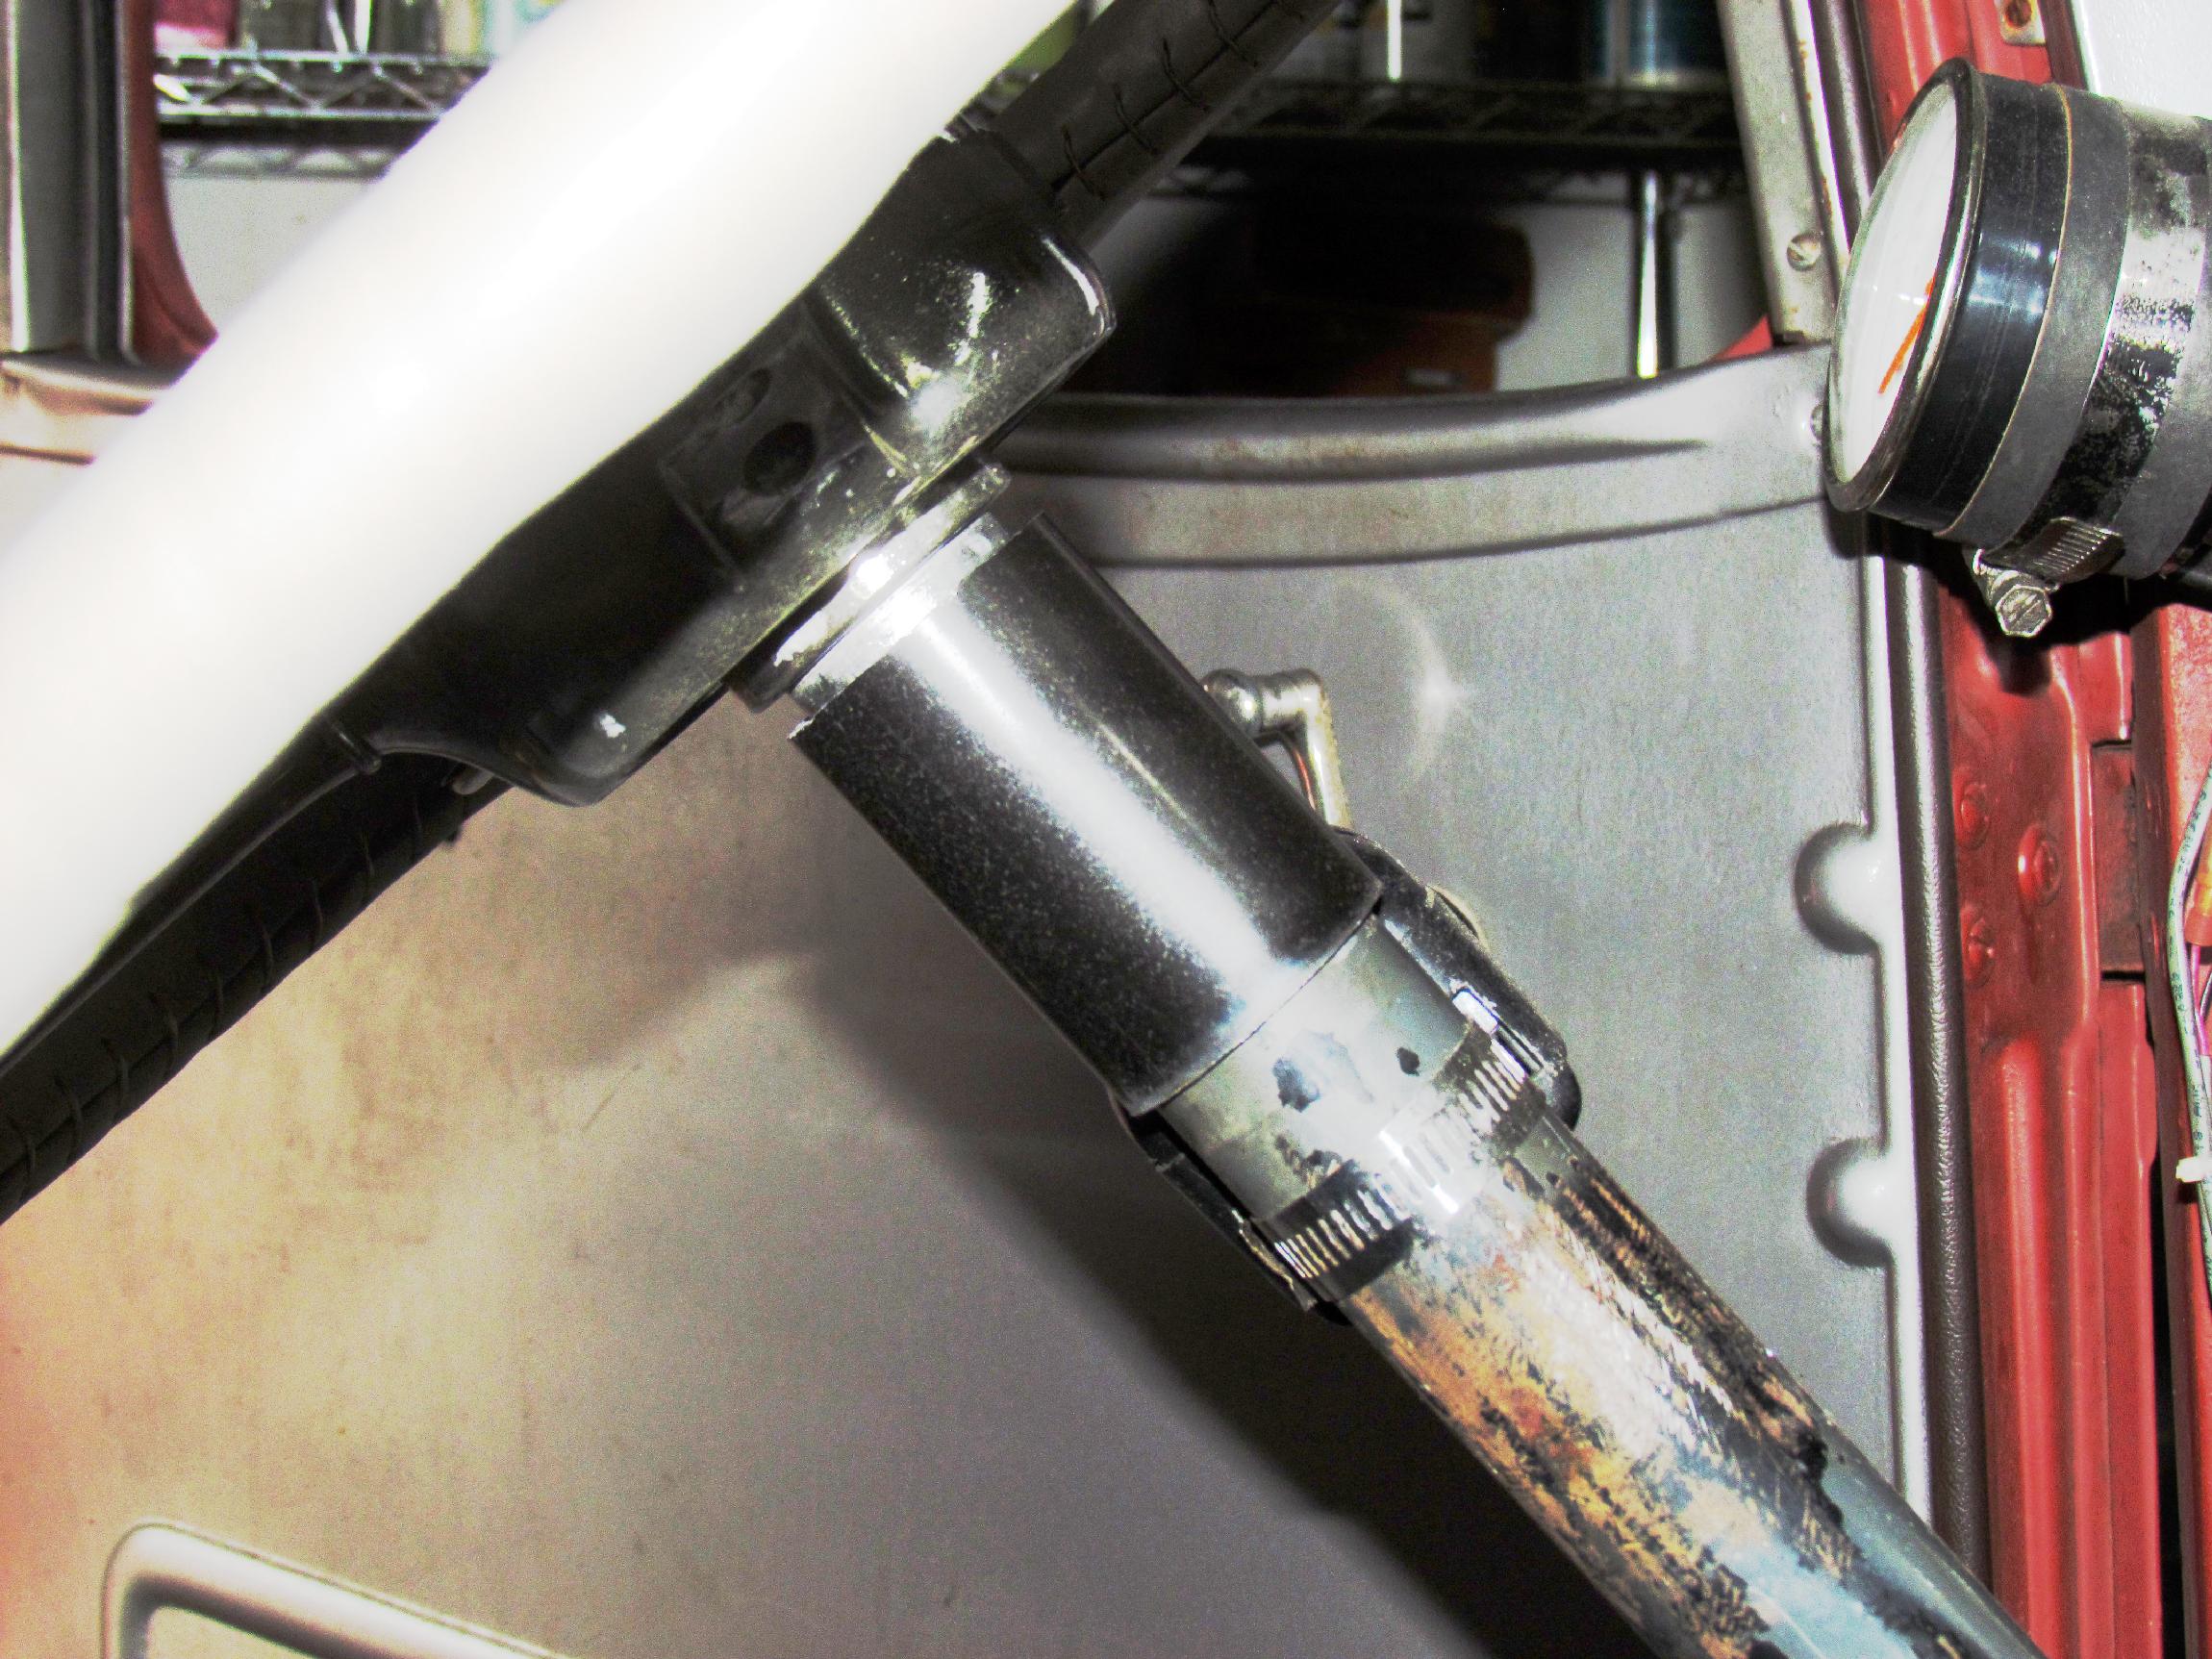 The
piece of pipe I was fabricating the steering mast cover from, was
measured and clamped in the chop saw. This was the first time for my
use of this tool, and I took longer than I might normally to review the
safety precautions. Finally, I donned my face shield and turned the
machine on. A few seconds later, I had my cover. Cleaned it up, removed
the steering wheel, and snugged the cover up on the steering mask. Put
the spinner wheel back on and I was done.
The
piece of pipe I was fabricating the steering mast cover from, was
measured and clamped in the chop saw. This was the first time for my
use of this tool, and I took longer than I might normally to review the
safety precautions. Finally, I donned my face shield and turned the
machine on. A few seconds later, I had my cover. Cleaned it up, removed
the steering wheel, and snugged the cover up on the steering mask. Put
the spinner wheel back on and I was done.
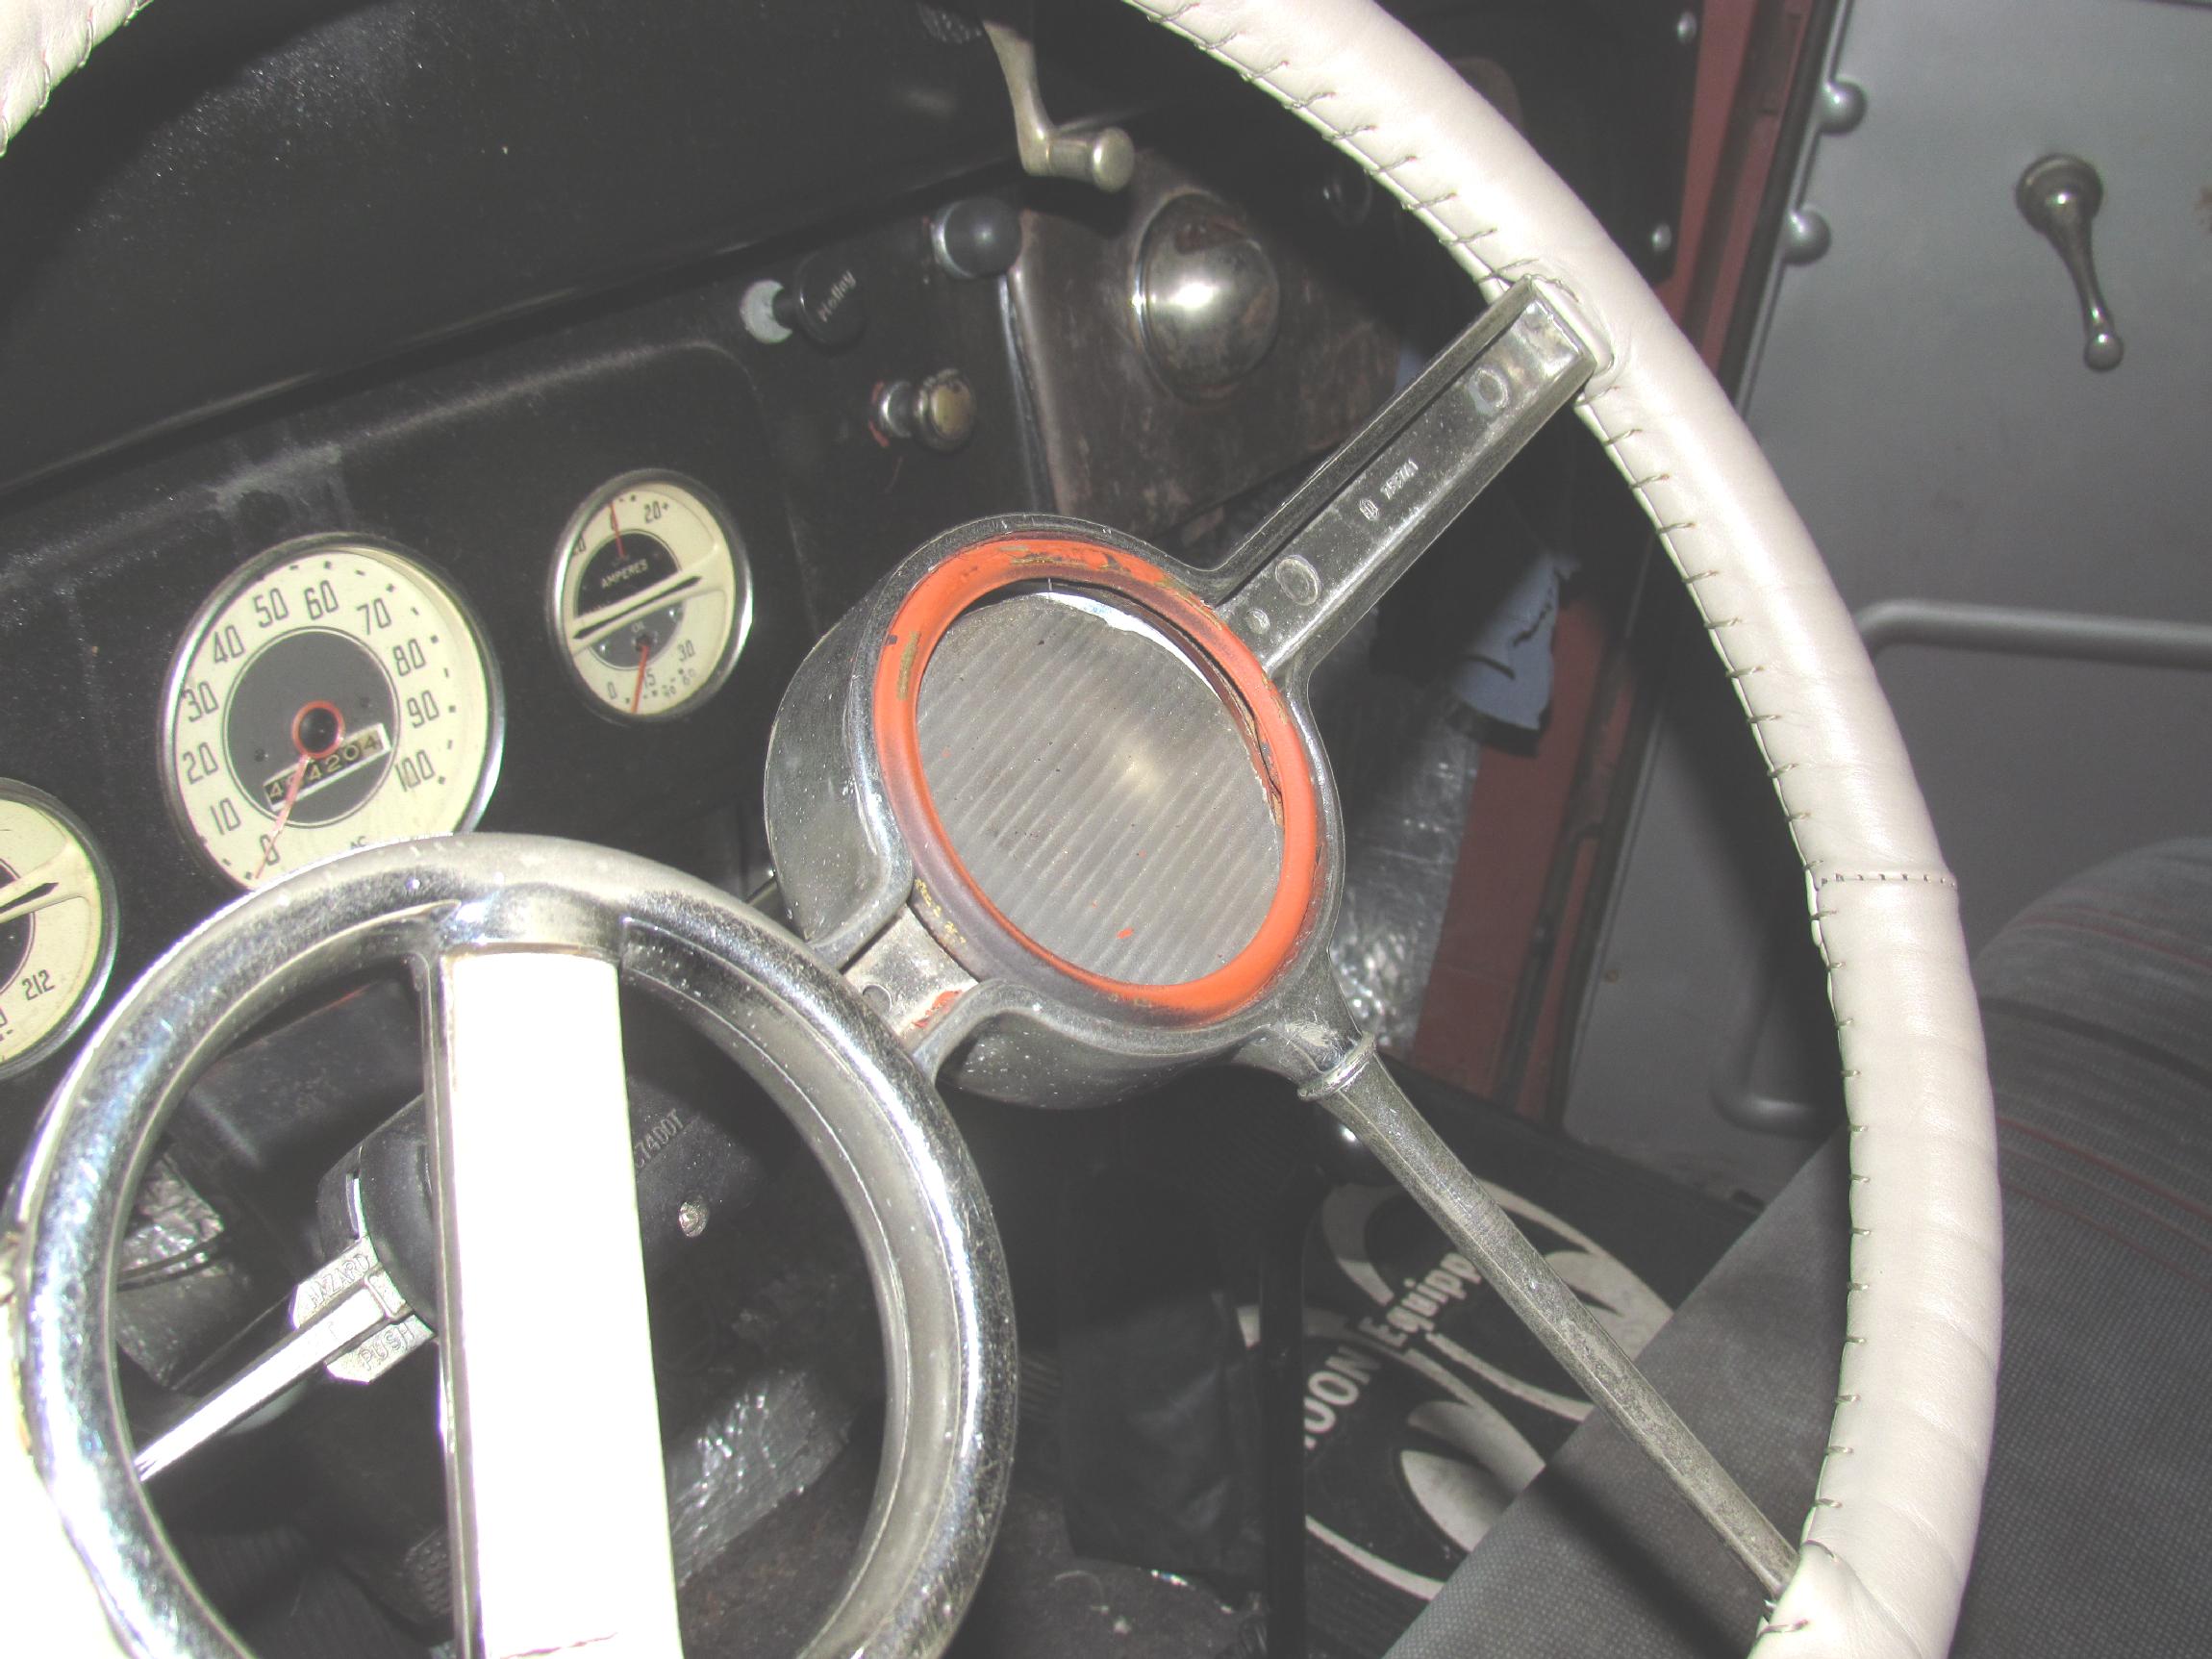 The
spinner wheel did not come with its plastic hub insert and horn bar.
These items are listed in Chevys of the Forties catalog at $175 and $85
along with the spinner grips for $75. A little rich for my blood but
understandable from a small production run viewpoint. I'm going to
fabricate something else to finish the hub and bar. By mid-afternoon,
with a few Budweiser Black Crown beers and a couple more cigars, I had
my inspiration. I did a partial mock-up but the rest will have to wait
for the next log entry. This one is getting too long.
The
spinner wheel did not come with its plastic hub insert and horn bar.
These items are listed in Chevys of the Forties catalog at $175 and $85
along with the spinner grips for $75. A little rich for my blood but
understandable from a small production run viewpoint. I'm going to
fabricate something else to finish the hub and bar. By mid-afternoon,
with a few Budweiser Black Crown beers and a couple more cigars, I had
my inspiration. I did a partial mock-up but the rest will have to wait
for the next log entry. This one is getting too long.
| < Back
to Intro |
You can email me at ![]() webmaster@laroke.com
webmaster@laroke.com
Issued Monday February 3, 2014
Updated Monday June 11, 2018
copyright © 2008-2018 Larry R. Kephart all rights reserved
| | LRK Home | | Bio Info | | Krash Khronicles | | LAROKE | |
| | BettyLou | | BillyBob's Garage | | Rat Patrol | | Deerslayer | | Elvira | |
| | Land of the Free and Home of the Brave | |
| | Keppylou's Art | | WWI Soldier's Diary | |