| | LRK Home | | Bio Info | | Krash Khronicles | | LAROKE | |
| | BettyLou | | BillyBob's Garage | | Rat Patrol | | Deerslayer | | Elvira | |
| | Land of the Free and Home of the Brave | |
| | Keppylou's Art | | WWI Soldier's Diary | |
Renegade's Patrol Log
![]()
JEEP LINKS including vendor sites for parts and tools as well as sites for jeep organizations
![]()
PATROL LOG includes log entries of minor repairs and and adventures between time of purchase and the present.
![]()
RENEGADE MAINTENANCE Ever changing detailing, oil change, lube, etc. maintenance routines developed for Renegade based on the BillyBob routines, including required tools, materials and procedures.
4. On the road again
 April
10th 2007 Once I
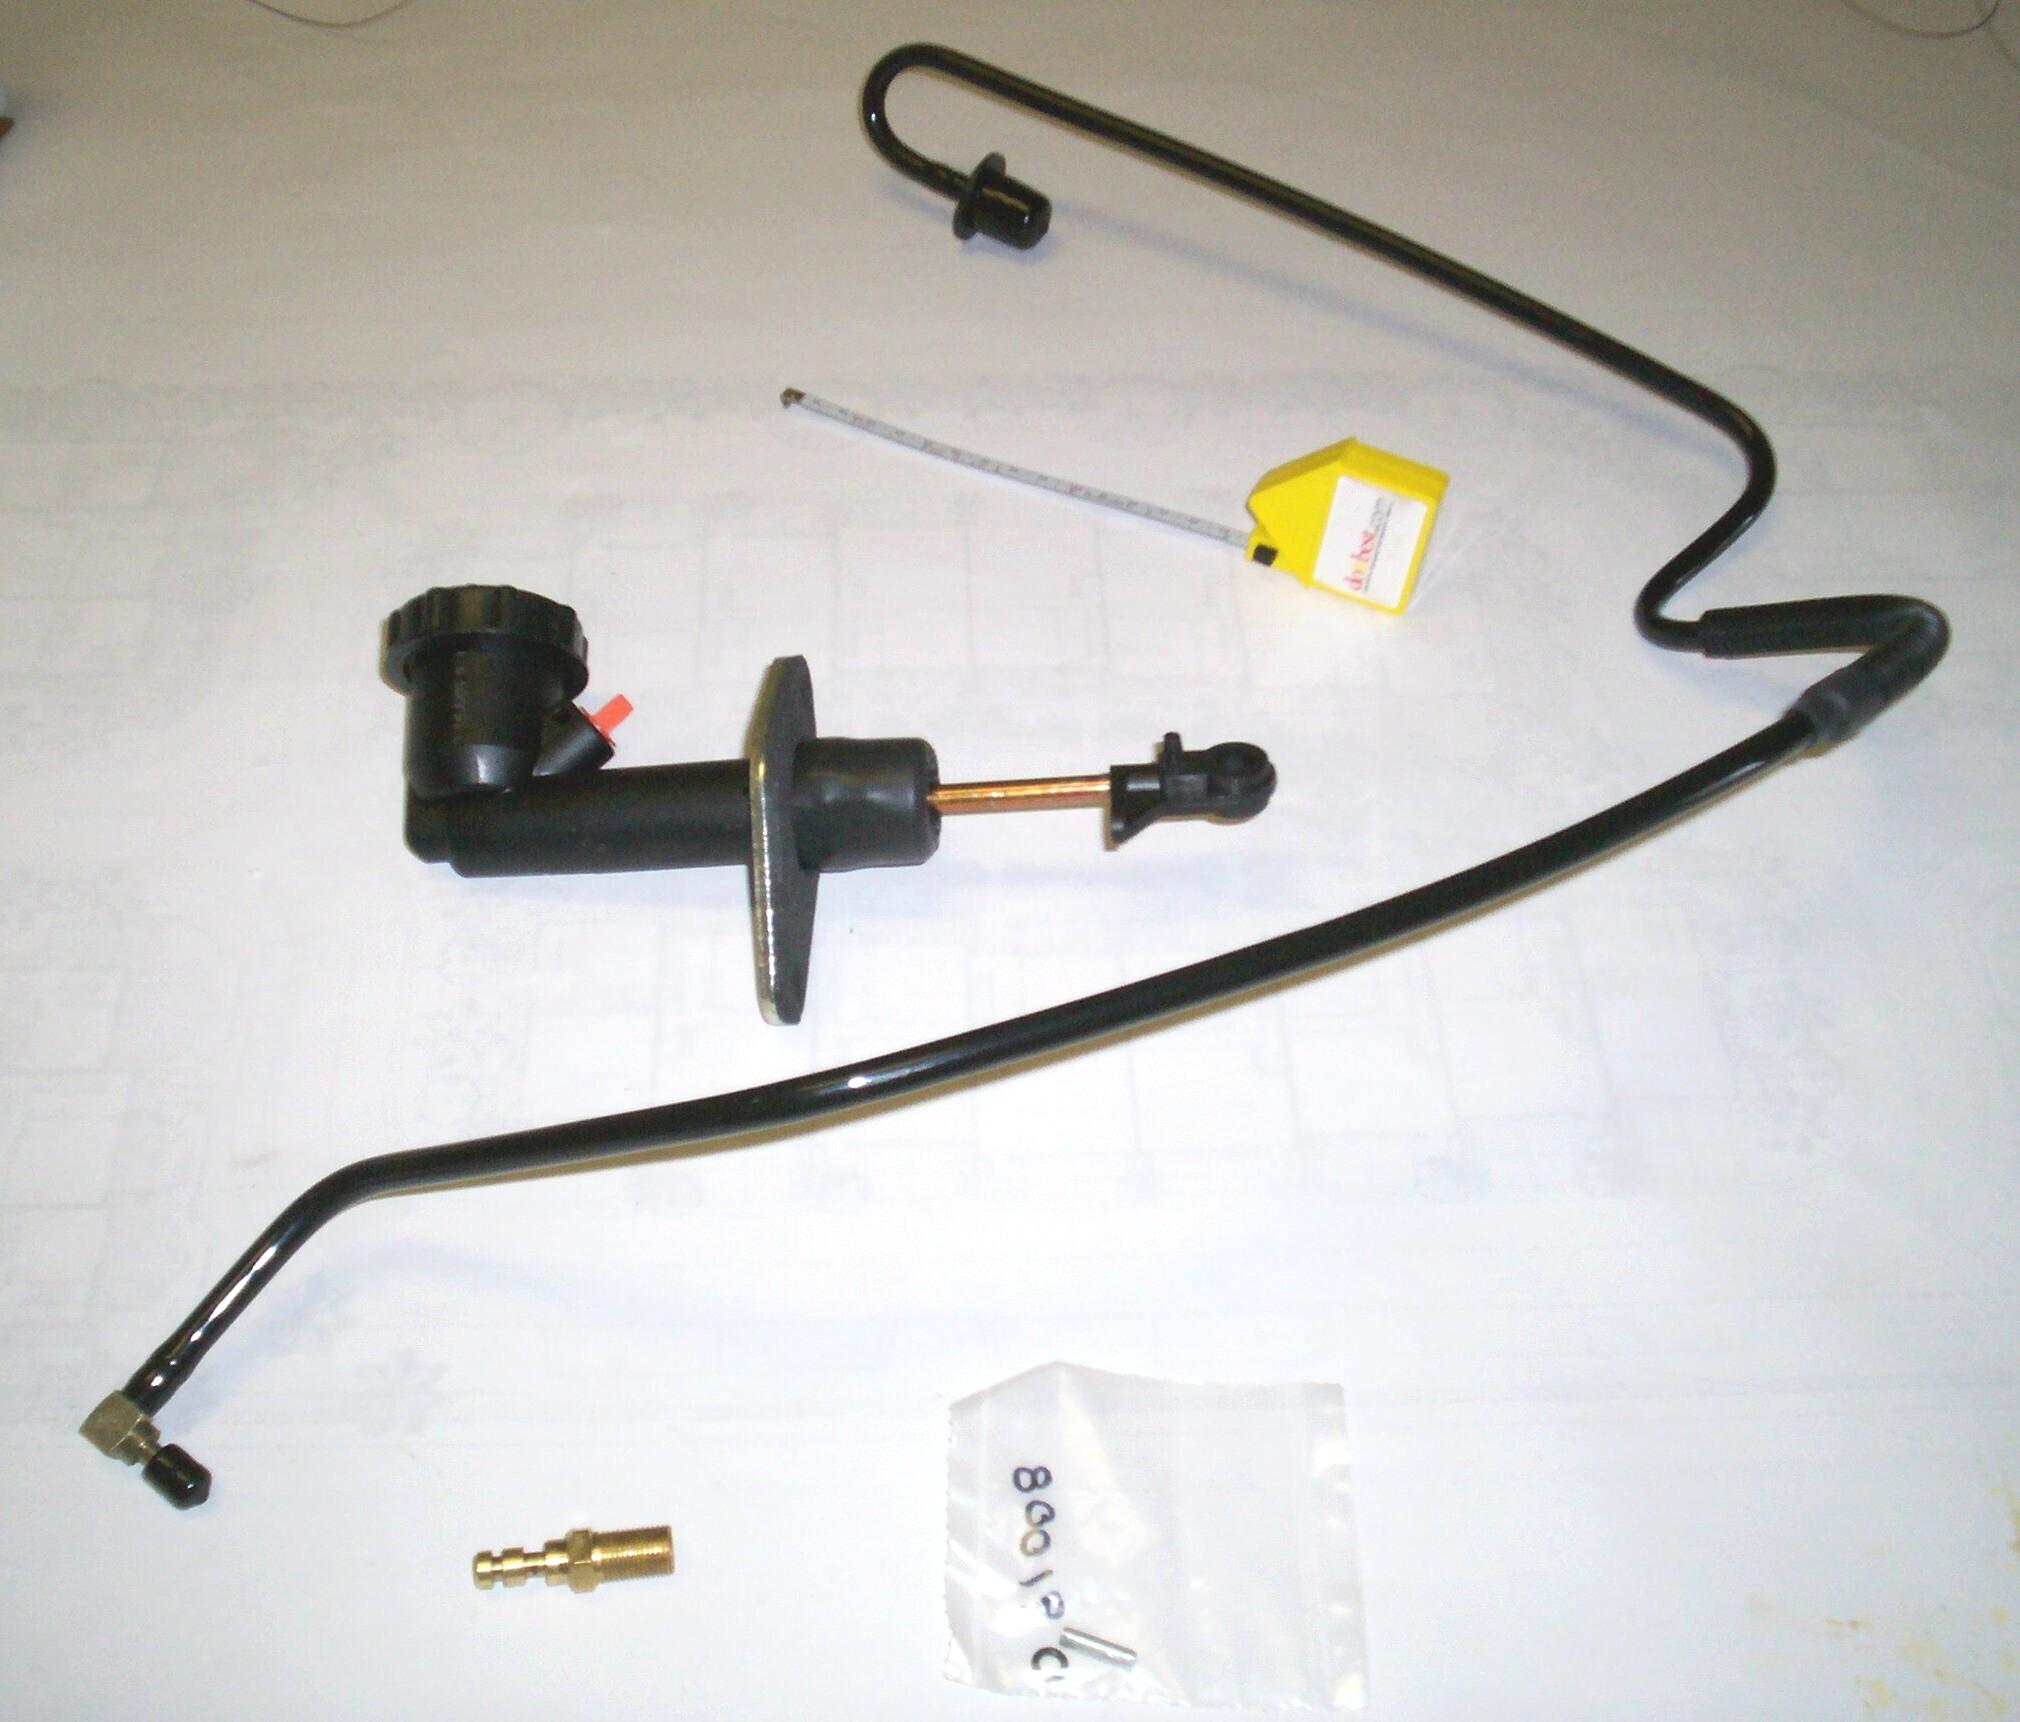
decided to fab my own clutch line I ordered a backup master cylinder
from Quadratec
just in case I buggered the old one trying to make things work out
(also to get a new o-ring and determine how this fitting worked). What
made the flared tubing solution possible was a Hydraulic
clutch line adapter fitting (#HCA-2) from Novak Conversions.
It's the brass fitting on the lower left above. From the description on
Novak's website:
April
10th 2007 Once I
decided to fab my own clutch line I ordered a backup master cylinder
from Quadratec
just in case I buggered the old one trying to make things work out
(also to get a new o-ring and determine how this fitting worked). What
made the flared tubing solution possible was a Hydraulic
clutch line adapter fitting (#HCA-2) from Novak Conversions.
It's the brass fitting on the lower left above. From the description on
Novak's website:
These fittings each feature a male 1/4" DOT threaded ends so that the installer can use or make standard hydraulic lines or hoses for the particular situation. The tip inserts into your 1991-1995 Jeep YJ (and 1991-1996 Jeep XJ) or 1997-present Jeep TJ & XJ master cylinder using the factory style o-ring and retaining pin.
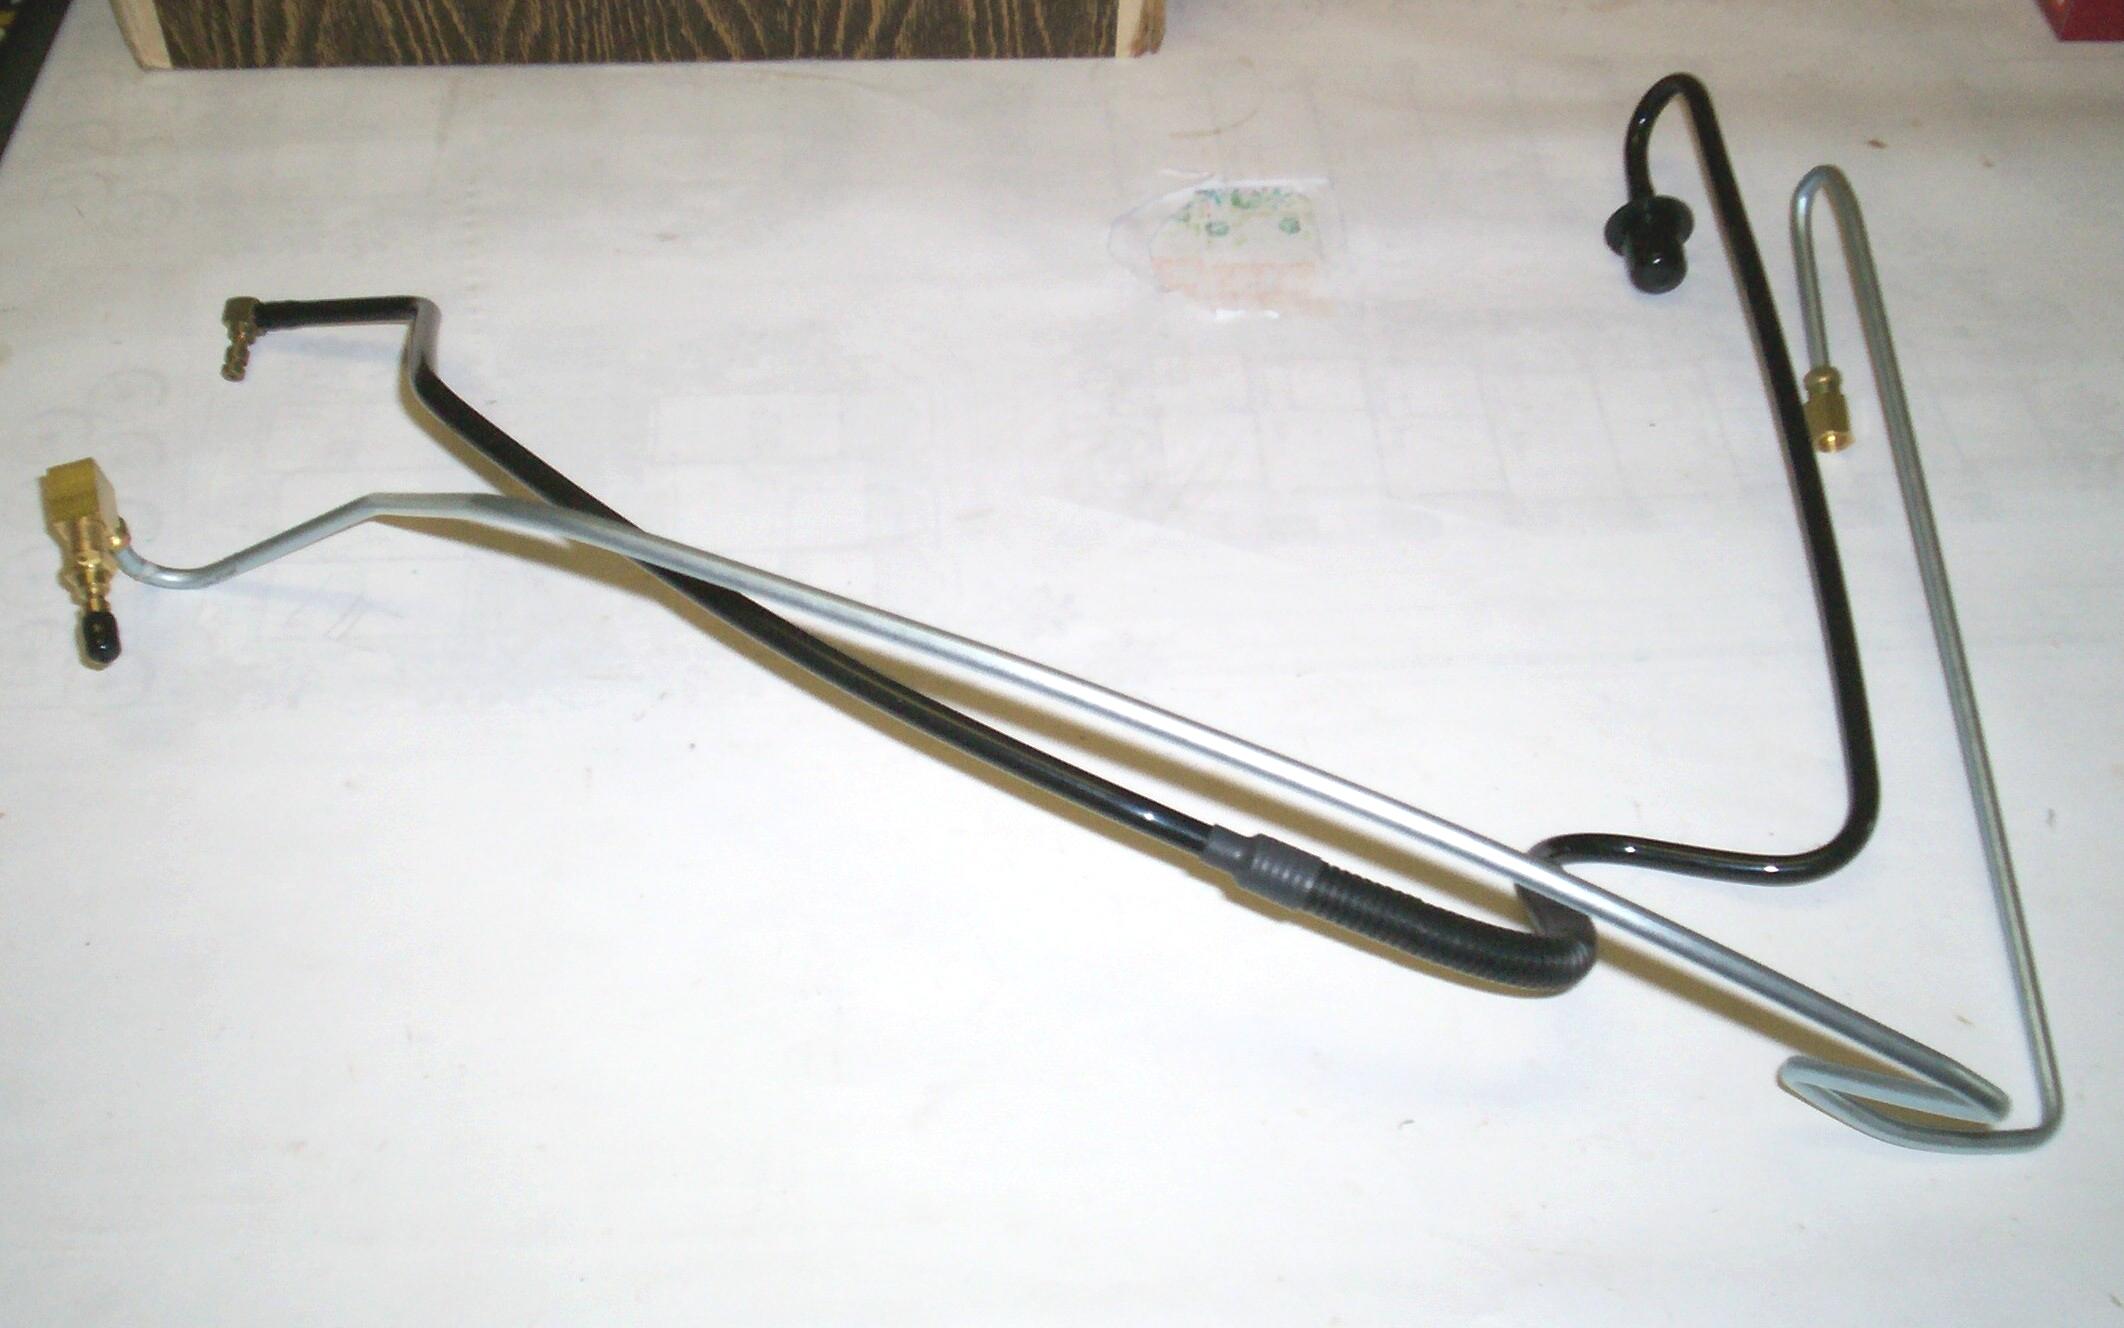
I measured the length of the stock plastic clutch line (48") and sent off to LMC Truck for a stock length of 1/4" steel line with flare fittings already installed at both ends (51"). I also ordered a couple of unions for good measure.
 April
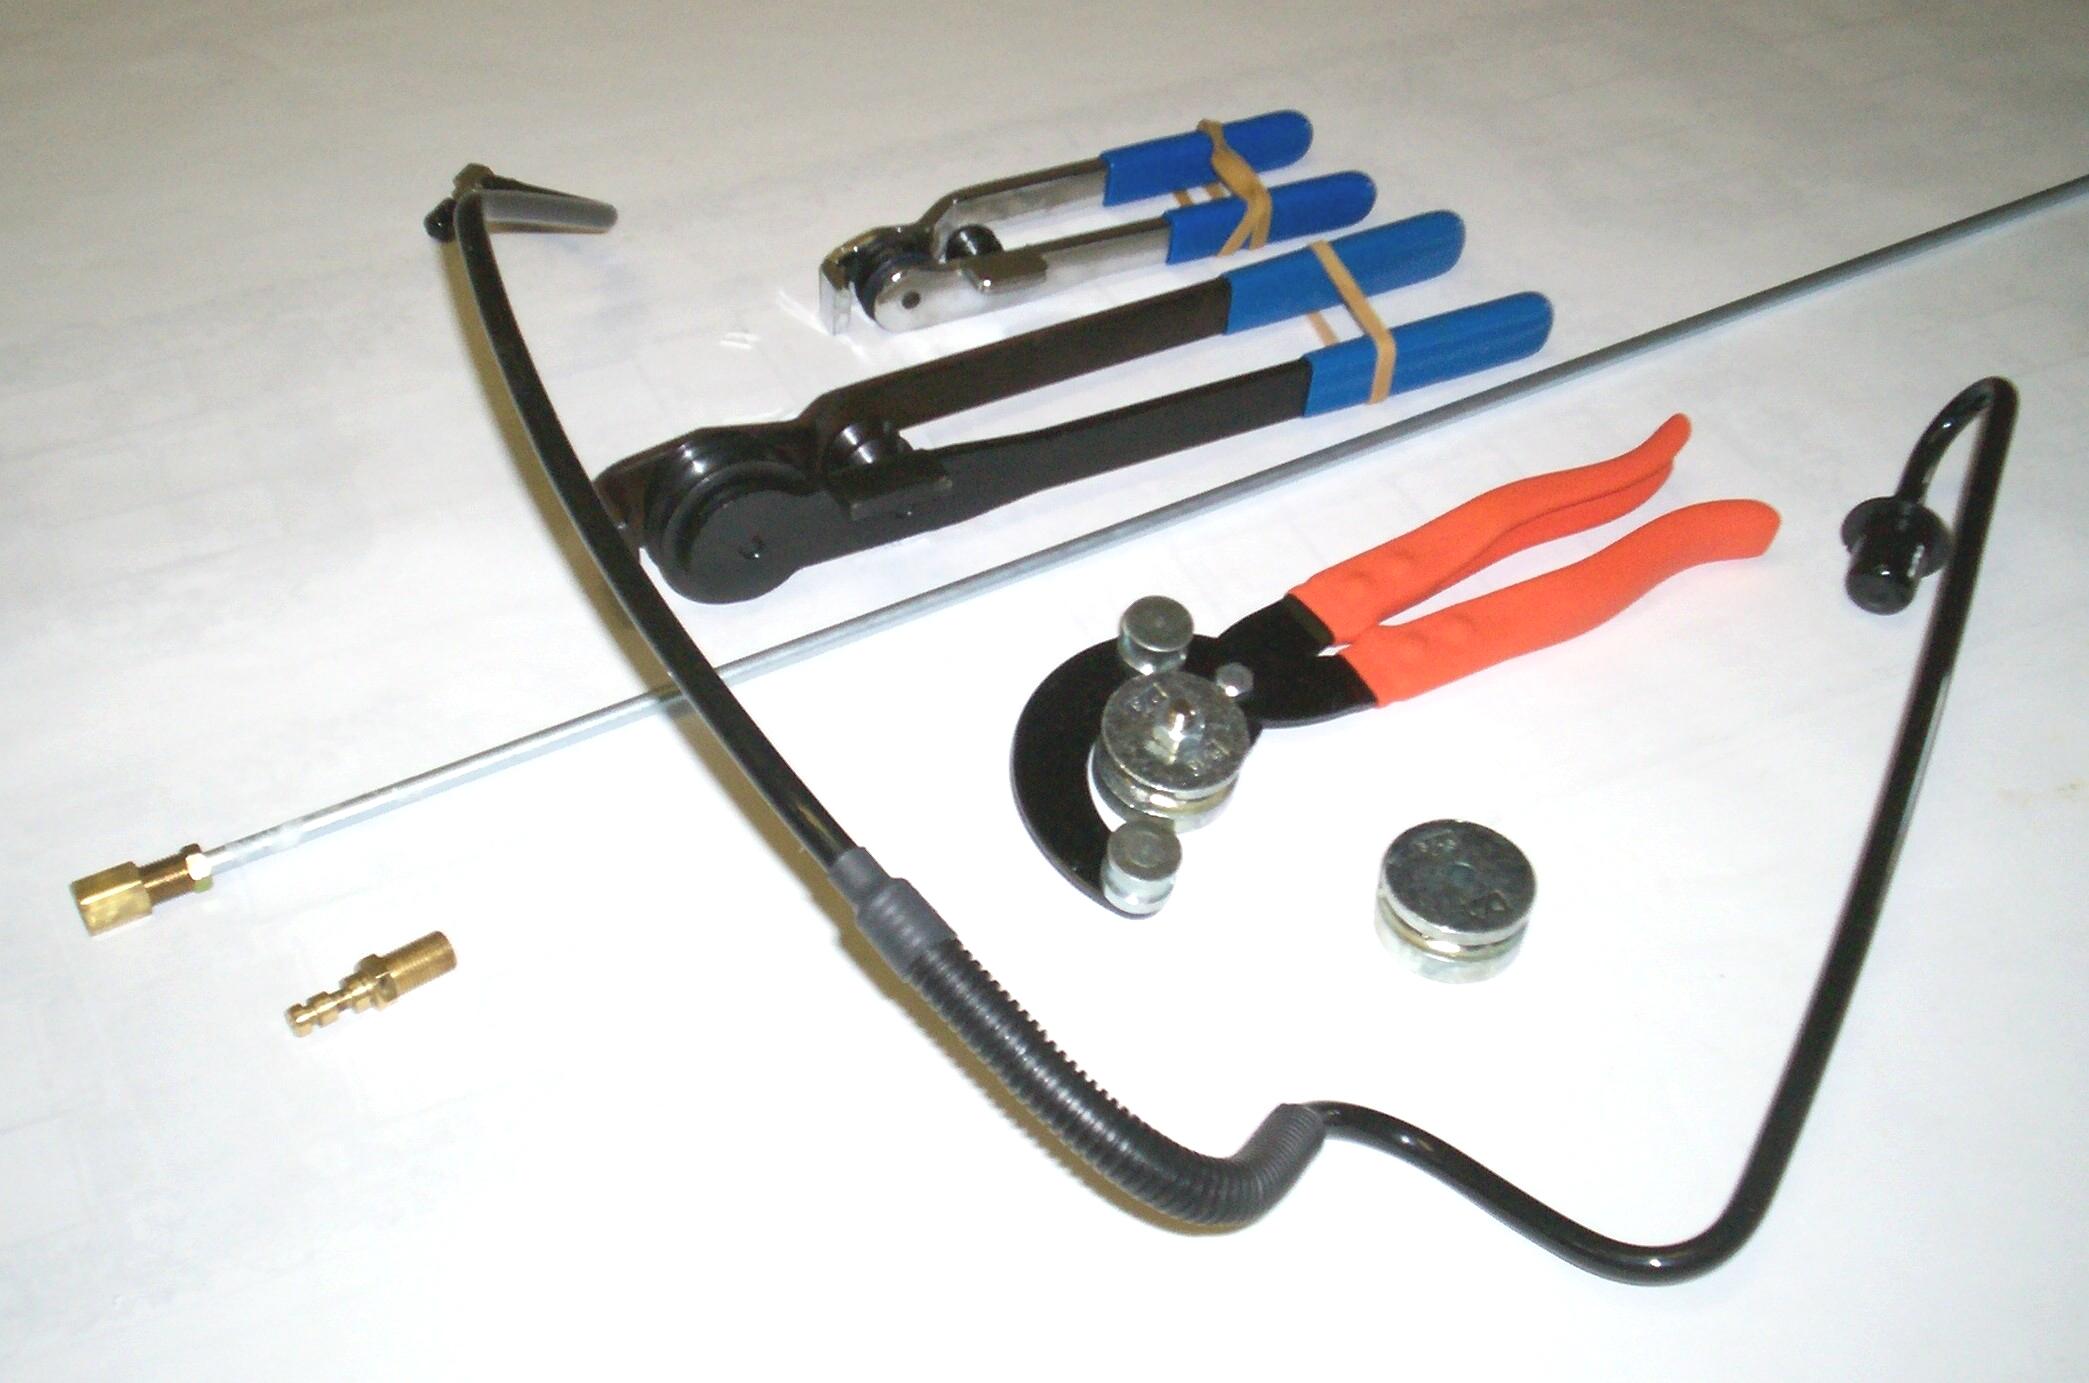
29th 2007 Got my length
of 1/4" tubing with flared fittings and unions from LMC. Brought my
tubing tools down from the warehouse and set about figuring out how the
bending tools work. Two of the tools have a tab on them that looks made
for a table vise so I lugged the vise in from the shed and c-clamped it
to the workstation where I was set up. The first curve will have to be
the tightest I can make to clear the firewall.
April
29th 2007 Got my length
of 1/4" tubing with flared fittings and unions from LMC. Brought my
tubing tools down from the warehouse and set about figuring out how the
bending tools work. Two of the tools have a tab on them that looks made
for a table vise so I lugged the vise in from the shed and c-clamped it
to the workstation where I was set up. The first curve will have to be
the tightest I can make to clear the firewall.
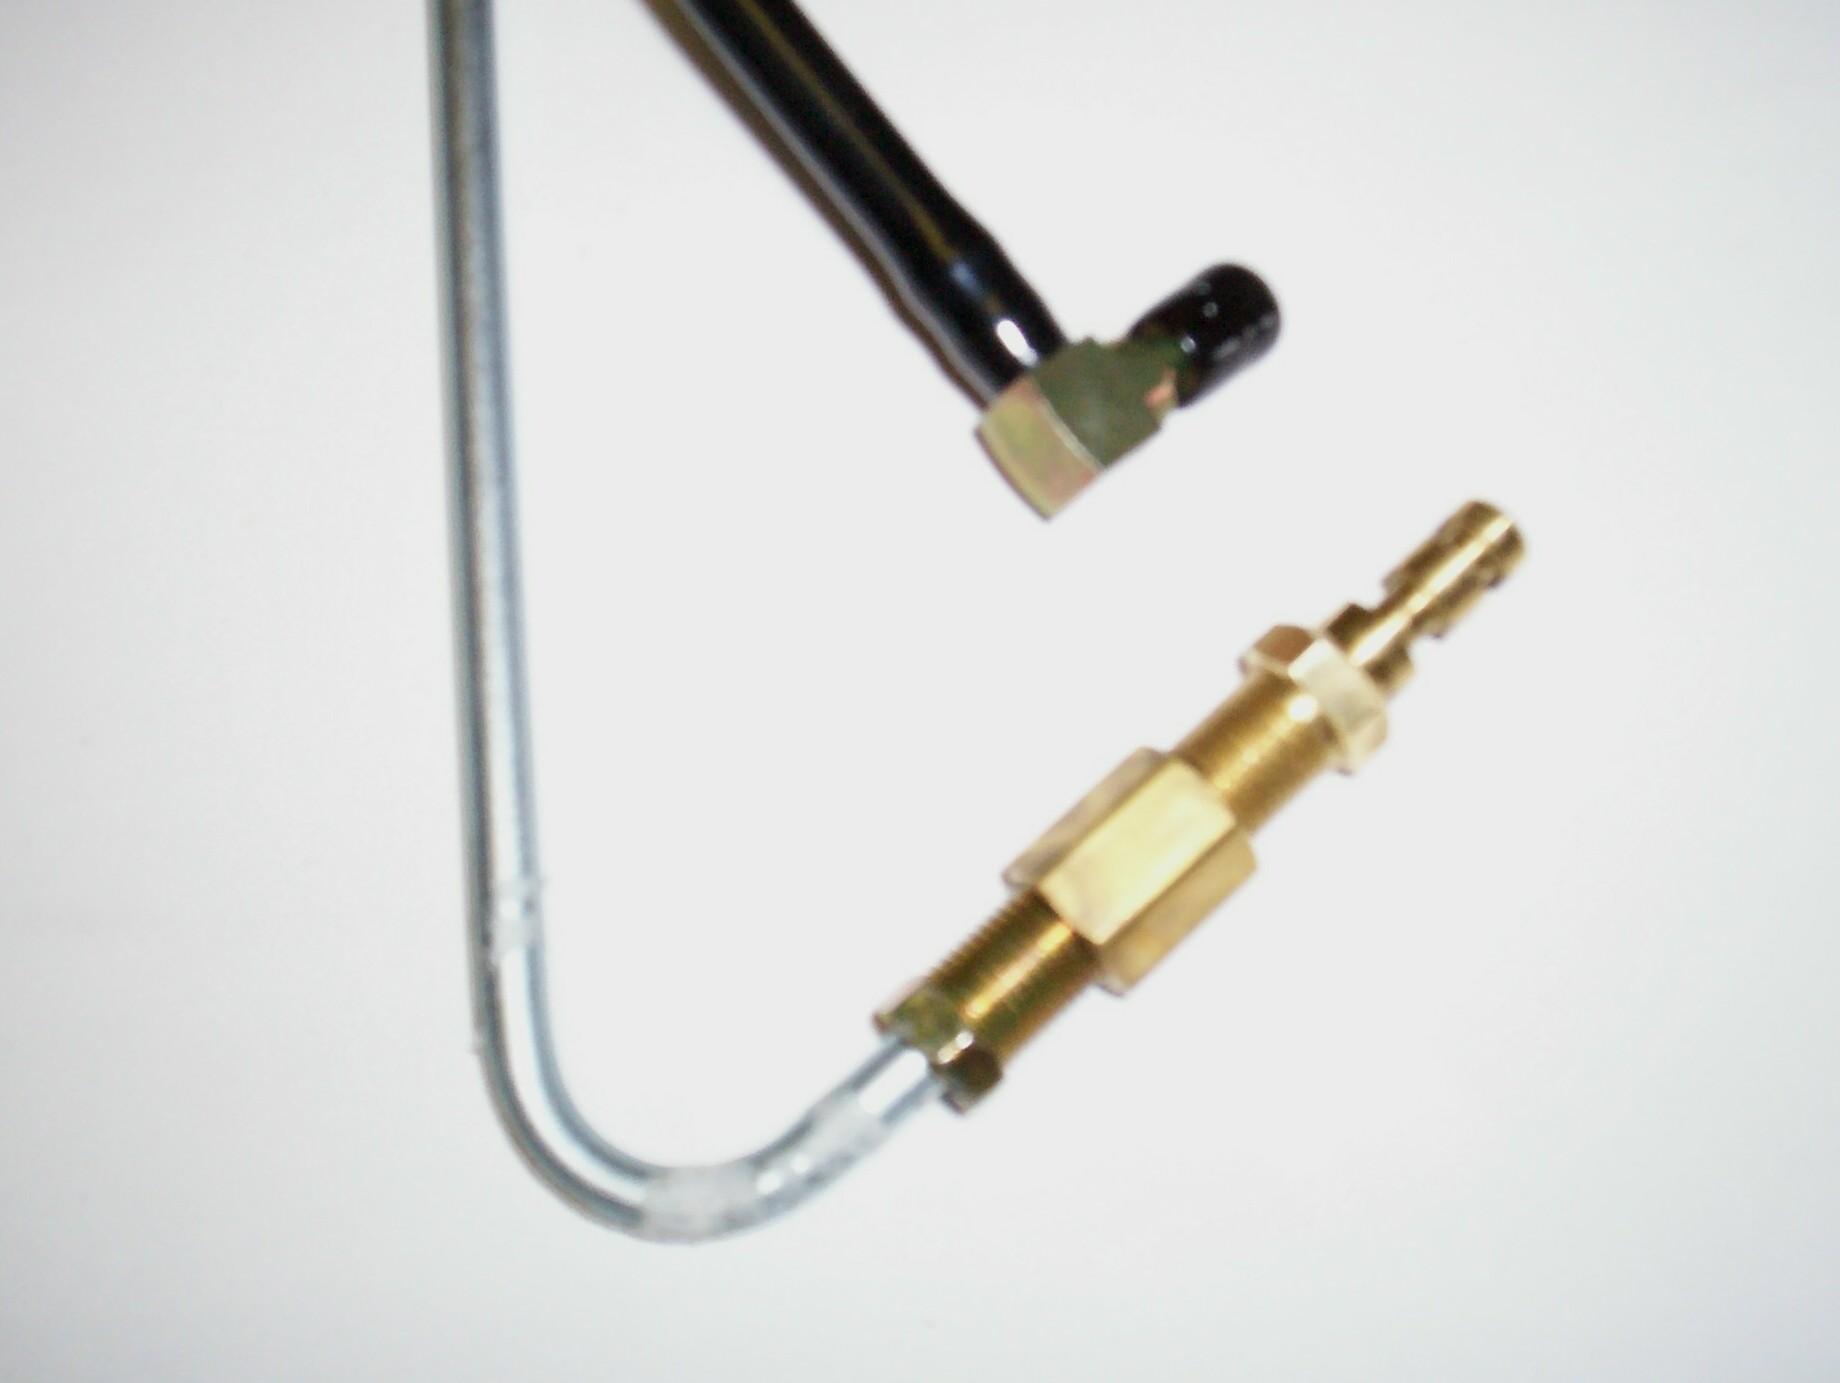 Made
the curve and took the tubing out to Renegade to have a look-see. No
good. The fittings and the union are too long. If I'm going to make
this work, I need some kind of ninety degree angle block. Time to
search the McMaster-Carr catalog if I'm gonna pull this idea out of the
pooper. At least I know how the bender works now and am happy with how
nice the bends are. If I can get past this clearance problem, I'll be
in like flint.
Made
the curve and took the tubing out to Renegade to have a look-see. No
good. The fittings and the union are too long. If I'm going to make
this work, I need some kind of ninety degree angle block. Time to
search the McMaster-Carr catalog if I'm gonna pull this idea out of the
pooper. At least I know how the bender works now and am happy with how
nice the bends are. If I can get past this clearance problem, I'll be
in like flint.
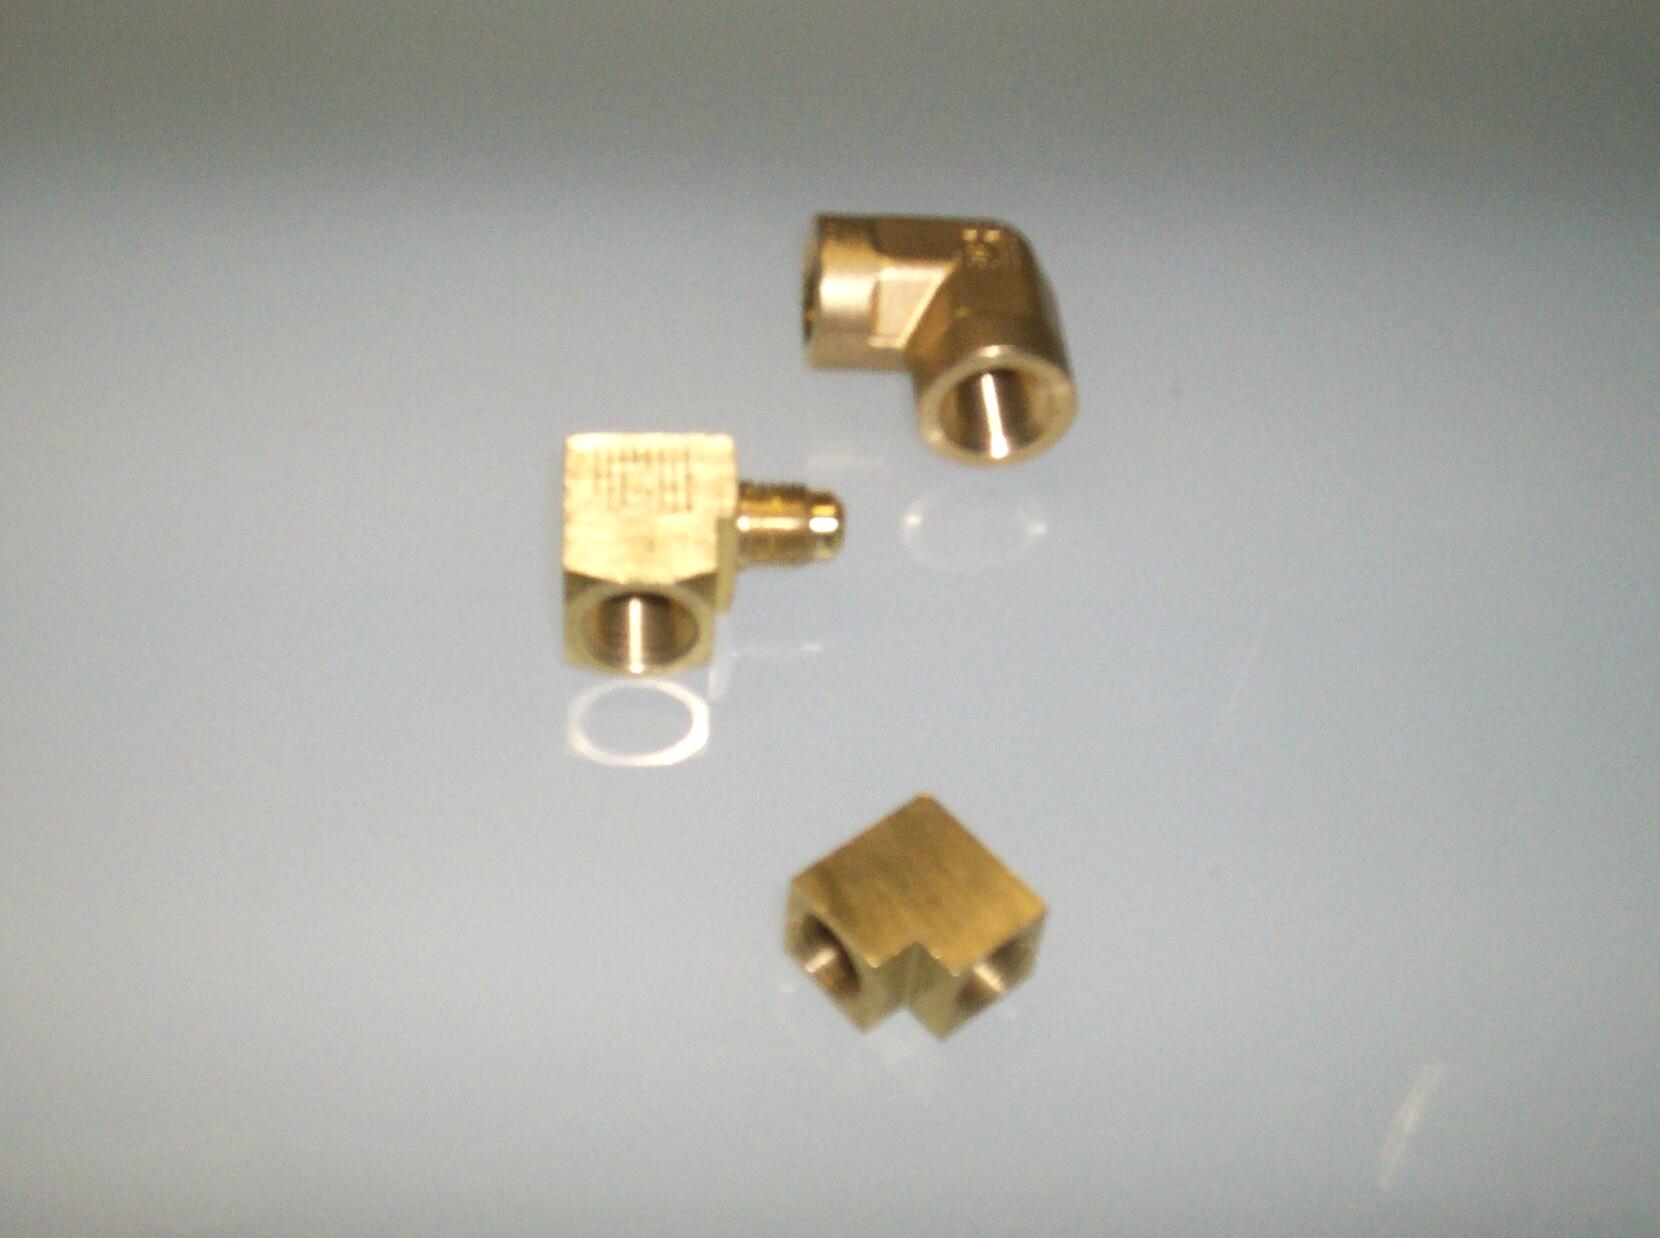
April 30th 2007 Sweet Jesus H Gonzales! The simplist things turn out to be so fracin' difficult sometimes. Ordered a 1/4" brass female/female elbow online at McMaster-Carr but had the sinking gut feeling that the threads will be wrong after some more research. Went to the Lawson website and found a 1/4" female to flare elbow and tried to order that. Had to register and sign-in. Did that and still could not checkout my cart! Gave up and five minutes later got a call from a rep who read my registration process. I ordered the item from her but I still think the threads on the female portion will be wrong. All I want is a 90 degree brass elbow with female 7/16"-24 threads at both openings. Why is that so hard. Went to the Fastenal website where I think I found the elusive elbow fitting. My web browser crashed three times on the checkout process. ~!@#$%^ I know when I'm being beaten like a rented mule. I'm giving up for today.
 May
7th 2007 My problem
here is twofold. I don't know the correct terminology for the connector
I need and I'm in too big of a hurry to wait until I do know. As a
result, I have educated myself at a cost of about forty bucks and I
have some odd fittings that the executor of my estate will probably
drop off at goodwill someday. My first two purchases from McMaster-Carr
and Lawson respectively were dead ends. The third from Fastenal was the
item I was looking for from the beginning. It is described as a "1/4"
90 Deg Union Elbow Brass Inverted Flare Fitting" on the
invoice. As luck would have it, they were also the slowest shippers and
didn't arrive in time for the weekend's work.
May
7th 2007 My problem
here is twofold. I don't know the correct terminology for the connector
I need and I'm in too big of a hurry to wait until I do know. As a
result, I have educated myself at a cost of about forty bucks and I
have some odd fittings that the executor of my estate will probably
drop off at goodwill someday. My first two purchases from McMaster-Carr
and Lawson respectively were dead ends. The third from Fastenal was the
item I was looking for from the beginning. It is described as a "1/4"
90 Deg Union Elbow Brass Inverted Flare Fitting" on the
invoice. As luck would have it, they were also the slowest shippers and
didn't arrive in time for the weekend's work.
 May
12th 2007 I finally
have the correct elbow now so, after some work on BillyBob and BettyLou, I set up
to finish bending the clutch line. The very first bend I did a few
weeks ago was perfect but I was not having the same luck today. I
couldn't figure it out but I was getting sharp bends and the tubing was
ovaling out. After I finished up and my subconcious had some pondering
time, I realized that the first bend I did had the end of the tubing
restricted from movement because the fitting was there and could not be
pulled thru the bender tool. All of today's bends did not have that
restriction. I'll have to find some way to clamp the tubing in the
future when I use this tool again.
May
12th 2007 I finally
have the correct elbow now so, after some work on BillyBob and BettyLou, I set up
to finish bending the clutch line. The very first bend I did a few
weeks ago was perfect but I was not having the same luck today. I
couldn't figure it out but I was getting sharp bends and the tubing was
ovaling out. After I finished up and my subconcious had some pondering
time, I realized that the first bend I did had the end of the tubing
restricted from movement because the fitting was there and could not be
pulled thru the bender tool. All of today's bends did not have that
restriction. I'll have to find some way to clamp the tubing in the
future when I use this tool again.
The working area where the clutch master cylinder sits on the firewall is tight and I couldn't see how to get the retaining pin for the special o-ring fitting out. The Haynes manual was no help in this task. Decided, then and there, to install the new master cylinder. Everything in the hydraulic system will be new now. Undid the radiator support strut and pivoted it out of the way, then moved the wiring harness aside. Pulled the spring clip (cotter pin) off the shaft under the dash and disconnected the pedal rod. Removed the two hex nuts holding the master cylinder to the firewall. Took awhile and some choice words due to the restricted wrenching area.
May 13th 2007 Decided the best approach wuz to put the elbow on the Novak o-ring fitting first. Couldn't find any info on installing the o-ring fitting into the master cylinder so, I winged it. Soaked the new o-ring that came with the new master cylinder in brake fluid for a few minutes, then installed it on the bottom recess of the Novak fitting. Put the master cylinder in a vise to hold it and inserted the fitting, then drove the new retaining pin that came with the master cylinder in with a brass hammer. I guess it's OK. It swivels pretty easy but so does the old one I took out yesterday.
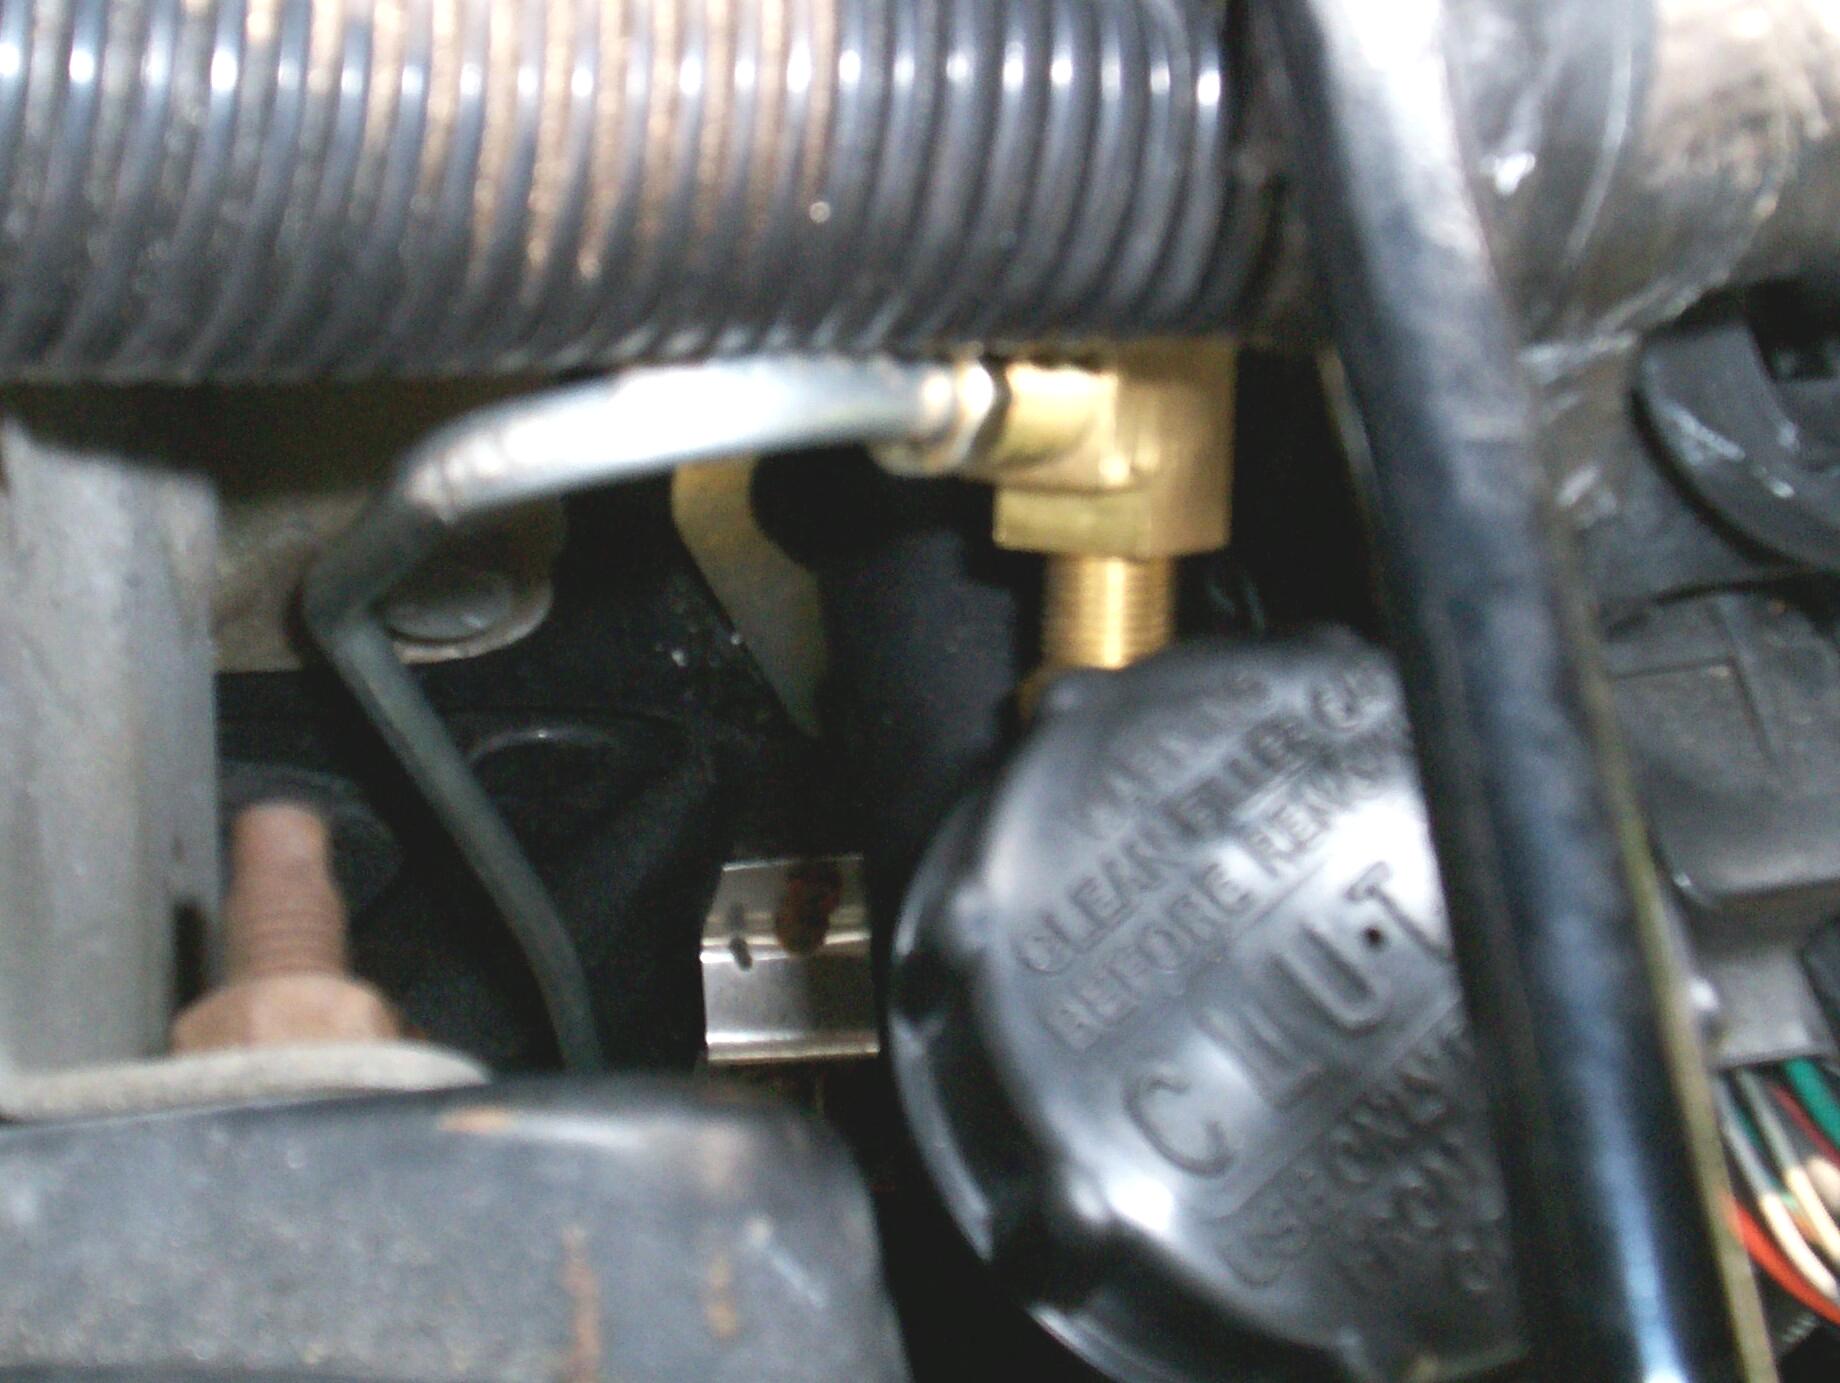 Fished
the new fabbed hydraulic line in next. I found out the hard way that it
goes in easier from the bottom. Bolted the new master cylinder to the
firewall loosely so I still have some fudge room to jocky the hydraulic
line into the elbow fitting. After I got the fitting snugged up, the
master cylinder bolts were tightened, with the same cussin' that I used
taking the old one out yesterday.
Fished
the new fabbed hydraulic line in next. I found out the hard way that it
goes in easier from the bottom. Bolted the new master cylinder to the
firewall loosely so I still have some fudge room to jocky the hydraulic
line into the elbow fitting. After I got the fitting snugged up, the
master cylinder bolts were tightened, with the same cussin' that I used
taking the old one out yesterday.
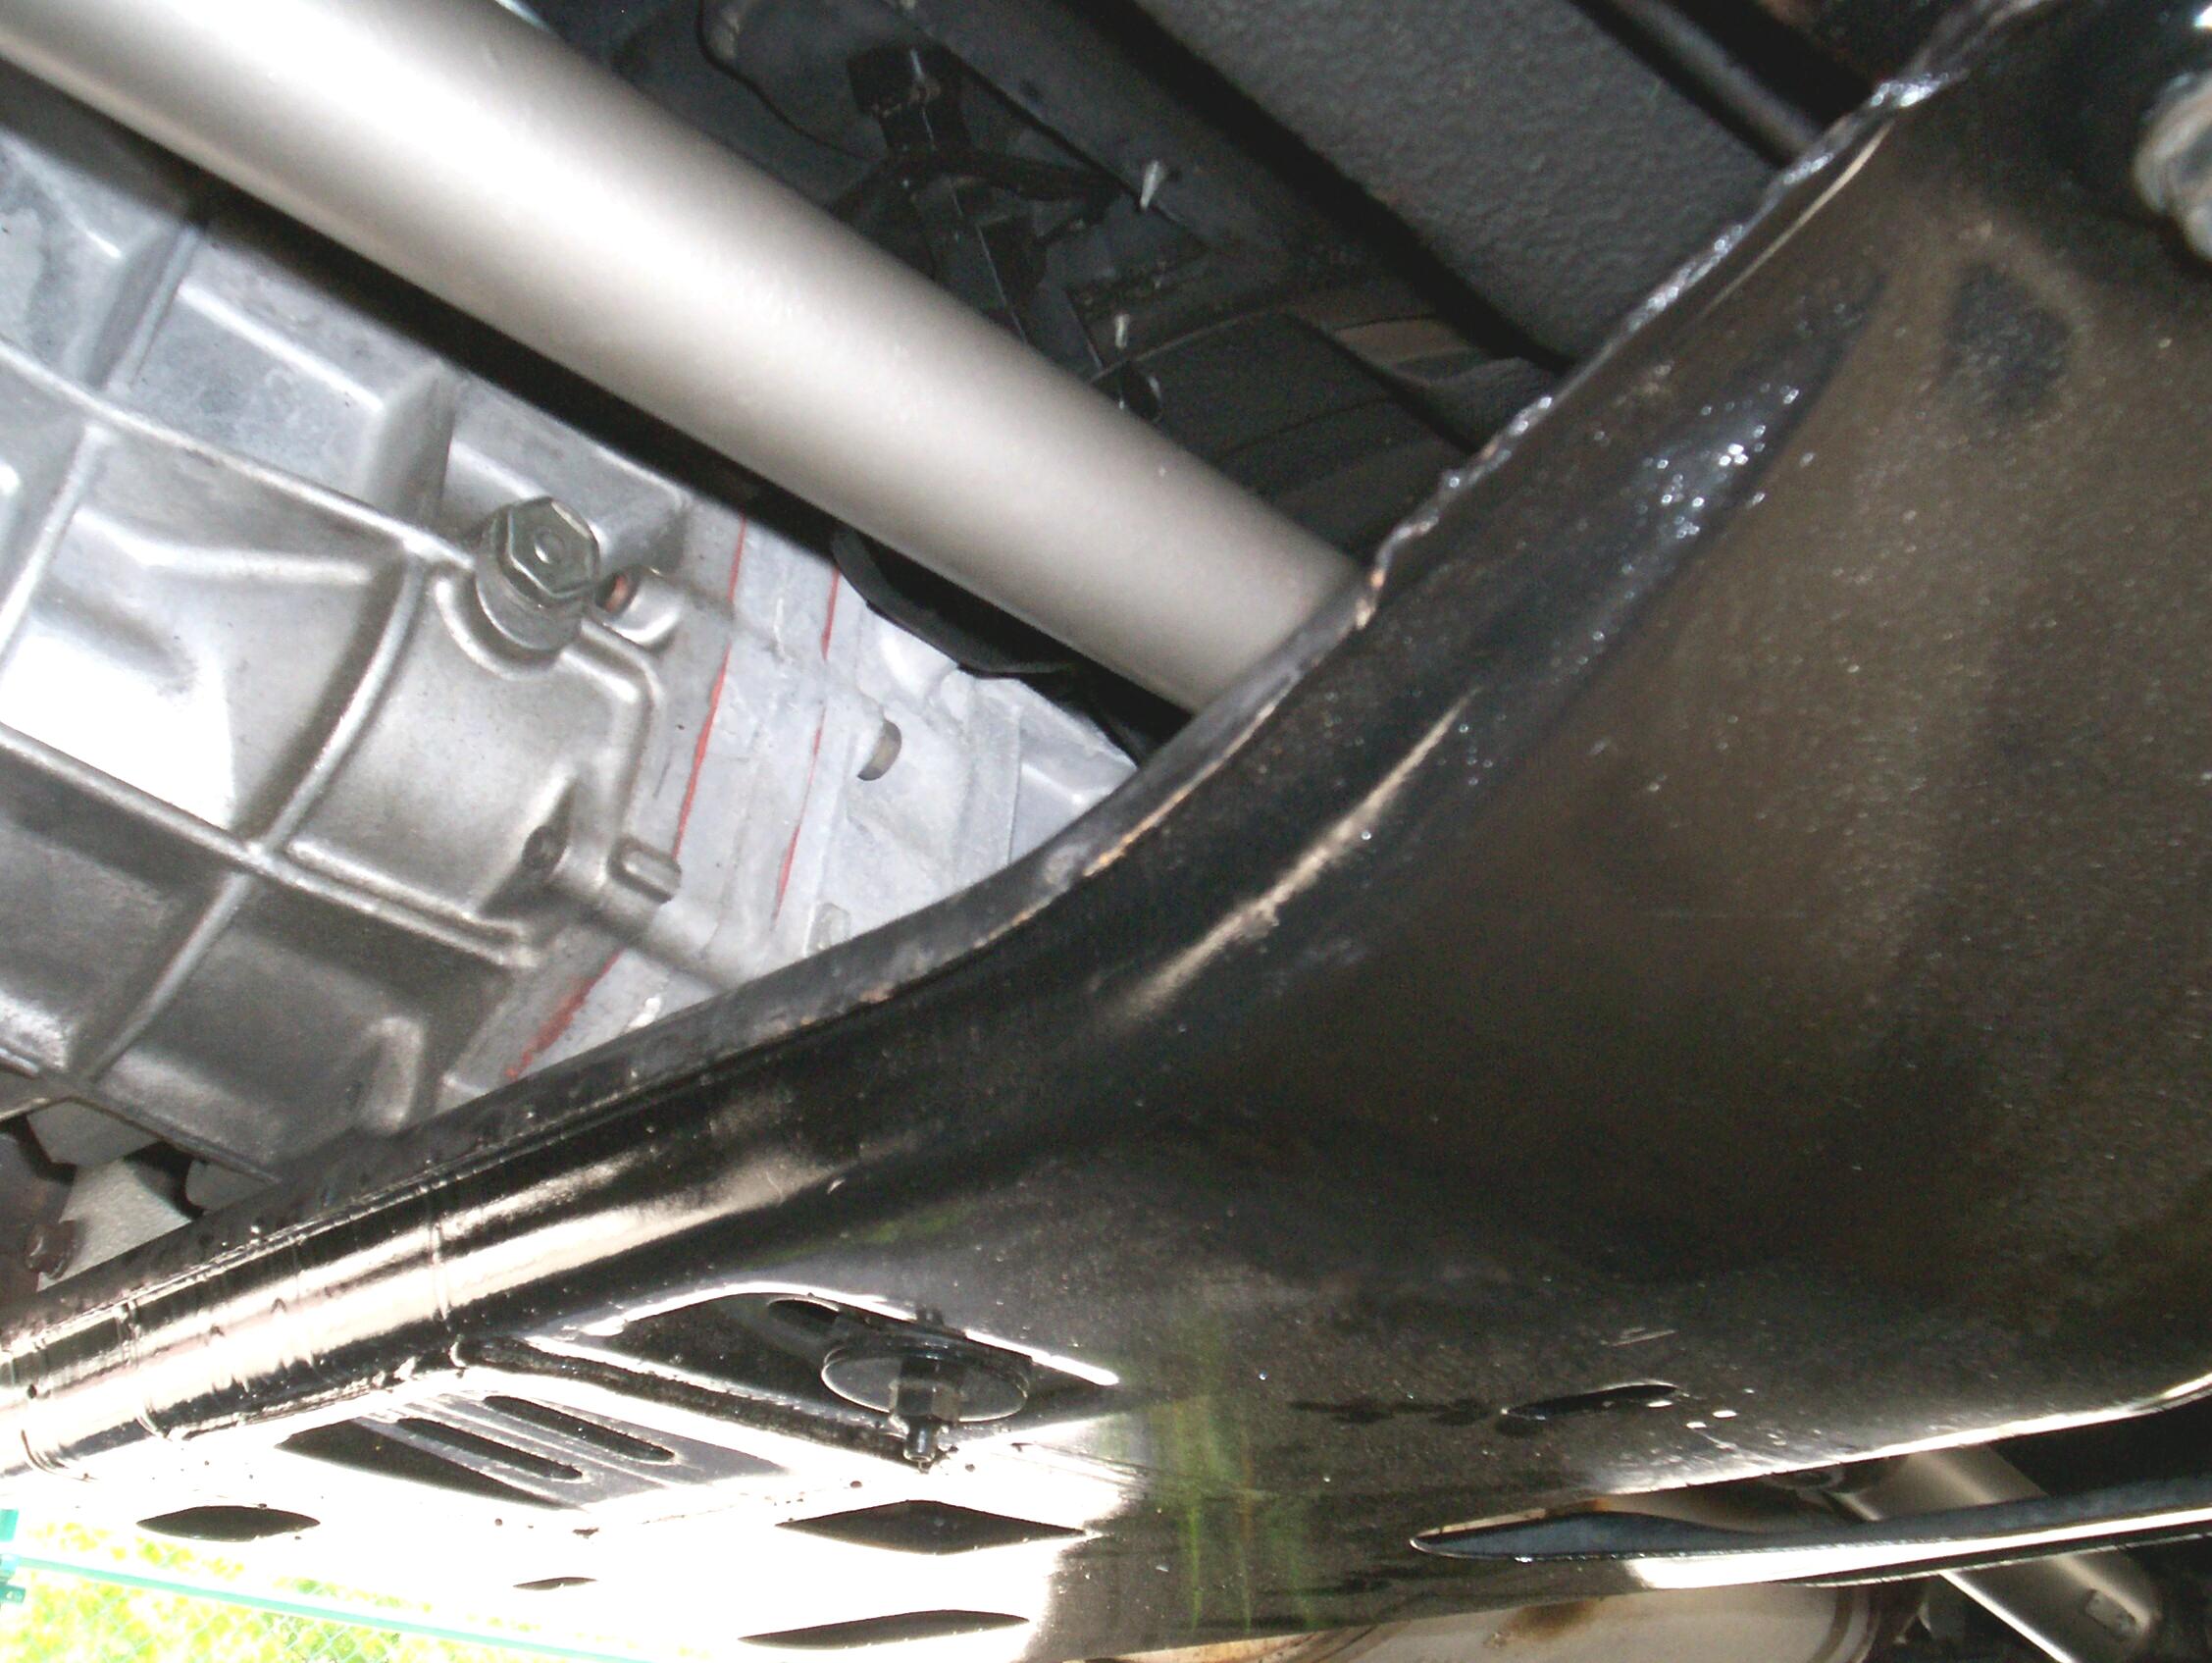
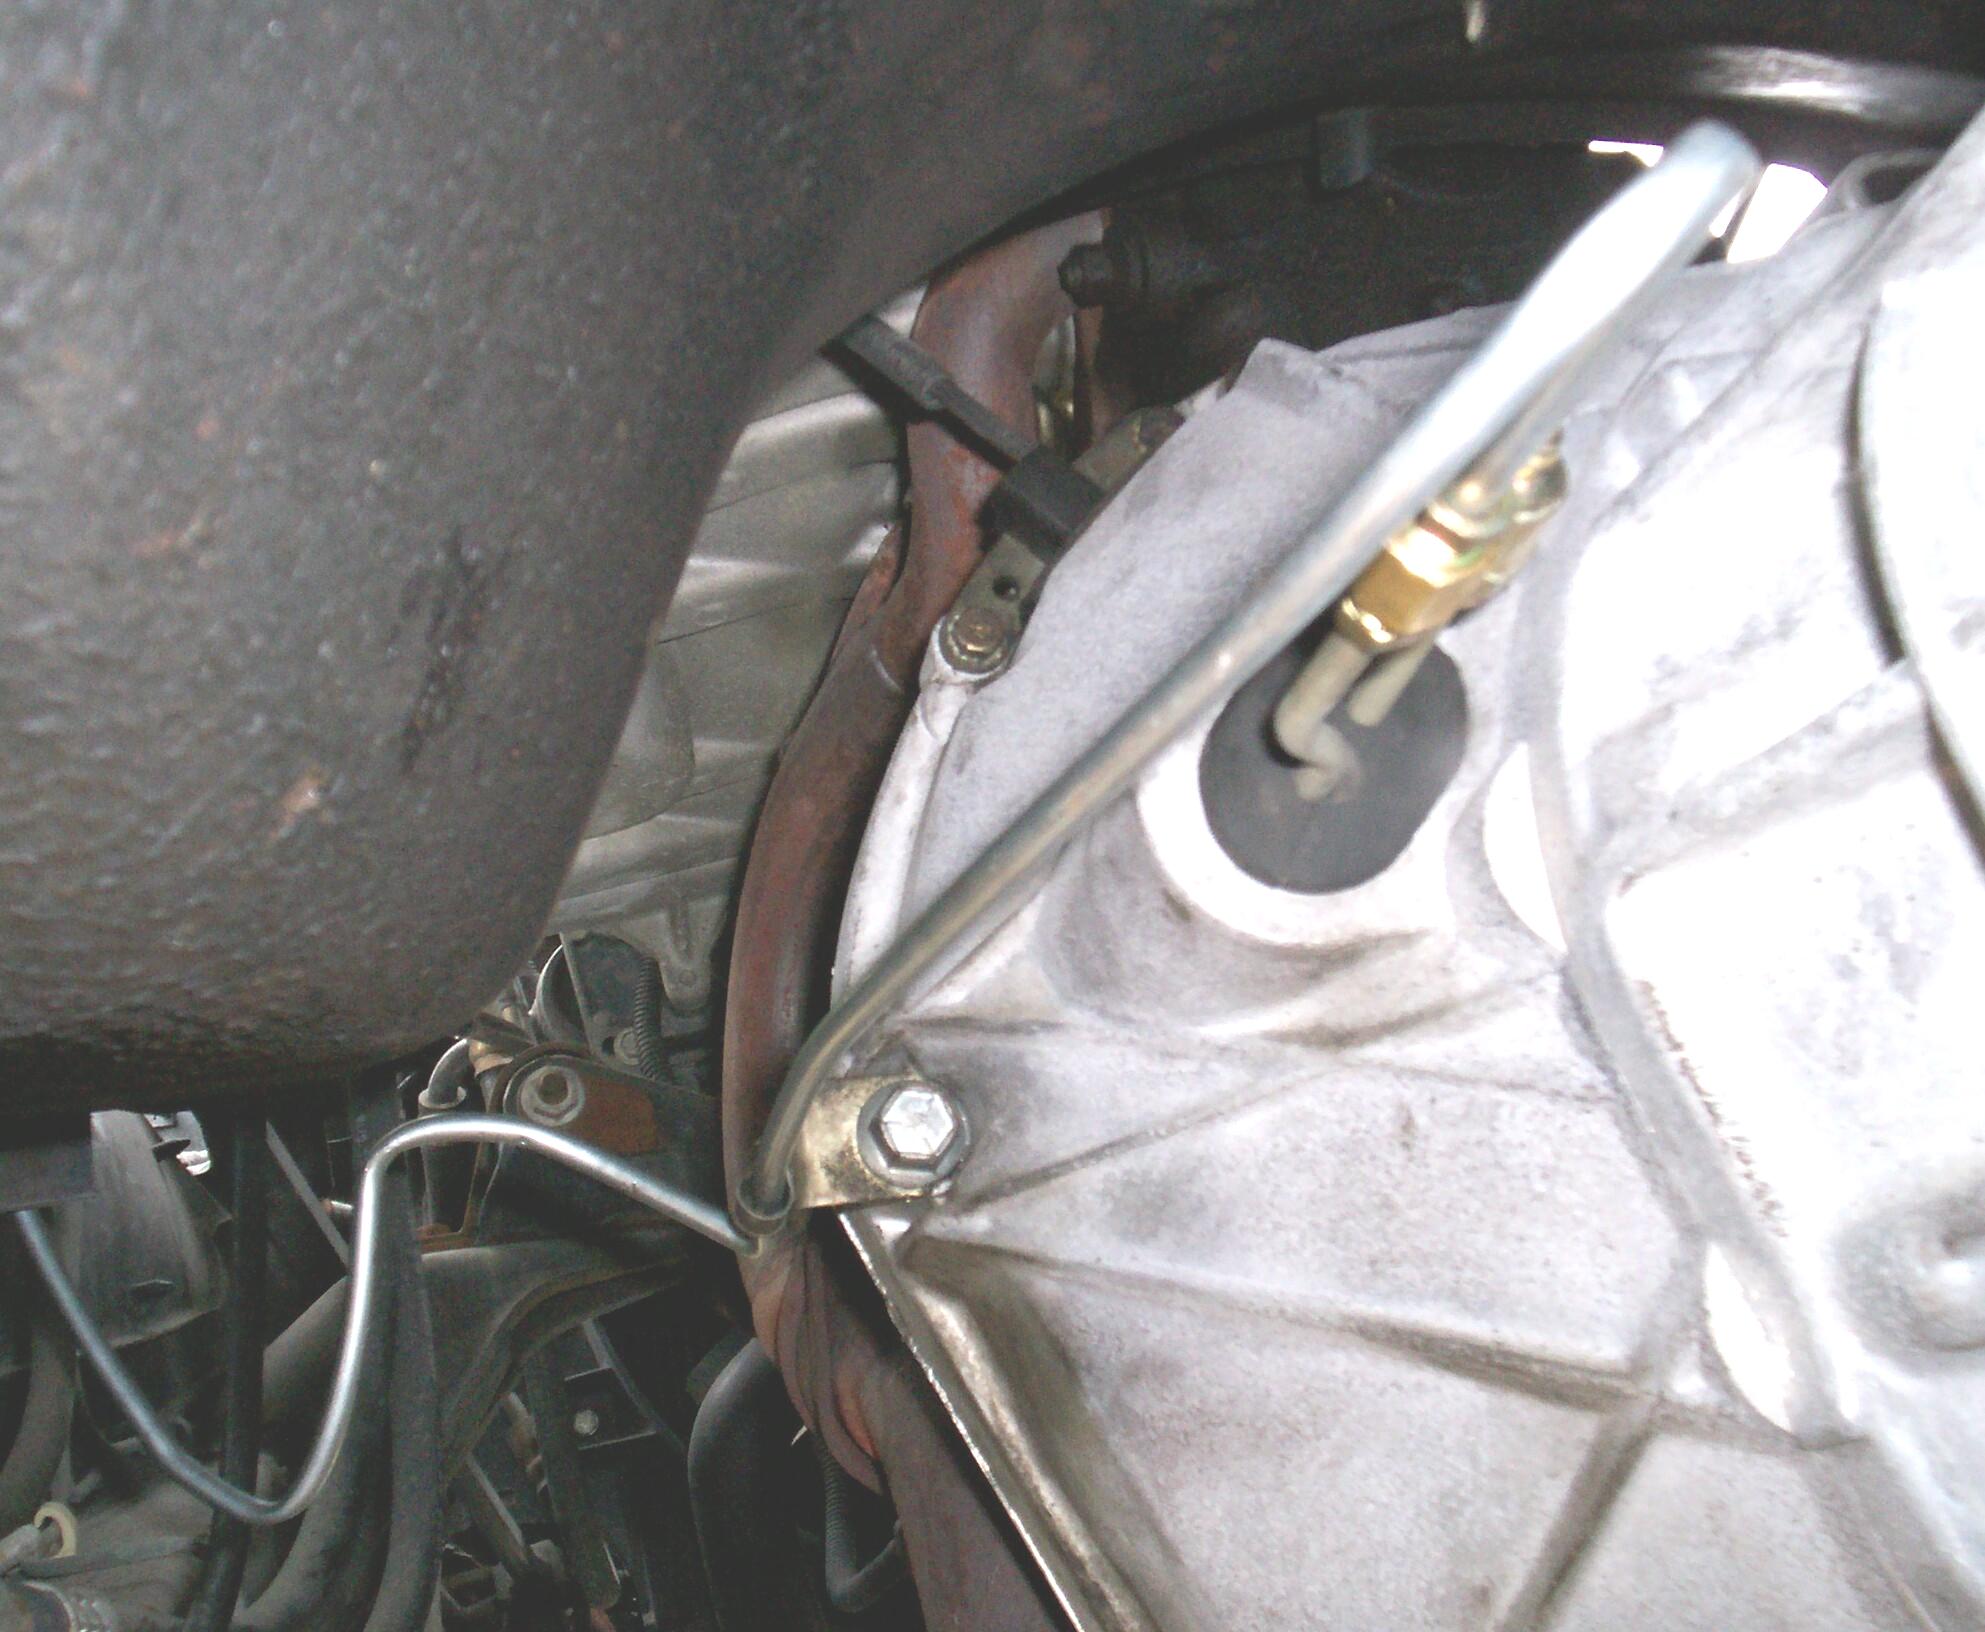 Hooked
up the other end of the new line at the bellhousing end with a standard
union. There are two clamp brackets that I took off the old line. They
anchor the hydraulic line to the bellhousing and the lower firewall. It
took some additional in-place bending to get the line next to the
anchors. OOPS! Two of the sharp bends got
compromised and started to flatten out. I got the flats undone but they
are still restricted a bit. I'll have to see how this whole assembly
works. I may be ordering another piece of tubing to bend.
Hooked
up the other end of the new line at the bellhousing end with a standard
union. There are two clamp brackets that I took off the old line. They
anchor the hydraulic line to the bellhousing and the lower firewall. It
took some additional in-place bending to get the line next to the
anchors. OOPS! Two of the sharp bends got
compromised and started to flatten out. I got the flats undone but they
are still restricted a bit. I'll have to see how this whole assembly
works. I may be ordering another piece of tubing to bend.
 May
28th 2007 It's
Decoration Day. Take a moment to relfect on memories of the fallen in
their service to our country. I've been goofin' off this weekend and
not getting much done. Did manage to drag the air compressor out and
put air in Renegade's almost flat passenger side rear tire. Continued
on by re-intalling the front driveshaft after replacing the universal
joint bearing cups that had missing roller bearings with new cups from
a replacement joint. Finally, the skidplate crossmember was jacked into
position and bolted into place. Transmission mount hex nuts were placed
too, all with threadlocker blue.
May
28th 2007 It's
Decoration Day. Take a moment to relfect on memories of the fallen in
their service to our country. I've been goofin' off this weekend and
not getting much done. Did manage to drag the air compressor out and
put air in Renegade's almost flat passenger side rear tire. Continued
on by re-intalling the front driveshaft after replacing the universal
joint bearing cups that had missing roller bearings with new cups from
a replacement joint. Finally, the skidplate crossmember was jacked into
position and bolted into place. Transmission mount hex nuts were placed
too, all with threadlocker blue.
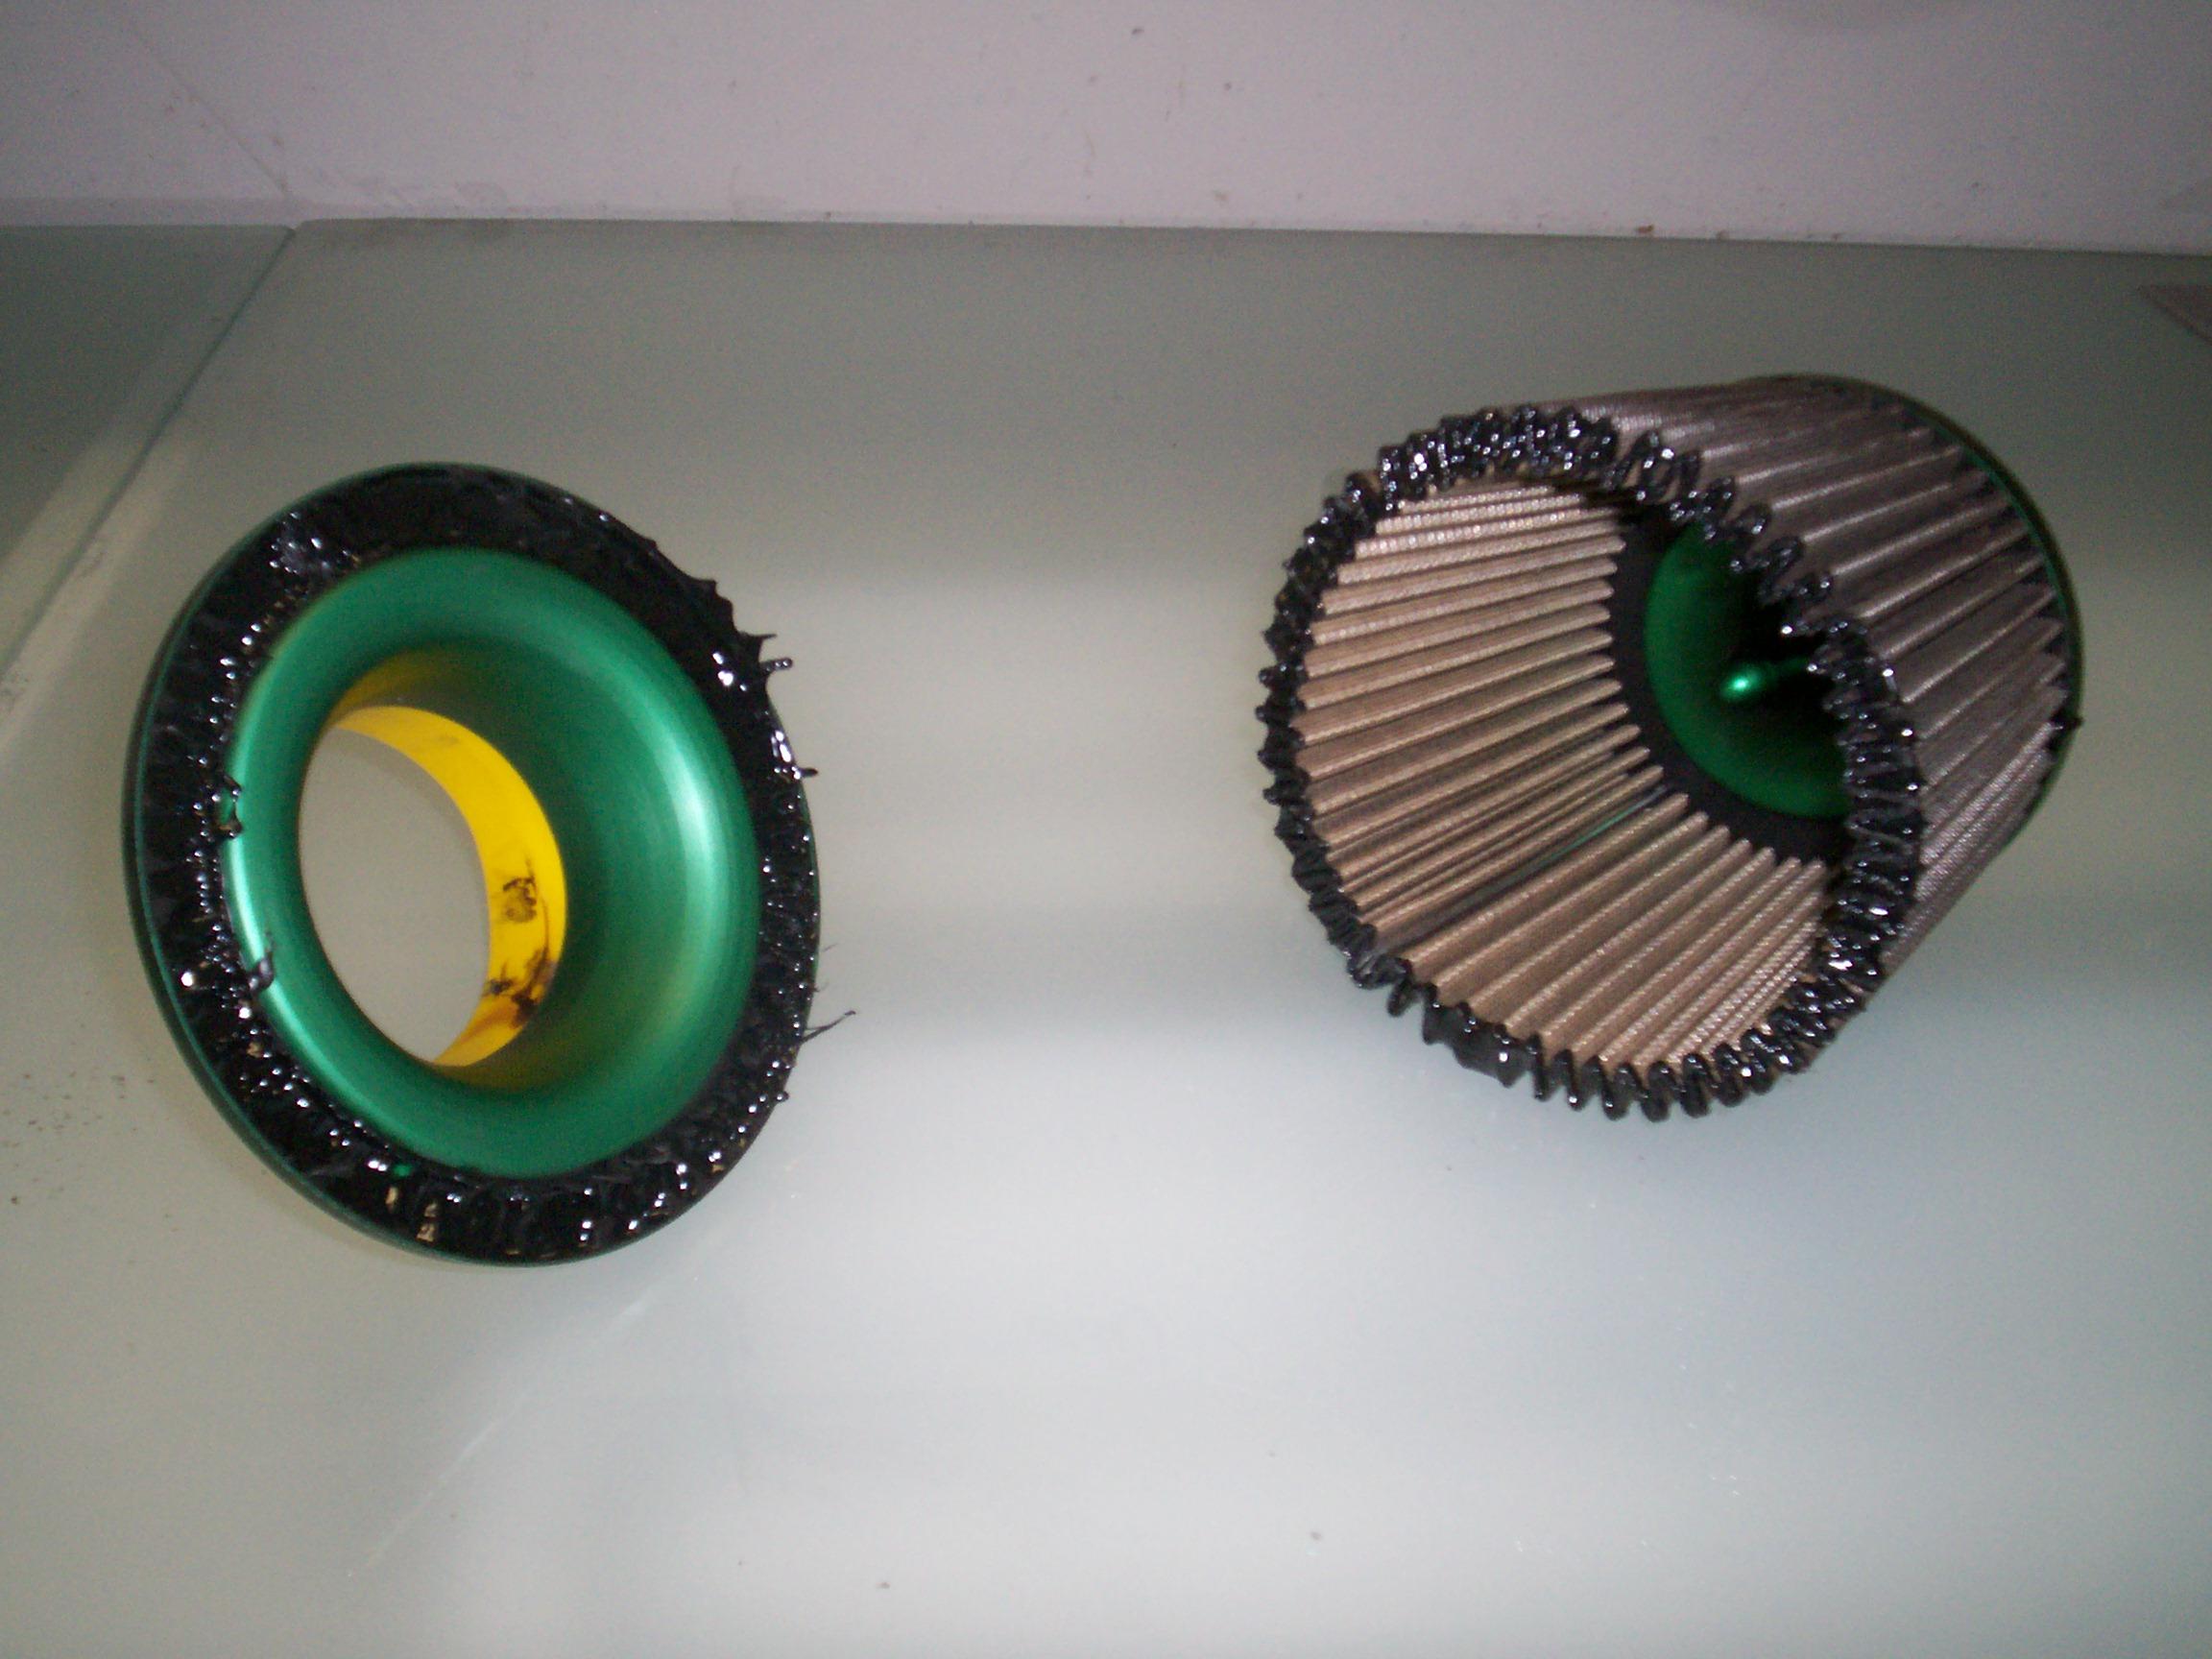 October
13th 2007 Renegade has
been sitting quietly, waiting for me to get back to him. Today, when I
opened the hood, I saw that the air cleaner element had fallen off.
Disconnected the rest of the air cleaner and brought the assembly
inside the Krash Lab. This appears to be some kind of plastic bond that
let go. I had some black Plasti Dip at hand so I opened that up and
glopped generous amounts on the failed bond surfaces and slapped the
two components back together. Put a paving stone on top of the assembly
to apply pressure for a couple of hours will the Plasti Dip cured.
October
13th 2007 Renegade has
been sitting quietly, waiting for me to get back to him. Today, when I
opened the hood, I saw that the air cleaner element had fallen off.
Disconnected the rest of the air cleaner and brought the assembly
inside the Krash Lab. This appears to be some kind of plastic bond that
let go. I had some black Plasti Dip at hand so I opened that up and
glopped generous amounts on the failed bond surfaces and slapped the
two components back together. Put a paving stone on top of the assembly
to apply pressure for a couple of hours will the Plasti Dip cured.
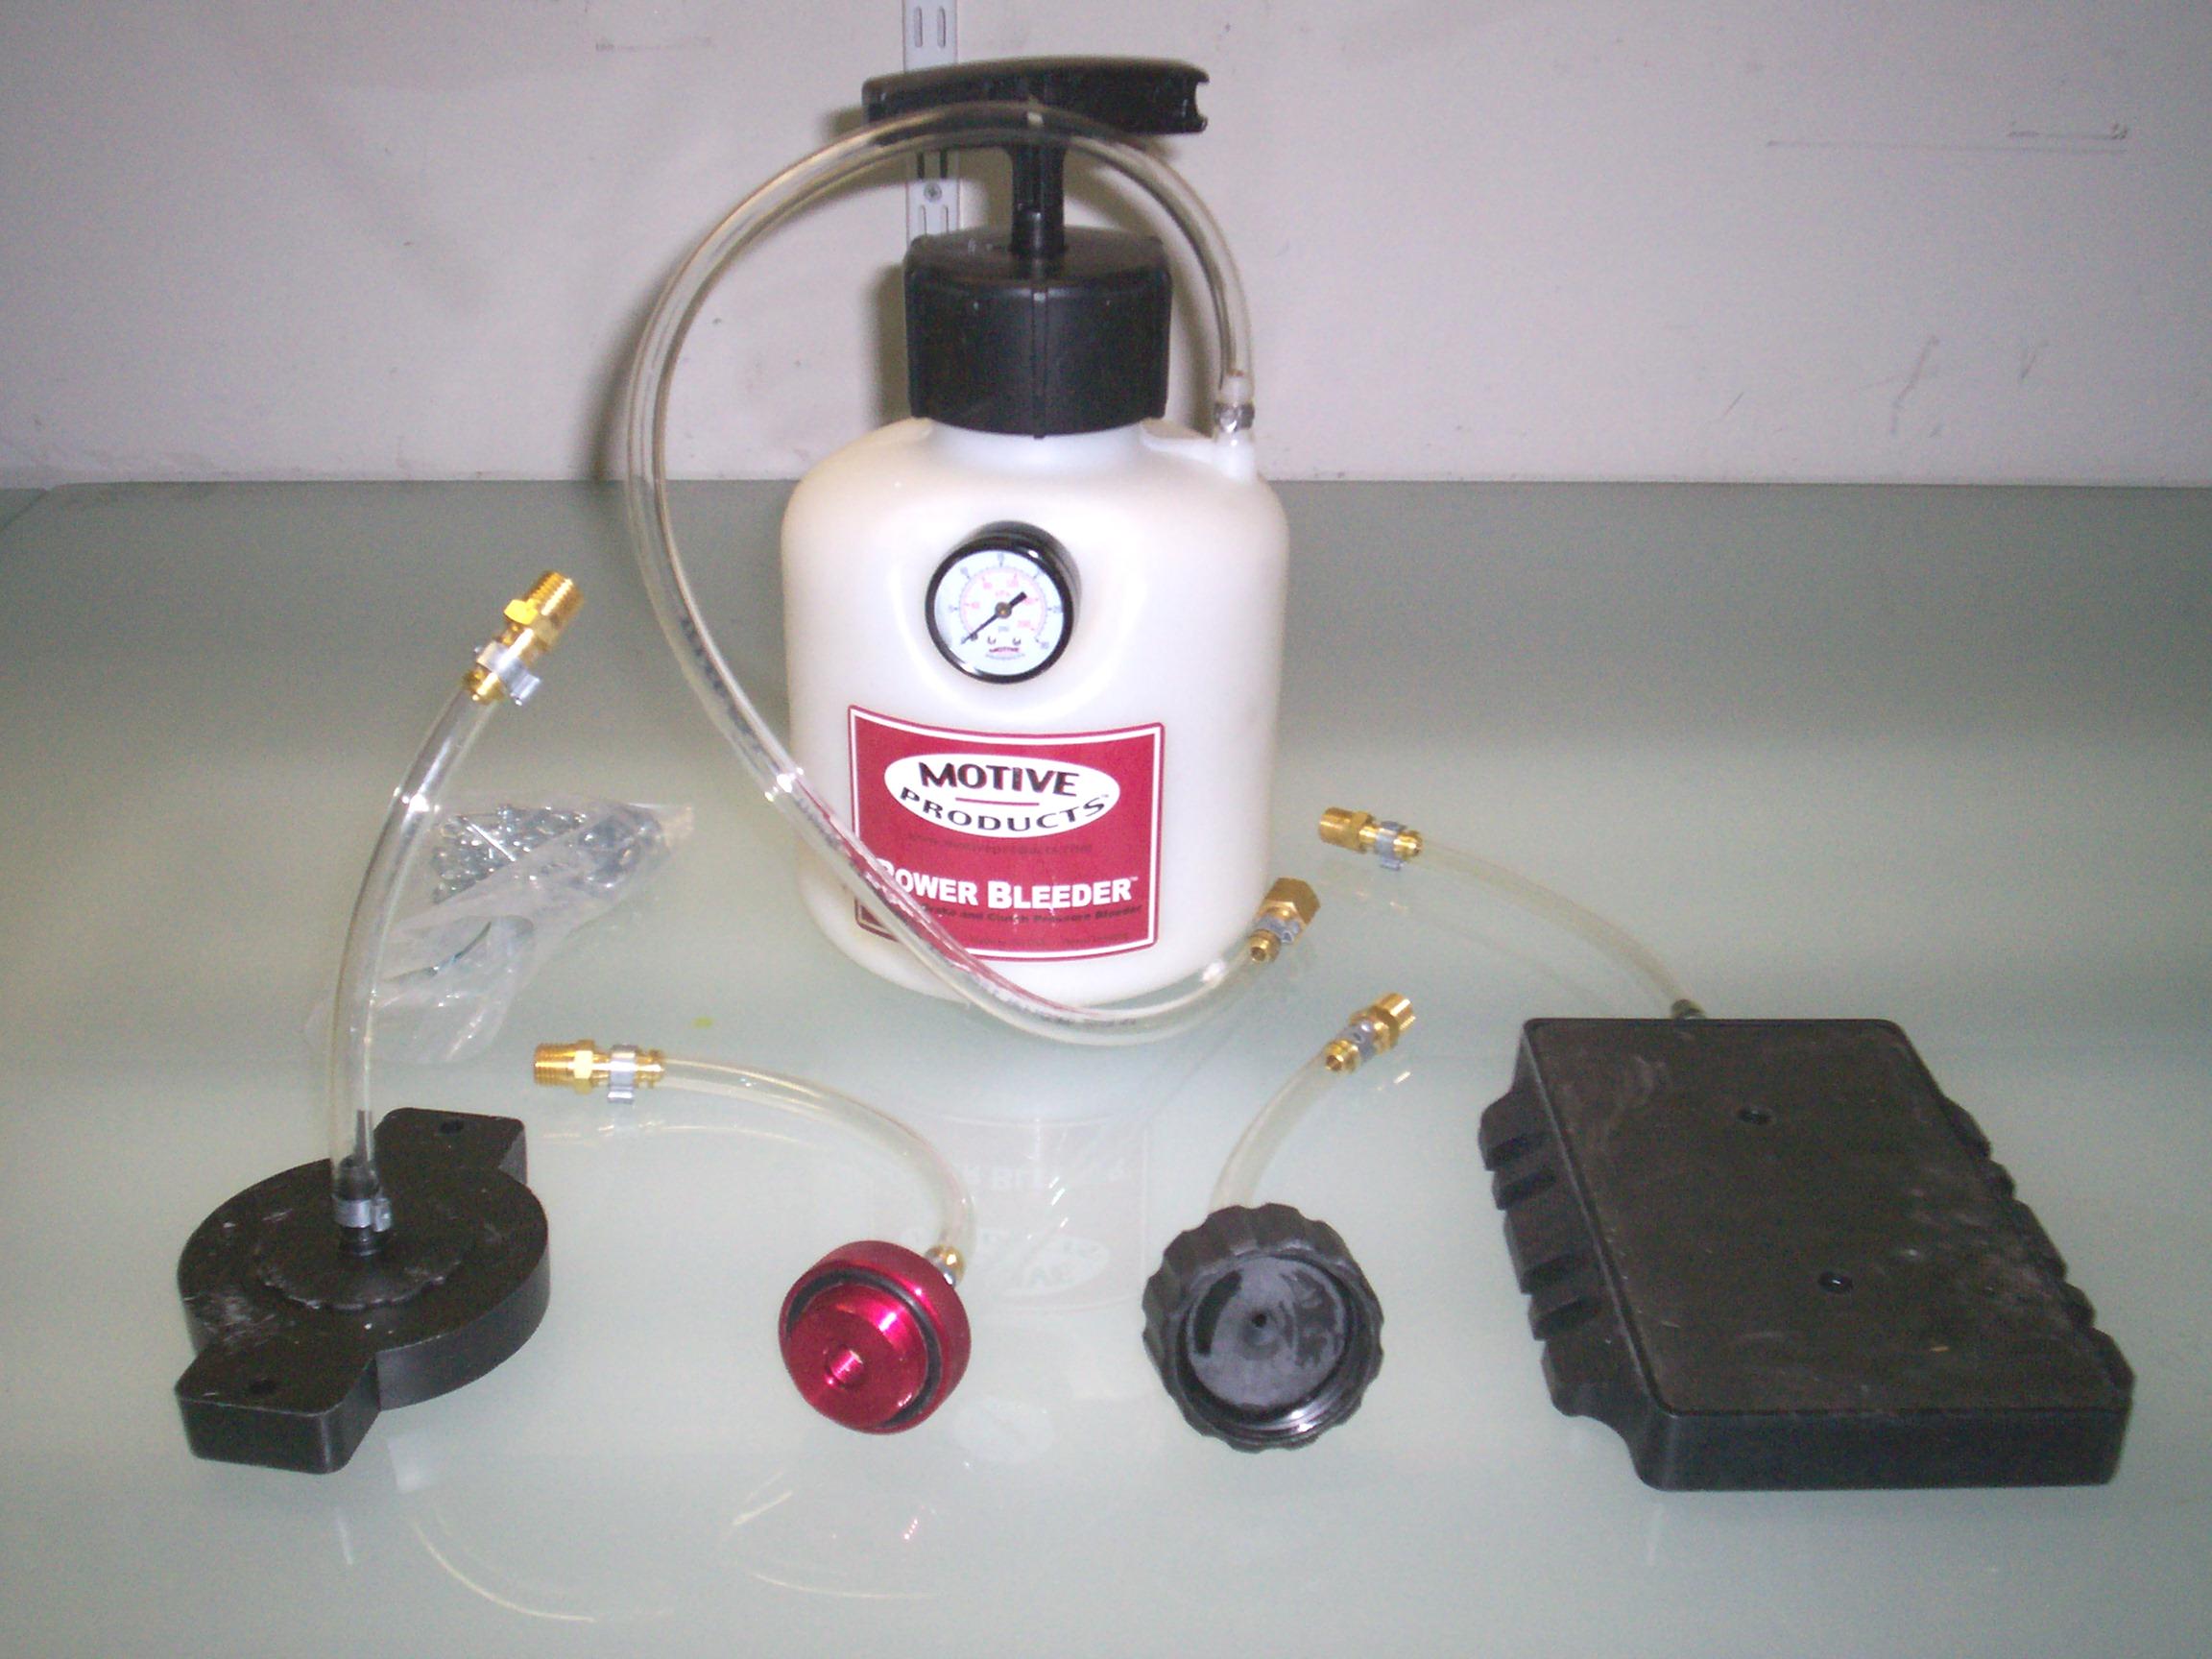 October
28th 2007 Got back to
Renegade today. Had a morning storm. After the shadetree garage dried
up a bit, I finally got down to bleeding the hydraulic clutch system
with a pressure bleeder I purchased for this specific task some time
back. I had ordered all the accessory connectors so I could use this on
the hydraulic systems of all three vehicles. One of them fit the clutch
master cylinder so I didn't have a problem there. The power bleeder was
connected (empty) and was pumped up to 10 psi for a pressure test.
After ten minutes, it was still holding at 10 psi. At least, I had
gotten all my connections tight when I plumbed my custom line. I opened
the bleeder valve down at the bellhousing and was rewarded with the
sound of hissing air. Good so far. Released all the pressure in the
power bleeder and added a couple of quarts of DOT 3 brake fluid. Pumped
the pressure back up to 10 psi and proceeded to bleed the system.
Drained fluid at the bleeder valve until the fluid ran clear without
bubbles. Did this a couple of times with both the clutch pedal in
engaged (with a helper stick) and released positions. The pedal doesn't
have as much resistance as I thought it would have but, it being a new
performance clutch, I won't know until the engine is running if
everything with the clutch is hunky-dory or not.
October
28th 2007 Got back to
Renegade today. Had a morning storm. After the shadetree garage dried
up a bit, I finally got down to bleeding the hydraulic clutch system
with a pressure bleeder I purchased for this specific task some time
back. I had ordered all the accessory connectors so I could use this on
the hydraulic systems of all three vehicles. One of them fit the clutch
master cylinder so I didn't have a problem there. The power bleeder was
connected (empty) and was pumped up to 10 psi for a pressure test.
After ten minutes, it was still holding at 10 psi. At least, I had
gotten all my connections tight when I plumbed my custom line. I opened
the bleeder valve down at the bellhousing and was rewarded with the
sound of hissing air. Good so far. Released all the pressure in the
power bleeder and added a couple of quarts of DOT 3 brake fluid. Pumped
the pressure back up to 10 psi and proceeded to bleed the system.
Drained fluid at the bleeder valve until the fluid ran clear without
bubbles. Did this a couple of times with both the clutch pedal in
engaged (with a helper stick) and released positions. The pedal doesn't
have as much resistance as I thought it would have but, it being a new
performance clutch, I won't know until the engine is running if
everything with the clutch is hunky-dory or not.
That was the good news. Here's the bad. The battery was recharged and put back in the Jeep. With the tranny in neutral, I tried to start Renegade for the first time in over a year. It cranked for some time but I was happy with that because I was hoping for some oil circulation before firing. Renegade did start after a minute or two. It was missing some and I had to keep jiggling the throttle pedal. After thirty seconds or so it quit missing but there wasn't any power and I had to keep jiggling the accelerator. When I let it go back to idle, it quit. After a few minutes, I started it again but it stayed lit only a few seconds and wouldn't start again after that. The gas stabilazer additive I had put in was way past its effective date but I think the problem is water in the gas. That's what it feels like anyway. I guess draining the tank is next.
November 10th 2007 The weather is beautiful today. Cool and not a cloud in the sky. Last weekend, I ordered a "Shop Manual, Engine, Chassis & Body 1991 Jeep Reprint" and a "Shop Manual Electrical, Heating-A/C & Emissions 1991 Jeep Reprint" from Bishko Automobile Literature and they arrived mid-week. These things are much more detailed than the Haynes and Chilton repair manuals I've been relying on.
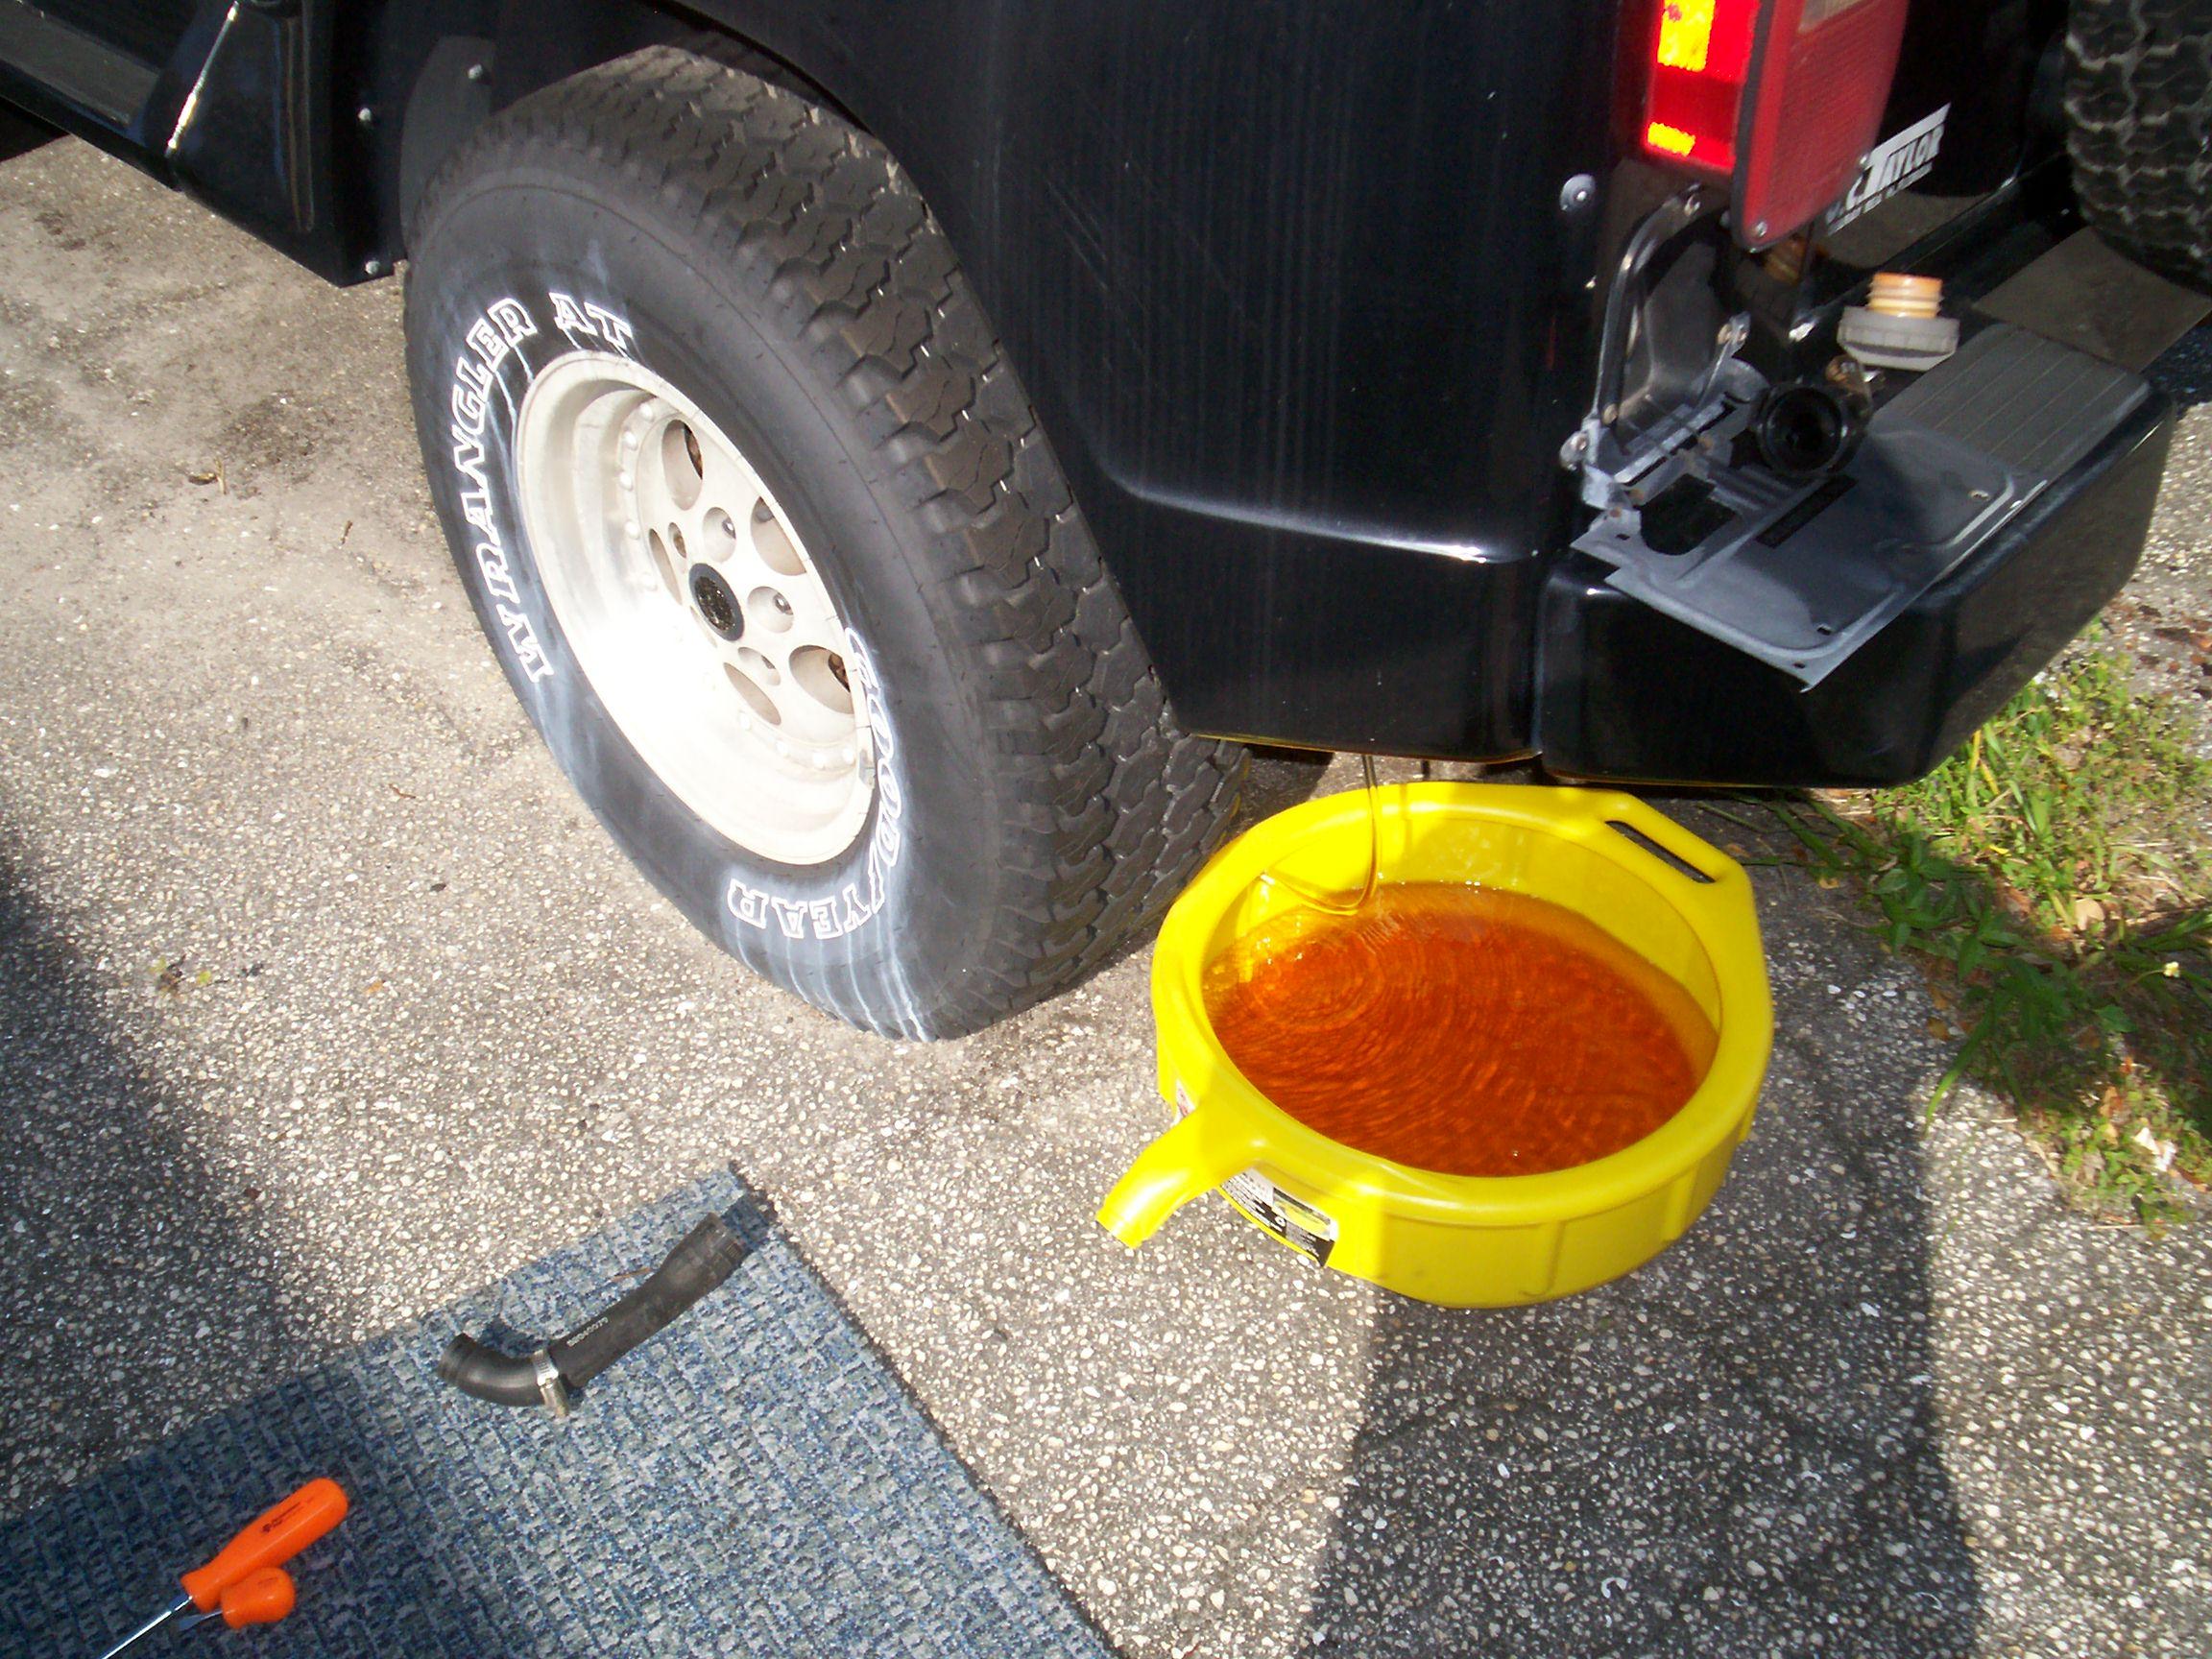 I
set about draining the gas tank. Following the manual, the gas cap was
removed, battery ground was disconnected and fuel pressure released
from the valve on the fuel rail. There was no pressure. I don't know if
this is a problem or not at this point. A siphon tube was inserted into
the gas tank filler to drain the tank but it would not go into the
tank. Took off the fuel filler neck shroud underneath the fender at the
rear and removed the filler hose. Put the siphon directly into the tank
at this point and proceeded to drain the tank. I got just shy of five
gallons which is about half of what I expected. Put everything back
together and took the battery into the Krash Lab for recharging.
I
set about draining the gas tank. Following the manual, the gas cap was
removed, battery ground was disconnected and fuel pressure released
from the valve on the fuel rail. There was no pressure. I don't know if
this is a problem or not at this point. A siphon tube was inserted into
the gas tank filler to drain the tank but it would not go into the
tank. Took off the fuel filler neck shroud underneath the fender at the
rear and removed the filler hose. Put the siphon directly into the tank
at this point and proceeded to drain the tank. I got just shy of five
gallons which is about half of what I expected. Put everything back
together and took the battery into the Krash Lab for recharging.
November 11th 2007 Armistice Day. Hug a Vet! Stopped on the way to the Krash Lab this morning and got five gallons of fresh gas to put in Renegade's now empty (I hope) tank. Poured the gas into Renegade and re-installed his charged up battery. Took a lotta crankin' but Renegade finally started up. No power on the throttle but he would idle ok. Ran the engine for about a hour to recharge the battery again and run out the rest of the bad gas/water while I smoked a cigar.
at the end of the hour, there was still a slight hesitation when the gas was hit hard but it wasn't bad. I'll check into fuel line cleaning additives in the upcoming week. The clutch would not work unless I pumped it hard and fast five or six times before shifting. Time to get the pressure bleeder out again. It may be jumpin' the gun a bit, but I think it's time for a little victory dance.
November 17th 2007 It promises to be a good weather day. On the way up to the Krash Lab, I picked up 'nother five gallons of gas for Renegade. Yesterday, I got some Gumout Fuel System Cleaner from my favorite FLAPS. It's good for 21 gallons so I poured half of it in Renegade's tank, followed by the gas to mix it up a bit. Hooked up the power bleeder again and bled the clutch circuit. Pumped the bleeder pressure tank up to ten psi with a quart of DOT 3 fluid in it. This time, I pumped the clutch pedal fast, six times, then fixed it, pressed to the floor, with a helper board. Bled a couple of ounces off, then repeated the whole process two more times. After that, I had a firm clutch pedal for the first time in twenty-three months. Life is good!
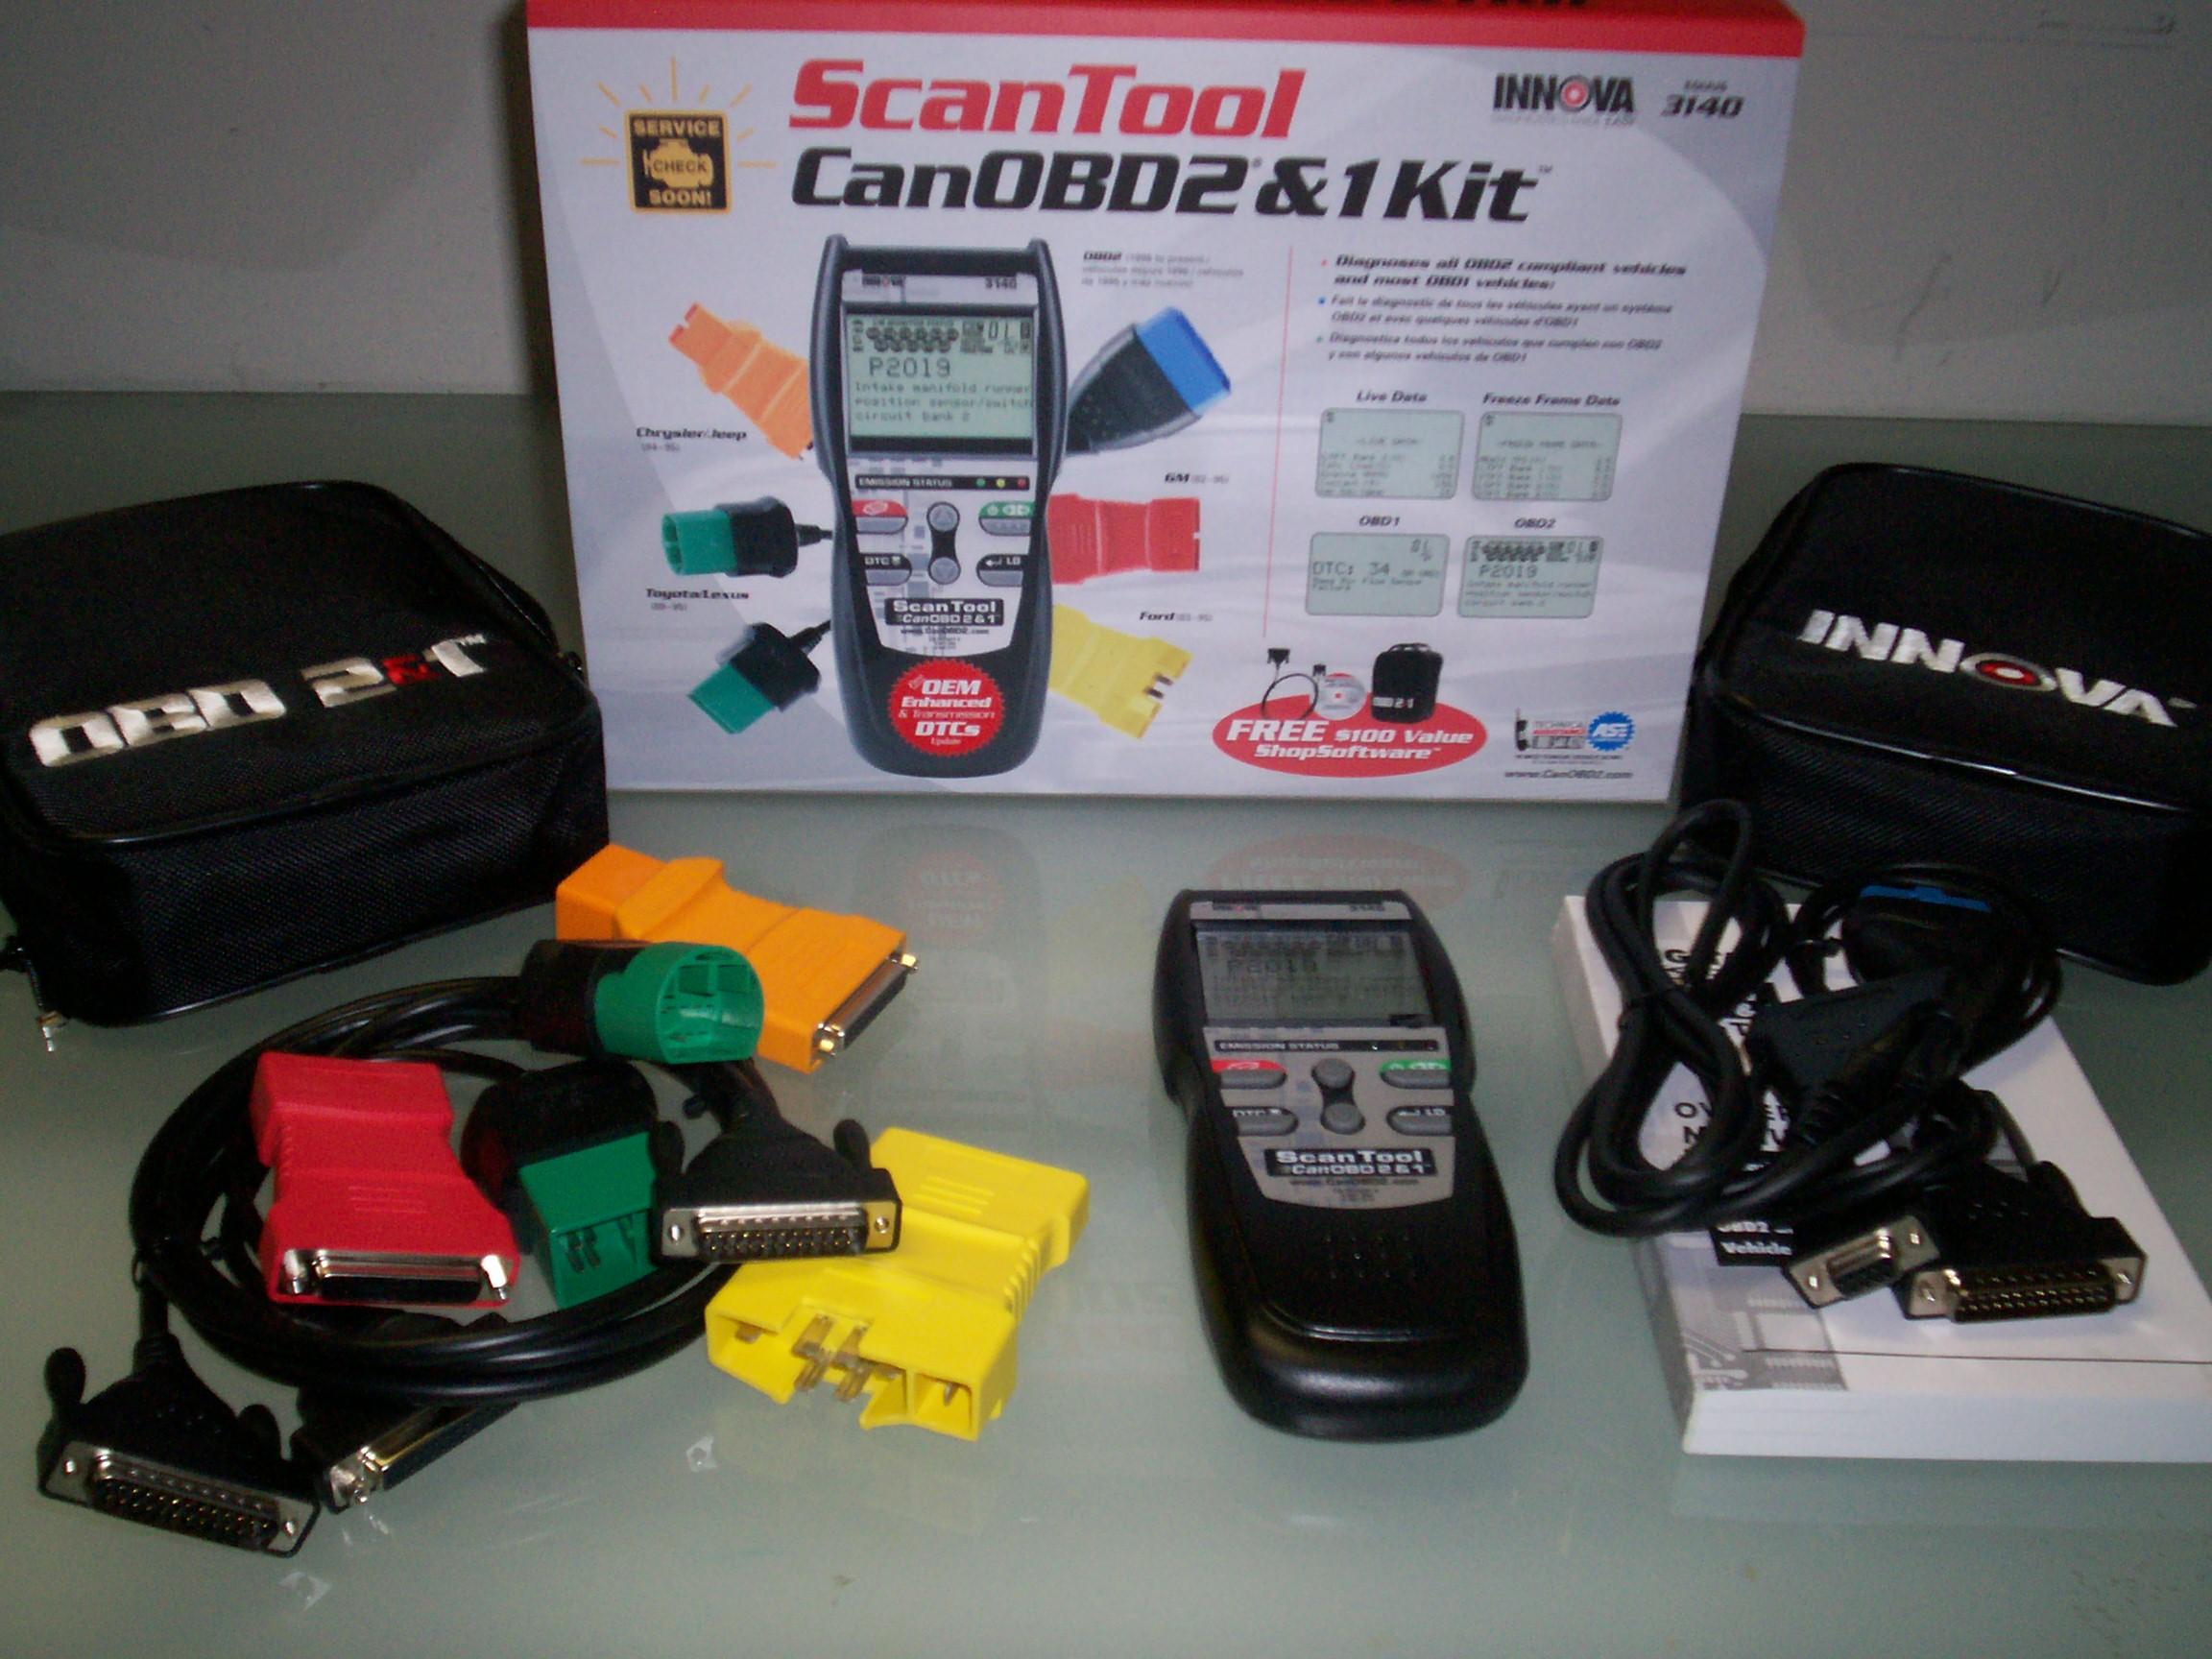 Started
Renegade up. I've got a "check engine" light. Damnation! I'm not gonna
get off that easy afterall. A few weeks ago, I got a Innova Equus 3140
Can OBD II and I scan tool from Amazon.com for work on BettyLou. It's
'sposed to work with Jeeps 1993 and up. The fly in the buttermilk is
that Renegade is a '91.
Started
Renegade up. I've got a "check engine" light. Damnation! I'm not gonna
get off that easy afterall. A few weeks ago, I got a Innova Equus 3140
Can OBD II and I scan tool from Amazon.com for work on BettyLou. It's
'sposed to work with Jeeps 1993 and up. The fly in the buttermilk is
that Renegade is a '91.
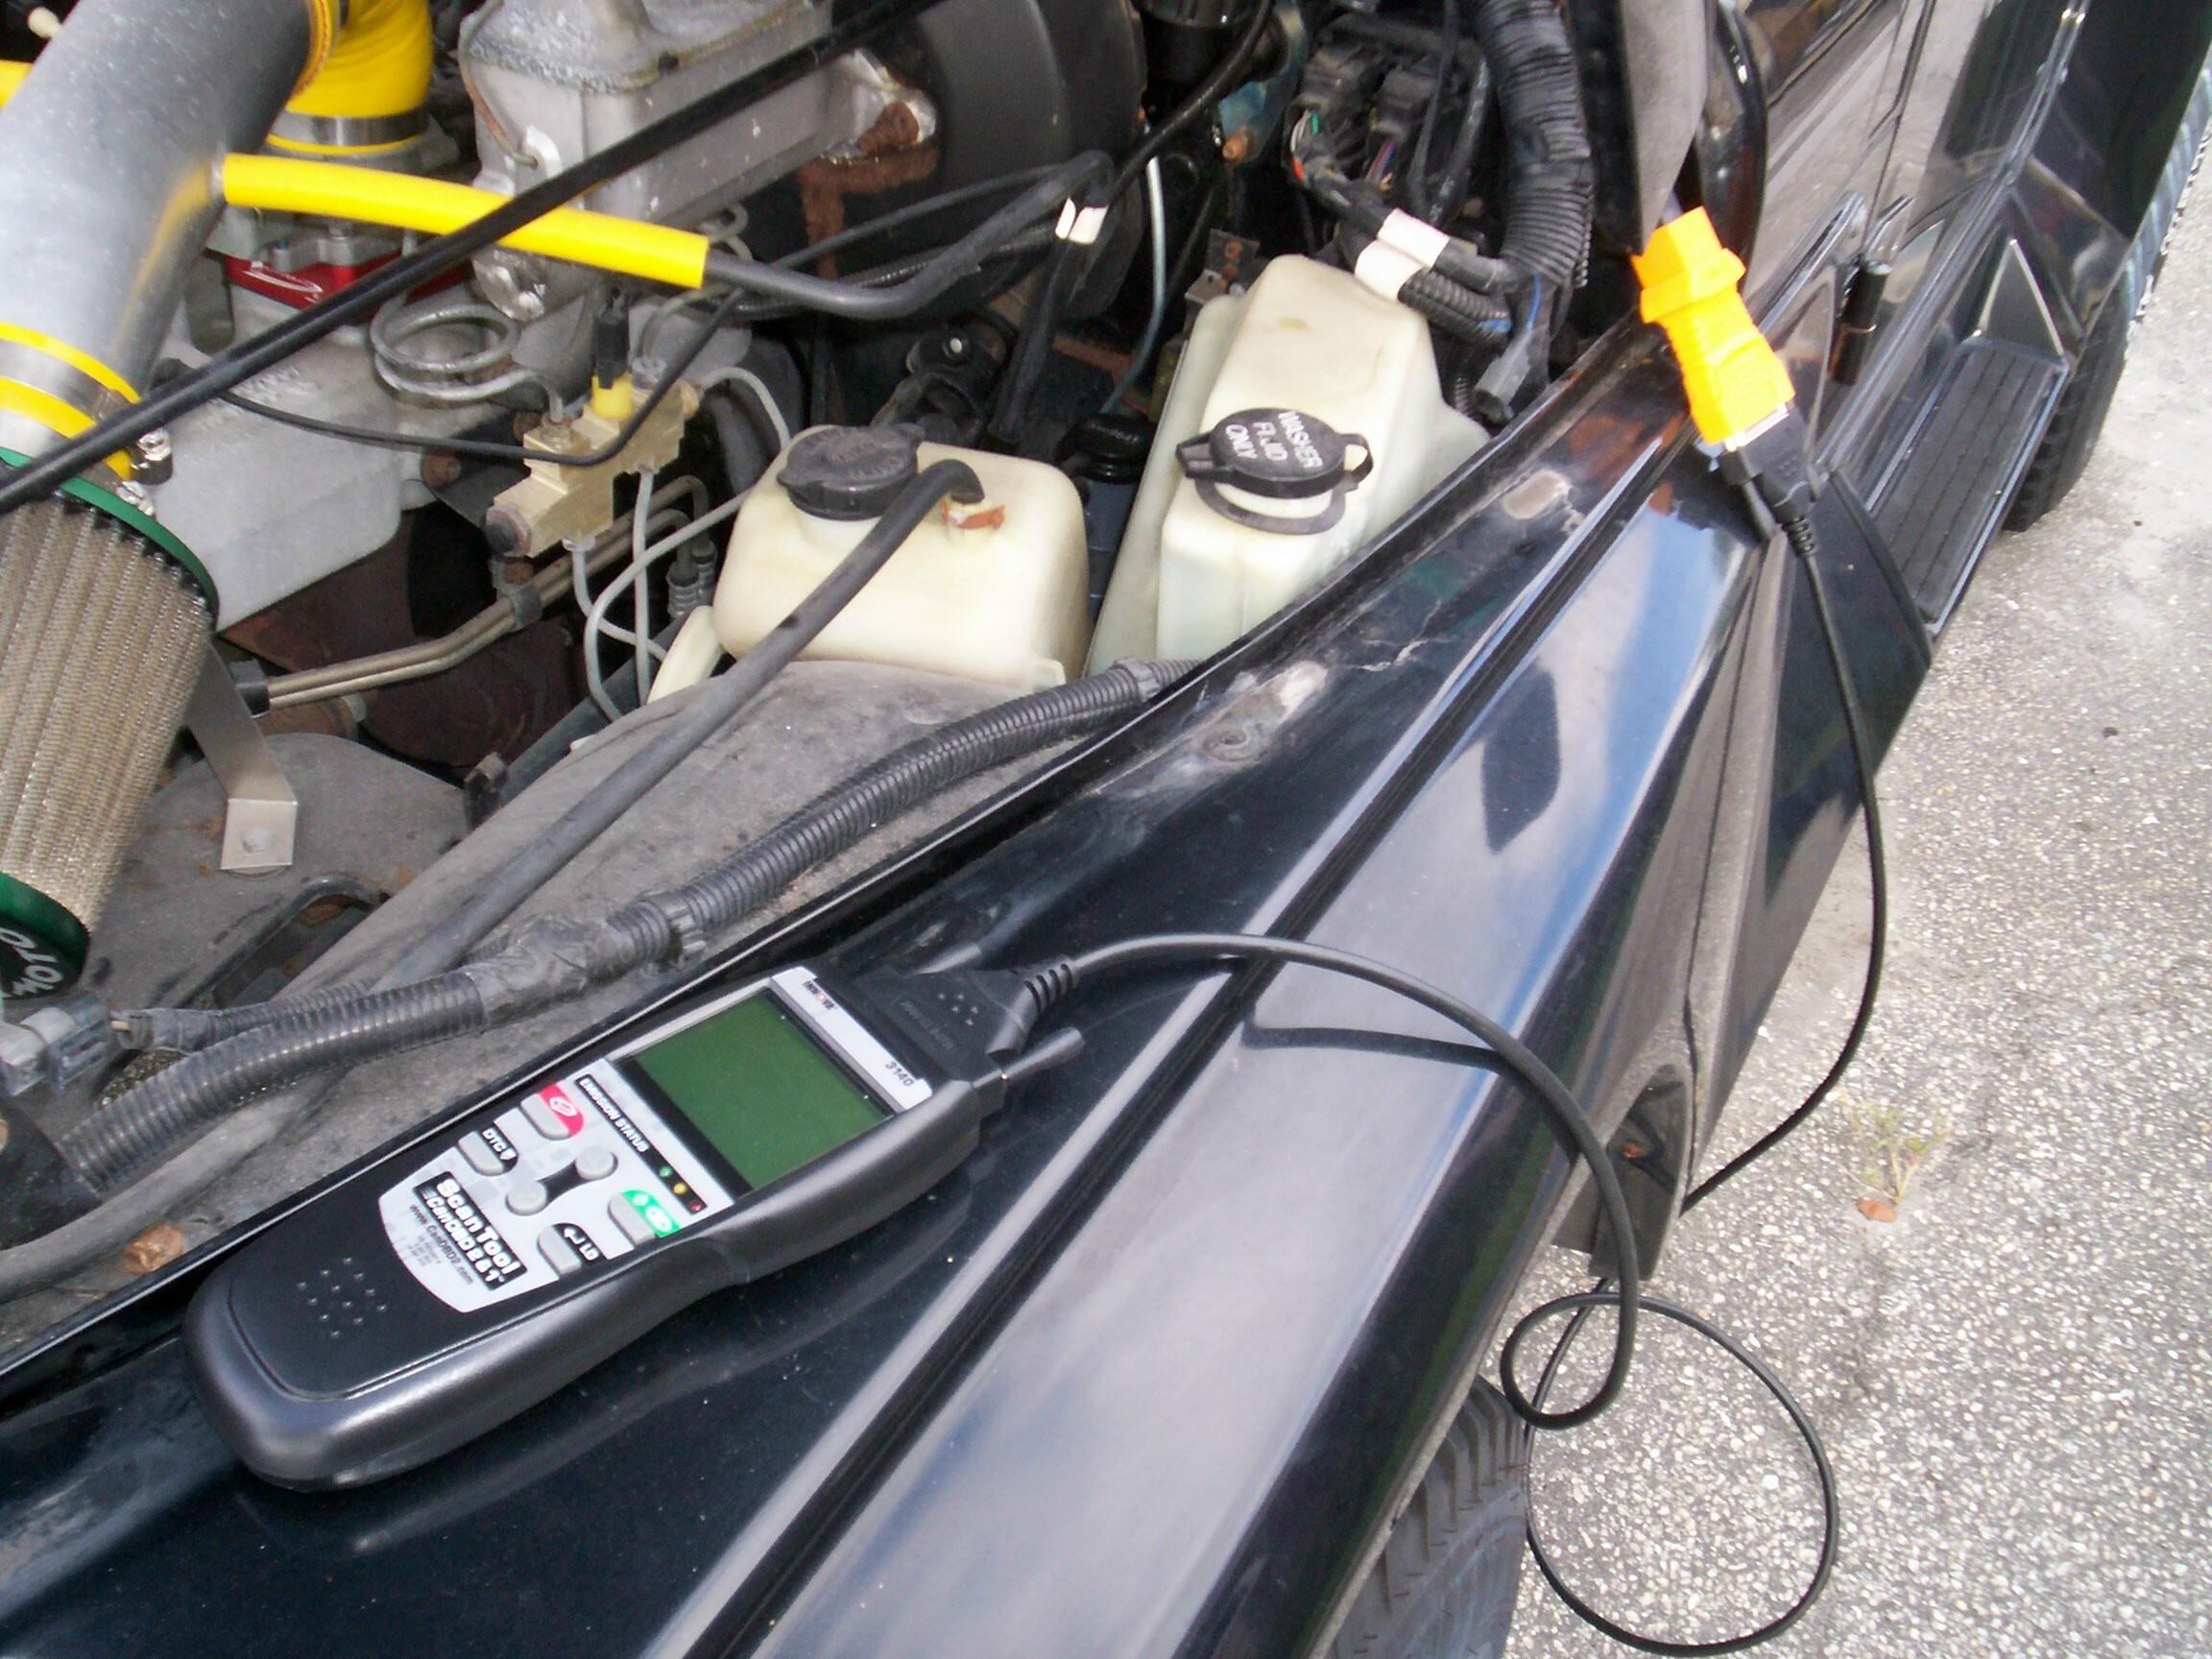 I
found the proper Chrysler diagnostic connector under the hood so, I
said "what the hell", and hooked it up. Followed the instructions and
was rewarded with two trouble codes: DTC:24 Throttle Position Sensor
Input Above The Maximum Acceptable Voltage and DTC:33 An Open Or
Shorted Condition Detected In The A/C Clutch Relay Control Circuit.
Pondered the manual fer awhile. Found out how to test the Throttle
Position Sensor and the A/C Relay and where the heck they were in the
engine bay. I'm not very good with electronics. It's all voodoo to me.
Got the multi-meter out and, if I did the Throttle Position Sensor
tests correctly, it is indeed outside parameters. The relay tested OK
but I don't know how to test it under load. I thought of swapping it
with the fog lamp relay but they are different model numbers and that
is probably a bad idea. I went online to NAPA and ordered both items.
I
found the proper Chrysler diagnostic connector under the hood so, I
said "what the hell", and hooked it up. Followed the instructions and
was rewarded with two trouble codes: DTC:24 Throttle Position Sensor
Input Above The Maximum Acceptable Voltage and DTC:33 An Open Or
Shorted Condition Detected In The A/C Clutch Relay Control Circuit.
Pondered the manual fer awhile. Found out how to test the Throttle
Position Sensor and the A/C Relay and where the heck they were in the
engine bay. I'm not very good with electronics. It's all voodoo to me.
Got the multi-meter out and, if I did the Throttle Position Sensor
tests correctly, it is indeed outside parameters. The relay tested OK
but I don't know how to test it under load. I thought of swapping it
with the fog lamp relay but they are different model numbers and that
is probably a bad idea. I went online to NAPA and ordered both items.
December 2nd 2007 The pain and suffering continues. The throttle position sensor and relay finally arrived from NAPA this week . . . Whiskey Tango Foxtrot! This is not a relay. It's a relay socket. Damnation! Went online and checked NAPA's website. I put a relay in the shopping basket. When it hits the basket, it turns into a socket. Same thing happens at RockAuto's site. I take that back. It does say connector on the NAPA site but it's mixed in with relays and the a/c relay is the only one not available. At the RockAuto site, it sez harness in the description but relay in the title and picture.
I went to Advance Auto Parts and the counter guy gave me a GP Sorensen MR78. I would have felt better about it if he had let me finsh saying "1991 Jeep Wrangler A/C Clutch Relay" before disappearing into the stacks. If this thing doesn't work, I'll try Chrysler Parts Direct. Shipping takes a long time with them but they do have it listed under the original part number.
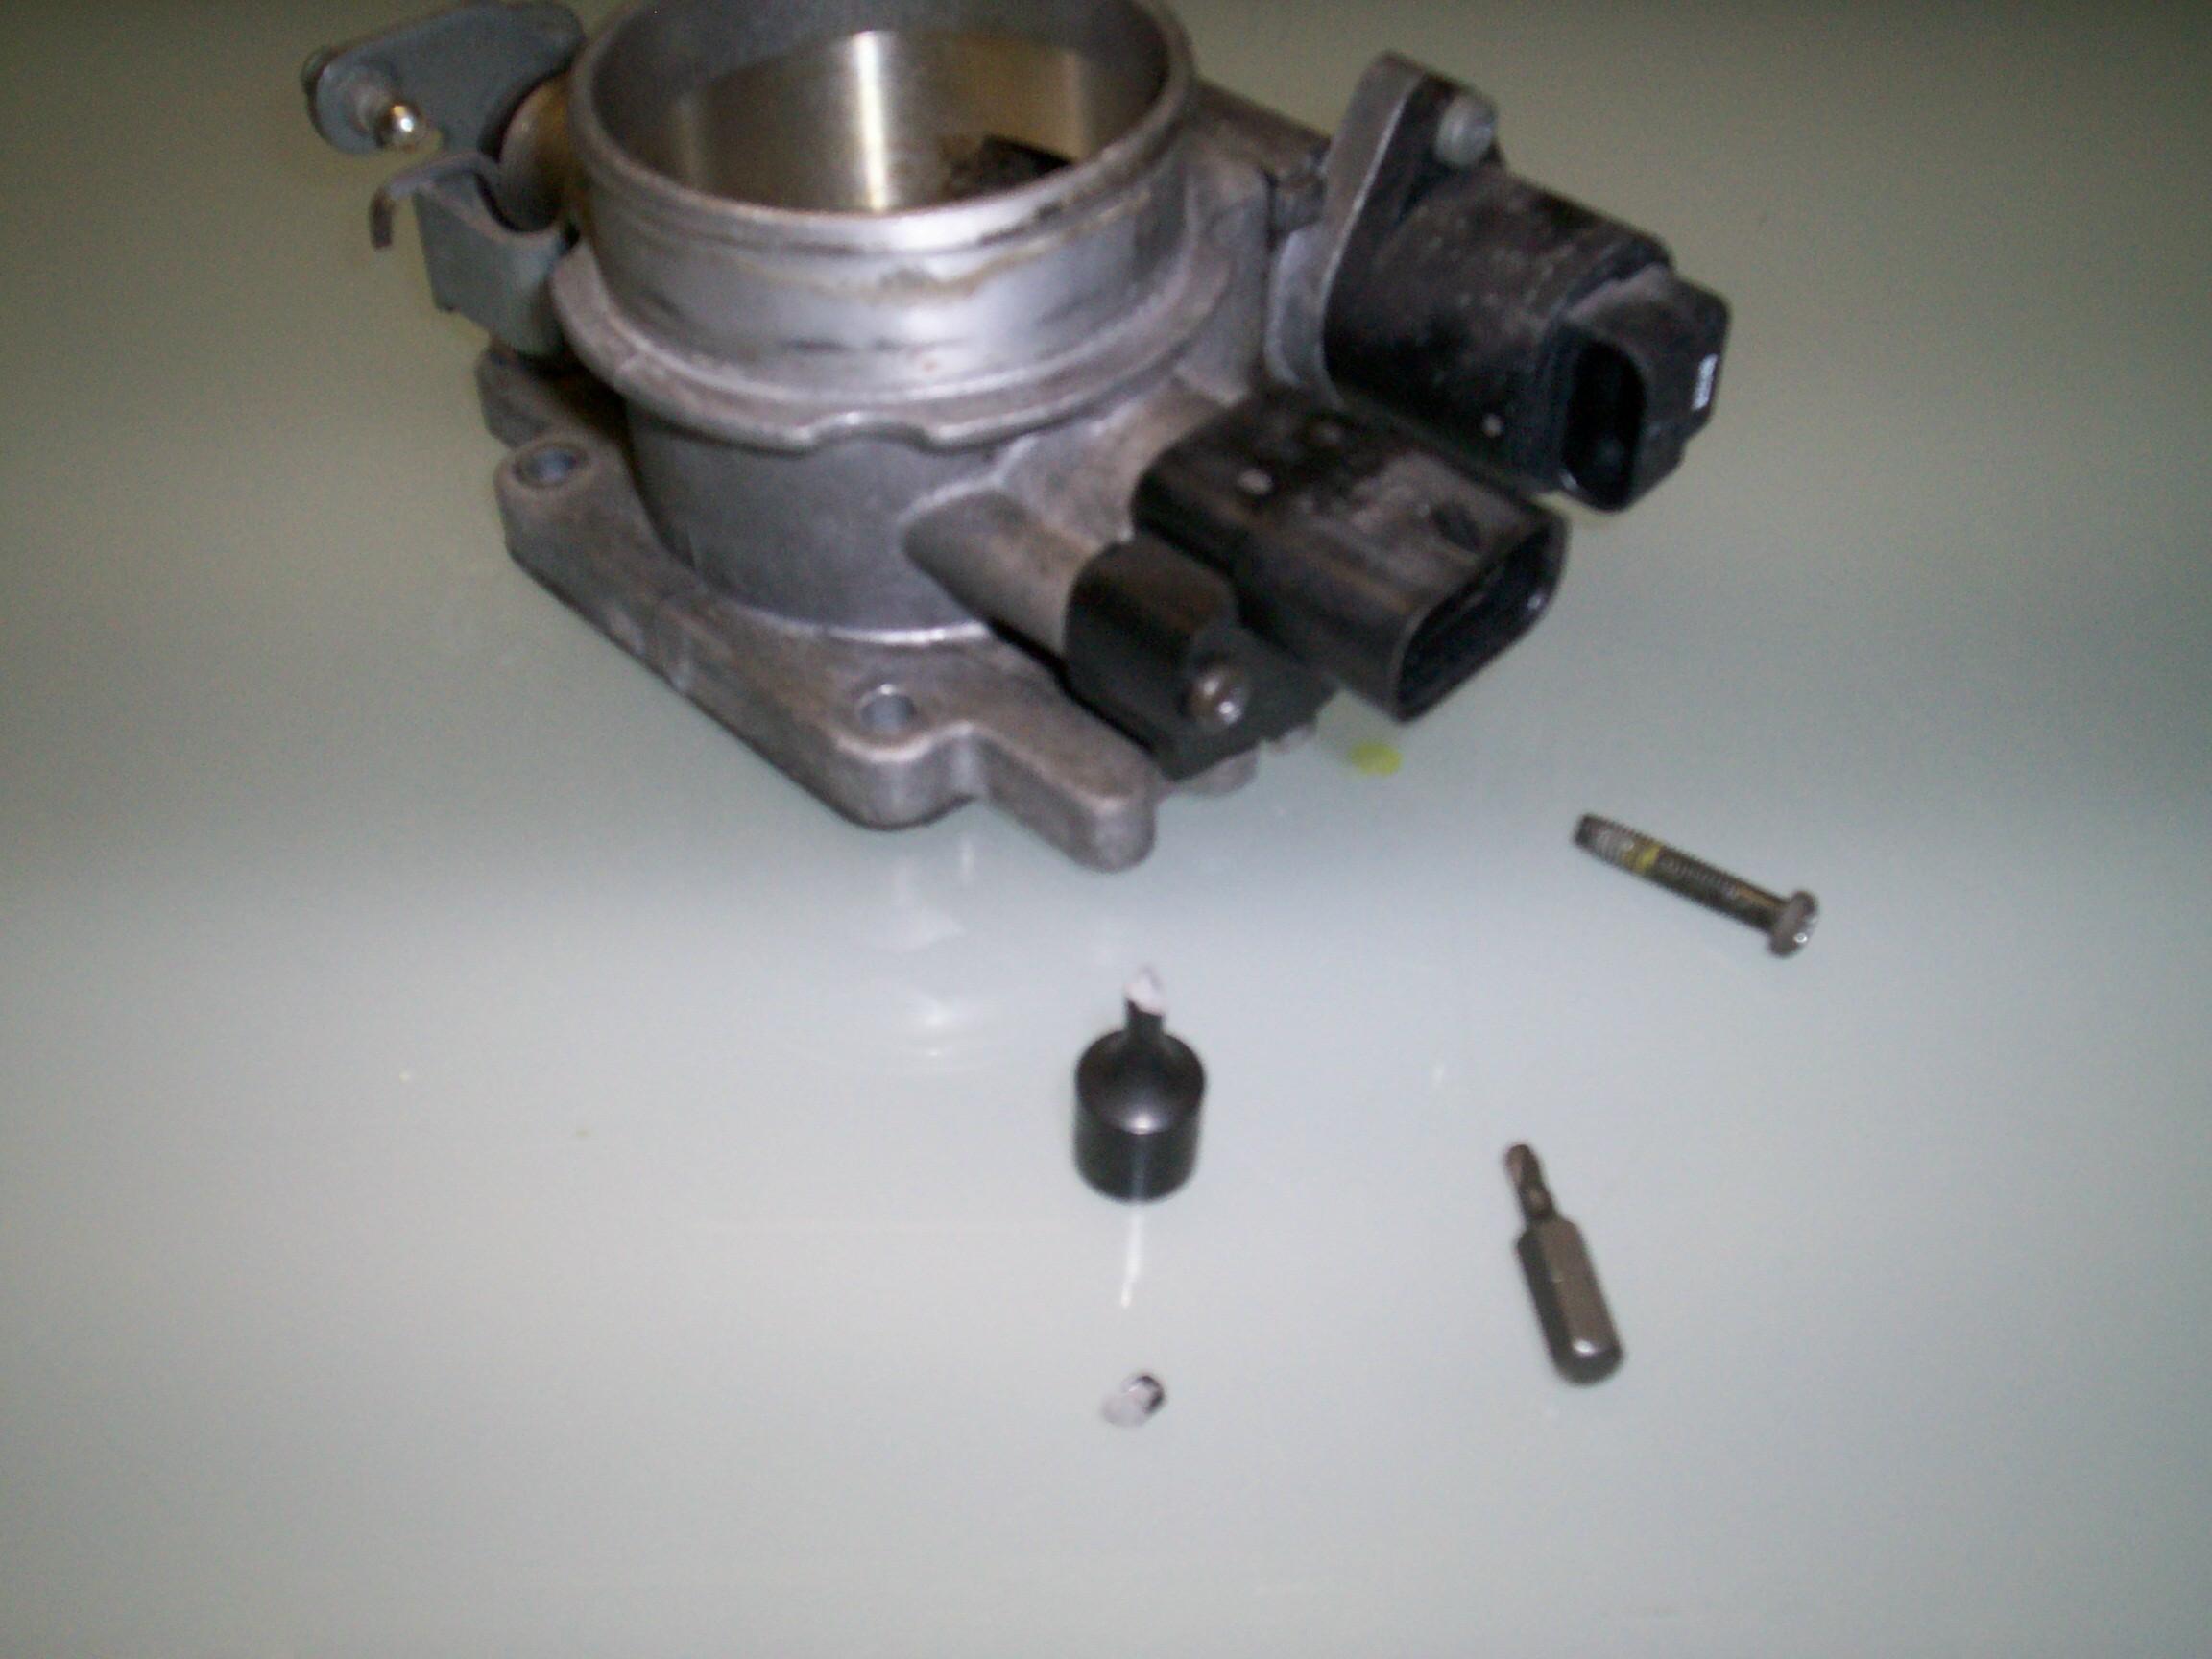 I
didn't even get to the relay today tho' since I ran into a brick wall
with the throttle position sensor. This thing fits to the back of the
throttle body and you can't see the two screws holding it on. After a
minute or two fiddling with it, I knew it was gonna have to come off.
Two electrical connectors, throttle cable and four capscrews later, I
had it in the Krash Lab to remove the sensor. The screws are the
acursed torx screws. They are tight. I think I'm the first human to
touch them as they seem to have been put on by a malignant robot on the
assembly line. I finally get one out. Damnation! It's a fine-thread
self-tapping deal that is triangular in cross-section, not round. I
then broke my two T20 torx bits on the other one. One bit sheared and
the other one twisted. I just know that if I keep messin' with this, it
will break off.
I
didn't even get to the relay today tho' since I ran into a brick wall
with the throttle position sensor. This thing fits to the back of the
throttle body and you can't see the two screws holding it on. After a
minute or two fiddling with it, I knew it was gonna have to come off.
Two electrical connectors, throttle cable and four capscrews later, I
had it in the Krash Lab to remove the sensor. The screws are the
acursed torx screws. They are tight. I think I'm the first human to
touch them as they seem to have been put on by a malignant robot on the
assembly line. I finally get one out. Damnation! It's a fine-thread
self-tapping deal that is triangular in cross-section, not round. I
then broke my two T20 torx bits on the other one. One bit sheared and
the other one twisted. I just know that if I keep messin' with this, it
will break off.
I go online to Quadratec and order a Rock-It Hi-Flow Throttle Body. As long as I'm going with a new throttle body, I might as well as go performance. Then I go to the SnapOn Tools website and order a quality replacement T20 torx bit. At least, the weather is good today. I grab coffee and a cigar to consider what my next moves will be. I sit on the back stoop on a bubble chair. The air compressor comes on and I go over to shut it off. I hear a noise behind me and turn to see the bubble chair roll over my coffee. Murphy wins today.
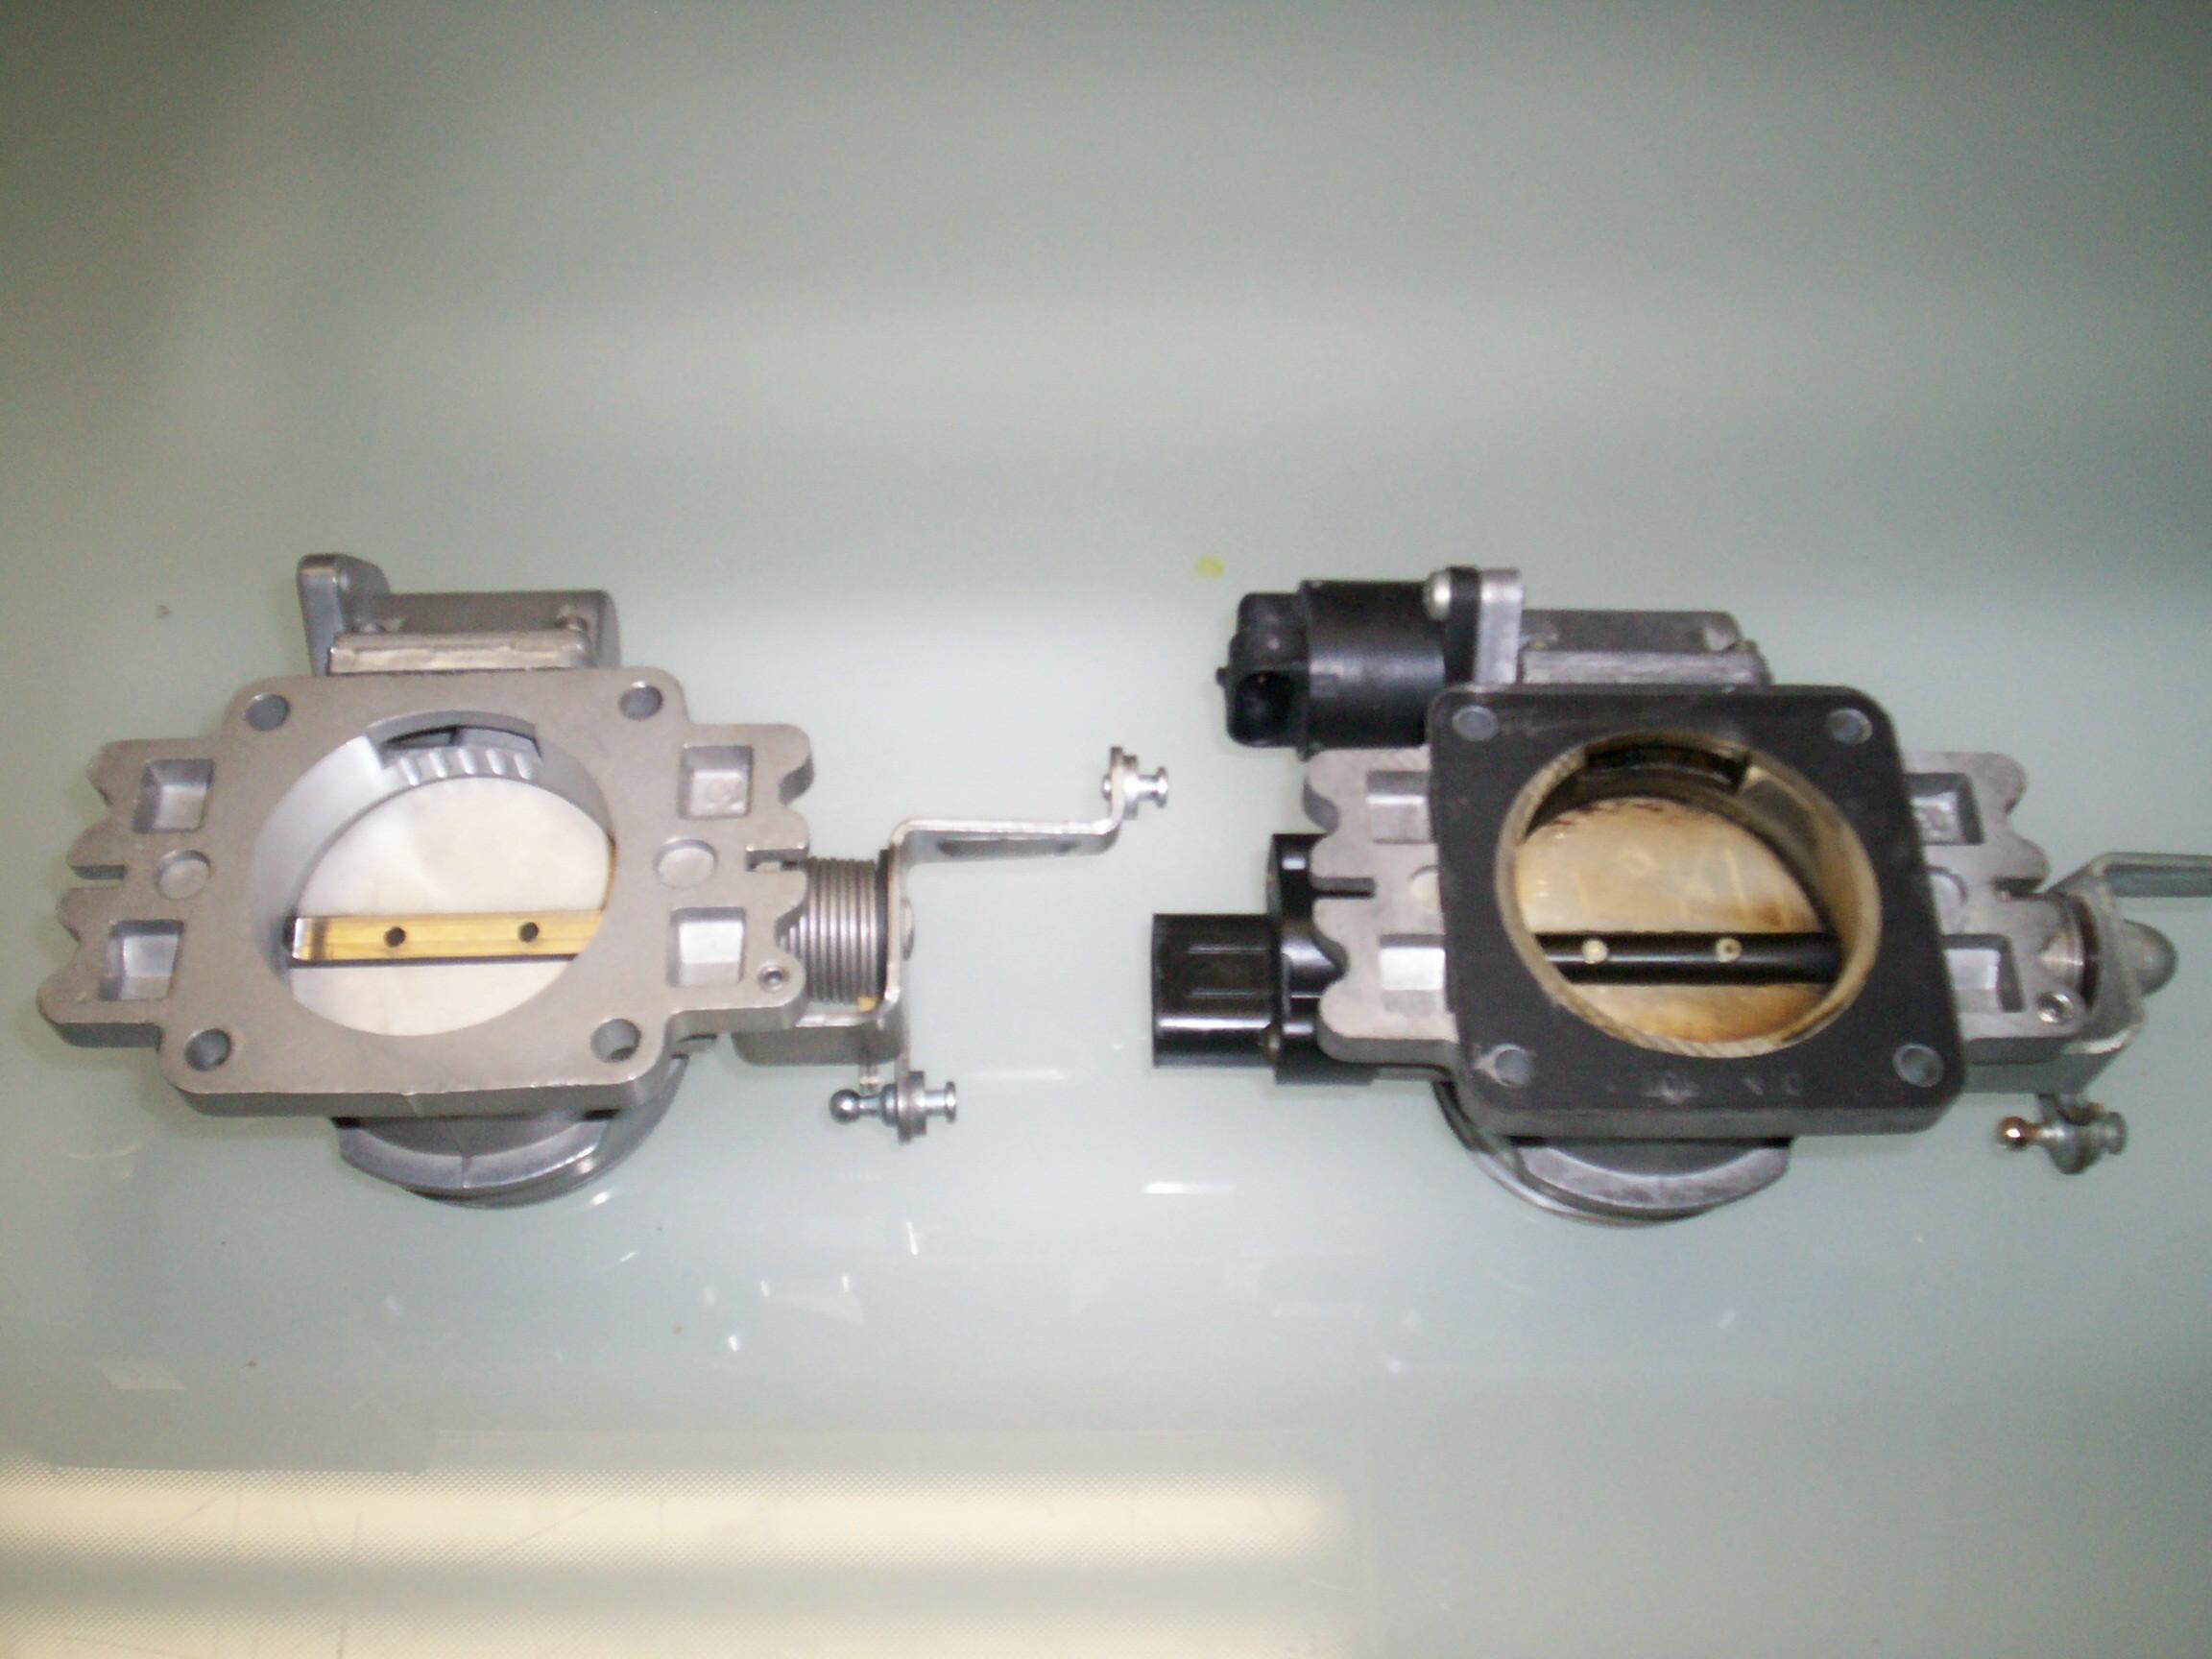 December
8th 2007 It's a good
weather day. Worked on my truck, BillyBob, 'til noon then continued on
Renegade's resurrection. The throttle body arrived during the week. It
was $209 plus 'nother $209 for the core charge plus shipping. You can
see how much it's bored out by comparing it with the old throttle body.
All the metal beyond the edge of the gasket is gone on the new one. It
also matches more closely the diameter of the Poweraid Helix Throttle
Body Spacer that I installed back in March of '03. Installed the new
throttle position sensor with standard stainless steel #10 - 32 screws
and anti-seize compound in lieu of the accursed torx screws. The
instructions for the throttle body sez to tap the torx screws to
"shock" the sealant before removing them. I didn't do that and I don't
know if that might have saved me from breaking two torx bits. I also
installed a new fuel injection idle air control valve I ordered some
time back. The "probe" on the working end of this thing didn't look
like the old one. Most alarming to me was that it was a quarter inch
shorter. I put it on anyway and put the new throttle body on the
engine. Time for the moment of truth. Cranked the engine and it started
up but wouldn't idle lower than 2,000 rpm. I turned it right off again.
December
8th 2007 It's a good
weather day. Worked on my truck, BillyBob, 'til noon then continued on
Renegade's resurrection. The throttle body arrived during the week. It
was $209 plus 'nother $209 for the core charge plus shipping. You can
see how much it's bored out by comparing it with the old throttle body.
All the metal beyond the edge of the gasket is gone on the new one. It
also matches more closely the diameter of the Poweraid Helix Throttle
Body Spacer that I installed back in March of '03. Installed the new
throttle position sensor with standard stainless steel #10 - 32 screws
and anti-seize compound in lieu of the accursed torx screws. The
instructions for the throttle body sez to tap the torx screws to
"shock" the sealant before removing them. I didn't do that and I don't
know if that might have saved me from breaking two torx bits. I also
installed a new fuel injection idle air control valve I ordered some
time back. The "probe" on the working end of this thing didn't look
like the old one. Most alarming to me was that it was a quarter inch
shorter. I put it on anyway and put the new throttle body on the
engine. Time for the moment of truth. Cranked the engine and it started
up but wouldn't idle lower than 2,000 rpm. I turned it right off again.
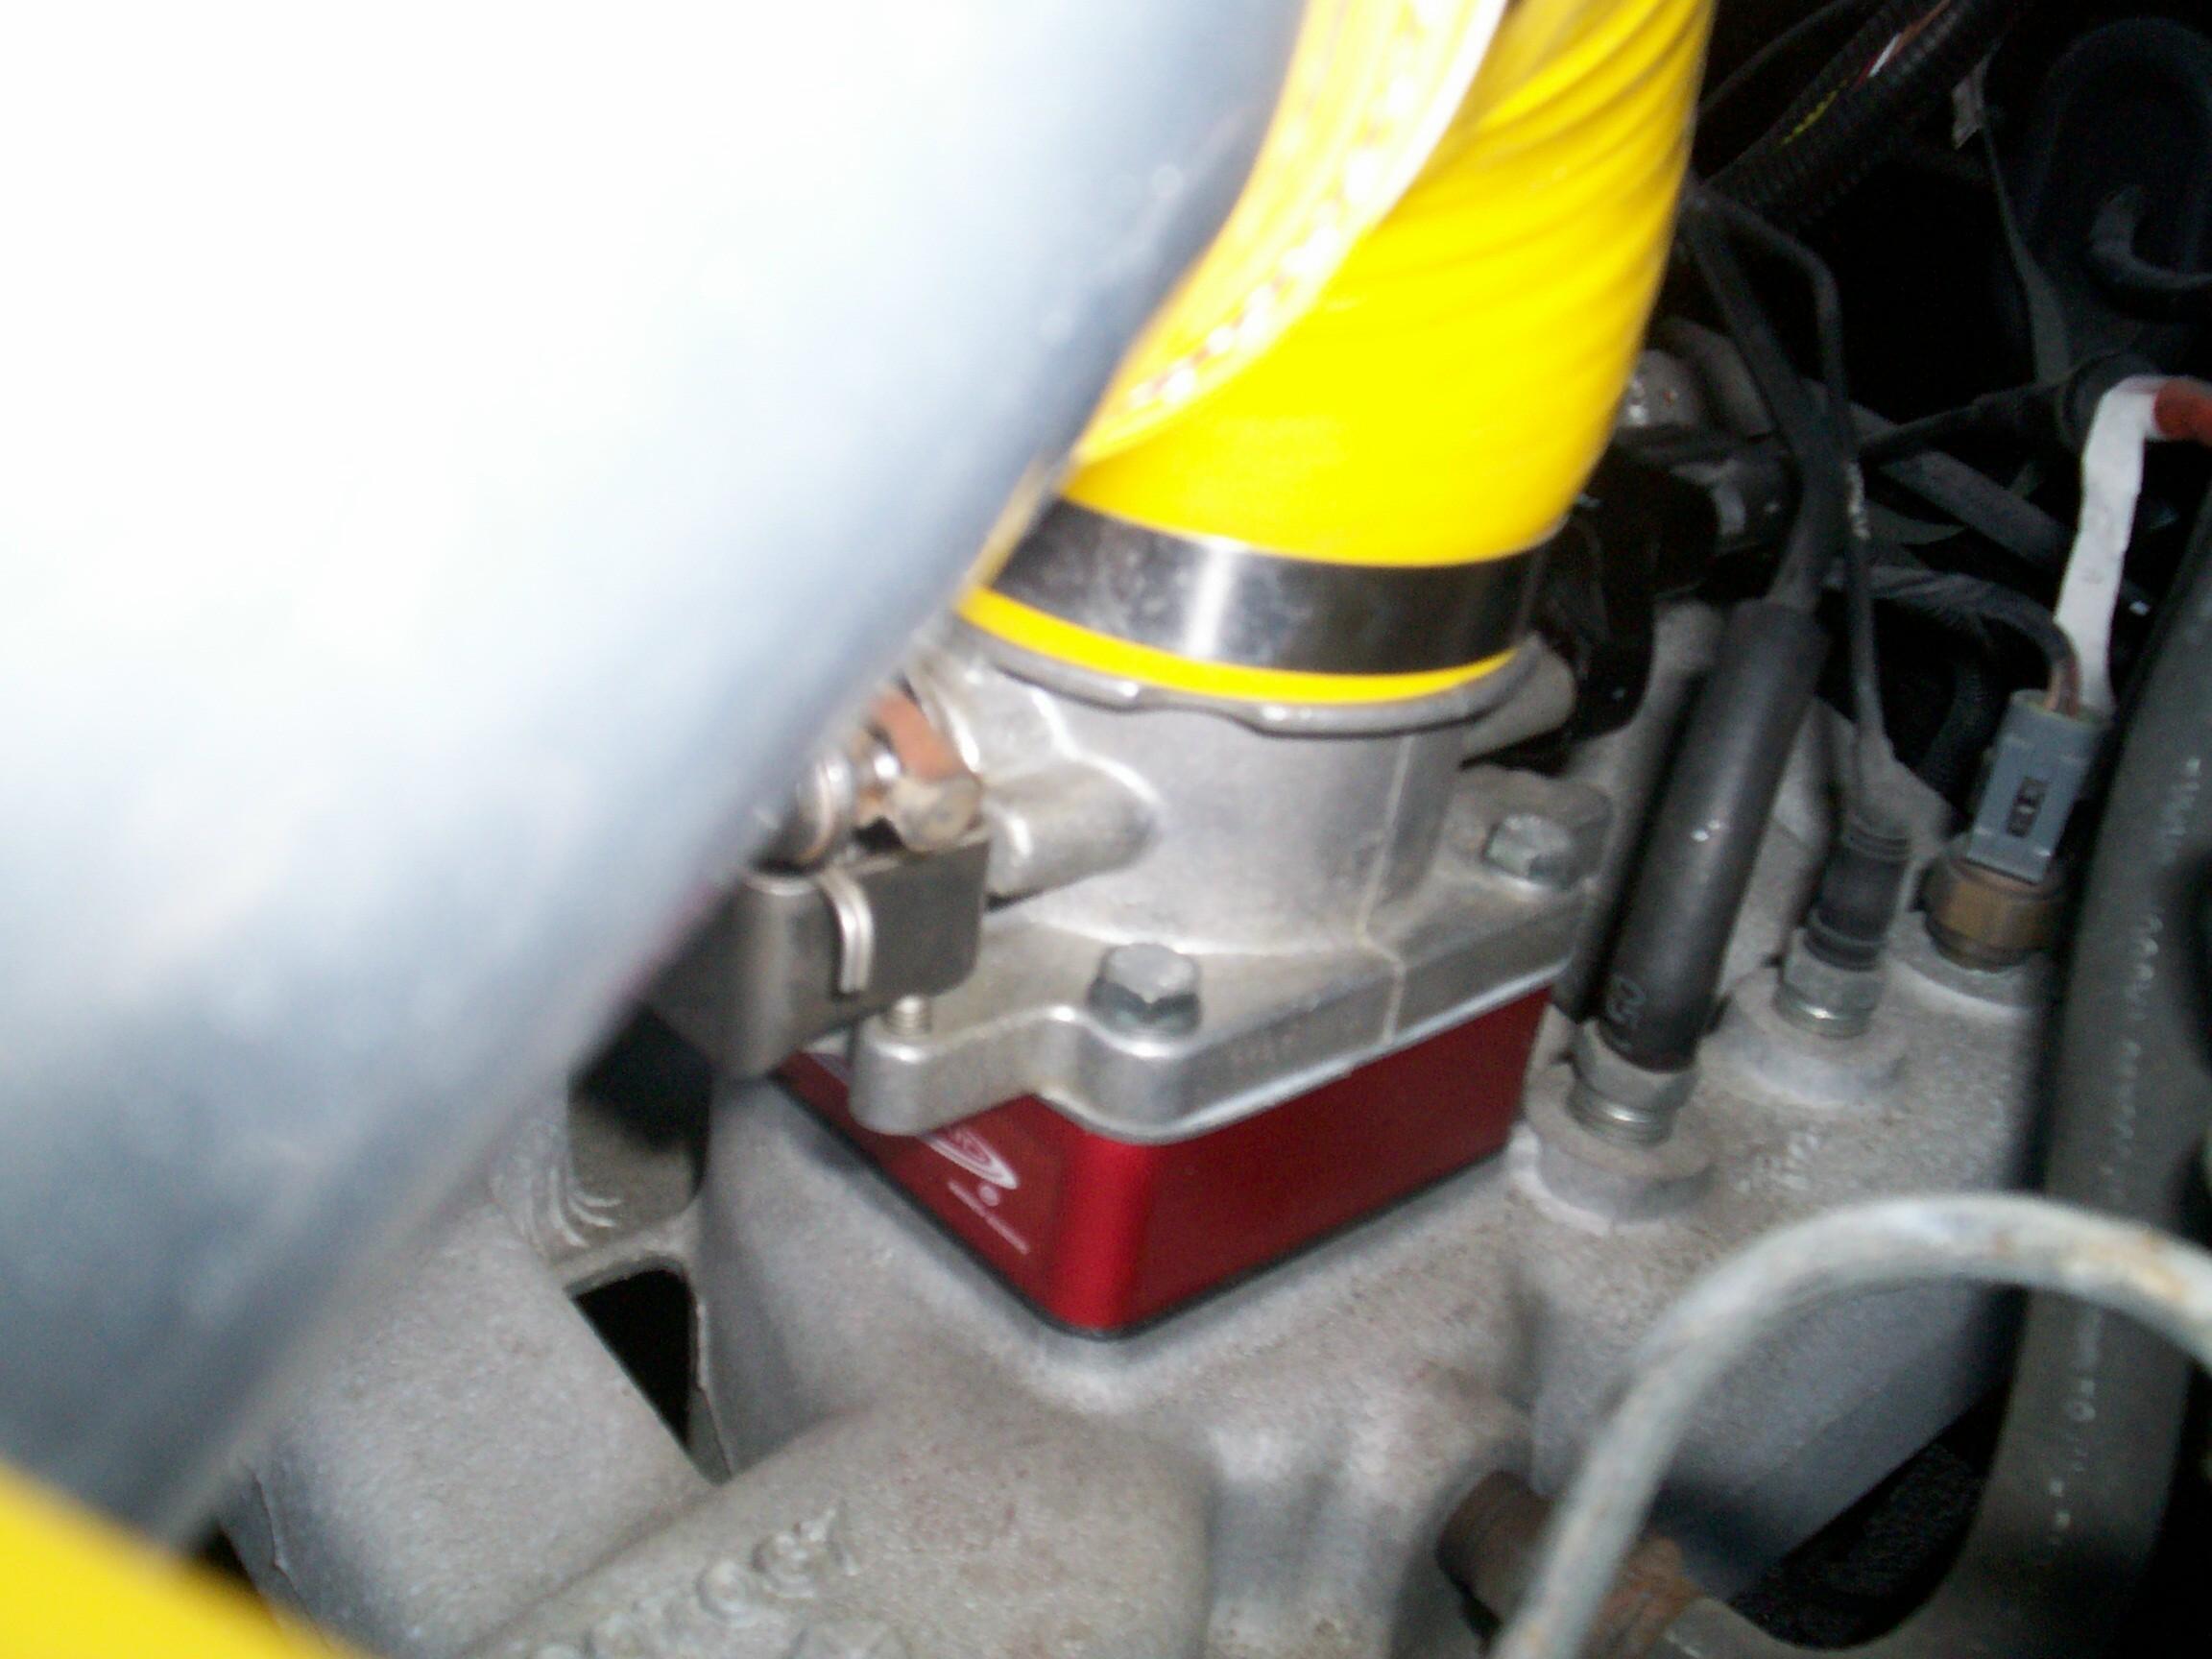 Back
into the Krash Lab with the throttle body to put the old fuel injection
idle air control valve on the new throttle body. It was a bit sooty
lookin' but I was pretty shure the new one wasn't working properly.
With the throttle body back on the engine again, it was started for the
second time . . . That's better! It settled down to a 900 rpm idle and
it didn't stumble when I blipped the pedal. The "Check Engine" light
was out even tho' I hadn't put the A/C relay in yet and the socket was
empty. I turned the engine off and put the relay in.
Back
into the Krash Lab with the throttle body to put the old fuel injection
idle air control valve on the new throttle body. It was a bit sooty
lookin' but I was pretty shure the new one wasn't working properly.
With the throttle body back on the engine again, it was started for the
second time . . . That's better! It settled down to a 900 rpm idle and
it didn't stumble when I blipped the pedal. The "Check Engine" light
was out even tho' I hadn't put the A/C relay in yet and the socket was
empty. I turned the engine off and put the relay in.
Put Renegade's license tag back on with stainless steel connectors and took him for a ride around the block. Feels pretty good and the clutch hydraulics are holding too. I'm feeling good. Time to break out the beer. This week it is Flying Dog Classic Pale Ale.
 December
9th 2007 After I got to
the Krash Lab this morning in BillyBob, I took a shakedown run up to
the warehouse and back in Renegade. Feels strong but it's been
twenty-three months since I've driven the jeep. I did notice that the
speedo was not workin' so that bears some investigation. When I got
back to the Krash Lab, I noticed that the wire for the oil pressure
switch was off and had been for some time. I didn't take it off or even
know what it was. Had to do some research on the intarweb to find out
what the heck this thing is. The guage has always shown good pressure.
I reconnected it. OK, Renegade is good to go fer awhile. I don't know
what's next fer the jeep. It's either coolant system or exhaust system
improvements. For the time being, I have to concentrate on getting
BettyLou back on the road and my attentions to Renegade will consist of
regular maintenance and cleanup.
December
9th 2007 After I got to
the Krash Lab this morning in BillyBob, I took a shakedown run up to
the warehouse and back in Renegade. Feels strong but it's been
twenty-three months since I've driven the jeep. I did notice that the
speedo was not workin' so that bears some investigation. When I got
back to the Krash Lab, I noticed that the wire for the oil pressure
switch was off and had been for some time. I didn't take it off or even
know what it was. Had to do some research on the intarweb to find out
what the heck this thing is. The guage has always shown good pressure.
I reconnected it. OK, Renegade is good to go fer awhile. I don't know
what's next fer the jeep. It's either coolant system or exhaust system
improvements. For the time being, I have to concentrate on getting
BettyLou back on the road and my attentions to Renegade will consist of
regular maintenance and cleanup.
| < Back
to Intro |
You can email me at ![]() webmaster@laroke.com
webmaster@laroke.com
Issued Sunday December 9, 2007
Updated Thursday April 26, 2018
copyright © 1996-2018 Larry Robert Kephart all rights reserved
| | LRK Home | | Bio Info | | Krash Khronicles | | LAROKE | |
| | BettyLou | | BillyBob's Garage | | Rat Patrol | | Deerslayer | | Elvira | |
| | Land of the Free and Home of the Brave | |
| | Keppylou's Art | | WWI Soldier's Diary | |